
How to Create & Setup BigCommerce Navigation Menu?
By Sam Nguyen

Many of the UI components that users can use to get to specific details on your website are referred to as navigation. The header navigation menu, product category pages, filters, on-site scan, and footer are all examples of these. When your eCommerce platform limits your ability to build custom navigation routes, you will end up with a nice-looking but unusable website that few customers will choose to go away, and your conversion rate will suffer as a result.
In this article, we’ll learn more about how to create a Navigation Menu for your BigCommerce business.
What is the navigation menu?
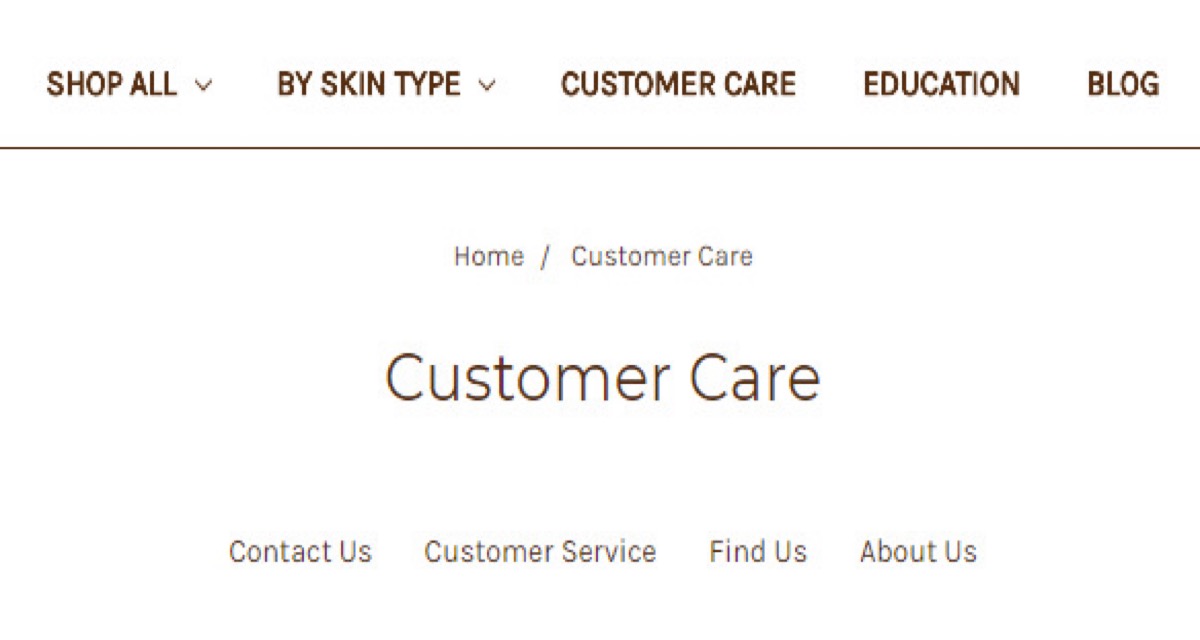
A navigation menu is considered as a set of links that point to key areas of a website. They are usually shown as a horizontal bar of links at the top of each website page. Navigation menus provide structure to your site and assist visitors in finding what they are looking for.
Adding menus and submenus to your BigCommerce site is a breeze. Links to your most important sites, categories or subjects, blog posts, and even personalized links like your social media profile can be added.
Your BigCommerce theme determines your menu’s exact location. Most themes will offer you various choices, allowing you to create different menus that can be displayed in multiple locations.
Most BigCommerce themes, for example, have a primary menu that appears at the top. A secondary menu, a footer menu, or a smartphone navigation menu may be included in certain themes.
Purpose of the navigation menu
Websites without navigation may appear unstructured and disorganized. The navigation bar or tools indicate that your website is rich in information and depth. People are aware of what is available and what they will find and expect from the website. If they can clearly see the navigation bars and connections, they will be motivated to explore more. Navigation tools aid in the organization of the website into logical and understandable categories and classes.
Since your readers don’t want to find out how your website functions, navigation is crucial. The viewer’s search can be sped up with good navigation. The aim of navigation on a website is to give visitors a clear understanding of what the site is about without having to navigate the entire site. The navigation should be easy to understand, as this will encourage viewers to remain longer and return because it is enjoyable to use. Good navigation is beneficial to SEO since it allows Search Engine Spiders to properly crawl and index websites. It will also increase the usability of the site. This means that if a website does not have a connection to it, search engines will not find it.
Websites with good navigation will rank highly in search engines. Navigation is important for making your website open and available. Visitors will be able to browse your site for longer periods of time if you have good navigation, since that will give them faith in where they are and what they will get from it. Visitors can easily scan using the navigation.
How to create the navigation menu in BigCommerce
Step 1: Create your first custom navigation menu
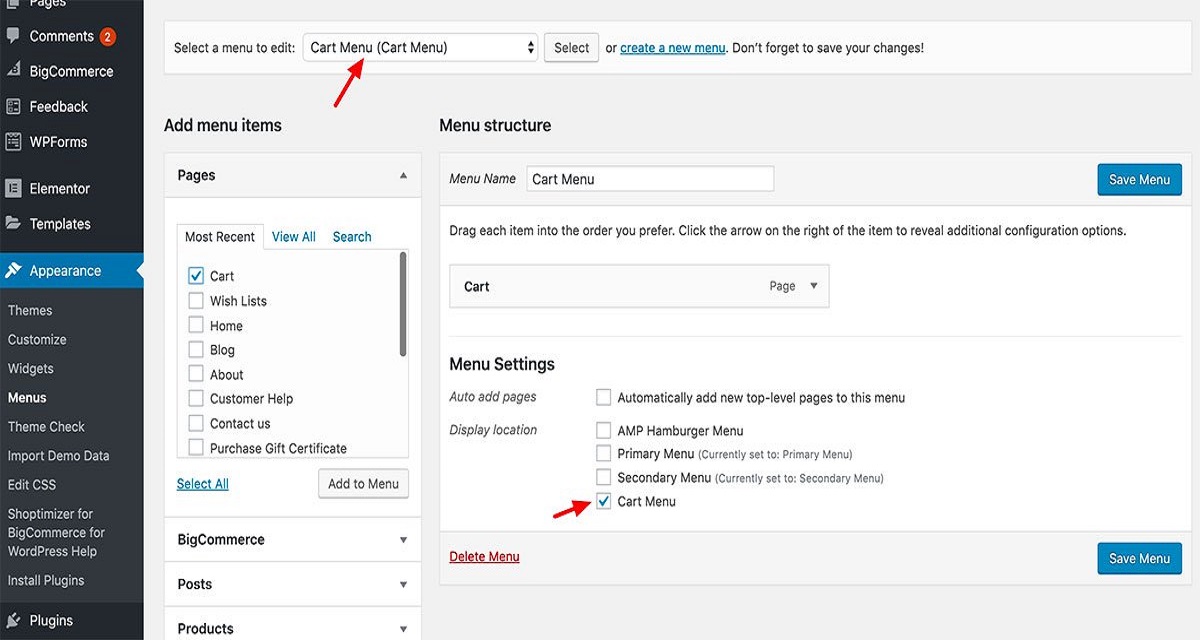
You must go to the Appearance » Menus page in your BigCommerce admin dashboard to build a navigation menu.
First, give your menu a name, such as “Top Navigation Menu,” and then press the “Create Menu” button.
After that, you can choose the pages you want to use in the menu. You can either have all new top-level pages added automatically, or you can select individual pages from the left column.
To see all of your site’s pages, go to the ‘View All’ tab. Then, next to any of the pages you want to add to your tab, check the box next to it and press the “Add to Menu” button. Once you have added your pages, you can drag and drop them to where you want them.
All menu items are listed in a vertical (top to bottom) row in the menu editor. Depending on the position you want, the menu will appear vertically or horizontally (left to right) when it goes live on your site. Most themes allow you to place menus in a variety of places.
After you have finished adding pages to the menu, choose where you want it to appear and press the “Save Menu” button.
If you are unsure where each location is, save the menu in several locations and then visit your site to see how it looks. You are unlikely to use any of the locations, but you might want to use more than one.
Step 2: Create Drop-down menus
Navigation menus of parent and child menu items are known as drop-down menus or nested menus. When you hover your cursor over a parent object, a sub-menu will appear underneath it with all of the child items.
Drag an item below the parent item and then slightly to the right to construct a sub menu. That’s what we have done with three sub-items in our menu under the heading “Services”:
You can also add several layers of dropdowns to your sub menu so that it has its own sub menu. Many themes do not allow multi-layer drop-down menus, so this may look a little cluttered.
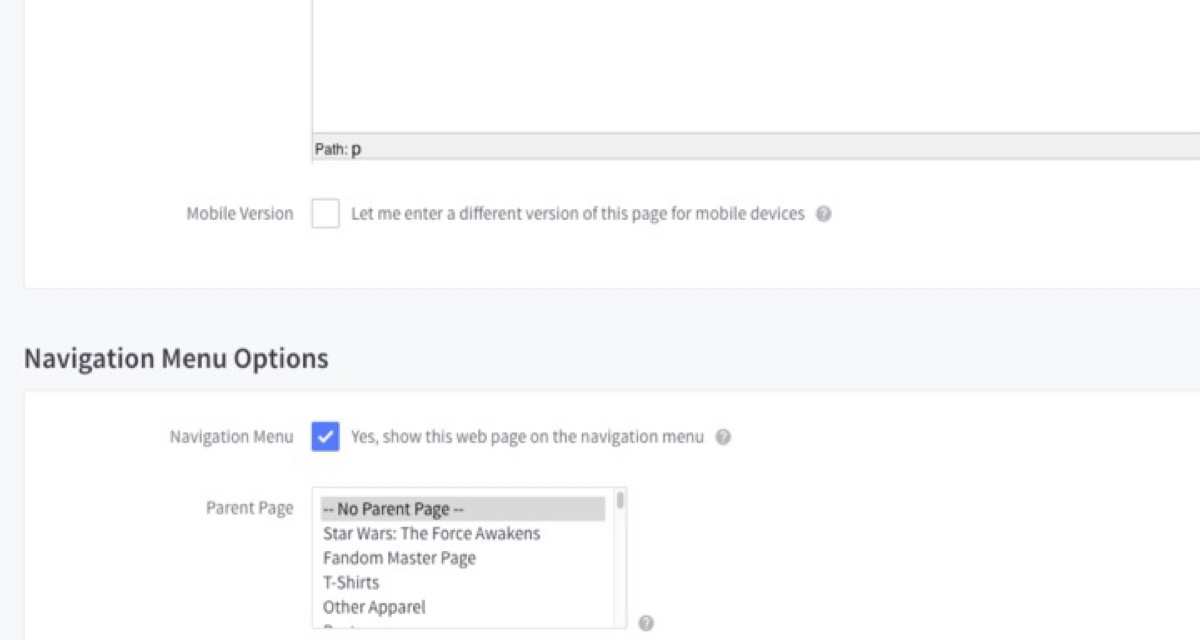
Step 3: Add categories to menus
If you are running a blog with BigCommerce, you may want to make your blog categories a drop-down menu in your BigCommerce menu.
By selecting the Categories tab on the left side of the Menus page, you can easily add categories to your menu. To see all of your categories, you can need to press the ‘View All’ tab.
Simply press the ‘Add to Menu’ button after selecting the categories you want to include in the menu.
At the bottom of your menu, the sections will appear as standard menu items. You can move them around by dragging and dropping them into position. Both of these categories can be found under the Blog menu object.
Step 4: Add custom links to navigation menu
Aside from categories and pages, BigCommerce makes adding custom links to your menu a breeze. It can be used to connect to your social media accounts, your online store, and/or other websites you own.
You will need to use the Menu screen’s “Custom Links” tab. Simply paste the connect into your menu along with the text you want to use.
You can also get imaginative with your menu and include social media icons.
Step 5: Edit or remove a menu item in navigation menu
BigCommerce uses the page title or category name as the connecting text when you add pages or categories to your custom navigation menu. If you like, you can change it. By clicking the downward arrow next to any menu object, you can edit it.
You can change the menu item’s name here. You can also press ‘Remove’ to remove the connection from your menu completely.
If you are having trouble with the drag-and-drop interface, you can also select the necessary ‘Move’ icon to move the menu item around.
Step 7: Add BigCommerce menus in sidebars and footers
BigCommerce uses the page title or category name as the connecting text when you add pages or categories to your custom navigation menu. If you like, you can change it. By clicking the downward arrow next to any menu object, you can edit it.
You can change the menu item’s name here. You can also press ‘Delete’ to remove the connection from your menu completely.
Step 8: Go further with navigation menu
We have a tutorial on making a super menu in BigCommerce if you want to make a truly epic menu with a lot of ties. This allows you to build a drop-down menu with a large number of options, including photographs.
If you have a big site, such as an online store or a news site, mega menus are a great choice. Sites like Reuters, Buzzfeed, Starbucks, and others use this kind of menu.
How to create Mega Menu for BigCommerce stores?
Mega Menu (Advanced) is a Bigcommerce add-on that allows you to build a menu with several columns. You can use our extended menu in addition to Bigcommerce’s default menu. With the Mega menu, you can easily add picture banners, video clips, paragraph text, static blocks, and more to your menu. As a result, the menu becomes more varied, appealing, and practical. Your menu can also have several columns of dropdowns, which you can organize according to the store’s layout. Simply tell us the layout and how you want it to appear, and we will take care of the rest.
Mega menus can be set up in two ways: in the theme editor or in the theme files, depending on your needs and mega menu layouts and structure.
If you have your own design, there might be an additional charge to customize it.
If you are not using one of our themes, there could be an additional charge if your theme’s HTML structure needs to be rewritten in order to install this add-on by two ways:
Install free add-ons
Be adapted from the Cornerstone Theme (Stencil framework).
To sum up, Mega Menu (Advanced) – Menu with Several Columns Add-ons for Bigcommerce In addition to Bigcommerce’s default menu, you can use expanded menu. You can easily add image banners, video clips, paragraph text, static lines, and more to your menu with Mega menu. As a consequence, the menu expands in terms of variety, appeal, and utility. You can also have several columns of dropdowns in your menu, which you can arrange according to the layout of your shop.
Conclusion
Navigation refers to a lot of the user interface elements that users can use to get basic information on your website. These include the header navigation menu, product category sections, filters, on-site search, and footer. When your eCommerce platform restricts your ability to create custom navigation routes, you are about to end up with a nice-looking but unusable website that few customers can use, lowering your conversion rate.
We hope that this article has shown you how to add a navigation menu to your BigCommerce site. You may also be interested in our BigCommerce guides on how to style navigation menus and how to construct a sticky floating navigation menu.


