
How to Use BigCommerce to Start an Online Store?
By Sam Nguyen

Being familiar to those who are selling online, BigCommerce is a SaaA product in which users have to pay a monthly fee to use its features while not owning it.
BigCommerce has various advanced selling functionalities and management tools for all types of business. However, it’s not hard to set up and get used to the software. In just some basic steps, you can create your own online store and start selling things right away.
This article will give you an in-depth guide on how to get started with BigCommerce. Let’s dive in!
What is BigCommerce?

In general, BigCommerce is a hosted eCommerce solution and a public technology company. Using BigCommerce, users can provide products on the website and in their online stores. What’s more, BigCommerce runs its servers, so users do not have to pay money to buy or install anything. This gives you a chance to fully control your business from anywhere.
Why should you use BigCommerce?
All eCommerce solution has their own pros and cons. BigCommerce does, too. One of the biggest drawbacks when using BigCommerce is locating and setting up. This process wasted time and effort if business owners do not know much about technology.
However, it’s still worth your money due to the following reasons:
- There’re no platform fees on any pricing plans
- Well-designed in-built and user-centric features
- Suitable for multi-channel strategy thanks to integration
- Strong SEO support
- Best suitable for ambitious eCommerce stores with an advanced and amazing feature set
- Being scalable because pricing plans range from only $39
So, as you can see, BigCommerce can provide you with multiple features which you can’t approach when using other platforms with the same price. The only minus point of it is difficult to set up, which prevents small businesses from approaching this. However, don’t worry since we are about to give you an in-depth tutorial on how to set up and use BigCommerce. Remember to read it carefully. I’m sure you will find BigCommerce worth investing in.
Further Reading: BigCommerce Reviews 2021: Features, Price, Support, Pros & Cons
11 Steps to get started with BigCommerce
Step 1: Create your BigCommerce Account
Before building your eCommerce website (BigCommerce.com) and starting selling products or services, you will need to create your BigCommerce account. This step can be automatically passed if you have already had one.
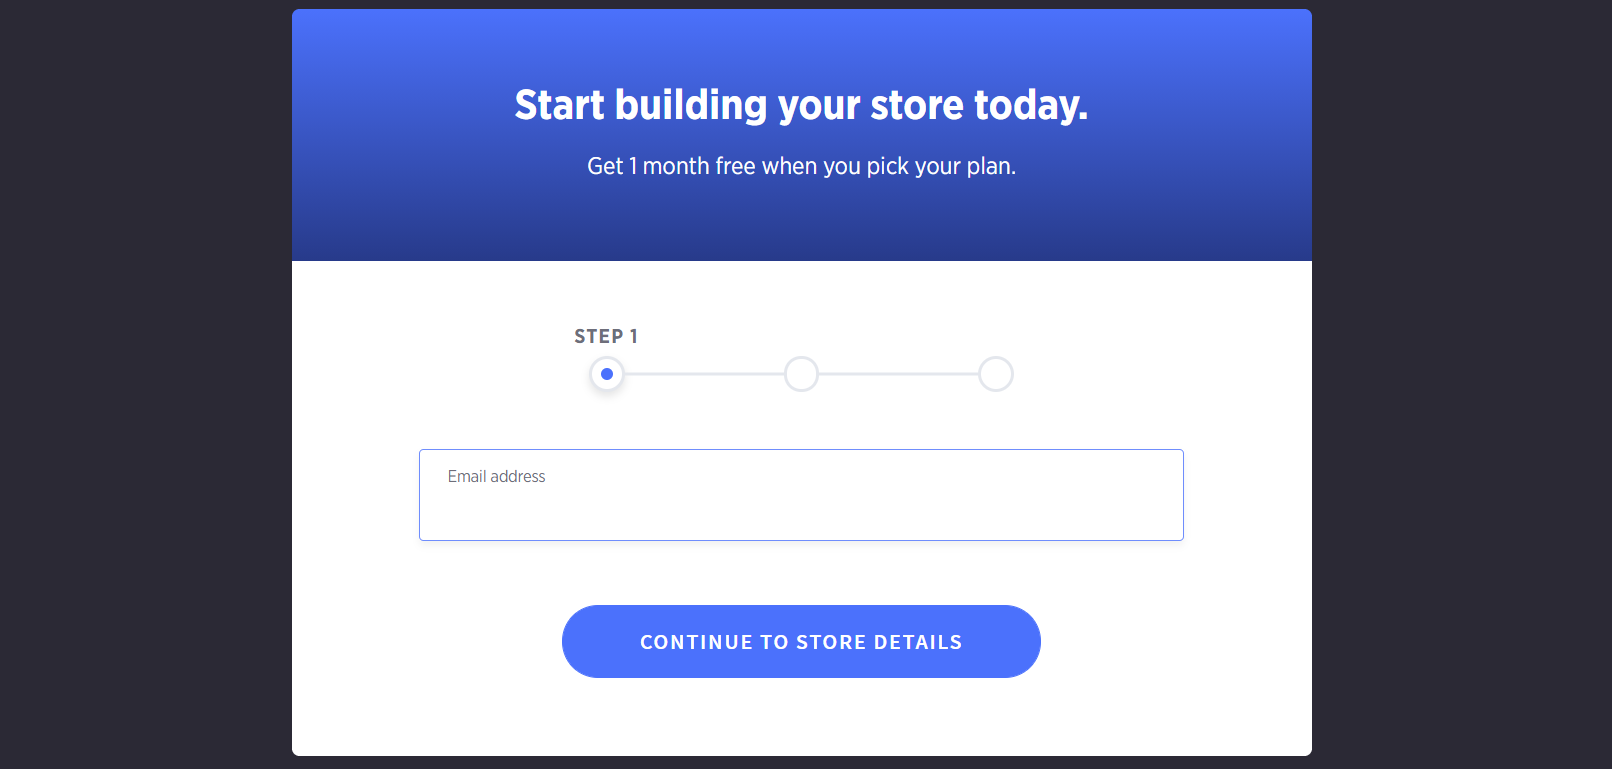
First, you should come to the main site of BigCommerce and click on Start Your Free Trial or Get Started to sign up for your account.

Here you can enter your email, and BigCommerce will let you fill in some information to set up your store.
- This information includes:
- Your store name (It can be changed later)
- Password
- First name and Last name
- Phone number
- Business size
- Your existing website
- Your selling products
After filling in all needed data, you will be sent to your BigCommerce dashboard and start with your free trial. Remember that you don’t have to pay anything to get started with BigCommerce. This free trial plan lasts up to 15 days without providing the credit cards, strings, etc.
Step 2: Choose a theme for your online store
Coming to the process of developing your online store, you will start with your store’s BigCommerce Dashboard. Here is where you can see all the needed features and tools.

The reason why you need to choose a theme for your online store right after signing up and before any other steps is that BigCommerce themes will decide the overall design, look, and feel of your store.
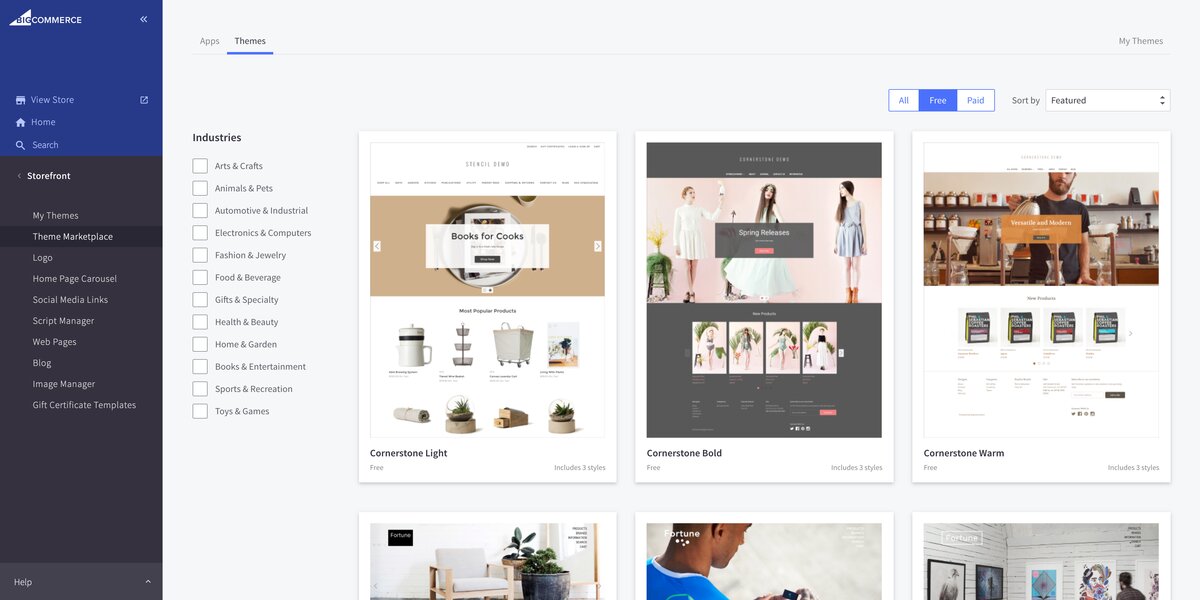
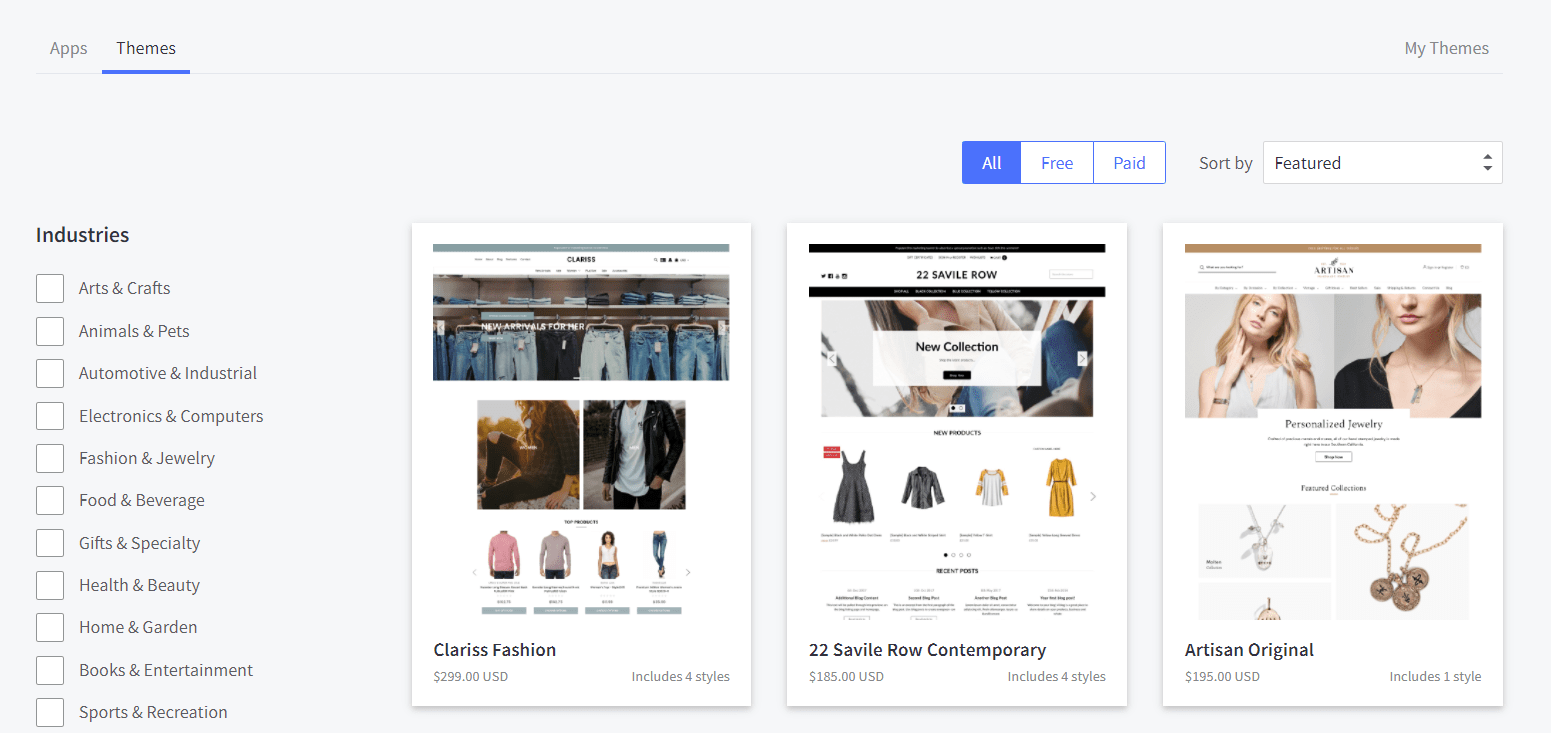
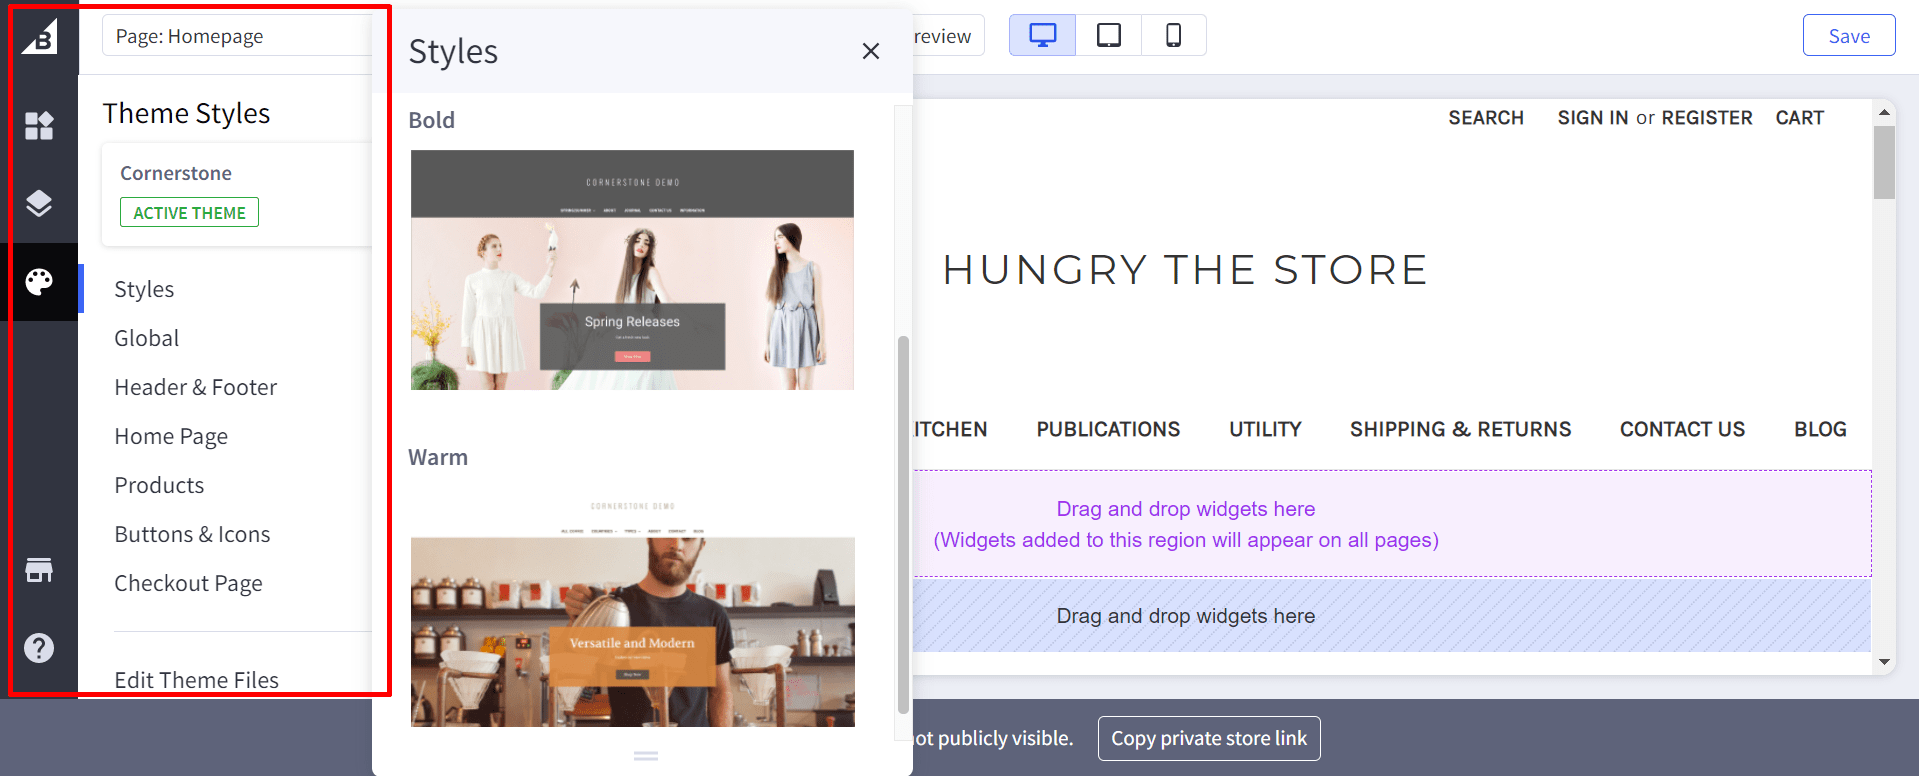
When starting with BigCommerce, you are given the default theme, which is called Cornerstone. It is enough if you expect only some simple features or layouts. However, you can still improve the look of your store by changing into other themes within the Theme Marketplace. You will be provided 12 free themes which are suitable for those just starting their stores. They allow you to adjust images, colors, typefaces, or some store elements. If you are ready to pay for themes, there are more than 120 themes that include various advanced features with prices ranging from $165 to $250. Paid themes will give you more optional features to improve your site and design.
To change your theme, you should navigate to the Storefront tab, which is on your dashboard. Next, you will be sent to the BigCommerce Theme Marketplace, where you choose the theme you like.
Besides, you also have an option to upload your custom theme. However, make sure you have great technical skills before uploading one since BigCommerce will not tell you how to do that or help you add new features to your theme.
Our advice for you when starting using BigCommerce is to use its free theme and add at least a few products to see how it works. When getting used to it and know how your store should look like, you can find paid theme to suit your demands.
Step 3: Customize your BigCommerce theme
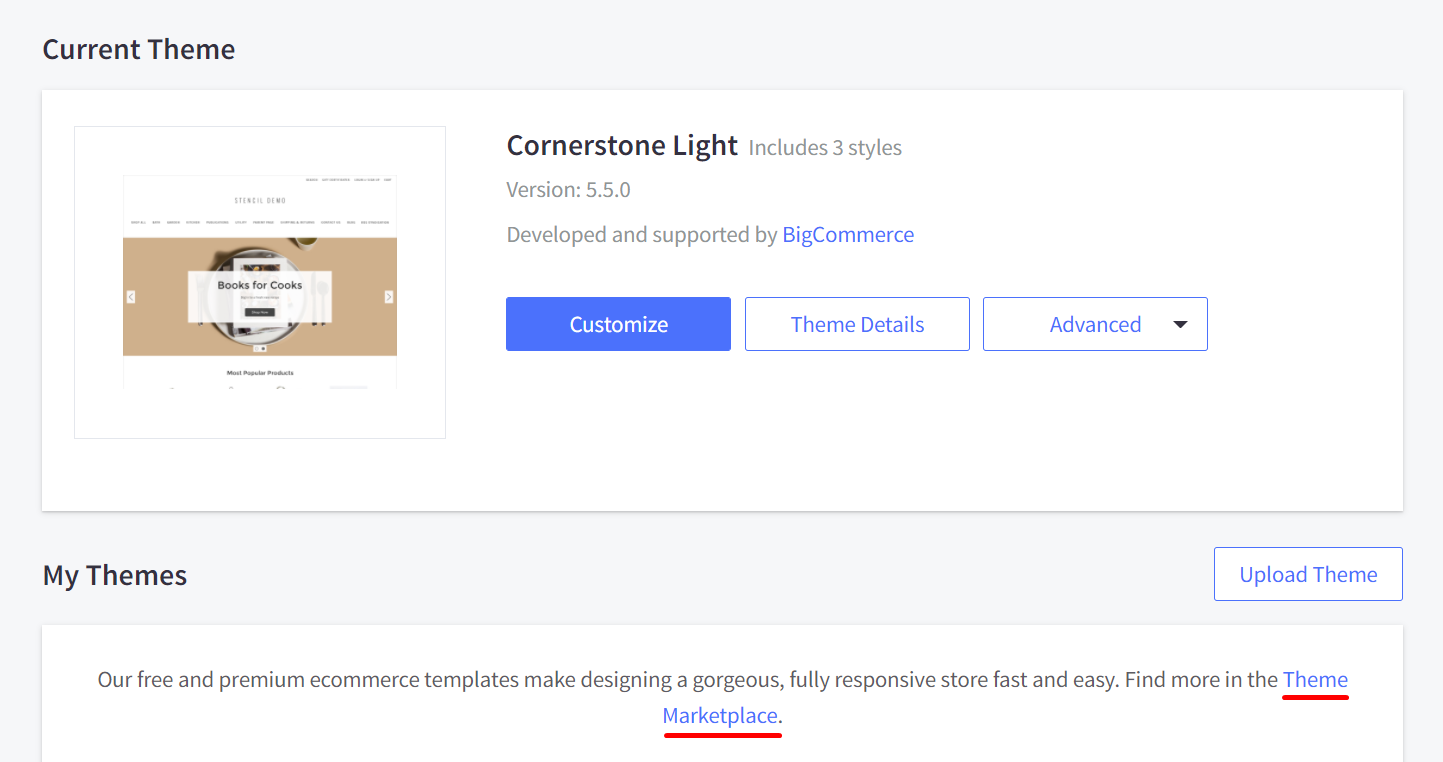
Next, it’s time you should customize your BigCommerce theme. Remember that you can change and customize it at any time you want.
In order to customize it, you should go to the Storefront section. Next, choose the My Themes option and click on the Customize button. This will direct you to the section of starting editing your theme.
Here are factors you can adjust when customizing BigCommerce theme:
- Colors
- Payment sections
- Checkout sections
- Fonts
- etc.
If you want to learn more about how to edit the appearance of your store well, click here to visit theme tutorials of BigCommerce.
Step 4: Add your logo and homepage carousel image on your online store
Add your logo to your online store
The logo is one of the most important elements which should be added to your online store right away when building an online store. However, that is easy to add-in.
Again, you should go to the Storefront section to open the sub-navigation bar. Scroll down to find the Logo tab. Click on this button, it will direct to the Logo Options screen.
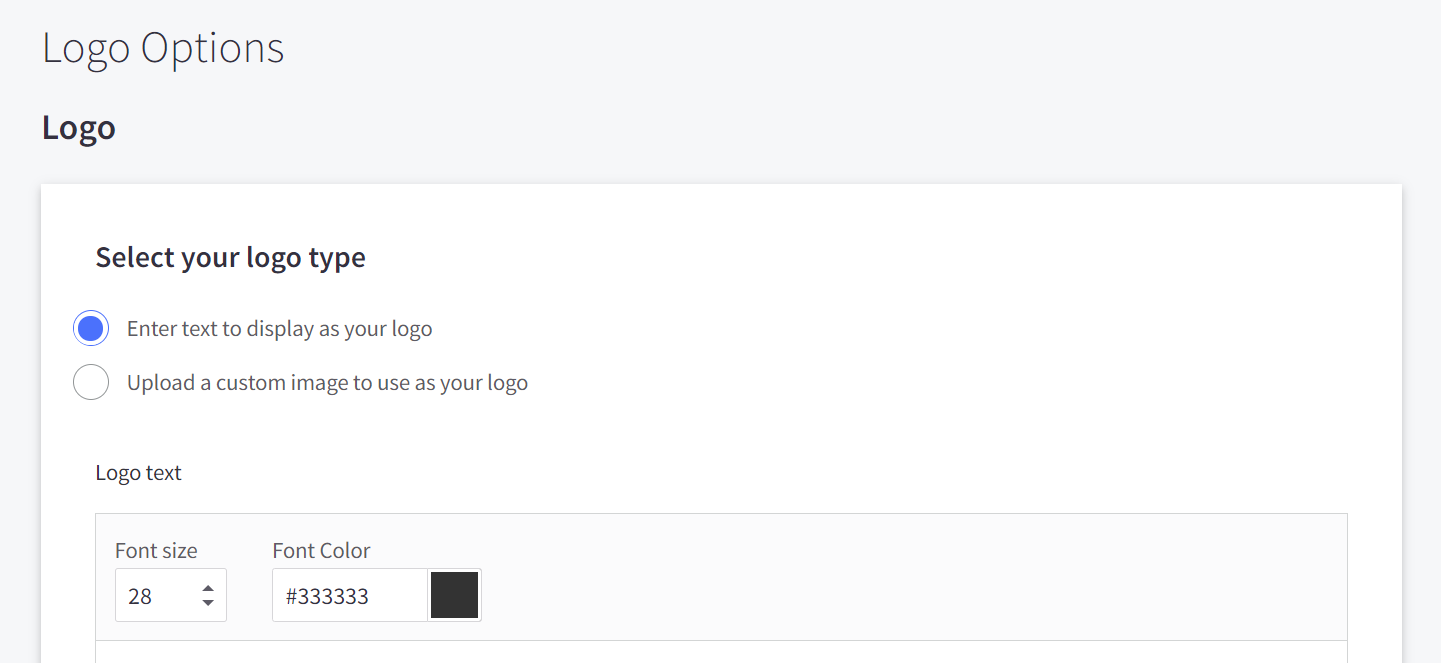
Now, let’s choose between using plain text as your logo or uploading a custom logo to your website. In case you decide to use your existing logo, you should ensure the logo size suits the recommendation for your theme.
After adding the logo to your online store, you can freely change its position via the Launch Store Design link.
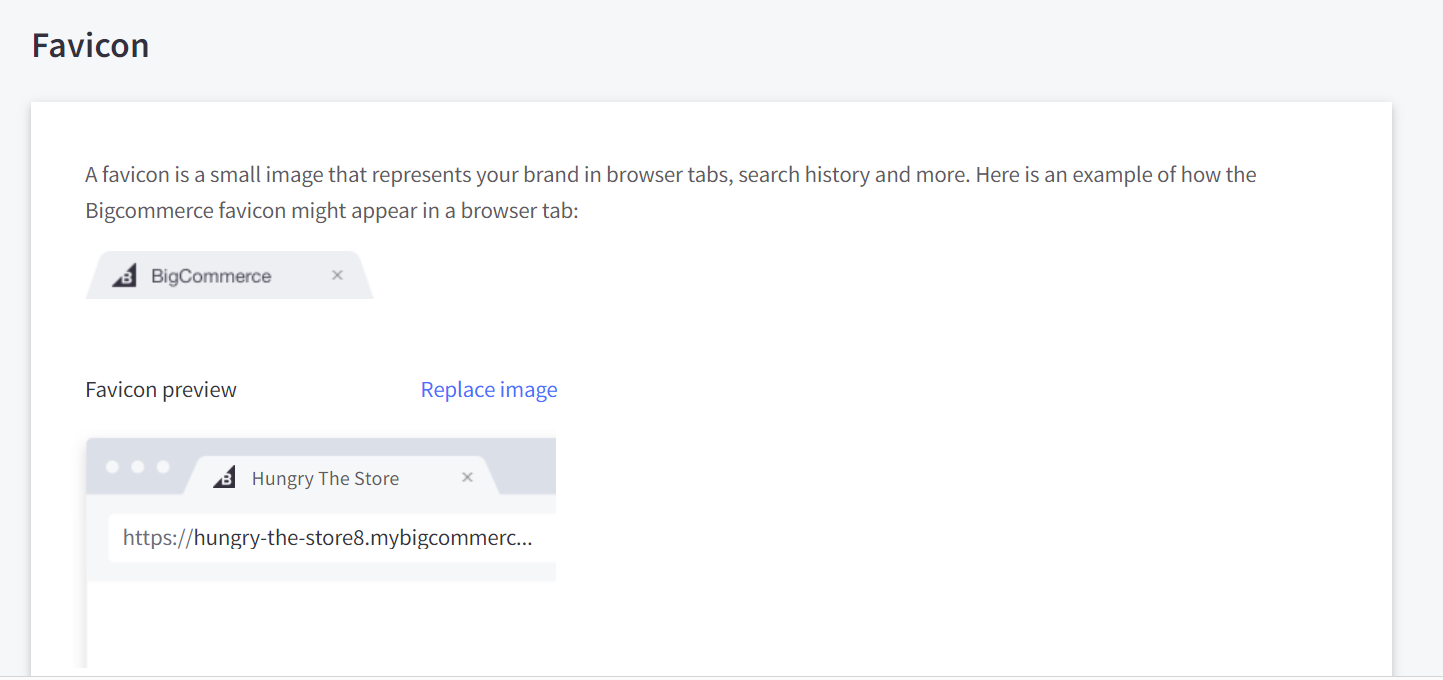
Besides, you can also add a custom favicon. This image must be 32x32 pixels in size, or BigCommerce won’t allow you to upload it.
After editing the logo as you wish, remember to click the Save button in the lower right corner.
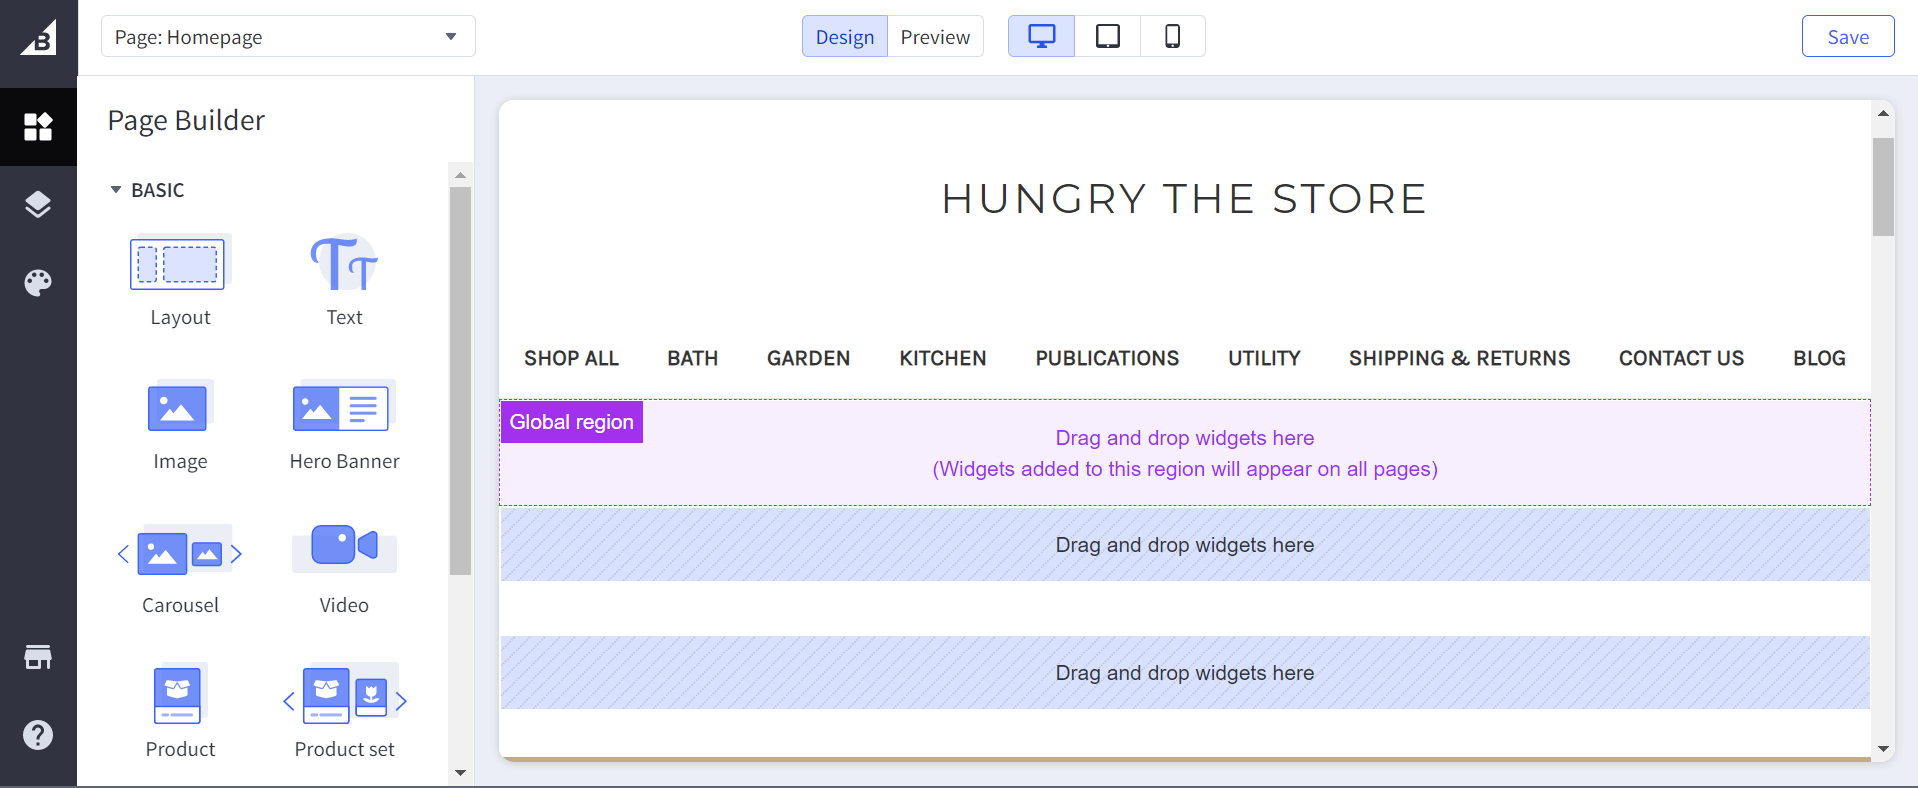
Add your homepage carousel image on your online store
Your homepage carousel image is similar to your header or primary image. You can add more than one image, and they are the featured graphics section which includes all things you want to display to get a good impression of customers.
To add homepage carousel images, you should go to the Storefront tab and click on the Home Page Carousel Section. Coming to the Home Page Carousel page, you will see that there are two preloaded demo images. You should want to change them into what is suitable for your store. To do it, simply click on the red x’s to get rid of these images first.
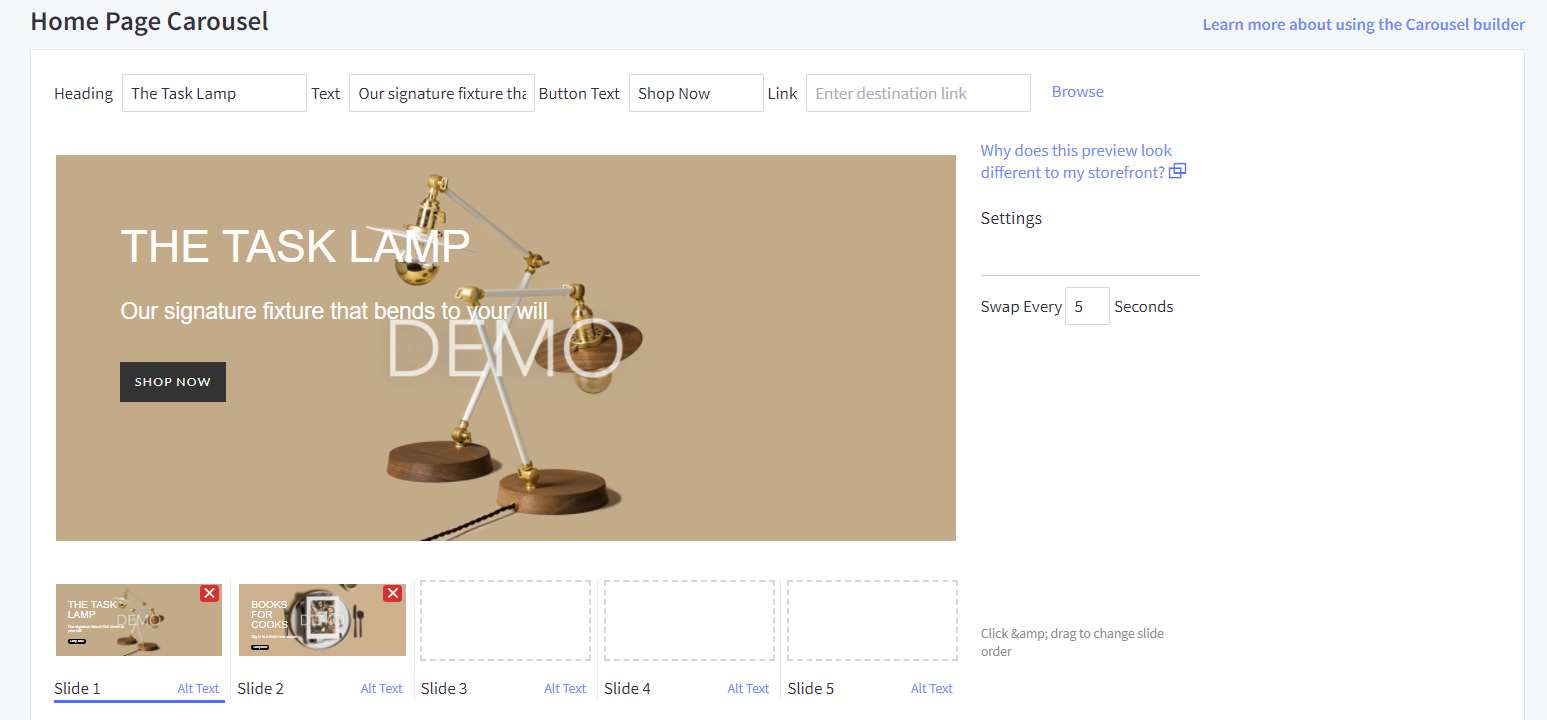
Then, let’s insert your own images by clicking on “Select from your computer” and choose the image for each slide. You are enabled to upload up to five slides, so let’s choose the most noticeable images of your store.
One thing to remember is the size. The slide images will be 1200x600 pixels so if you upload the image at the wrong size, you cannot display all parts of your picture.
Besides images, you should also add the following elements to show more about your business:

- Heading: This should have one to five words that include the key points about your store.
- Text: This can be a paragraph, but we recommend you should keep it as short as possible, about eight to ten words only.
- Button text: This will tell what your customers should do next.
- Link: As long as the associated category and product page has been successfully built, you and add a link to direct visitors to these pages.
You also rearrange slide orders via the click and drag tool of BigCommerce. Besides, you can adjust the swap time based on your wish, quickly or slowly. The default swap time is five seconds, which is quite suitable, in my opinion.
Step 5: Build up product categories
We all recommend that you should add product categories and build them before adding products. Here are reasons why:
- Adding product categories will help you manage your store better
- Adding product categories will help customers navigate your shop more easily
- Having product categories will help you rank higher on Google since Google can easily understand the structure of your store.
- Adding product categories before adding products will save your time and effort since you can choose the suitable category when adding each new product. In case you have a new product that does not belong to any existing category, you can still come back any time to add new categories.
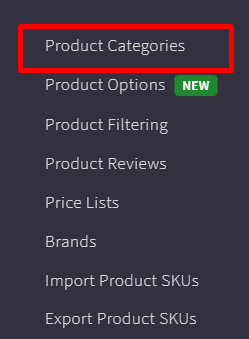
So, how to add new product categories? You first need to click on the Products option on the navigation column of the BigCommerce dashboard. Then, continue clicking on the Product Categories section.
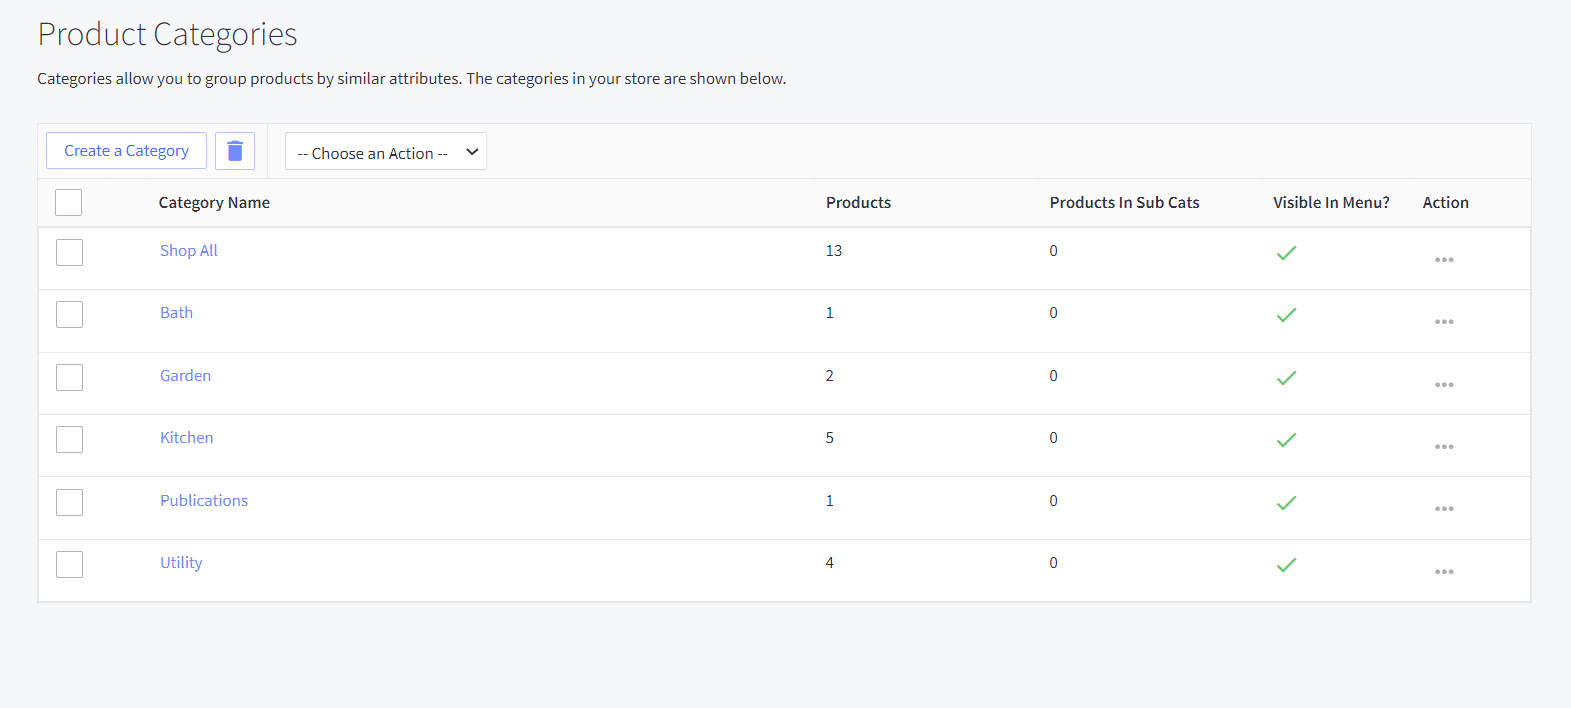
When the Product Categories page opens, you will see that there are some basic product categories that BigCommerce has added automatically. If any of them match your products, keep them. If there are some categories, you don’t need, simply delete them by ticking them and click on the Delete section.
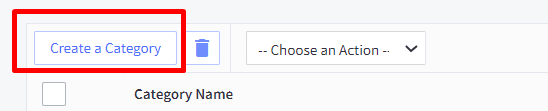
Then, if you want to add new categories, click on the Create a Category button.
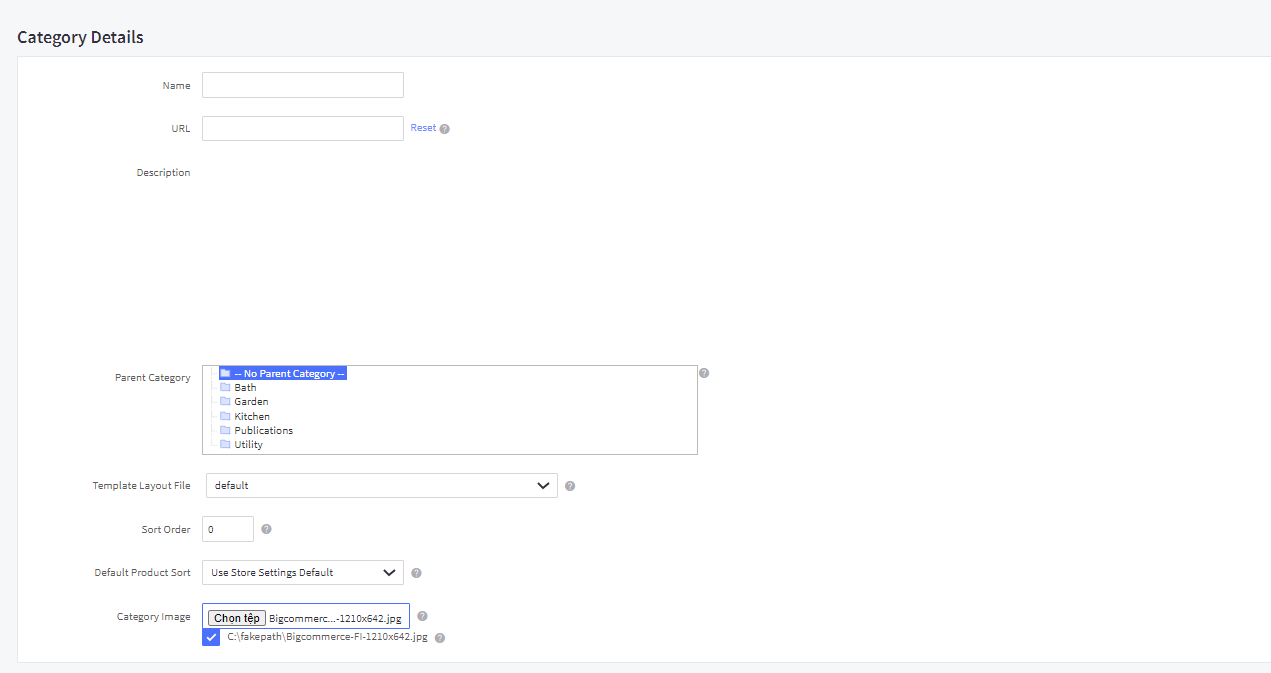
After clicking it, you will be provided eight fields to add information about your new product category. However, you don’t need to complete all these fields. You should fill in the needed information about your category, which are The category name, The category page URL, and The Description for the category.
Step 6: Add products to your online store
After adding your product categories, you’re now ready to add products to your online store. To fulfill this step, you will need to complete many fields. Don’t worry since BigCommerce makes this process straightforward. Make sure you spend time adding products since it not only provides your customers with enough information about your products and services but also makes them more satisfied. In this way, you can sell more products and increase the number of good product reviews as well as reduce the number of product returns.
In order to add products, go to the Add product option by clicking on the Add button of the Products navigation bar on the left side of your screen. Then, you will be directed to the Product Dashboard.
To complete this step, you will be ordered to fill in all types of information about each product which includes basic product description, product options, storefront details, fulfillment details, and SEO details. Remember to press the Save button after filling out each product field in the lower right corner of the dashboard.
Now, let’s come to each field!
Add basic product descriptions
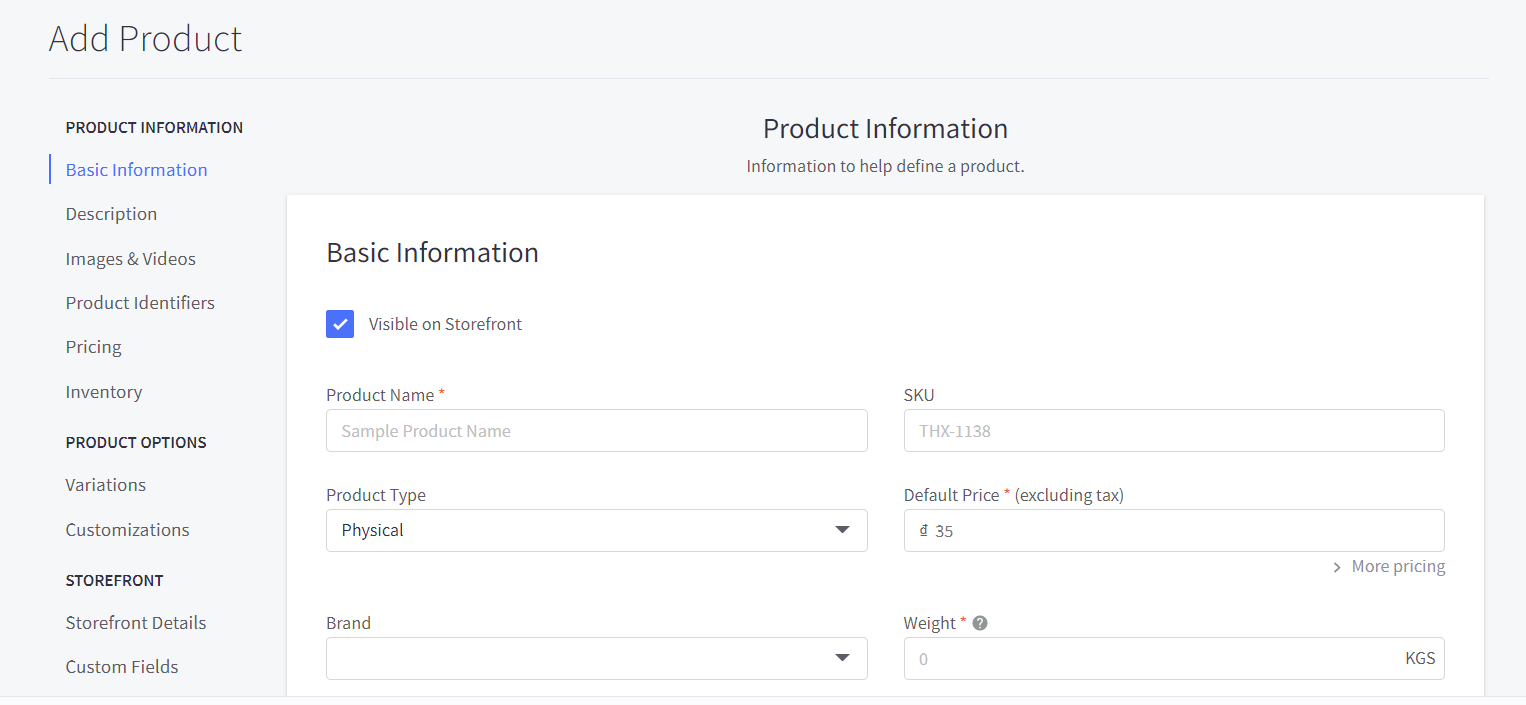
Adding basic product descriptions will help you display more about what you are selling. You can also add images and videos to improve the quality of products and easily convince customers to buy from your store.
Here are what you can fill out in this field:
- Basic information: What is the product name? What type of product it is? How much is this? What is the brand weight, product category, or SKU?
- Detailed description: This section lets you explain more about your product’s features and advantages.
- Product identifiers: They include Universal Product Code (UPC), the Bin Picking Number (BPN), Manufacturer Part Number (MPN), and a Global Trade Number (GTN).
- Pricing: Besides the price included in the basic information part, you can add a default price excluding tax, the tax class, the tax provider tax code here. You can also add detailed information about pricing like sale price, discounts, or MSRP.
- Inventory: This part is included for you to track inventory and provide the amount of stock available
These sections are not compulsory to fill out, and entering all information also doesn’t make sure you can sell more. We suggest all needed information like description or pricing should be surely completed.
Add product options
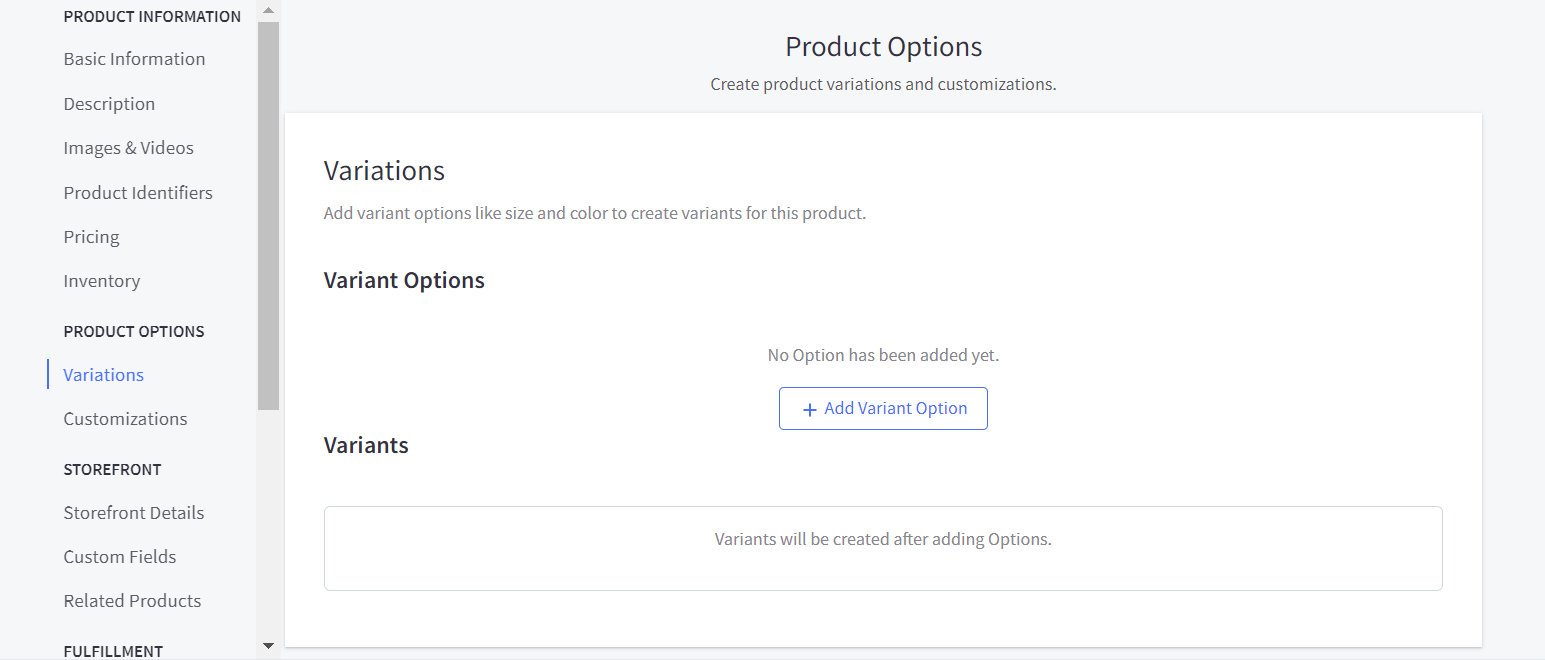
In case you sell product variations and customizations, you need to add product options:
- Variations: This section lets you provide multiple choices in multiple variations like colors or sizes.
- Customizations: This section lets you fill out information for customized products you sell.
Add storefront information
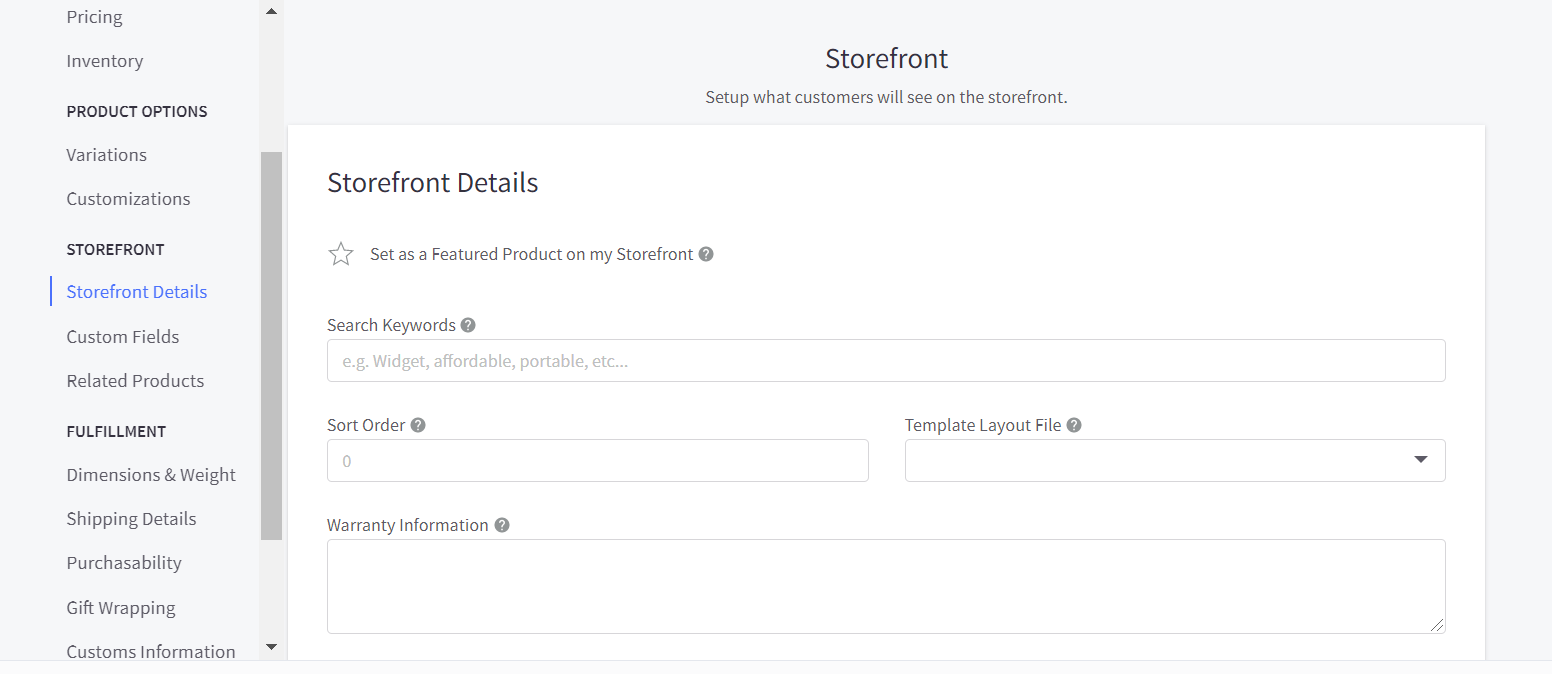
Via adding storefront information, your store can display more information about your business and products. There are some options you can fill out though they may not all included in your store:
- Storefront details: How high do you want your products to be displayed on your Storefront? What is your product availability information?
- Custom fields: This section is only needed when your products require description fields not offered in the standard BigCommerce Product dashboard.
- Related products: This section allows you to link one product with others that are related to your online store.
If these sections don’t apply to your store, simply leave them blank.
Add product fulfillment information
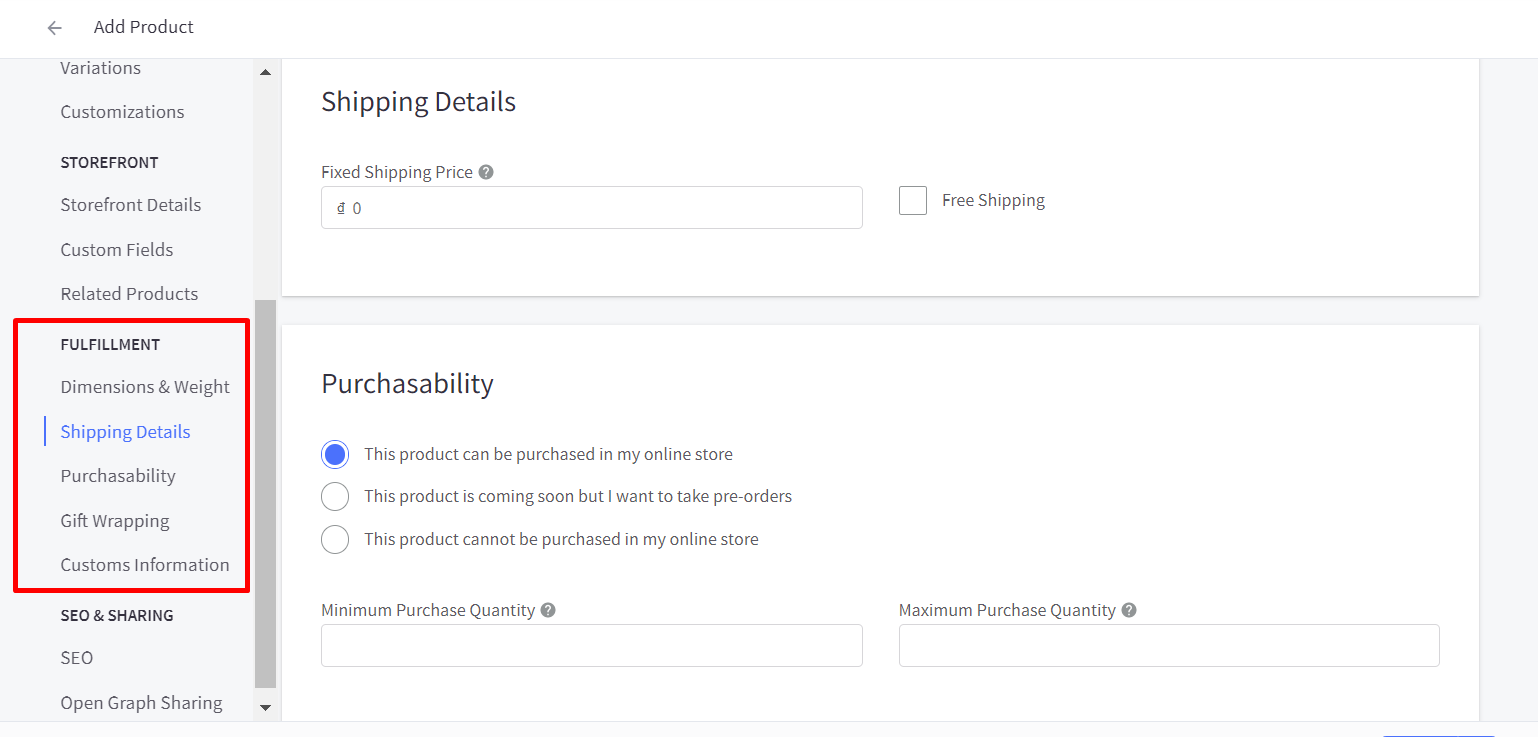
This field ensures that your products can come to customers after they make a purchase. Here you have the chance to fulfill product orders:
- Shipping information: You can fill out a fixed shipping price, a free shipping option, and more here.
- Dimensions and weight: You can enter product weight in ounces, height, width, or depth.
- Gift wrapping: You are enabled to give gift wrapping options for some products at the product level.
- Purchasability: Here you can provide the status and purchasability of your products such as immediate purchasing, pre-orders, and more.
Add SEO and Open graph sharing information
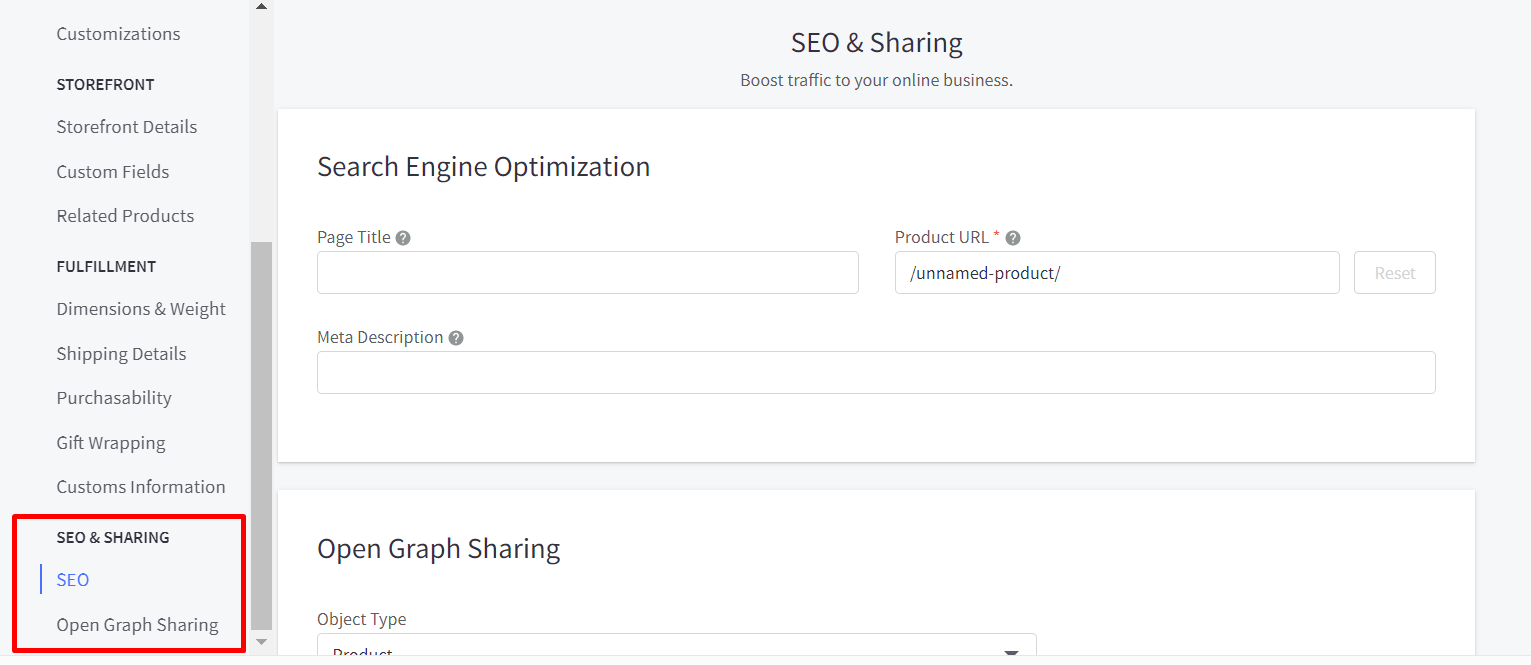
Here is the field where you can bring about organic traffic to your business by adding SEO information. You can add data like customizable page titles or meta descriptions. Besides, when it comes to open graph sharing information, you can have full control over when and where your product page is shared by customers.
Step 7: Set up your store information page
A store information page is necessary for business owners to inform details about their stores to customers as well as answer common questions without replying to each phone call or email.
Luckily, BigCommerce will provide its users with customizable pages via its Web Pages dashboard. In order to approach the Web Pages section, simply go to the home Dashboard screen, choose the Storefront option and click on the Web Pages button.
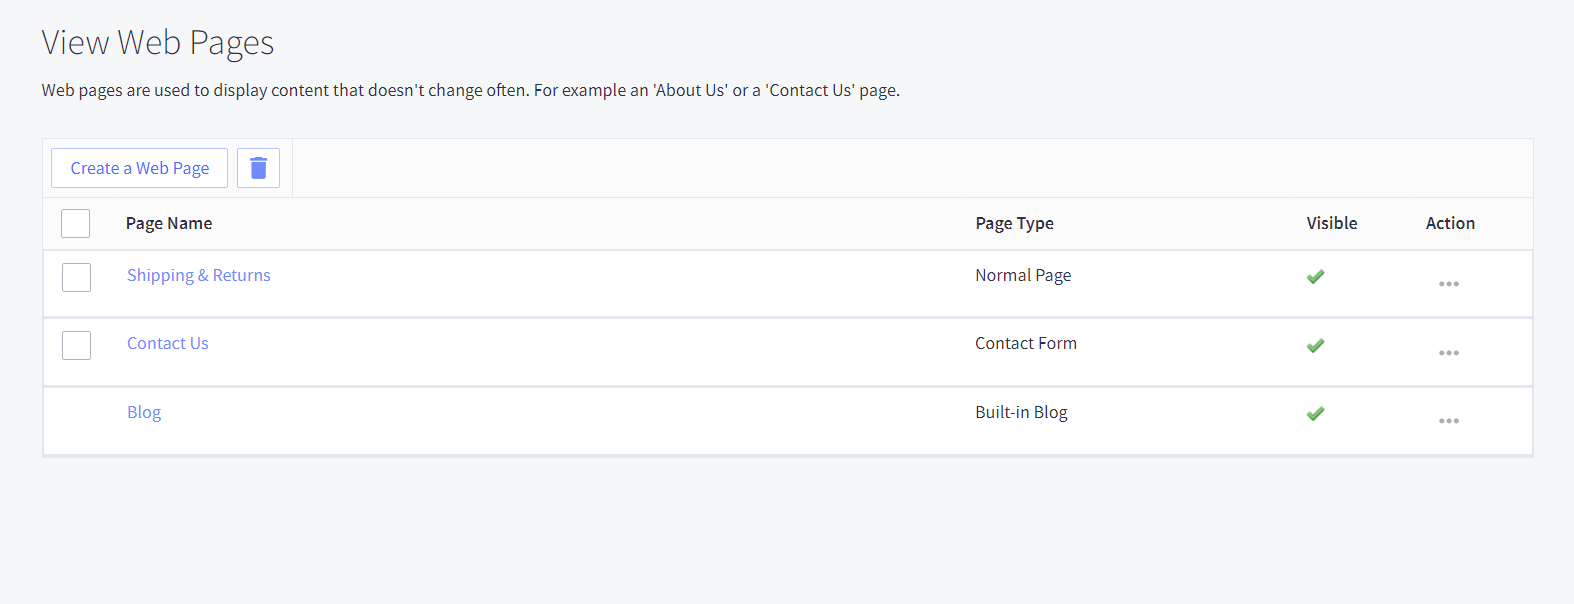
Your website should include the following web pages:
- Shipping & Returns: BigCommerce will give you a demo page but you can freely customize it by adding the shipping and return information, shipping methods, shipping rates, delivery times, return instructions or refund policies.
- Contact us page: You should include your contact information as well as your hour of operation.
- About us: Here is where you provide information about your company and create a reliable feeling for customers.
- Privacy policy: This policy will be required by law which is the information you will get from customers and how you use that information.
Besides these four basic pages, you can also create more to suit your demand, such as your business stories or case studies.
Step 8: Set up your store navigation
Your setting up is 80% complete! You should now set up your store navigation to increase the shopping experience of your customers.
To do this, simply come back to your theme, which you have customized before. Click on the Storefront button, choose My theme and select Customize to edit the navigation.
The default primary navigation menu and main navigation will include the product categories and web pages that you have added. However, you can choose not to display them in your menu by clicking on the Visibility section, which is on the Theme navigation, and deselect them.
In some situations, you will want some web pages to be displayed in your main navigation and the rest to be displayed in other areas.
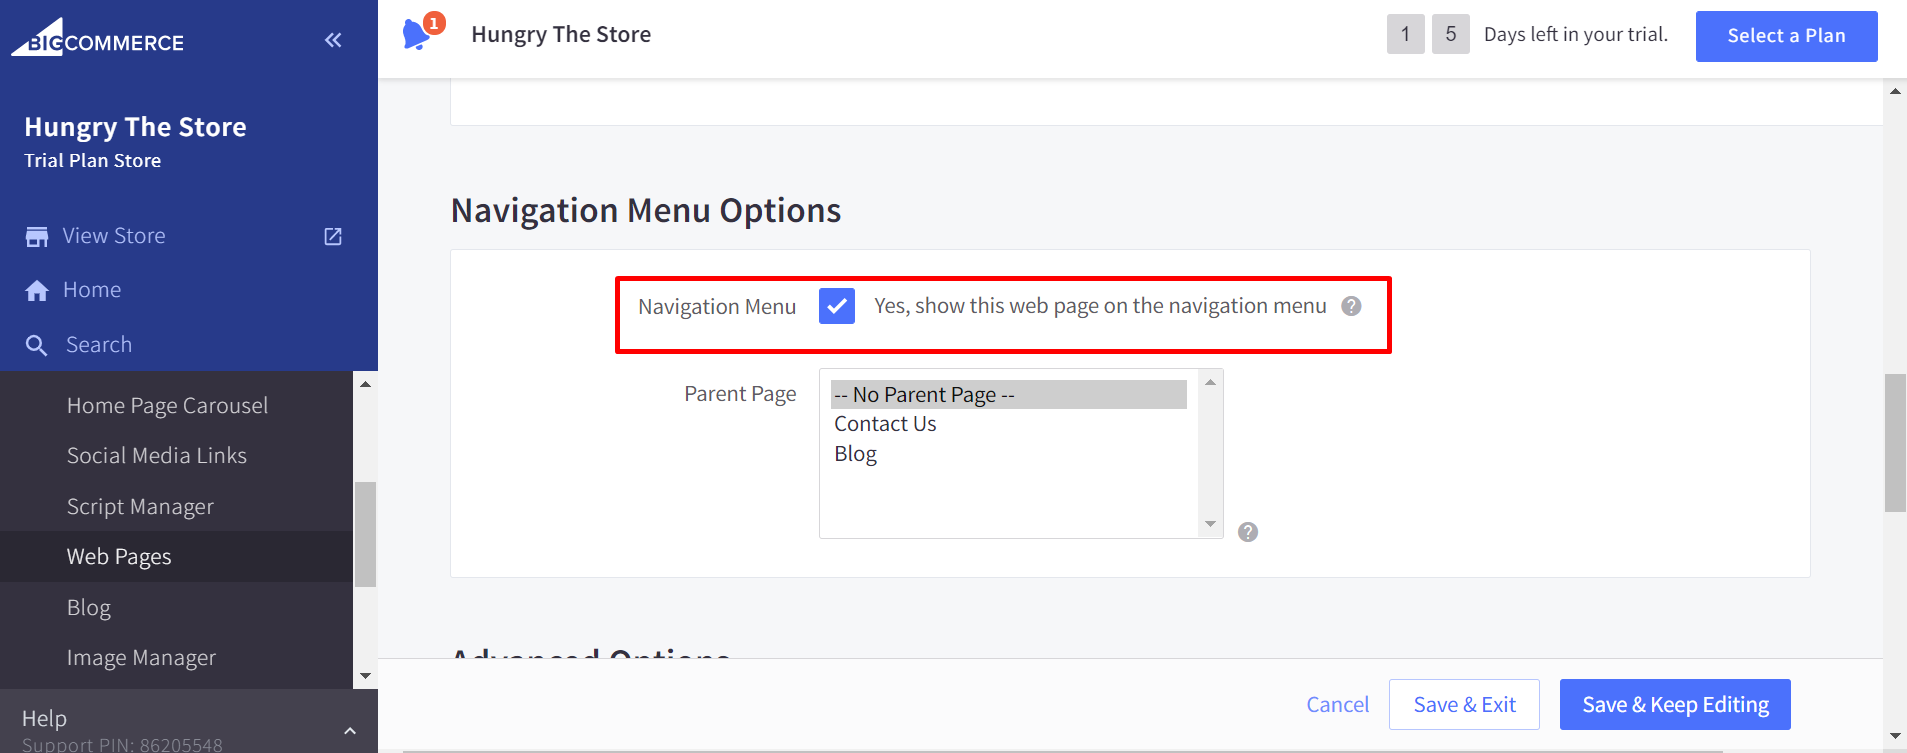
In order to get rid of what is in your header that you don’t want, come back to your Web Pages dashboard. Then, select the one that you don’t want. Next, let’s scroll down to the Navigation Menu Options and deselect it by clicking on “Yes show this web page on the navigation menu”.
When it comes to social media channels, you can also link your store to up to six channels. Let’s go back to the Storefront option, which is on your dashboard, go to the Social Media Links. Now, you can add your social media connections to each network profile. Then, click, drag, and drop your links to the Live on Your Storefront section of the screen.
As you can see, your navigation page is now completely set up with categories, products, contact information, customer support. One thing you need to keep in mind is saving each adjustment before coming to other fields.
Step 9: Set up your shipping rates and methods
When selling online, you need to care not only about what you sell but also how your customers receive their orders.
In order to set up your shipping rates and methods, go to your BigCommerce dashboard, choose the BigCommerce Shipping Manager section, which is under the Store Setup -> Shipping. You will have multiple options of shipping. To choose the most suitable shipping methods for your business, you should look at BigCommerce’s shipping video tutorial.
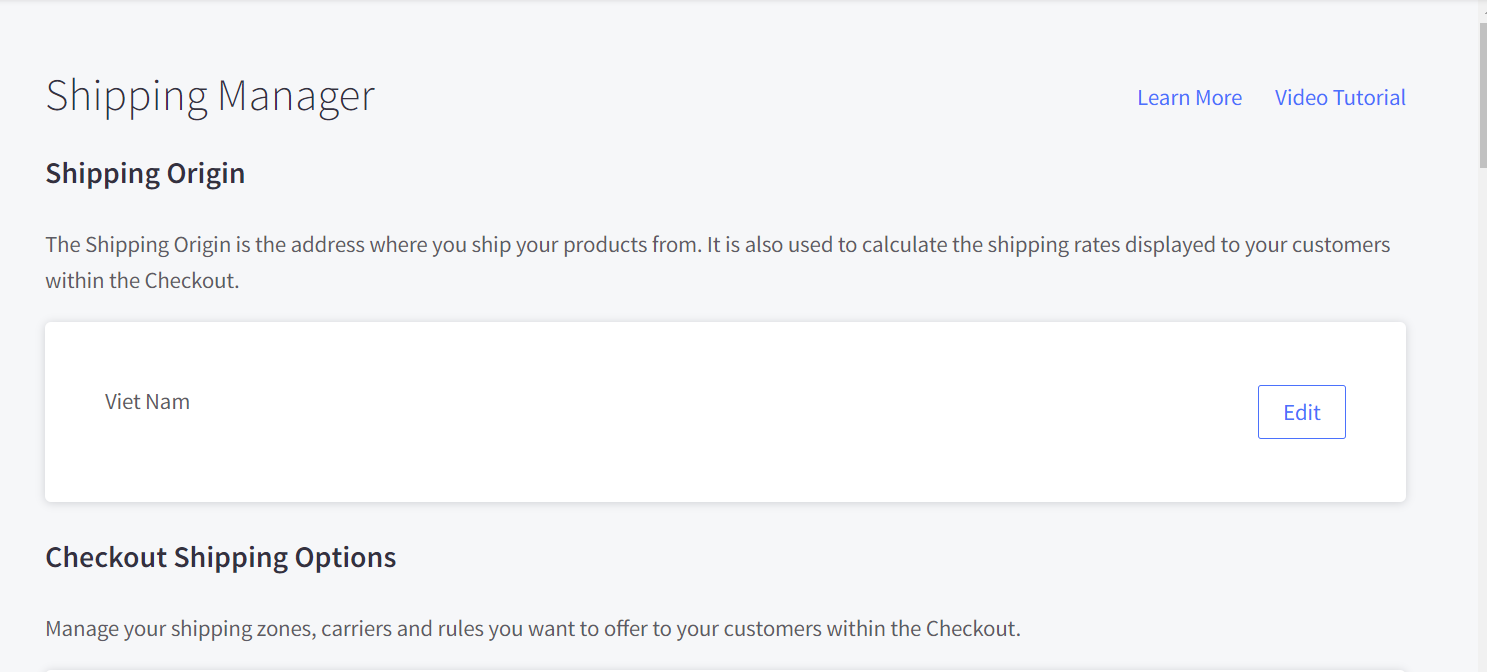
After approaching the Shipping section, you can now fill out basic information about the place you ship your items from ranging to your home address, your company warehouse to the provider’s address, or the fulfillment agency.
In terms of shipping services and partners, you should go to the Set-Up Services section. BigCommerce will provide its users with the free option, which is B Shipping powered by ShipHawk and ParcelCast. You can also choose ShipStation, but you have to pay for it after a 60-day free trial.

You have the chance to approach multiple shipping partners suggested by BigCommerce. However, you can still choose to be in charge of the shipping on your own by printing USPS shipping labels. We recommend you use the options supported by BigCommerce instead of handling them yourself if you don’t have experience and time.
When it comes to shipping zone, the default one of BigCommerce is the United States. To change or add another shipping zone, scroll down to the bottom of the Shipping Manager dashboard, under the Checkout Shipping Options.
Then, let’s set up the shipping method for your store by choosing the Configure button, which is next to the default shipping zone of the platform. You can also add static shipping quotes and real-time shipping quote options for customers. In case your business aims to ship internationally, you have to repeat this step many times.
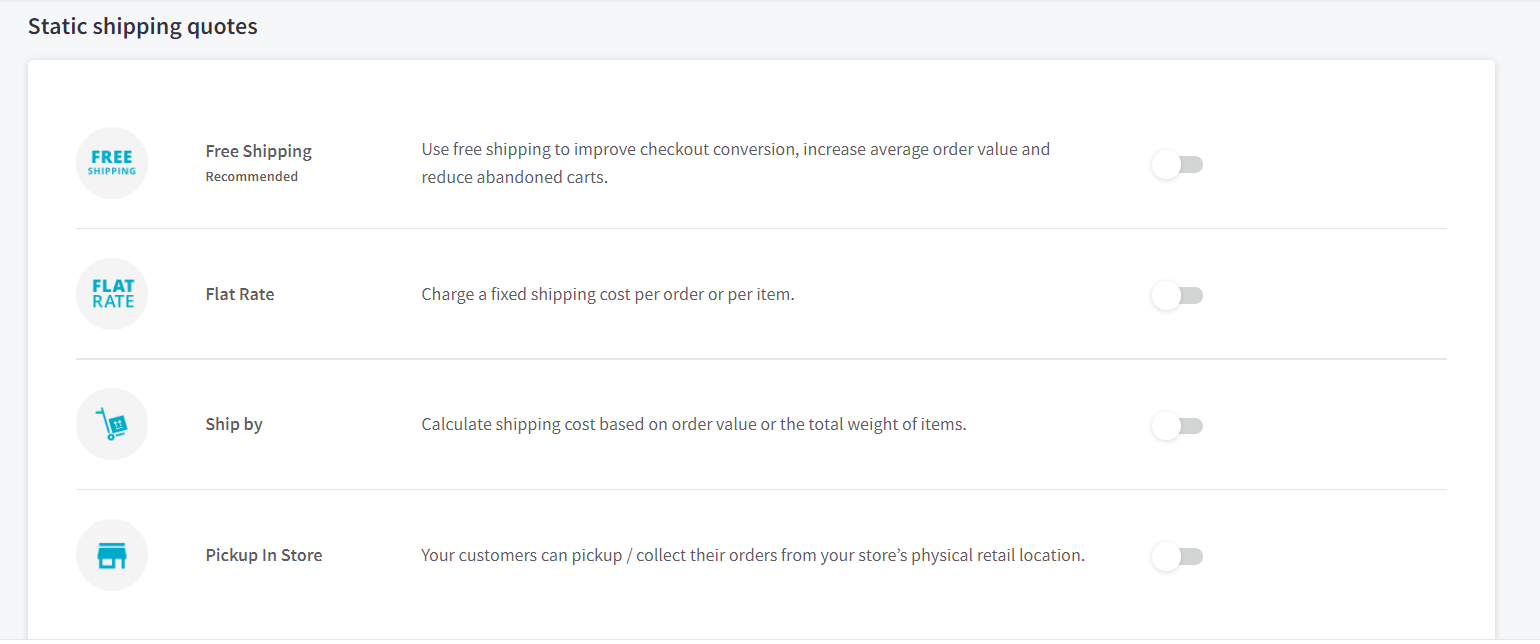
There are four types of static shipping quotes which include:
- Flat-rate shipping: This quote can be applied to the whole order or one item in an order.
- Free shipping: You can offer a free shipping quote on all items or some items over a certain amount of price.
- Shipping by weight or total order: Shipping rate can be different depending on total order weight.
- Pickup in store: If you do have a brick-and-mortar store, this quote can be added so that customers can directly take their orders from your store.
Offering real-time shipping quotes is not familiar, but if you do need it, you should connect to shipping carriers such as FedEx, UPS, and the USPS.
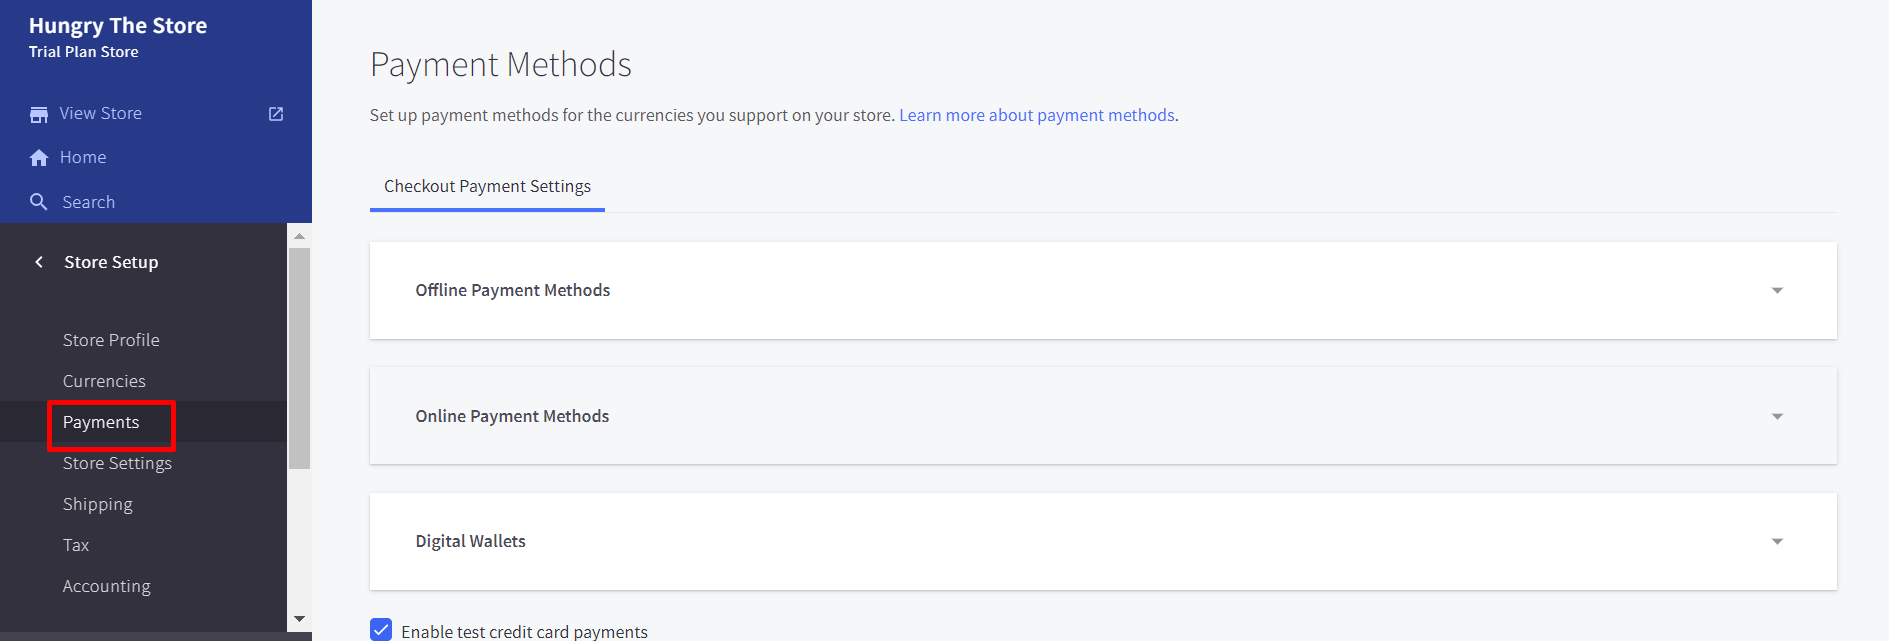
Step 10: Set up your payment methods
To set up the payment methods of your store, come back to your main dashboard, click on Store Setup -> Payments. Here you can see multiple payment methods that BigCommerce provides.
Even when you don’t have a payment provider or merchant account, you can still sell online by using a built-in payment process powered by Braintree - PayPal.
Besides that, there are other methods that you can apply to your store.
- Payment gateways: They include Square, PayPal, or Stripe. Simply create an account on one or some of them and link your payment gateway to your online store.
- Merchant service accounts: To collect a payment, you can also set up a merchant service account.
- Digital wallet solutions: This solution is becoming more and more popular. You can link your online store to digital wallets like Visa checkout, Apply Pay, Google Pay, or Masterpass.
- Offline payment methods: In case your customers tend to pay by cash, you can also offer offline payment methods like money order, C.O.D, pay in-store, and more.
When first launching your store, the default payment method provided by BigCommerce is PayPal. If you have other merchant processors, you can just skip PayPal by clicking “No thanks”. Then, coming to the bottom of the page to set up your existing methods.
Step 11: Launch your online store
You have done a great job! Now let’s come to the last step, which is finally launching your online store. To officially get your store ready to sell online, you need to set up the store profile, create the sale tax settings, preview your store.
Set up the store profile
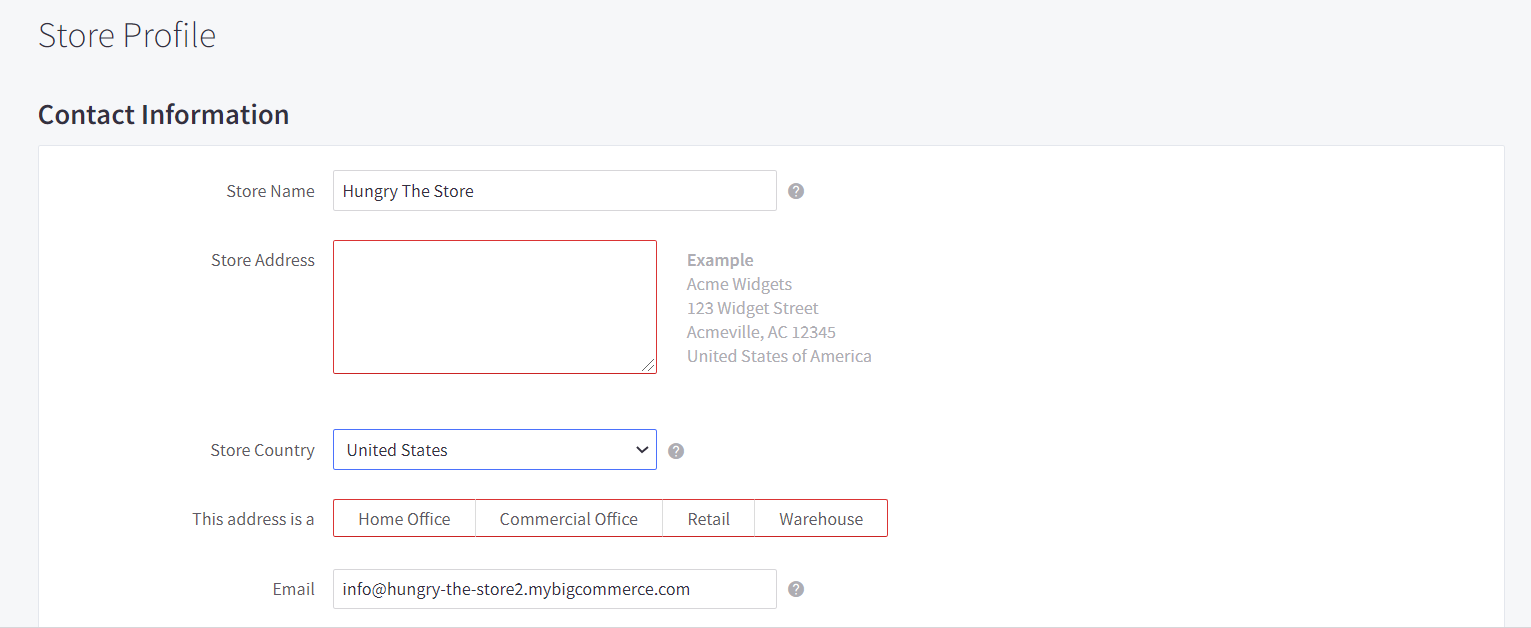
Now let’s come to the main dashboard, choose the Store Setup -> Store Profile. Here, you should fill in the basic information about your store: name, address, email, and phone numbers. This information will be shown in the footer of your store.
Build up your sales tax settings
When opening the Sales Tax settings, the default setting is Manual Tax. You can adjust it at any time you want. However, in this step, we recommend you should research more about sales taxes or have an accountant do it for you since it is quite complicated for some business owners.
Preview
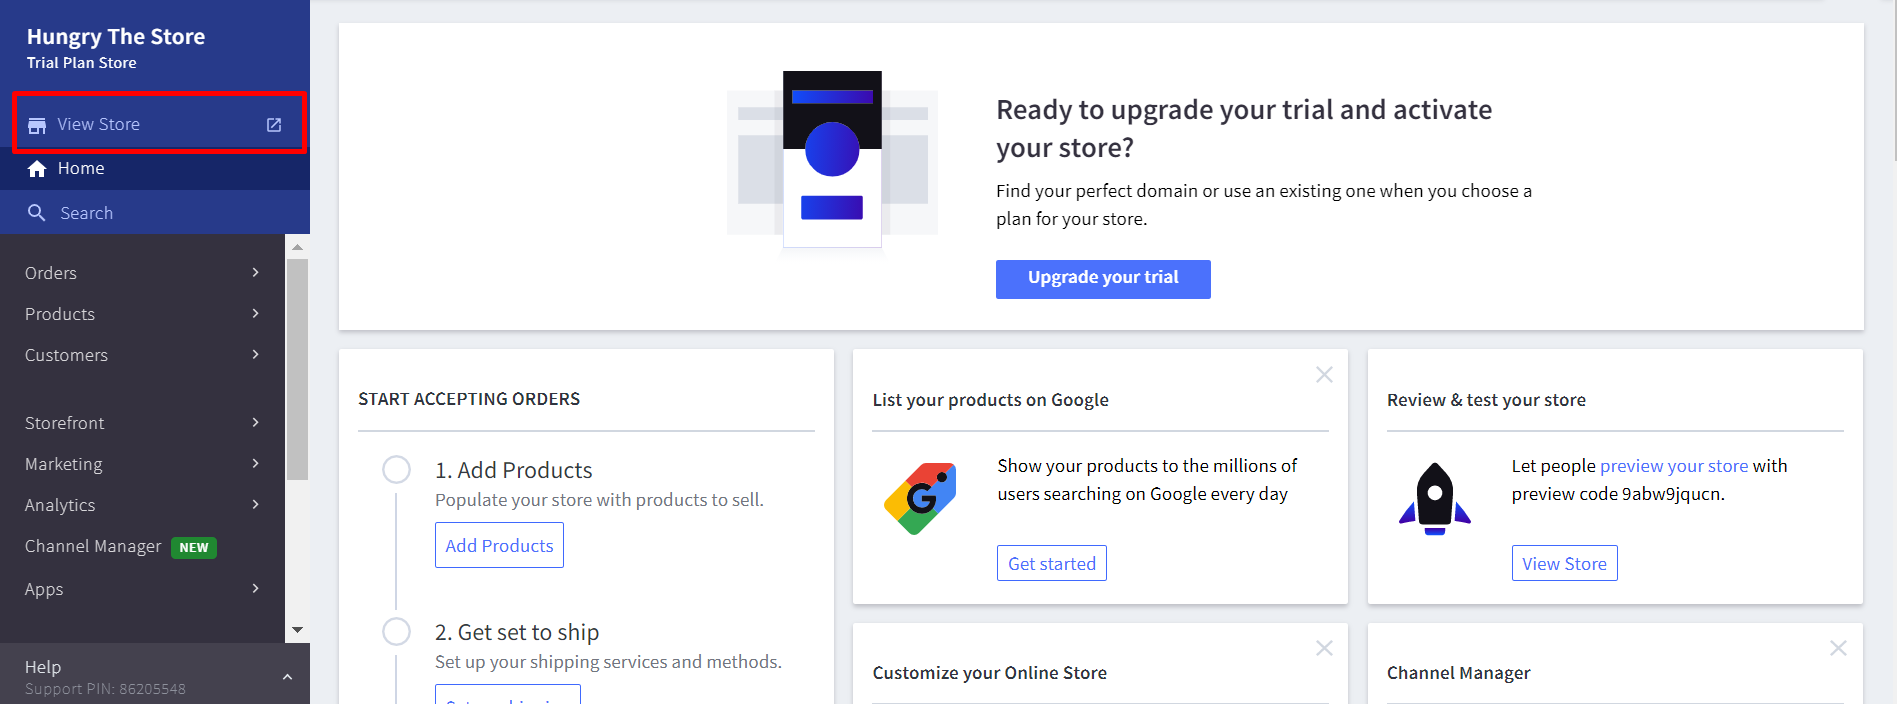
Previewing your store is very important. You won’t want one minor mistake to ruin all your setting up process. So, let’s make sure all elements of the website are what you want. Now, let’s go to the homepage and click on View Store to see how it looks. Remember to check it carefully and adjust if you need.
If you want to ask your friends to get feedback, simply go to the home dashboard, copy the preview code, follow the store preview instructions, and others can view it before launching.
Launch your store
You must have waited for this moment, right? However, before making your store go live, you need to upgrade your free trial into a paid plan. Let’s go to your home dashboard and clicking on the Upgrade Your Trial button.
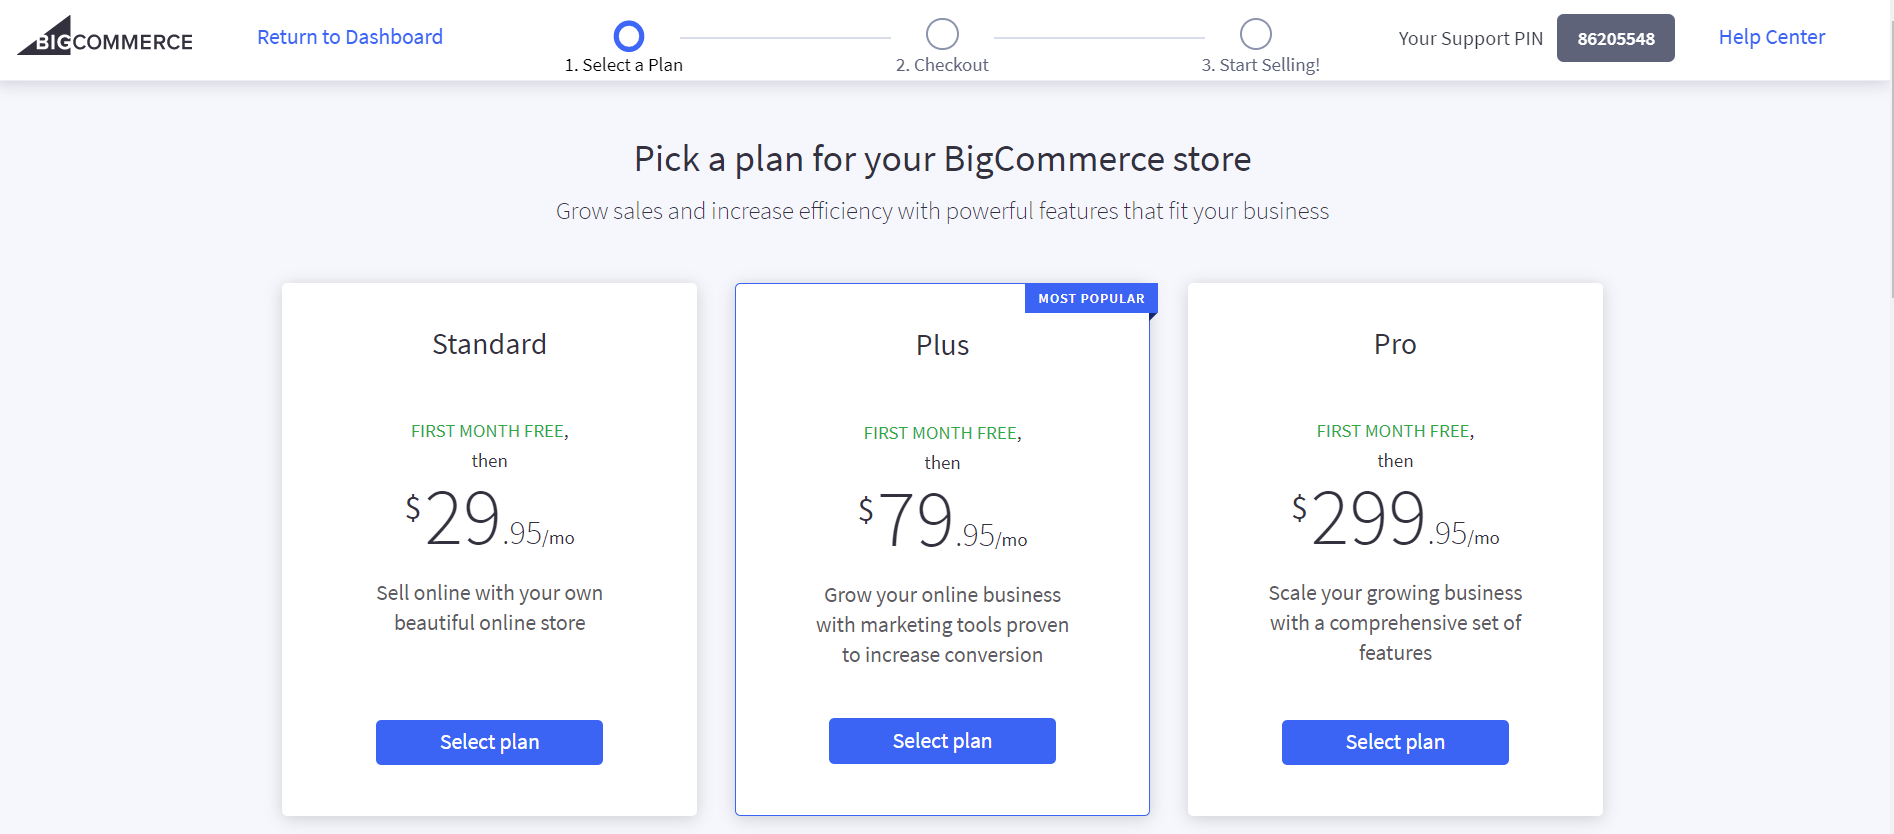
There are four pricing plans with different feature sets. The more you pay, the more you get. We suggest you should start with the Standard Plan and upgrade it later when your store grows. In our opinion, the features provided in the Standard Plan are worth your money since some of them cannot be offered in the same-price plan of other platforms.
Final thoughts
So, BigCommerce is not that difficult to use, right? I’m sure that you have to spend only about one hour setting up everything before starting selling things via BigCommerce. Hopefully, this post is informative and useful for you who are getting trouble using BigCommerce. If you have any questions, don’t hesitate to leave us a comment in the section below. We will surely reply to use as soon as possible.
Besides, if you find this post interesting and want to read more relevant topics, remember to share it with your friends and visit us for more.
Thank you, and good luck with your business!
Related Post: How to use BigCommerce to sell on Amazon?


