How to Setup a BigCommerce Store in 30 minutes?
BigCommerce is rising up as one of the most widely used eCommerce sites but you don’t know How to set up a BigCommerce store ? Although it might not be easy to have a store in BigCommerce setup at first but as you have it under your control, a promised land is waiting for you.
With a few simple steps below, we’ll show you how easy it is to fully start with Bigcommerce. If you already have things to market, you will be up and running in a matter of hours.
How to Setup a BigCommerce Store
1. Create an account on BigCommerce
Step 1: Get started
Strolling over to the Bigcommerce pages. This will give you a clear sense of what your shop is capable of. You are ready to sign up once you see what you love! Fill out the form on the home page with your company’s name - which can be changed at any time. Click, Start my Bigcommerce free trial now
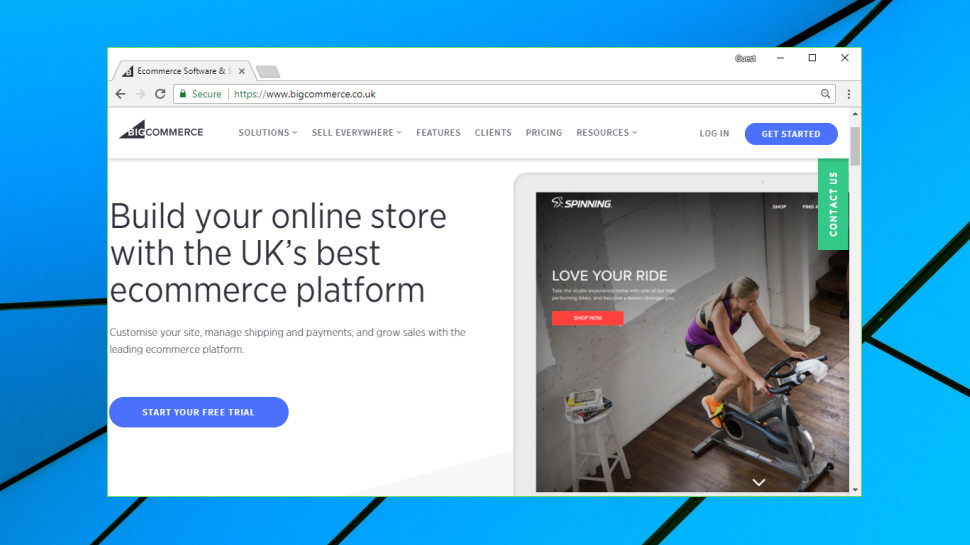
Step 2: Complete the form with some information
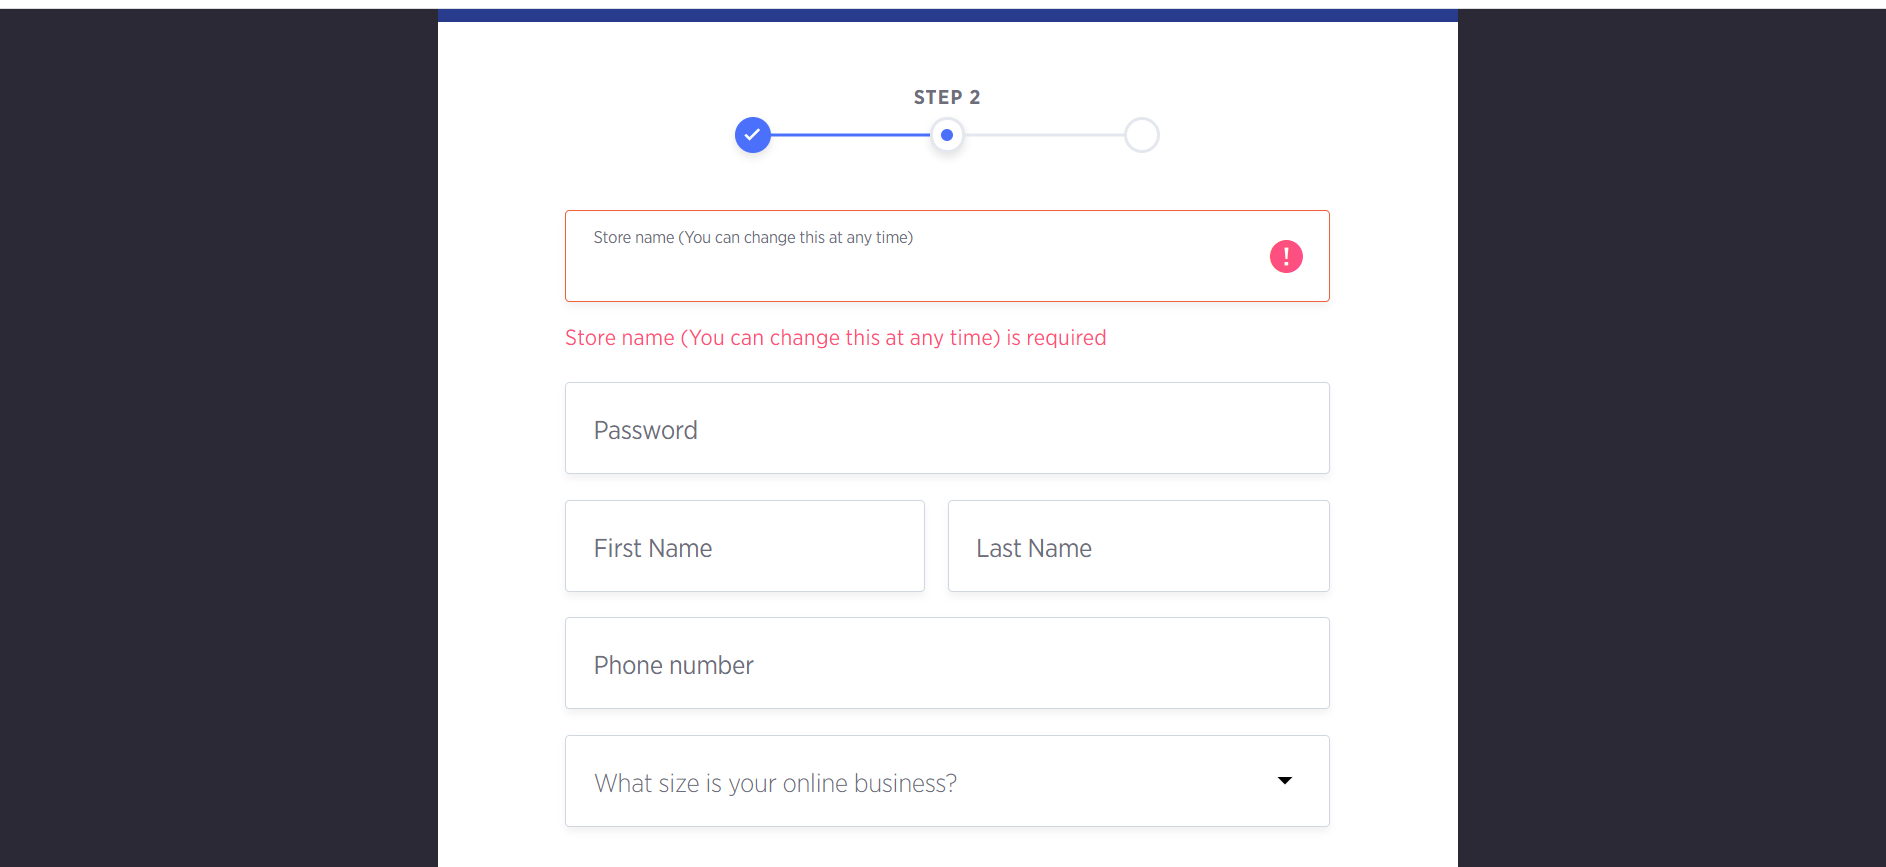
You will be required to fill in some information about you and your store such as:
- What you‘ll sell
- Where you are based
- Your name and contact details
If you have not made your decision, choose I’m not sure yet. On the other hand, if you are ready to have your store, choose Create my store now.
Step 3: Visit you store
Just with a few minutes waiting, you will officially have your store opened!
2. Design the store as you want

Step 1: Add you store name and address
You can update the store’s name, location, contact numbers, and email account by choosing the blue button, Update your store settings.
Finish by saving what you have just done.
Step 2: Choose the units for measurements
Scrolling down on the Store Name and Address tab to choose whether you’ll measure your items in metric or US dollars .
Step 3: Select a Theme
Go to Change your Theme and Logo, you’ll be brought to the Bigcommerce dashboard section in which you can adjust your theme or template. When you’ve found a template you need, press the Apply this template text button. Once you’ve checked all of the validation boxes, press Apply to apply the theme to your store.
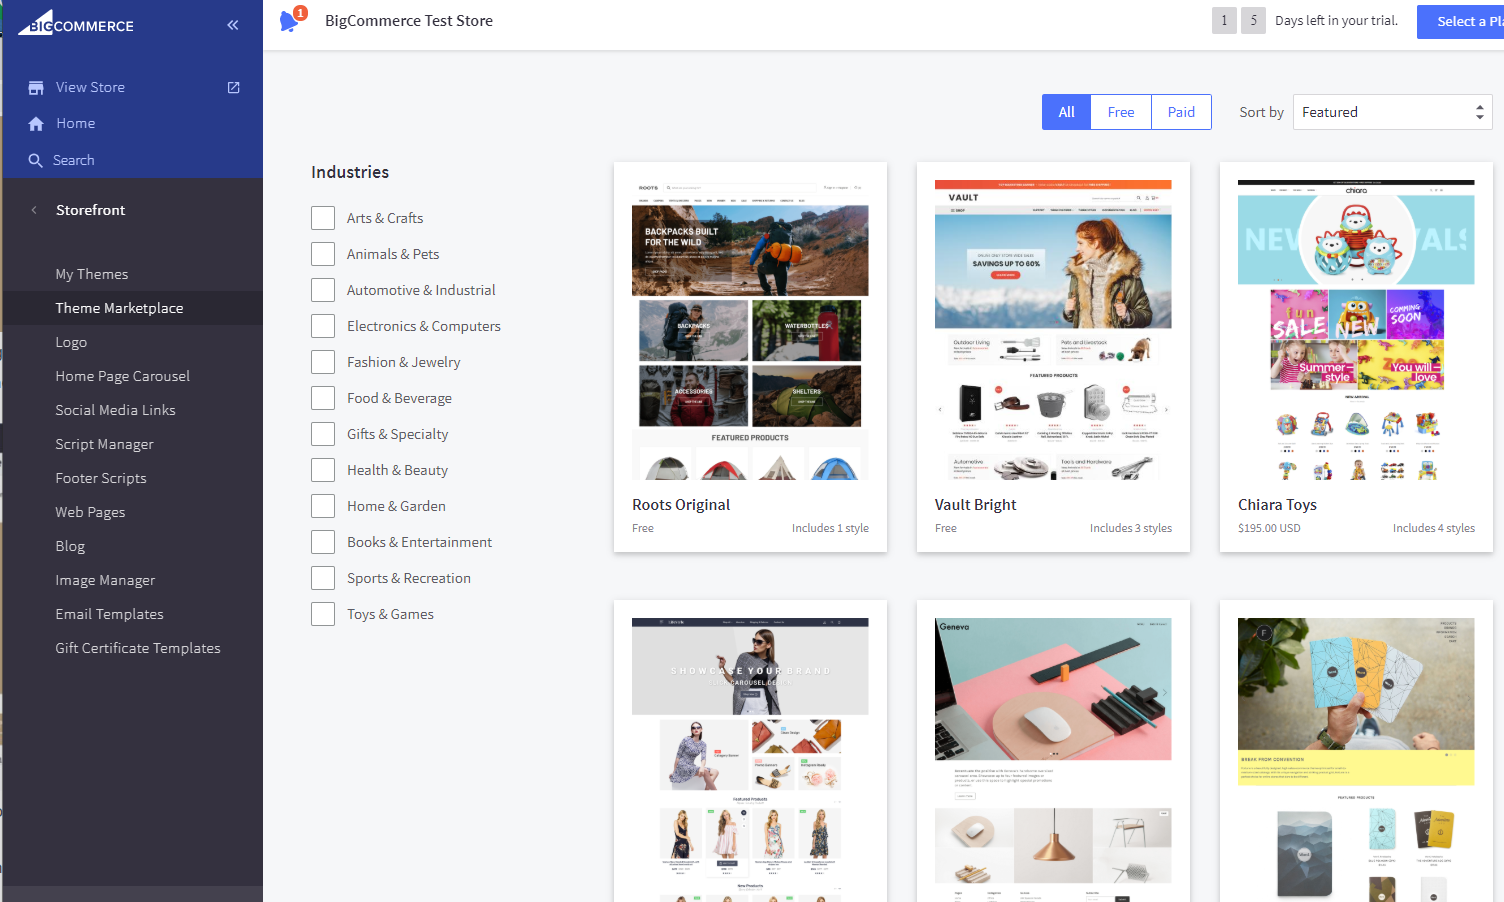
Step 4: Design your logo
The tab will have access to the Logo section in which you can either choose to Upload a logo image from my computer or Show Text where my logo will be displayedIt will then offer the chance to enter text to replace your logo.
3. Set up Product categories
Step 1: Add Product Details
Choosing Add Products button, and then you can fill in some details about
- Your Product is Physical or Digital
- Name of your Product
- Product categories
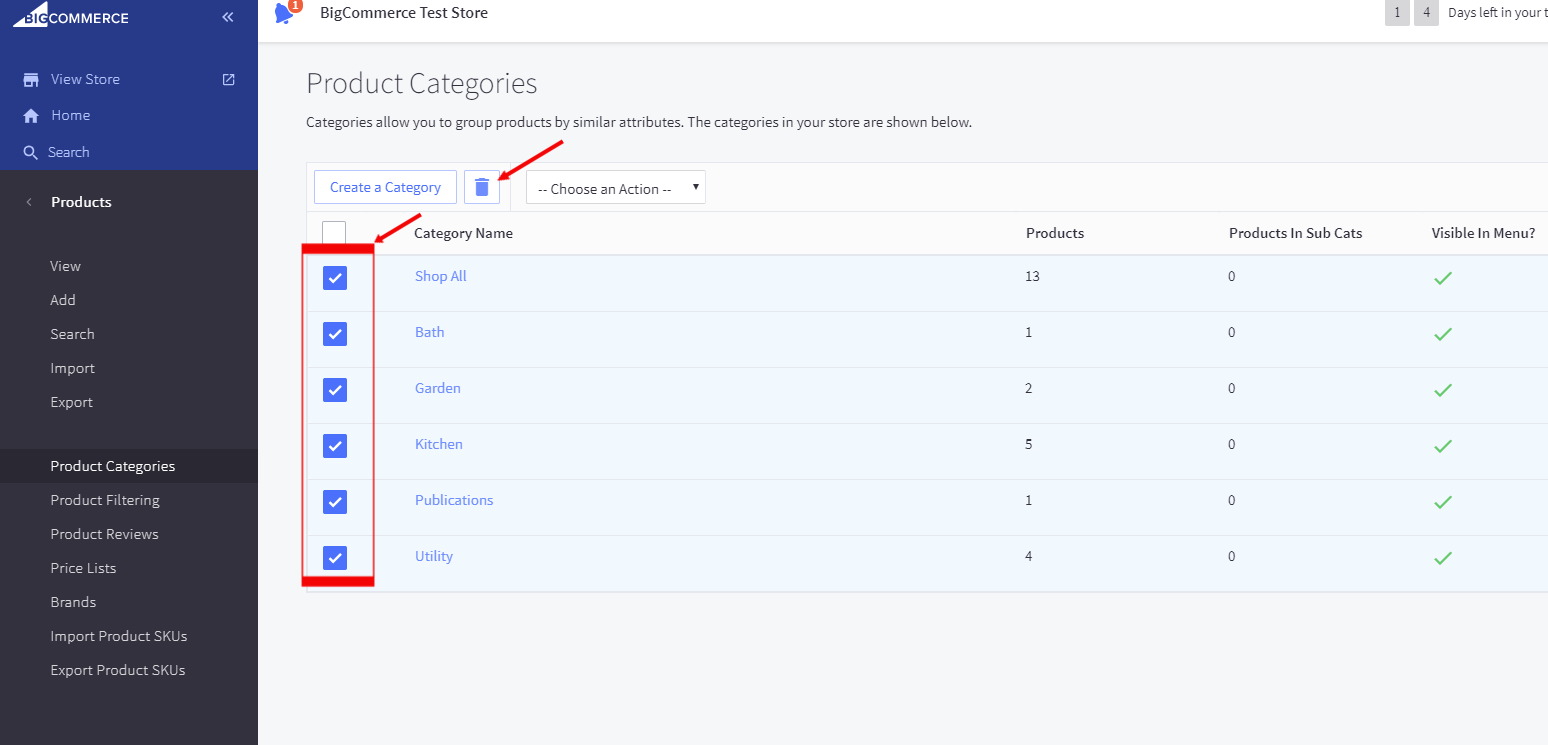
Step 2: Complete Product description
Going down and filling out the product description. Although it is unnecessary, it increases the chances that your product will be found in search results. Moreover, a good description function is considered as a sales pitch, persuading people to purchase.
Step 3: Enter default price and shipping fees
Just go down to enter the price and shipping information about your goods. You can specify if the shipping fee is depending on size and weight or if it is set.
Step 4: Upload product image
On top of the pages, you can see the Images and Videos tab. You can select images and videos for your product by dragging and dropping it. Click Save & Exit once you are done. kB
4. Choose Payments, Shipping Methods
Step 1: Set up Payment methods
Move to stage 3 and click Set up payment methods, you can choose among different methods they provide. In case you couldn’t find what you prefer, select More payment methods Here are the most popular payment methods for your BigCommerce online store:
- Popular payment gateways : Sign up for a Square, PayPal, or Stripe account and connect your preferred payment channel to your online business.
- Merchant service accounts: To collect payments, set up a merchant service account, such as Chase Merchant Services.
- Digital wallet solutions: You may connect your online store to Visa Checkout, Apple Pay, Chase Pay, Google Pay, and Masterpass.
- Offline payment solutions: BigCommerce also allows you to set up less popular offline payment methods such as money order, cash on delivery, or pay in-store for things that customers pick up at your real shop.
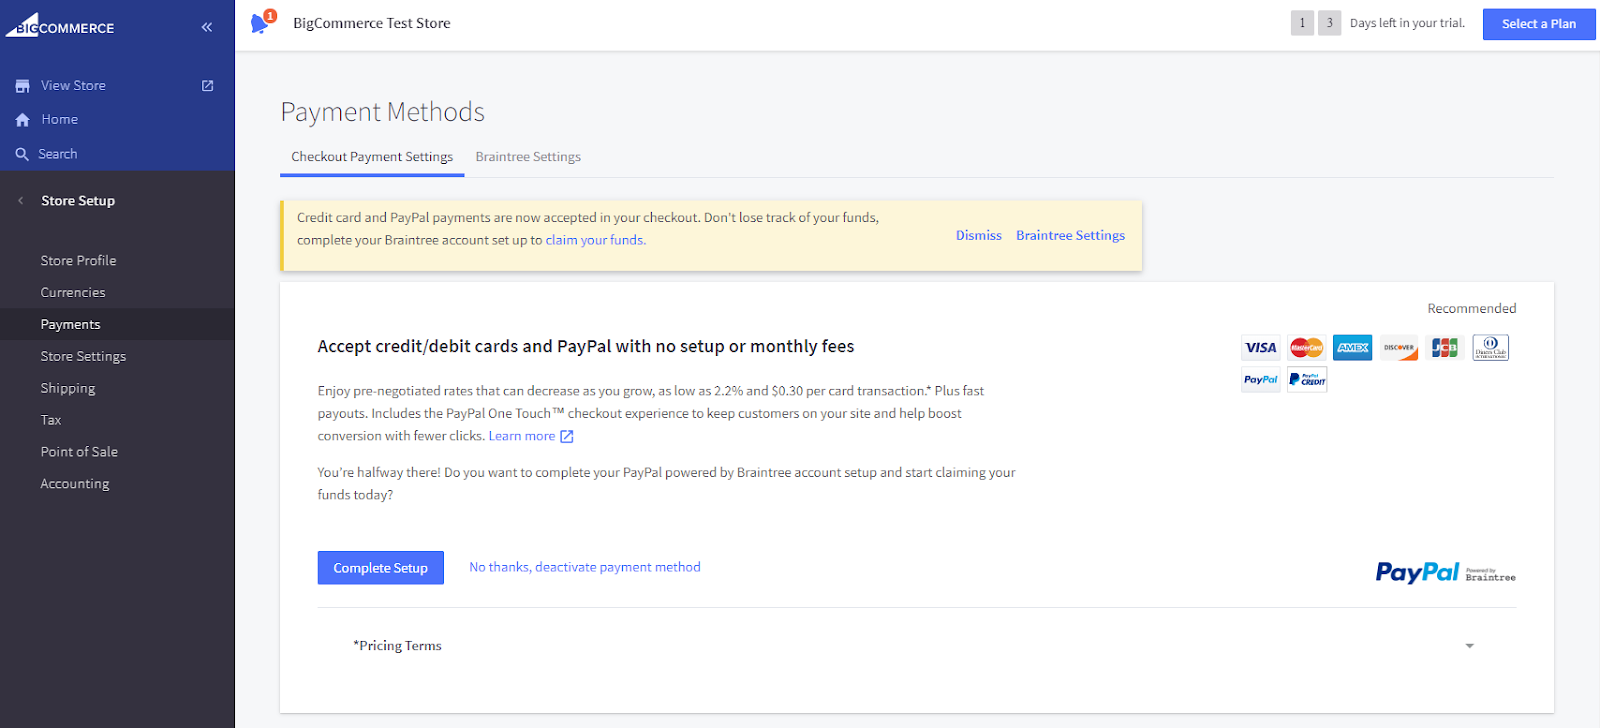
Step 2: Choose Shipping options
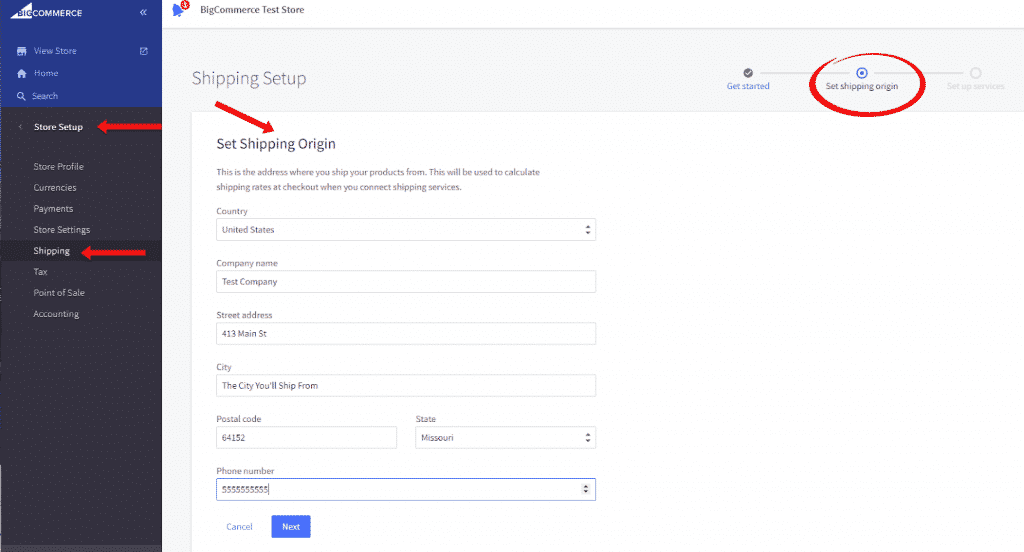
Remain on stage 3 and choose Ship your products and continue with Choose Shipping Options. You’ll be asked for a company address here, and you’ll have the ability to create shipping zones. You can include the following sorts of static shipping quotes:
- Free shipping: With BigCommerce, you may provide free delivery on all goods or on those that exceed a specified value level.
- Flat-rate shipping: You can charge flat-rate shipping on entire purchases or on individual items within an order.
- Ship by weight or total order: You may also define shipping pricing ranges based on the entire weight of your purchase.
- Pickup in store: If you also have a physical shop, you may offer clients the opportunity to order things online and then pick them up in your store.
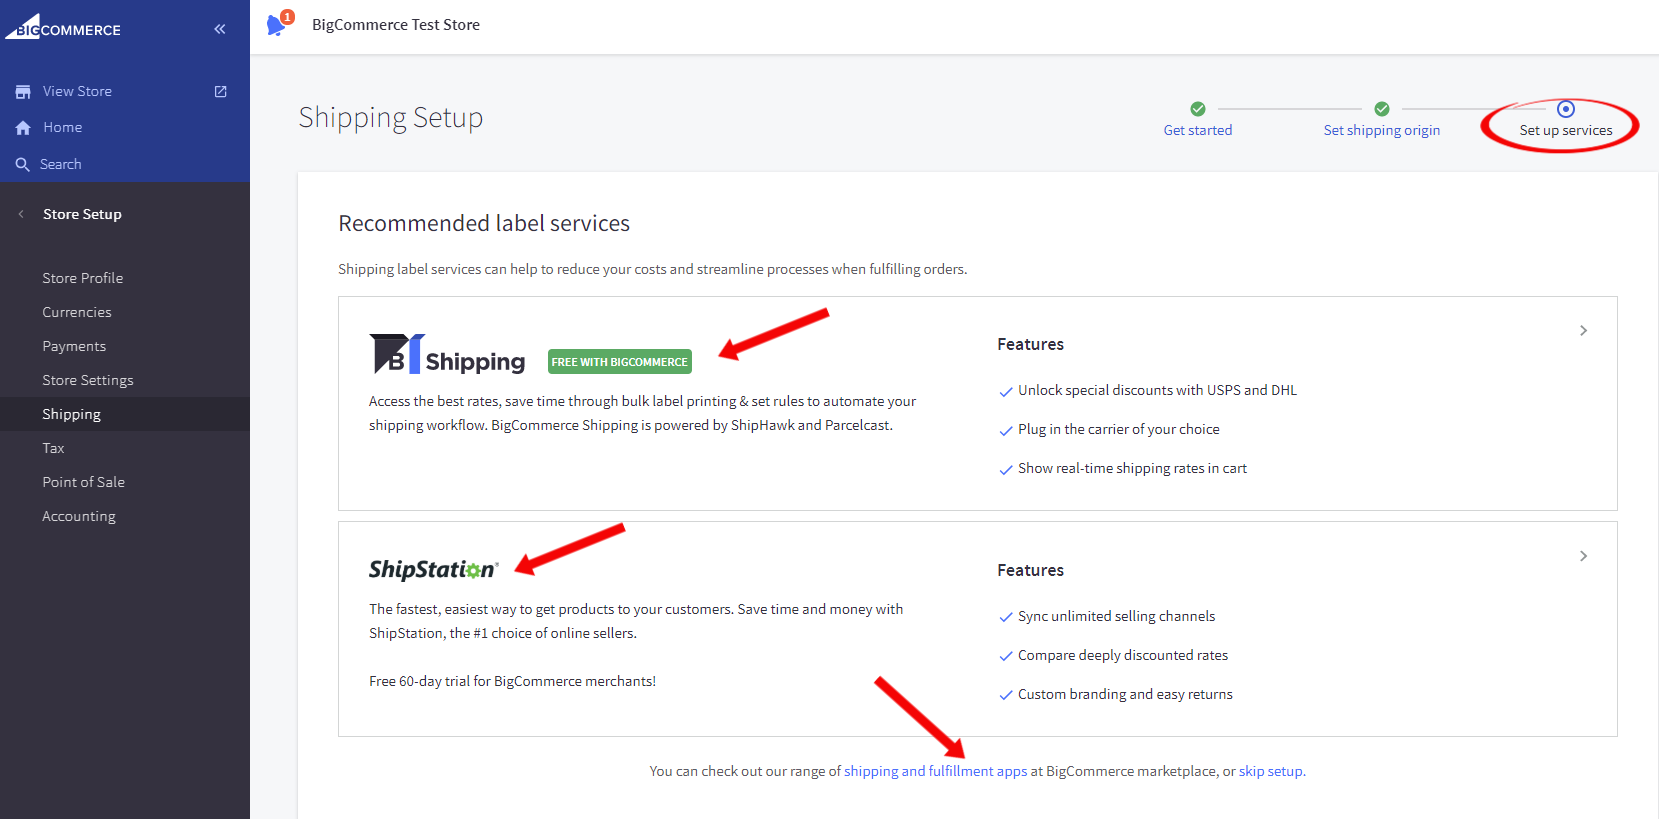
5. Start your Business!
By clicking the Launch button and then to Launch your store. You are now finally becoming an eCommerce trader and have your first store on BigCommerce. From now on, all you need to do is attract customers and make a profit for your store.
Final Words
We can not deny the popularity of BigCommerce nowadays. And with some instructions above, we hope that you can easily set up a BigCommerce store and get access to the eCommerce world successfully. If you have any concerns on the subject, please express them in the comments area below. We will respond as quickly as possible. Please share this article with your friends and return to our site for fascinating stuff.


