How To Sell Amazon Products on Shopify?
Are you selling on Amazon, and now looking to sell your products on your own website? Whether you’re selling 100 or 1,000 products on Amazon, try to become less dependent on the platform by expanding to other platforms is a great move as you won’t have to rely your entire life and death on the hand of a single person (Jeff Bezos?).
It won’t be hard to sell Amazon products on your own websites, all you need to do is follow this article, and at the end of it, be ready to get a new stream of sales that come from your website. Don’t worry, there’s no programming experience required to import and sell Amazon products onto your website. The whole set-up involves cutting, pasting, and mouse-clicking.
Exclusive Offer: Get Shopify 33 days for just $1 + The Online Store Starter Kit
Start your 3-day free trial, and enjoy your first month of Shopify for $1 plus the premium package designed especially for new Shopify merchants!
Now let’s jump right into the details of how to sell Amazon products on Shopify!
Why should you sell your Amazon products on your website?
When it comes to eCommerce, how easily customers find your products depends on how many sales channels in which your products are present. Amazon is a huge marketplace, and probably most online shoppers have visited or bought from it at least once. Despite that fact, Amazon is not the only place where people come and buy things. Tons of people buy directly from websites as well, and this is where your brand and product should be present too.
On top of that, as mentioned in the intro, it’s never a good idea to place all of your eggs in just one basket (the Amazon basket). There are many unexpected problems that sellers encounter with Amazon. For example, if you have browsed the Amazon seller forum before, you might have encountered stories of sellers whose accounts got banned by Amazon for no obvious or fair reason.
Being completely dependent on Amazon, you will have to play by its rules, and when Amazon sets rules, they do so for their best interests even if yours are violated. At the end of the day, that’s their platform, and you have to either obey or drop out of it.
On top of that, here are some other reasons for you to sell your Amazon products on your own website.
- You can build up your own brand.
- You can build up your loyal customer base who will come directly to your eCommerce store to buy instead of going to Amazon
- You can leverage their website for B2B sales if one day you want to expand.
- You can personalize your product listings in many ways such as using videos to educate your clients, which is not viable at Amazon.
It’s just a great idea strategically to have your own website, not just for increased revenue, but more importantly, for survival even without Amazon. Let’s move on to the steps that you can take to integrate Amazon with your Shopify website and start selling.
4 Steps to integrate Shopify with Amazon
Selling Amazon products on Shopify is simply linking the collection of products you have got on Amazon with your standalone Shopify website. To make it easier for you to digest the how-tos, I will break down the following tutorial into 4 easy-to-execute steps, including:
- Step 1: Import your Amazon inventory to Shopify
- Step 2: Manage your inventory on Amazon and Shopify
- Step 3: Sell on Shopify
- Step 4: Fulfill orders sold on Shopify
Before we dive into each of these steps, it’s worth mentioning that there are only two methods you can use to sell Amazon products on Shopify (it’s more precise to say “import” than “sell” as you will have to import the products first before you can sell, won’t you?).
The first method is manually importing all of your Amazon listings one item at a time, which will be exhaustingly time-consuming and labor-intensive.
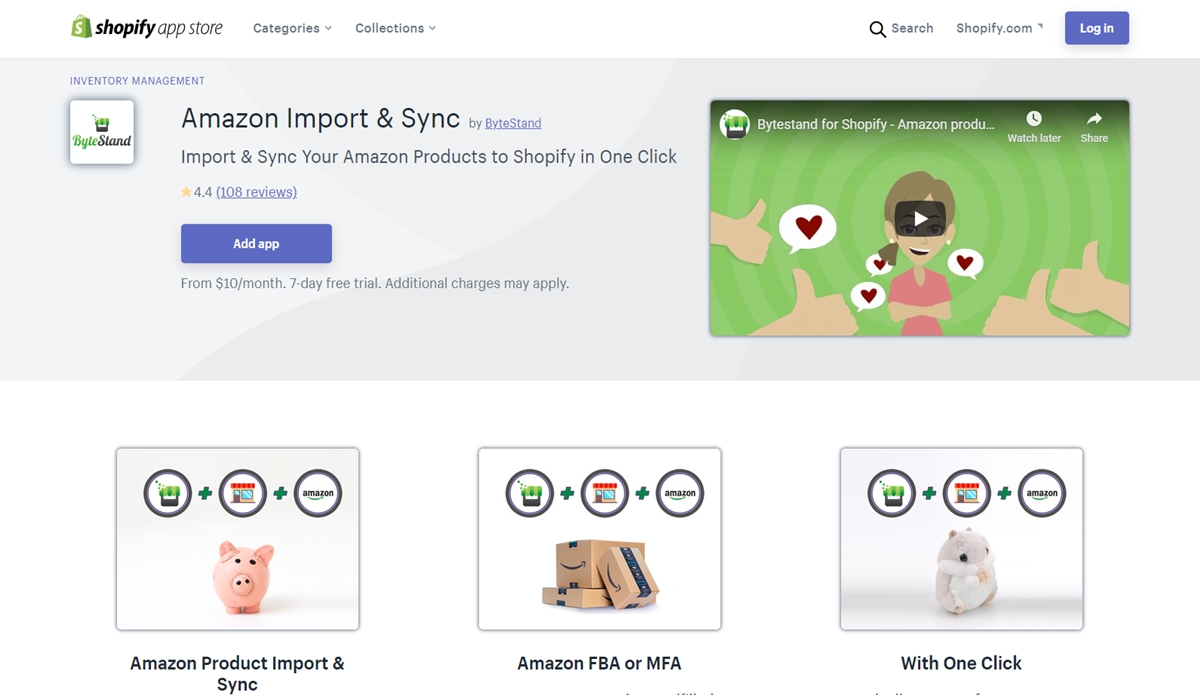
The second better method is using an app dedicated to this task, which will cost you a little but will save you tons of time. In this article, the app used is ByStand. This is a great app that is specially built for importing and managing Amazon products on Shopify.

Step 1: Import your Amazon inventory to Shopify
If you have used Shopify before, you might have known that it can take about 10 minutes to generate a product listing on Shopify. That’s how much time it would take to create a simple listing with no variations if you have already had content (images, descriptions, etc.). If you haven’t had the content ready, as well as having a bunch of variants for a single item, it will even take longer.
Why am I saying that? I’m trying to provide you the context of how much time it would take you if you import your Amazon listings to Shopify manually. Let’s say you have 100 products on Amazon that you want to sell on your Shopify store. It would take 10 x 100 = 1,000 minutes or more than 16 continuous hours of copying, pasting, and typing to get the entire thing done.
That’s just for data entry just to remind you. It’s up to you if you feel that you can withstand that much manual labor to save a few bucks. For me, I would rather hang out less and use that saved money to pay for an app that handles and completes this entire tedious task for me in a few minutes. The time saved can be well spent on many other important things.
As I mentioned above, ByteStand is an app that is dedicatedly built to import and manage Amazon products on Shopify at as little as $10/month. It will spare you 16 hours of boring data entry work by seamlessly integrating Amazon and Shopify. One great feature that’s worth mentioning upfront about ByteStand is it pulls high-resolution images for all of your listings, along with your product variants if there is any.
To get started, you can download the ByStand app in the Shopify app store, follow the sign-up instructions, and you can start pulling your Amazon product listings over to Shopify. If you are a visual learner, you can check out the guide video that will walk you through how to sign up for ByteStand.
Step 2: Manage your inventory on Amazon and on Shopify
After installing and using ByteStand for data entry, now you’ve got your Amazon listings in your Shopify store. The next question is how can you manage and maintain your existing products and new listings on both platforms so that there’s no discrepancy?
ByteStand answers that question for you already. It will update everything you have chosen in the app’s settings (such as prices, descriptions, variants, quantities, etc.) automatically or as scheduled. You can manually update everything too by doing a fresh product import in the app.
Not too bad for a deal, isn’t it? It will take you about 10 minutes to do all of that instead of 16 hours. Two steps left, and then you’re good to go on your own!
Step 3: Sell on Shopify
Before you can sell on Shopify with the imported products from Amazon, you might need to spend some time organizing and updating your product listings based on how your theme is built. Different themes on Shopify treat tags and categories differently, so modify your product listings based on the theme that you’re using.
This task won’t take you a lot of time as there’s the Shopify bulk editor that you can use to get the task done. This bulk editor is just similar to Excel, but used within the Shopify admin. When you want to update and organize your product listings, check out Shopify’s bulk editor as it is a huge time saver.
When you’ve got to this part of the process, you will find out one great feature of ByteStand that is after pulling your product listings from Amazon to Shopify, it allows you to continue updating your price and inventory without messing up any of your changes. This means you can set all of the descriptions and details as how you want them to be, ByteStand will set them as fixed for you, and then you can set the app to just update the parts of your product listings that you want to update.
Now you’re ready to sell! But when you’ve got an order on Shopify, how can you fulfill it? Find your answer in the last step!
Step 4: Fulfill orders sold on Shopify
If you already fulfill your own listings on Amazon, then fulfilling your sales through Shopify is a no brainer; just fulfill your orders on Shopify as you often do for a typical eCommerce order.
If you use the Amazon FBA service, you can set up to let Amazon fulfill orders for you. However, there are just a couple of things that you need to set up and a big issue to solve. That issue is how can you manually enter shipping rates and fulfillment costs for all of your 100 products while these costs can change anytime?
This issue can be solved by another Shopify app named FBA shipping. What it does is pull real-time FBA fulfillment and shipping costs to your Shopify order processing, and pass them to your customers at checkout. You can set up to charge a bit more, a bit less or even provide free shipping based on the volume of your customer’s order. Everything is automated and you won’t have to touch a single button on your keyboard once everything is fully set up.
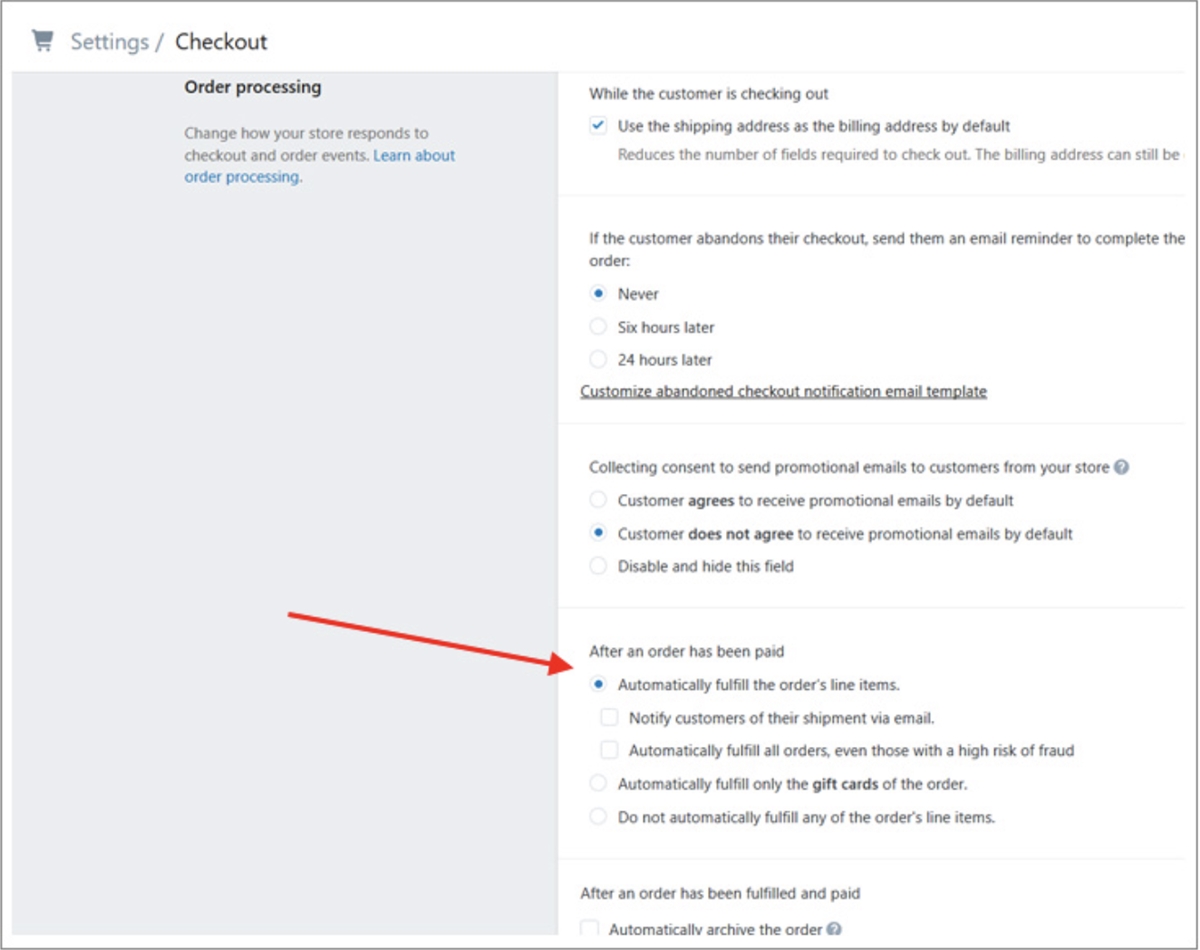
After you download the FBA Shipping app, there are two last things that you need to set up to get everything automated. The first one is to activate the Automatically fulfill order’s line items in Shopify.

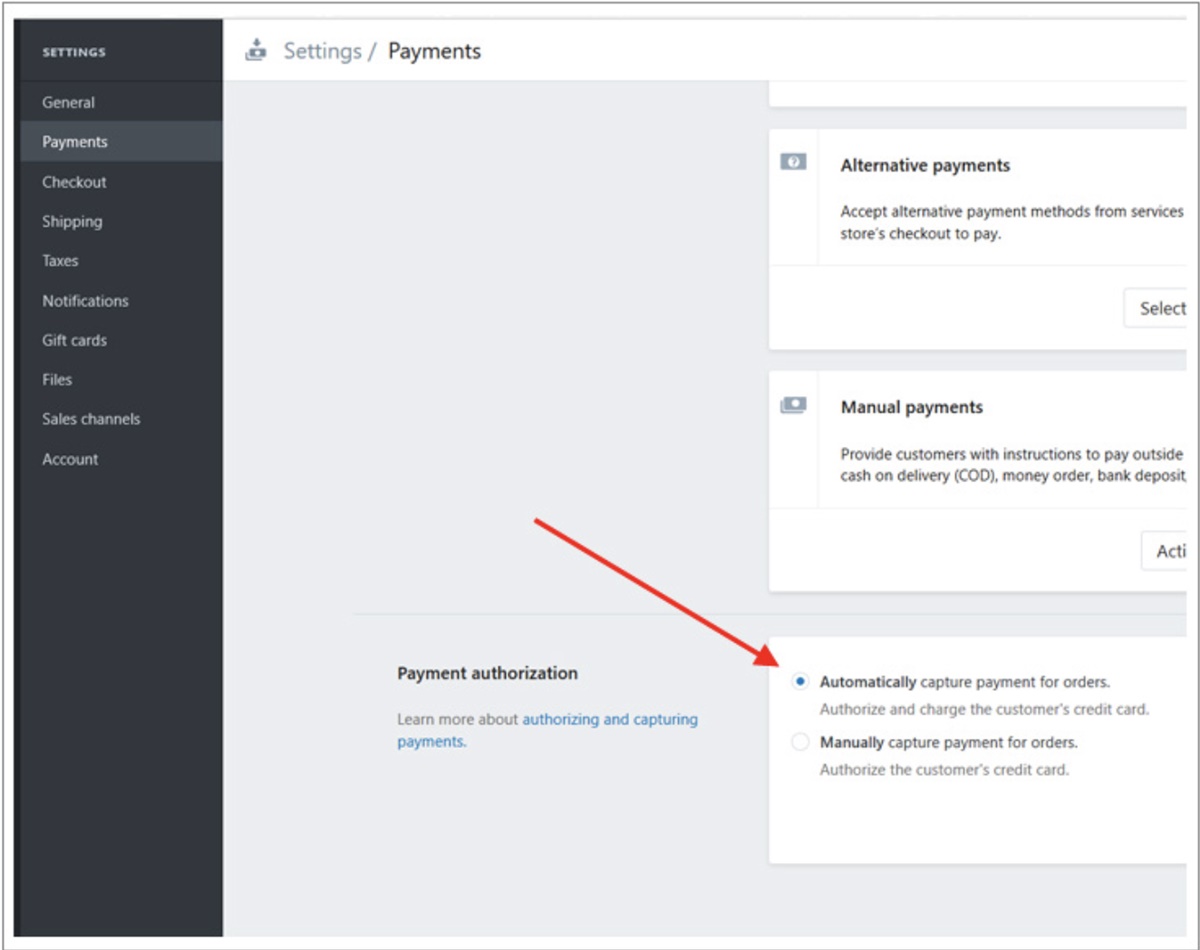
The other is to activate the Automatically capture payments for orders option so that you get paid!

That’s it! With FBA shipping and these two options activated, your order processing on Shopify will be on autopilot, and you will be able to sell your Amazon products and let Amazon FBA fulfill orders for you.
Final Words
With two apps and these 4 simple steps, you will be able to seamlessly sell Amazon products on your Shopify store. Get started now and reduce your dependence on Amazon!
New Posts


