How to assign a new template to a product in Shopify
Customizing product templates in Shopify is essential for creating a unique shopping experience that reflects your brand’s identity. Sometimes, the default template might not be sufficient to meet the specific needs of certain products. So, how do you assign a new template to a product in Shopify? In this guide, we’ll walk you through the steps to easily change and assign a new template to your products, enhancing user experience and optimizing your online store. Let’s dive in!
Assign a new template to a product
Step 1: Go to Products
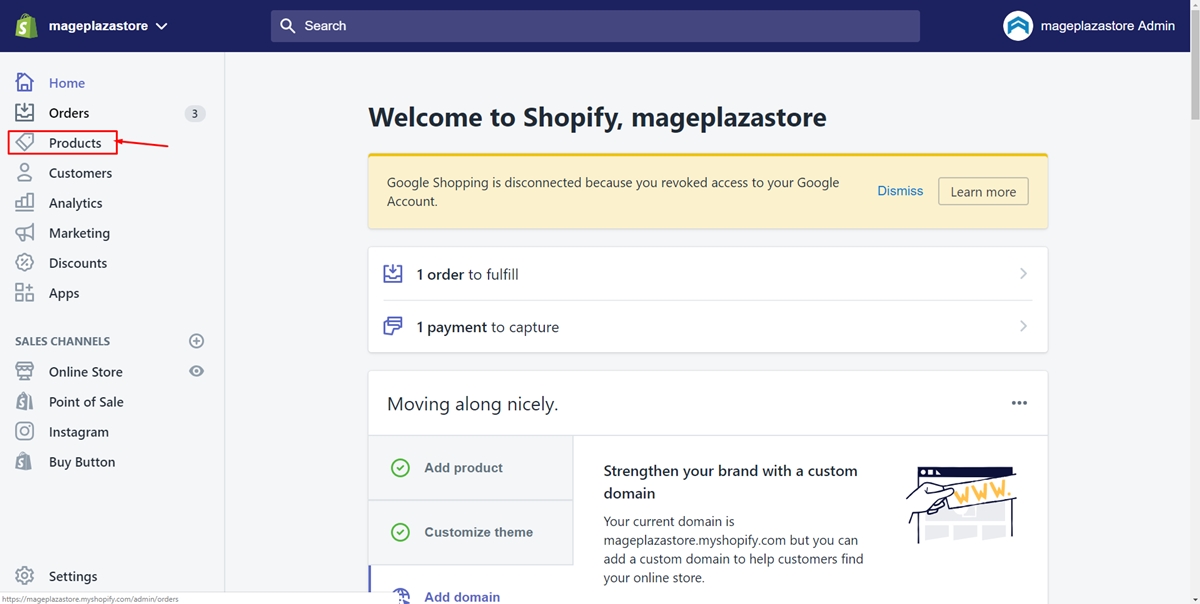
In the first step, you need to make sure to log in your Shopify account. You can tap here to access to the login page. After you’ve entered your account and password, you will go to the admin page. Take a look to the left of the page. Press on the Products button.

Step 2: Select the product
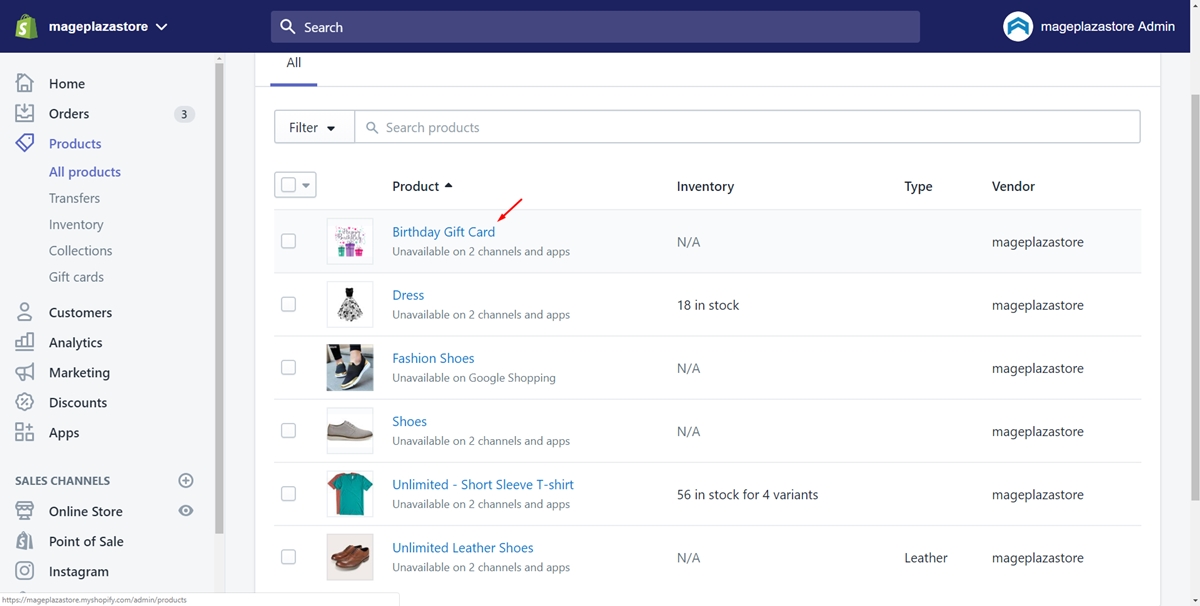
A list showed all of your products will appear. Choose a product that you want to assign your new template by clicking on the name of it. For example, I choose an item called birthday gift card.

Step 3: Click on your new template
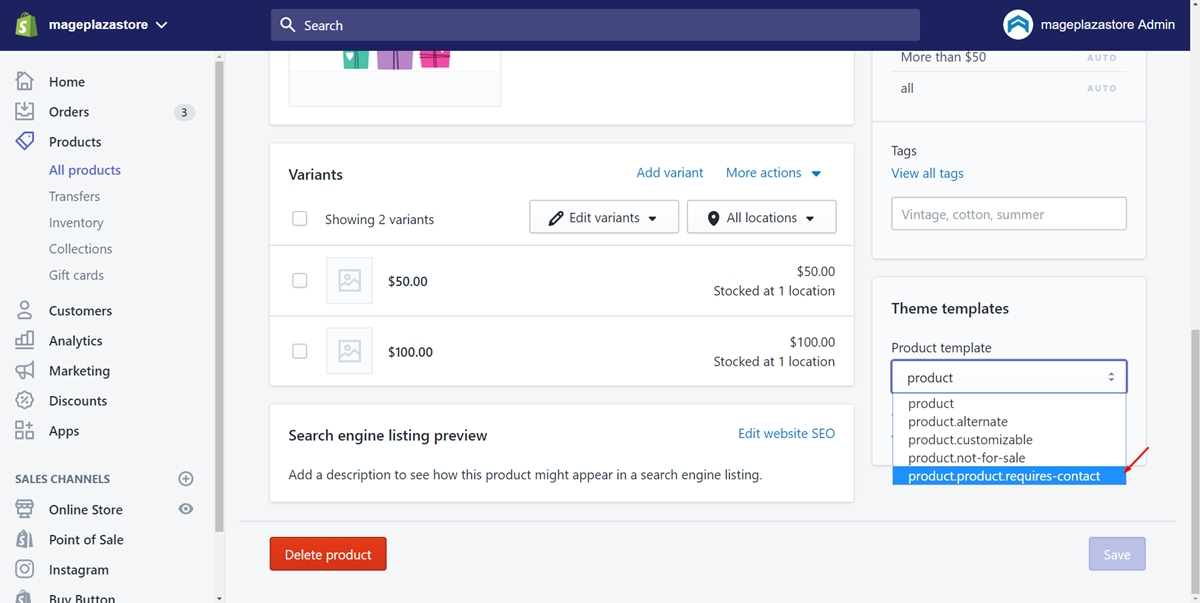
In this step, scroll down to the bottom field of the page. Make sure that you look on the right-hand side. Find a field called Theme templates. Afterward, under the Product templates, there is a drop-down list. Select the new requires-contact template you’ve made. Look at the following picture as an example.

Step 4: Save
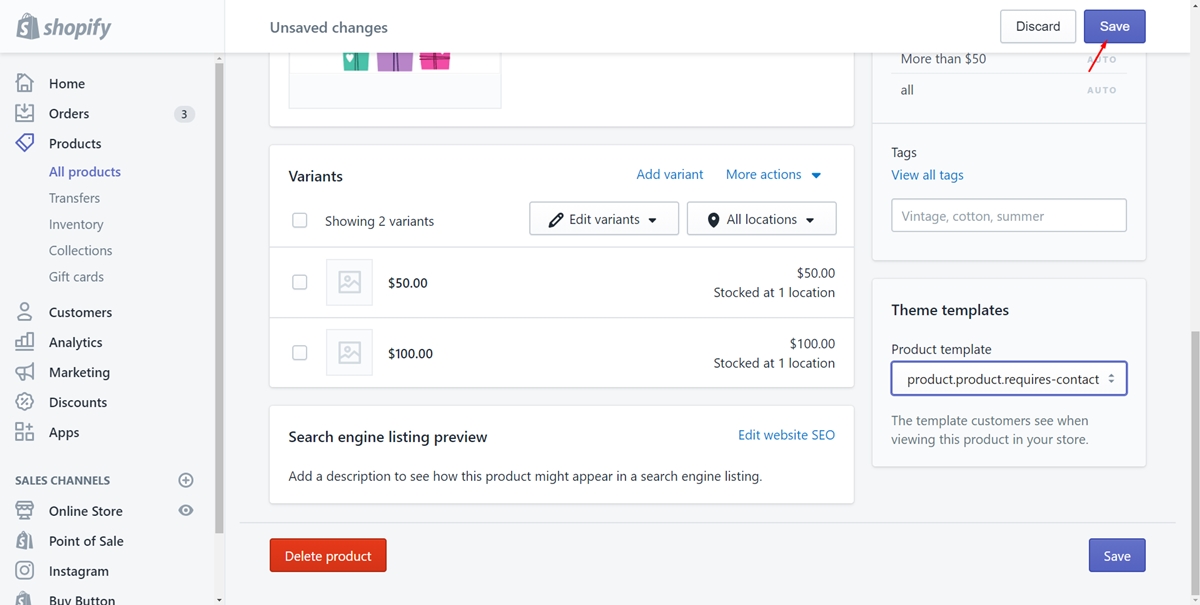
To finish, press on the Save button which has just appeared after you selected the new template. You can repeat all these steps if you want to assign the new template with other items.

Summary
Thank you for following this guide on assigning a new template to a product in Shopify. We hope these steps help you tailor your store’s design to better fit your brand and product needs. Now that you’ve mastered this process, start customizing your templates to enhance your customers’ shopping experience and make your store stand out. Happy customizing!


