How to add a Collection to a page in Shopify
As an online businessman, you might know that the Shopify eCommerce platform provides collection pages to help its users promote the conversion and then increase their sales. A collection to a page on Shopify aims at giving customers more chances to categorize their products and manage them in the way they like. In other words, to keep all of your items organized and to assist customers in searching and finding your products, you can group them into different categories, which is known as a collection. Then, there exist several ways you can apply to get your online store’s products well customized.
Hence, in this article, you will be shown on how to add a collection to page in Shopify. Don’t miss out on this post if you are searching to do it in a proper way. On Shopify, you can delete the collection that you don’t want as well.
Why do you need to create a Collection page?
Inserting a custom page template to the Shopify theme enables you to generate custom Pages with collections you prefer to focus on. For example, you can easily create a Jewelry page to possess the Bracelet Collection, Earrings or Necklace collection. After that, you are able to have another page called Blue Jewelry and your list only includes Blue Necklace Collection, Bracelet Collection, or Blue Earrings Collection.
Create your new page template for a Collection Page
To help you create a new page template for a Collection Page, you should obey the following steps:
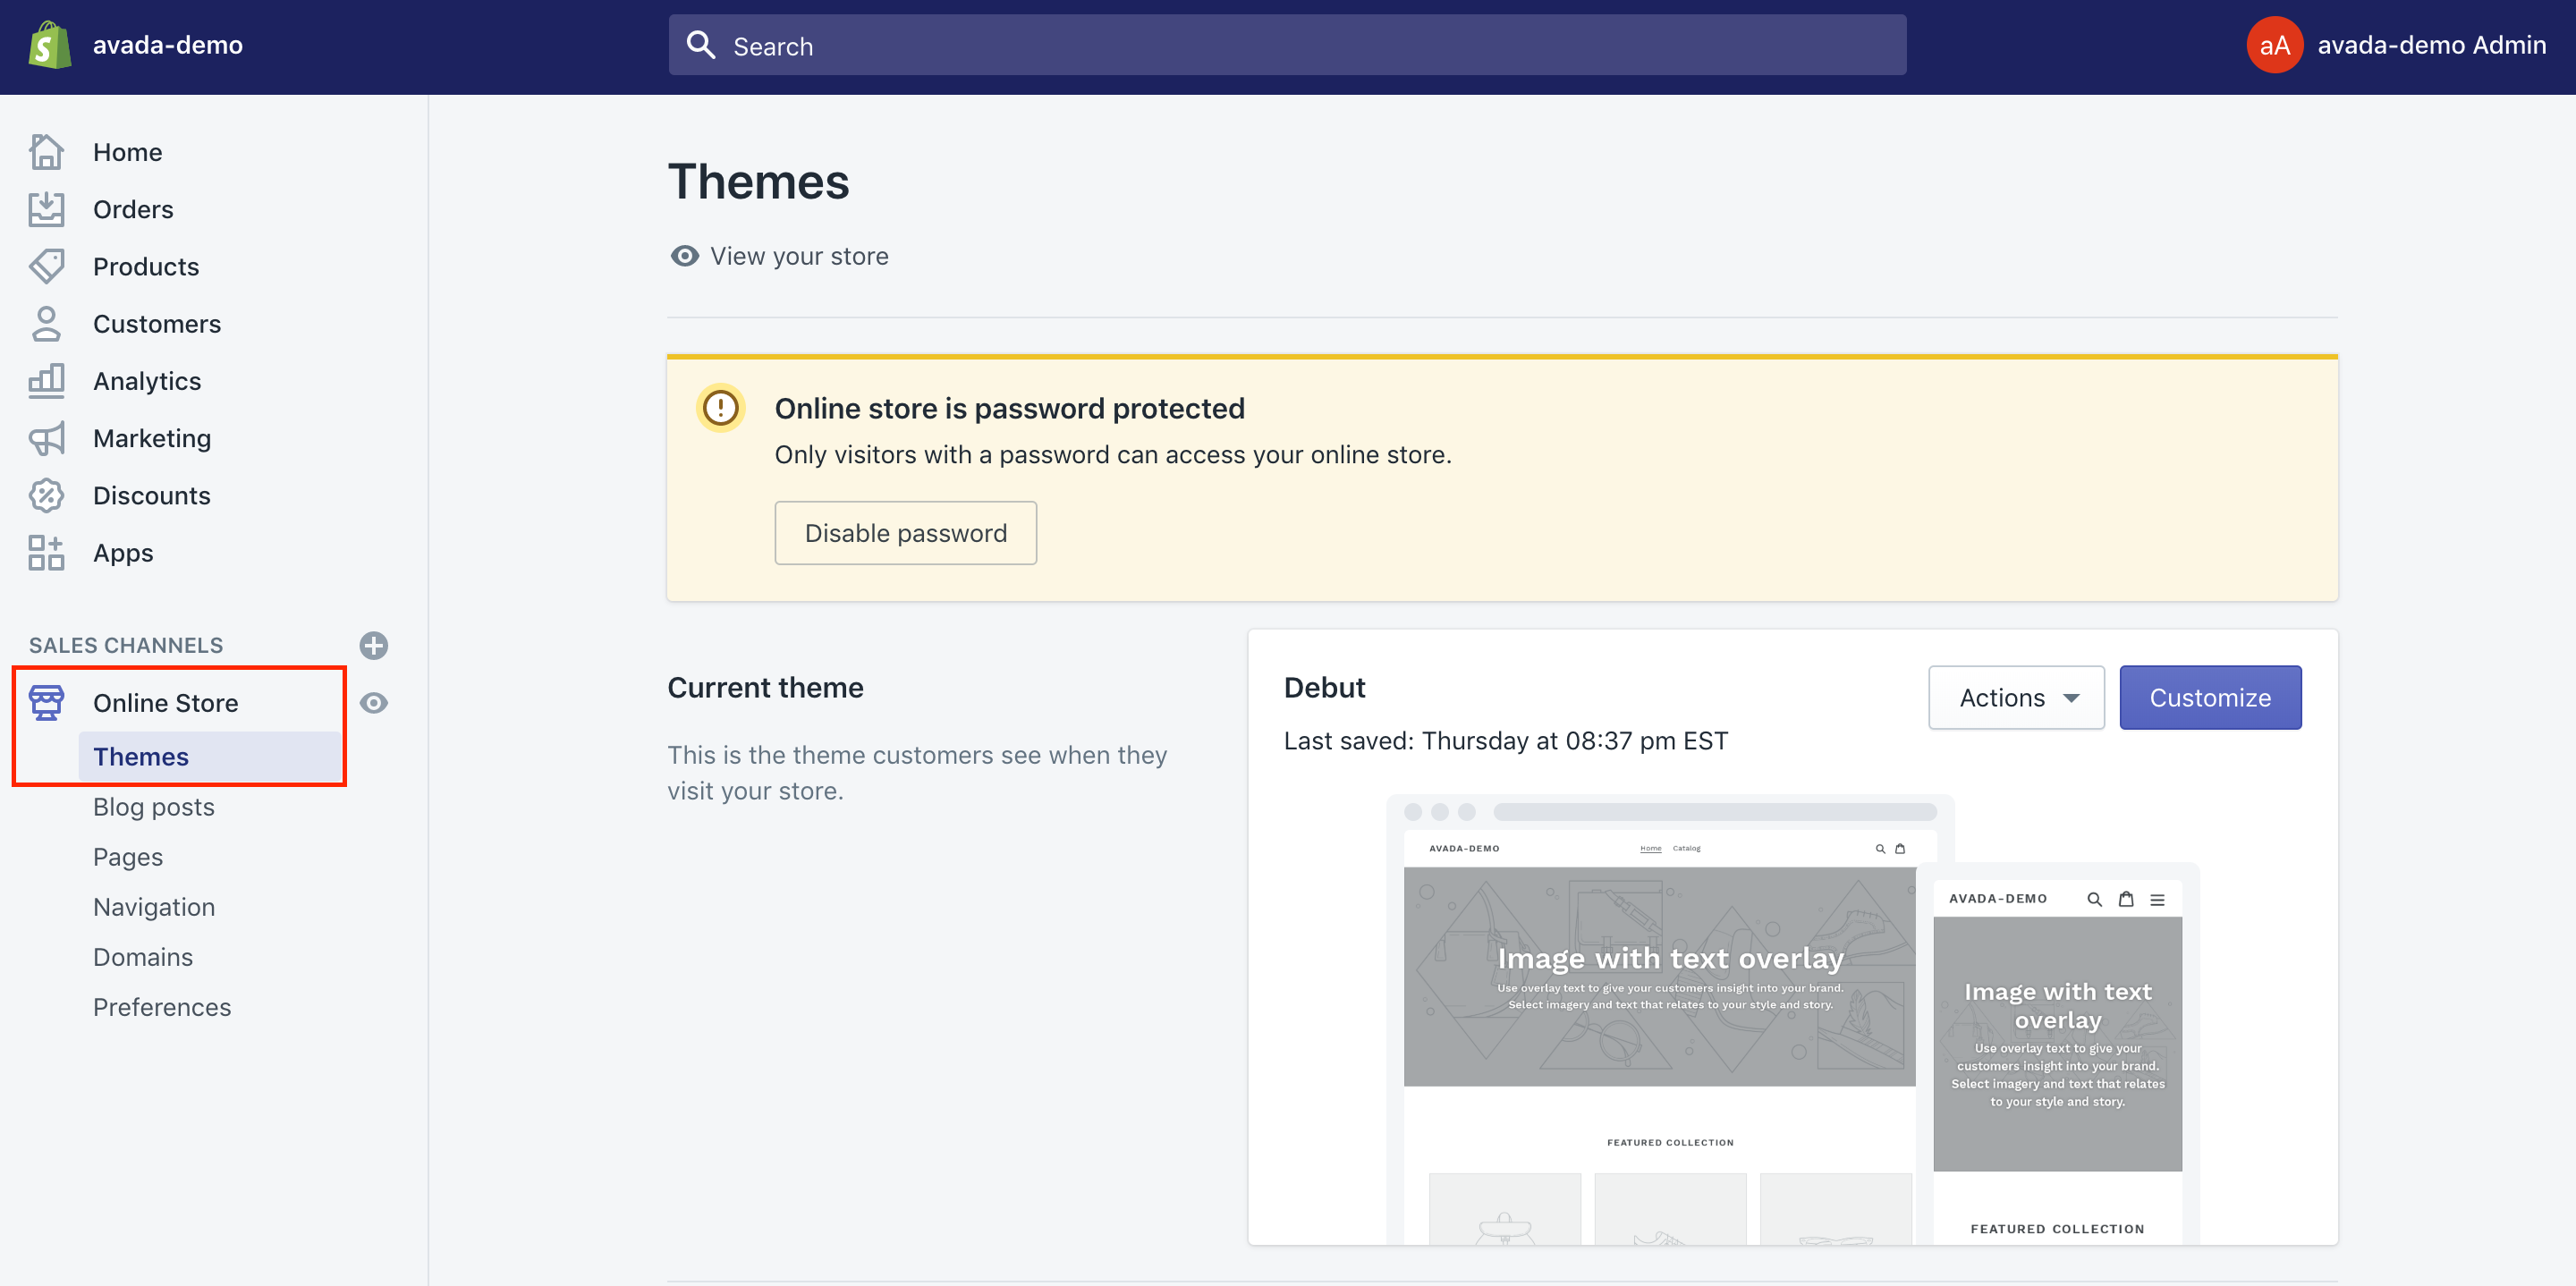
Step 1: Head to Themes
The first thing you need to do is to head to Online Store > Themes from your Shopify admin.
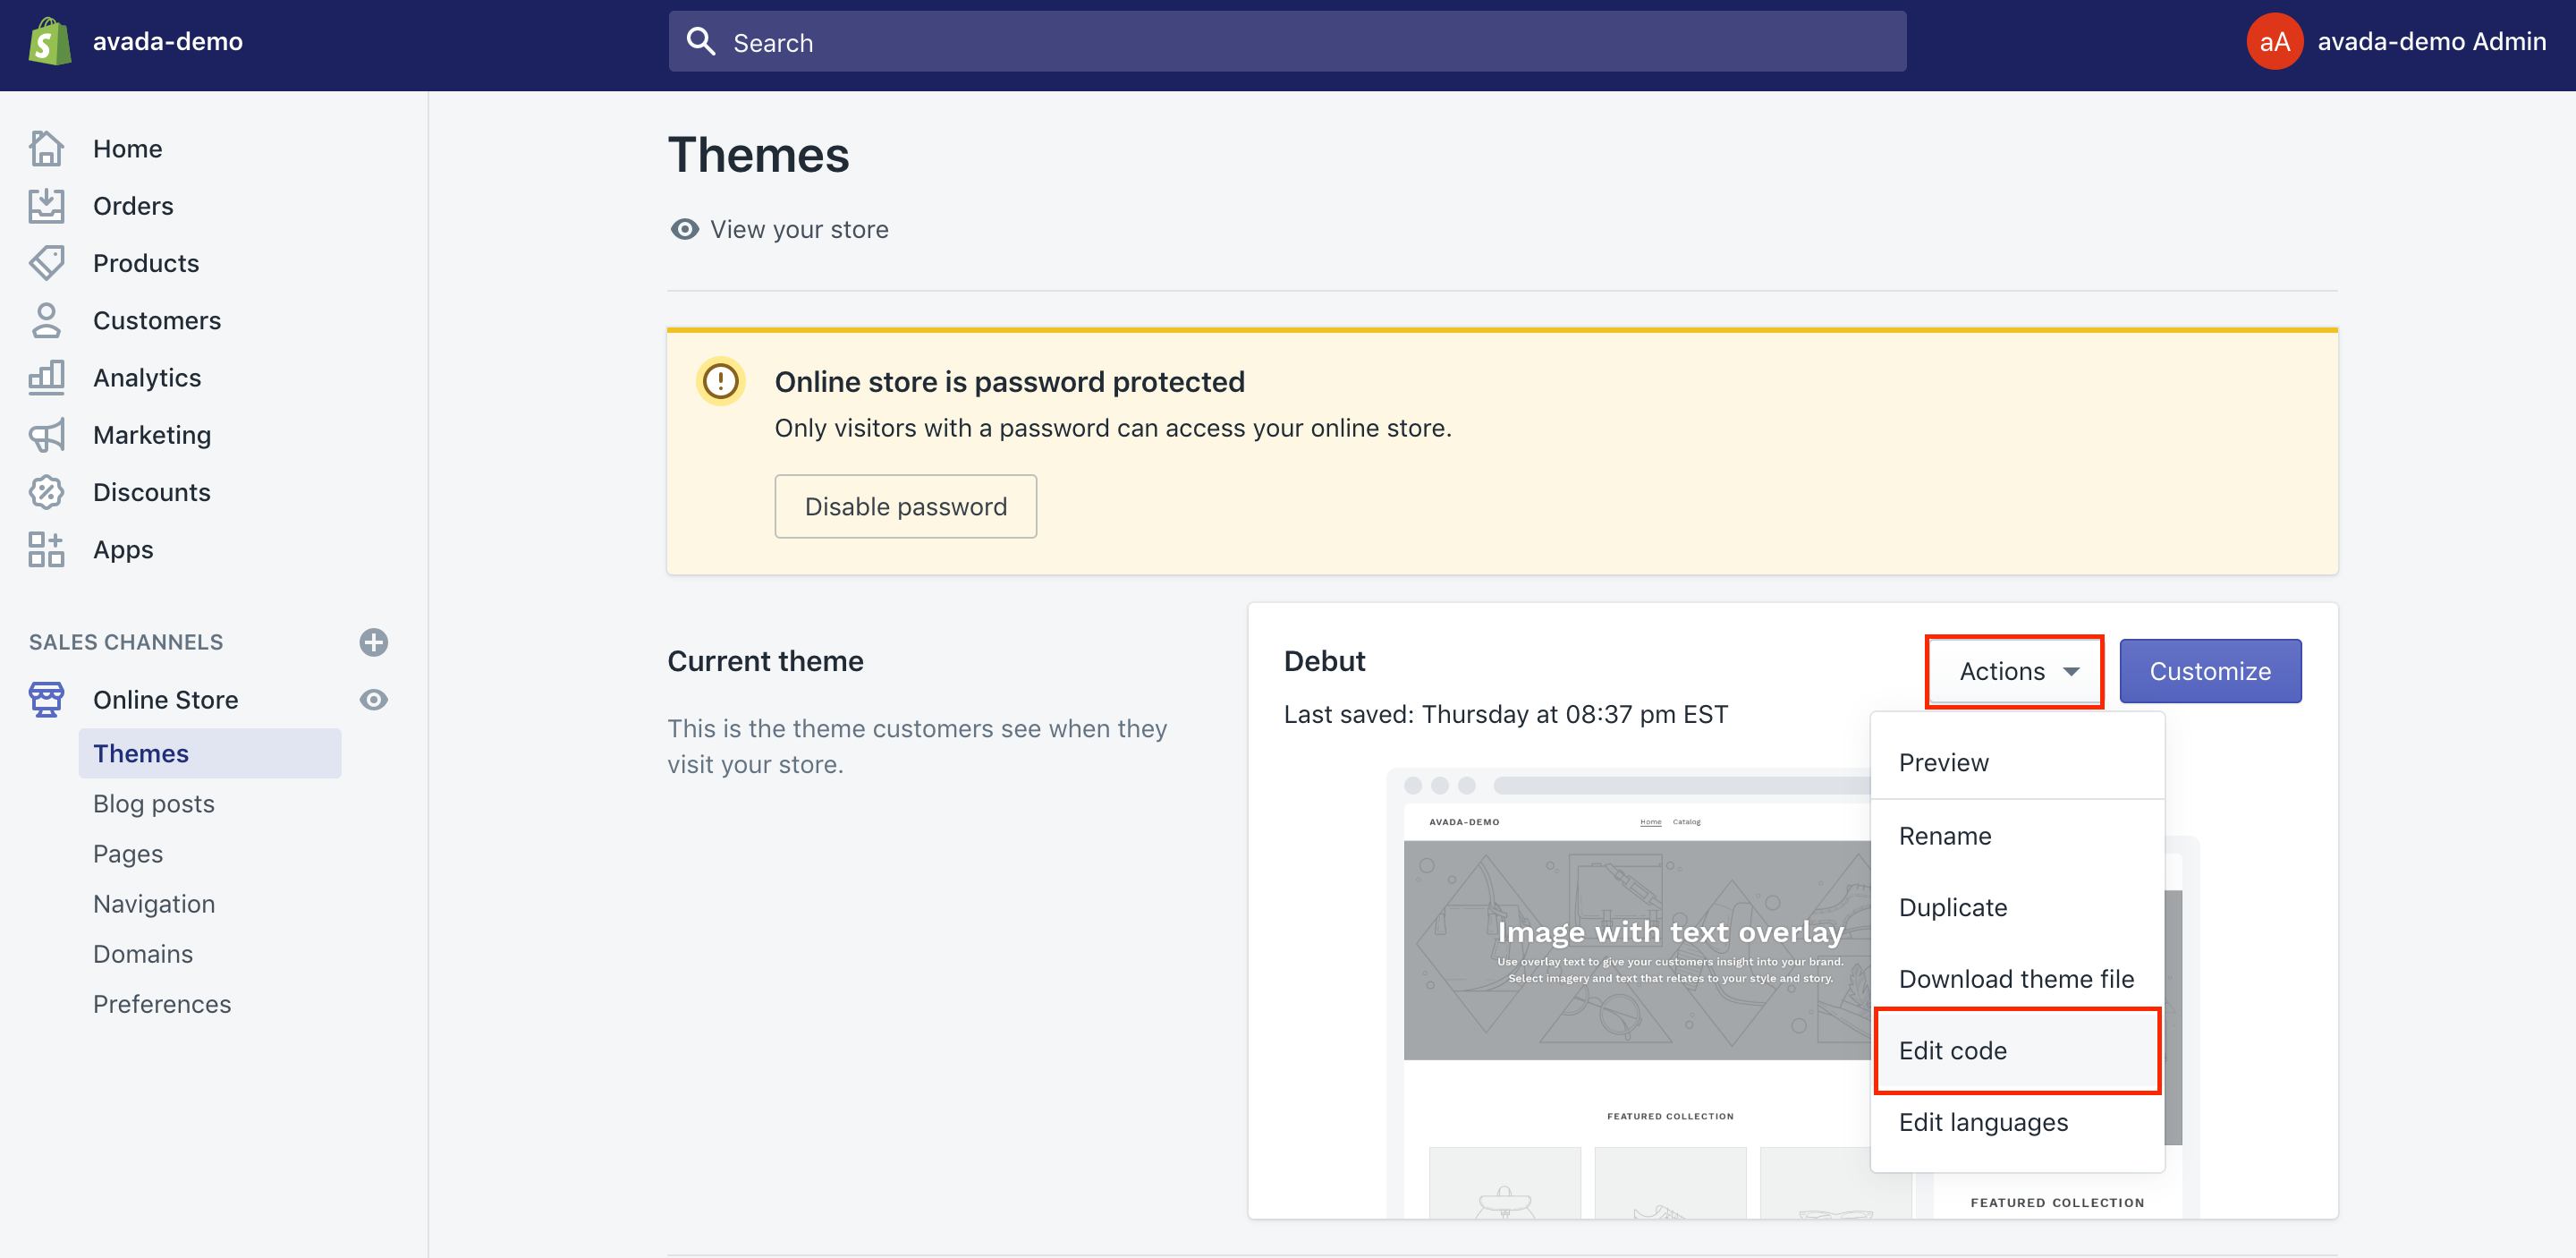
Step 2: Choose Edit code
Next, you can find the theme you wish to get it updated, then choose Actions > Edit code.
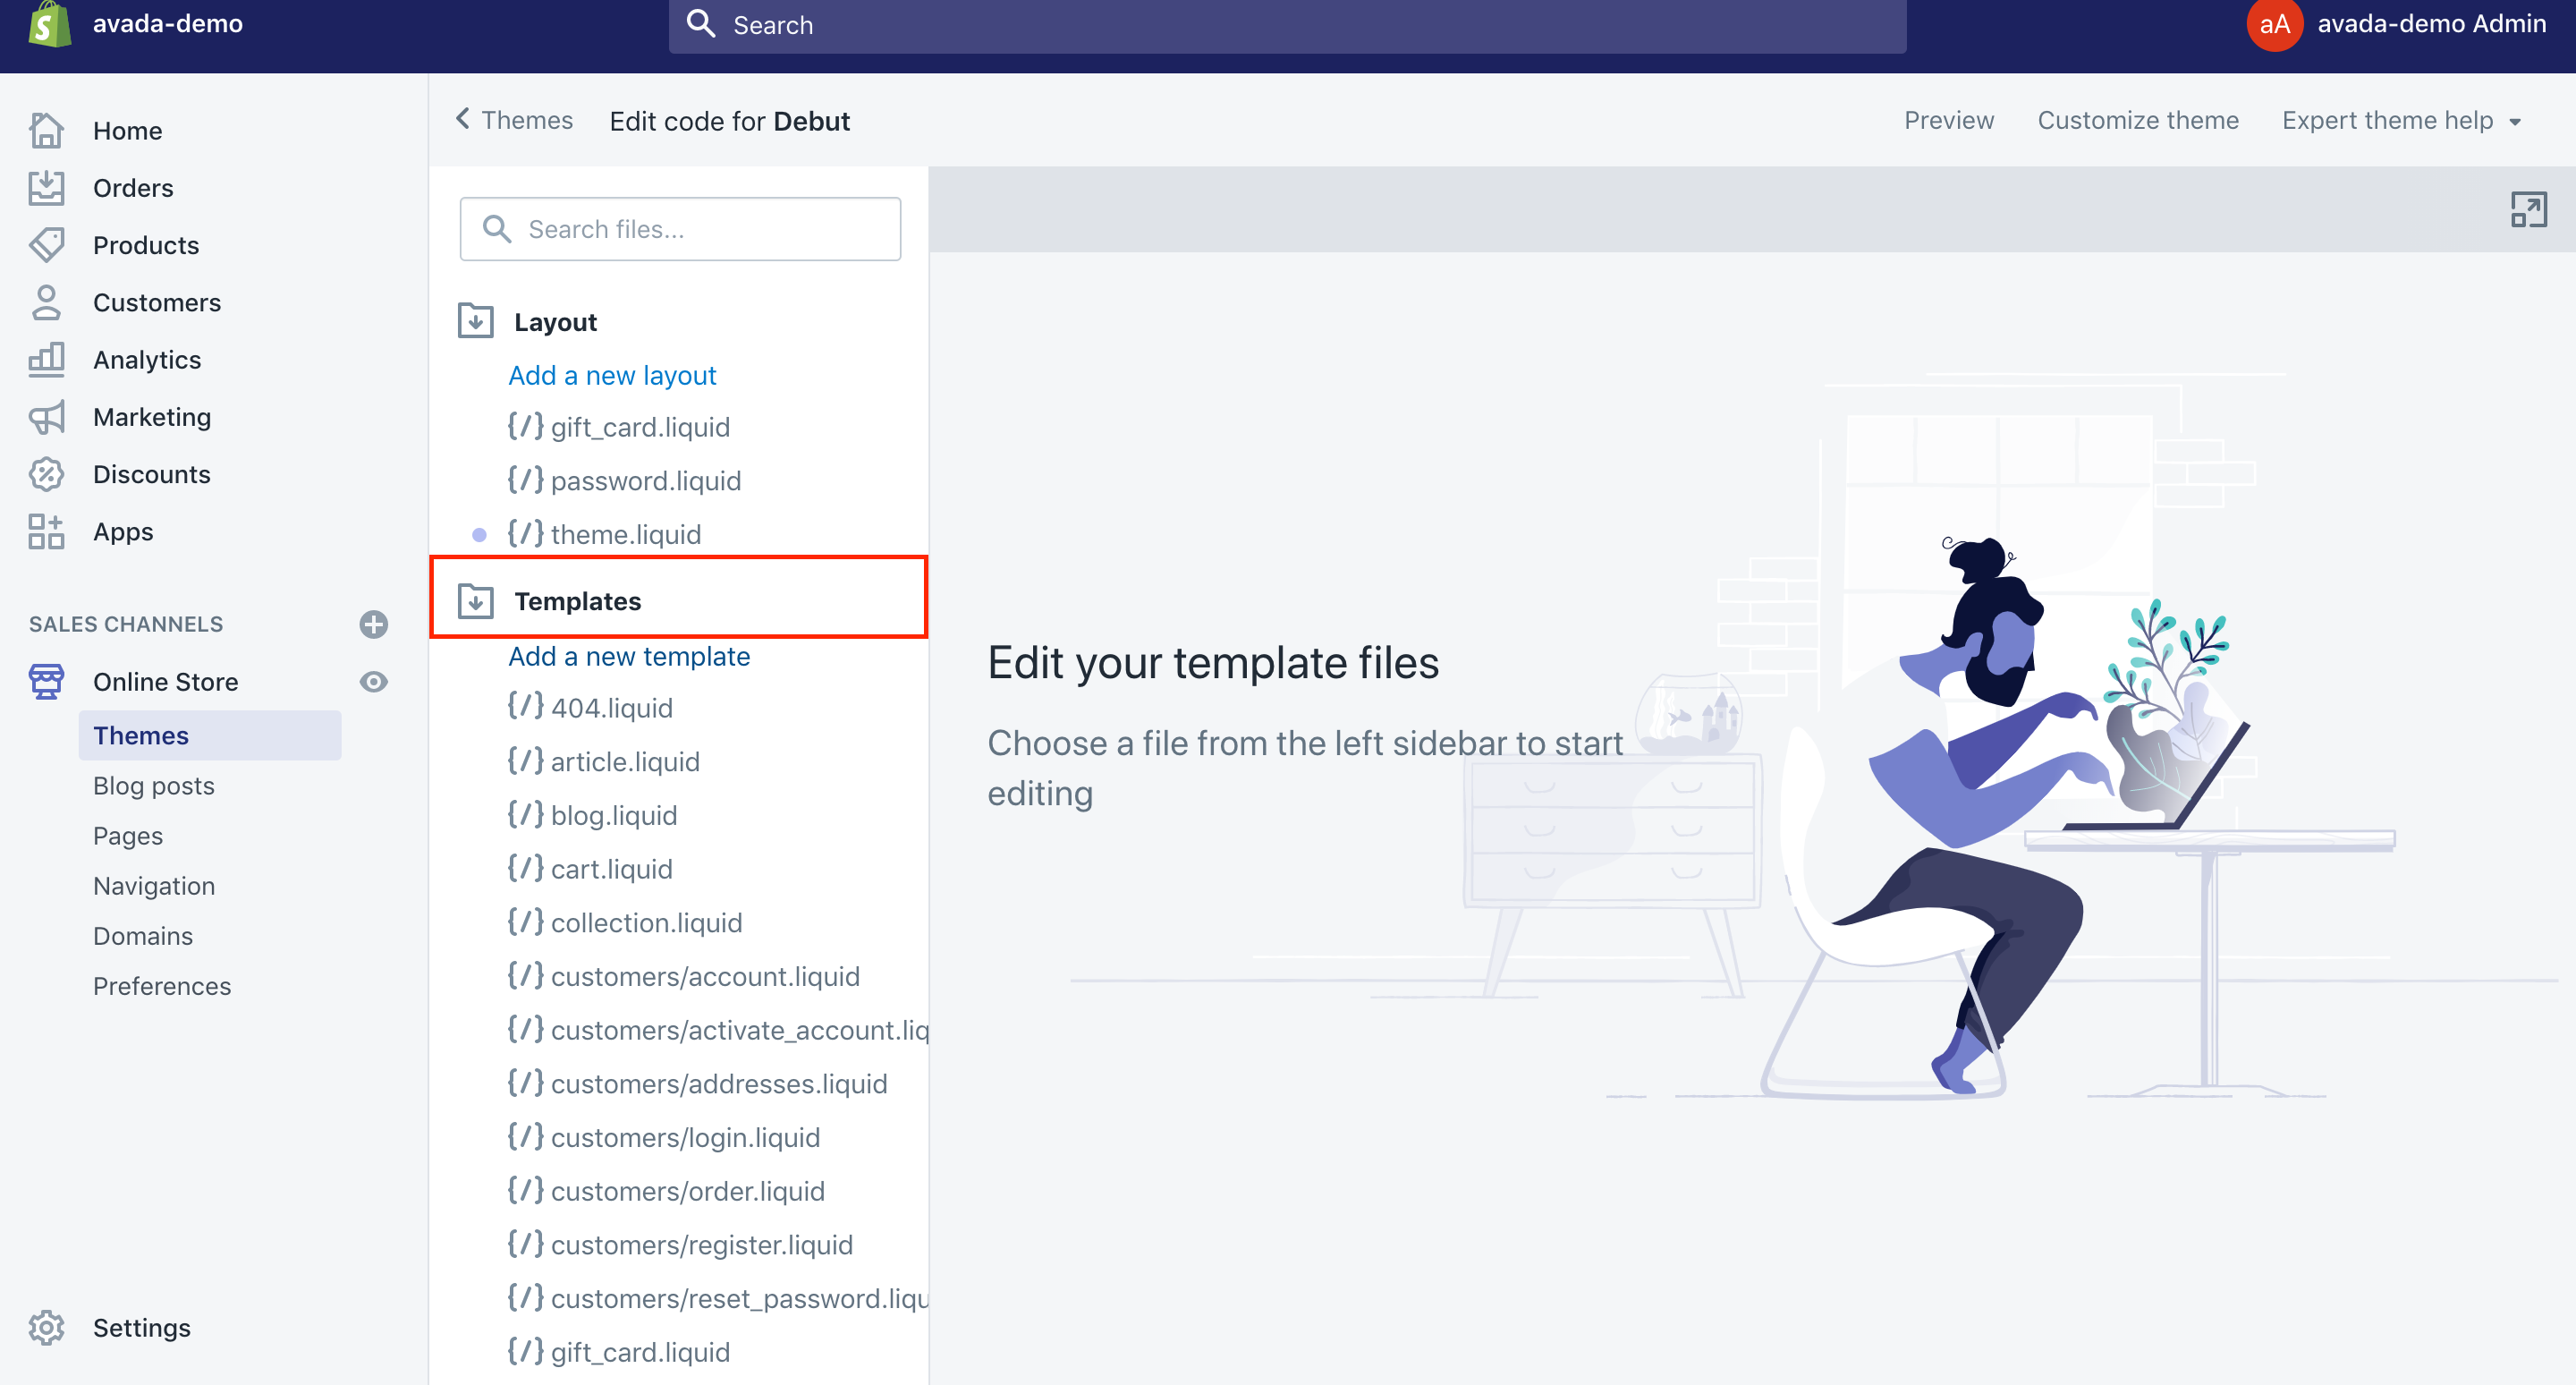
Step 3: Select Add a new template
In this step, you can select Add a new template located in the Templates directory.
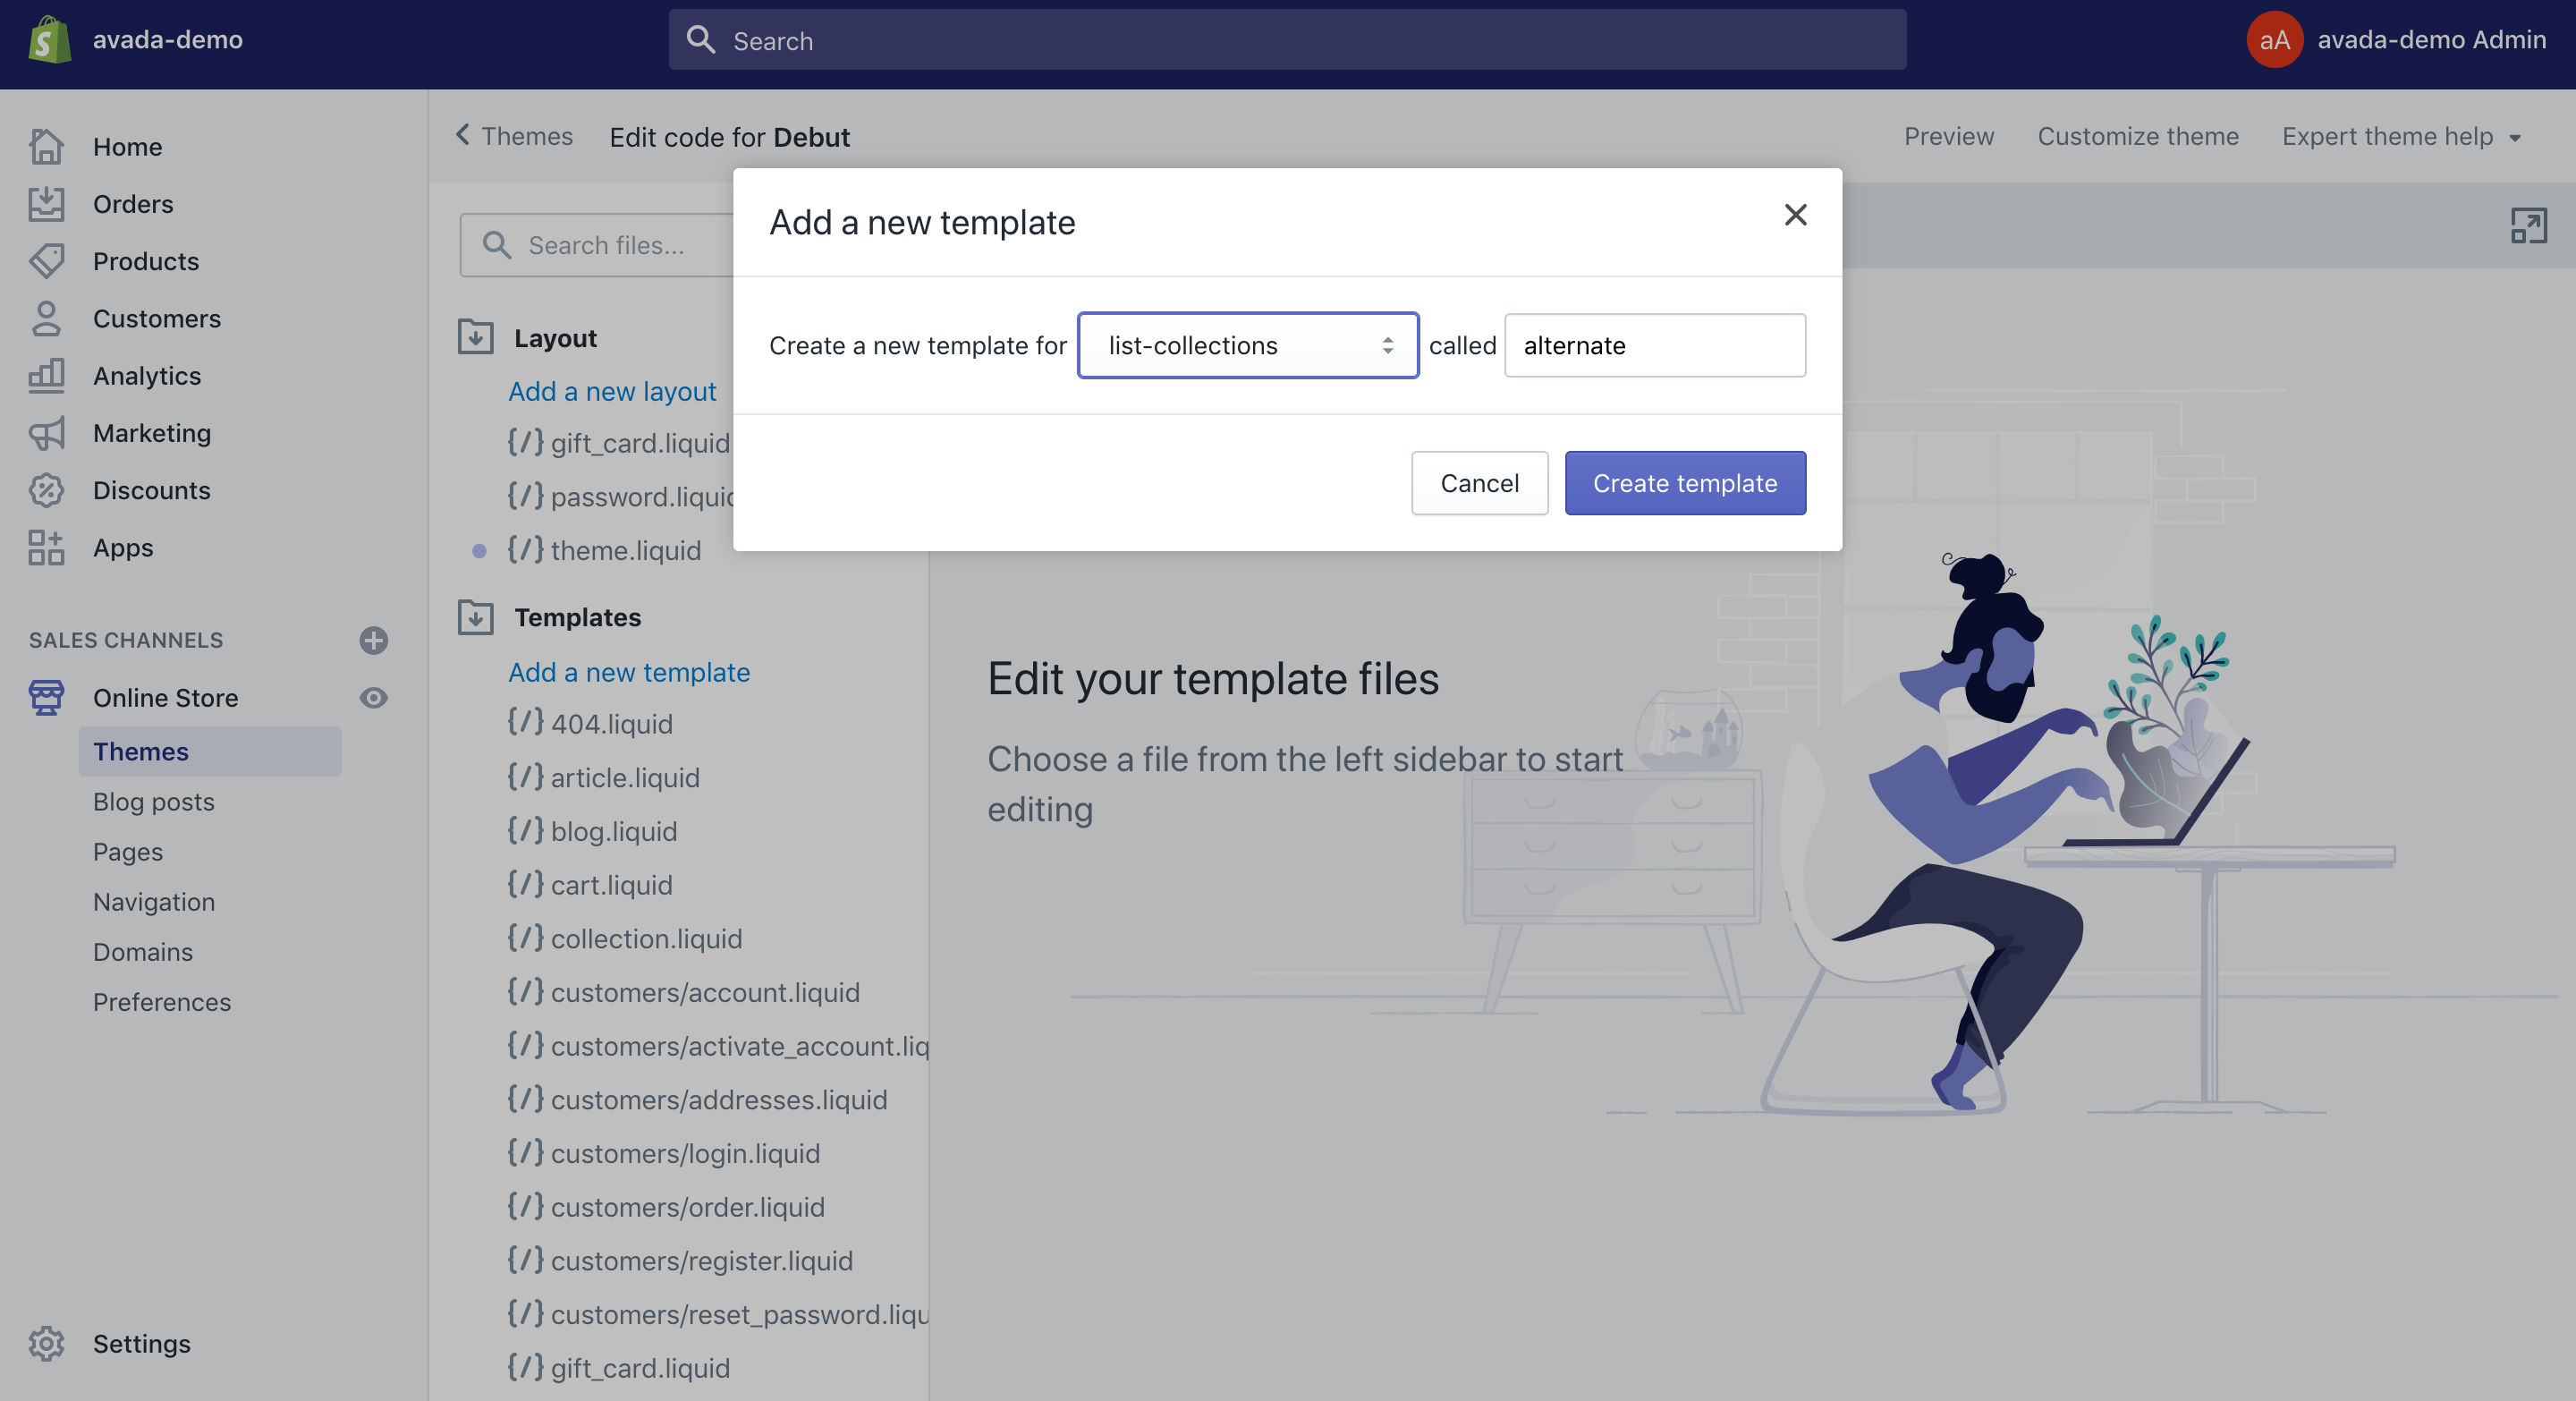
Step 4: Produce a new template for a page
To keep going, you can produce a new template for a page named list-collections.
Step 5: Paste the code on Github
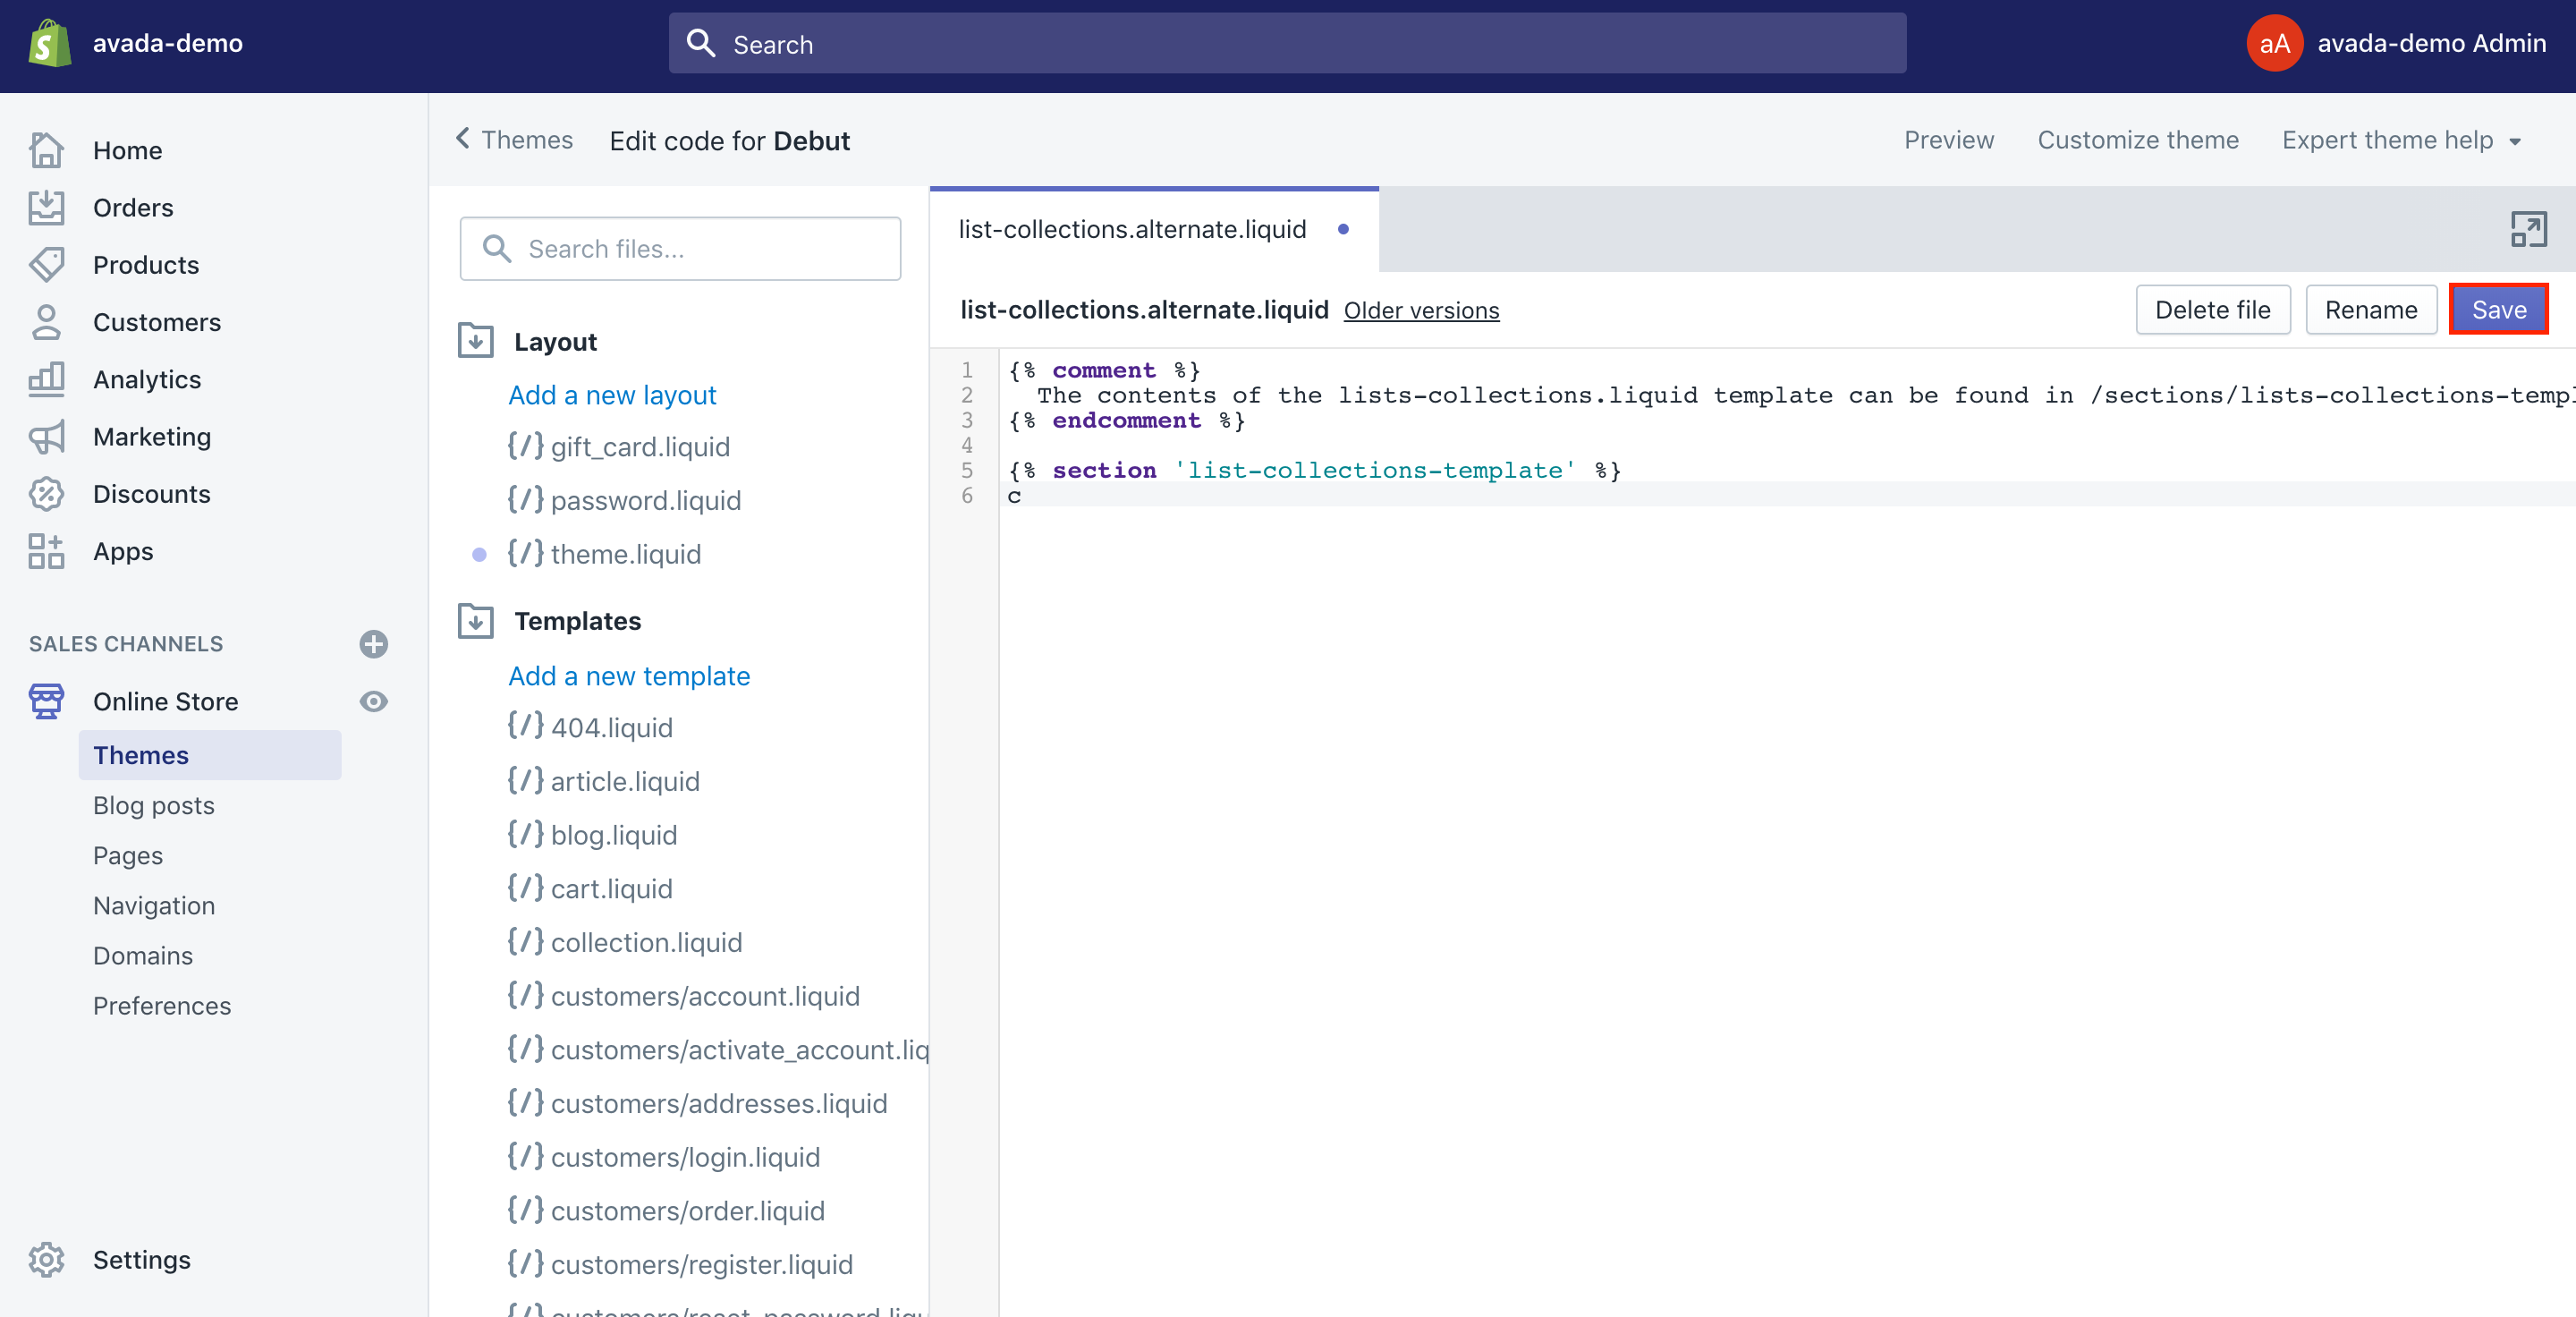
Then, you can paste the code hosted on the Github under the bottom of your new page.list-collections file.
Step 6: Click on Save
Finally, don’t forget to click on Save to save what you have done to your page.
Create a Custom Page including the Desired Collections
To create a Custom Page to feature your collections, let’s refer to those following steps:
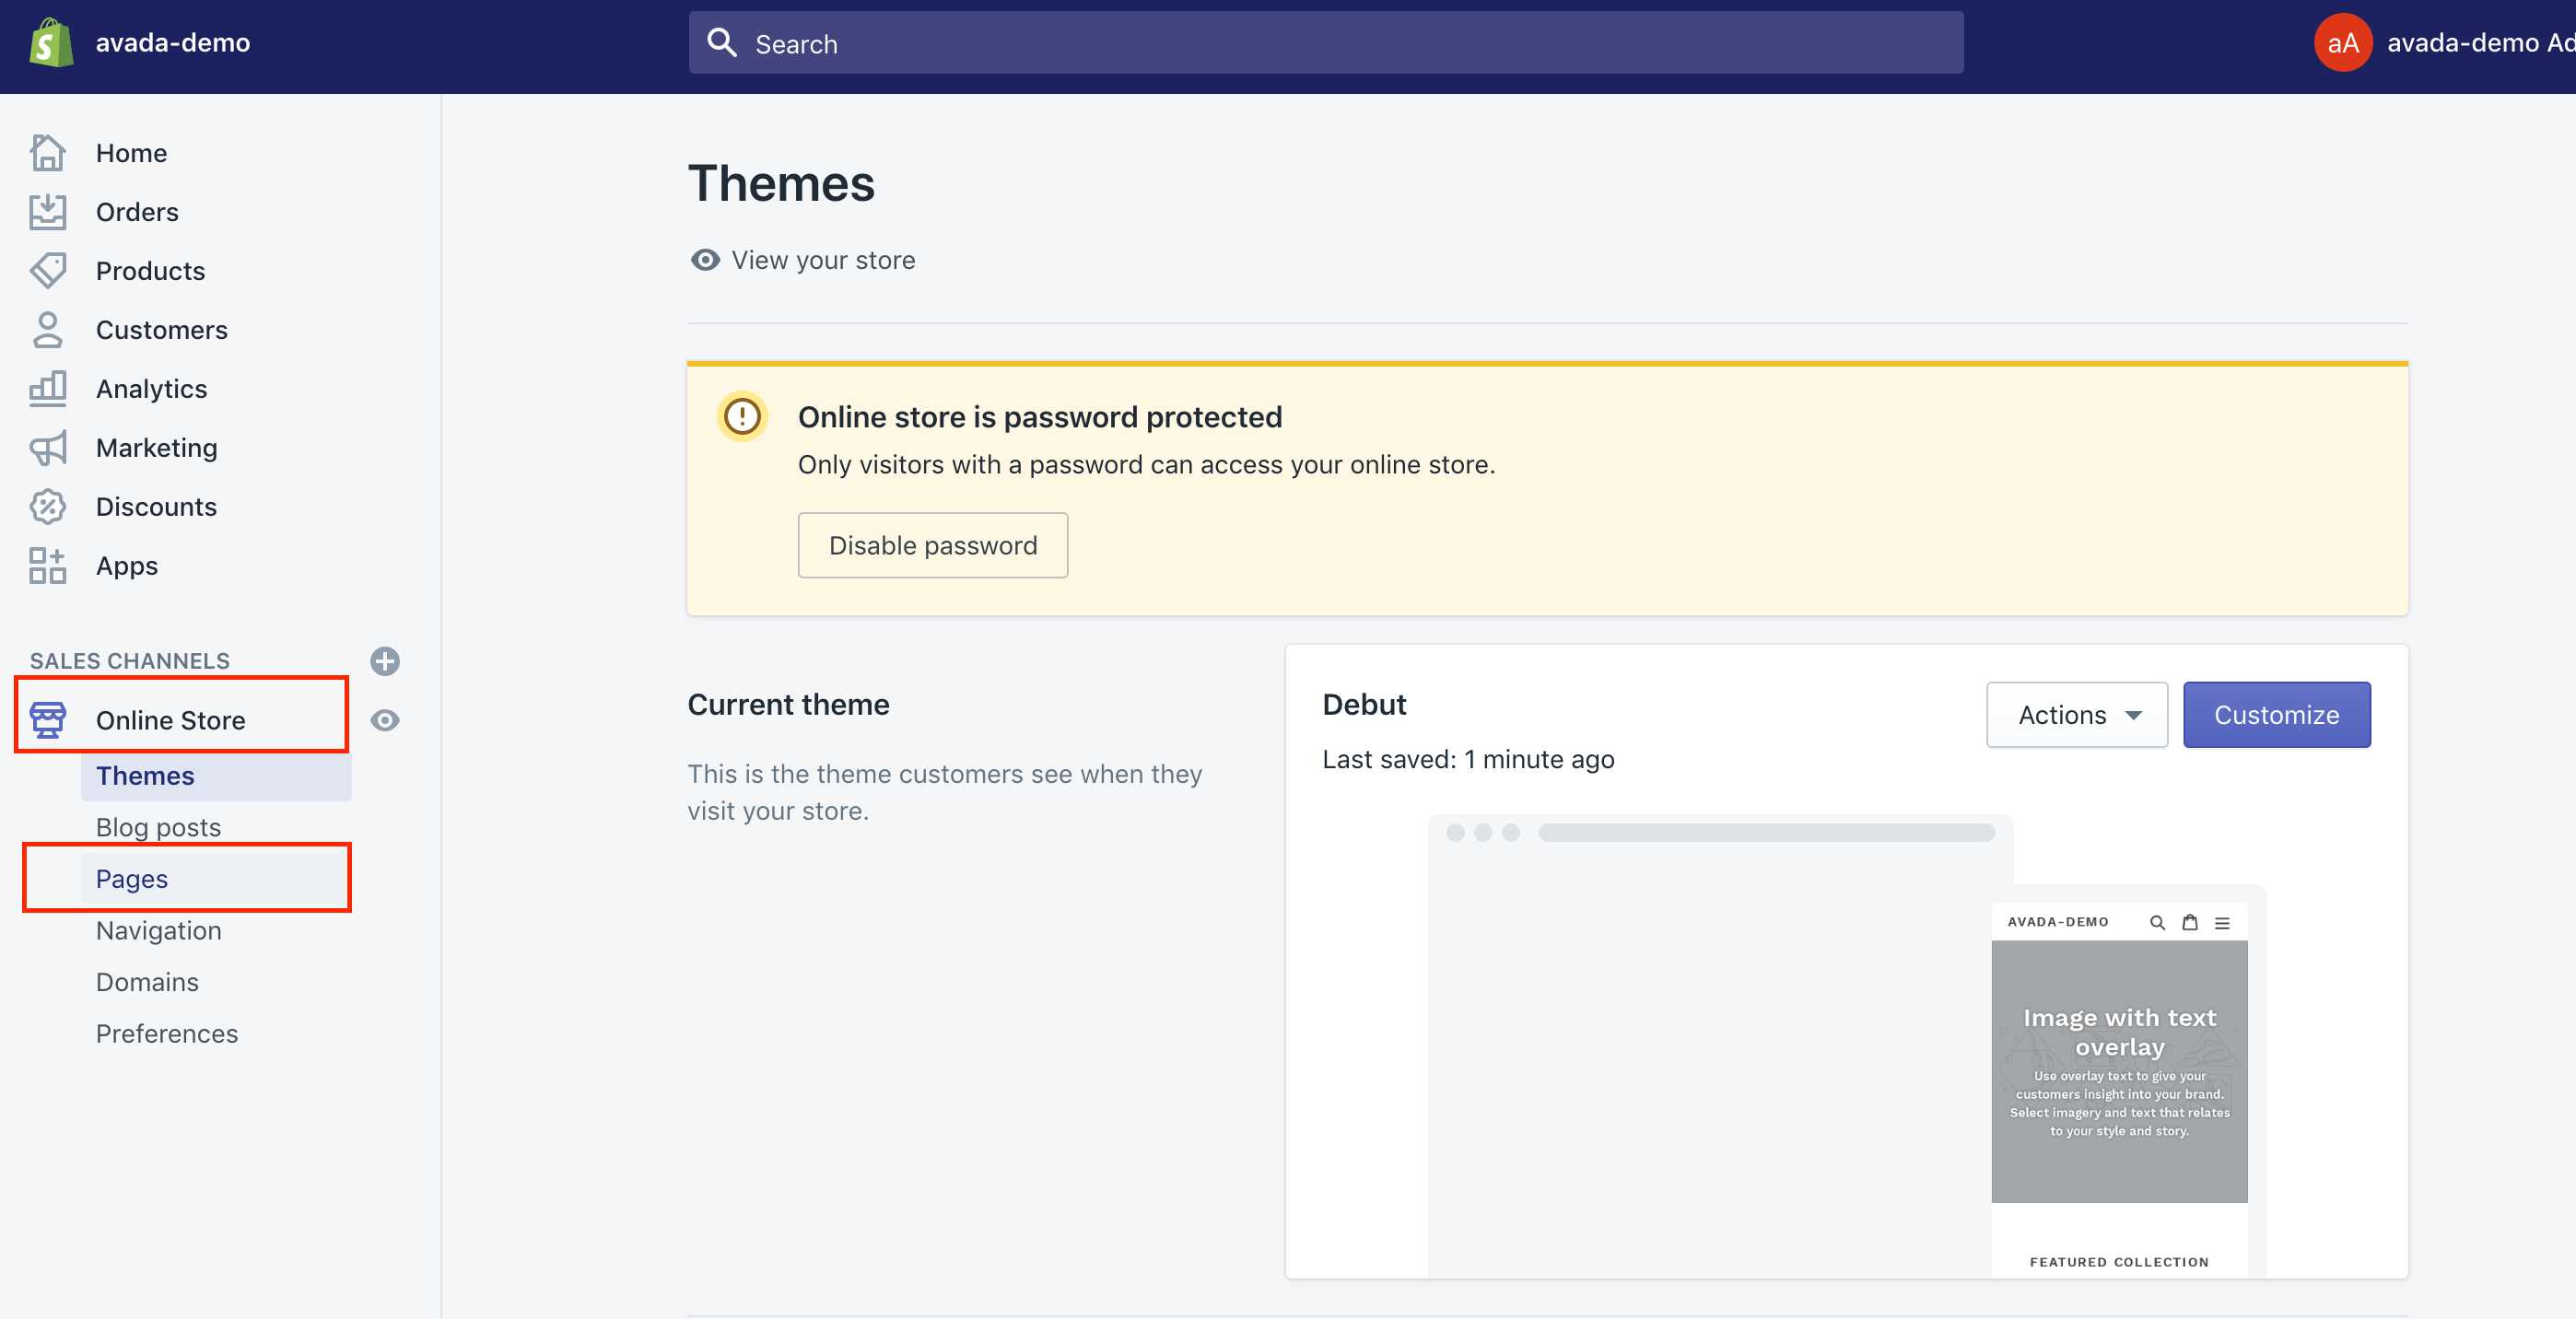
Step 1: Head to Pages
From your Shopify admin, you can go to Online Store > Pages.
Step 2: Choose Add page
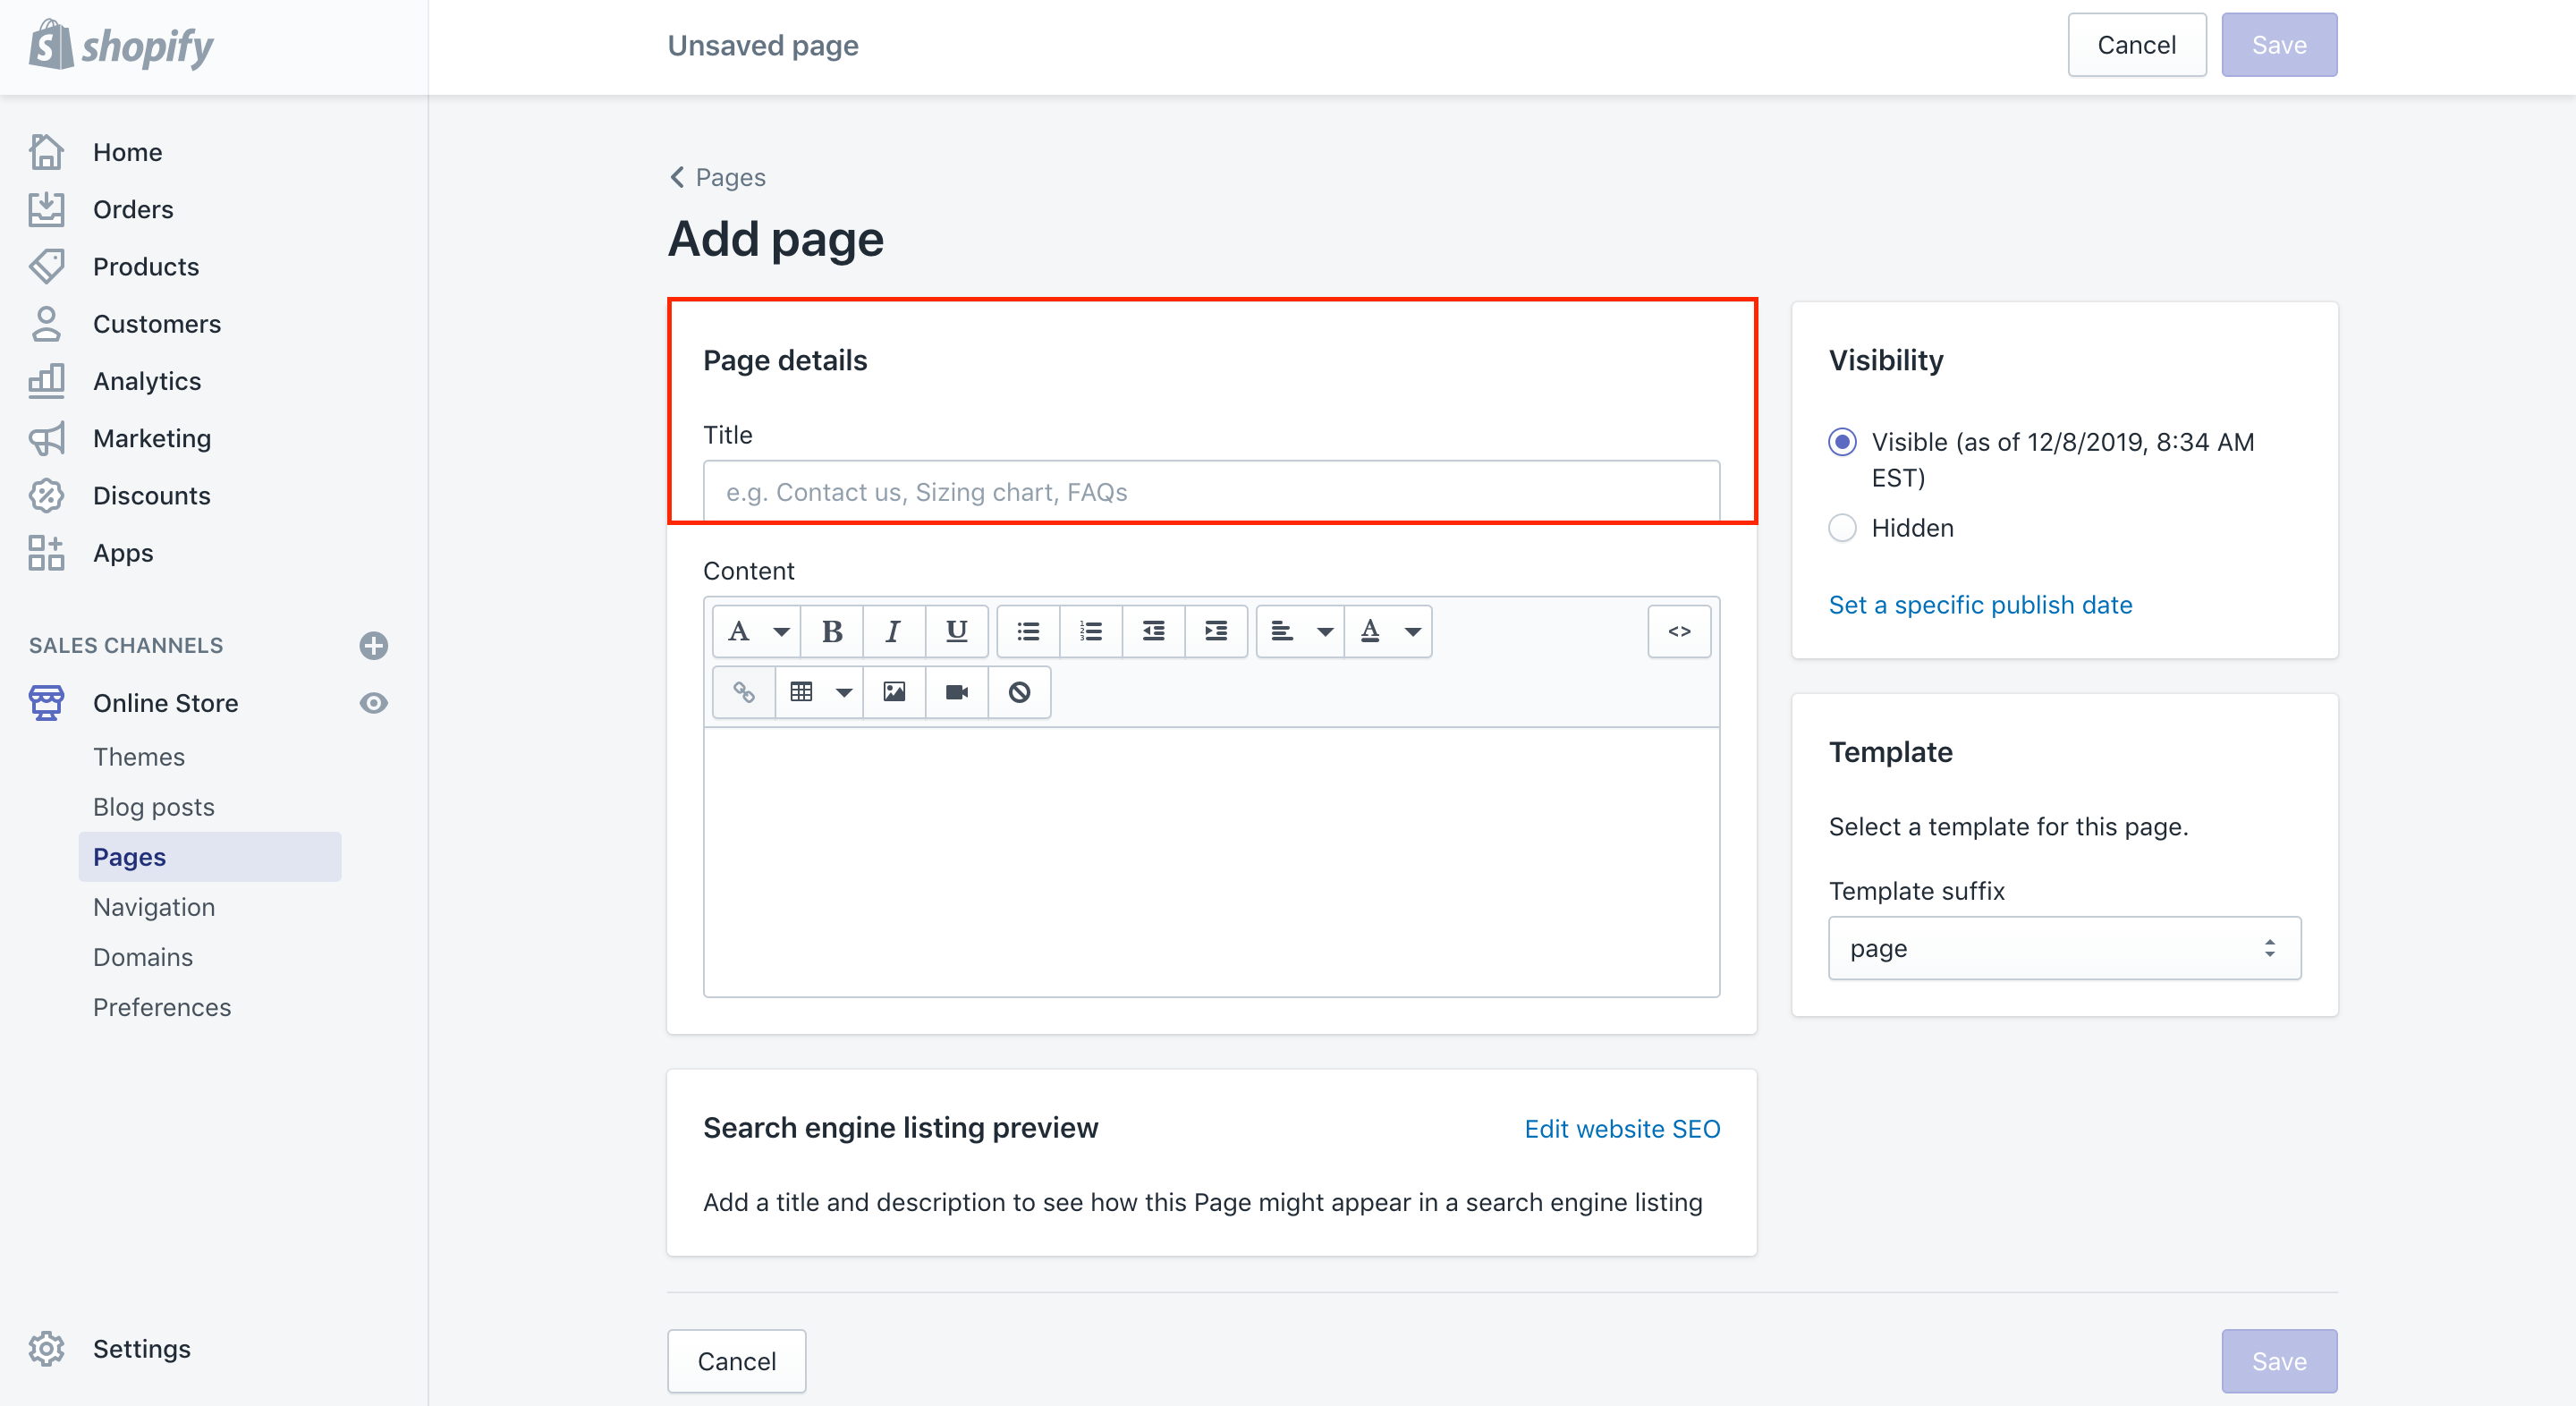
Next, Shopify allows you to choose the Add page button.

Step 3: Enter a title in the text box
Then, in your page editor, you can enter a Title in the given text box. However, you need to remember that you need to apply the same title for menus you intend to create in the next steps.
Step 4: Go to page.list-collections
To continue, let’s get the new template assigned to your page by going to page.list-collections under the Template suffix drop-down list located in the Template area.
Step 5: Select Save
Don’t forget to select Save.
There is a note for you. If your new page is getting visible, it will not appear in your own online store navigation. You might need to insert a link to it on a menu.
Create a Link List Menu including the Collections page
Step 1: Select Online store menu
The first step is to select the Online store menu.
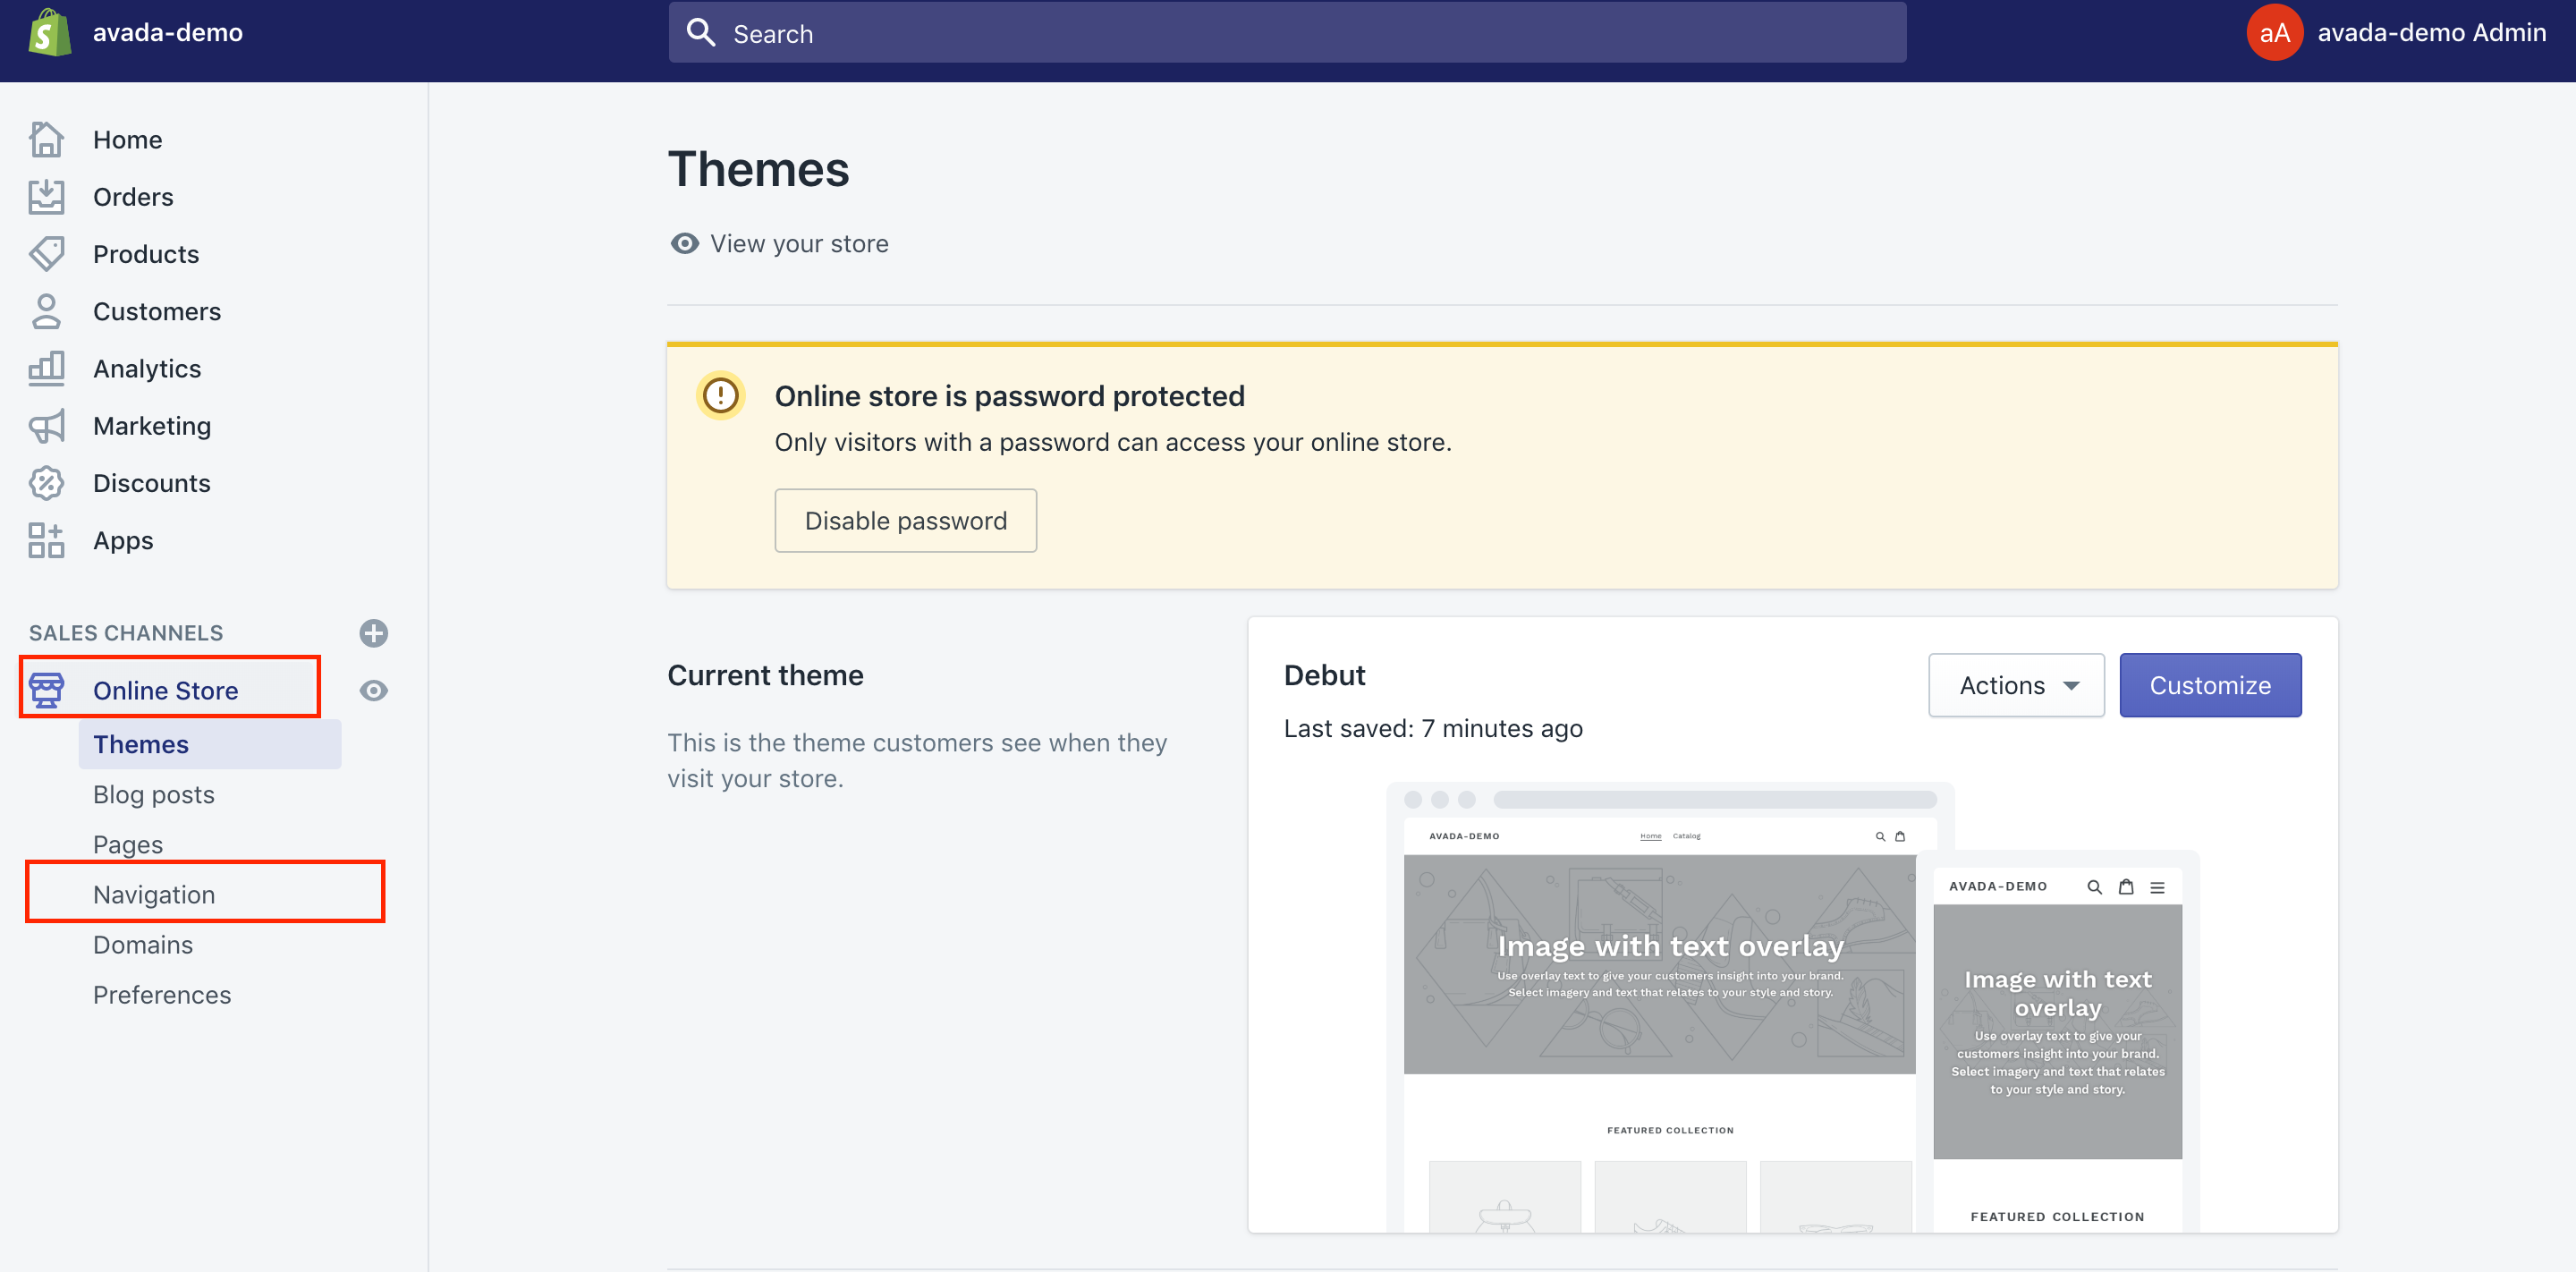
Step 2: Come to Navigation
Next, Head to Navigation.
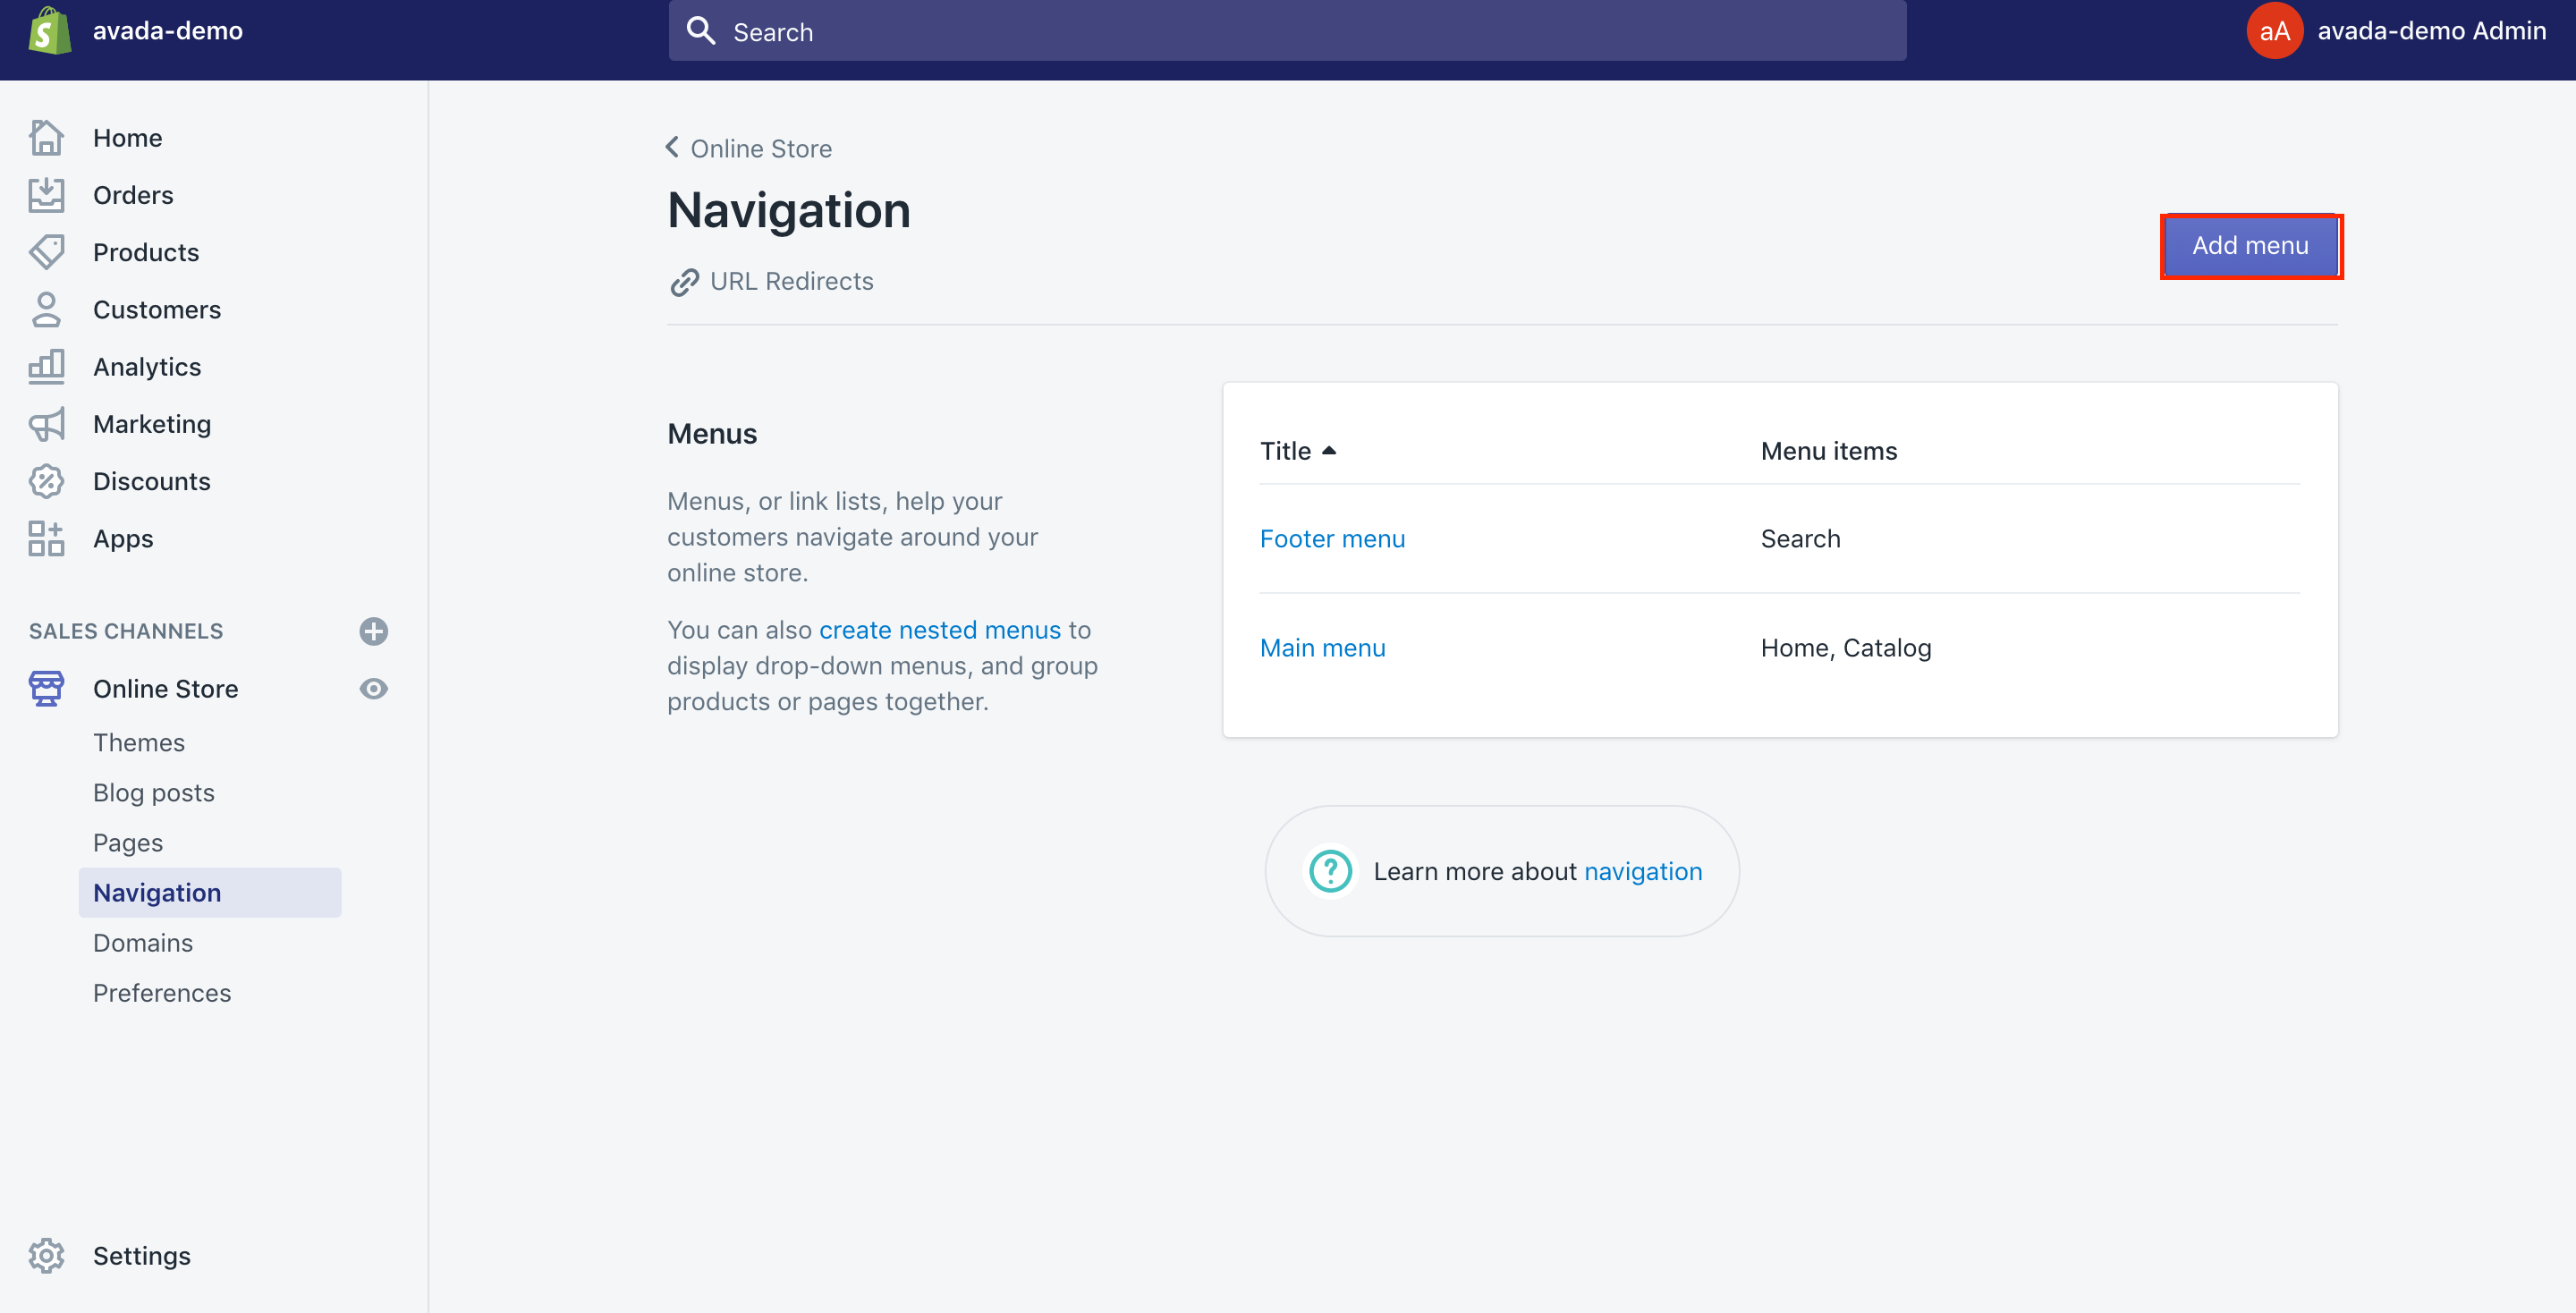
Step 3: Select Add Menu button
In this step, you are able to select the Add Menu button.
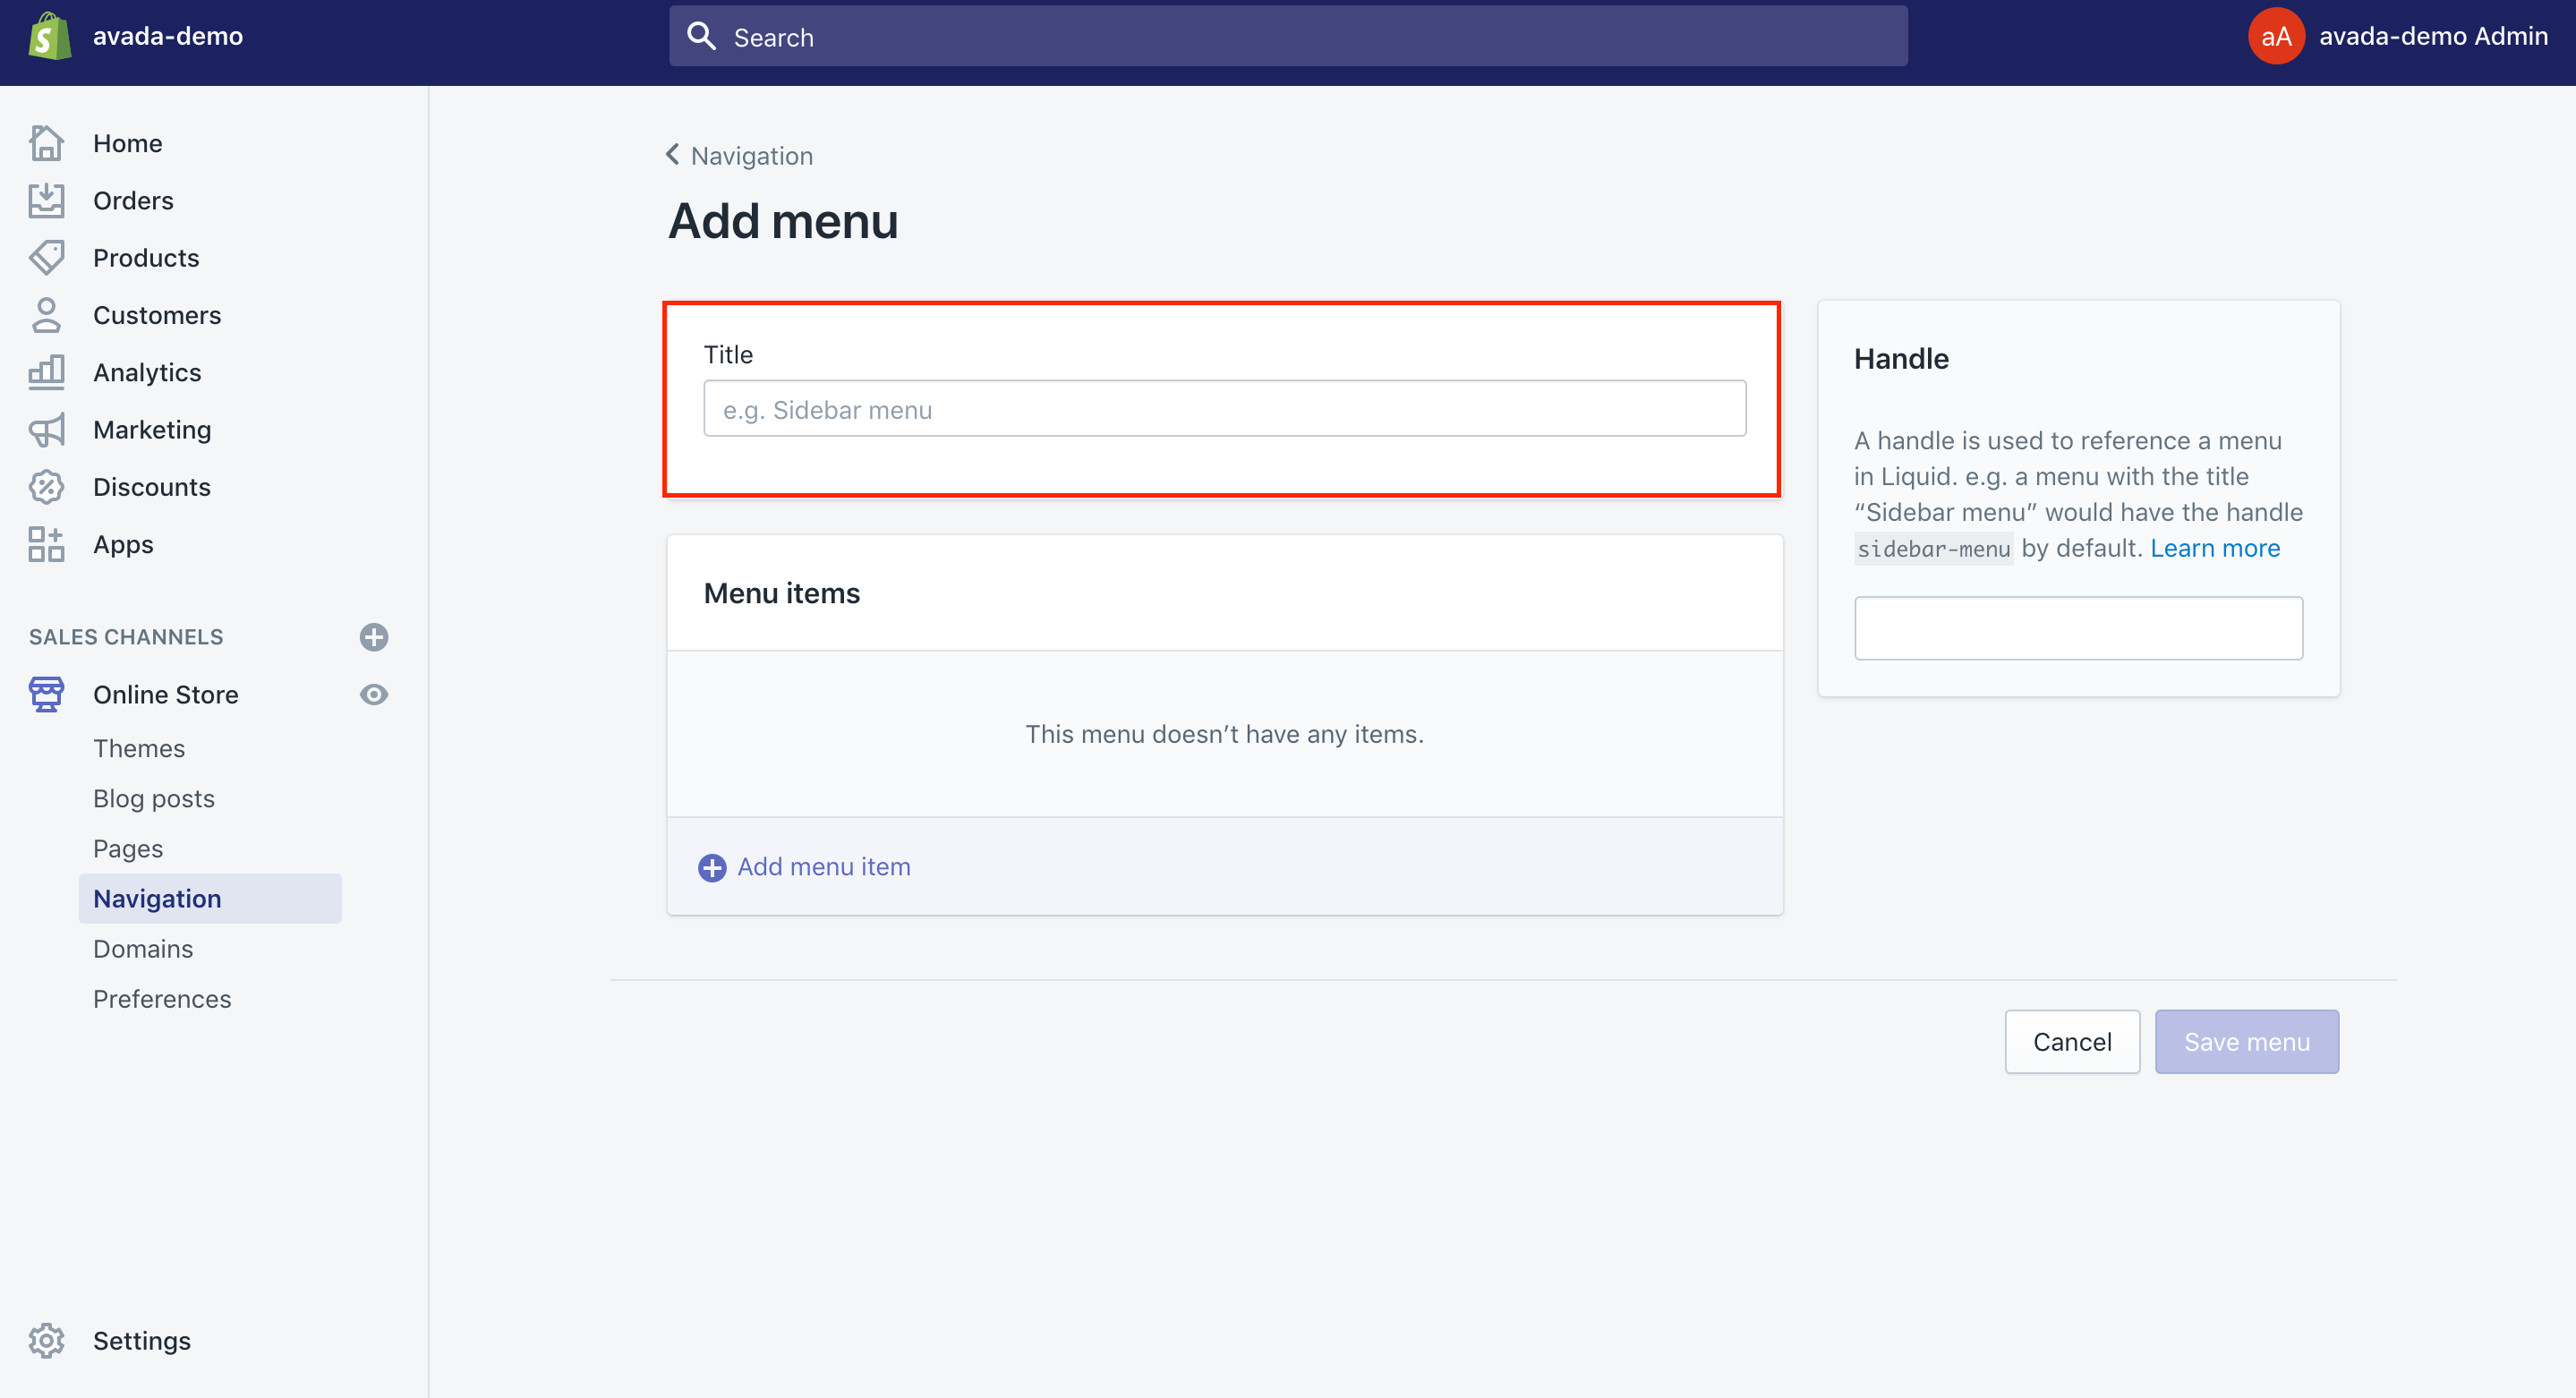
Step 4: Give the menu the same name
Then, you are requested to give the menu the same name as your custom page.
Step 5: Choose Save
To keep going, you can choose Save, then move to the next step.
Step 6: Add menu items
Now, it is time for you to add menu items which should be the collections you wish to insert into a page. Give a name, then connect to this collection.
Add a Navigation Menu to show your collections page
Step 1: Choose Navigation
To add a Navigation Menu, let’s begin by choosing the Navigation.
Step 2: Click on Main Menu
Then, click on Main Menu.

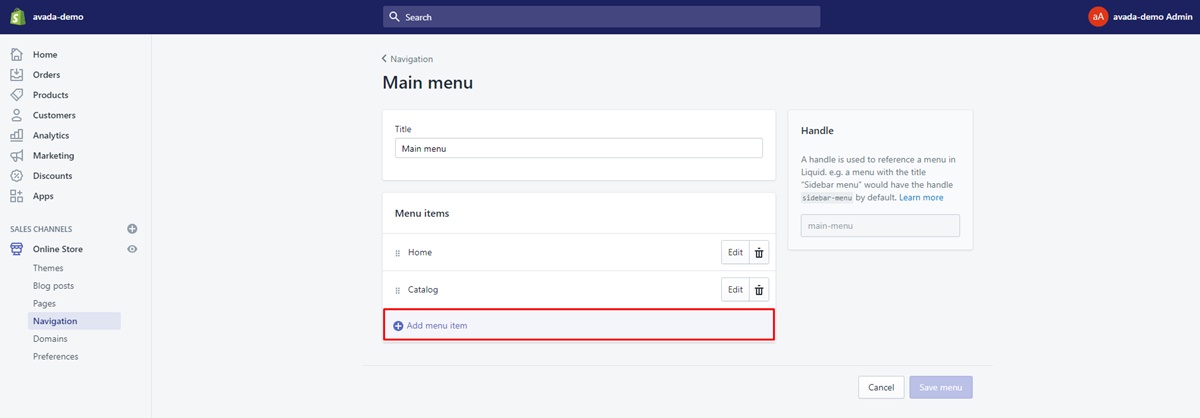
Step 3: Select Add Menu Item
In this step, you can select Add Menu Item.
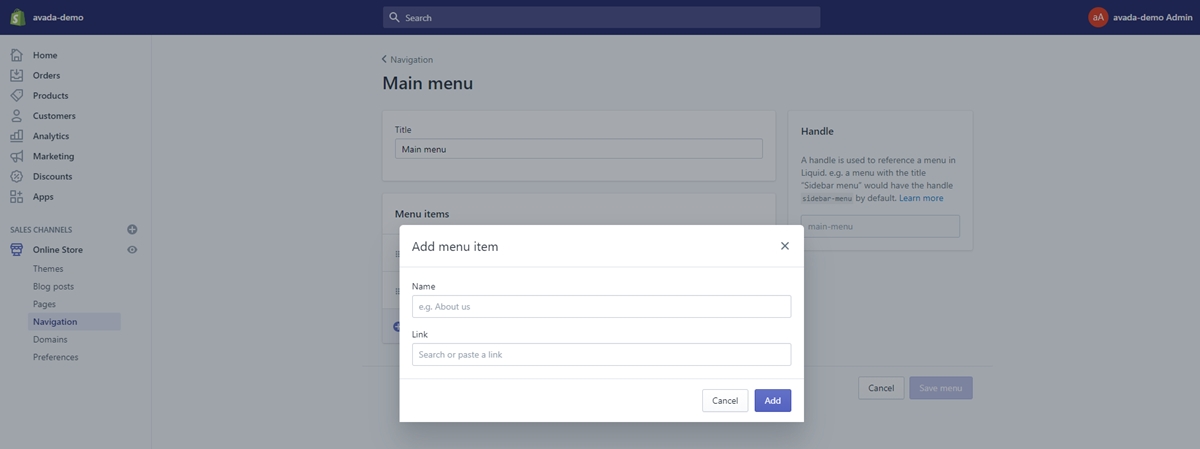
Step 4: Give the menu the same name
As usual, you can give the menu the same name as your Custom Page.
Step 5: Connect the Menu to Page
You can connect the Menu to Page, then go to the customer page name.
Step 6: Drag the Menu
To navigate the menu, let’s drag the menu to your desired location.
As a result, this menu can become a submenu and on the Main menu.
Before you make any changes in your theme code
Before editing your theme code, you need to make sure the things below:
-
Check the settings for the theme in the theme editor. In case there is a setting for the modification you are making, you do not have to edit your own theme code.
-
Get your theme duplicated to produce a backup copy. This is used to discard your modifications and begin again if necessary.
-
Guarantee that you have a good knowledge of what level of support is now available.
Conclusion
We hope that the above tutorial on how to add a collection to a page Shopify will completely satisfy your demand. All the steps are easy-guided to help you successfully finish your task. If you have any questions, don’t hesitate to contact us for further discussion.
Related Posts:


