How to Add Social Media to Shopify
Adding Social Media is an extremely valuable method for promoting your marketing content. It is commonly used to create leads, boosting their sales and spreading brand awareness digitally.
As a matter of fact, it is proved that Social Media button has successfully increased sales via a strong online presence on sites such as Facebook and Twitter as they provide a cost-effective way to interact directly with prospective consumers. Hence, many companies have utilized the power of Social media to creating leads, boosting their sales and spreading brand awareness digitally.
That’s why you need to add Social Media to your Shopify store. Let’s figure out the way to get the work done!
Adding Social Media to Shopify using apps
If you are a newcomer to Shopify, you might need support here from some apps to insert Social Media to your Shopify account to complete all the work for you. Just simply understand that you just have to download a compatible app and then connect Social Media to your Shopify via that app. The process often takes not so long.
Normally, you can go to the Social Media section of the App Store as it provides themes from the Theme Store that already comes with the feature to add Social Media button. You can check the theme editor and checking the Header, Sidebar, Homepage, and/or Footer menus to see if your theme already has a Social Media button or not after finish adding.
There is a collection of 13 Shopify Social Adding apps here that are recommended by AVADA from AVADA Commerce Ranking. You will be able to consider the price as well, from free, paid Social Media apps or alternatives to Social Media also.
Also, there is one specific app that I recommend to all users that is POWr.io. It is an important tool for every Shopify eCommerce store owner to create your own social media icons and link them to all of your social profiles.
Adding Social Media to Shopify in Advanced way
In Advanced way, there are 2 major methods to insert Social Media to your Shopify account by coding the buttons into any theme you want, which are using Addtoany and Addthis.com.
These two ways are basically the same. However, normally, the process will follow these steps:
Step 1: Open your Themes
From your Shopify admin, navigate to your Online Store and then go to Themes.
Step 2: Edit code
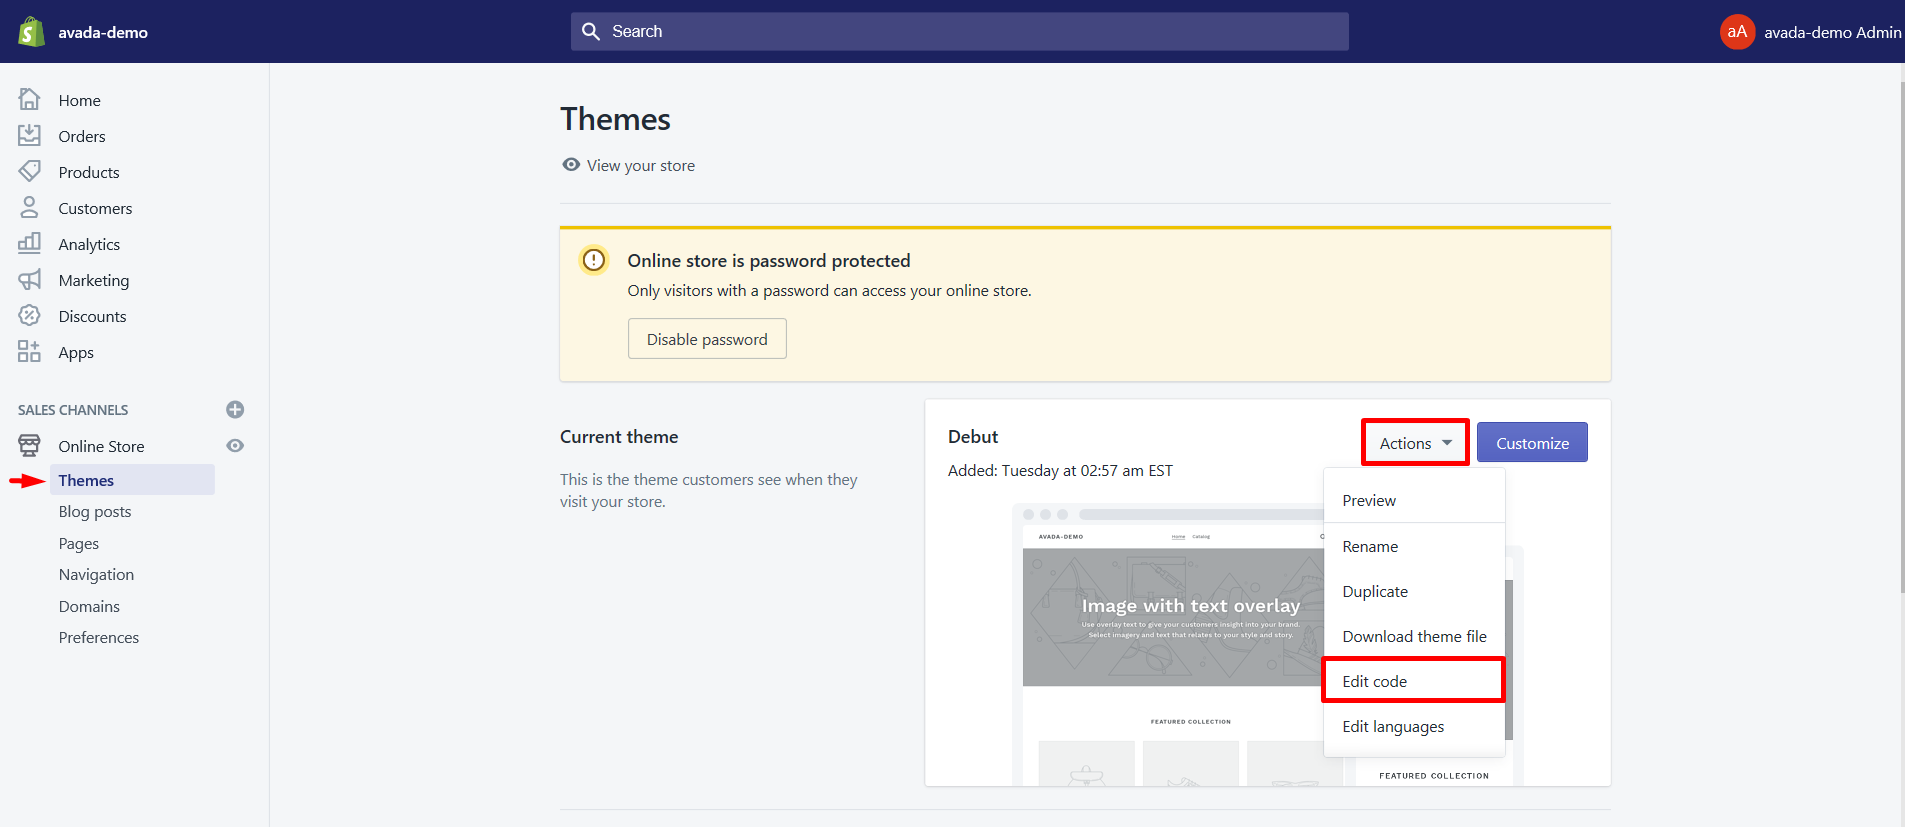
If you have already found the theme that you want to edit, just then click on to the Actions button, and then click Edit code.
Step 3: Upload Social Media icon image
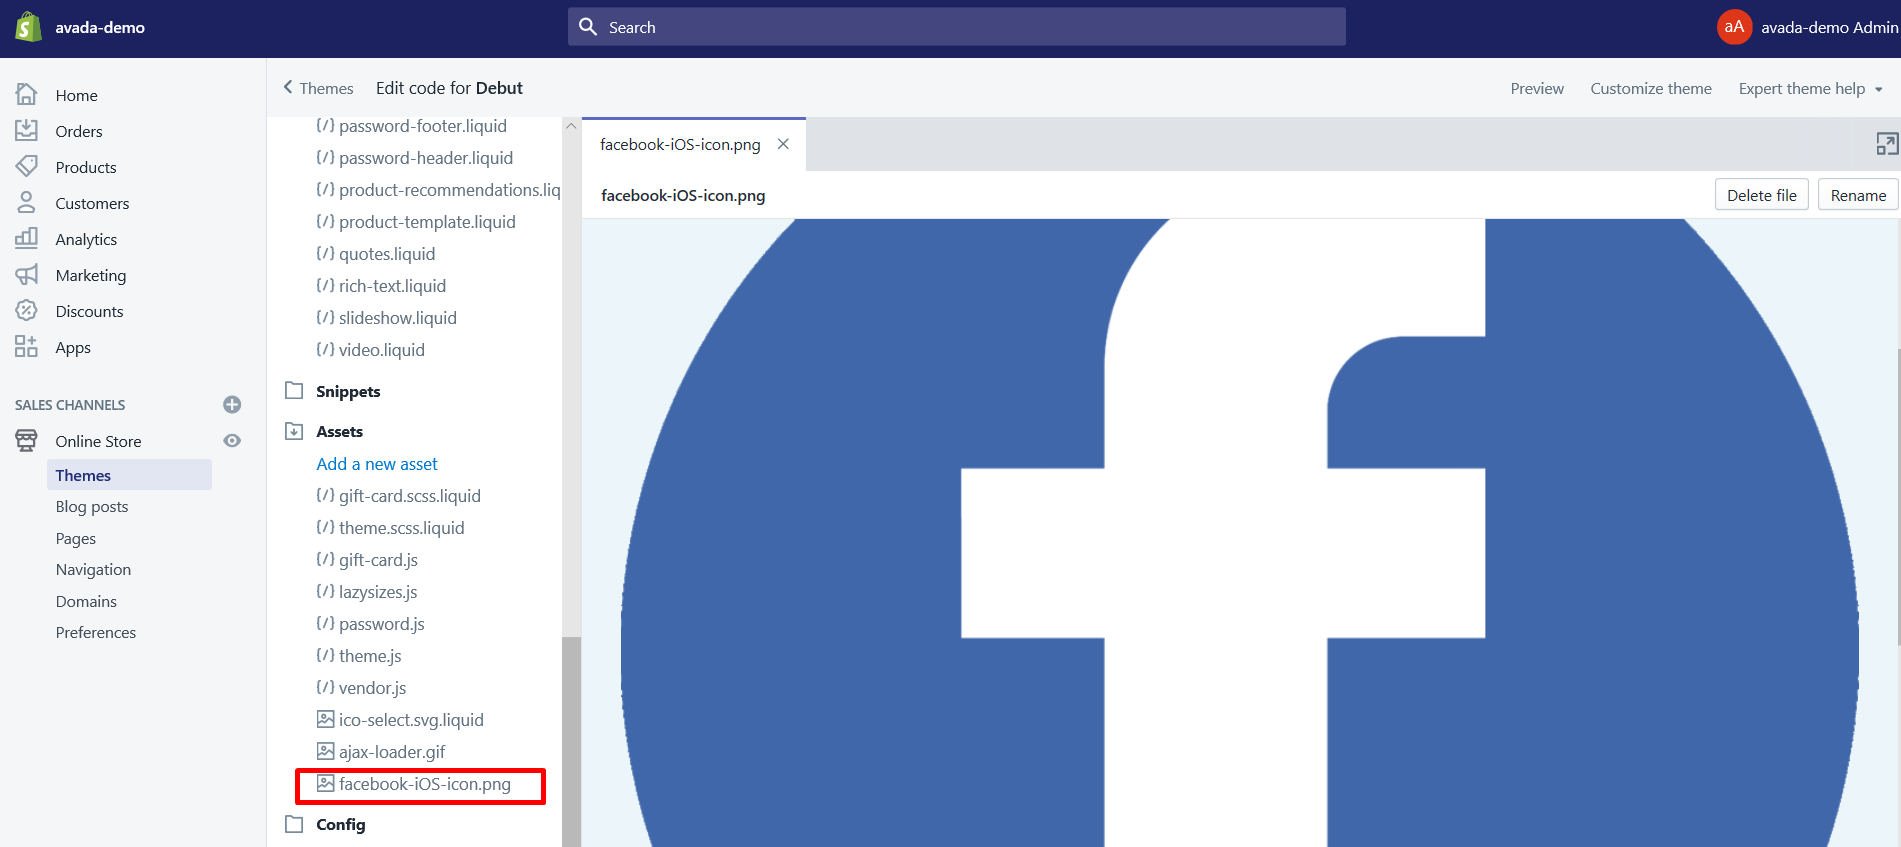
From here, you only need to upload the Social Media icon image to your theme to get your button on your site. Of course, you will have to go into the Assets folder to open it.
Step 4: Add a new asset link
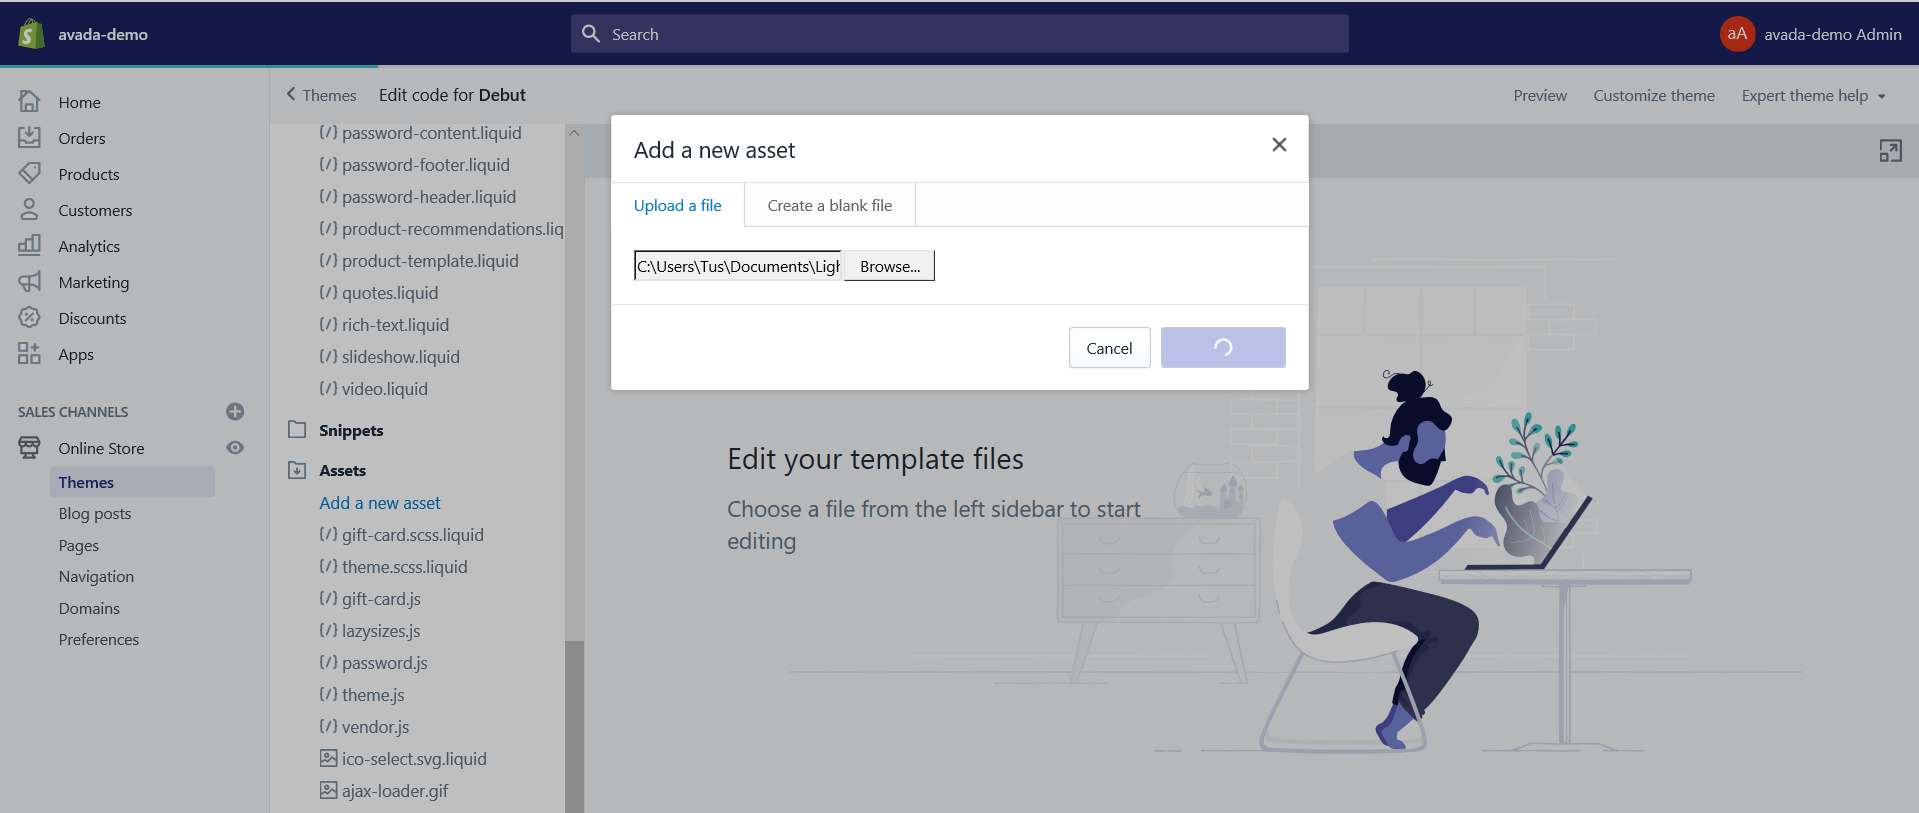
Scroll down and you will see the Add a new asset link option and click on it.

Step 5: Upload icon
Select the icon from your file on your computer and upload it to your website by clicking Upload
Step 6: Open theme.liquid file
Move to this step if you have already had the physical button icon uploaded.
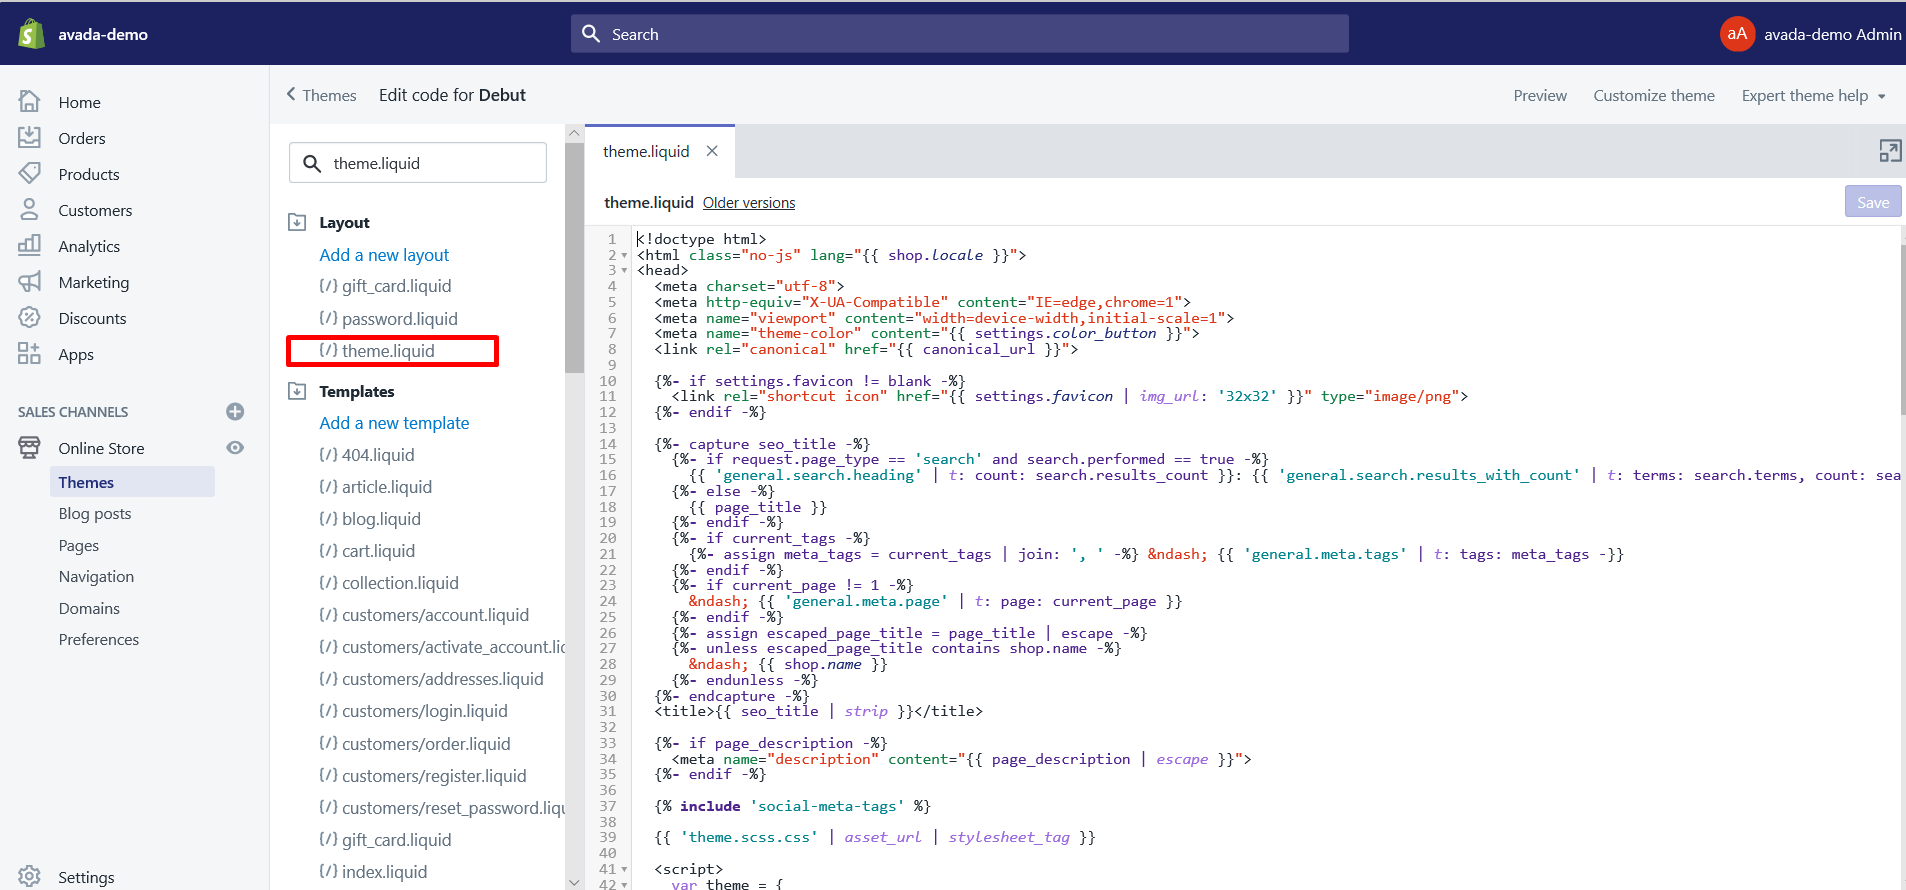
After that, click on the theme.liquid file and then open it in the online code editor.
Step 7: Add the code
From this step, we are going to add the code directly to make the button work. Addtoany and Addthis will differ from here. Because the line you paste in the code will be decided by the location that you want the buttons to appear on your theme. It’s your privilege to look through the code to find your perfect location. And then follow two methods below to complete your task.
Adding Social Media using Addtoany
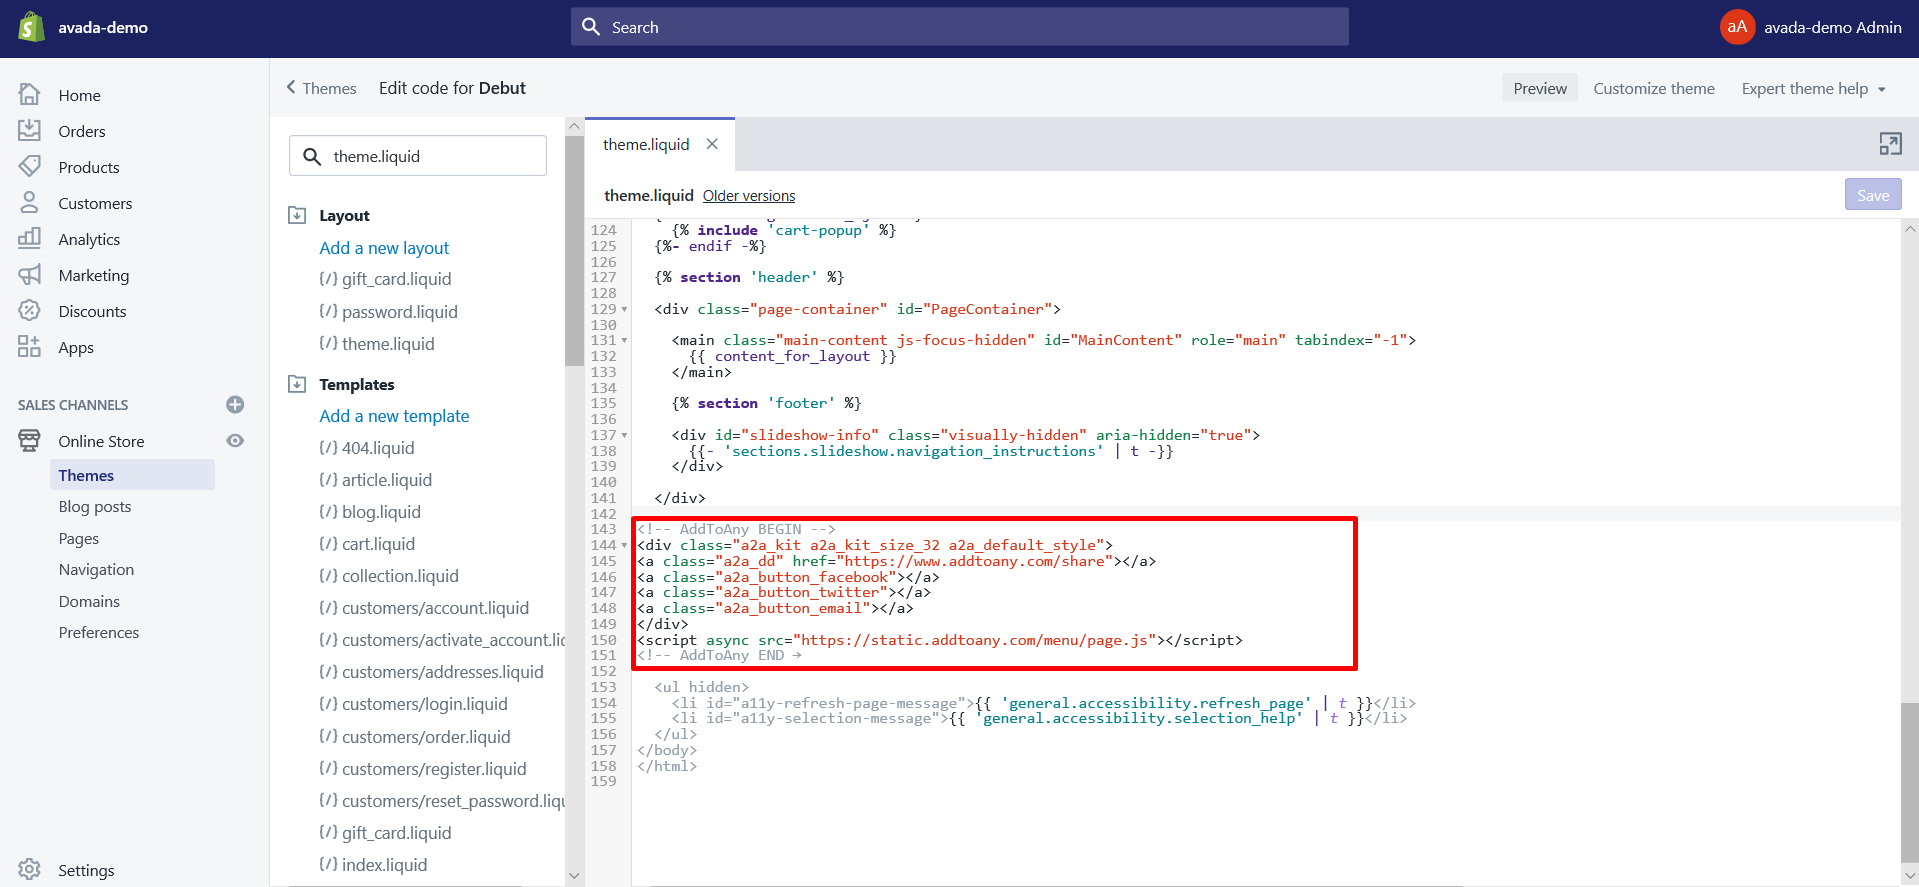
For Addtoany, the process will be easier as you don’t need to have any account to add. Just patse the line below to your theme.liquid section:
<!-- AddToAny BEGIN -->
<div class="a2a_kit a2a_kit_size_32 a2a_default_style">
<a class="a2a_dd" href="https://www.addtoany.com/share"></a>
<a class="a2a_button_facebook"></a>
<a class="a2a_button_twitter"></a>
<a class="a2a_button_email"></a>
</div>
<script async src="https://static.addtoany.com/menu/page.js"></script>
<!-- AddToAny END →
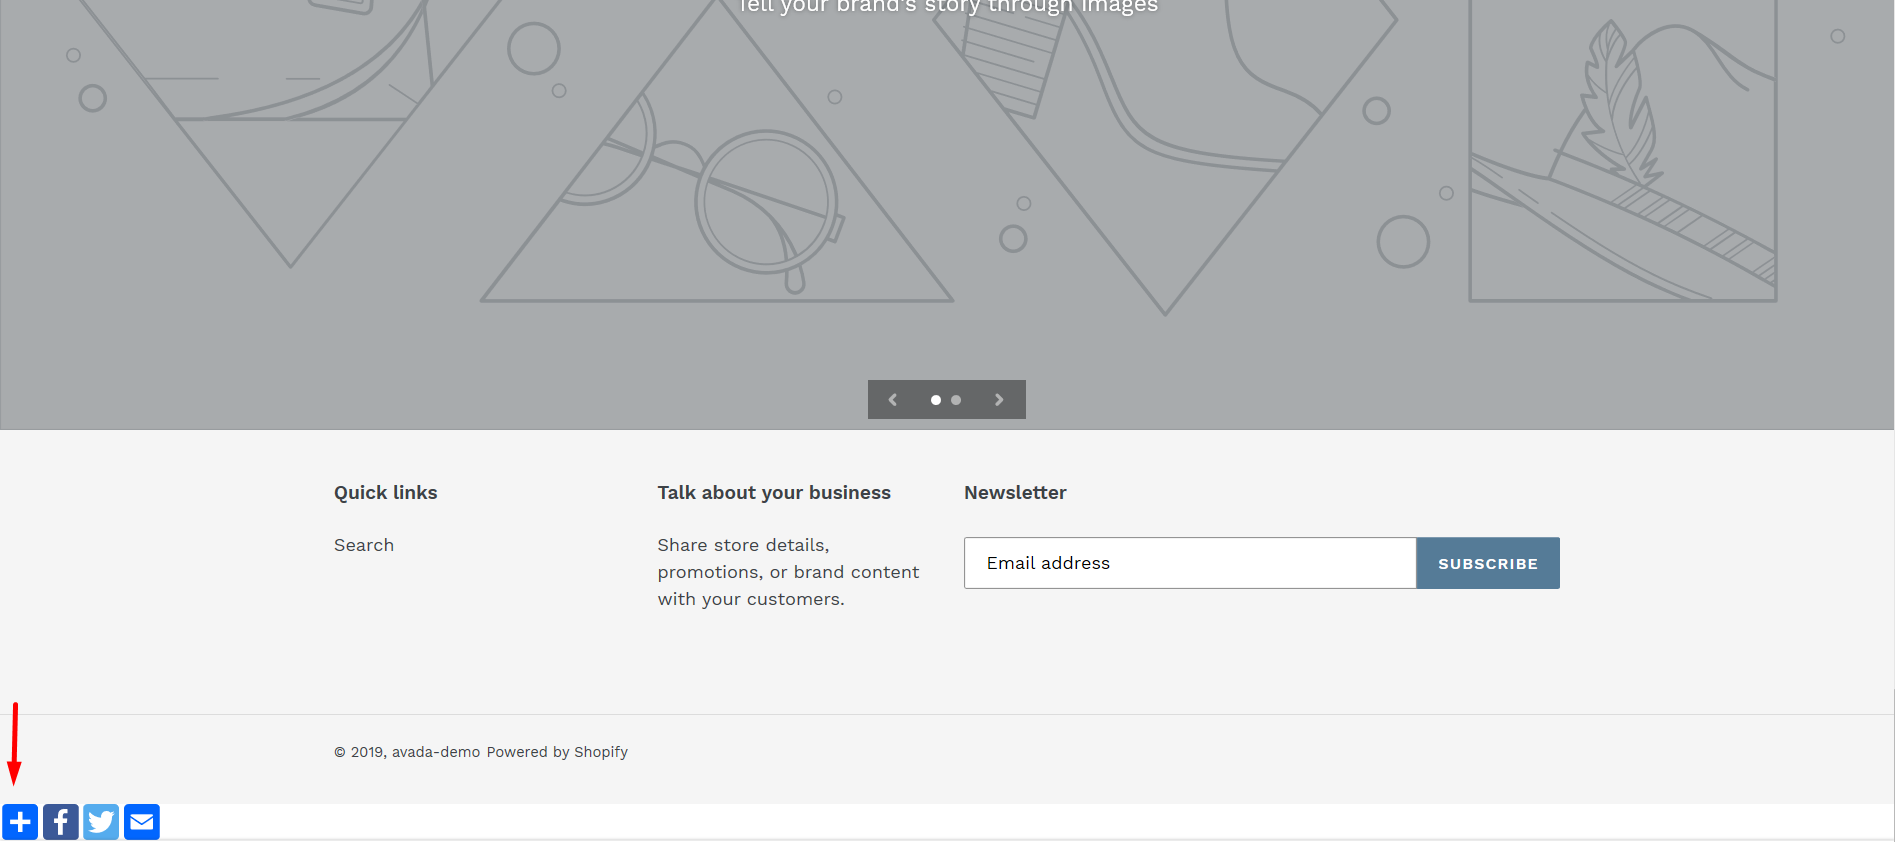
What you got here will look like these icons in the left corner of your website:
Adding Social Media using Addthis.com
You will need a Addthis.com account to do this. Don’t worry because it won’t take you long to register a account
After filling out all the information below and get a verified account. Just paste the line of code below to your theme.liquid section:
<script type="text/javascript" src="//s7.addthis.com/js/300/addthis_widget.js#pubid=[YOUR PROFILE ID]" async="async"></script>
Step 8: Save your work
Finally, you are done! Click Save and check the result by going to the Preview section of your theme.
Conclusion
It is undeniable about the ability to increase sales because a strong online presence on sites such as Facebook and Twitter provide a cost-effective way to interact directly with prospective consumers.
I really think that the detailed instruction above worked in helping you to add Social Media to your Shopify store. Also, I bet that your business is nowhere can build your own brand, improve SEO and increase traffic for your store as well.
If there are any troubles occur while practicing, contact us right away via comments below. Be sure that you will get the replies in just moments!
Related Posts:


