How to add Stripe to Shopify - Stripe Payment integration
As we might have already known that Shopify Payments is one of the most user-friendly aspects of launching an online store with Shopify. It is available in many countries all over the world like in the USA, Canada, and the UK and many more and allows users to take advantage of low credit card rates. But what about Shopify Payments, Powered by Stripe?
Would it be different when you set your Shopify plans? and how to connect Stripe to your Shopify store? Read through our article below to understand more.
What is Stripe?

For someone who might not know, Stripe is a technology company which builds economic infrastructure for the Internet. Stripe supports the very size of businesses, from new startups to public companies by utilizing their software to accept various payments and manage their businesses online.
When you come to Stripe, you will be given a fluent experience with the Payments platform with applications that put revenue data at the heart of business operations. Since Stripe is a top Payments platform of applications to manage revenue, prevent fraud, and expand internationally. Its core Payments platform is a powerful payment engine that can make money-moving easy. Also, people choose Stripe for its cloud-based infrastructure, which provides reliability, scalability, and security to users.
How to add an Existing Stripe Account to Shopify
Here comes the main section of connecting an existing Stripe account to Shopify.
If you have already had a Stripe account, continue reading to complete connecting. However, if you haven’t, register your own account and let’s move on to the next step!
Step 1: Check out your eligibility
First and foremost, you have to log in to your Shopify store and then have a check to see if you’re eligible for Shopify Payments requirements or not.
If you are eligible, congratulations, you are totally given the access right to use the option powered by Stripe. But if you are not, unfortunately, you have to create a new account.
Step 2: Go to your Payment Providers
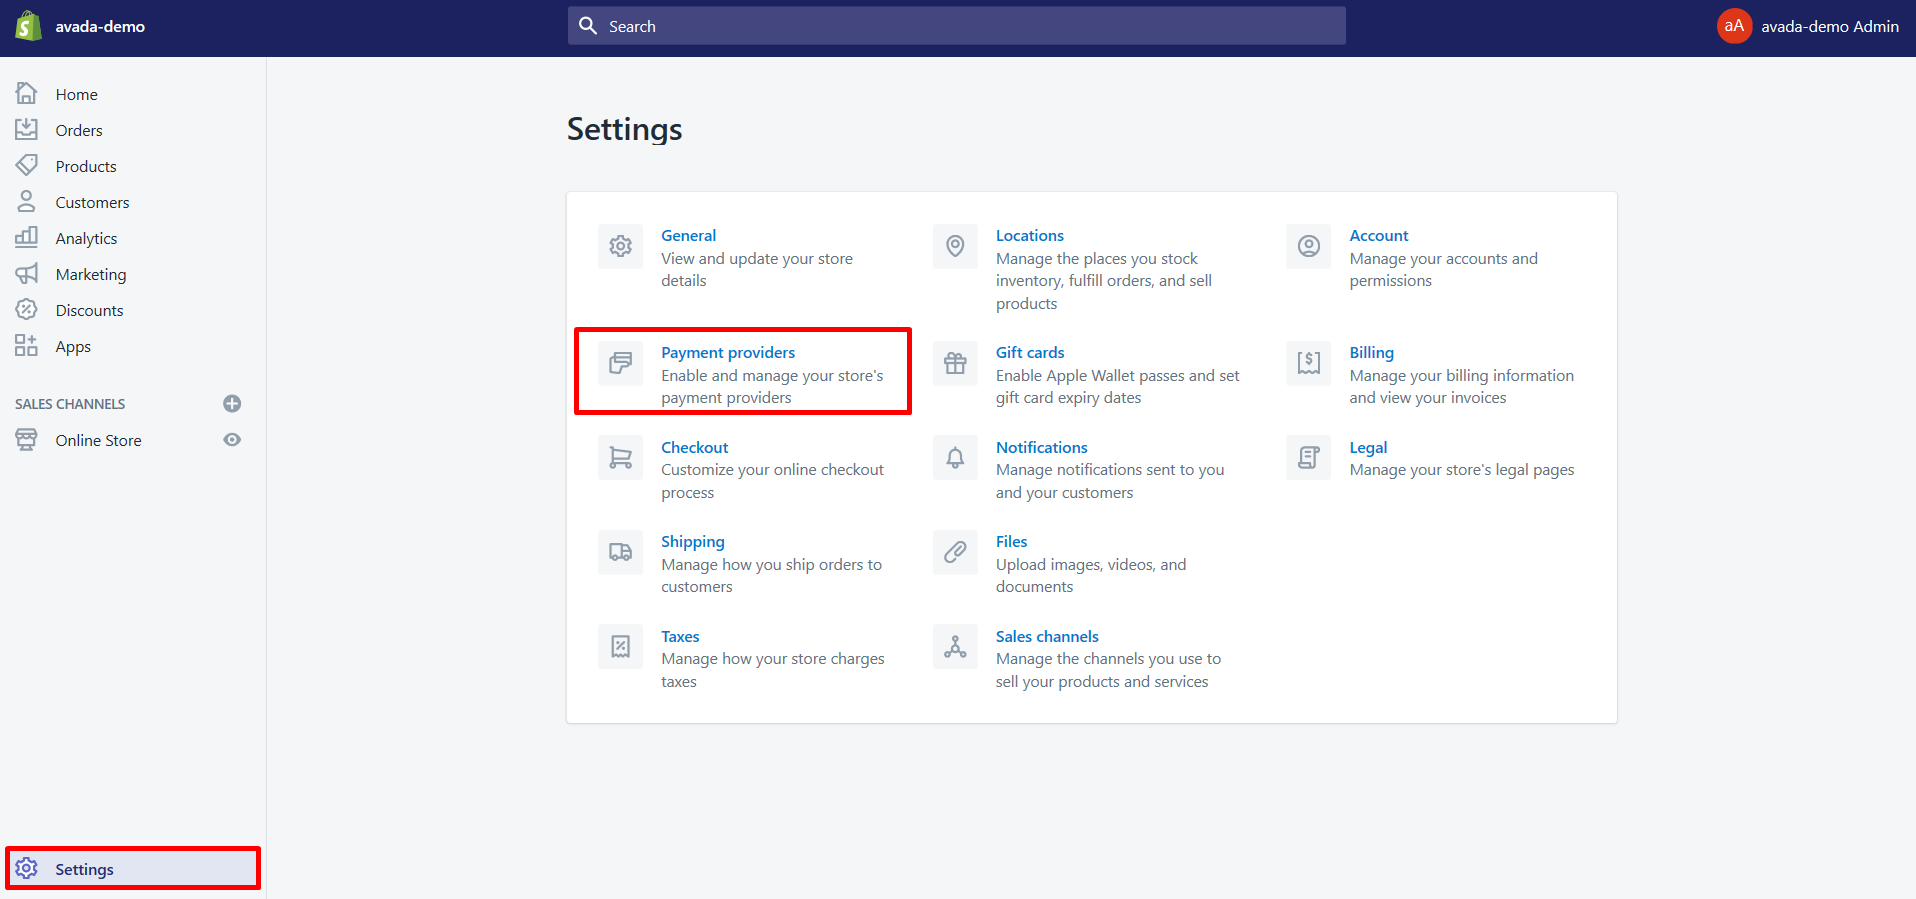
From here, go to your Shopify admin, and click on Settings, which locate at the bottom left of the screen and then select Payment providers

Step 3: Choose for Third party credit card provider option
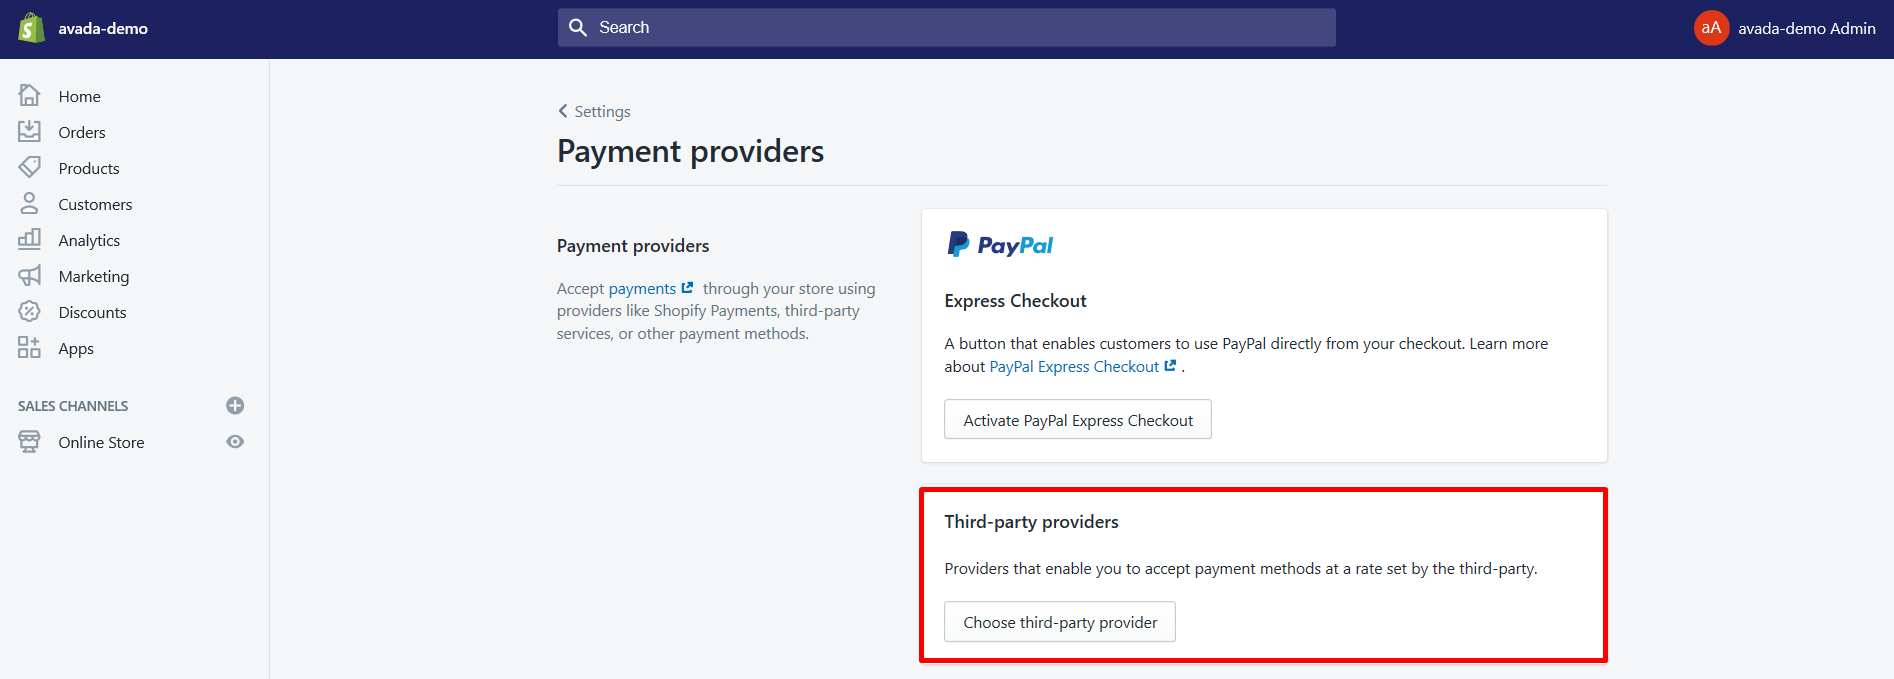
You will see the Third-party providers dialog box show up, now, select the Third party credit card provider option

Step 4: Pick Stripe as your provider
From here, you will have to choose Stripe as the provider for you to use. The option will appear from the drop-down menu, click on the Stripe button to keep continuing.

Step 5: Enter credentials for Stripe
It’s your job here to enter your account credentials for Stripe.

Step 6: Click Activate
Finish it? After all, click Activate and you’ll be able to accept credit card payments. However, you will not be able to view all your Shopify Payments in the Stripe Dashboard despite the fact that Shopify Payments use Stripe.
What happened with the Stripe payment gateway?
From here, you have successfully connected your Shopify to Stripe account as a Shopify Payments option. It means that your own payment gateway is now powered by Stripe. However, Stripe will not be available in a region where your Shopify Payments is available.
Specifically, Shopify Payments is considered to be the main gateway featured in those regions, so it would be the best option for merchants there. In case you can’t find the Stripe option even though you have already had a verified Stripe account, it means that your Stripe here is now Shopify Payments. So don’t worry about that.
Conclusion
That’s all! I guess with the information above, there nothing challenges you with your practising in Stripe Payment Gateway integration. If there is any trouble occurring, please let us know. You are always welcomed to share. In case you are finding Shopify Integration apps, we’ve covered them for you too.
Related Posts:


