How to Change Order Number in Shopify
When there is a customer reaches a certain point in his checkout, the order number will be assigned, and then moved to be completed. From that moment, your orders numbers will just increase, but never be perfectly and neatly sequential, which means you can not change the order number itself in a manual way. However, Shopify still enables you to view the existing orders in chronological order and do other things instead.
Therefore, it is impossible to change order number in Shopify, but there are other things that you can adjust for your order. In this article today, I’ll present to you what you can adjust, how to do it, and the reason for making that change.
Related Posts:
- How to Sort your Orders List on Shopify?
- How to Delete an Order on Shopify?
- How to Add a Tracking Number on Shopify?
View an order’s timeline
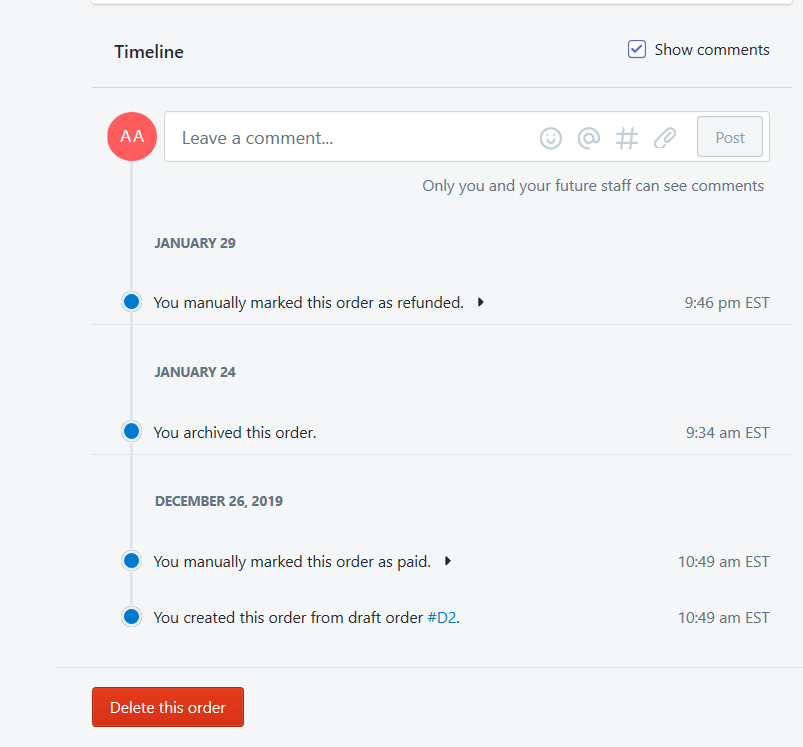
Shopify allows sellers to see the detailed history of their order via the order’s timeline of their stores. Also, in the timeline, you will be enabled to enter notes and comments that you hot in the timeline. What is more, the timeline is also a powerful tool that can help you to communicate with staff members, attach your very own files to it, and then set the link to other products, orders, and customers, etc.
Step 1: Open Order list
In order to view an order’s timeline, first of all, log in to your Shopify admin account. Then, click the Orders, which is the second option.
Step 2: Select an order
Next, select the order that has the timeline that you want to view.

Step 3: View the order’s timeline
Finally, simply scroll down to the section of your order’s timeline when you are on the order details page. You have successfully viewed your order’s timeline here.

Check an order’s currency
This would be pretty helpful for those who are selling in multiple currencies. In detail, from your Shopify admin, your orders are shown in your store currency, which also enables you to preview how your order look if it is displayed in your customer’s currency.
Step 1: Open Orders section
In order to do this, just click the Orders button when you are in your Shopify admin.
Step 2: Choose an order
After that, choose one of your orders.
Step 3: View the order’s currency
Scroll down to the payment section, just simply click View order in customer's currency and then you are done!
Add tags, notes, or edit an order
Your order is designed to be updated information that is associated with an order from the Orders page of Shopify like adding tags, notes or editing.
Step 1: Navigate to Orders
When you are at your Shopify admin, navigate to Orders by clicking that option.
Step 2: Open an order
Then, just hit a click on the number of the order that you want to update.
Step 3: Add tags, notes, or edit
From here, Shopify allows you to make some changes like:
- Edit customer information
- Add or remove order notes
- Add or remove order tags

Add a Prefix and/or Suffix
As you can not change the Shopify order numbers, however, you are able to insert either a prefix or suffix for your orders on the Shopify store. In order to do this, follow the guideline below:
Step 1: Click General
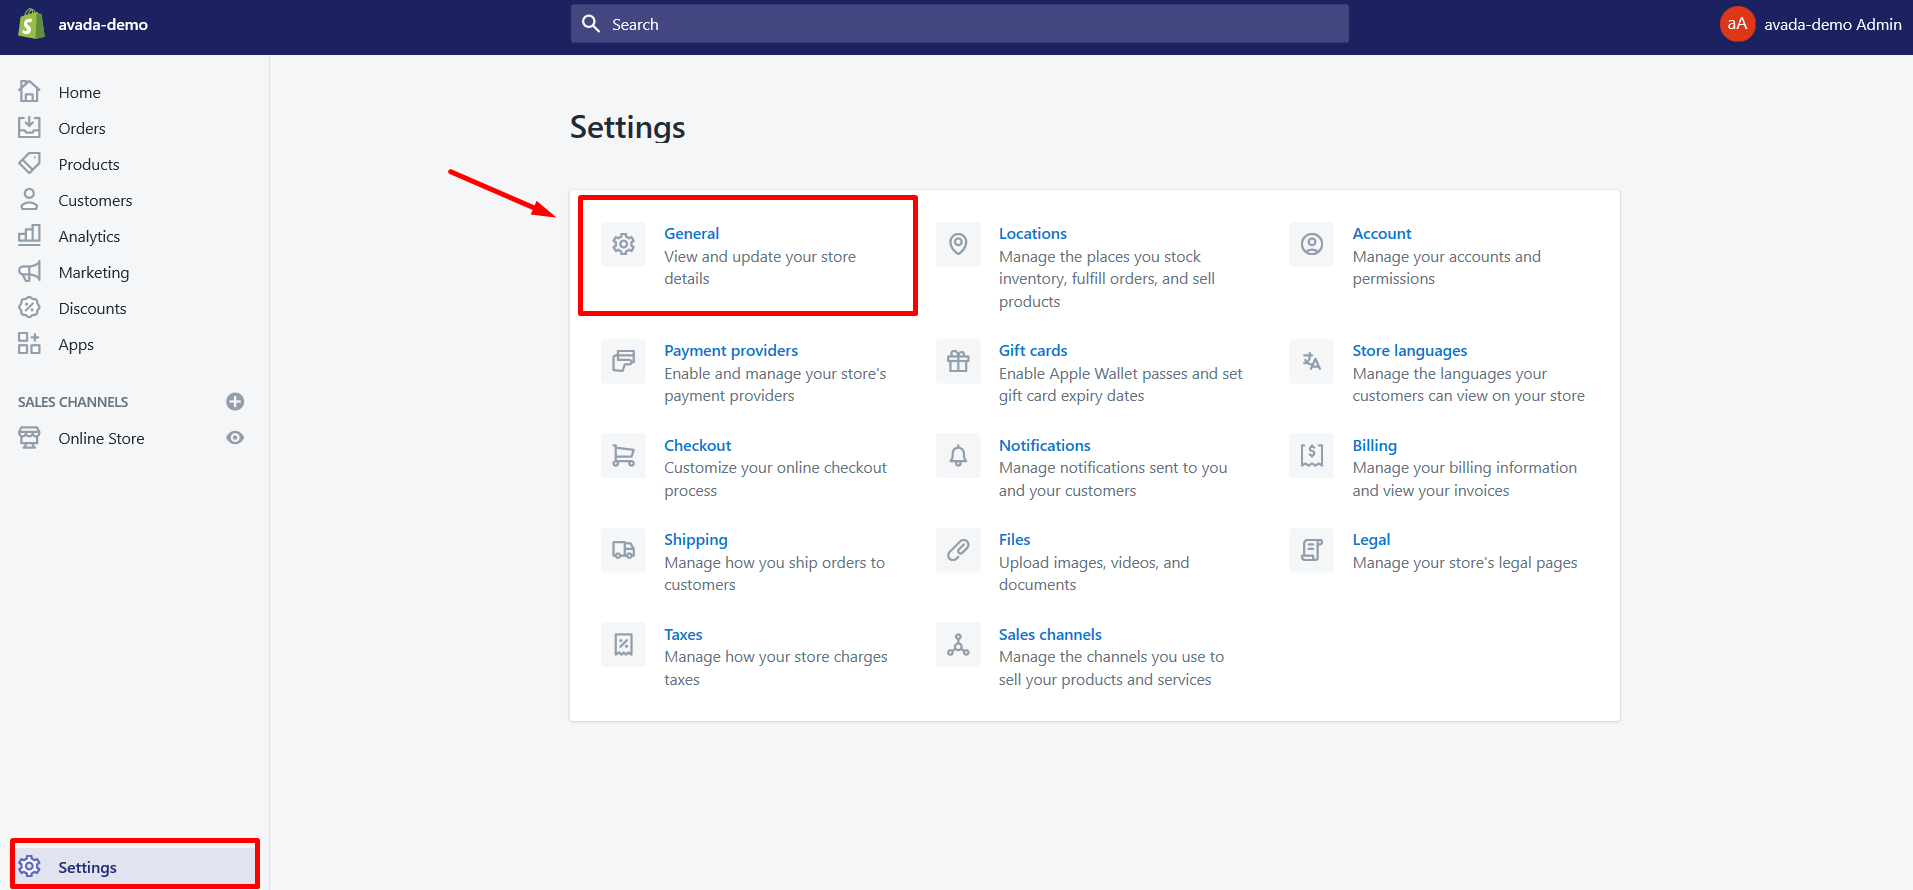
From your Shopify admin, open your Settings page, then click General, after that, just scroll all the way down to the bottom of the page.

Step 2: Add a Prefix and/or Suffix
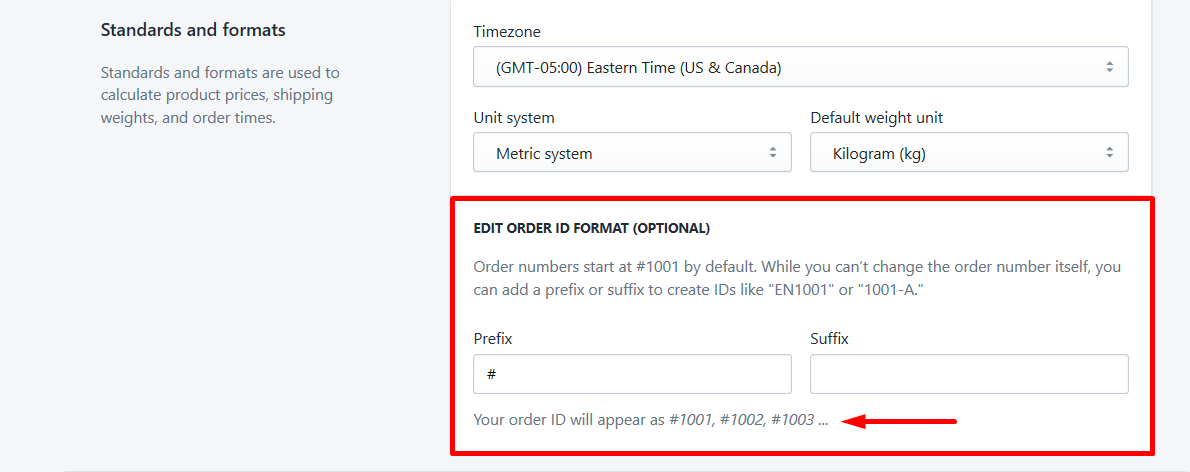
From there, you will see the location that enables you to enter the prefix and suffix. Notice the line “Your order ID will appear as #1001, #1002, #1003 …” below that section. That sentence means that when your has an order number less than a thousand in your existing system, then you can switch without having to do anything.

In case you have already past order #1000 then you still want to do so with your prefix or suffix. I would recommend you to set the default # as the prefix, and I insert a suffix after that. While doing this, remember not to turn things too complicated. A character or two will be enough.
Contact a customer about an order
All your customers’ contact information is stored in Shopify. So, it means that you are totally able to add additional contact information by clicking the Edit in your available Contact section of the order page and enter the details subsequently. In case your customers are given the opportunity to leave an email address or phone number at their checkout, then only contact information that your customers chose to enter in the Contact section is visible for you. If there is anything about the order that you want your customers to know, and you want to contact the customer that chose to enter a phone number, just simply call the number that they entered.
Step 1: Click Orders
When you are at your Shopify admin, navigate to Orders by clicking that option.
Step 2: Choose order you want to contact
When you are on the Orders page, click to choose the number of orders from the customer that you want to make contact.
Step 3: Contact customer via email
You are now in the Contact section, hit a click on the customer’s email address then.
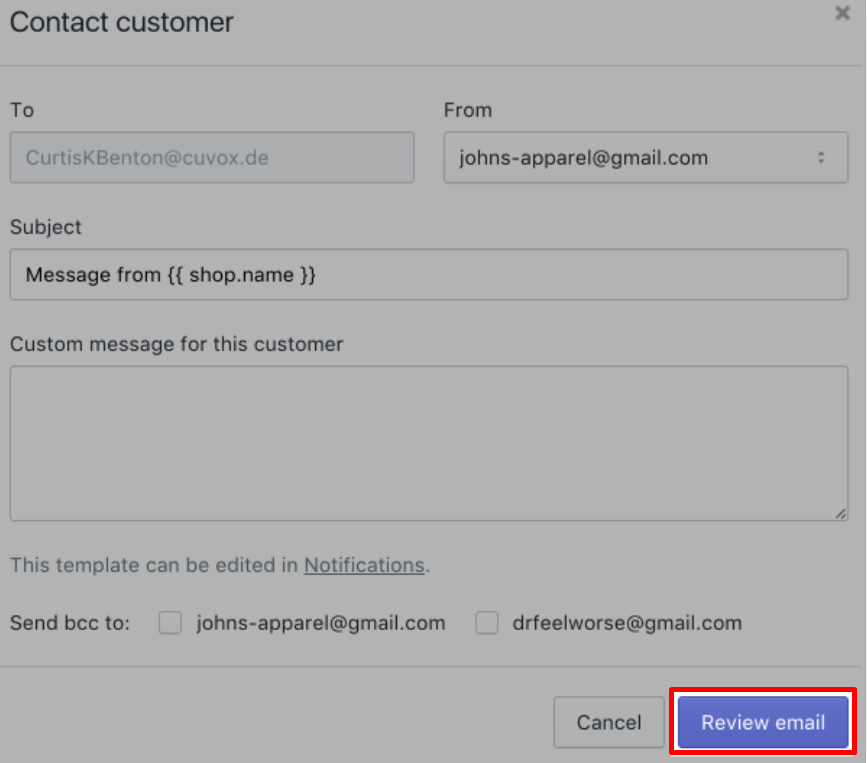
In the Contact customer dialog, type the message that you want to send in the blank section.
In case you want to direct a copy of your message to your email address or the store owner’s email, just select the box that lies beside the address that you want to use.
After all, hit a click on Review email button.

Next, your email will be reviewed. From here, you can choose to Send notification, or Back to make any changes, click any option that you prefer.
Conclusion
That wraps this article today about How to Change Order Number in Shopify. Even though it can not literally help you adjust the order number of your Shopify store, but I do believe you can get a lot of helpful information about your other ordering matters.
I really expect these six sections above that I have just shown you would be possible to help you run your business in a smooth and convenient way. If you find any wrong during your practice, please contact us and let us know. We always here for your help.


