How to Change Price of Products on Shopify in 5 minutes
While importing your products from suppliers, there might be many original prices that need to be imported into your Shopify admin. In order to increase their own profits in selling products, merchants often need to increase the prices in their Shopify store. That’s why Shopify enables you to set product price in a manual way, and also set global pricing rules for automatic markup.
Normally, business owners need to determine the whole cost of their products, form the mark-ups, or margins for them. Then, the profit will then turn to have the whole new different gap between the amount of money paid by the customer and the cost of the product, which is also known as the amount you paid the supplier.
That is why this article is here today. We will instruct you clear on changing price of products on Shopify. Trust me, it just only takes you about 5 minutes.
Strategies for pricing products in Shopify
Strategies for pricing products are things that merchants really should consider when they are pricing their products because it can have a huge influence on their business online on the whole. So, consider these following factor:

The cost of products
The product cost is what can help you determine the level of your desire to charge for a product. For instance, in case the product cost is no more than 5.00 dollars, then look at the product category and type, and consider marking it up 4 or 5 times and sell it for 20.00 - 25.00 dollars. By doing this, you will be able to make the profit up to 20.00 dollars, base on your shipping fee and other costs.
Other expense or business cost
These cost of marketing expenses, or your Shopify subscription, and transaction fees really need to be reflected when setting prices for your products. As these costs are must-have in your business costs, so consider covering these costs at the very least in your pricing.
How your competitors pricing their products
When seeing the stores that sell similar products, you will, at the same time, get support in determining the average price of the products you’re selling. As a result, you will be able to set your prices accordingly.
How to change the price of a product in Shopify
When you have figured out the necessary elements that you need for a pricing strategy, we will move on to the next step of changing the price of products on Shopify.
Step 1: Log in your Shopify Admin account
Step 2: Click on Products Section
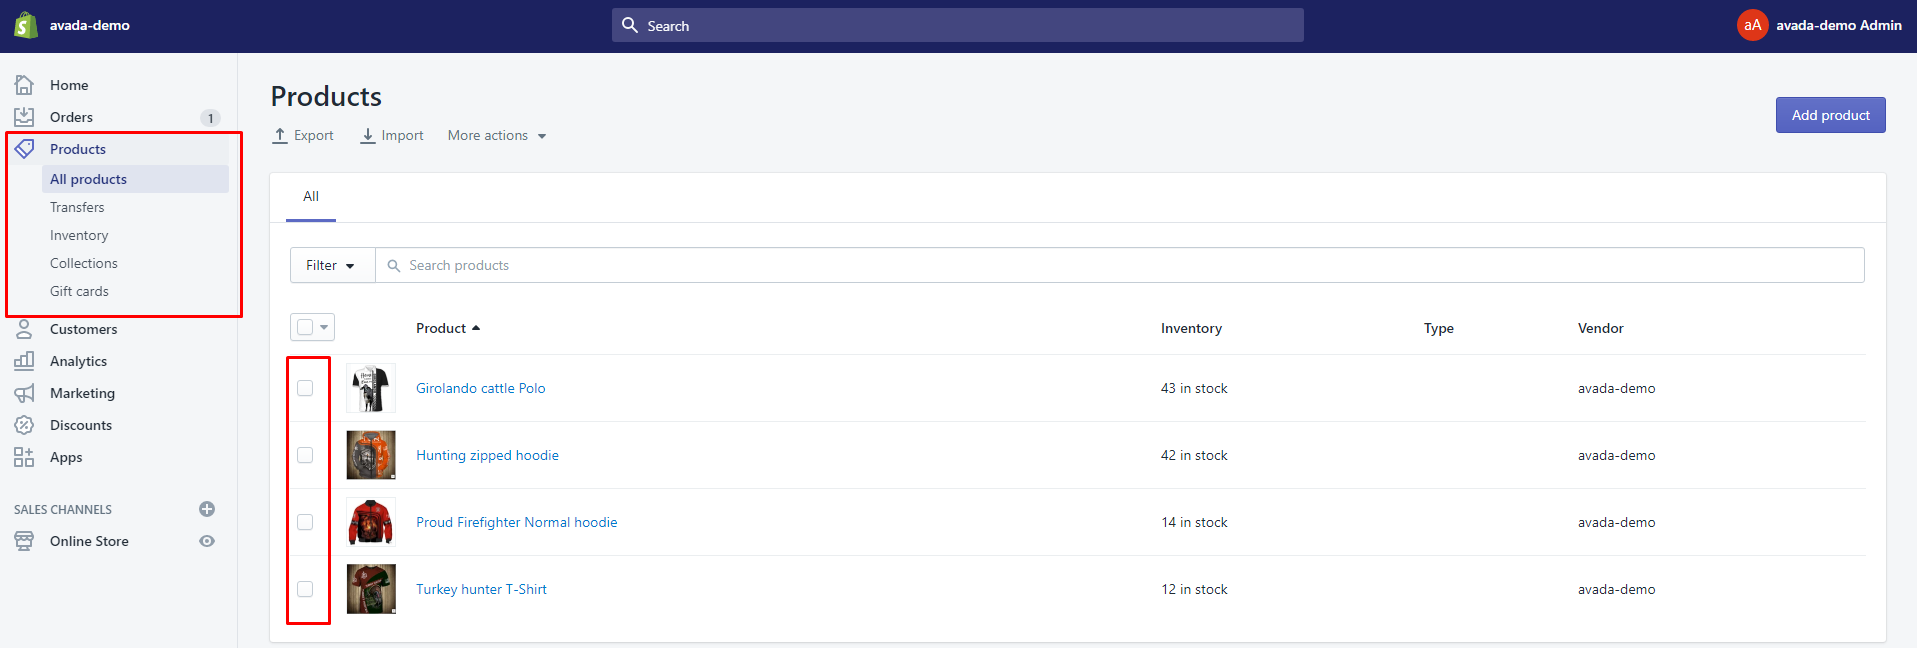
When you are working on your Shopify store account, then go for the Products Section, which locates on the left side of the screen to see all your products.
Step 3: Opt for the product
In this step, you should choose the product that you want to change the price by clicking at the product name.
Step 4: Open the Pricing section
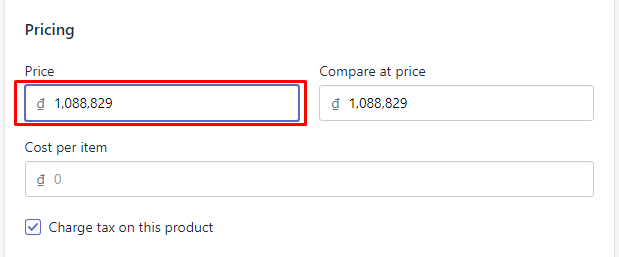
When you are on the product detail page, scroll down to see the pricing section.
Step 5: Set up the Price
Before start set the price up, you must understand the Price here is the actual price of the products. There is the Compare Price, which is optional but really recommended to set for your store, as it will provide you the lists of updates on your online store that shows the items on sale.
Normally, the value of Compare at price is higher than the value in Price that shows a sale price.
Step 6: Click Save
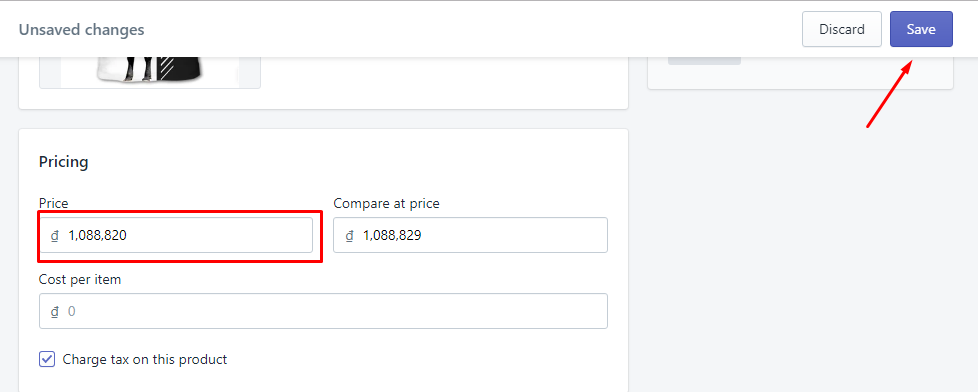
Finally, when you are done with the setting process, it’s your mission to click the Save button that locates on the top right corner of the screen to get your work done.
Change prices in bulk
Export your products to excel
First and foremost, you must care about exporting all your products into Excel file form via the Bulk Import Export Update with Excel app. You can do this by marking to export Products and Variants.
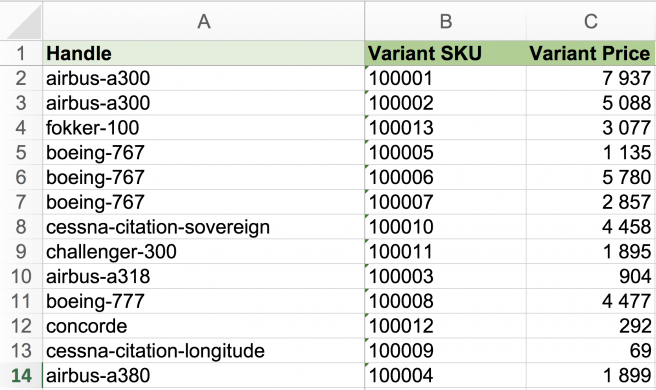
Update new price in the file
Then, open your exported file for editing in Excel. From here, you can edit and remove all columns that you think they do not need to be updated. In this step, you must consider the key elements that you need to have, which are:
- To have the product ID (or Handle)
- Variant SKU and Variant Price
These are really necessary for the App to get detailed information that the price belongs to the relevant
VariantsandProduct.
From now, you need to set the change for the prices of all needed variants for products.
Remember that you are able to utilize any other formula and change prices manually.
Don’t forget to save your work as well.
Import products
It’s time for you to import the Excel file back to Shopify with the Excelify app. Right after that, you will be able to check all the updated prices immediately in the Shopify admin.
Ways to identify products for the updated price
As some of you have might already know, there are two apps, which are Handles and Variant SKU combination can identify Product Variant and update the price. However, there are many other ways that you can utilize to identify the Product Variant from your store.
Variant SKU only
In case the supplier provides you with prices for each SKU number, you only need to use this app to update them. The app itself will update all the product variants that match imported SKU numbers because Shopify does not require the SKU to be unique.
Here are some minimal required columns:
- Variant SKU
- Variant Price
- Shopify update price SKU
Product Handles
When you are using the Product Handles, it will not require you any product variants, which means each product needs to have one variant. After that, you will be able to make an update only by using Product Handle.
Here are some minimal required columns: – Handle – Variant Price
ID and Variant ID
As a matter of fact, ID is the most precise reference to the item in Shopify. Consequently, ID and Variant ID is considered to be the fastest way to get your prices updated when there are a huge number of products available for you to update.
Here are some minimal required columns:
- ID
- Variant ID
- Variant Price
- Shopify update price by ID and Variant ID
Handle and SKU
Handle and SKU is created as there are some products that have the same SKU number so that you might want to set goals for your updates to have only the SKUs that belong to specific products.
Here are some minimal required columns:
- Handle
- Variant SKU
- Variant Price
- Shopify update price by Handle and Variant SKU
Handle and Barcode
In case you don’t have SKU numbers, and you still own the Barcodes? Don’t worry about that because Barcode totally enables you to identify product variants.
Here are some minimal required columns:
- Handle
- Variant Barcode
- Variant Price
- Shopify update price by Handle and Variant Barcode
Handle and Options
One unique way to update prices is by using variant options. For instance, you can set change to your prices by using a Color or Size, or any option combinations that are provided on your products.
Here are some minimal required columns:
- Handle
- Option Name
- Option 1 Value
- Option 2 Name
- Option 2 Value
- Option 3 Name
- Option 3 Value
- Variant Price
Conclusion
That’s all the information that you need to know when you intend to change price of the Products on your Shopify store. I hope this tutorial can help you to know this matter more clearly and gain more profits in your Shopify business.
If there is any trouble occurring while practicing, remember that our Support team is always here to help you fix that. Don’t forget to leave comments below about your experience with us to help you improve our website quality next time.
Related Posts:
- Upload product using CSV file in Shopify
- How to Use Tags in Shopify?
- Best Shopify Price editor Apps
- How to Add Product Type to your Shopify store?
- Shopify Themes 101: All you need to know
-
[How To Purchase Shopify Plans Step-by-step Guide](https://avada.io/articles/how-to-purchase-shopify-plan/)


