How to Change Shopify store URL
If you are a newbie to online business on the Shopify platform, for sure, you come up with a lot of challenges. One of them is not knowing how to change Shopify store URL.
This case happens when you have built an online store, but afterward, you may realize that you need to have a unique brand name, and you need to change the current store’s name.
Hence, in this writing, we are going to provide you with a simple step-by-step guide for you to modify Shopify URL easily and with minimum effort. Now, let’s get started!
Related posts:
- Export your URL Redirects - A Step-By-Step Guide
- How to Edit URL Redirects
- 6 Steps to Create an URL Redirect
What is an URL and why do you need it?

First thing first, what exactly is a URL is and why is it important? In your Shopify store, you will have to cope with more than one URL, but your primary domain is the most critical. On all your pages, you will notice this URL.
A shopper, for instance, notices your ad, and taps on the URL and then enters your shop. We can easily see your primary domain (shop name), and the product/service /contact, or whatever else you publicized in your advertisement in the address bar. You will have to buy the domain before modifying your Shopify store’s URL. Via Shopify or any other selected third-party vendor, you can do that.
How to change your Shopify stores URL?
You will have a completely new Shopify URL after following one of the alternative options below and your customers can find your shop with it.
Create a new Shopify account
Concerning this choice, you can duplicate your current store by exporting CSV files from your Admin section and moving transporting them to your new store (or account). But with this option, you would have to keep in mind the important things below:
-
You can back up (in CSV files) products, customers, gift card codes, etc. from your previous store.
-
To use your current theme, you can simply download it to your computer and then upload it to your new store.
-
Though a variety of significant data can be transferable from your old store to the new one, you have to manually transfer some data (via Shopify Admin section) to your new account.
-
Old visitor data is not transferable to your new store.
-
The only tool to import orders to the new store is Shopify API. Nevertheless, Shopify’s functionality does not include assisting this task. That is why you will have to pay extra fees hiring a Shopify expert to help you do that.
To perform well with this option, both your accounts (old store and new store) ought to adopt the same kind of plan. Let’s take a look at these simple steps to duplicate your old store’s content and data.
Step 1: Log into your two different Shopify store accounts
To log into your two different Shopify store accounts, open two tabs on your browser.
Step 2: Set up your store theme on the new account
Make sure you have already downloaded your old store’s theme, then upload it from your computer to install your theme on the new account.
Step 3: Back up products and customers CSV files
Export the products and customers CSV files to back up from your old account’s Admin section.
Step 4: Import the CSV files to the new store account
From your new store’s account, import the CSV files from Step 3 to your Products and Customers area.
Step 5: Reinstall all necessary apps to your new store
In your new store, set up all the apps that you find necessary again.
Step 6: Set store settings on your new account
Establish the settings on your new account, for example, shipping, taxes, payments, checkouts, and many more.
Step 7: Duplicate blog posts and page content to the new store
Copy blog posts and page content from your old store and then paste them to the new one.
Step 8: Manually build new store navigation.
So now with all the info from your old store, you are ready to use your new URL. Note that even though you have already copied most of your old account’s data, you will not be able to import the information related to analytics.
Use Third-Party App
To duplicate your old Shopify store to form a new one with a brand new URL, third-party apps are such a handy tool that help you do that. With only a few simple clicks that have the same powers as all the eight steps mentioned above, you can save a lot of time to copy all the data from your old store. Store Copy is an example of third-party apps. To know more about Store Copy, read this post right now.
URL Redirect
Running a Shopify store may sometimes cause you to decide on removing a product or its removal being from your suppliers’ end. If the URL is in use somewhere else, for instance, in social media or any other marketing platform, the use of URL redirect will be necessary. In other words, once a shopper taps on your original URL, they will be directed to a new one that has similar products. URL redirect, is indeed, a time-saver and it will not trigger many errors to your dear customers.
To produce a URL redirect:
Step 1: Log into your admin account
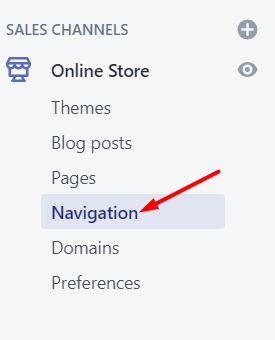
Step 2: Click Navigation
From the Online store section, click Navigation.

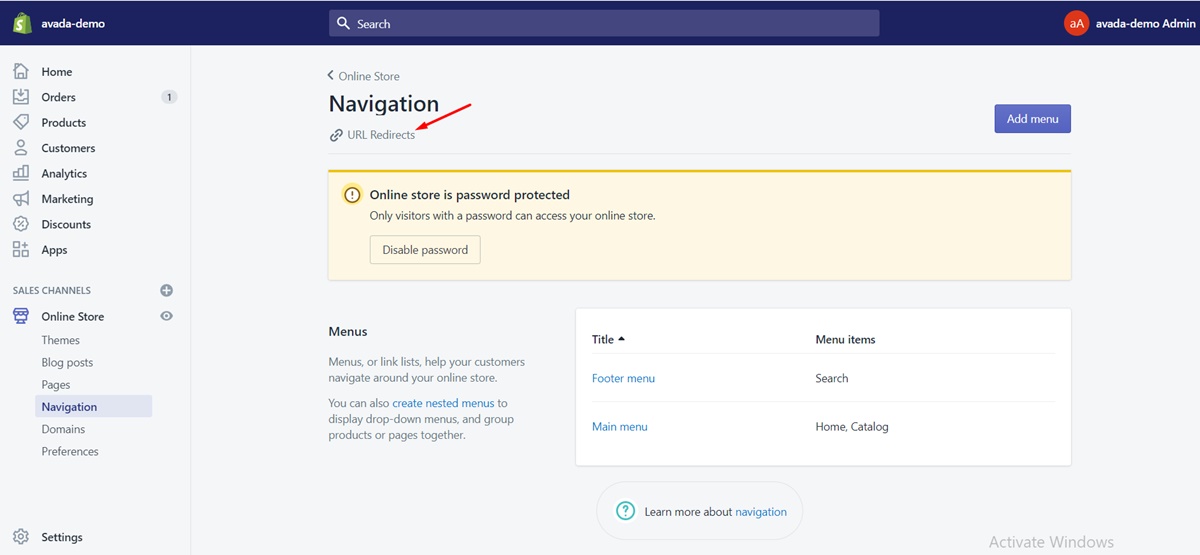
Step 3: Tap on URL redirects

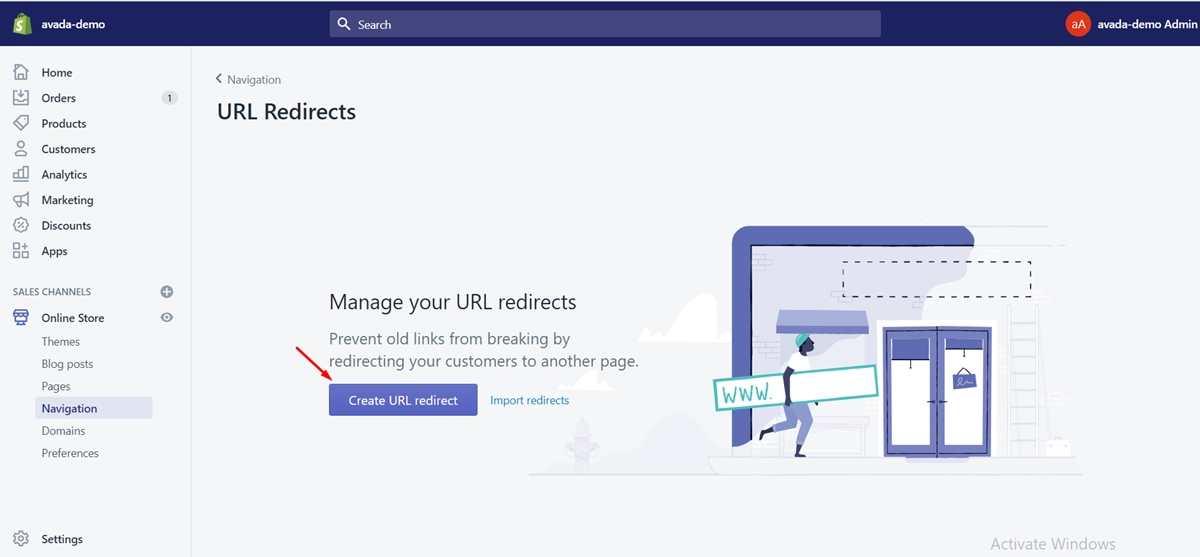
Step 4: Tap on Create URL redirect

Step 5: Enter the original URL
From the Redirect from, enter the original URL. A broken URL is a must to make it work.

Step 6: Enter the new URL
In Redirect to, type in the new URL to which your shoppers will be redirected ever since.

Step 7: Tap on Add
Conclusion
So far, I have provided you with simple steps to help you know how to change Shopify store URL. I hope that with our guidelines, you would be able to do change your Shopify store’s URL smoothly and in the future, have a prosperous online business.
In the case where you have already created a URL redirect but afterward you spot some errors in the input information process, then you will need to know how to Edit URL Redirects, check out our Edit URL Redirects post.


