How to Claim your Website on Pinterest for Shopify Store?
Pinterest is the most popular image sharing platform and social media service which is designed to help users save and discover more illustrators as well as imagery ideas. Moreover, Pinterest also provides a tool enabling users to verify or claim their websites on Pinterest Business Account.
It is essential to claim your website since it allows you to get access to analytics for the pictures you post, the analytics on Pins created by others from your website, and inform people of where they can find more posts of you.
Therefore, in How to Claim your Website on Pinterest for Shopify Store? post, we will cover the importance of claiming your website and a step-by-step guide to verify your Shopify store on Pinterest.
Let’s get started!
Why should you claim your website on Pinterest?
Claiming your website on Pinterest becomes increasingly familiar for online merchants who are managing business account SEO. Here are what you can benefit from claiming a website on Pinterest:
- The genuineness of your website and your account with Pinterest will be validated.
- When you post any Pins to your site, the profile picture will be displayed next to those posts.
- It will show up a Follow button for your Pinterest account which will stay next to your the link on your profile leading to your website. Instead, if you are a claimed merchant or creator, you may probably view the blue checkmark.
- It allows you to get access to web analytics for Pins that lead to your website.
So, how do you know whether your website is already verified or not? That’s simple. You can check out your website to see if the globe and checkmark symbol appear next to your website URL in your profile. If the answer is Yes, your website has been already claimed.
Before you begin claim Shopify store on Pinterest
Before you get started, make sure the following notes:
-
Create a Pinterest business account or convert a private account if you don’t have one.
-
You can claim more than one website for one Pinterest account as long as they have to be second-level domains (such as avada.com), subdomains (such as ads.avada.com), or subpath domains (such as avada.com/uk). However, in case the subdomain address the same destinations as the second-level domain, that domain will be treated in a similar way to a separate domain in your system.
-
To claim your website on Shopify, you need to accomplish by using a PC or a laptop.
-
Your profile on Pinterest has a website URL right below your profile photo or logo, which allows you to fill in any web address. However, you cannot claim them all but just those which you have access to adding HTML code. You need to add an HTML tag to your website, upload an HTML file to your website, and add a DNS TXT record to your website to let Pinterest know that the account owner also owns the website.
-
You need to turn off password protection for your online store. Or if you haven’t desired to open your store, let’s disable password protection and open it again when you finish verifying your domain.

The guide to claim Shopify store on Pinterest
You can claim more than just your websites. The process of verifying your websites on Pinterest is simple, which usually takes you a couple of minutes as long as you do the correct way. Therefore, follow the below instruction carefully to save time and effort.
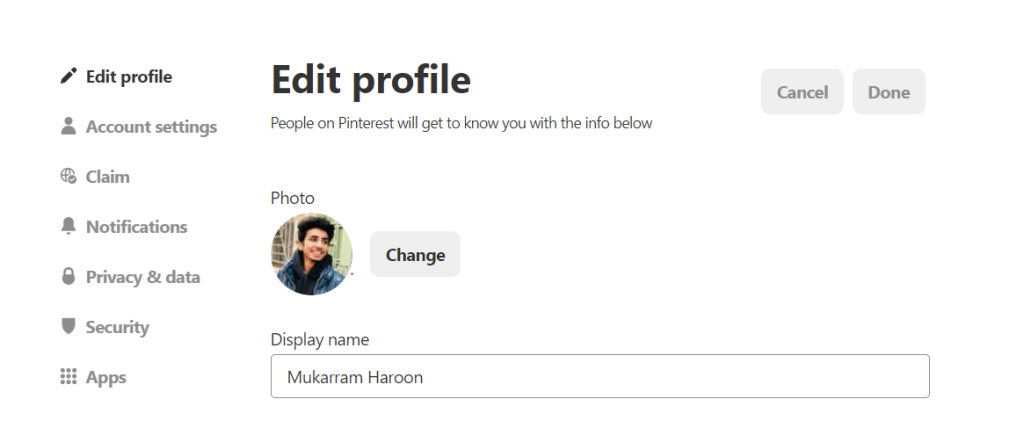
- Step 1: You should access to the Pinterest homepage and navigate to the Edit settings area. Click on the option that says “Claim”, which stays under the Edit section.
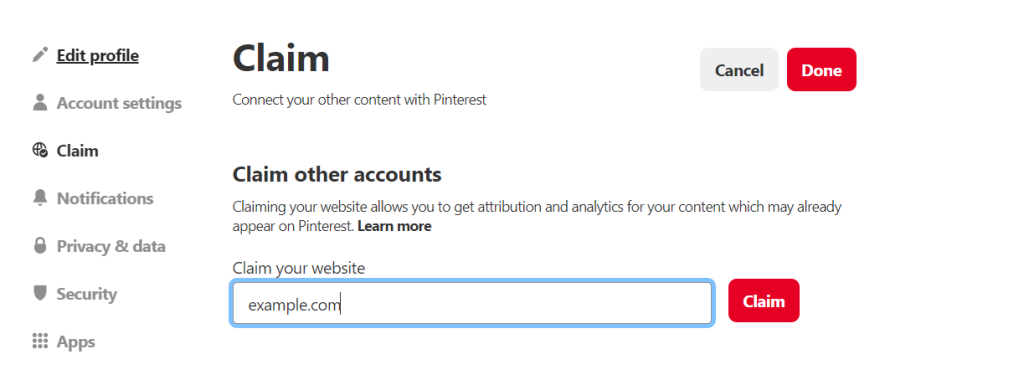
- Step 2: Now Pinterest will order you to add your website URL once you click on the Claim button.
-
Step 3: When you finish providing your website address, Pinterest will automatically send you a Meta tag that you can use to add to the head section of your site.
-
Step 4: Highlight the full meta tag on Pinterest and copy it to your clipboard by using cmd+c on a Mac or ctrl+c on Windows or a PC. Remember to select everything which includes the < and >.
-
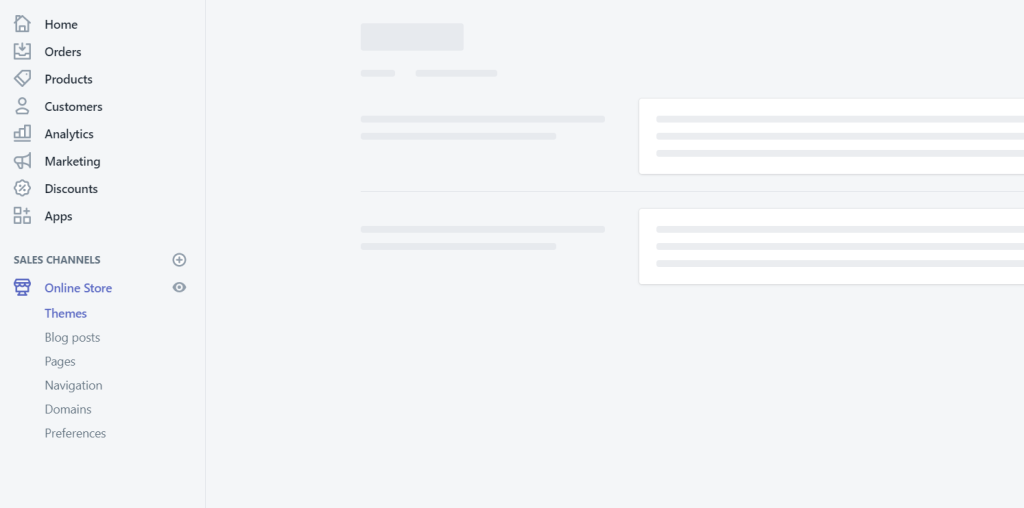
Step 5: Continue your Shopify store and click on the Online store option.
-
Step 6: Click on the Themes button and select the Actions option, which is all under Online store.
-
Step 7: After clicking on Actions, choose to edit the code.
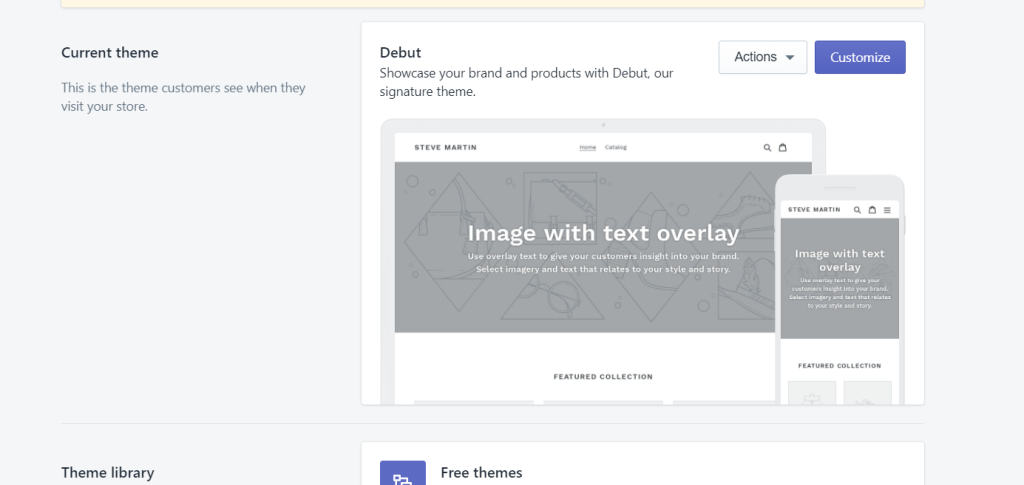
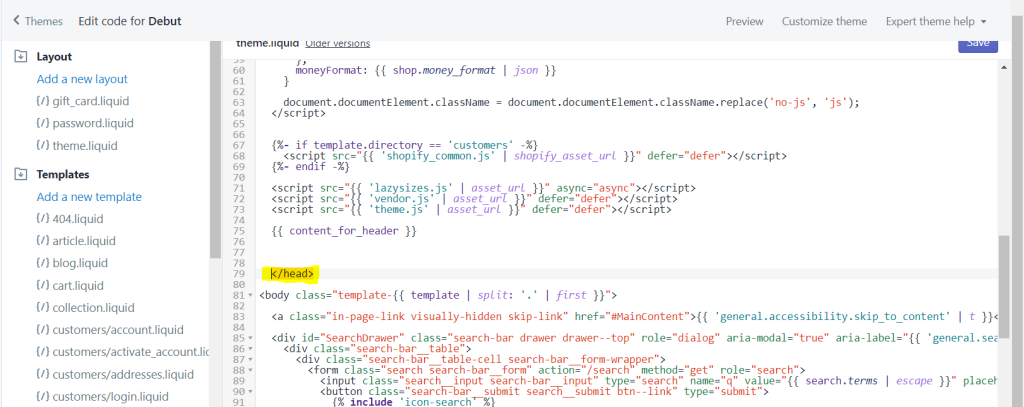
- Step 8: Find the theme.liquid which is under the Layout option. Click on it to open the file in the online code editor area.
-
Step 9: Paste the meta tag you have copied on a blank line directly under or anywhere in the top section after the opening <head> tag.
-
Step 10: Finally, click on the Save button to complete the verification steps on Pinterest. Don’t forget to exit the theme.liquid setting and go back to Pinterest. It’s time for you to click Confirm and wait a couple of seconds to complete the whole process. Once you follow all the above steps, you will surely see a globe icon that is next to your website on your Pinterest profile. What’s more, you will be sent an email to confirm from Pinterest.
Related posts:
- How to Sell on Pinterest?
- How to Connect Pinterest to Shopify
- 12+ Best Social Media Platforms for Business
Conclusion
Third-party services like Pinterest and Google Webmaster require you to verify your domain. It is important for online sellers to claim their accounts to let those platforms make sure that you are the owner of your Shopify store before providing their services to you.
Once you are claimed to be the owner of your website, it will be easier to optimize your profile, get access to analytics as well as show up your profile under Pins which you have on your site.
Hopefully, this post provides you with helpful information about the importance of claiming your website on Pinterest and instruction to carry out the task. Do not hesitate to leave a comment in the section below in case you have any questions. Share it with your friends and visit our site for more interesting posts.
Thank you!


