5 Steps to Activate Custom Fulfillment Service on Shopify
On the Shopify platform, there are many fulfillment services such as Amazon, Webgistix or Shipwire. However, you can also activate a custom fulfillment service and use it on your store, just like how you activate Shipwire. To help you understand how to actually do it, I have prepared some steps down here.
Related Posts:
- How to Activate Fulfillment by Amazon on Shopify
- How to Configuring Existing Products for Fulfillment by Rakuten Super Logistics
How to Activate a Custom Fulfillment Service
Step 1: Choose Shipping
The first thing you will have to do is going to this link and logging into your Shopify account. You will see the Setting section in the bottom left corner of the screen. In this section, choose Shipping which is between the Checkout and Taxes section.
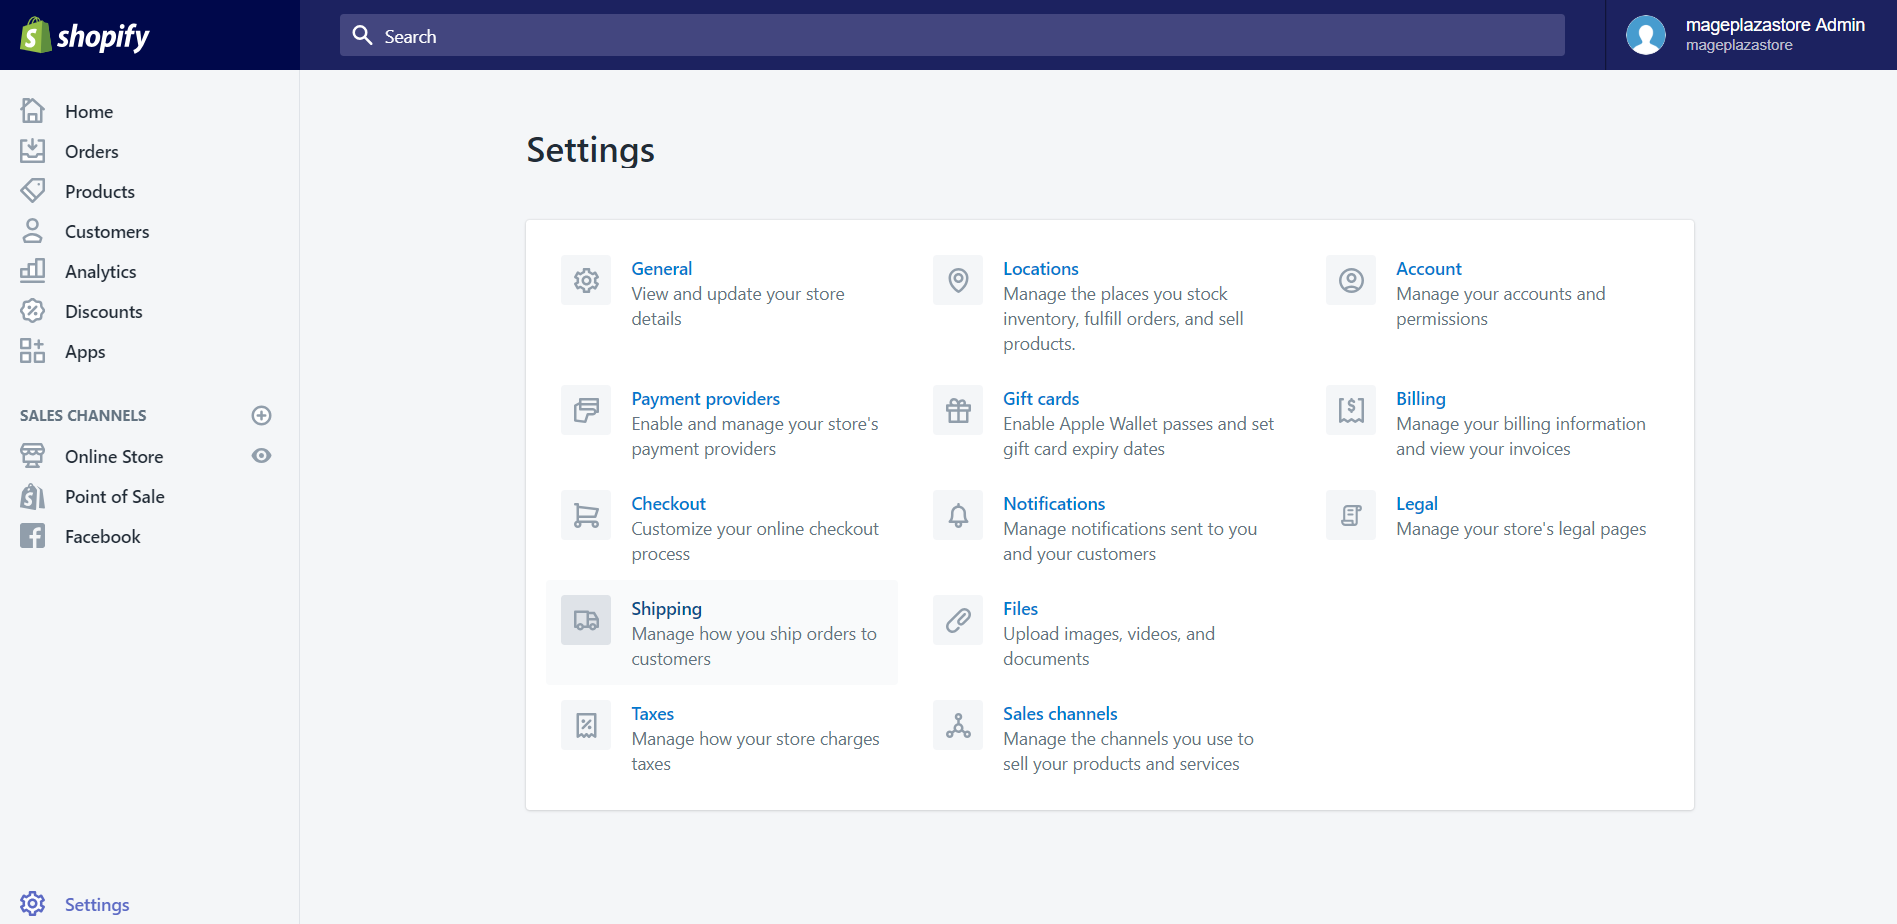
Step 2: Click Add dropshipping service
In the Shipping details screen, scroll down, and you will see the Dropshipping and fulfillment services at the bottom of the page. Afterward, click Add dropshipping services to activate a service. In case you have already added ones, and now you want to add another, you can click on the Manage services button instead.

Step 3: Click Add custom fulfillment service
In the Fulfillment and dropshipping screen, when scrolling down to the bottom of the page, you will see the Custom order fulfillment section. Click on the Add custom fulfillment service which is on the left side of the screen.

Step 4: Enter service details
In this step, a small dialog will appear, you will need to enter the information about the title of your custom fulfillment provider and the email address of them.
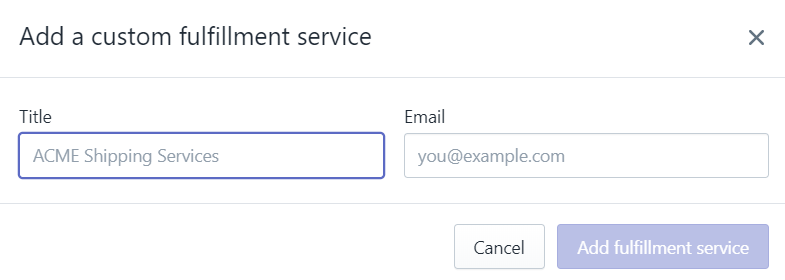
Step 5: Click Add fulfillment service
After entering all the necessary information, you need to click Add fulfillment service to save the details you have entered.

To activate a custom fulfillment service on iPhone (Click here)
-
Step 1: Choose Setting The first thing you will have to do is opening the Shopify app on your phone. Afterward, you tap
Store. In the store section, tap on theSettingbutton. -
Step 2: Tap Shipping In the second step, scroll down to the
Store settingssection. Under that section, tapShippingwhich is between theCheckoutandTaxesoption. -
Step 3: Tap Add dropshipping service In the
Shipping detailsscreen, scroll down, and you will see theDropshipping and fulfillment servicesat the bottom of the page. Afterward, tapAdd dropshippingservices to activate a service. In case you have already added ones, and now you want to add another, you can tap on theManage servicesbutton instead. -
Step 4: Tap Add custom fulfillment service In the
Fulfillment and dropshippingscreen, when scrolling down to the bottom of the page, you will see theCustom order fulfillmentsection. Tap on theAdd custom fulfillment service. -
Step 5: Enter details In this step, a small dialog will appear, you will need to enter the information about the
titleof your custom fulfillment provider and theemailaddress of them. -
Step 6: Tap Add fulfillment service After entering all the necessary information, you need to tap
Add fulfillment serviceto save the details you have entered.
To activate a custom fulfillment service on Android (Click here)
-
Step 1: Choose Setting The first thing you will have to do is opening the Shopify app on your phone. Afterward, you tap
Store. In the store section, tap on theSettingbutton.
-
Step 2: Tap Shipping In the second step, scroll down to the
Store settingssection. Under that section, tapShippingwhich is between theCheckoutandTaxesoption.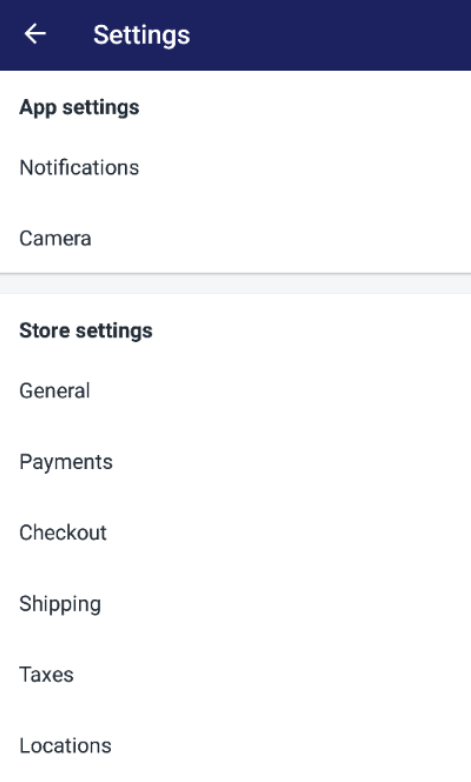
-
Step 3: Tap Add dropshipping service In the
Shipping detailsscreen, scroll down, and you will see theDropshipping and fulfillment servicesat the bottom of the page. Afterward, tapAdd dropshippingservices to activate a service. In case you have already added ones, and now you want to add another, you can tap on theManage servicesbutton instead.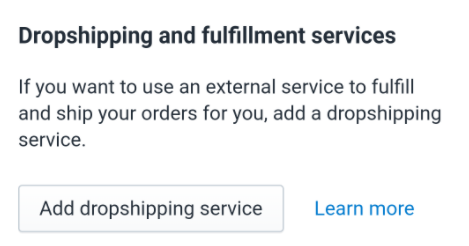
-
Step 4: Tap Add custom fulfillment service In the
Fulfillment and dropshippingscreen, when scrolling down to the bottom of the page, you will see theCustom order fulfillmentsection. Tap on theAdd custom fulfillment service.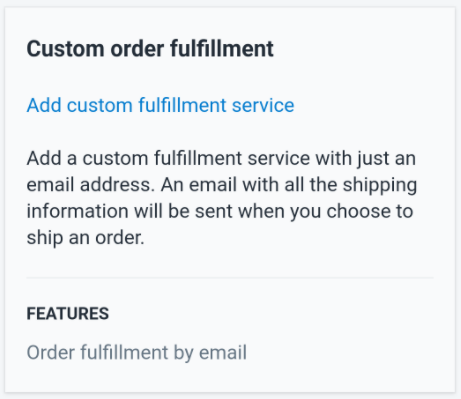
-
Step 5: Enter details In this step, a small dialog will appear, you will need to enter the information about the
titleof your custom fulfillment provider and theemailaddress of them.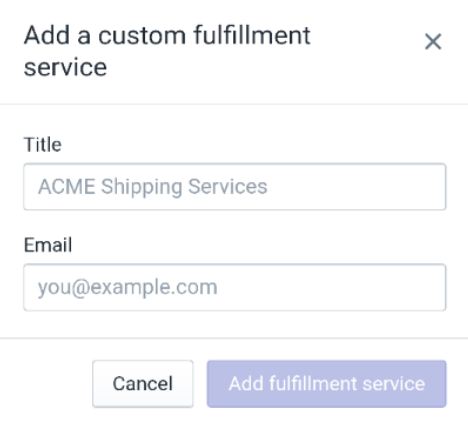
-
Step 6: Tap Add fulfillment service After entering all the necessary information, you need to tap
Add fulfillment serviceto save the details you have entered.
Conclusion
The above information is the tutorial on How to Activate Custom Fulfillment Service on Shopify. I hope that this instruction will support you and your crew when using the customer services. For further information, check out our other posts about adding and managing domains.


