How to Add Background Image or Color to the Main Content Area
It is possible for you to add a background image or color to the main content area of the checkout page. However, remember that you can not add both of them together since it will block the view of your customers because it is the area where your customers enter their shipping information. So make sure that you only add one of them.
Related Posts:
- 6 Steps to Add an Image to a Blog Post on Shopify
- How to upload a background image for the banner on Shopify
- How to add a background image or color to the order summary on Shopify
- How to Add a Product Image on Shopify
The below is an instruction which is written by me on the topic how to add a background image or color to the main content area on Shopify. This guideline is very detailed so make sure that you read it carefully to follow the instruction correctly.
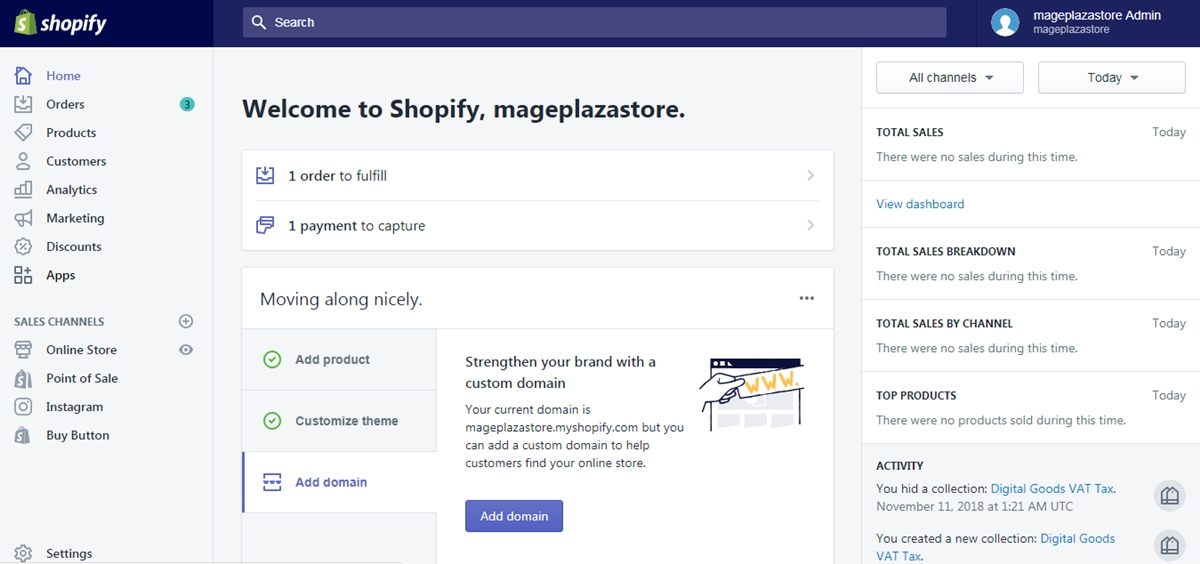
Step 1: Go to Settings -> Checkout
After you logged into your account, look at the left bottom of the screen and find the button named Settings and click on it to continue.
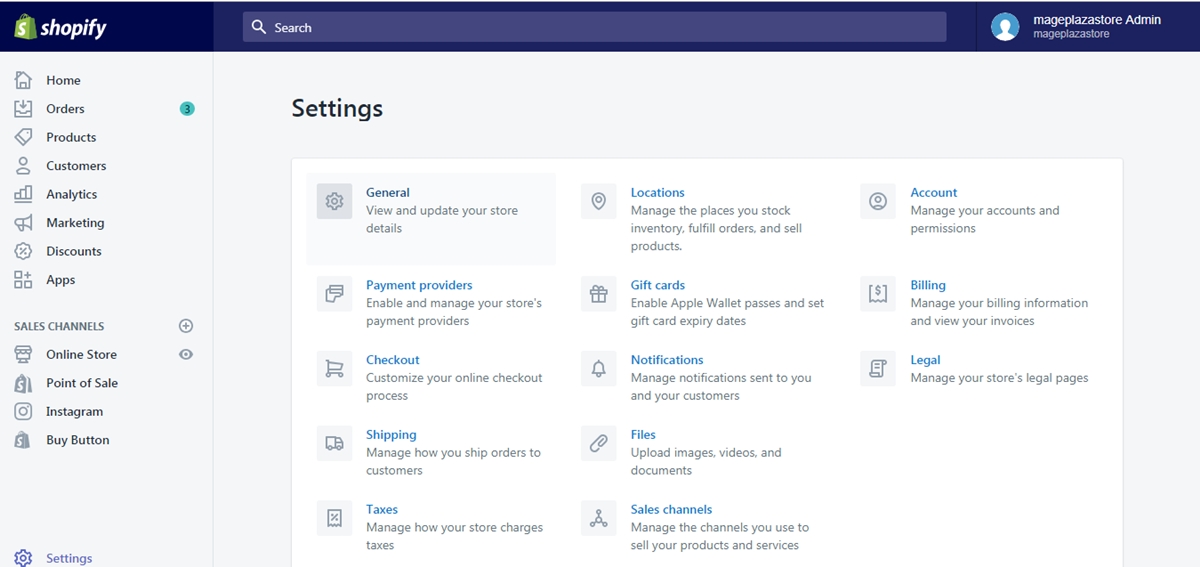
At the Settings page, find the Checkout button and click on it.
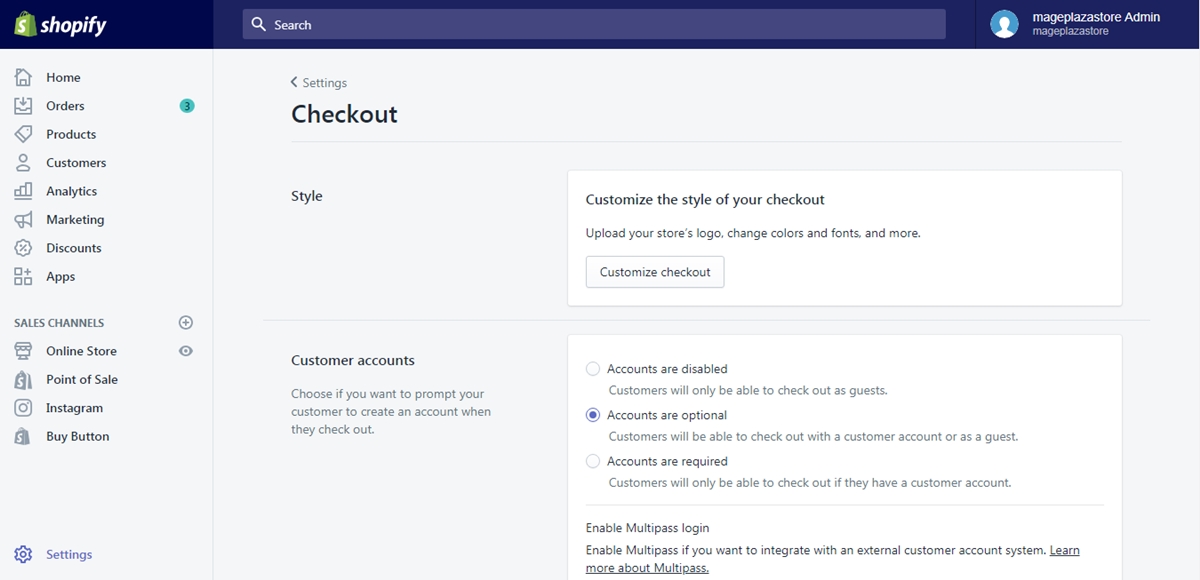
Step 2: Click Customize checkout
Inside the checkout page, you can see the Style area, in that area, click on the button named Customize checkout to see the theme editor.
Step 3: Add a background image or color
From the theme editor, scroll down to see the Main content area field.
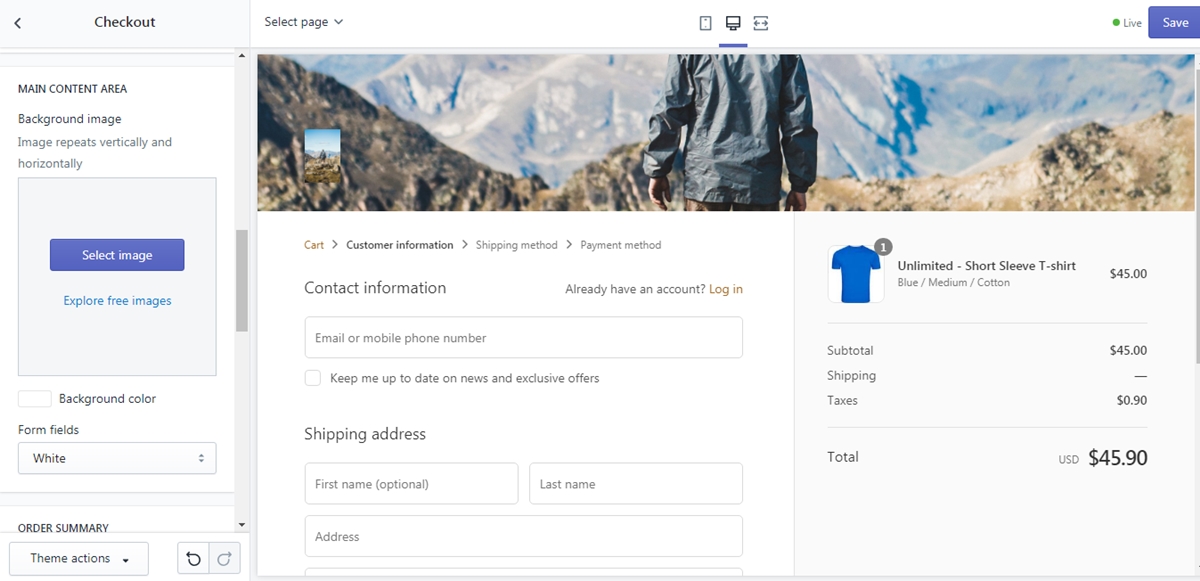
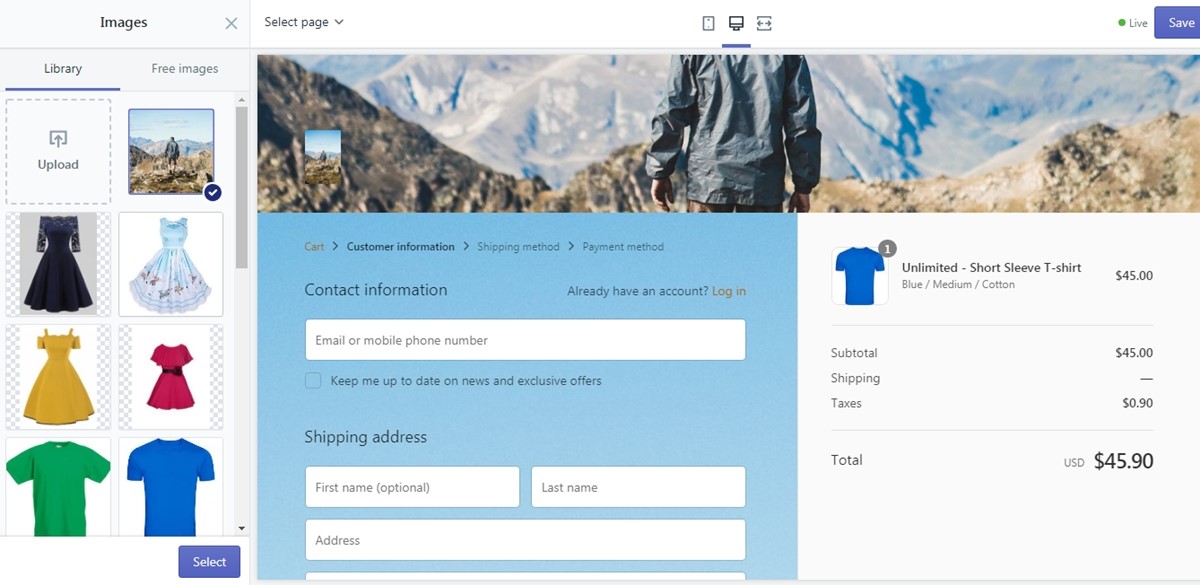
- If you plan to add an image to the main content area, click
Selectimage and upload or choose an existing image from the library.
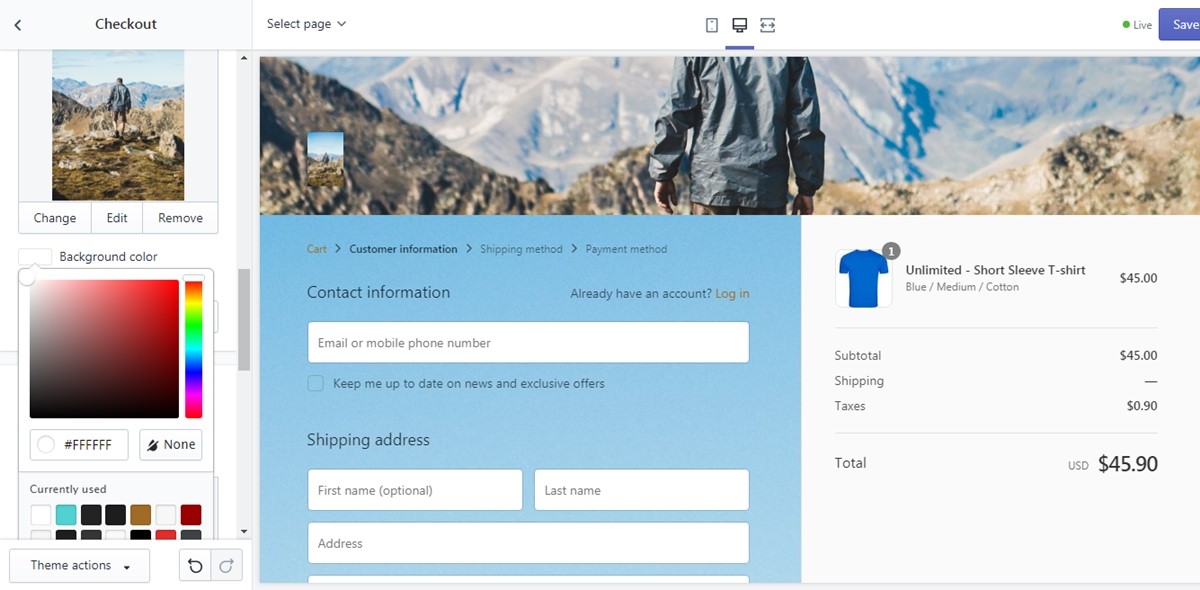
- If you plan to add color to the main content area, click on the box to choose a color.
Step 4: Saving
When you finished all the steps above, click Save to save all the changes.
To add a background image or color to the main content area on iPhone (Click here)
- Step 1: Go to Store -> Settings
When you get access to the home page of your shop from the app, go to Store button and continue by tapping the Settings section on that page.
- Step 2: Tap Checkout
From the store settings section, you can see an option named Checkout. Click on that option to go to the next step.
- Step 3: Tap Customize checkout
Inside the page, there is a field named style. From that field, tap Customize checkout to see the theme editor.
- Step 4: Add a background color or image
From the theme editor, scroll down to see the Main content area field.
-
If you plan to add an image to the main content area, click
Selectimage and upload or choose an existing image from the library. -
If you plan to add color to the main content area, click on the box to choose a color.
-
Step 5: Saving
When you finished all the steps above, click Save to save all the changes.
To add a background image or color to the main content area on Android (Click here)
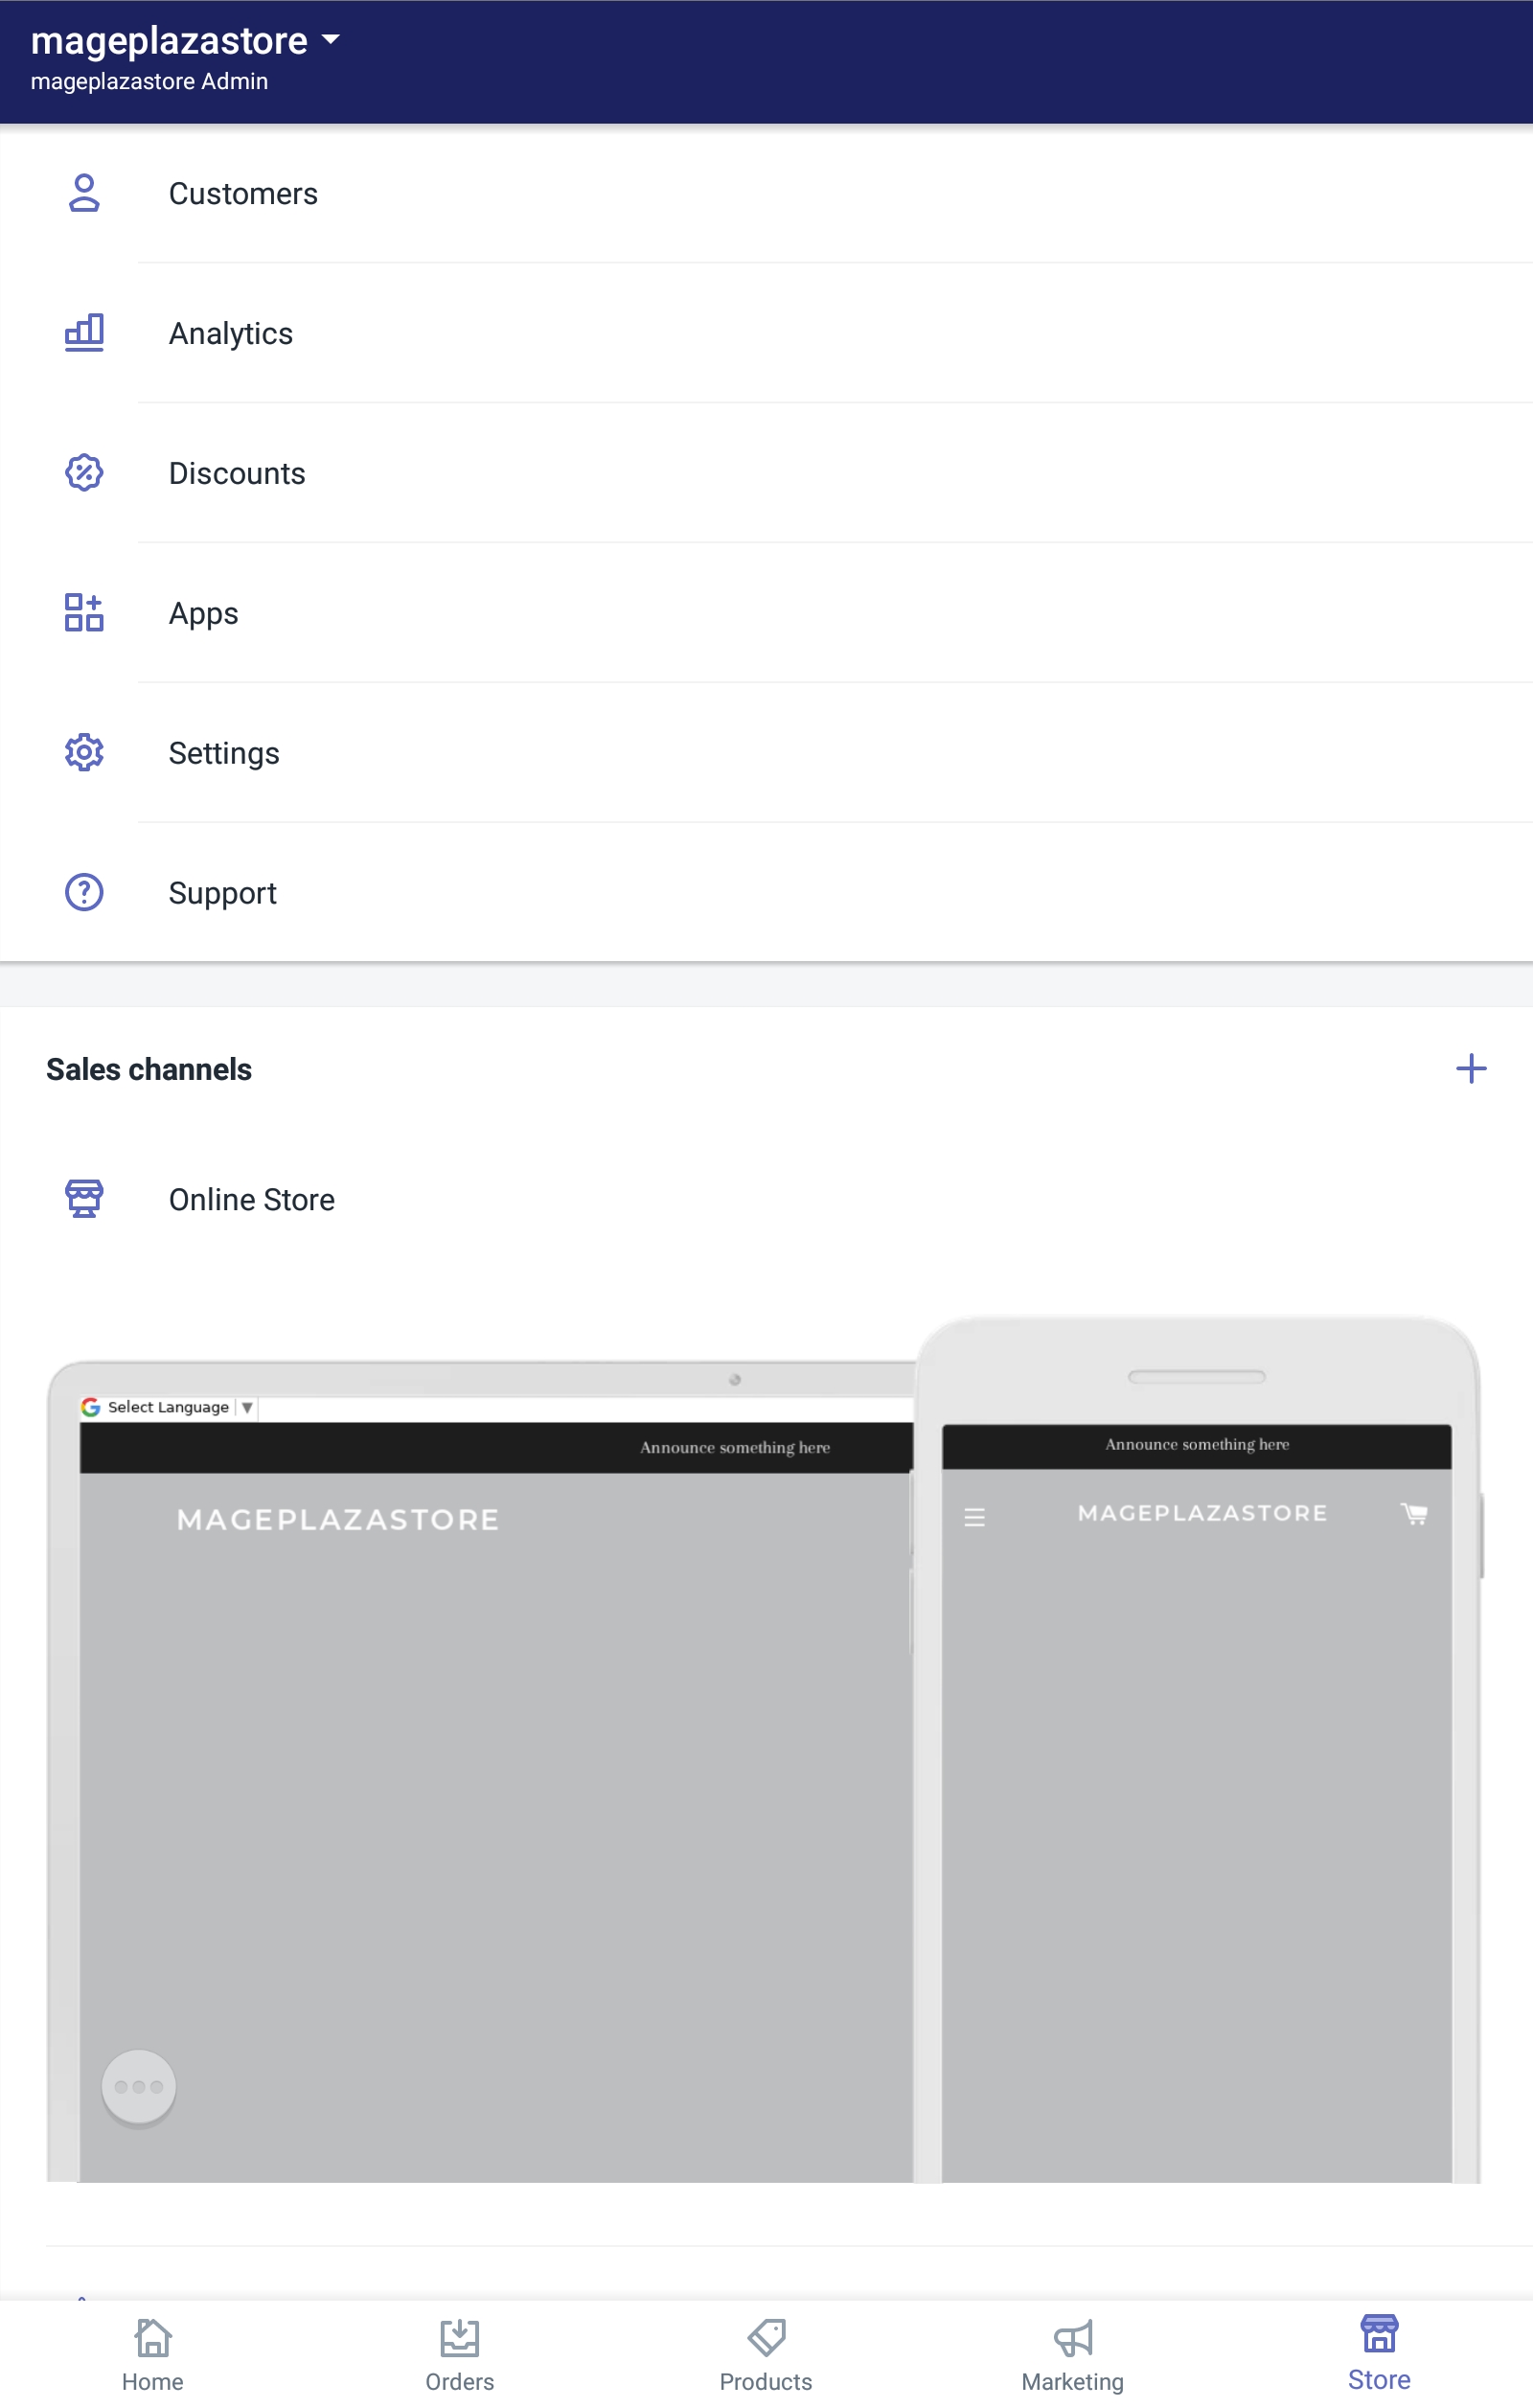
- Step 1: Go to Store > Settings
When you get access to the home page of your shop from the app, go to Store button and continue by tapping the Settings section on that page.
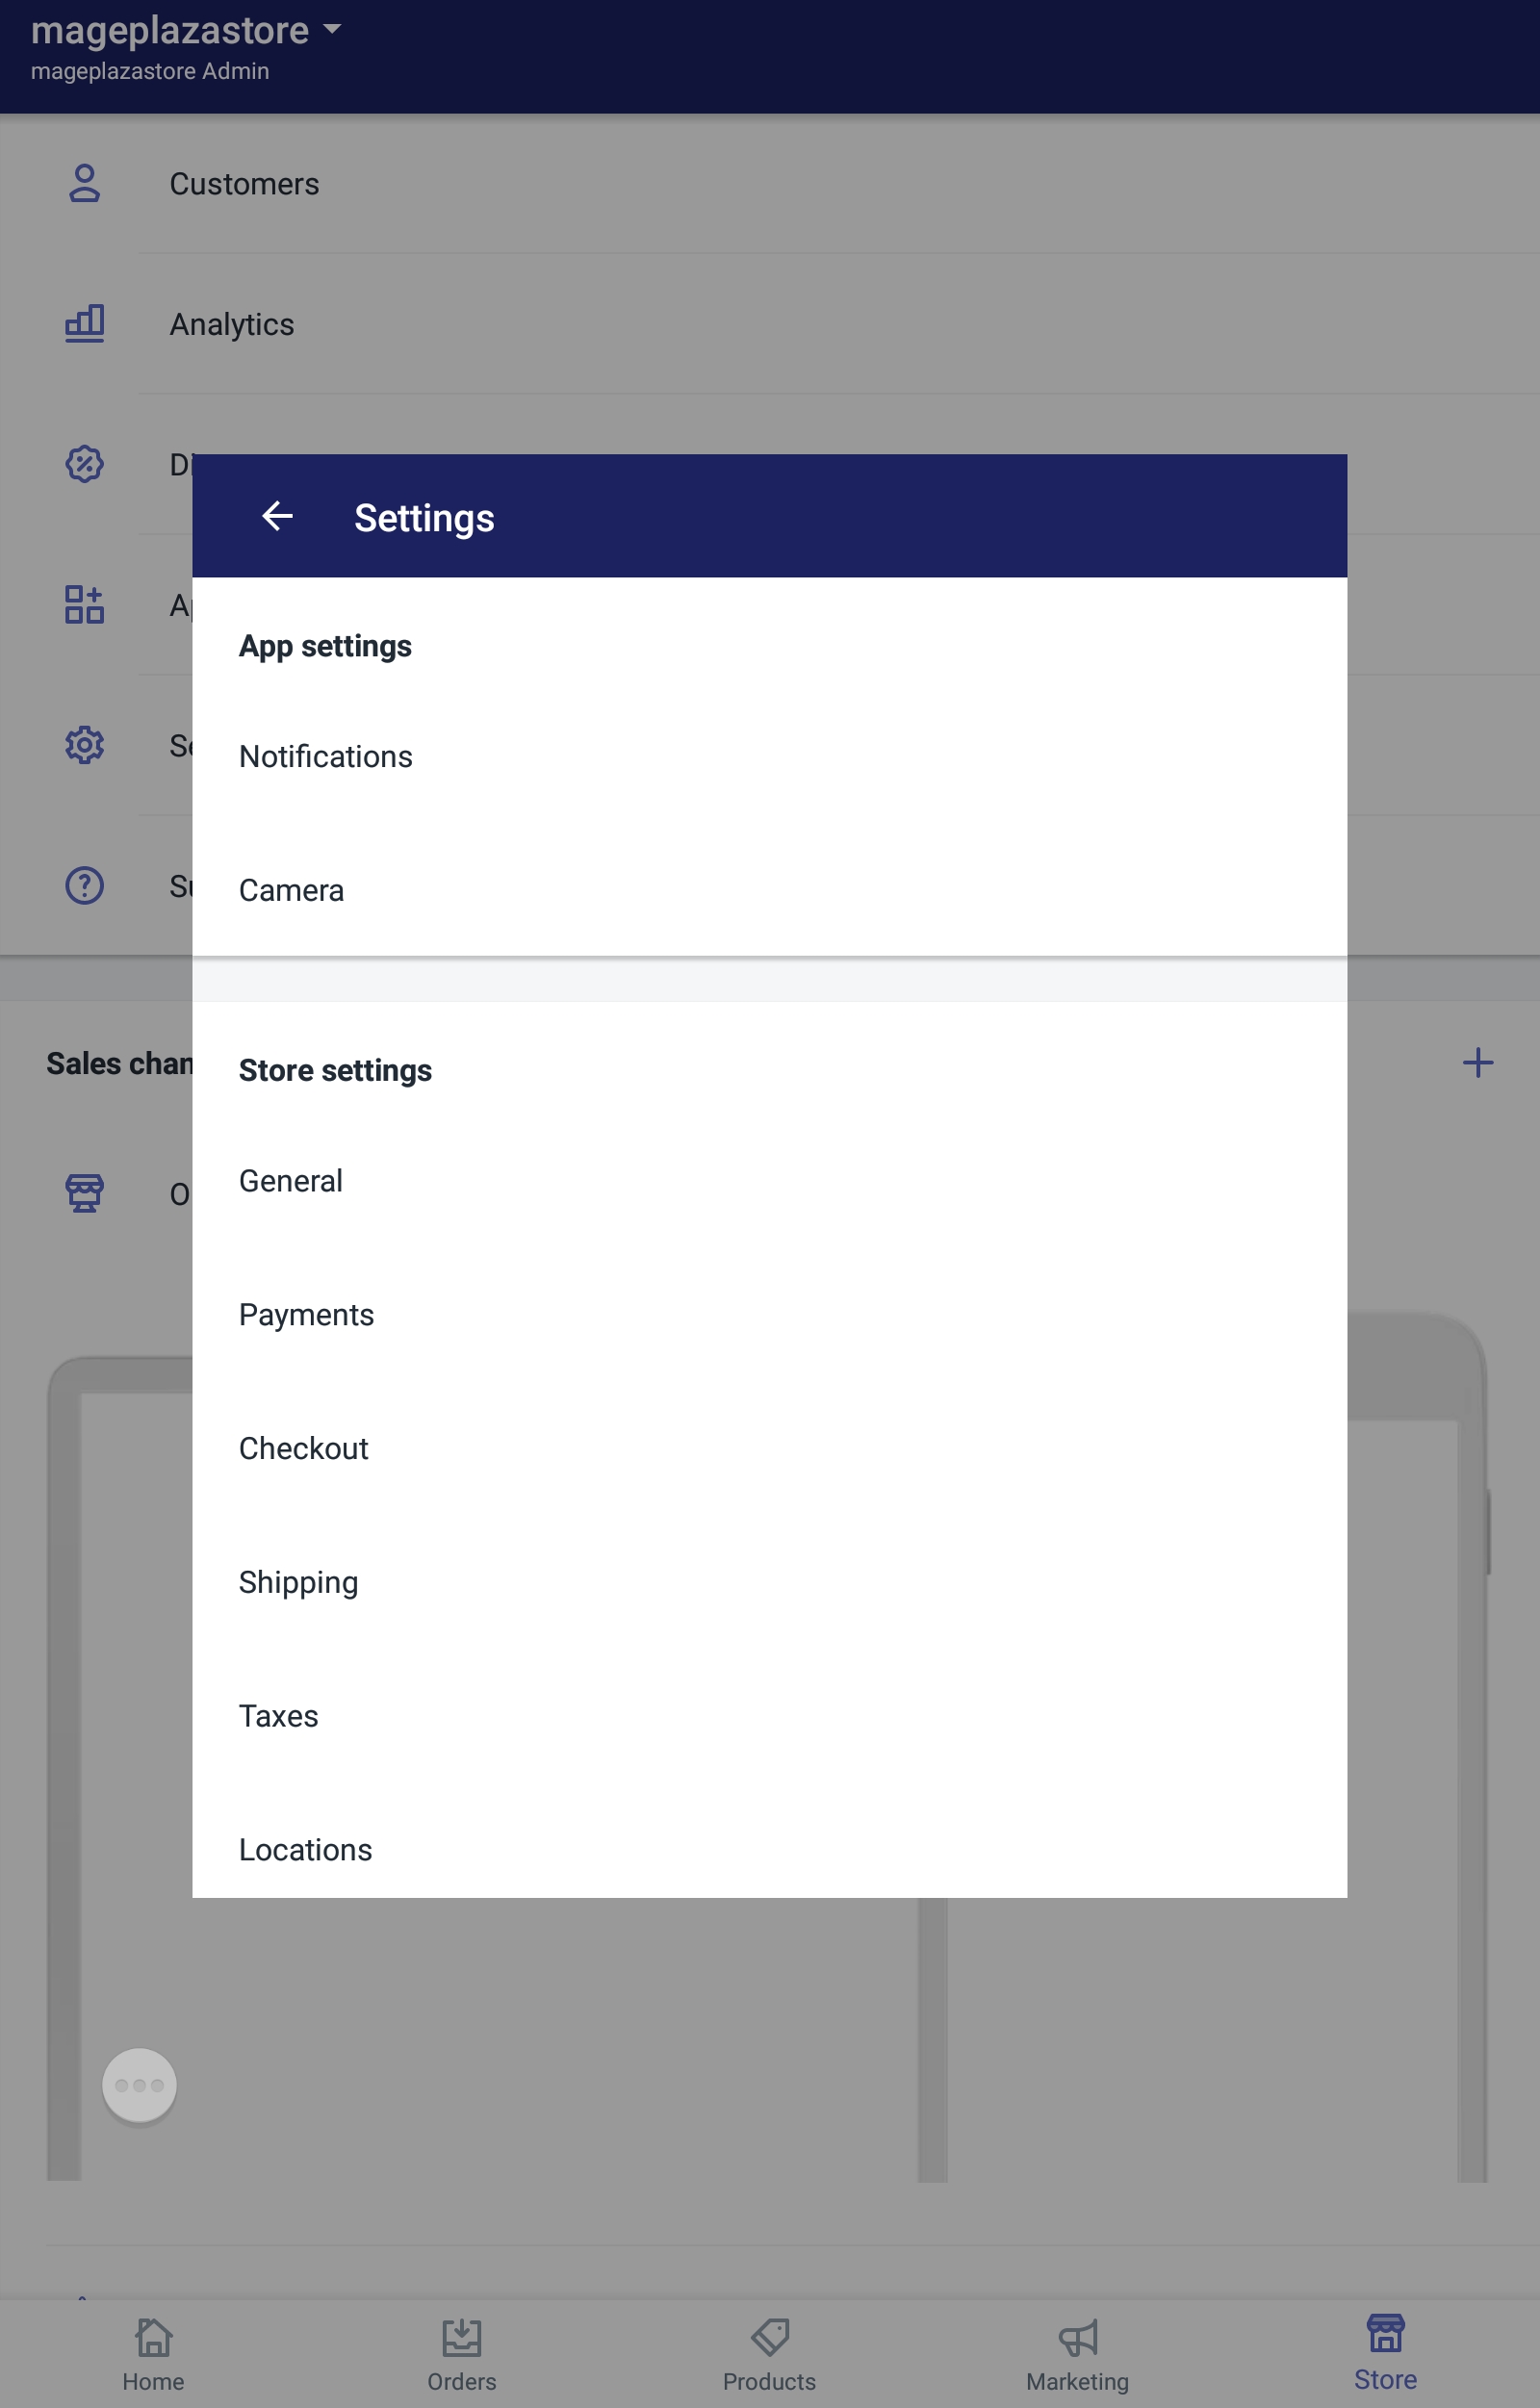
- Step 2: Tap Checkout
From the store settings section, you can see an option named Checkout. Click on that option to go to the next step.
- Step 3: Tap Customize checkout
Inside the page, there is a field named style. From that field, tap Customize checkout to see the theme editor.
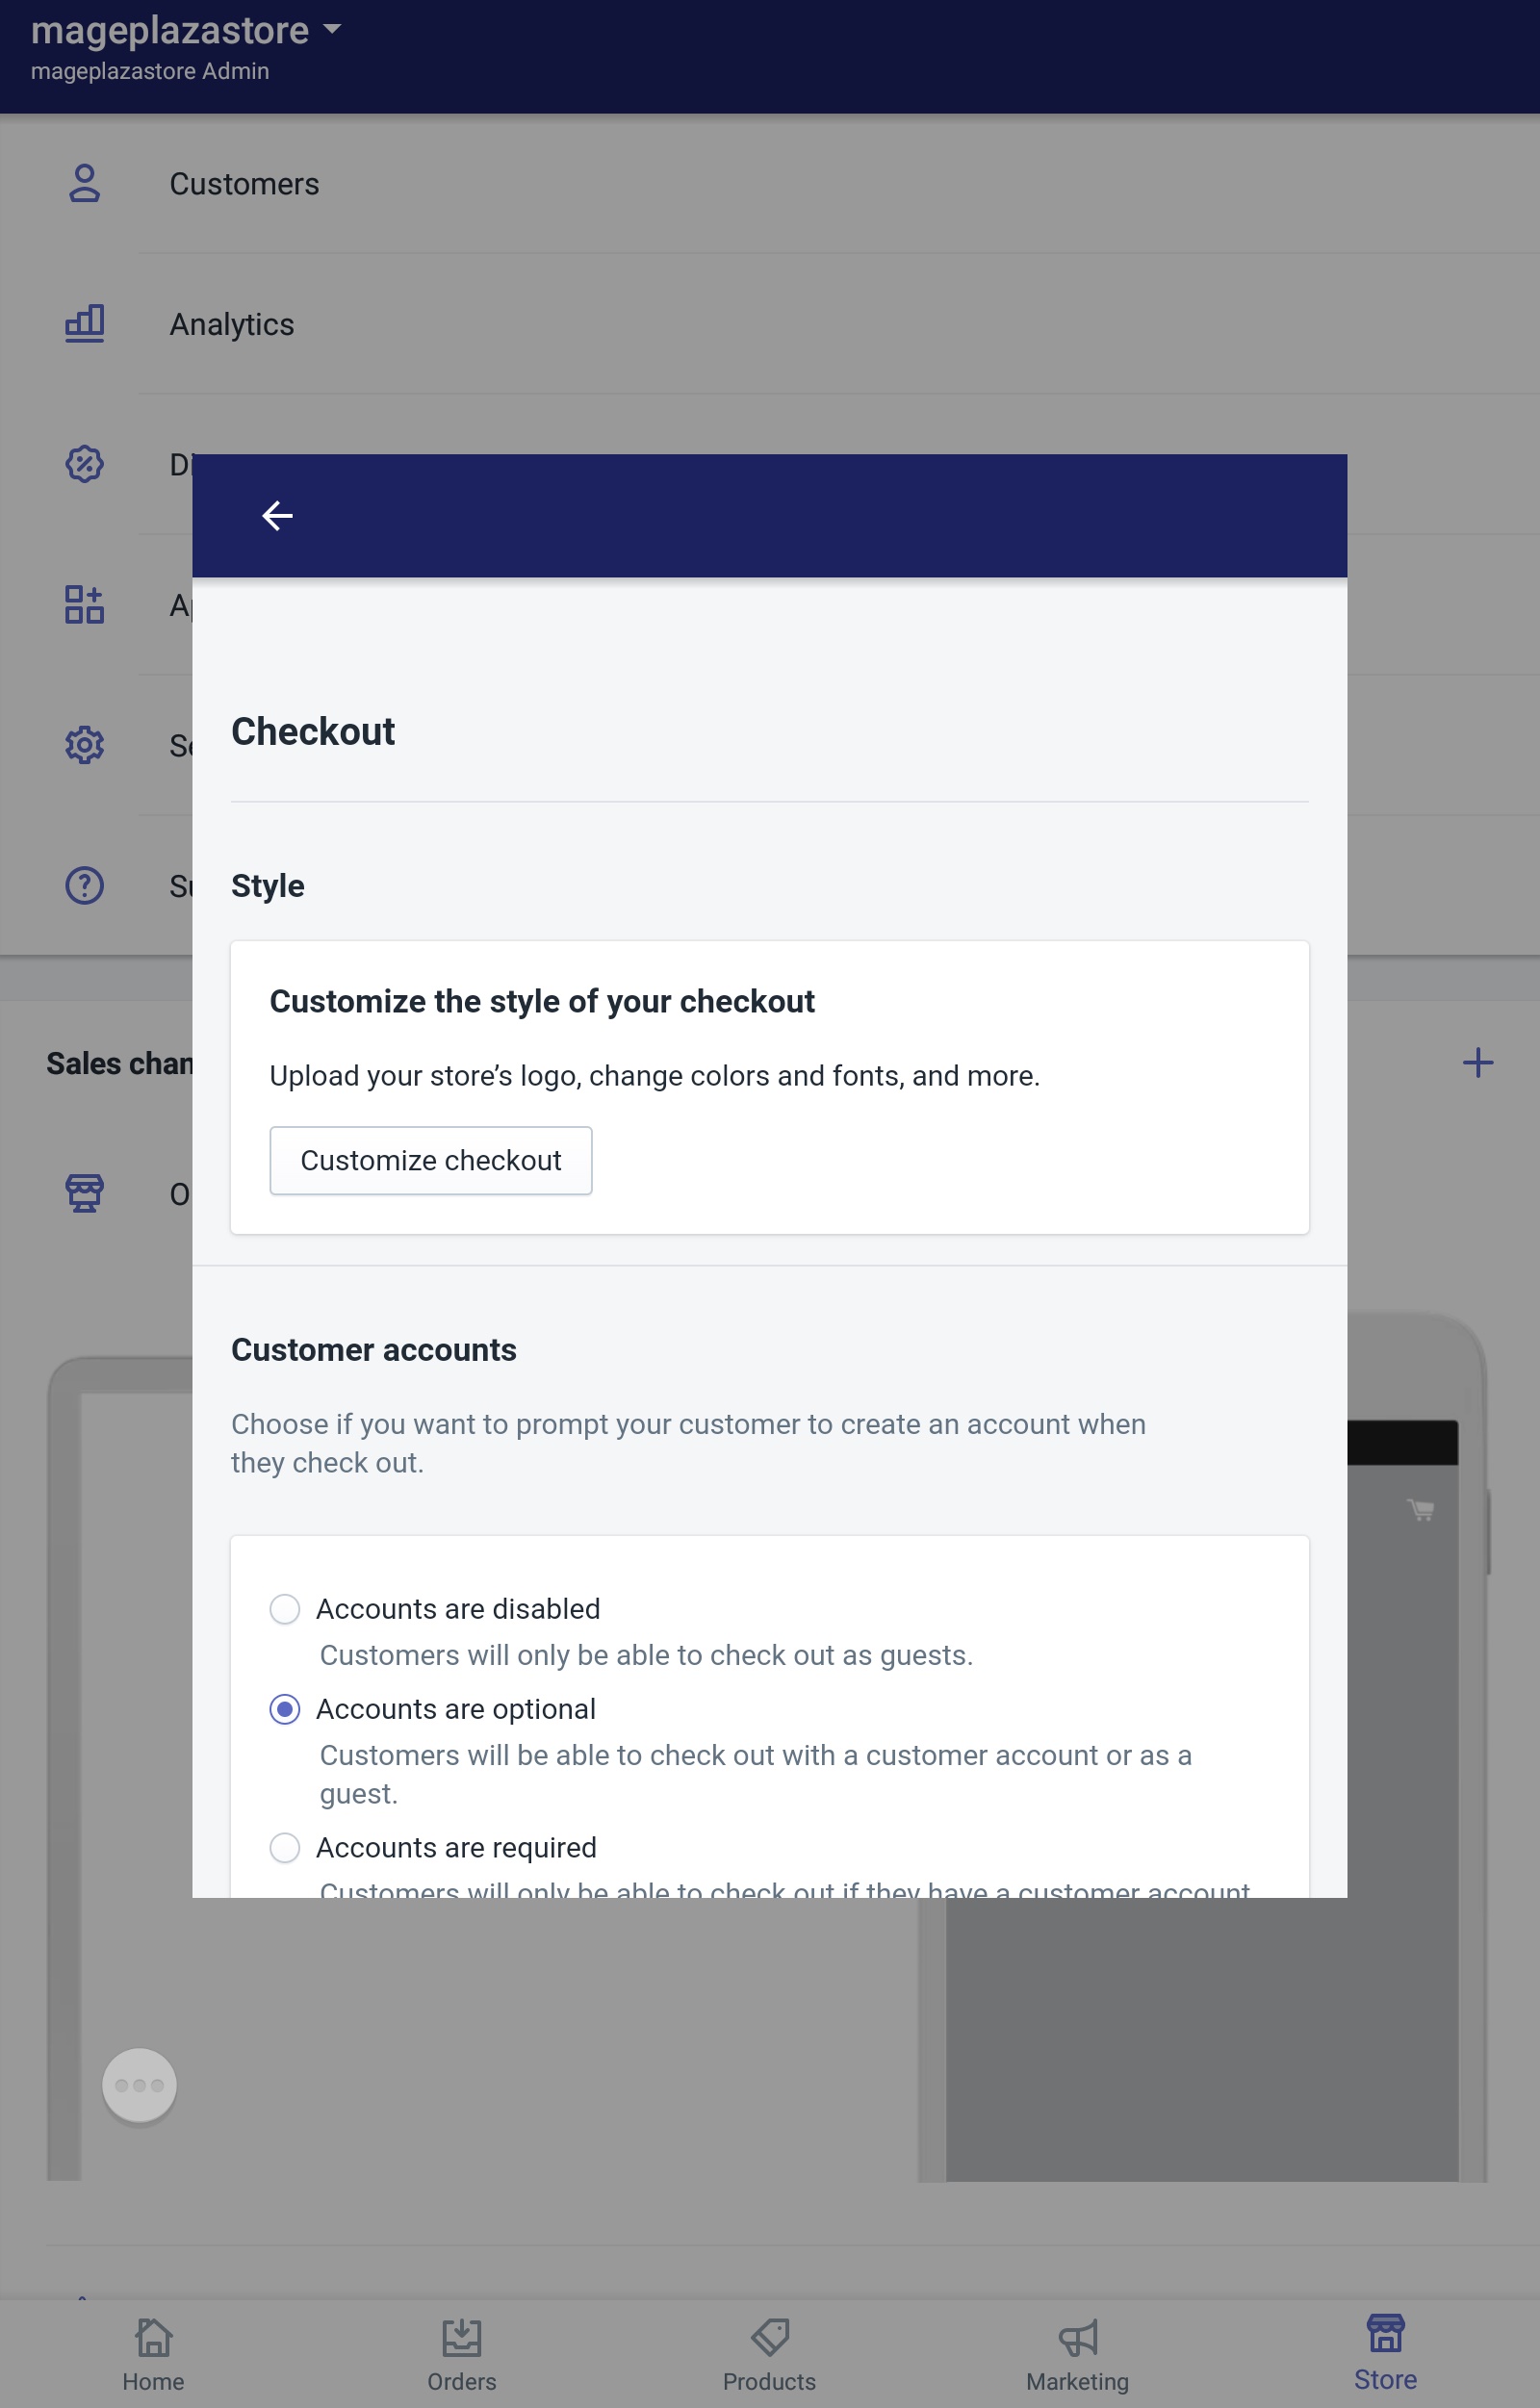
- Step 4: Add a background color or image
From the theme editor, scroll down to see the Main content area field.
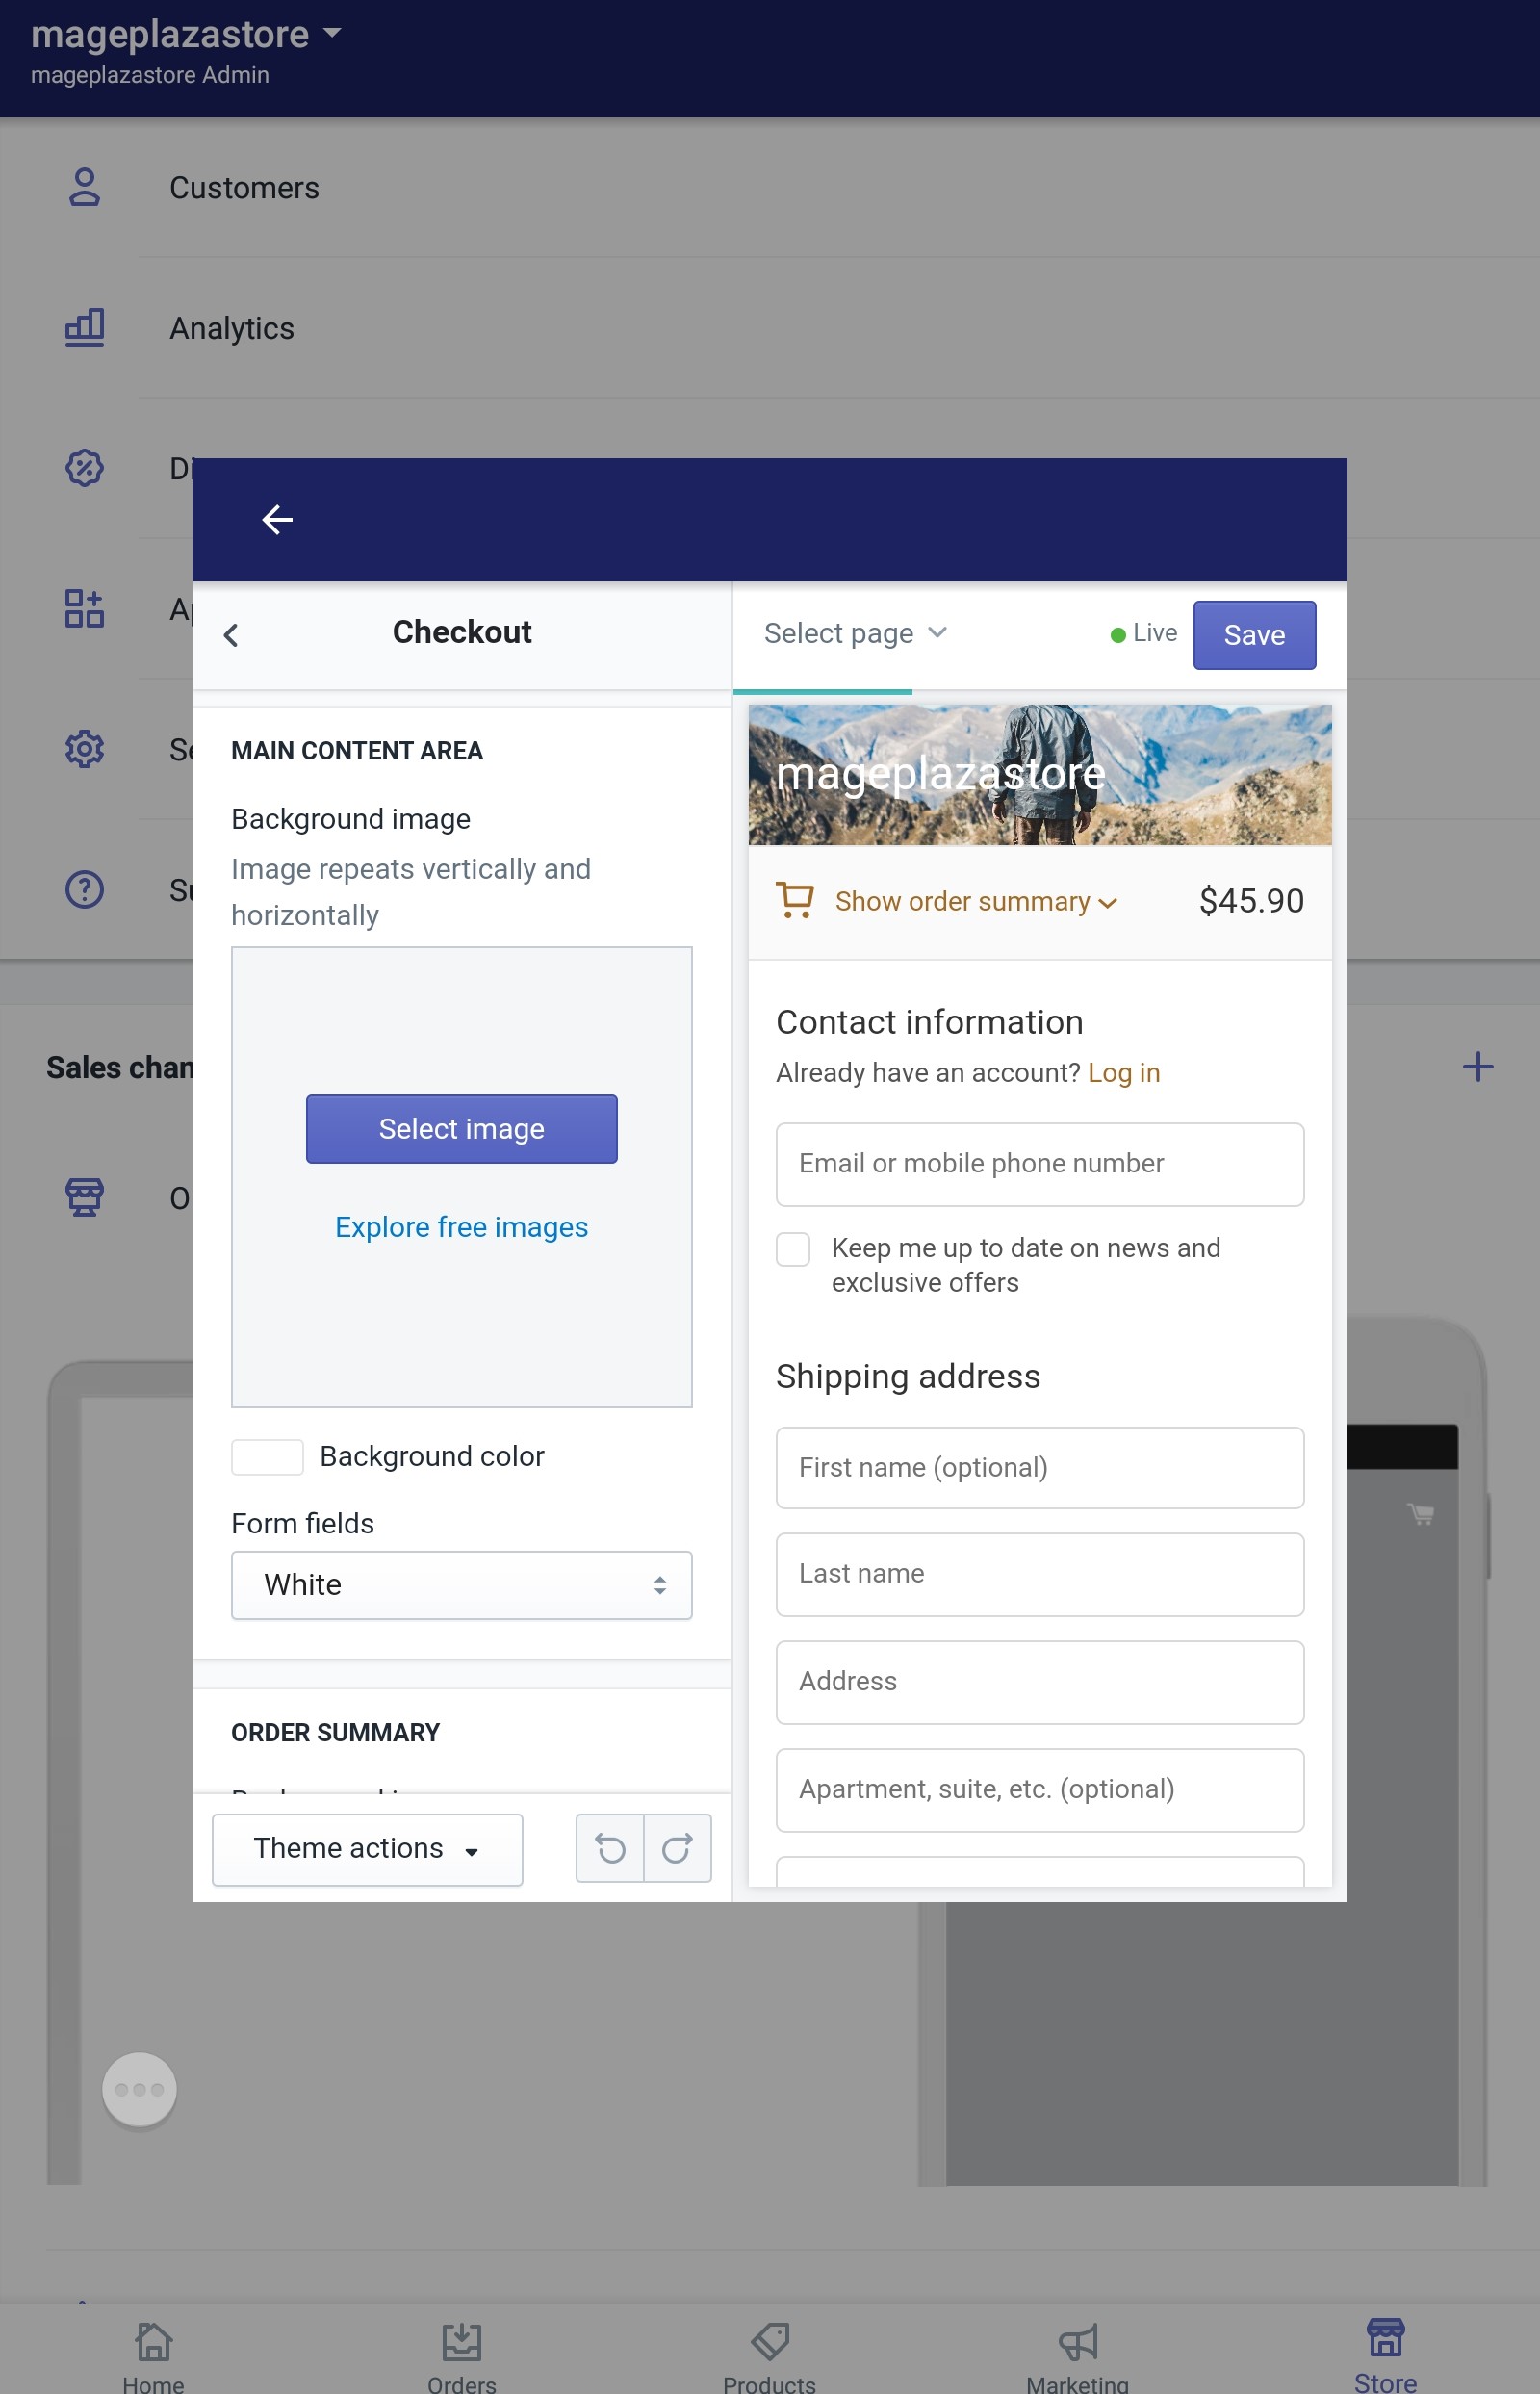
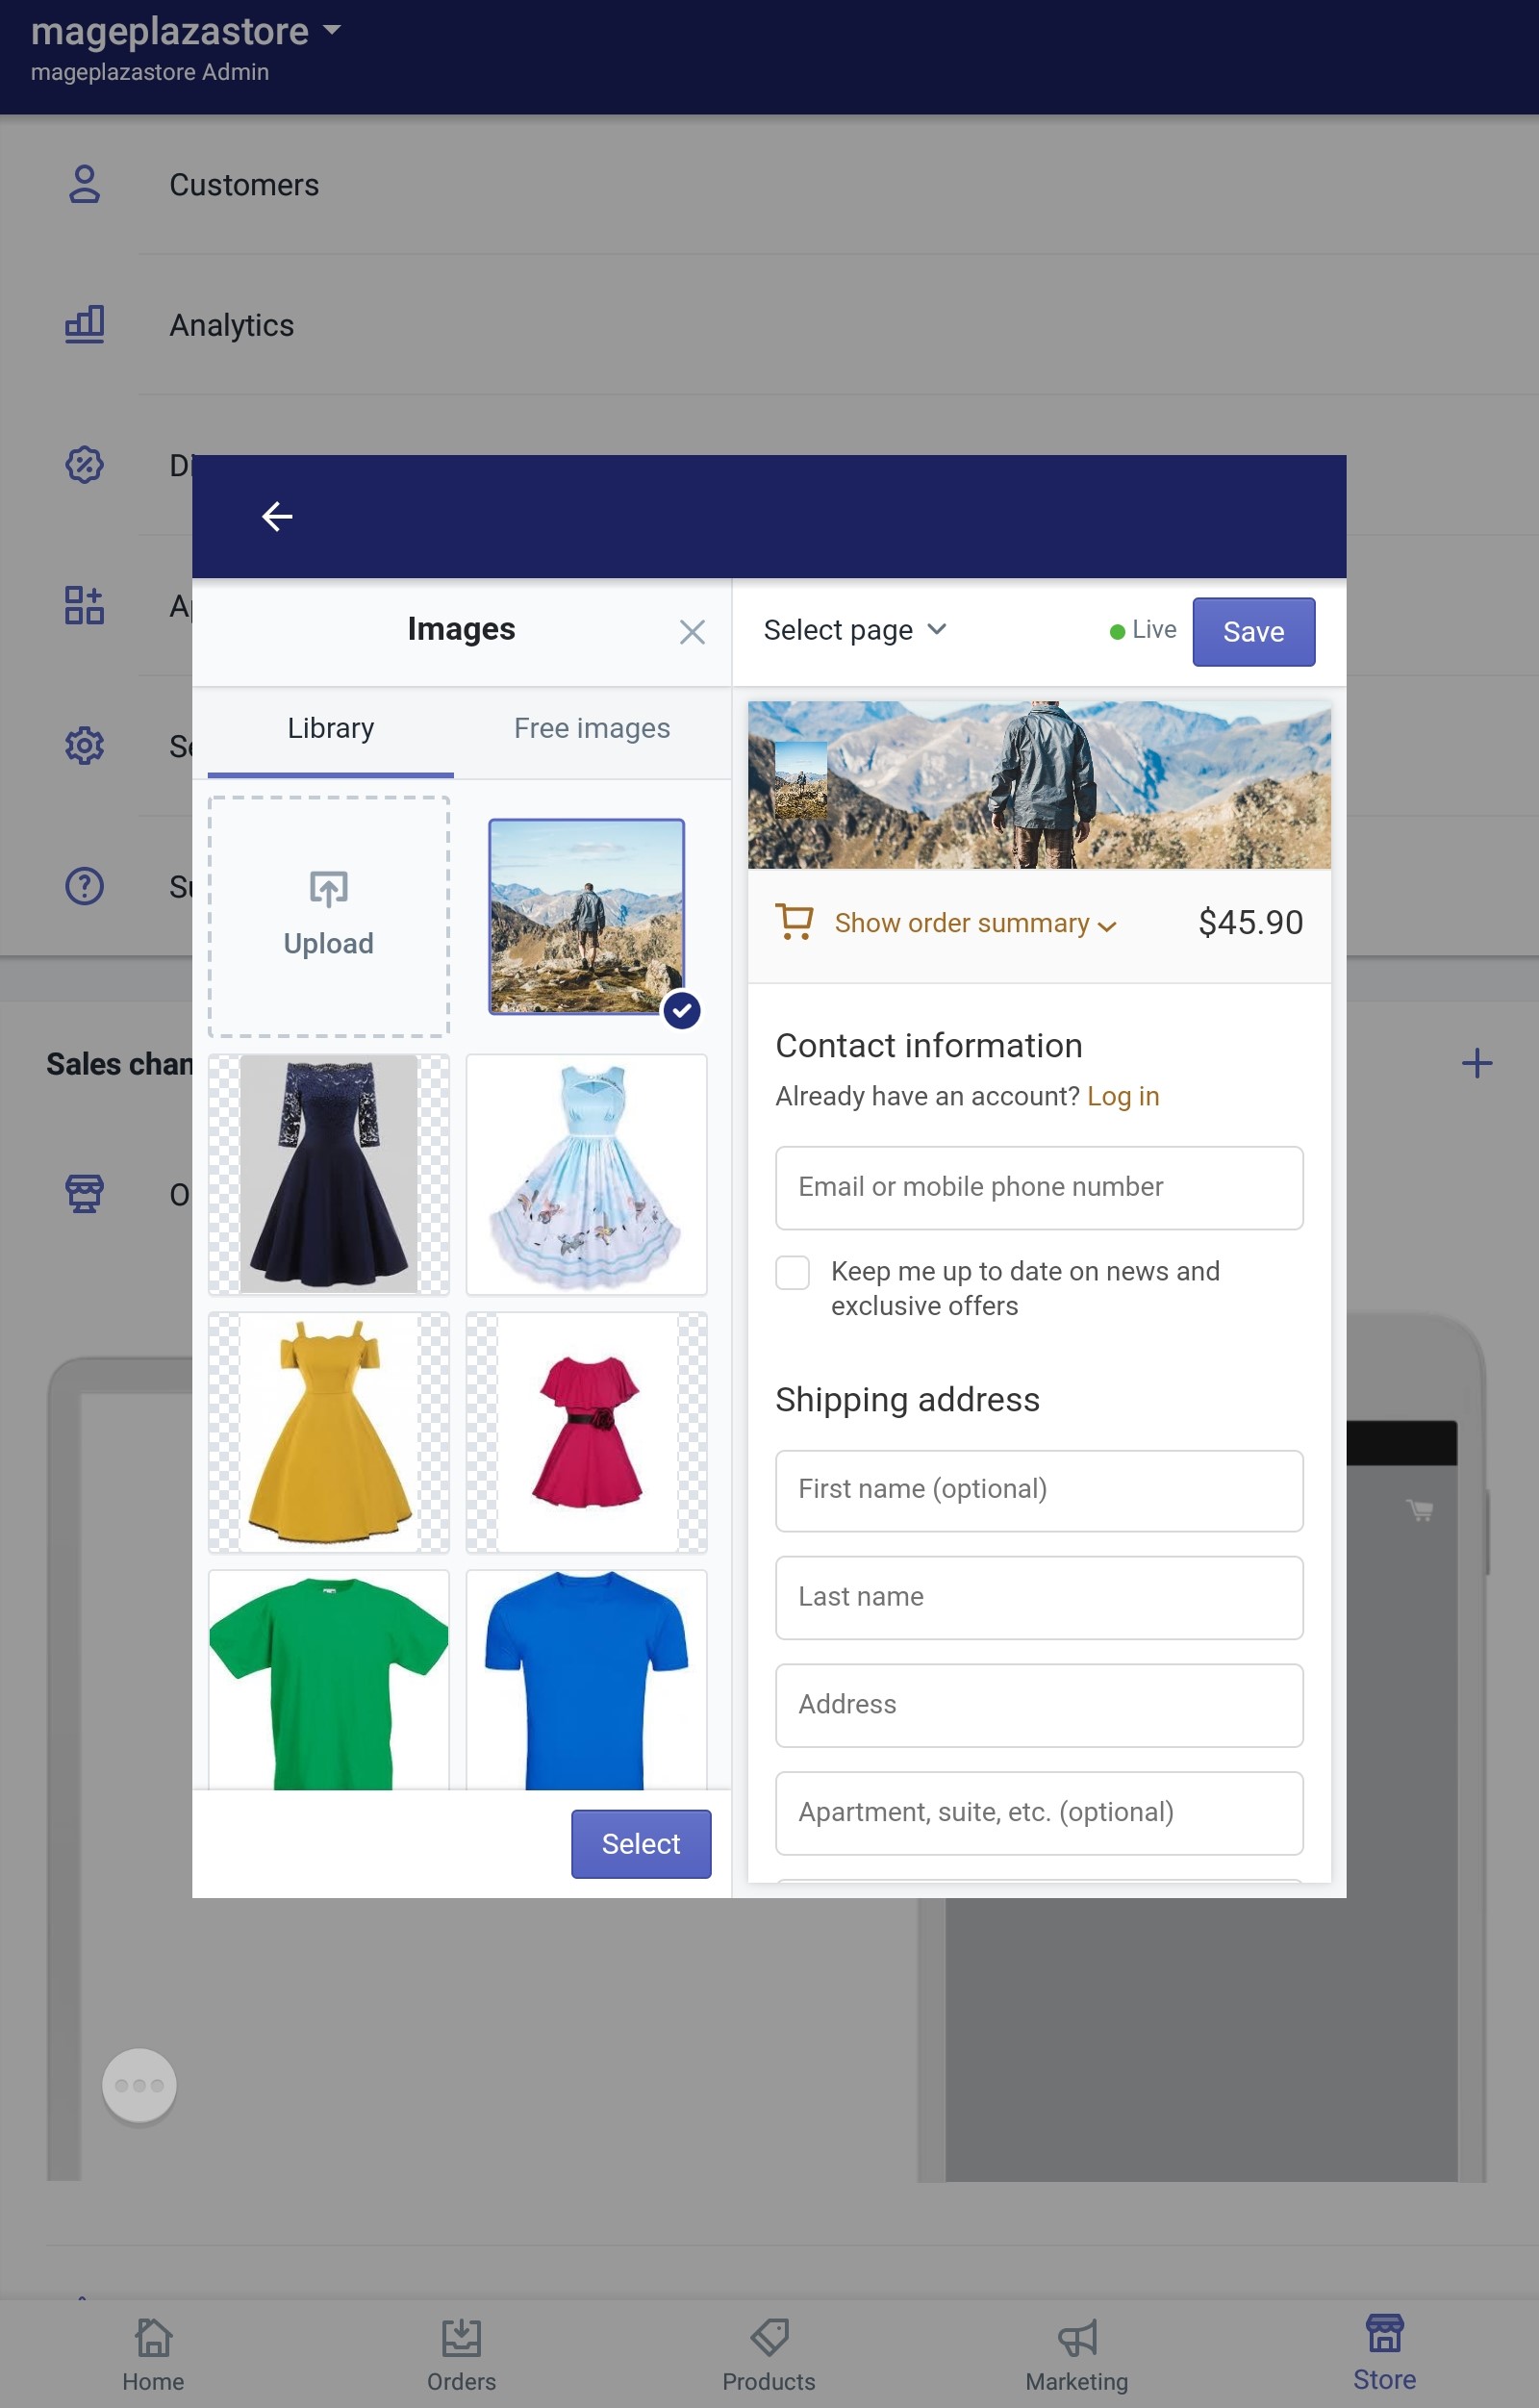
- If you plan to add an image to the main content area, click
Selectimage and upload or choose an existing image from the library.
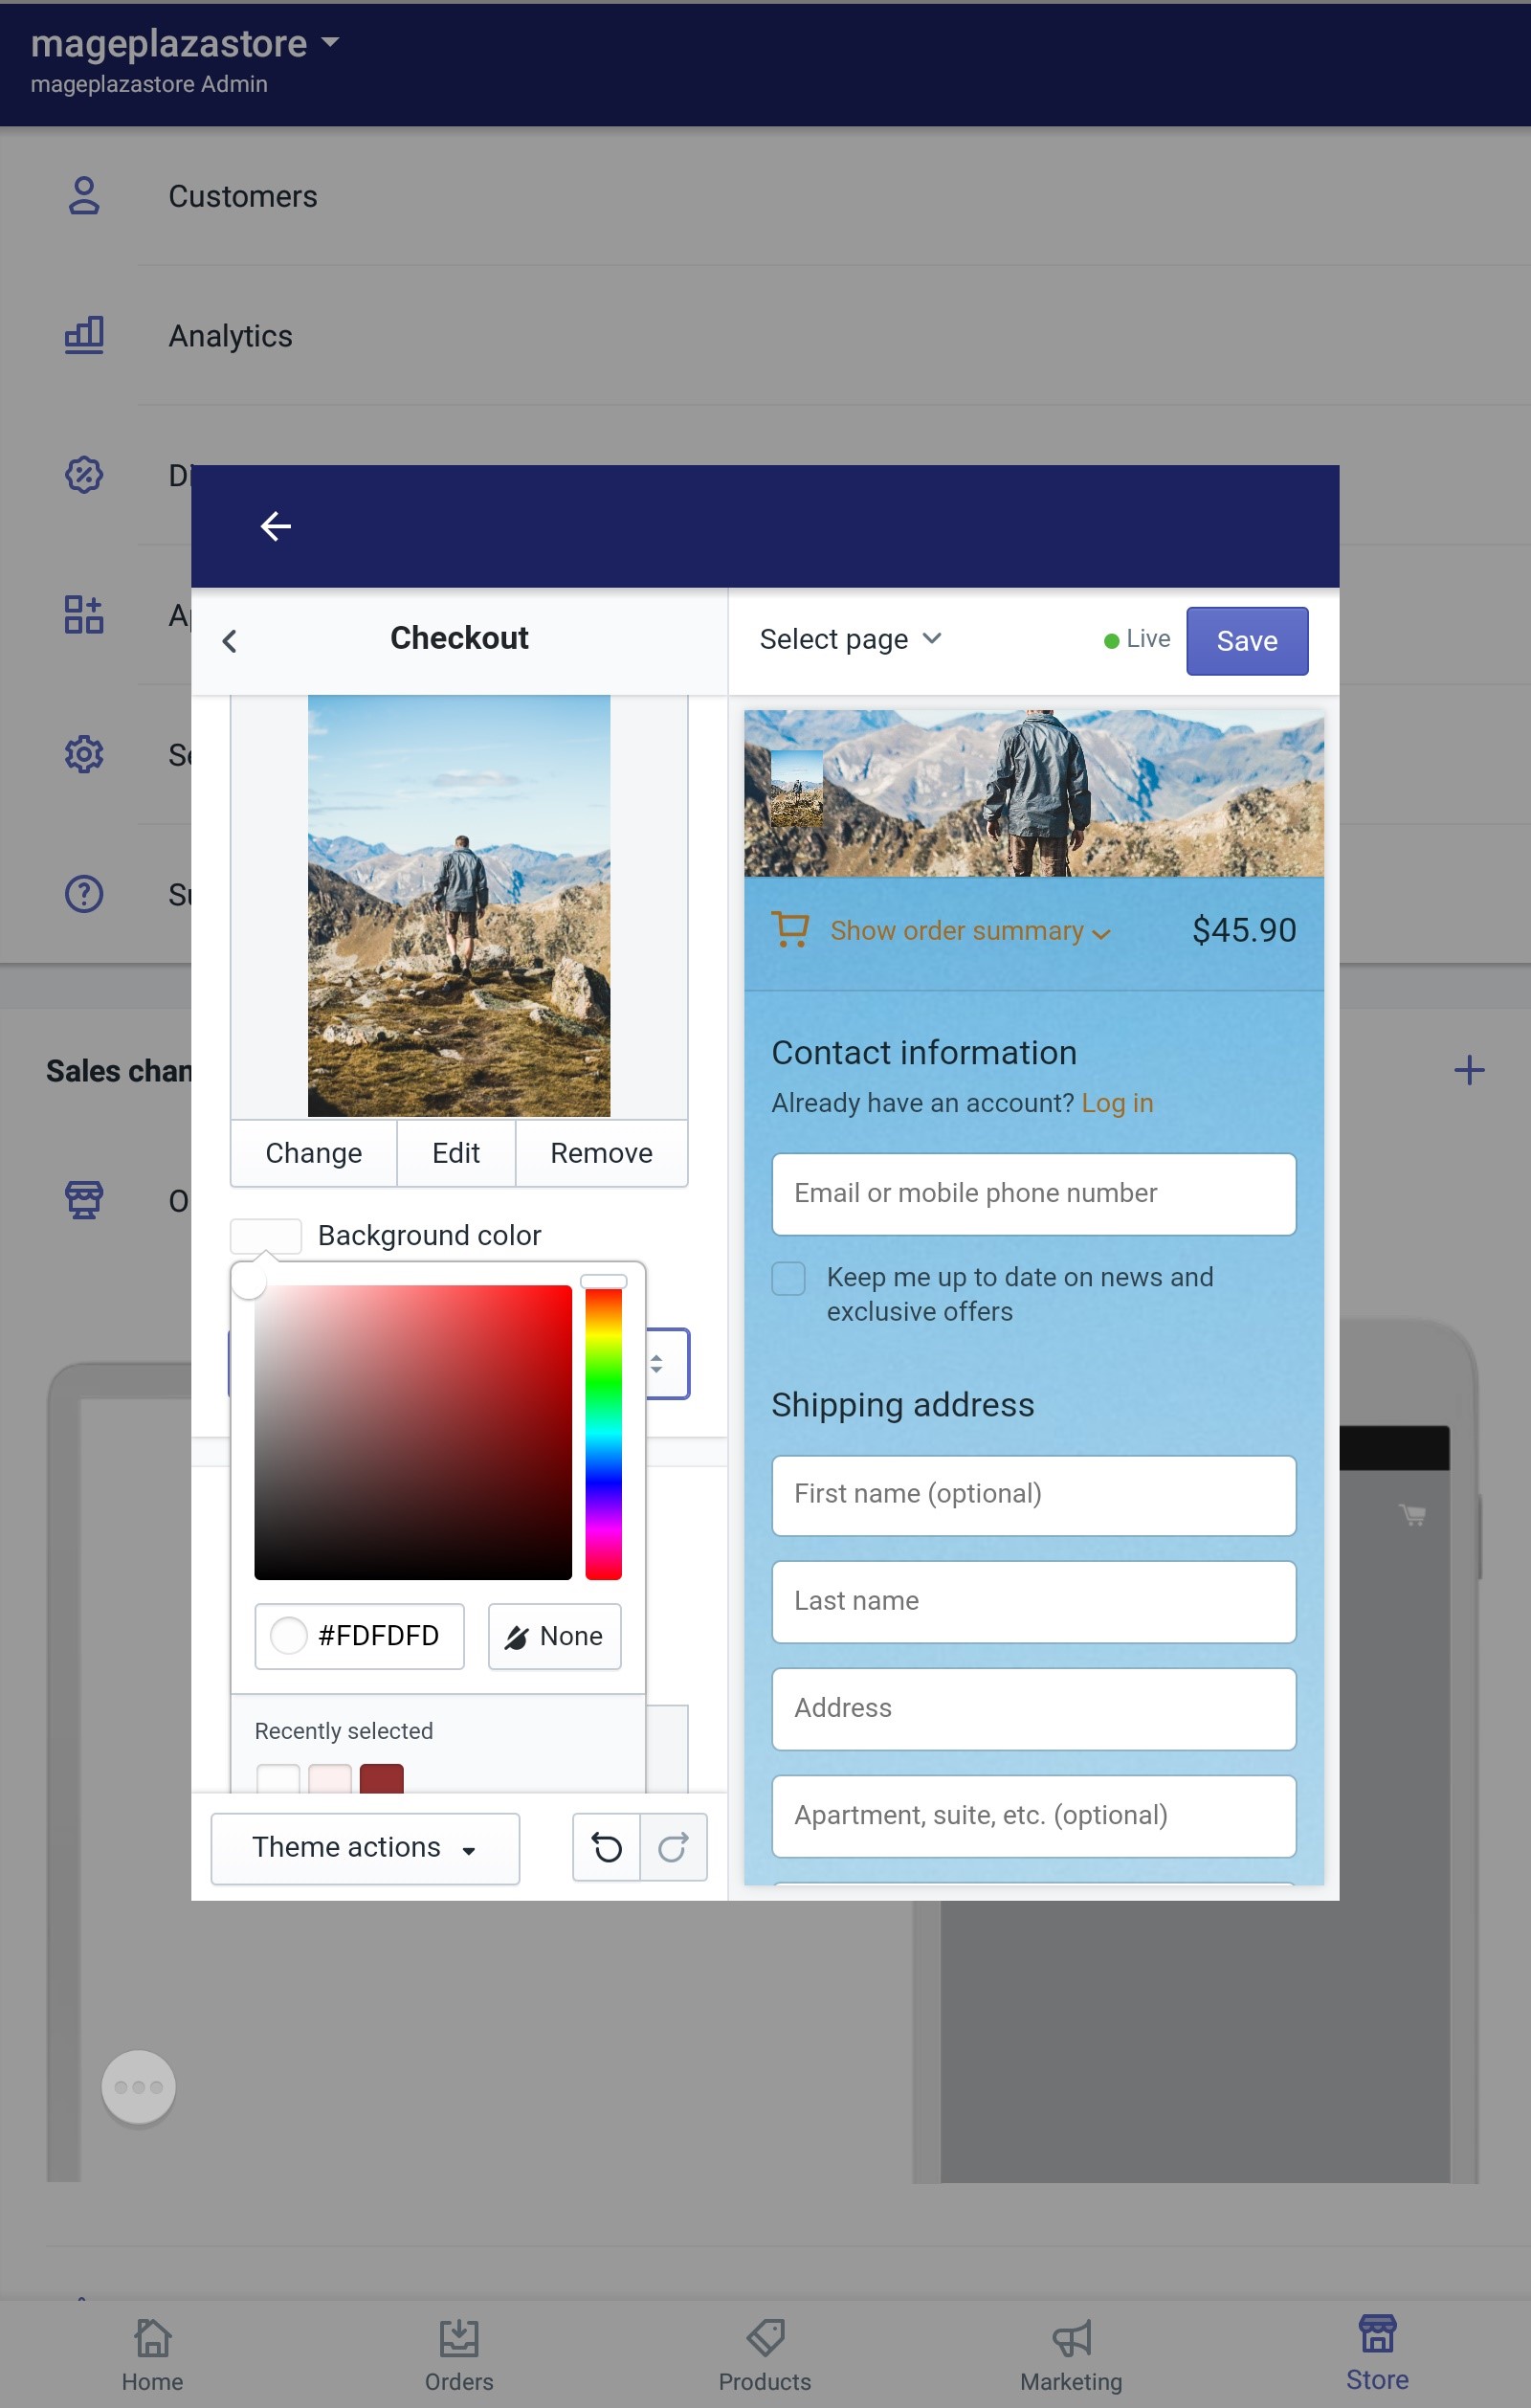
- If you plan to add color to the main content area, click on the box to choose a color.
- Step 5: Saving
When you finished all the steps above, click Save to save all the changes.
Conclusion
To sum up, the above is my instructional writing on the topic how to add a background image or color to the main content area on Shopify. I hope you enjoyed this writing and the information I just gave you will help you sell more online.


