Add a Logo to the Checkout Page in 6 Easy Steps
Similar to the background image, the logo also appears at the checkout page of Shopify. You can add a logo to your check out page and place it to the position you want in the banner. For example, at the top of the banner, in the middle or on the left or right-hand side.
Related Posts:
- How to change the font on the checkout page on Shopify
- How to change or remove an image from the checkout page on Shopify
- How to edit the checkout form options on Shopify
The below is my detailed instruction on the topic how to add a logo to the checkout page on Shopify. I hope you read this writing carefully since it is important and necessary for you while selling online.
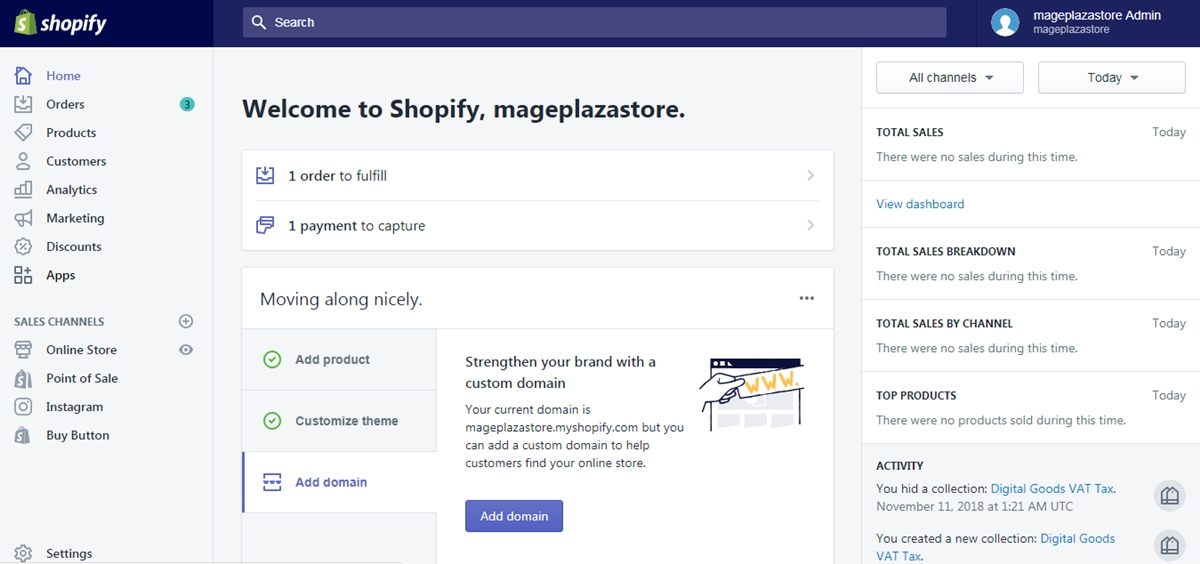
Step 1: Go to Settings -> Checkout
After you logged into your account, look at the left bottom of the screen and find the button named Settings and click on it to continue.
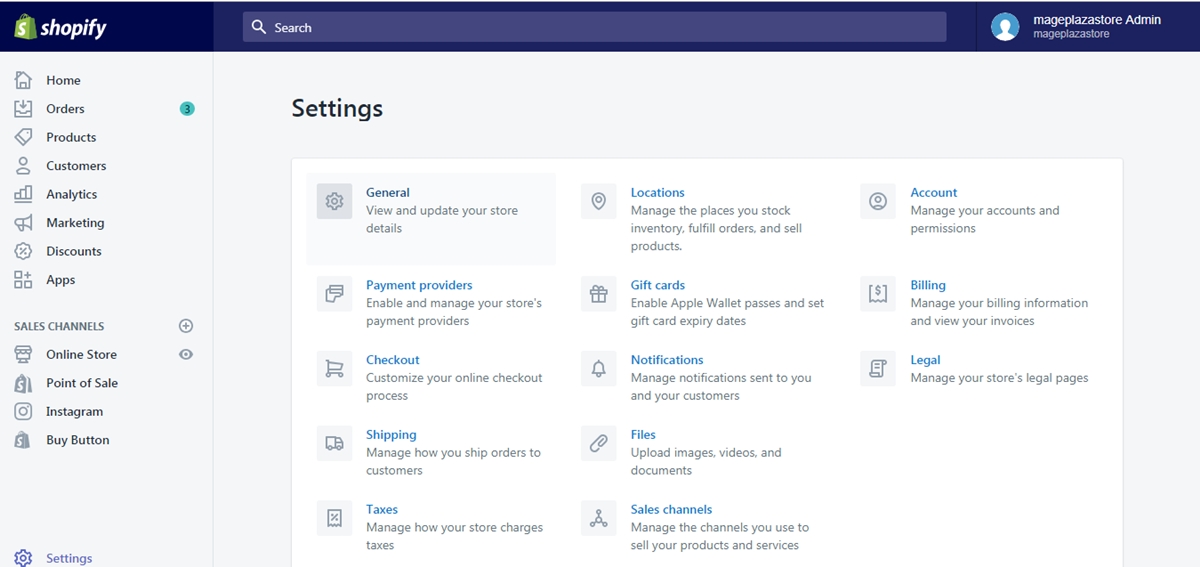
At the Settings page, find the Checkout button and click on it.
Step 2: Click Customize checkout
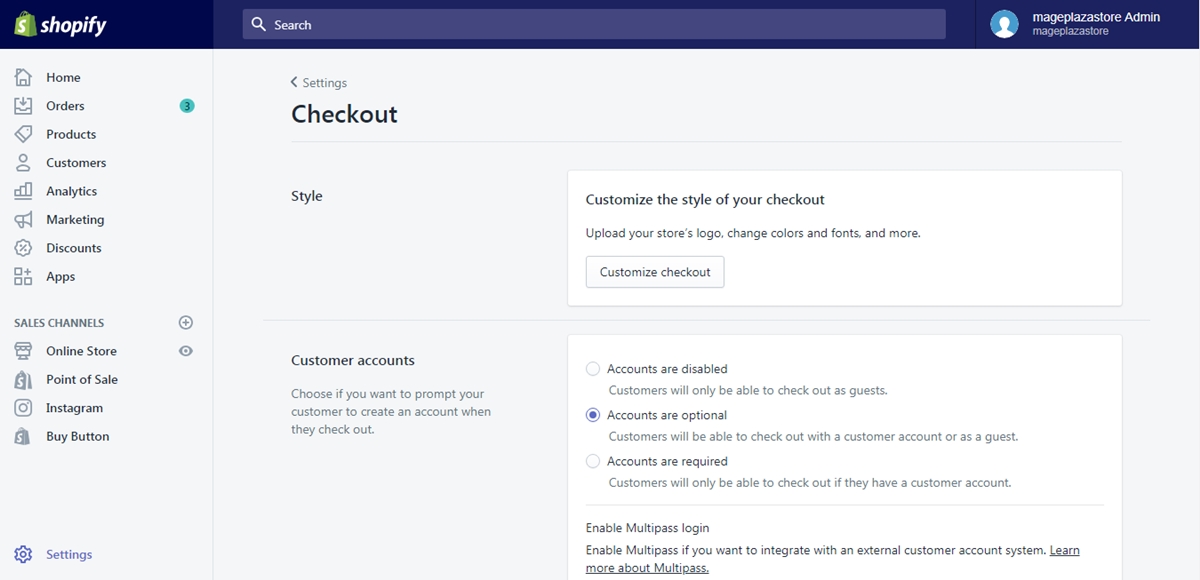
Inside the checkout page, you can see the Style area, in that area, click on the button named Customize checkout to see the theme editor.
Step 3: Upload image
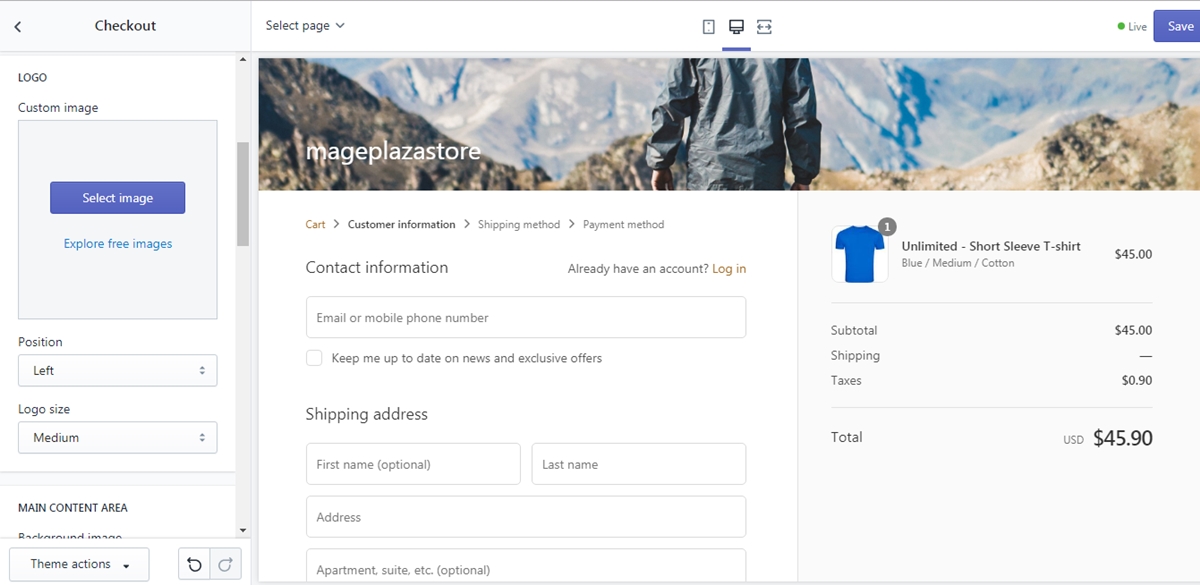
On the left screen, notice a Logo section. In that section, choose Select image and continue to Upload or choose an existing image in the library.
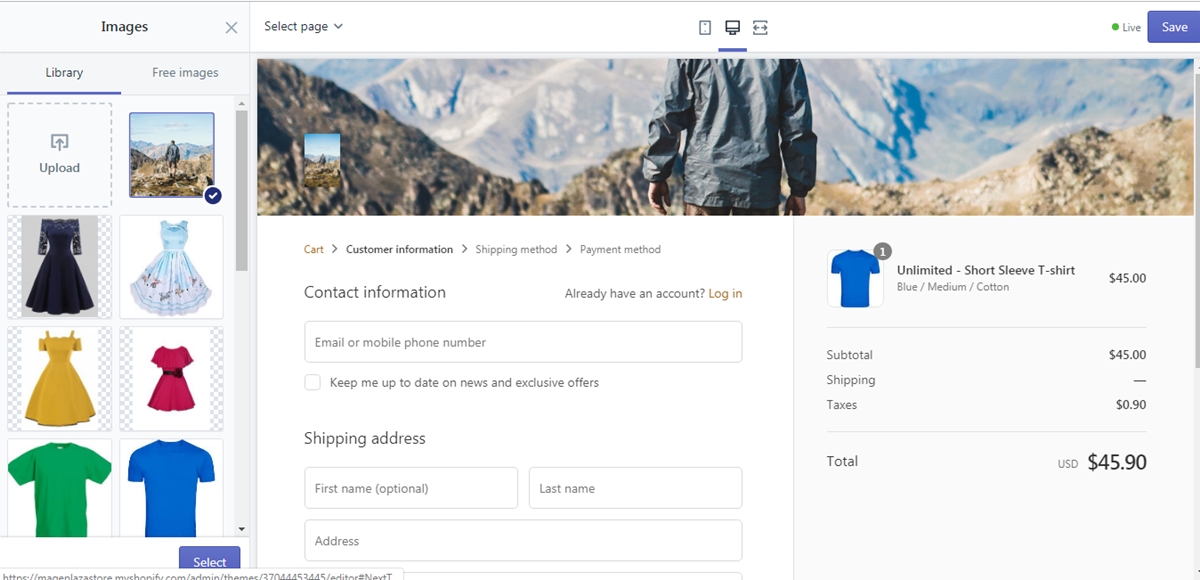
Step 4: Select logo’s positon
After you choose the logo, click Select and you get back to the theme editor page. Under the logo, you can set the position for the logo in the drop bar menu named Position.
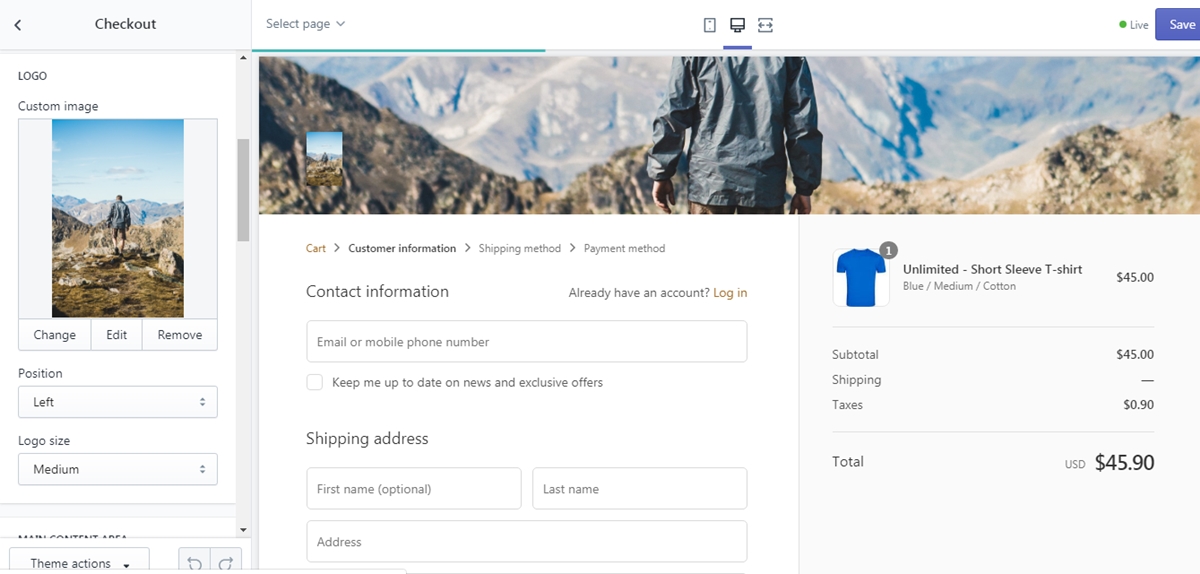
Step 5: Select logo’s size
Also under the logo picture, you can choose the size of the logo from the Logo size drop bar menu.
Step 6: Saving
Finally, click Save to save all your changes to the checkout page.
To add a logo to the checkout page on iPhone (Click here)
- Step 1: Go to Store -> Settings
When you get access to the home page of your shop from the app, go to Store button and continue by tapping the Settings section on that page.
- Step 2: Tap Checkout
From the store settings section, you can see an option named Checkout. Click on that option to go to the next step.
- Step 3: Tap Customize checkout
Inside the page, there is a field named style. From that field, tap Customize checkout to see the theme editor.
- Step 4: Upload image
On the left screen, notice a Logo section. In that section, choose Select image and continue to Upload or choose an existing image in the library.
- Step 5: Select a positon
After you choose the logo, click Select and you get back to the theme editor page. Under the logo, you can set the position for the logo in the drop bar menu named Position.
- Step 6: Select a size
Also under the logo picture, you can choose the size of the logo from the Logo size drop bar menu.
- Step 7: Saving
Finally, click Save to save all your changes to the checkout page.
To add a logo to the checkout page on Android (Click here)
- Step 1: Go to Store -> Settings
When you get access to the home page of your shop from the app, go to Store button and continue by tapping the Settings section on that page.
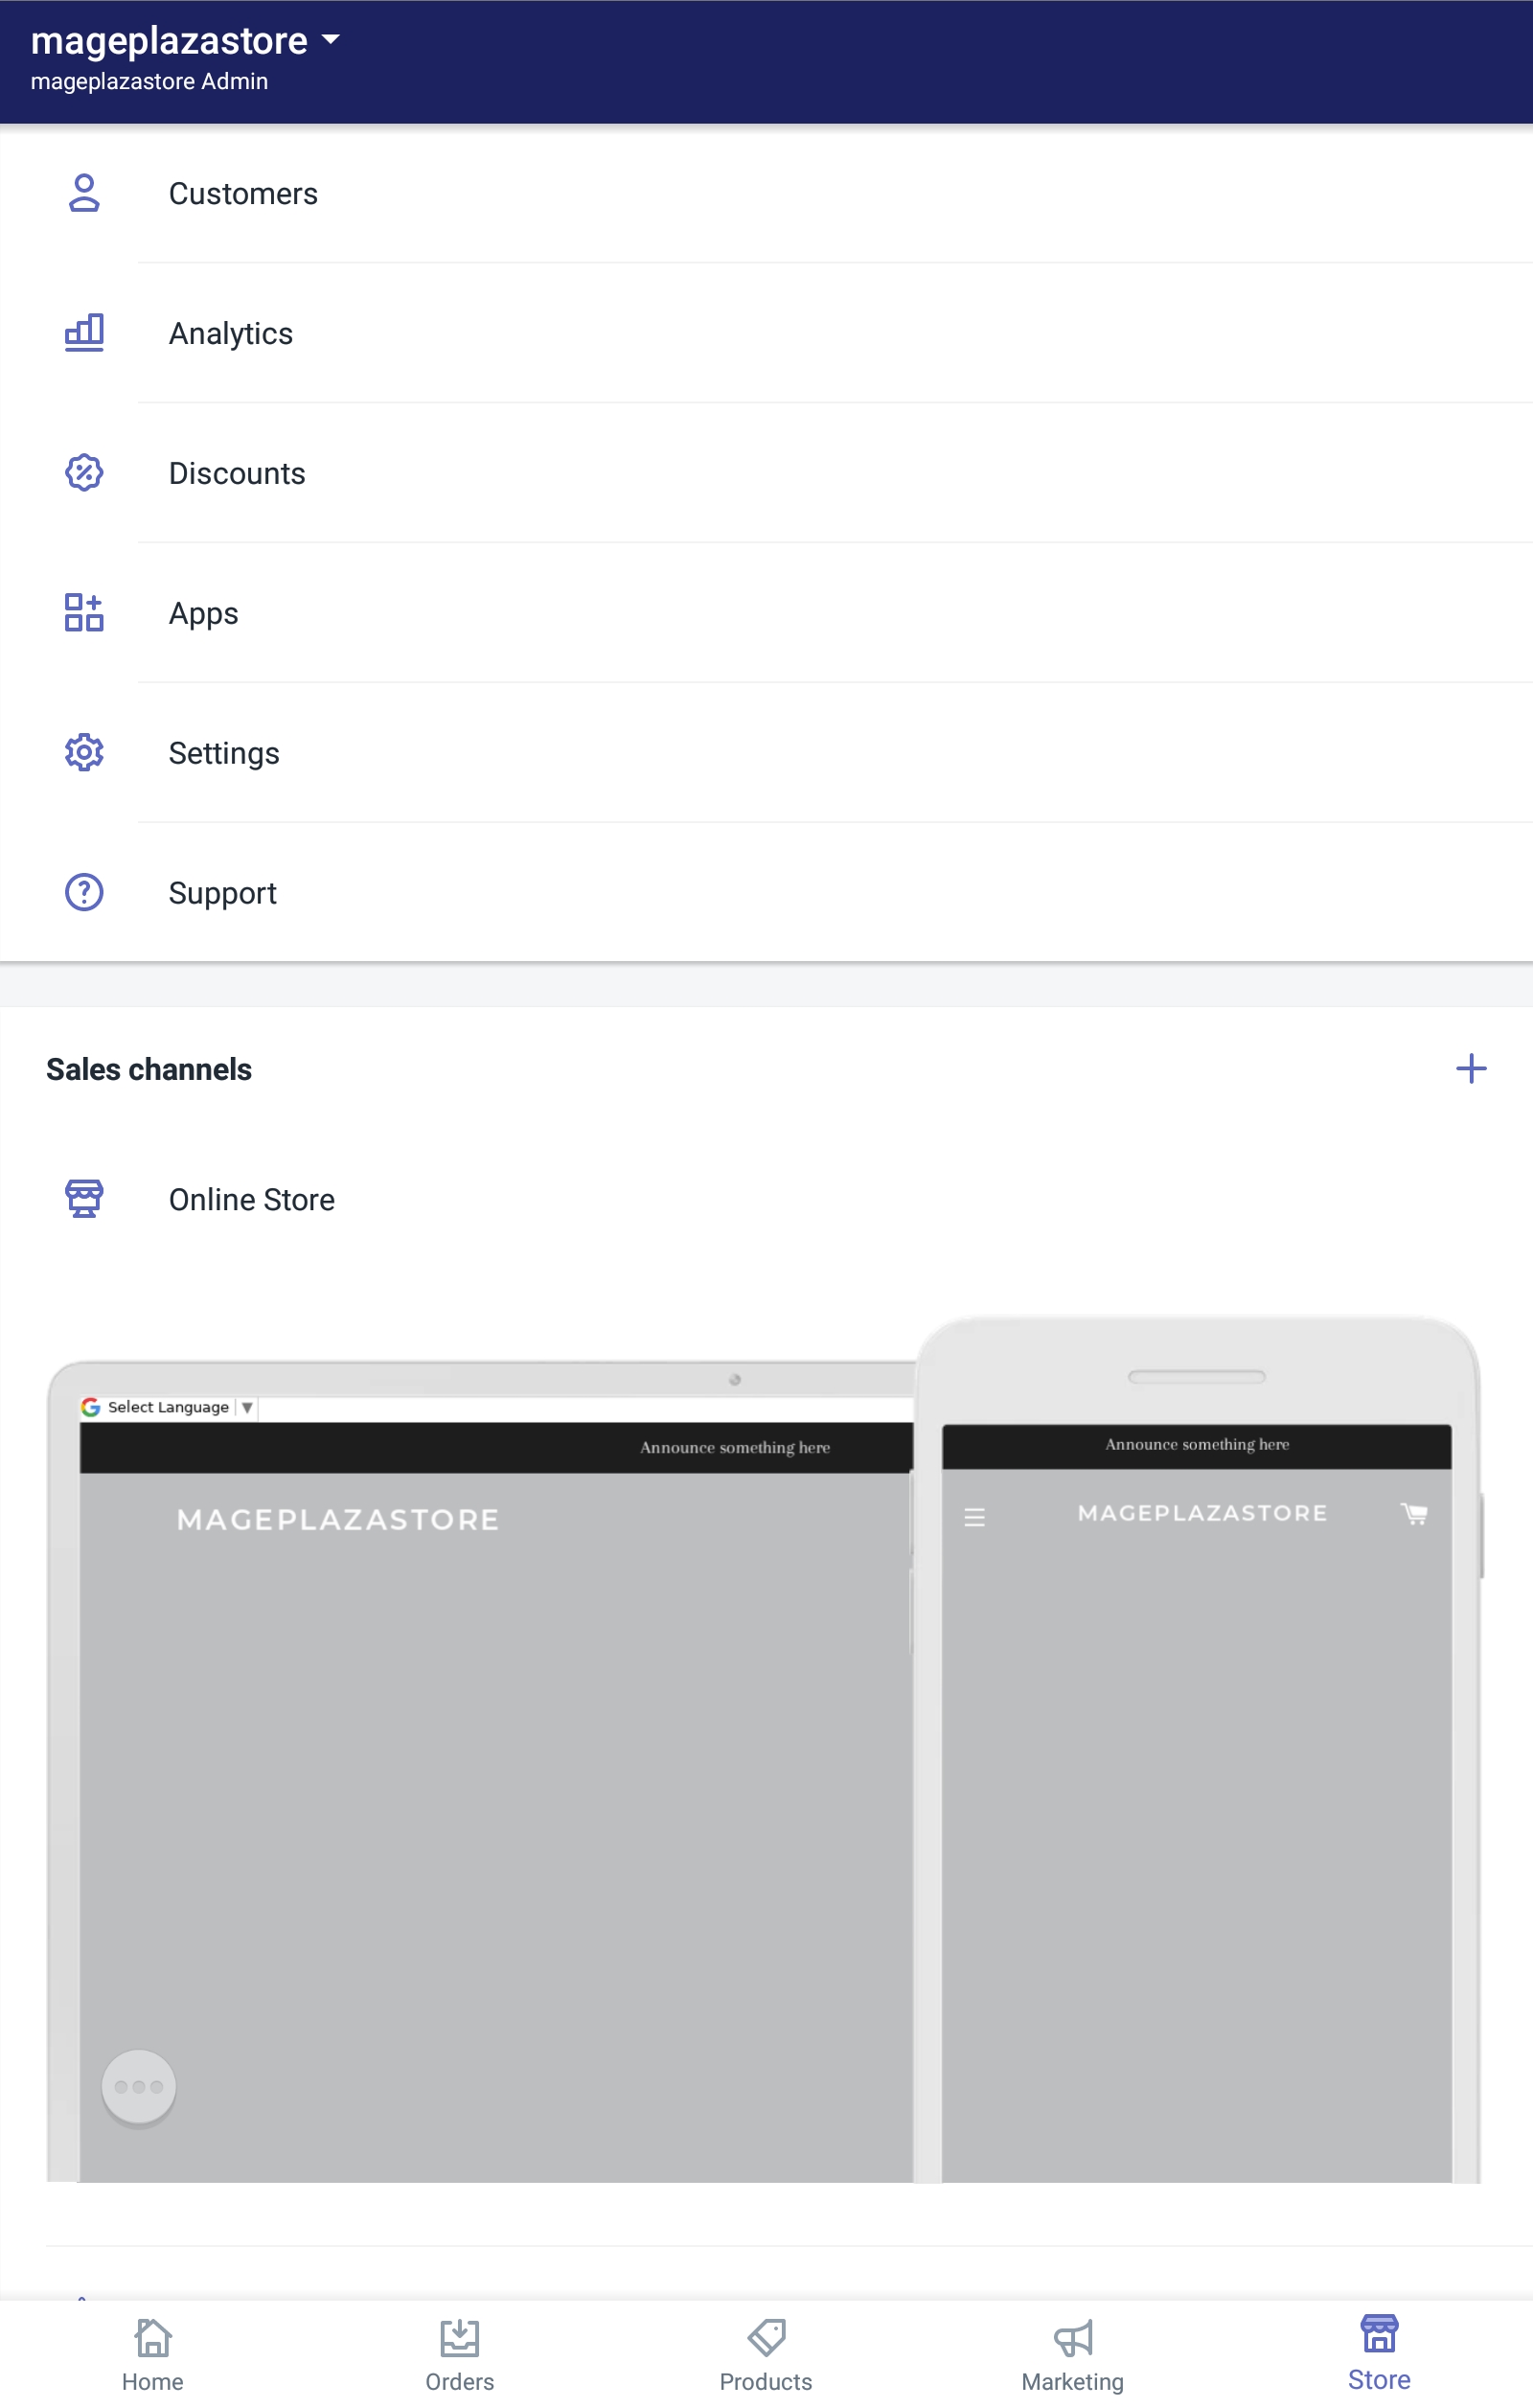
- Step 2: Tap Checkout
From the store settings section, you can see an option named Checkout. Click on that option to go to the next step.
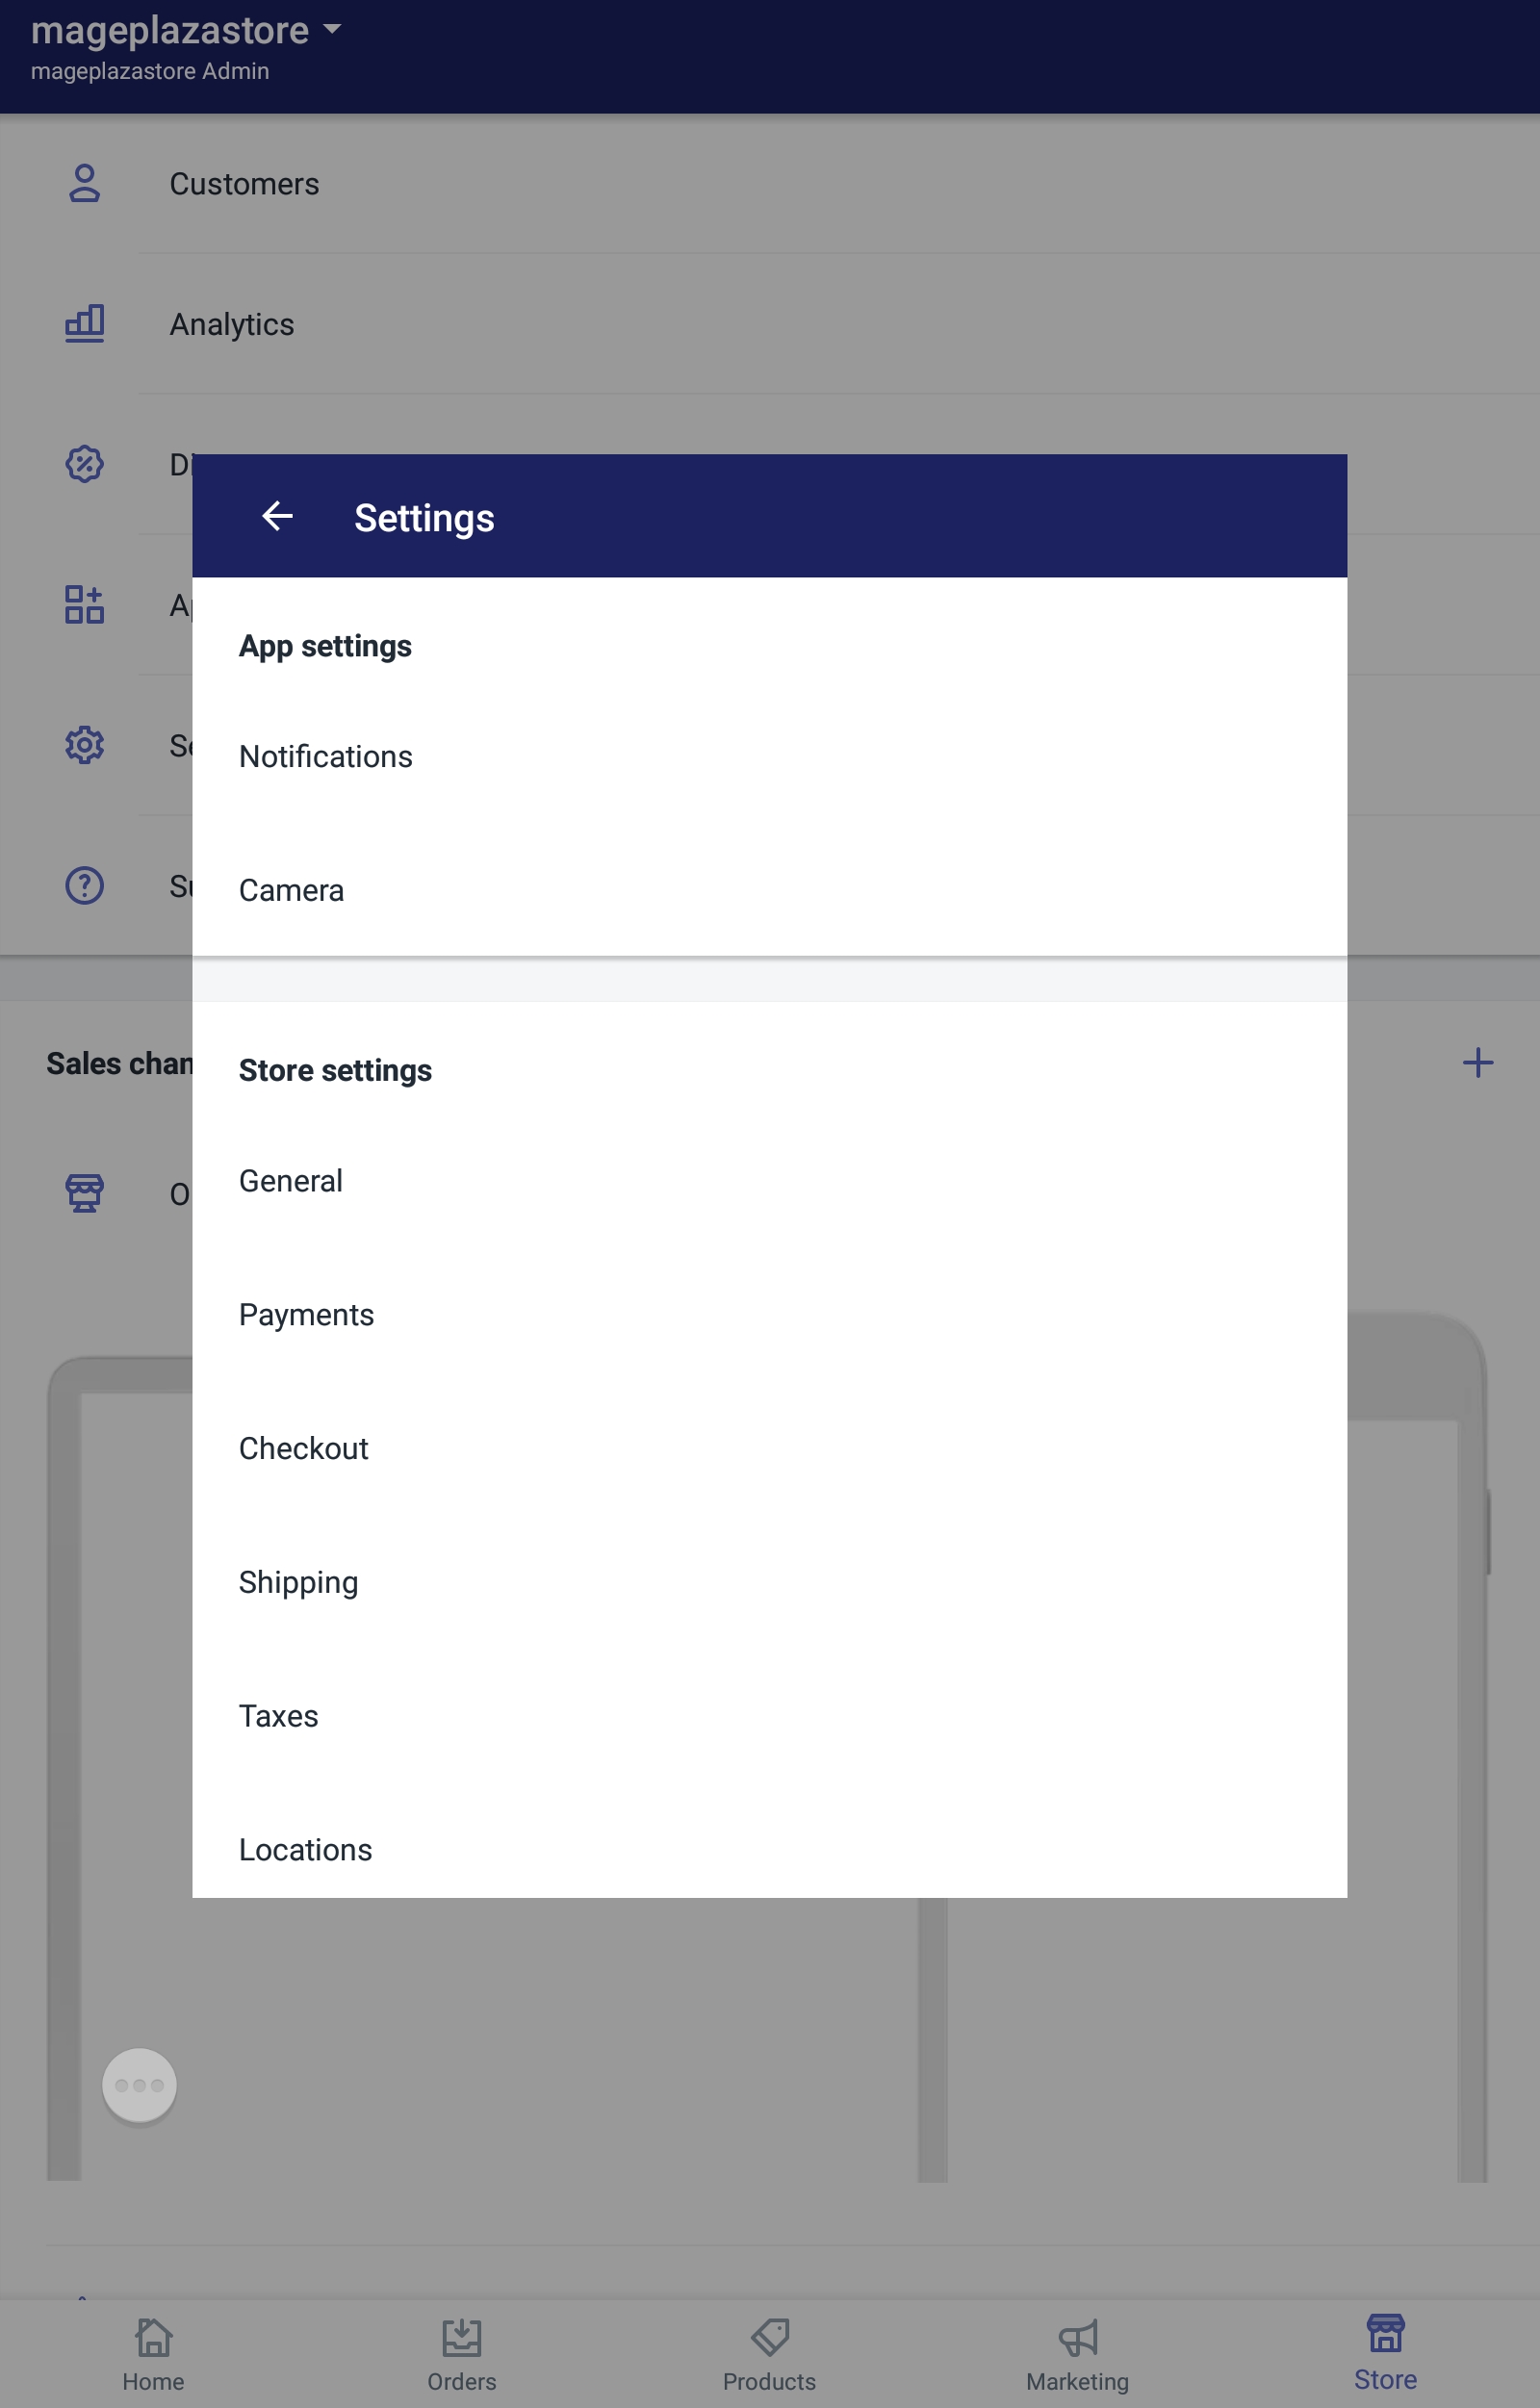
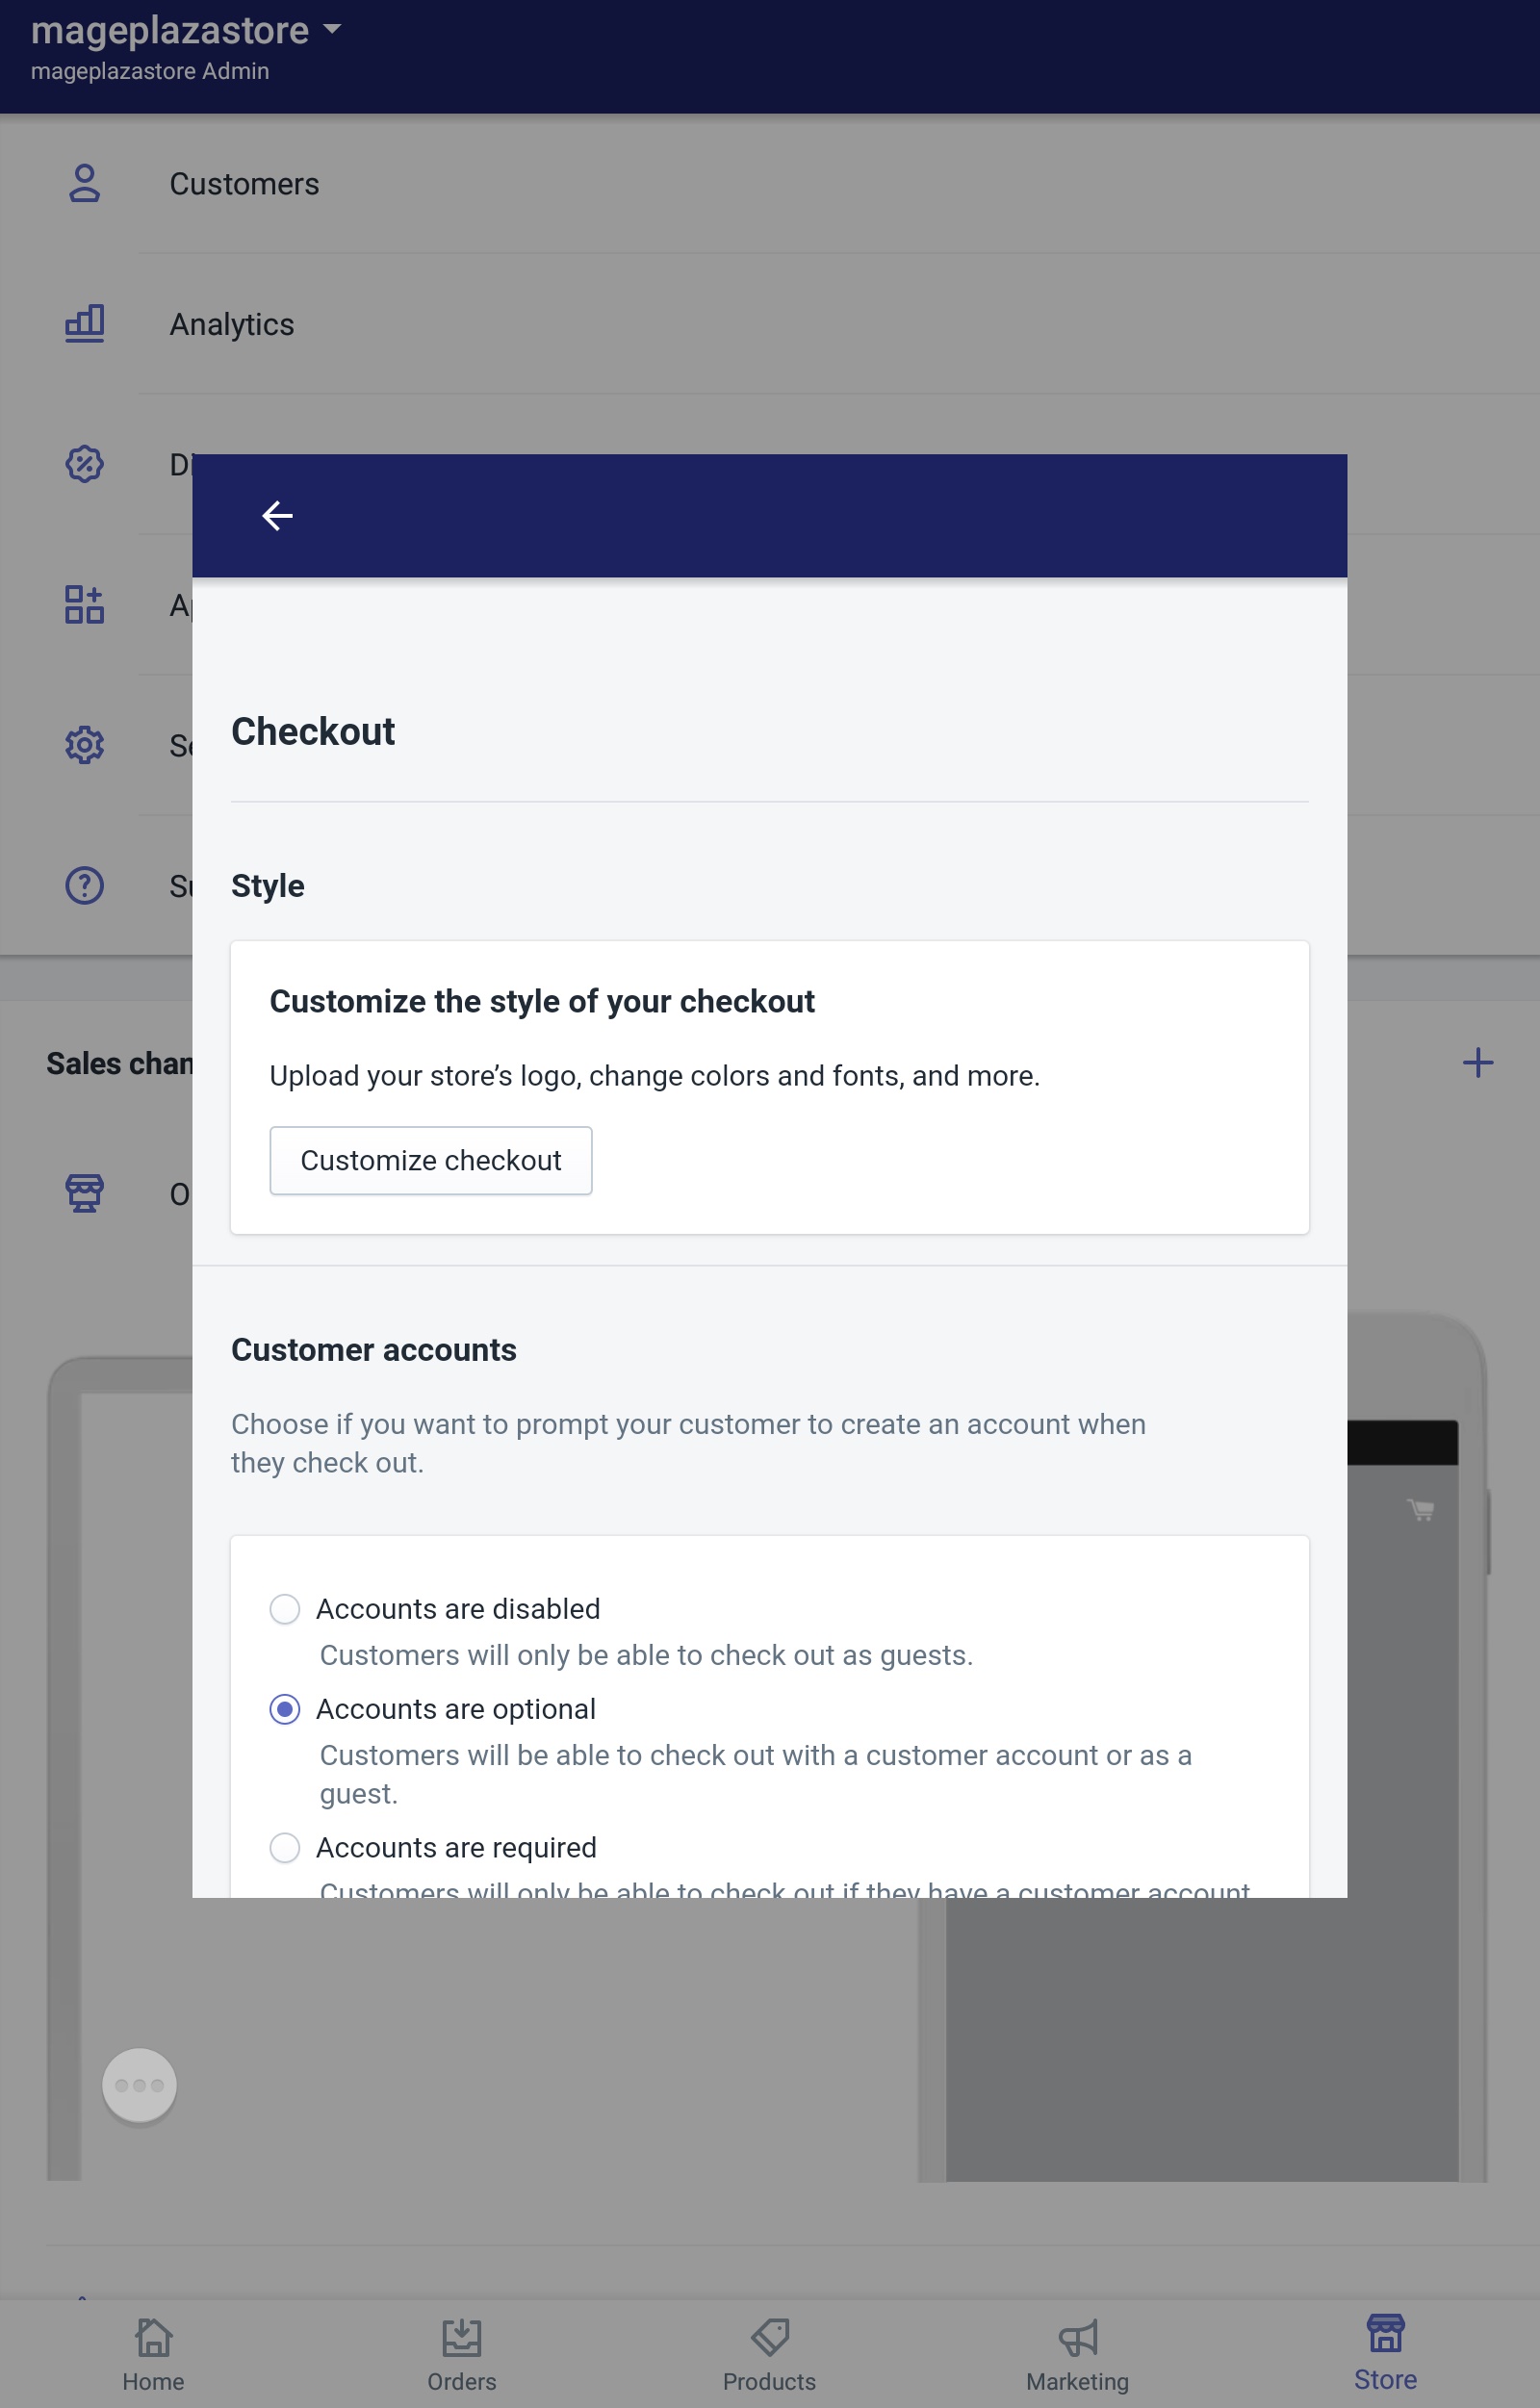
- Step 3: Tap Customize checkout
Inside the page, there is a field named style. From that field, tap Customize checkout to see the theme editor.
- Step 4: Upload image
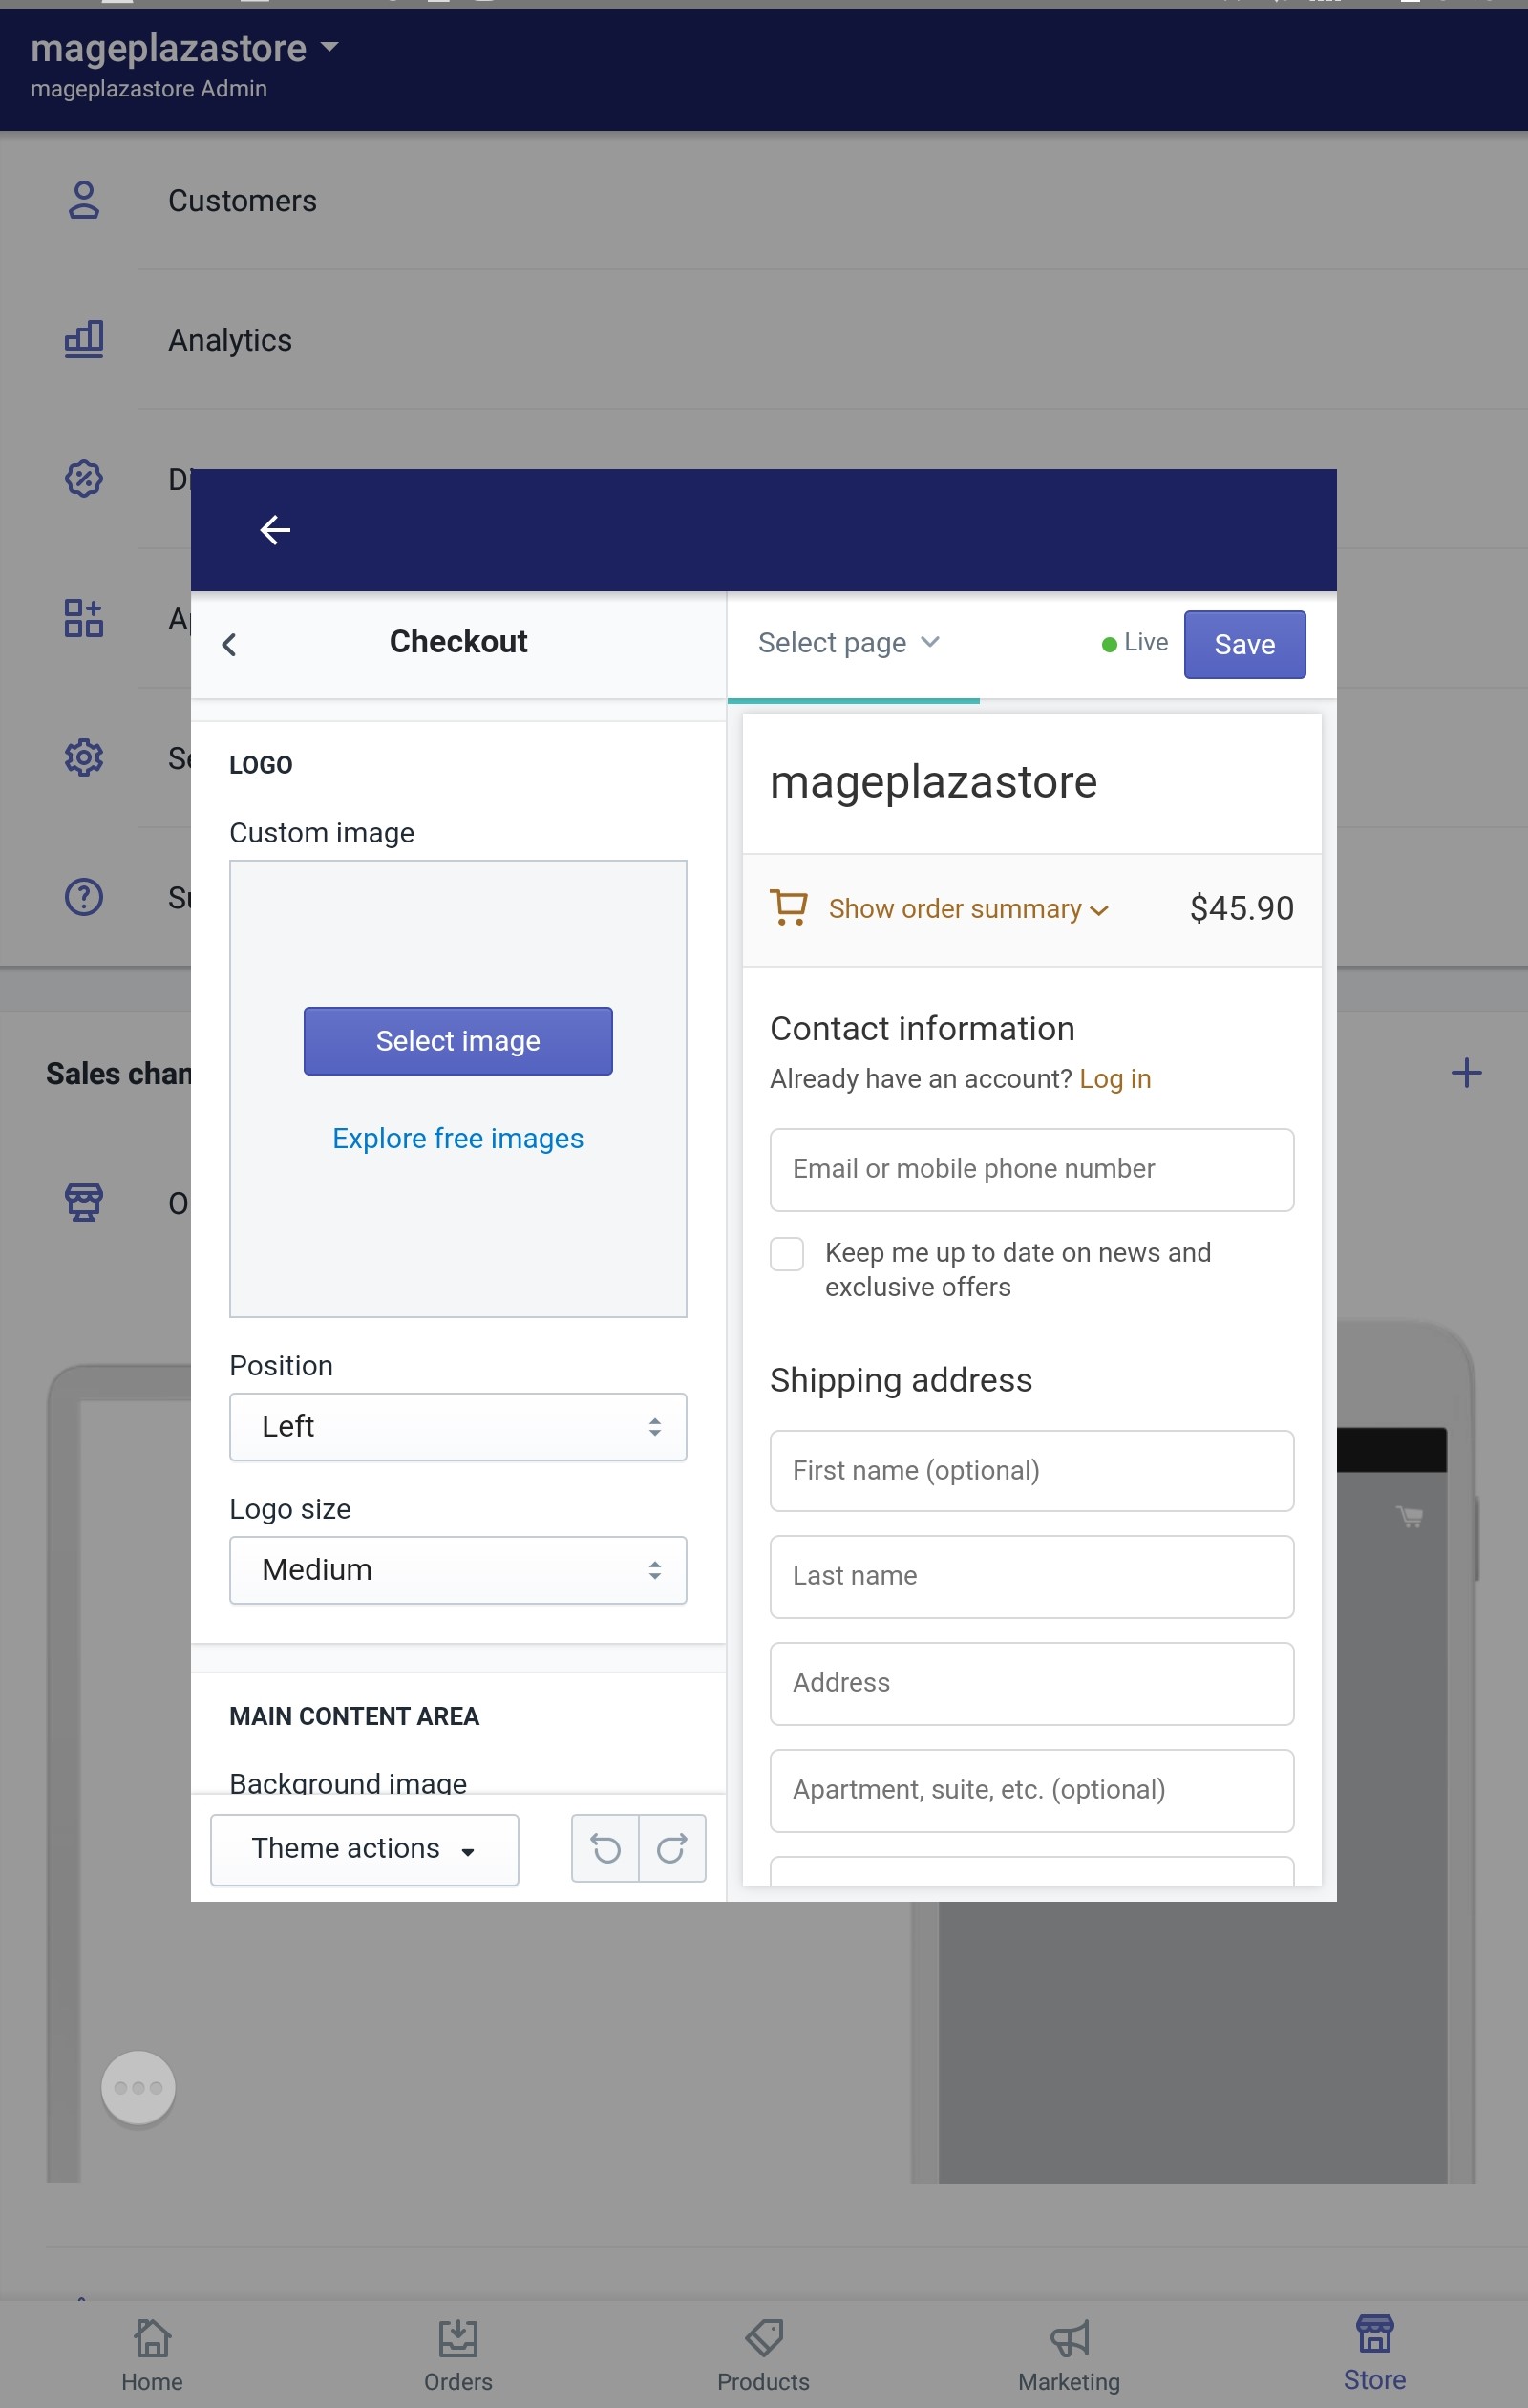
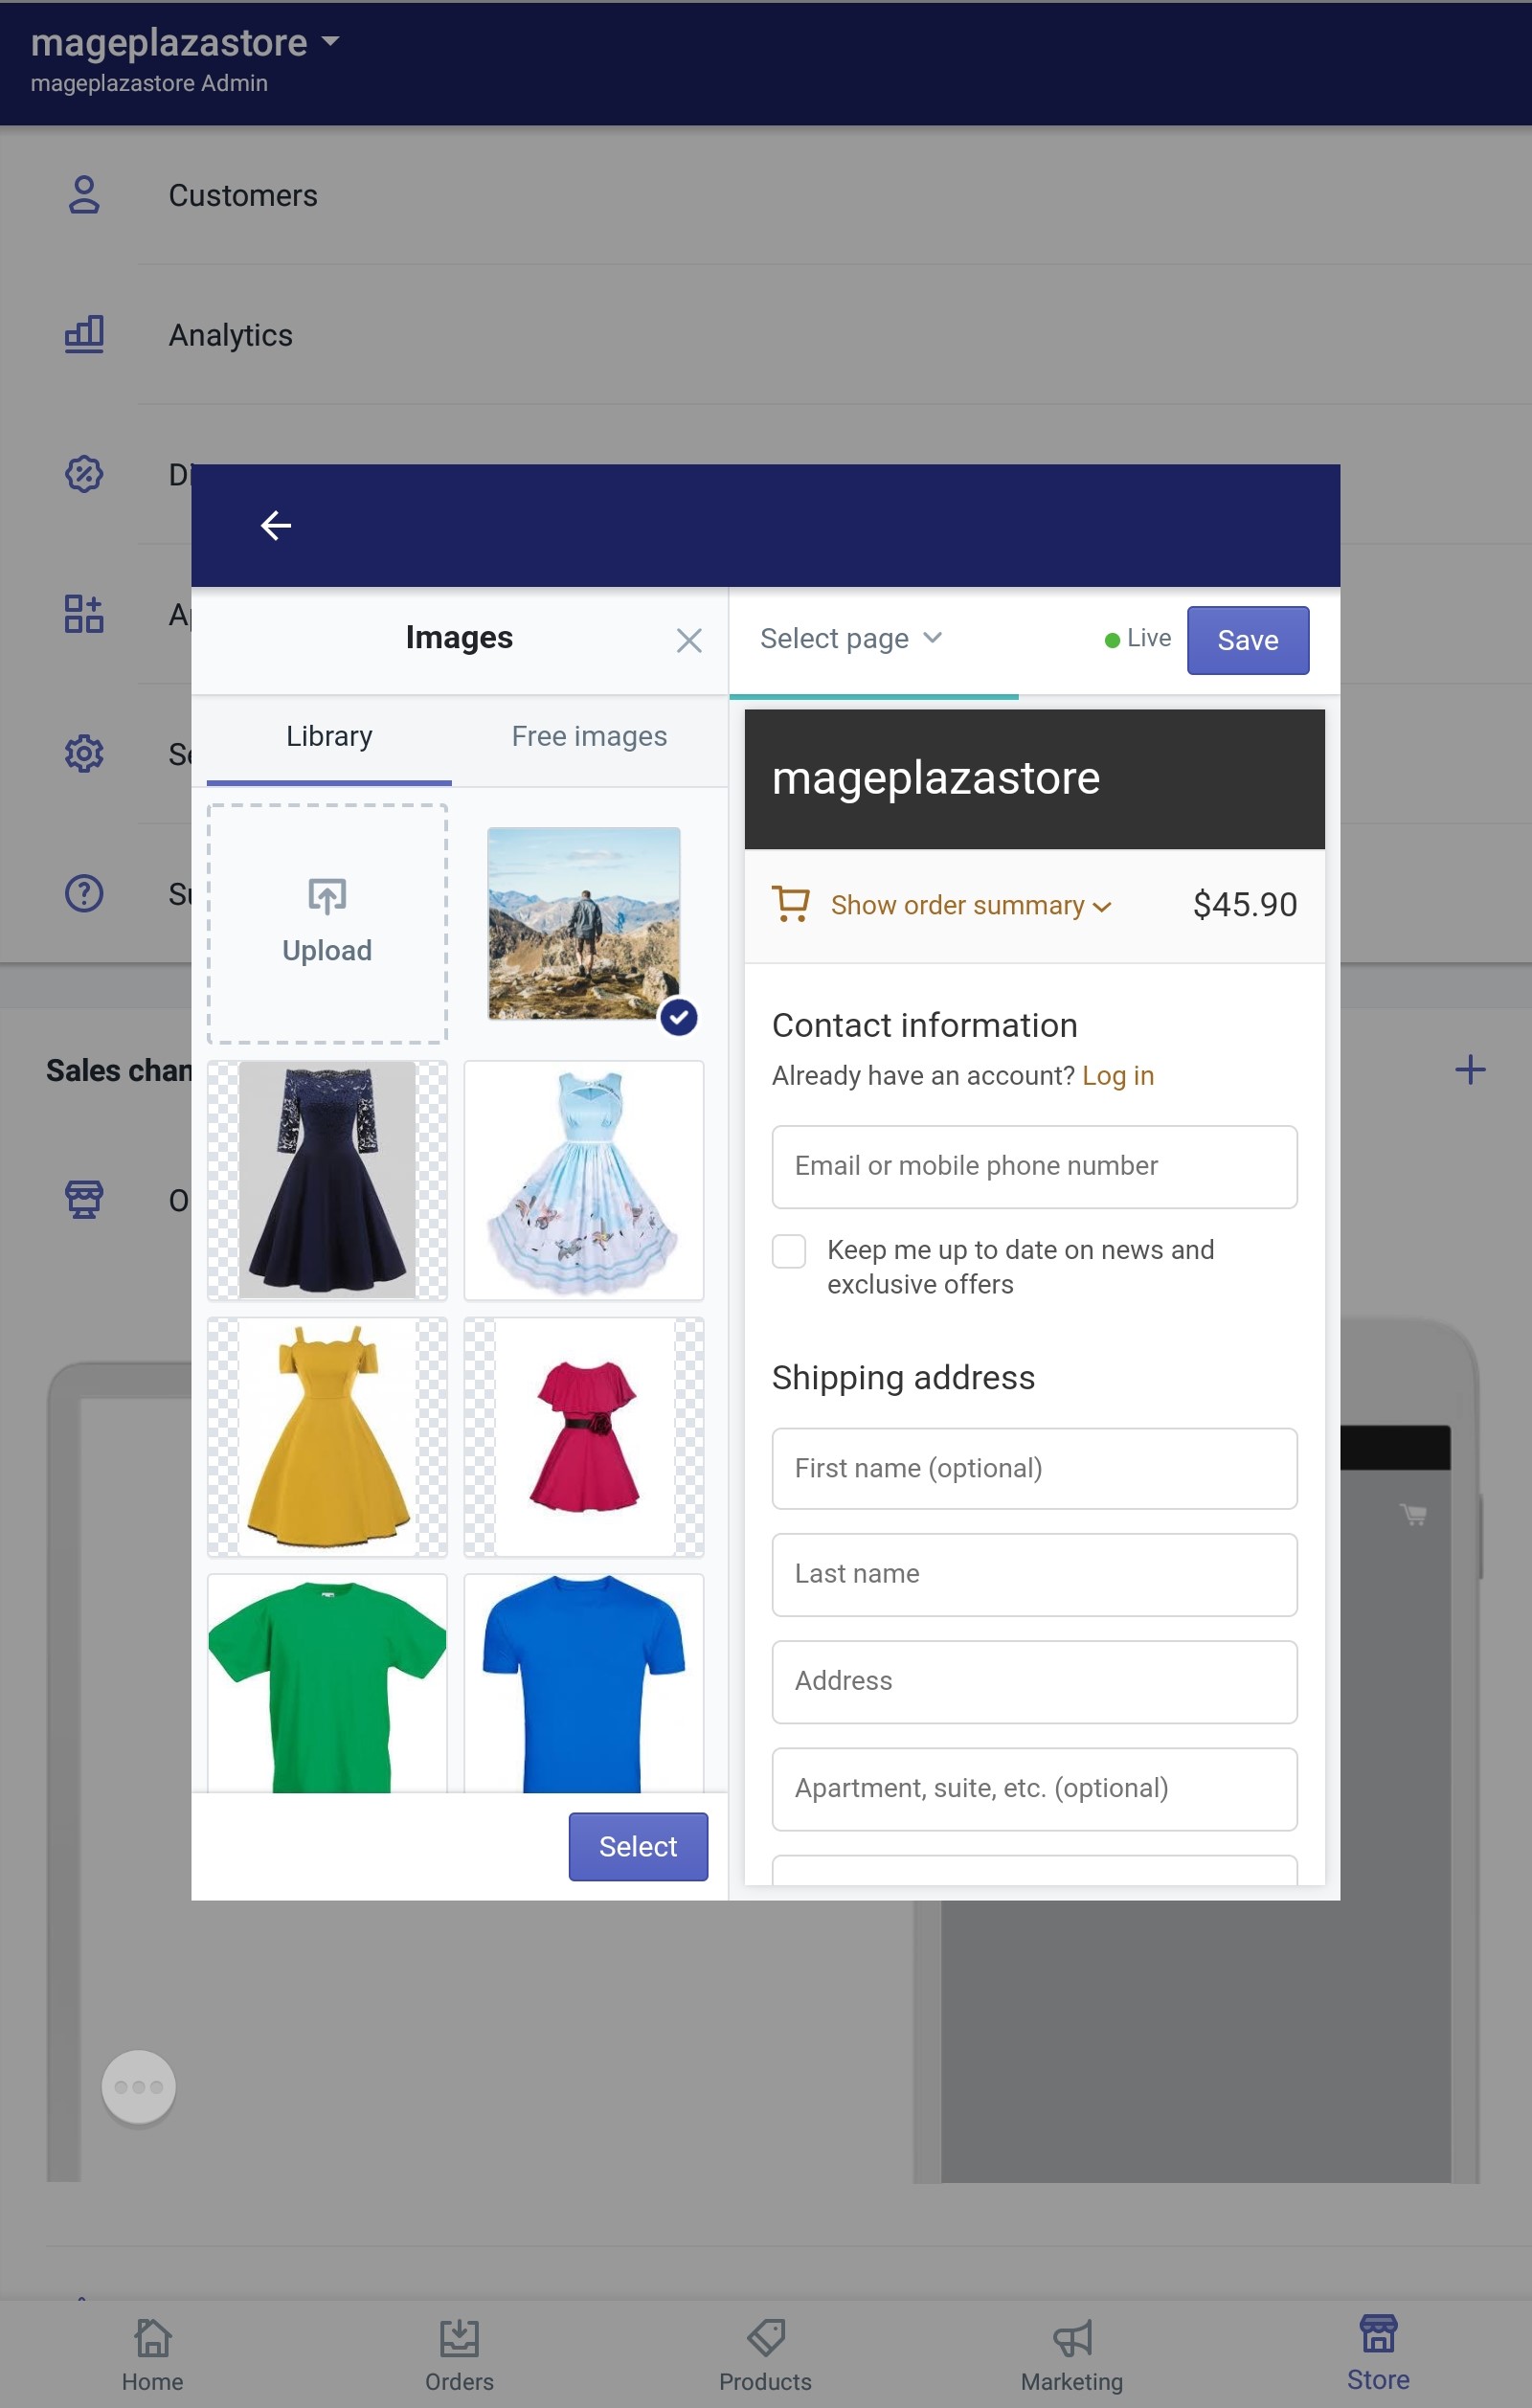
On the left screen, notice a Logo section. In that section, choose Select image and continue to Upload or choose an existing image in the library.
- Step 5: Select a positon
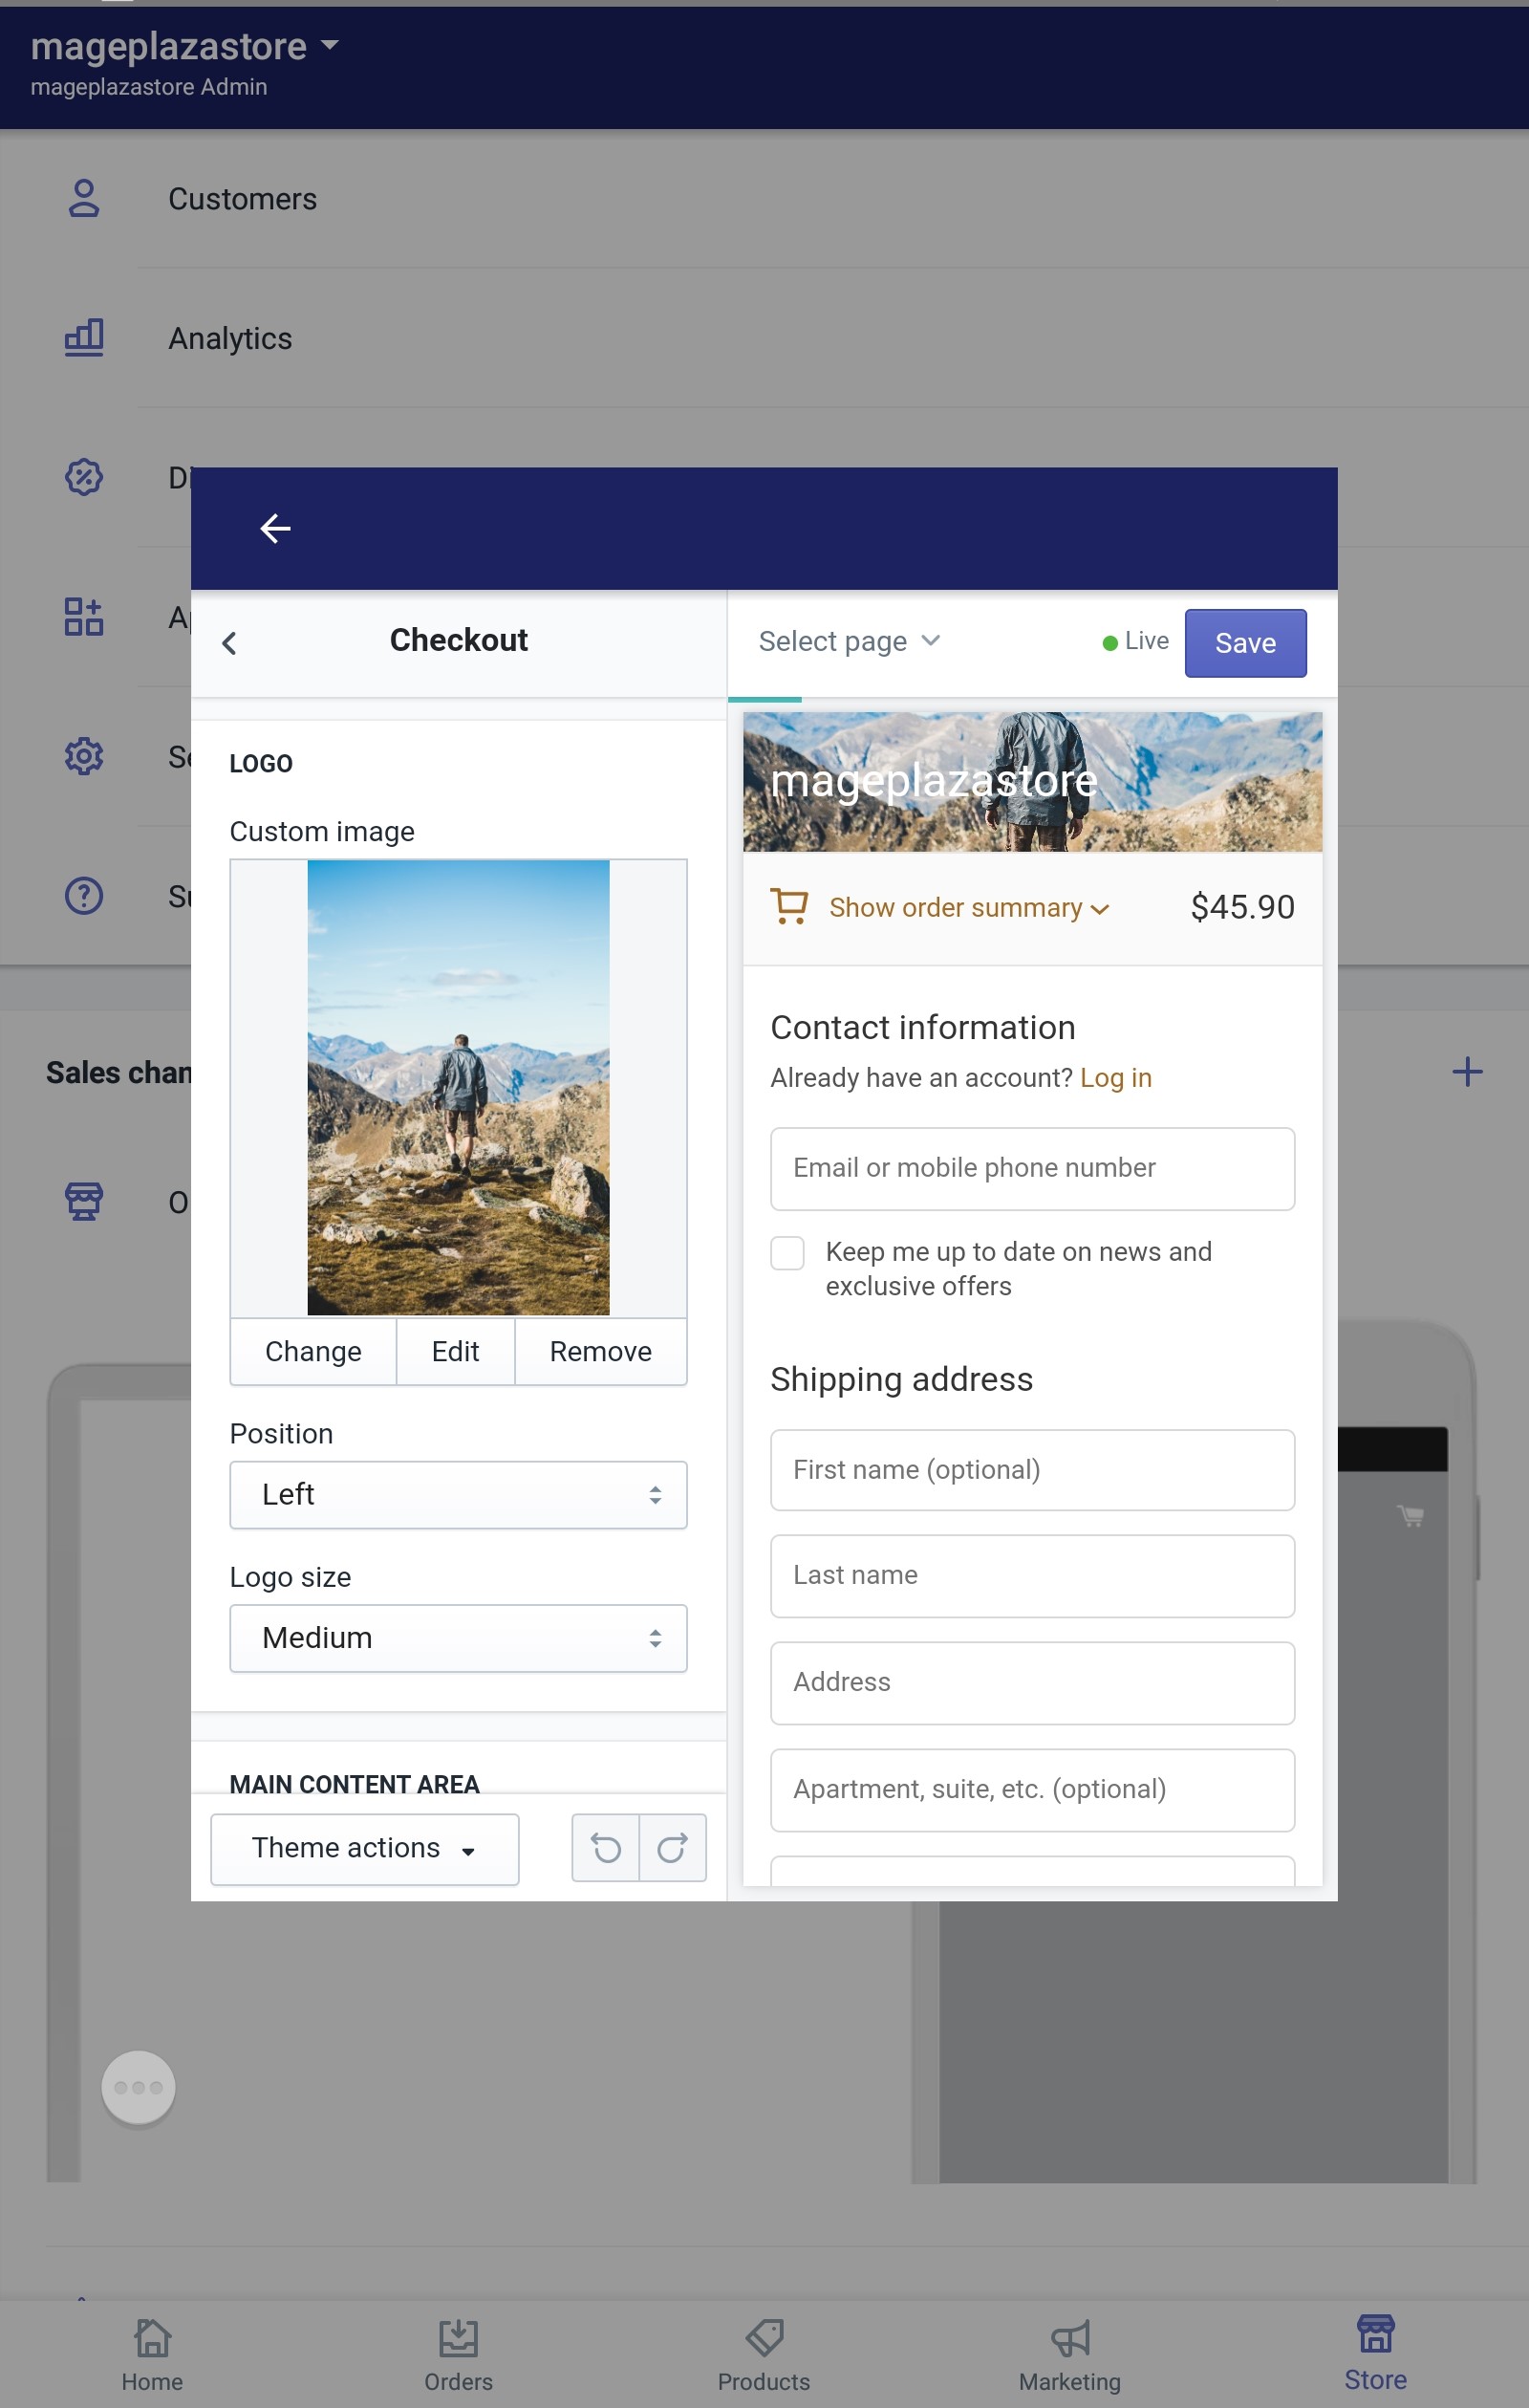
After you choose the logo, click Select and you get back to the theme editor page. Under the logo, you can set the position for the logo in the drop bar menu named Position.
- Step 6: Select a size
Also under the logo picture, you can choose the size of the logo from the Logo size drop bar menu.
- Step 7: Saving
Finally, click Save to save all your changes to the checkout page.
Conclusion
In conclusion, the above is my instruction on the topic how to add a logo to the checkout page on Shopify. I hope you have a good time reading and applying it to your store. For more helpful instruction like this, check out our Shopify tutorials.


