How to Add a Tracking Number on Shopify
In this post, you will learn how to add a tracking number on Shopify. The tracking number is a special sequence of codes printed on the carrier’s package. It is printed on a sticker on the carton, which can be read by a barcode scanner or also by the naked eye. The tracking number plays an important role in the online sale.
Tracking numbers are read and entered into vendor’s computer systems at all critical points along the route from the shipper to the receiver. The shipping carrier can find out the current location of the package by accessing the system on the internet. As a smart shop owner, you can provide your customers the tracking number so that they can know the current status of their package.
To help you easier when adding tracking numbers, I have prepared some detail steps on how to add tracking numbers while fulfilling an order and to fulfilled orders on Desktop. If you are using other devices like iPhone or Android, you can also apply these steps.
Related Posts:
- How to fulfill many orders at once manually on Shopify
- How to refund part of an order on Shopify
- How to sort your orders list on Shopify
Add tracking numbers while fulfilling order
- Step 1: Go to Orders
- Step 2: Choose an order
- Step 3: Click Mark as fulfilled
- Step 4: Enter the Tracking number
- Step 5: Choose a shipping carrier
- Step 6: Enter the Tracking URL
- Step 7: Click Fulfill items
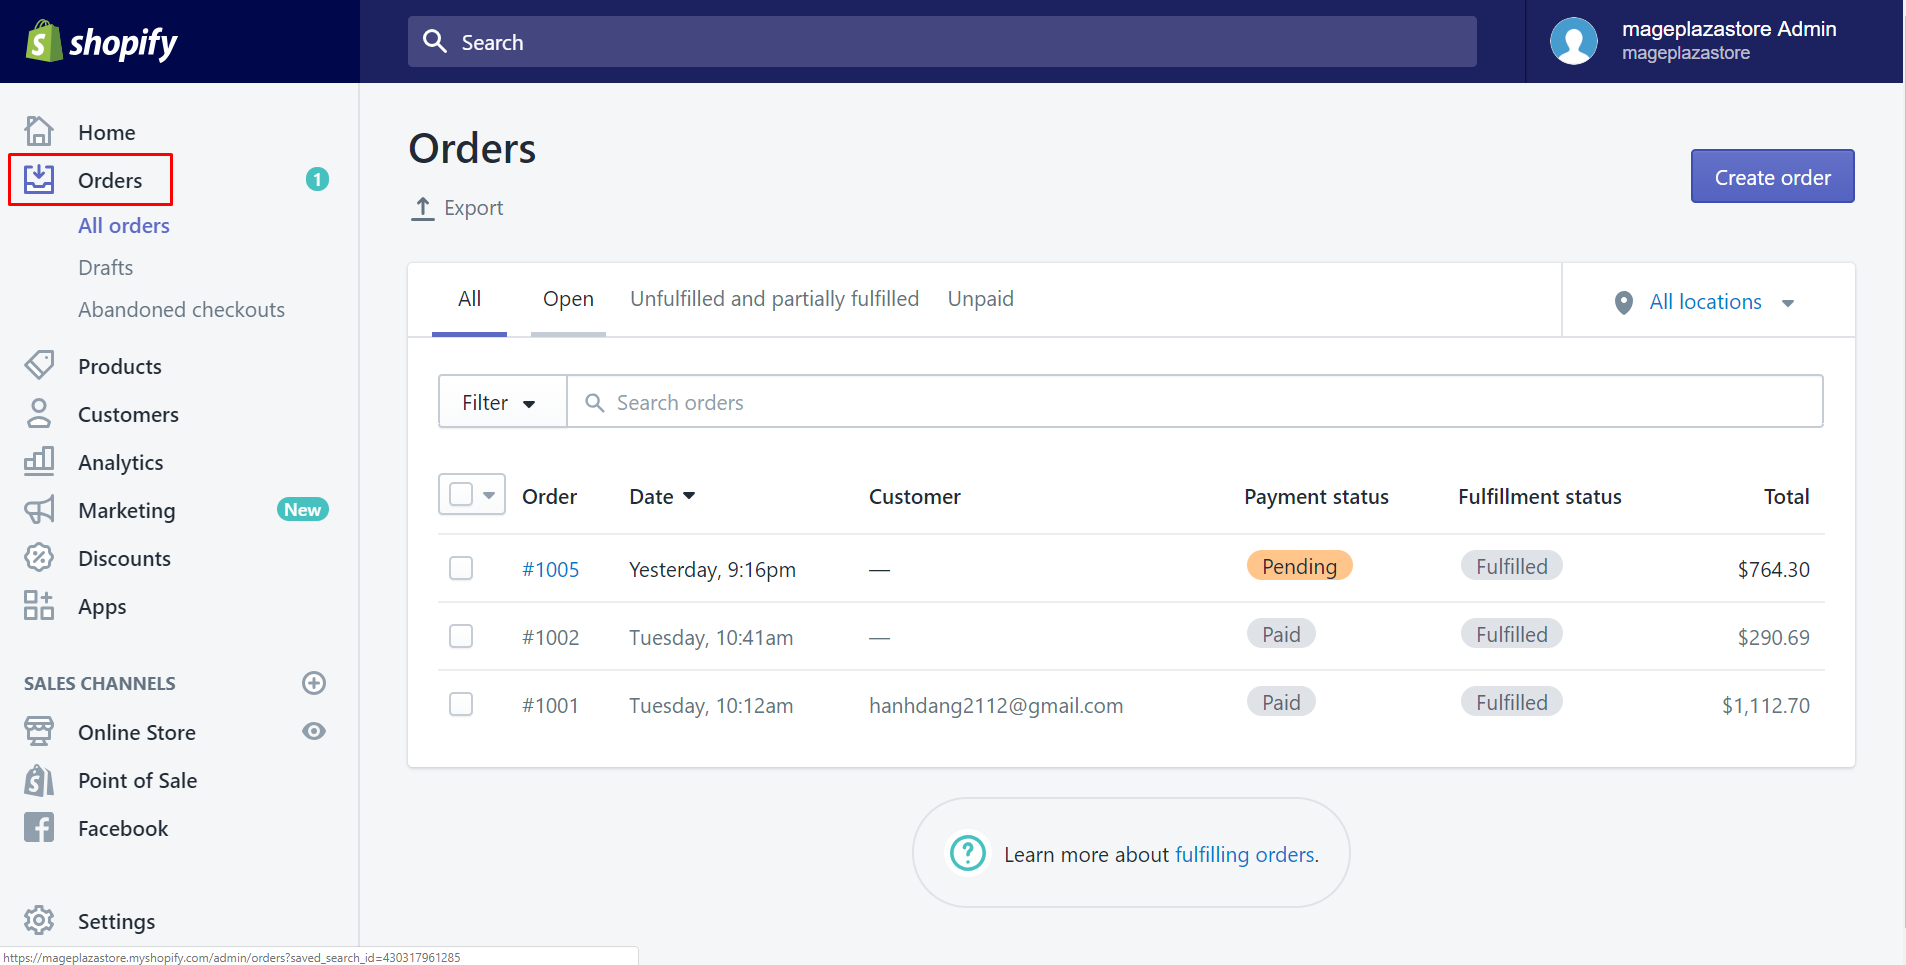
Step 1: Go to Orders
Make sure to log in your Shopify account to access the admin page. Then, click Orders section.
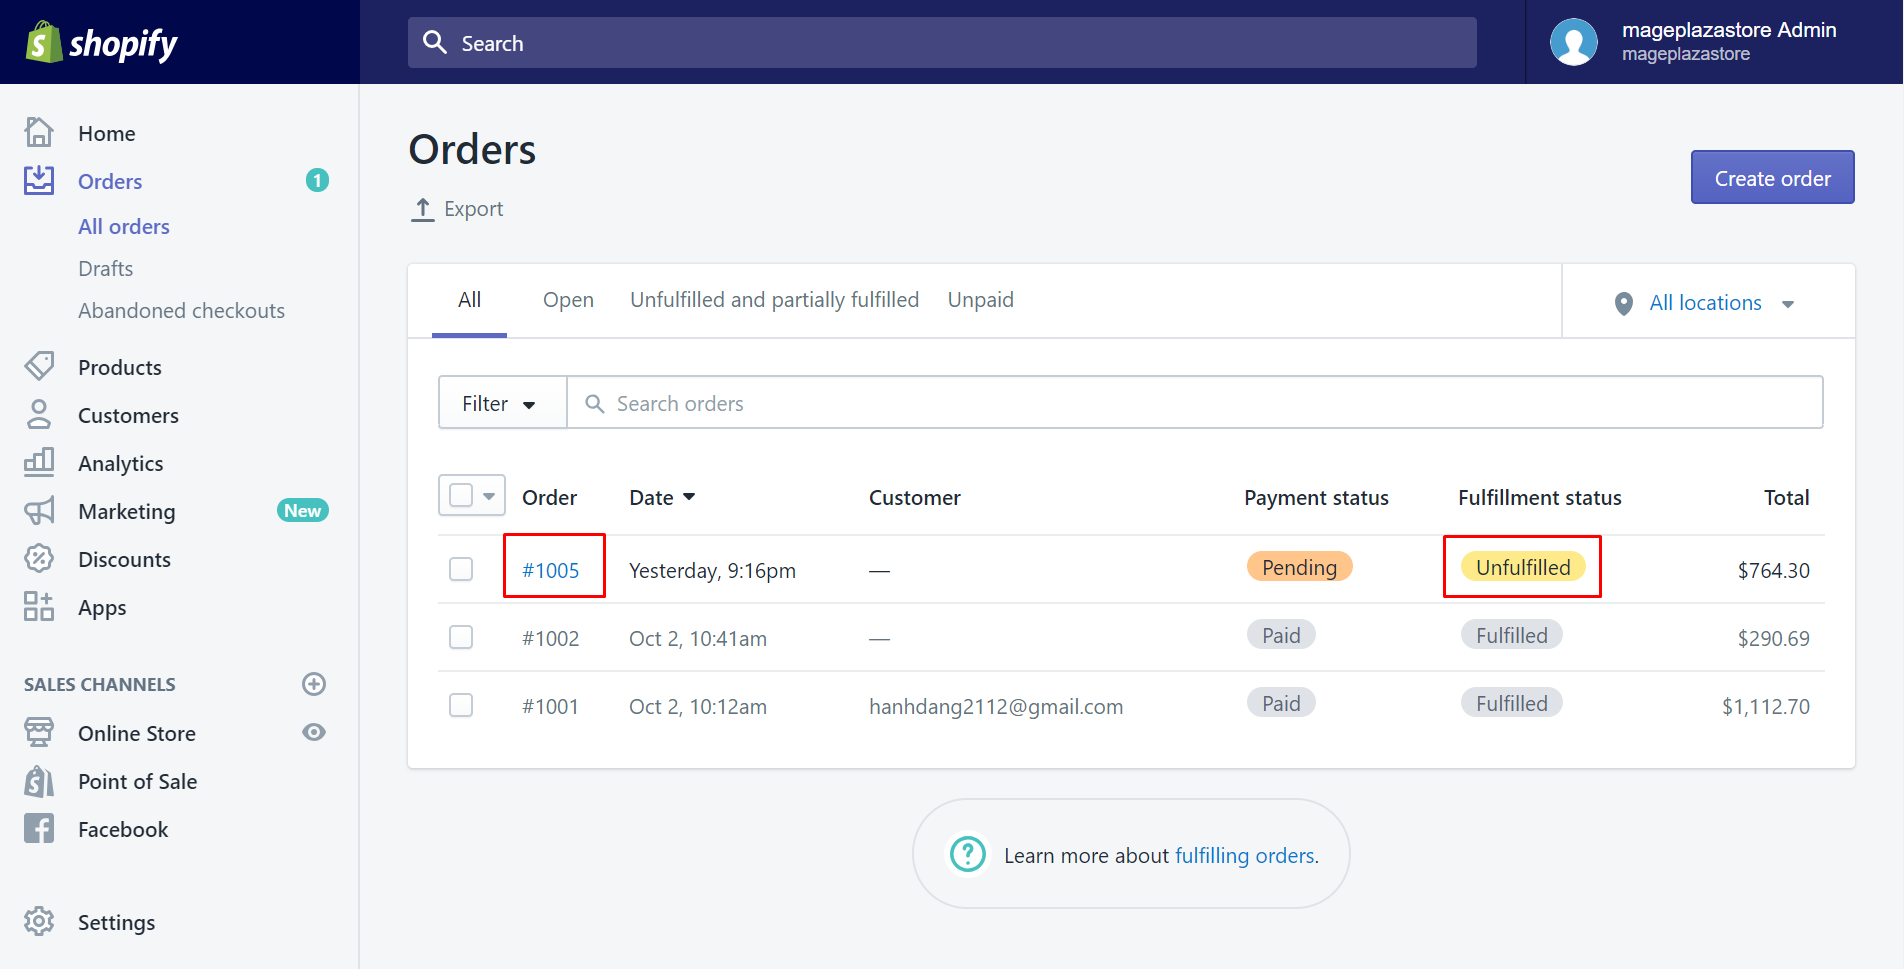
Step 2: Choose an order
The Orders page will come out. You can view a list with all of your orders you’ve made. Choose the one you expected to add a tracking number by tapping on the name. Remember that it must has a fulfillment status of Partially fulfilled or Unfulfilled.
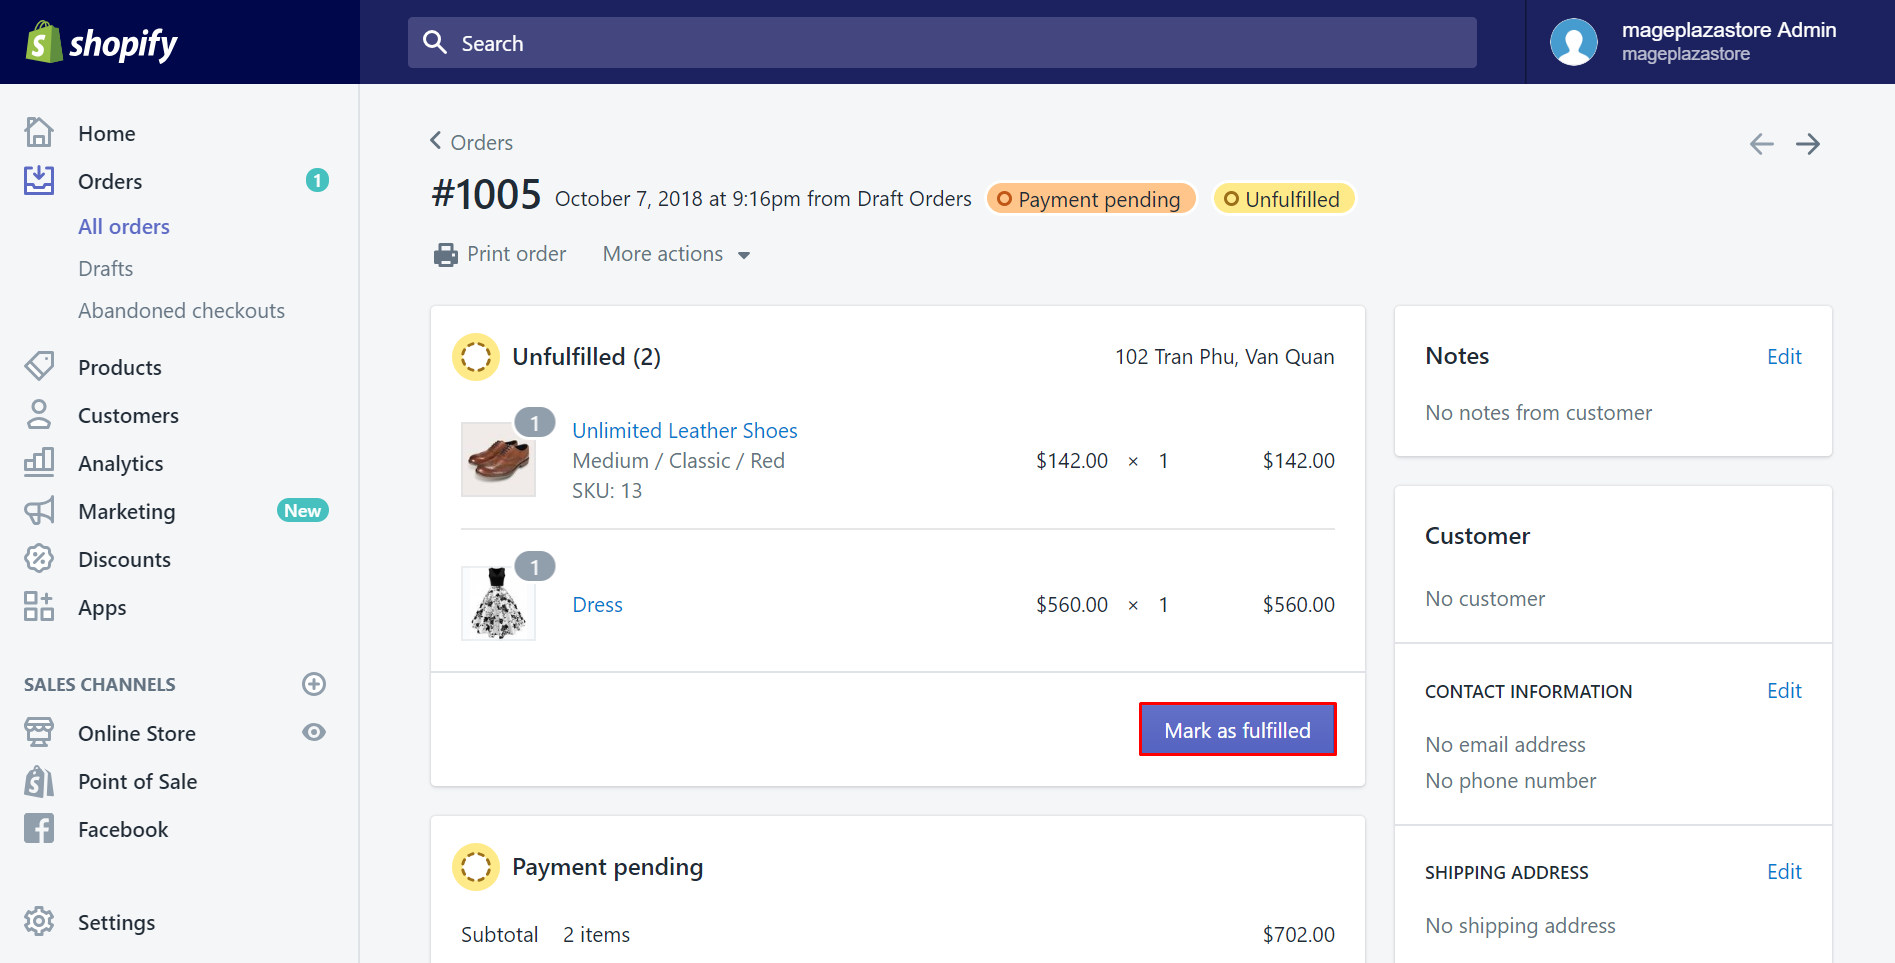
Step 3: Click Mark as fulfilled
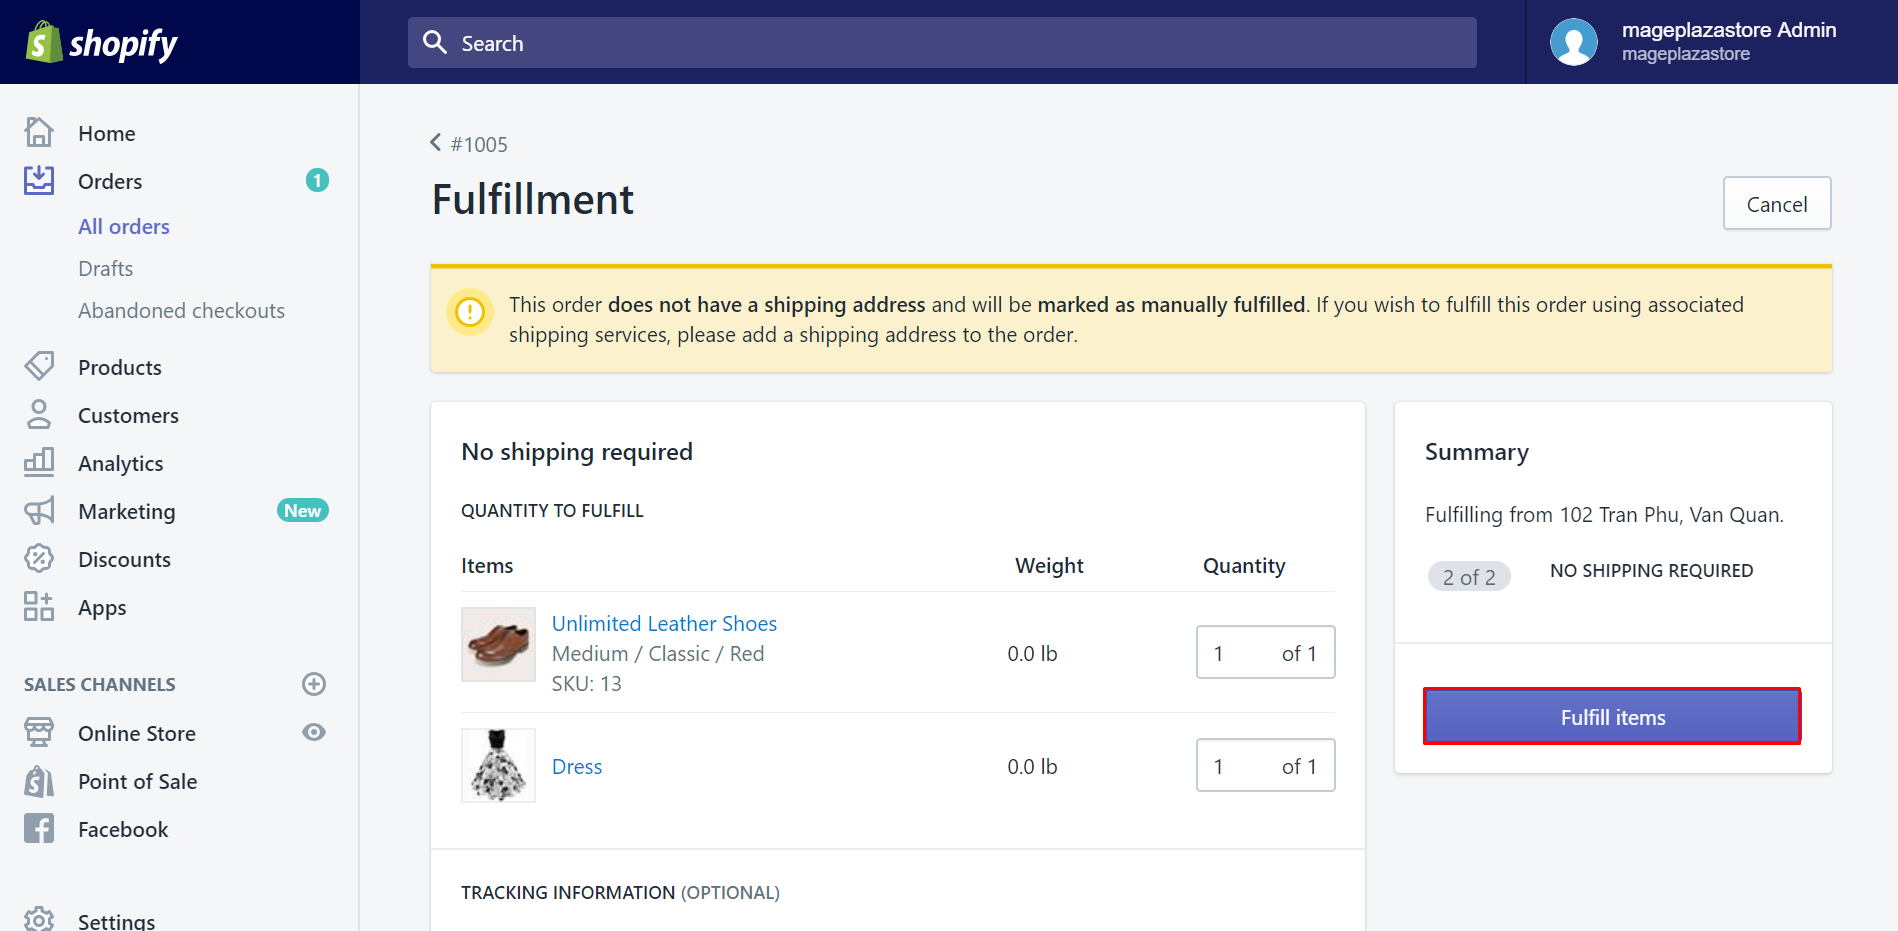
In this step, take a look of the Unfulfilled section, you will see a button called Mark as fulfilled. Click on it to access to the order’s Fulfillment page.
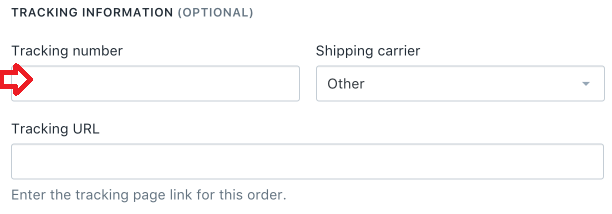
Step 4: Enter the Tracking number
At the bottom of the screen, there is a section named Tracking information. Enter your shipment’s tracking number here.
Step 5: Choose a shipping carrier
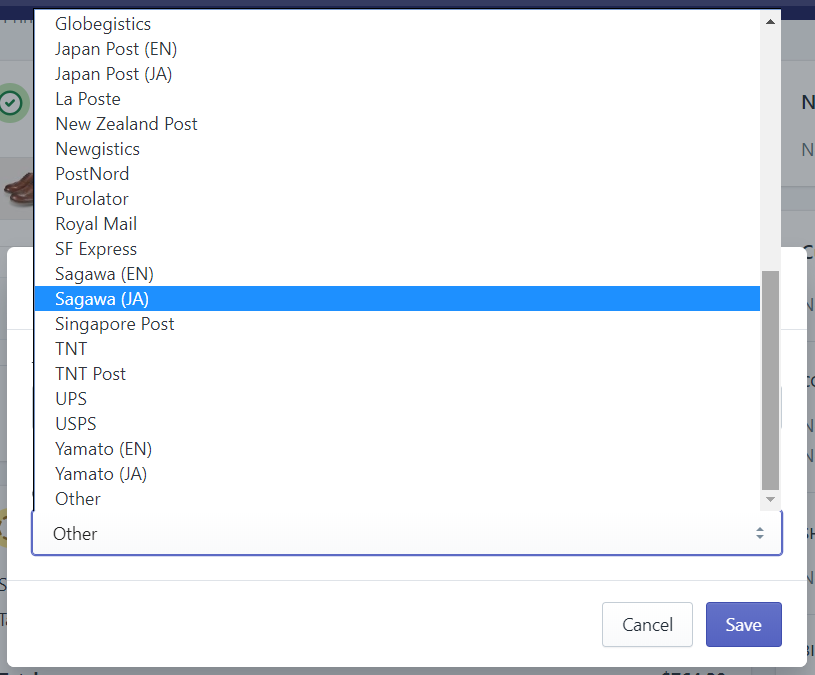
In this step, Shopify will automatically choose a shipping carrier for you based on the tracking number format. If it doesn’t meet your requirement, you can choose your shipping carrier on your own. Select one from the Shipping carrier drop-down menu.
Step 6: Enter the Tracking URL
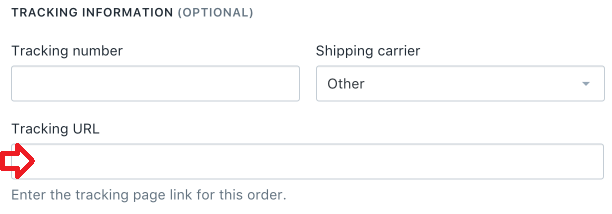
If the carrier you’ve chosen isn’t fully supported by Shopify or you choose Other option in the drop-down menu from the Shipping carrier section, make sure to enter the Tracking URL on your own.
Remember to type the complete URL so that the carrier can track the shipment effectively. This tracking number will be shown on the order status page for you to view.
Step 7: Click Fulfill items {click-fulfill-items}
Finally, select the Fulfill items button to complete.
To add tracking numbers to a fulfilled order
- Step 1: Go to Orders
- Step 2: Choose an order
- Step 3: Click Add tracking
- Step 4: Enter Tracking number
- Step 5: Choose a shipping carrier
- Step 6: Enter Tracking URL
- Step 7: Save
Step 1: Go to Orders
The first thing you will do to be able to add tracking numbers is clicking on this link and logging to your Shopify account. In the Shopify admin page, click on the Orders section.
Step 2: Choose an order
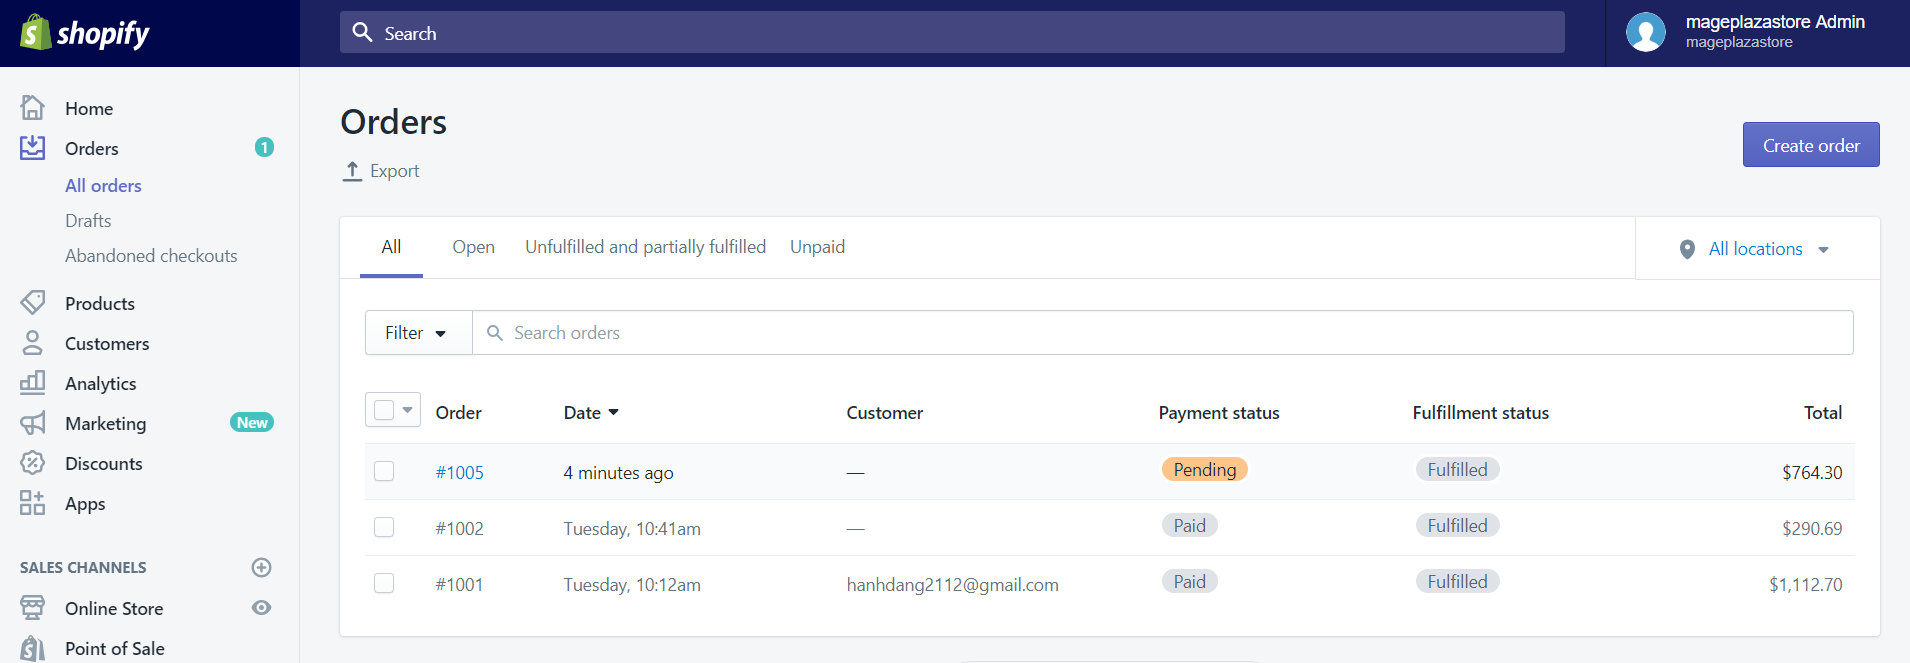
In the Orders screen, you will see a list includes all the orders that you have added before. In this list, you can find the order where you want to add a tracking number. When you found it, click on the order number of that order to select it.
Step 3: Click Add tracking
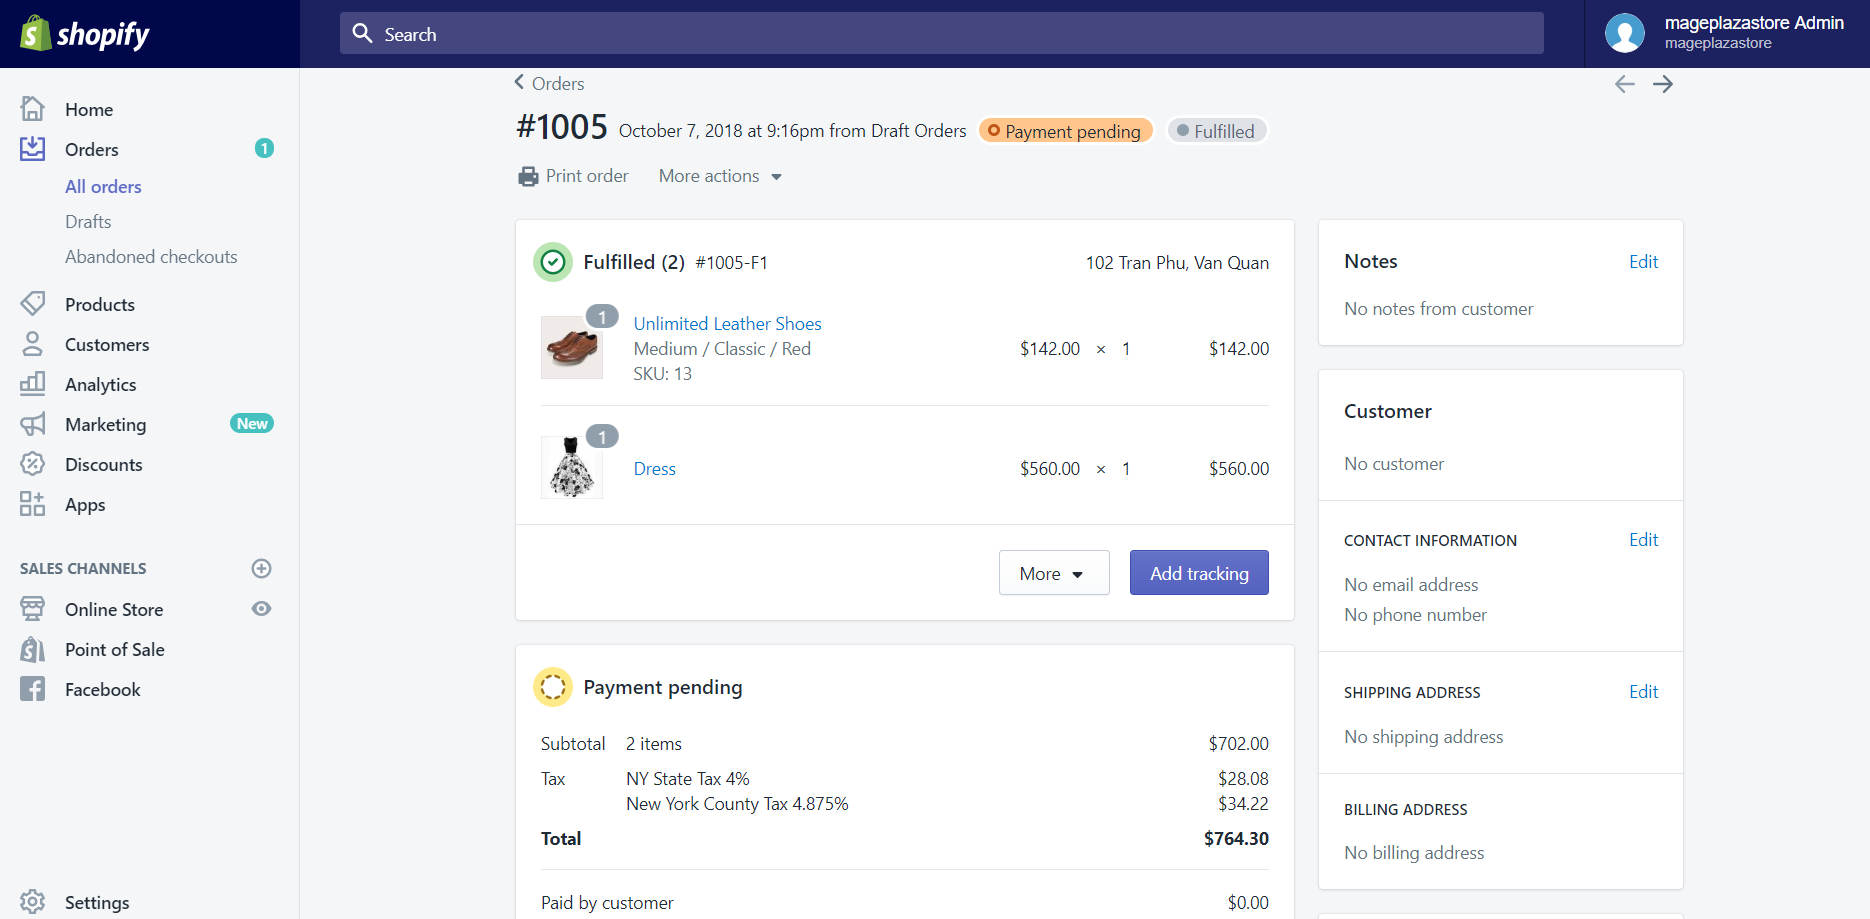
Afterward, in this step, you can click on the Add tracking button which is in the Fulfilled section.
Step 4: Enter Tracking number
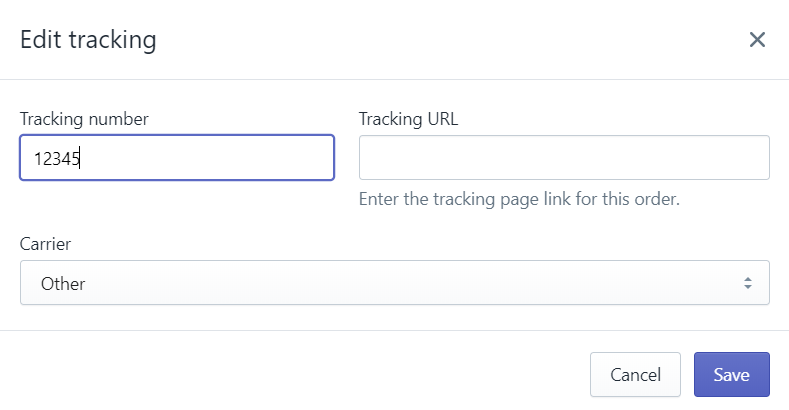
When you have finished the above step, a small dialog called Edit tracking will appear. In this dialog, you can enter the Tracking number of your shipment.
Step 5: Choose a shipping carrier
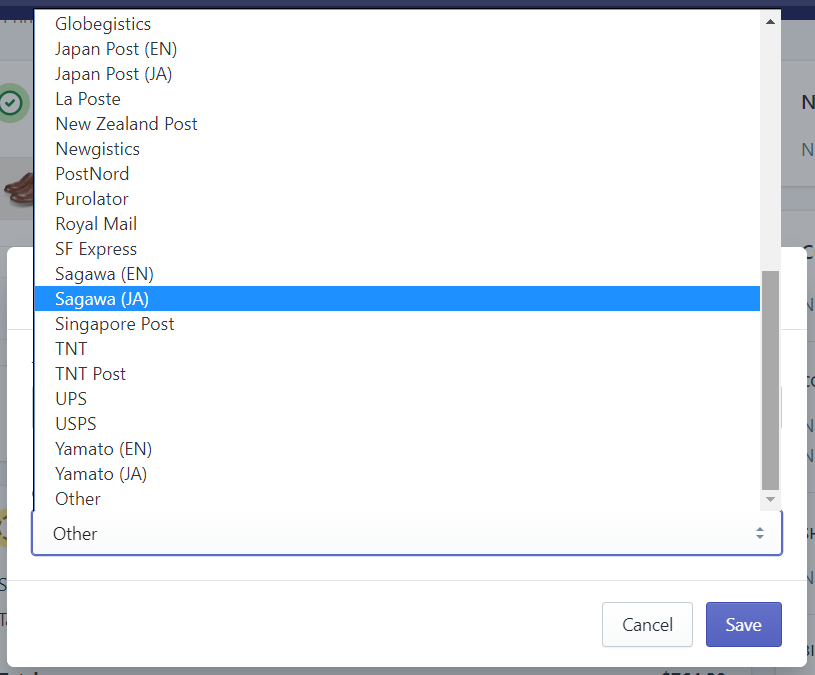
After entering your shipment’s Tracking number, Shopify may recognize the format of the tracking number, and it will automatically choose a shipping carrier for you. But, in some cases, Shopify might not identify the tracking number format. When this happens, you can then choose a shipping carrier which is in the Carrier drop-down list by yourself.
Step 6: Enter Tracking URL
If Shopify fully supports your carrier, you will not have to enter the Tracking URL. But if Shopify does not support your carrier, you can then select Other from the drop-down menu in the Carrier field and enter the Tracking URL. When entering the URL, you need to enter the complete one including the digits which your carrier provided to help you track the shipment.
Step 7: Save
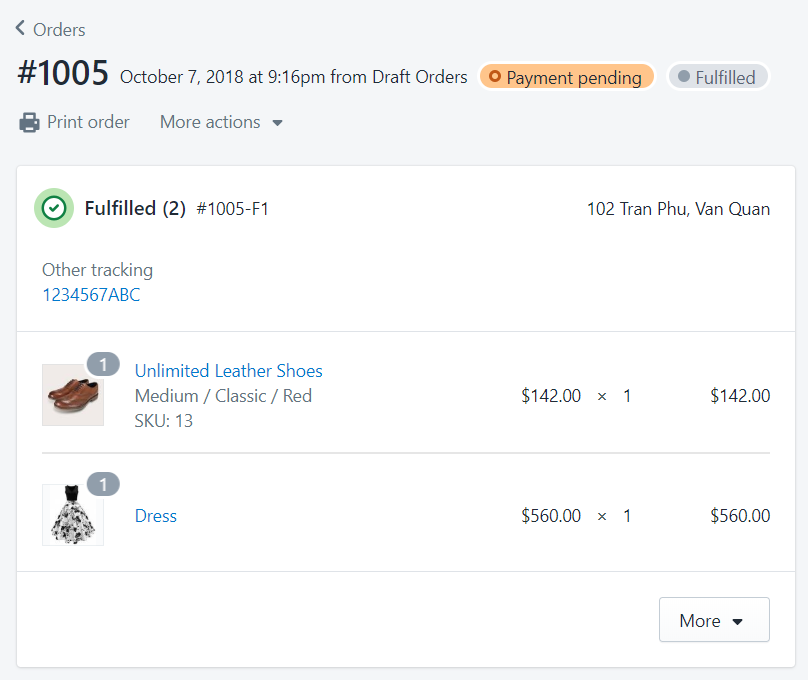
After you have finished entering all the information includes a Tracking number, Tracking URL and Carrier, the final thing you will need to do is clicking on the Save button. After you have saved this changes, the tracking number which you have entered will appear on your order status page.
Conclusion
Above is the brief tutorial that I have prepared for you on how to add tracking numbers while fulfilling an order and to fulfilled orders on Shopify. I hope that this could help you and your crew when adding tracking numbers. If you’re interested in this topic, check out our other posts about orders on Shopify.


