How to Allow or Disable Comments on a Blog on Shopify
When doing online business, you would like to create your own blog to get closer to the customers. When you have a blog, you have to manage it, that means you’ll need to know how to do things like allowing or disabling comments. If a new blog is created, its comments are all disabled by default. You can change it with these three options in the comment settings: disable your comments, allow comments with pending moderation, and allow comments with automatically publish.
Related Posts:
- How to add a blog on Shopify
- How to approve or delete comments on Shopify
- How to remove spam comments on Shopify
- How to create a new blog template on Shopify
- How to edit a blog name on Shopify
The following steps will tell you How to allow or disable comments on a blog on Desktop, iPhone, and Android.
Step 1: Go to Blog Posts
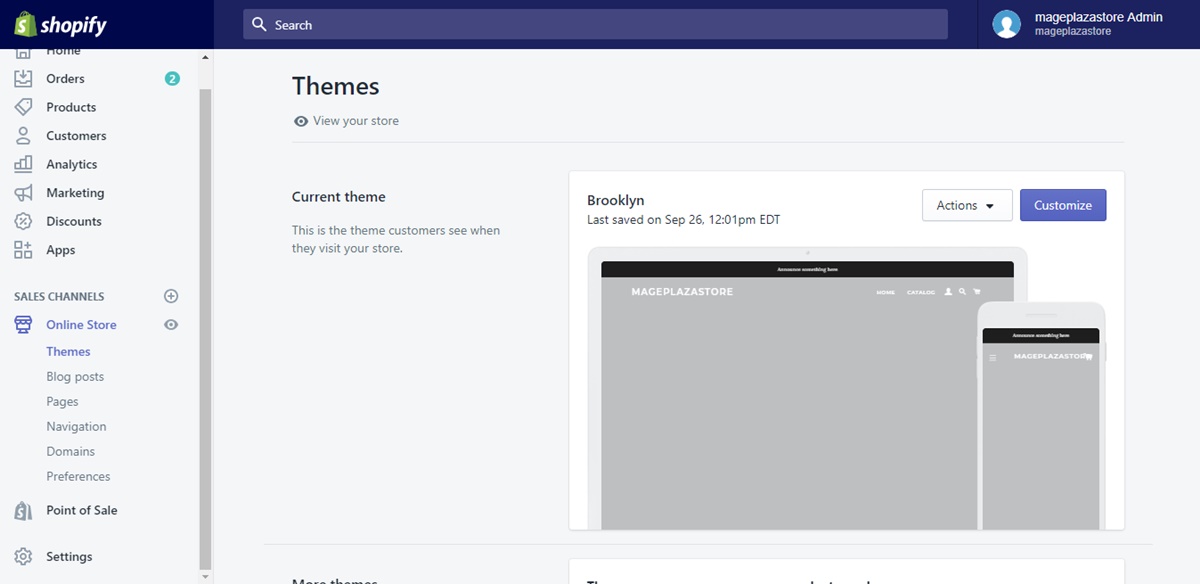
After logging in to your Shopify admin, click to choose Online Store under the Sale channels section in the column of your left. Choose Blog Posts under Sale channels for blog management.
Step 2: Click Manage Comments
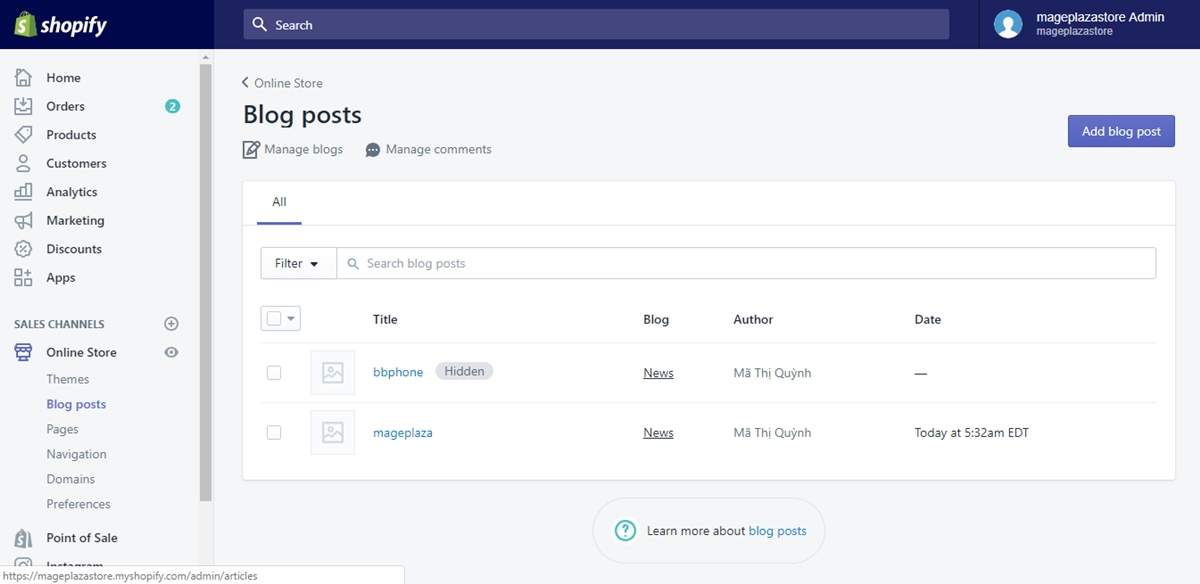
Upon directed to the Blog Posts page, you will see the Manage blogs and Manage comments option right under the Blog Posts line. Click on Manage comments for more comments managing options.
Step 3: Choose Blog
The Manage comments page shows you the blogs you can edit. Click on the title of the blog that you want to edit for further information.
Step 4: Comments managing
In the blog’s details page, scroll down till the Comments section appear. Select the option that you want in the three options. When you are done, click Save and your action is finished.
To allow or disable comments on a blog on iPhone (Click here)
- Step 1: Go to Store
From the Shopify app from your device, tap Store to enter the options about your store.
- Step 2: Enter the Online Store
In the Store page, tap Online Store after finding it out under the Sales channels section.
- Step 3: Your Blog posts
Tap Blog posts in the directed Online Store page. It will automatically lead you to your already-made blog posts.
- Step 4: Select Manage comments
In Blog Posts, you will see a three-dot button right next to the Blog Posts line. Tap on it and wait for more options to show up. In those options, select Manage comments to enter further steps.
- Step 5: Choose the blog
The Manage comments option will show you every blogs that you created. Tap on the title of the chosen blog so that you can edit it.
- Step 6: Manage your comments
In your chosen blog’s details page, scroll down to find the Comments section in which you will have the options to manage your comments. In the provided three options, select only one that you want, and tap Save to wrap up.
To allow or disable comments on a blog on Android (Click here)
- Step 1: Tap Store
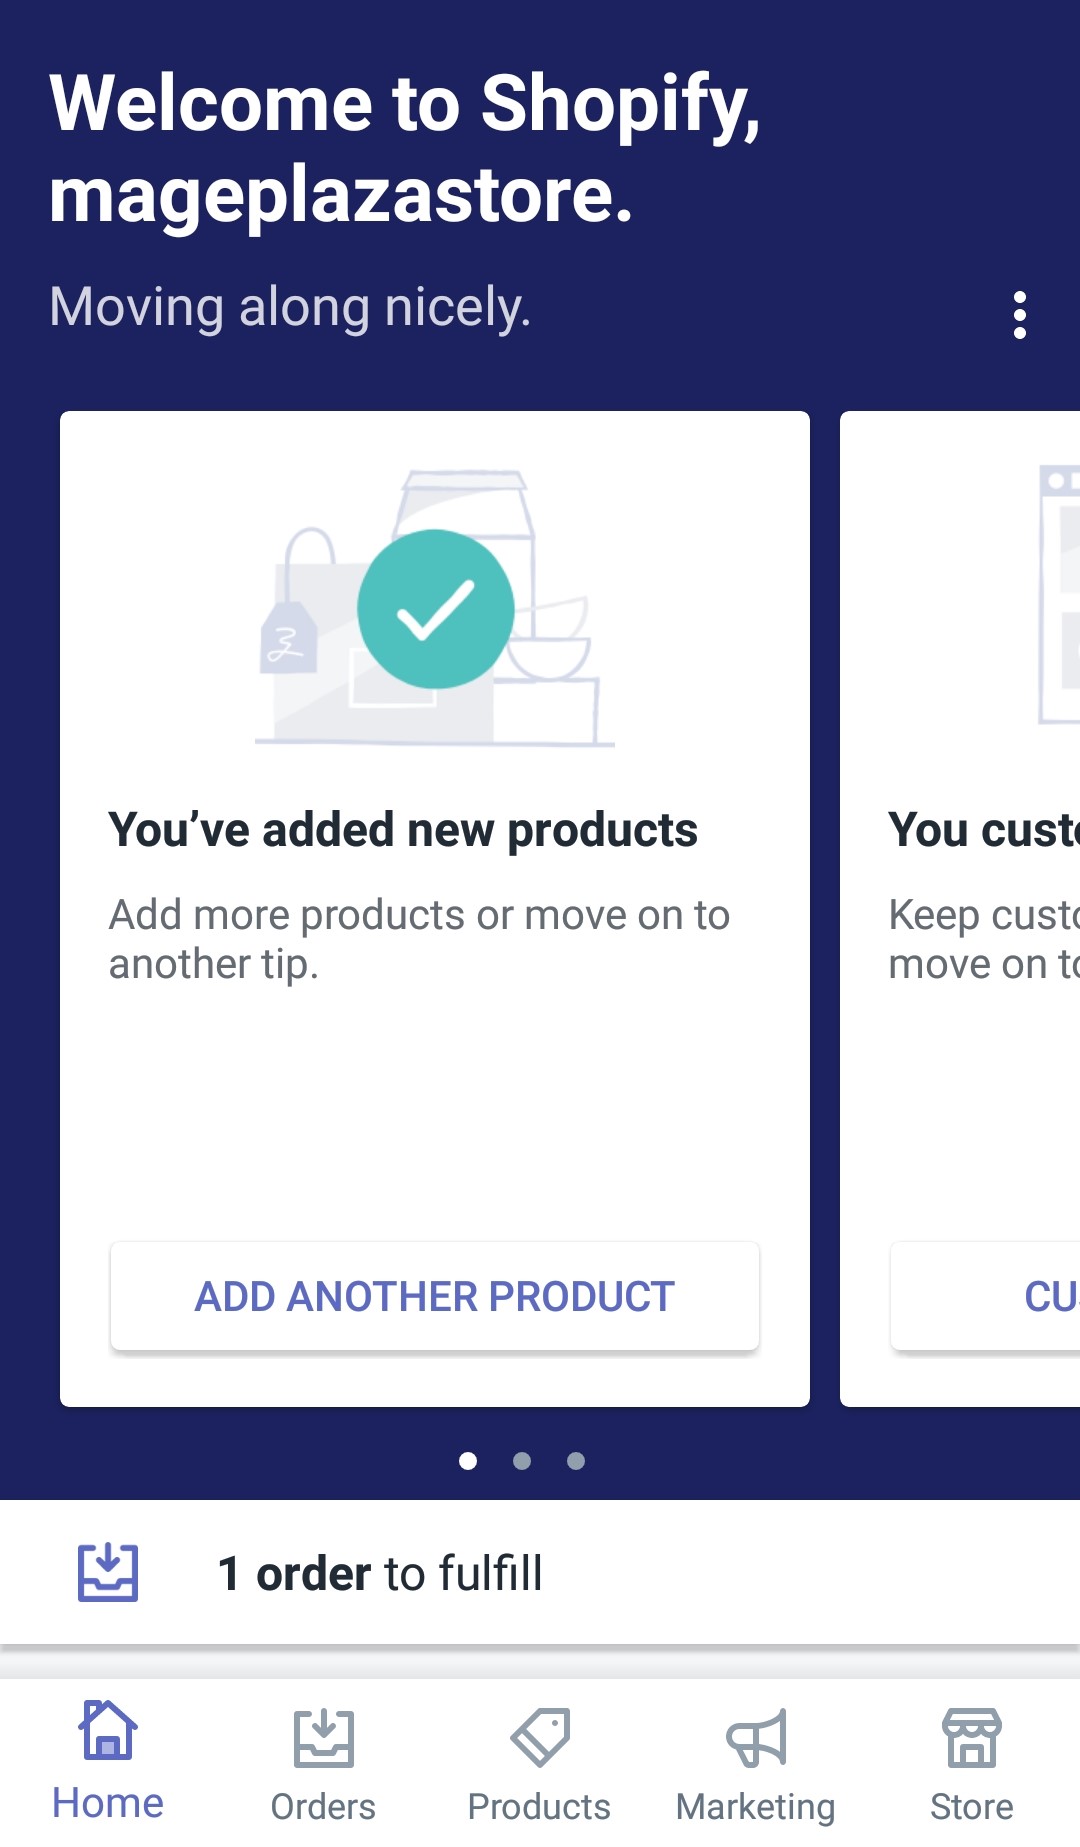
From your admin account logged Shopify app, find and tap the Store button to enter the Store page.
- Step 2: Go to Online Store
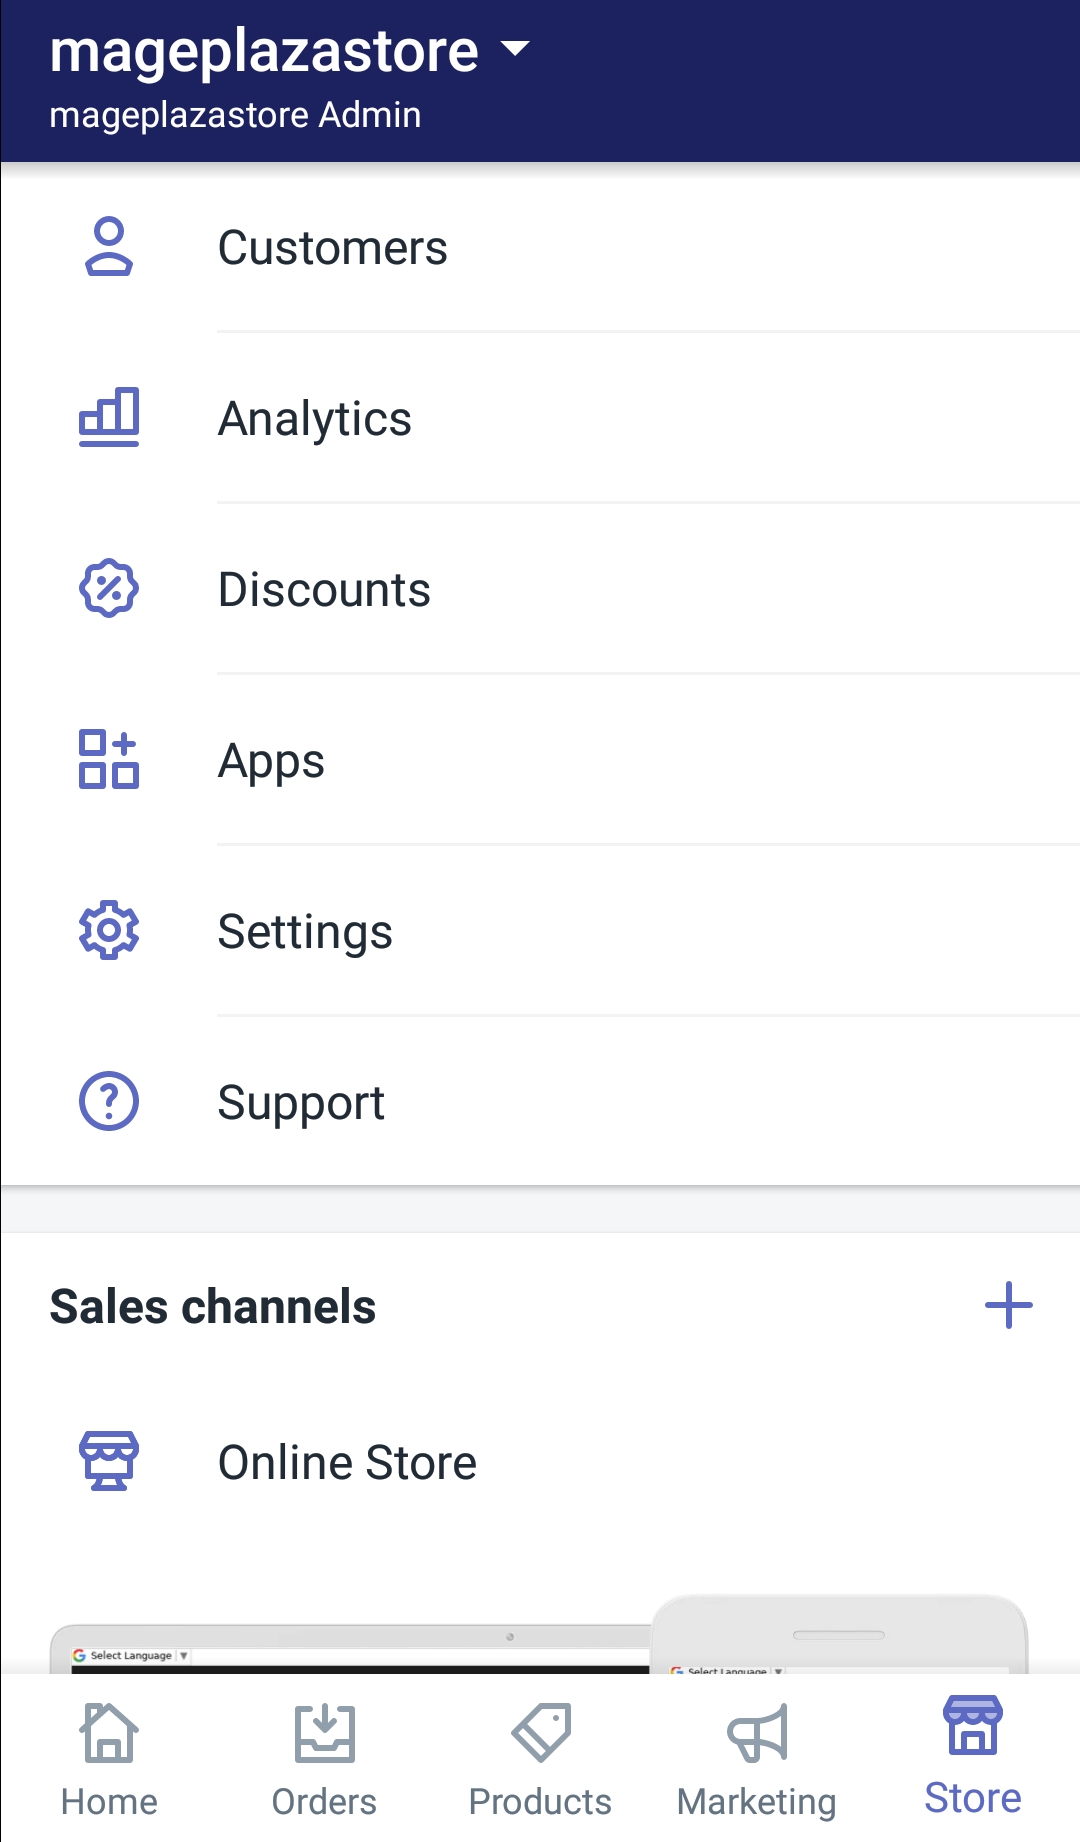
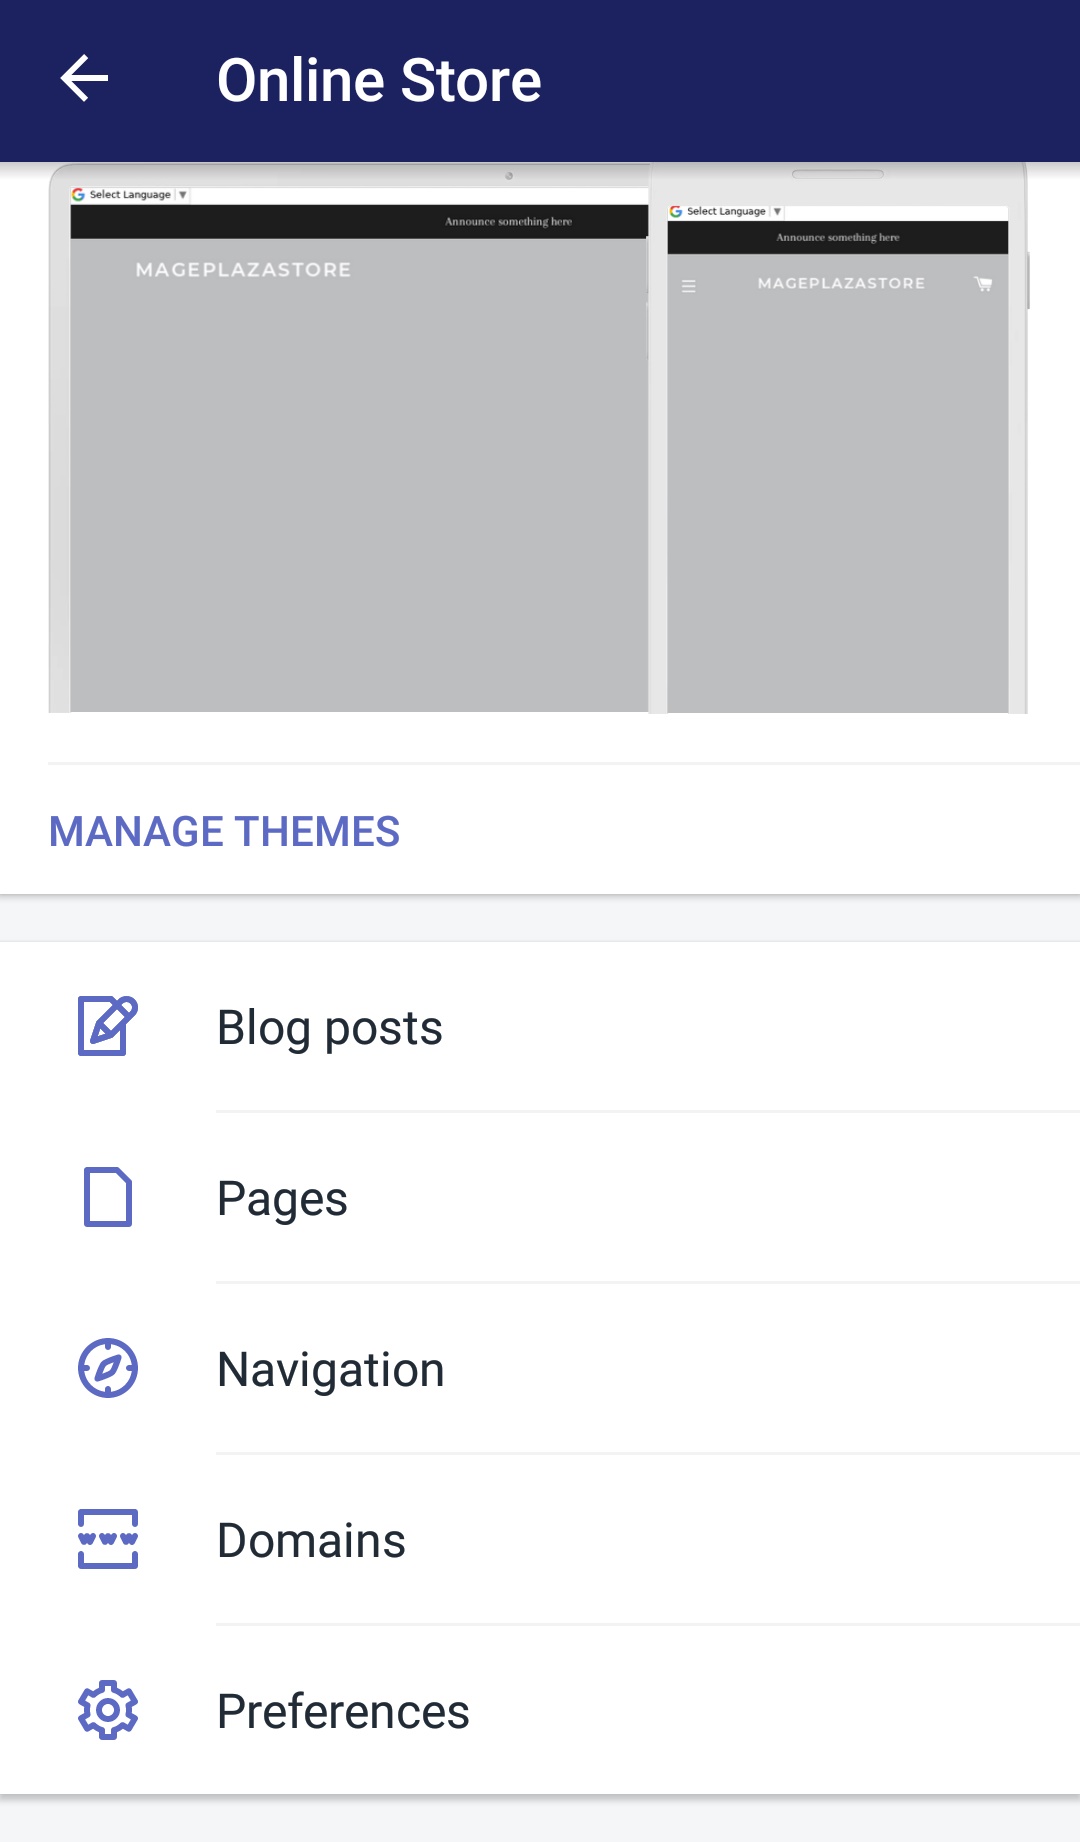
Scroll down until you see the Online Store option under the Sales channels section. Tap on it for more options.
- Step 3: Enter Blog Posts
In your chosen Online Store page, tap Blog Posts to enter more blog posts options.
- Step 4: Tap Manage comments
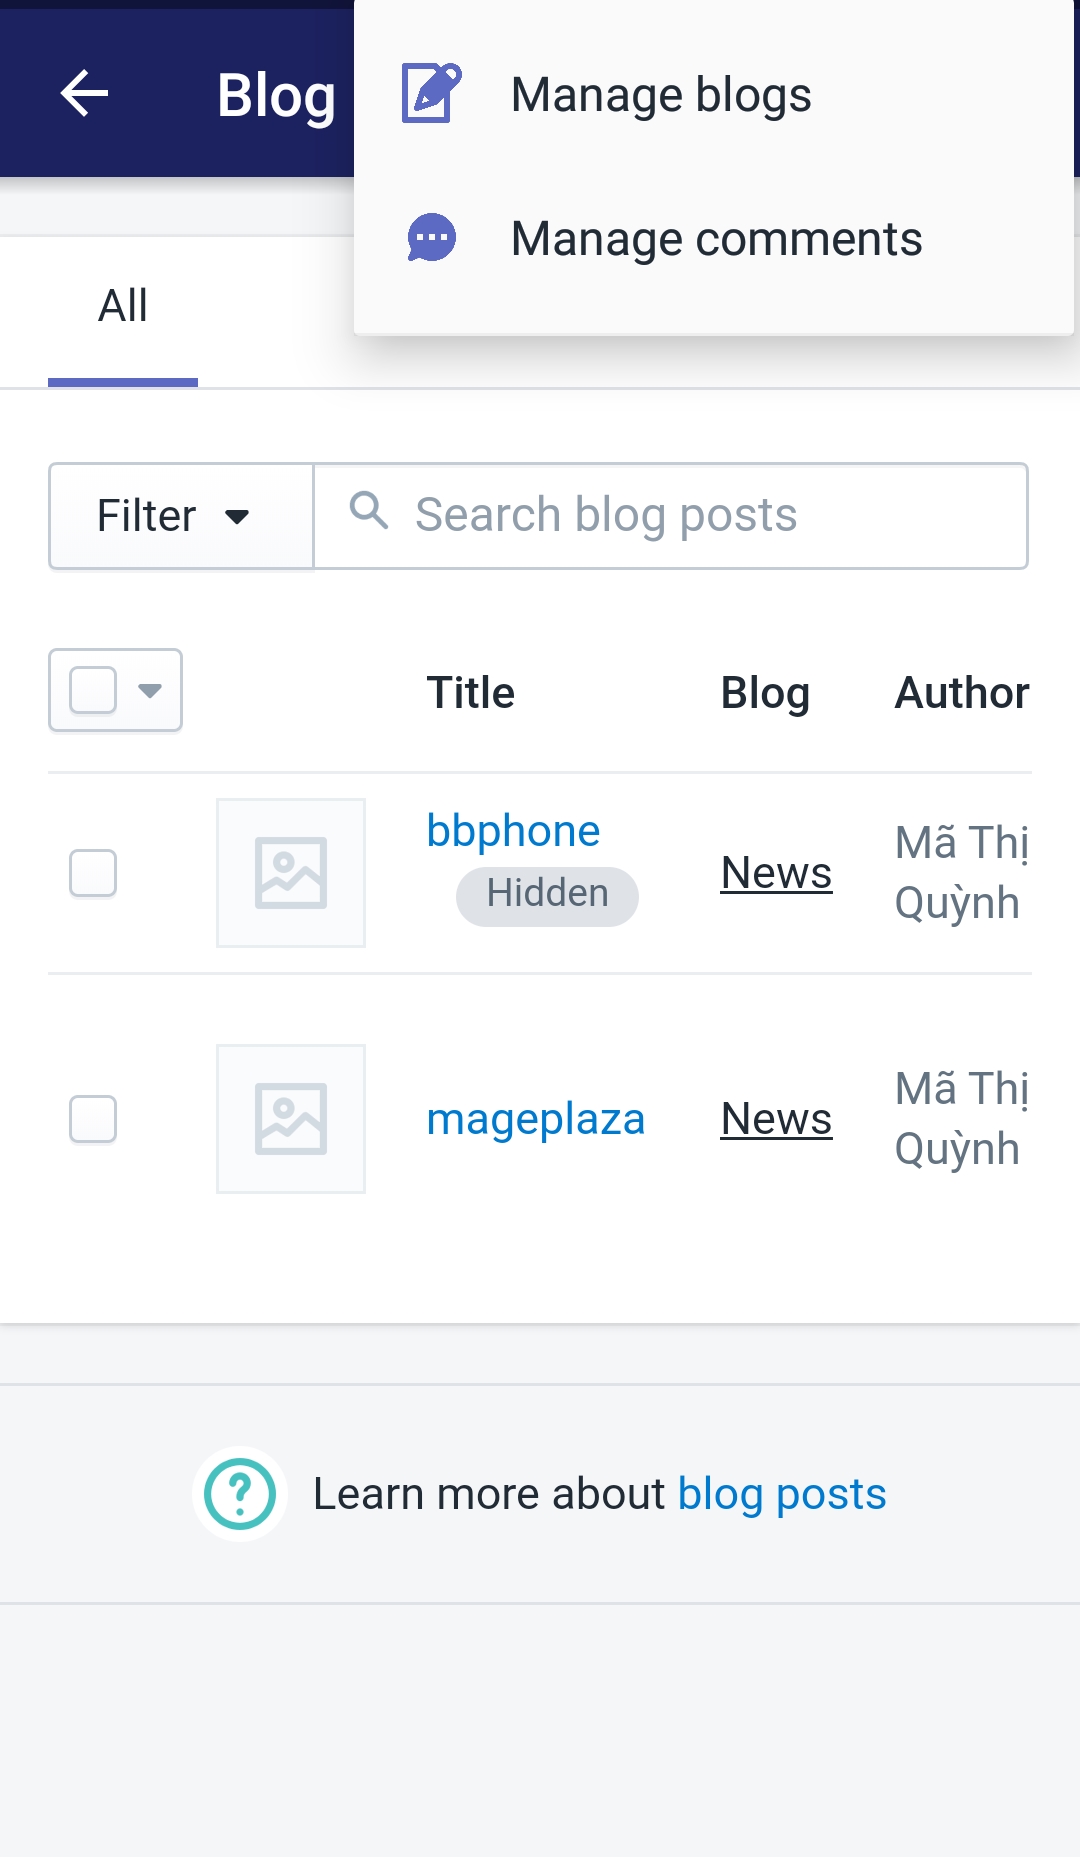
Upon entering the Blog posts page, you will see the Blog posts line in the page header. In the same line with the header is a three-dot symbol. Tap on it and select Manage comments to start managing your comments.
- Step 5: Choose wanted blog
Tap to choose the blog that you want to edit on its name. You will be automatically directed to the next step.
- Step 6: Comments management
Find the Comments section, choose your wanted option in the three provided options and tap Save to confirm your changes.
Conclusion
Above are some steps I prepared for you to tell you How to allow or disable comments on a blog on Shopify. I hope you will find these information helpful, and if you want more, check out our Shopify tutorials.


