How to Change Inventory Quantities by Using the Bulk Editor
Inventory changing is usually one of the most time consuming and tiring work to do when runnign a online store, but with the life-changing functions from Shopify, that hardship is completely removed.
But even though mastered every of the functions from Shopify, I believe that many of you still wonder if there is a faster way to resolve the inventory changing session that can make if faster and easier with just one tool and some brief steps. Instead of entering several pages and having to scroll up and down to find the right section, you just want to do all the works in one page only, with no more finding, scrolling, and redirecting.
That’s why today, I will introduce you How to change inventory quantities by using the bulk editor on Desktop. With the bulk editor, your online store products’ inventory quantities can be changed all at once, with all of the available locations and products.
Shopify online store owners who are running your business on iPhone or a Android device can also apply those steps to your store with no difference.
Step 1: Go to Inventory
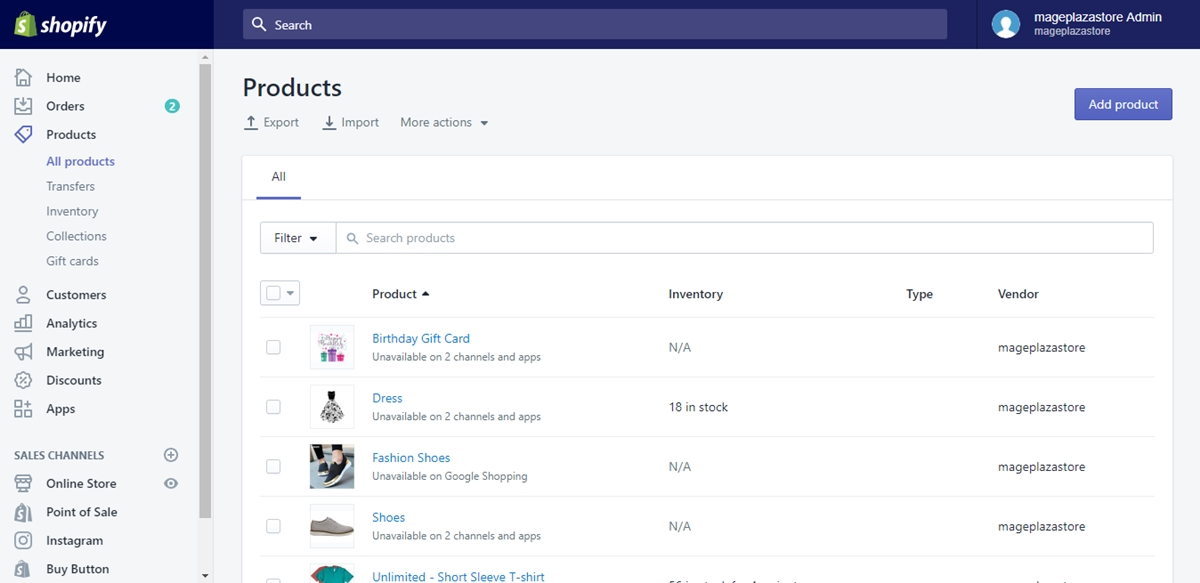
In your Shopify admin home page, go to Products from the managing menu on the left of your page. After that, click on Inventory to go to the Inventory page.
Step 2: Filter or search products
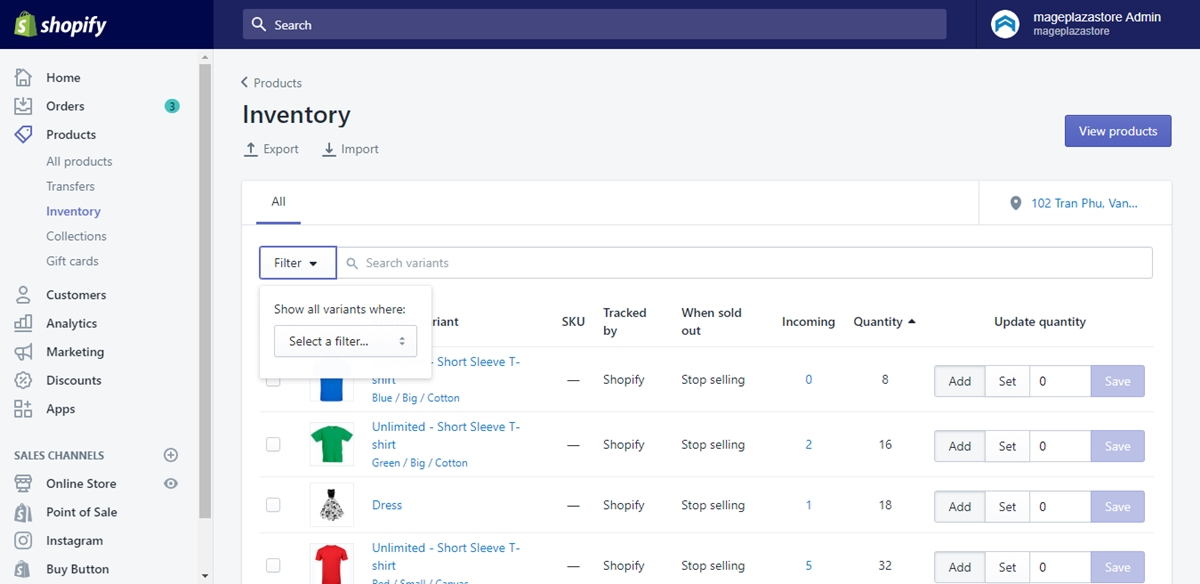
If you want to reach your wanted products easier as there are too many of them, choose to filter or [search the products] exact name. The Filter and Search option is displayed on the top of the list of your products. Click on each one that you like and do the recommended actions.
Step 3: Products selecting
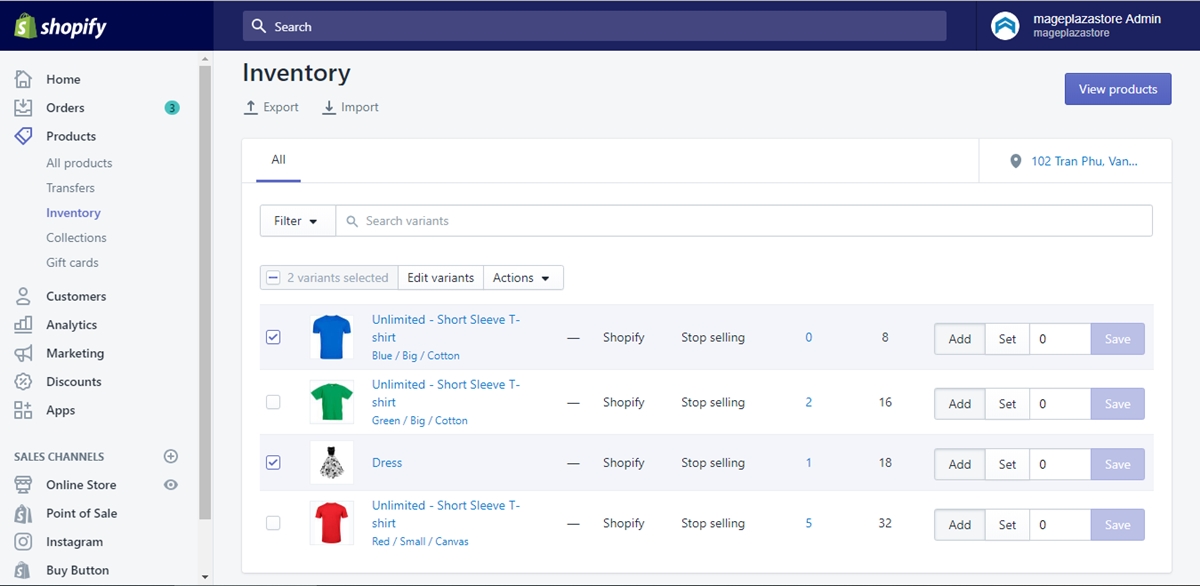
Select the products by clicking on the checkboxes right next to the products’ title. You can choose one or multiple products for the further actions as the bulk editor allows you to update as much products and locations as you want with just one step.
Step 4: Edit variants
After choosing the products, you will see a Edit variants button shows up right upper from the products list and next to the Actions button. Click on it to open the bulk editor.
Step 5: Enter quantities
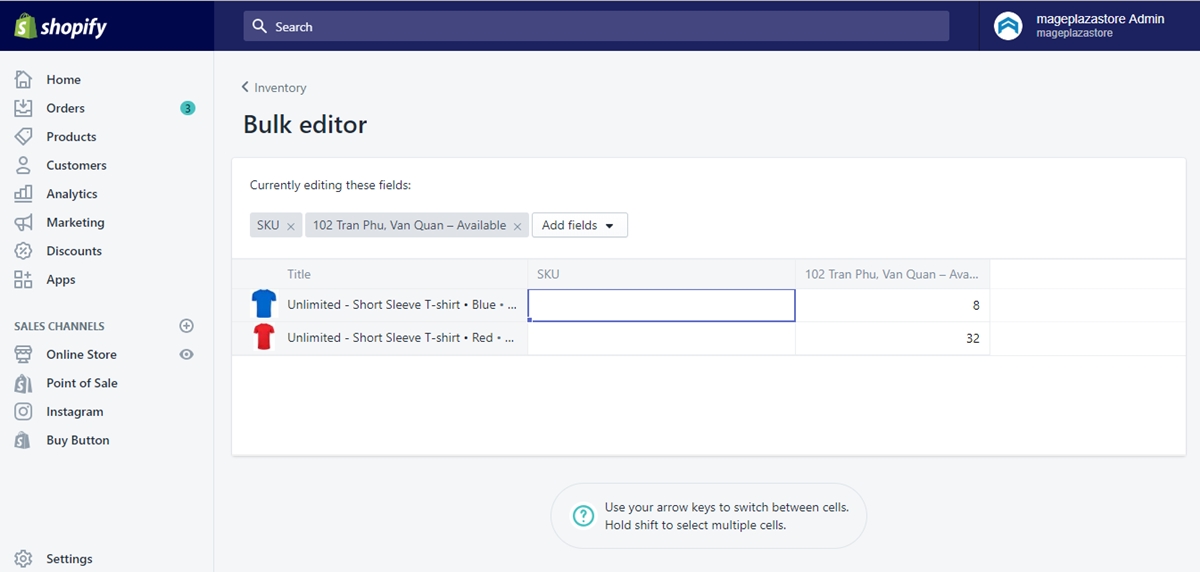
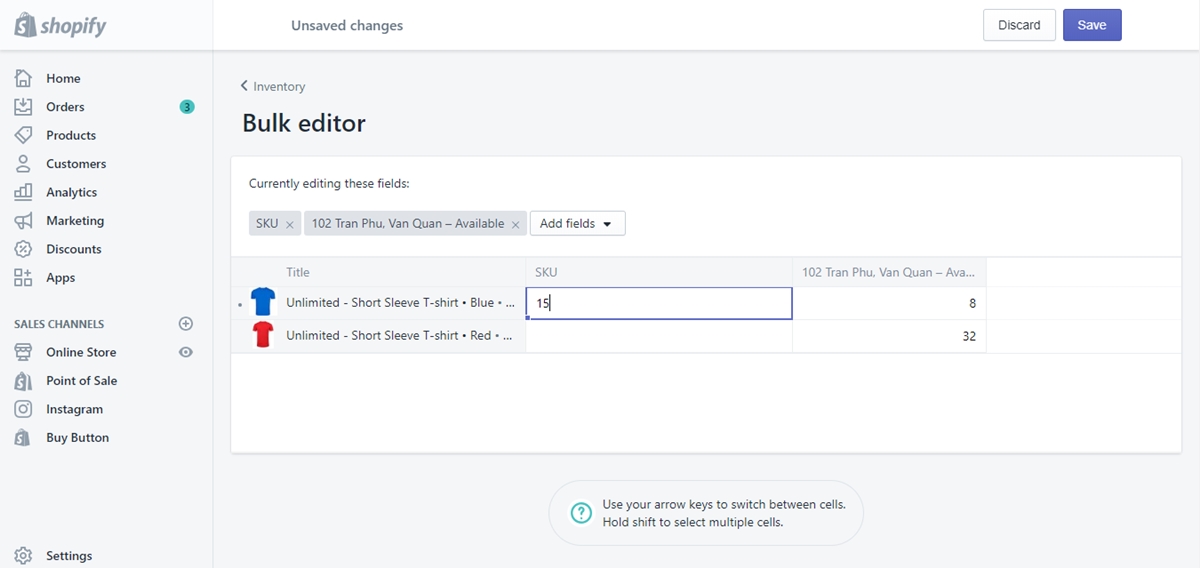
Now as you have entered the bulk editor page, you can make all the changes that you want on the chosen products, with both the quantites and the locations. In the page, you can add or remove locations, and enter each product’s quantites at its specific location.
Step 6: Choose Save
If you are satisfied with the changes that you made, you can save the changes by finding the blue Save button on the upper right of your page and click on it. After clicking the Save button, your actions on all of the chosen products are saved.
Conclusion
In today’s tutorial, I showed you How to change inventory quantities by using the bulk editor on Shopify. With this bulk editor feature, you surely can manage your stock faster by entering just one page with brief steps and effective actions. I hope that this step-by-step tutorial is helpful to you.


