How to Create a New Shipping Zone on Shopify
The destinations of your shipping order are categorized into shipping zones. A shipping zone often covers countries or geographical regions, in which the same fixed, preset shipping fees are applied within that zone. Your current shipping zones and the corresponding fees could be view on the Shipping page on Shopify.
For details, this article would provide you well-tailored instructions with illustration on how to create a new shipping zone on Shopify.
NoteIf a customer’s shipping address is outside of your shipping zones, Shopify will inform them that the shipping rate is not yet available for their location.
Creating a New Shipping Zone
Here’s the step by step guide on adding a new shipping zone on Shopify:
Step 1: Go to the Shipping section from Shopify Admin
First, log in your Shopify account, go to the Settings section in your bottom left corner and select Shipping.
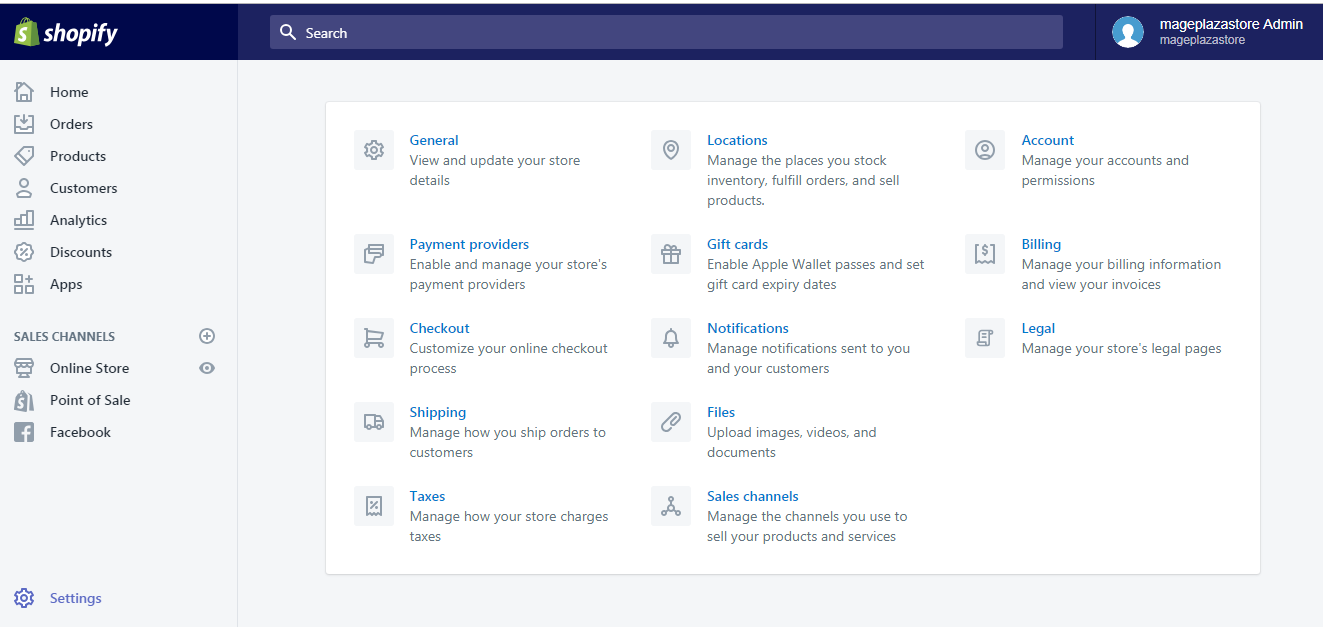
Step 2: Click Add shipping zone
In the Shipping zones section, click Add shipping zone on the top right.
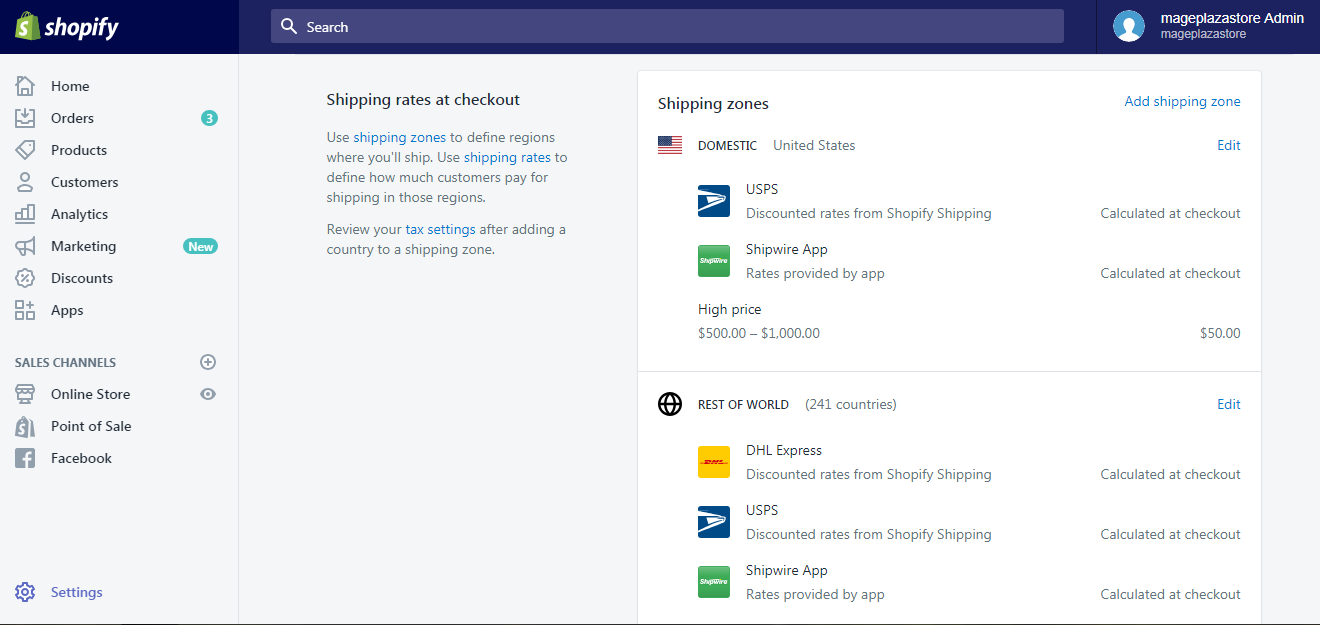
Step 3: Enter new shipping zone name
In the Zone name box, give your new shipping zone a name to differentiate it from others.
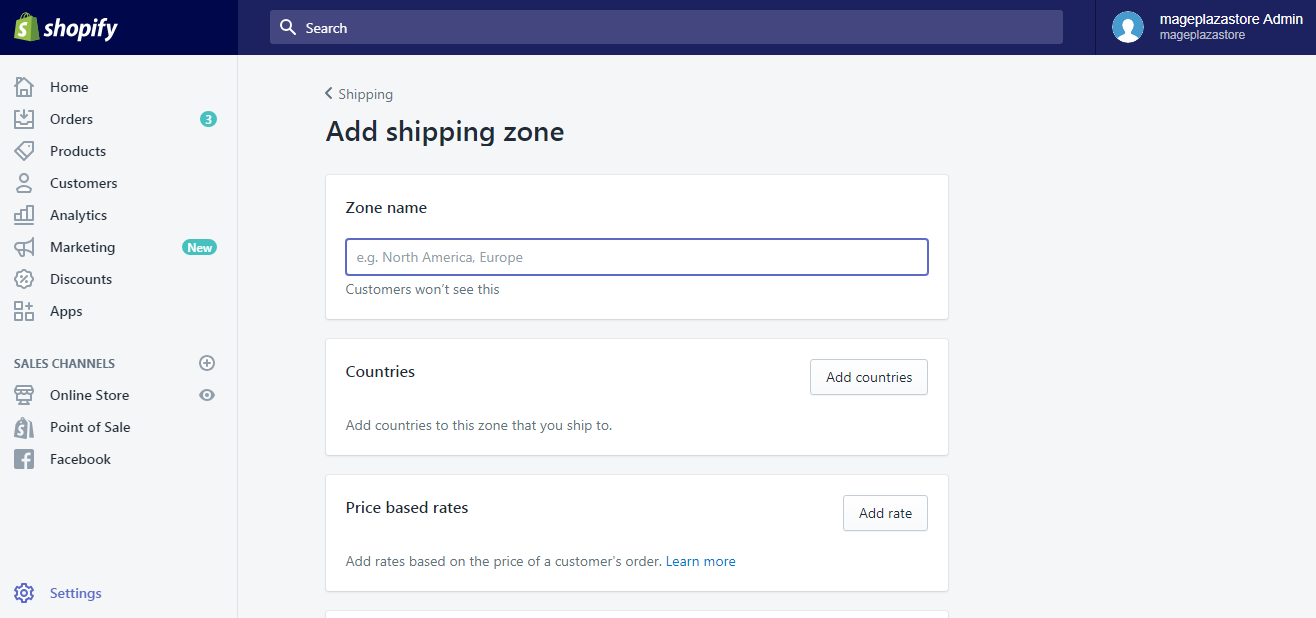
Step 4: Click Add countries
Right under Zone name, in the Countries section, select Add countries to add countries to the zone you named above.

- Caution Don’t forget to review your tax settings after you update a shipping zone, as the default tax rates are calculated based on this.
Step 5: Add countries for your shipping zone
A list of countries will now appear, categorized into continents: Asia, Europe, Africa, Central America, South America, Oceania, North America and Other areas. Select the countries you wish to cover in your new shipping zone, then click Add.
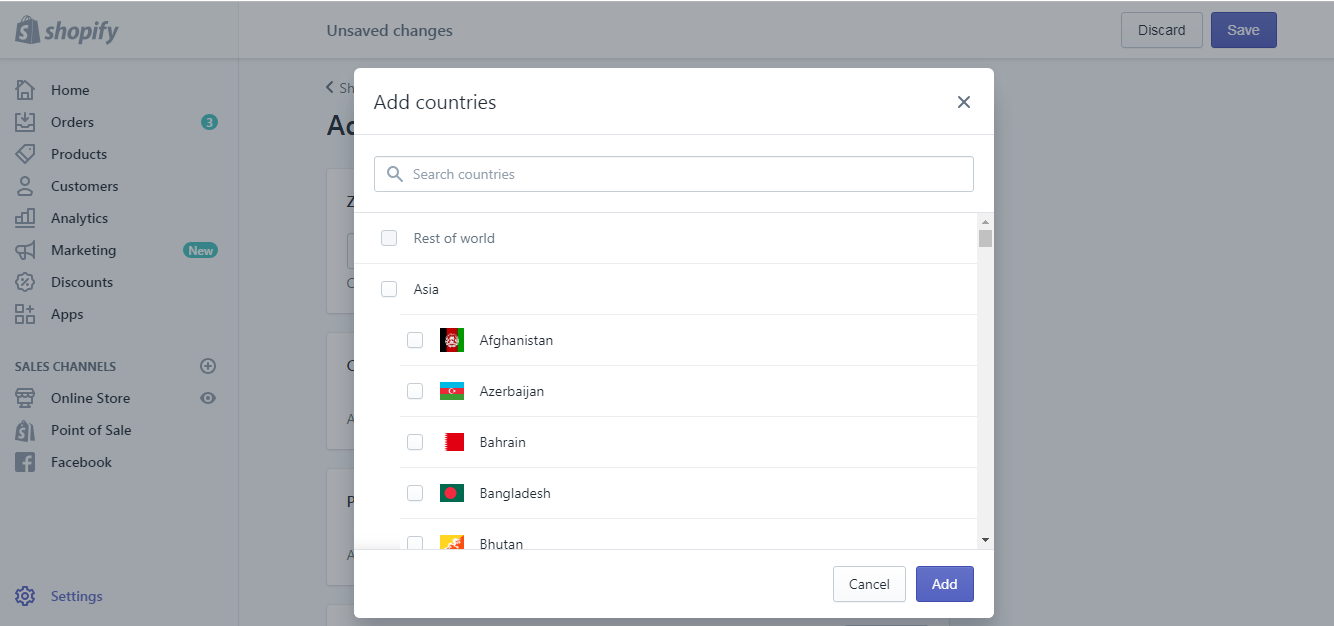
By selecting a large region like Asia or Europe, you will include all the countries in that region. If you want to exclude specific countries within that region, just uncheck the box beside them.
Step 6: Specify the shipping areas within a country if you wish
To limit the shipping areas within a country to certain places, click the blue Edit button beside the country name.
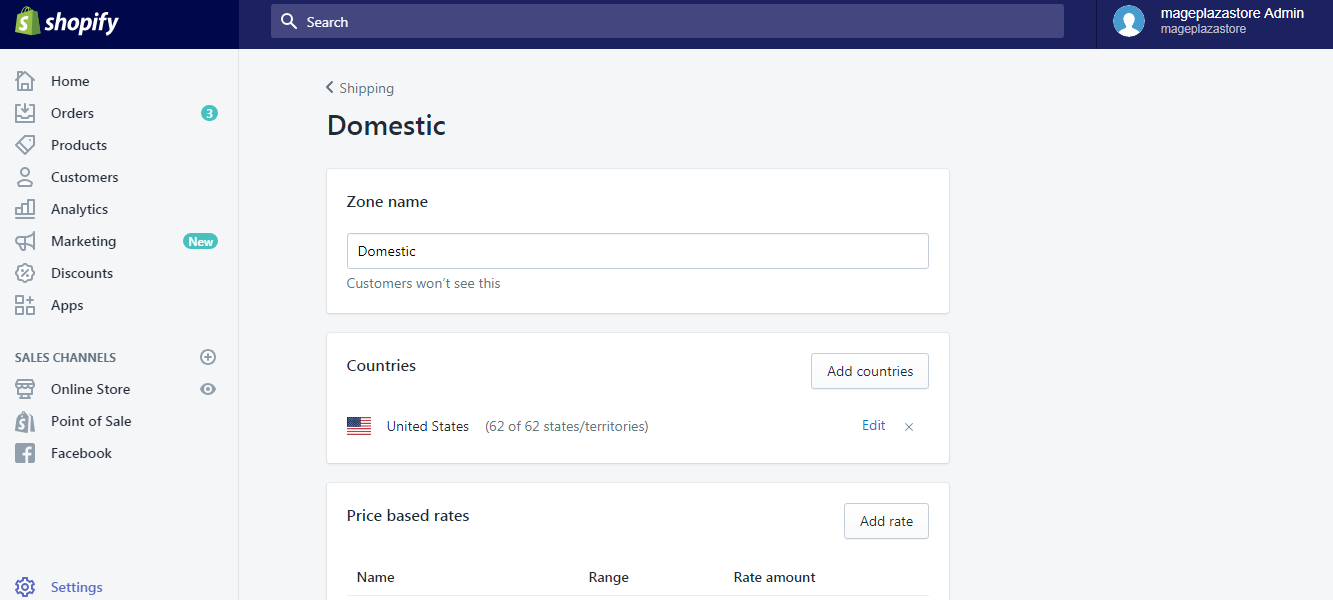
Check the boxes beside states or cities and provinces you want to include in your shipping zone. Uncheck if otherwise. Click Done to save your change.
However, be informed that, in this section, some countries might not display separate states or cities and provinces.
Step 7: Add price based rates or weight based rates to your shipping zone if you wish
Shipping rates for certain areas can be manually customized either based on price or weight. To add manual shipping rates to your shipping zones, click Add rate next to the type of rates you prefer.
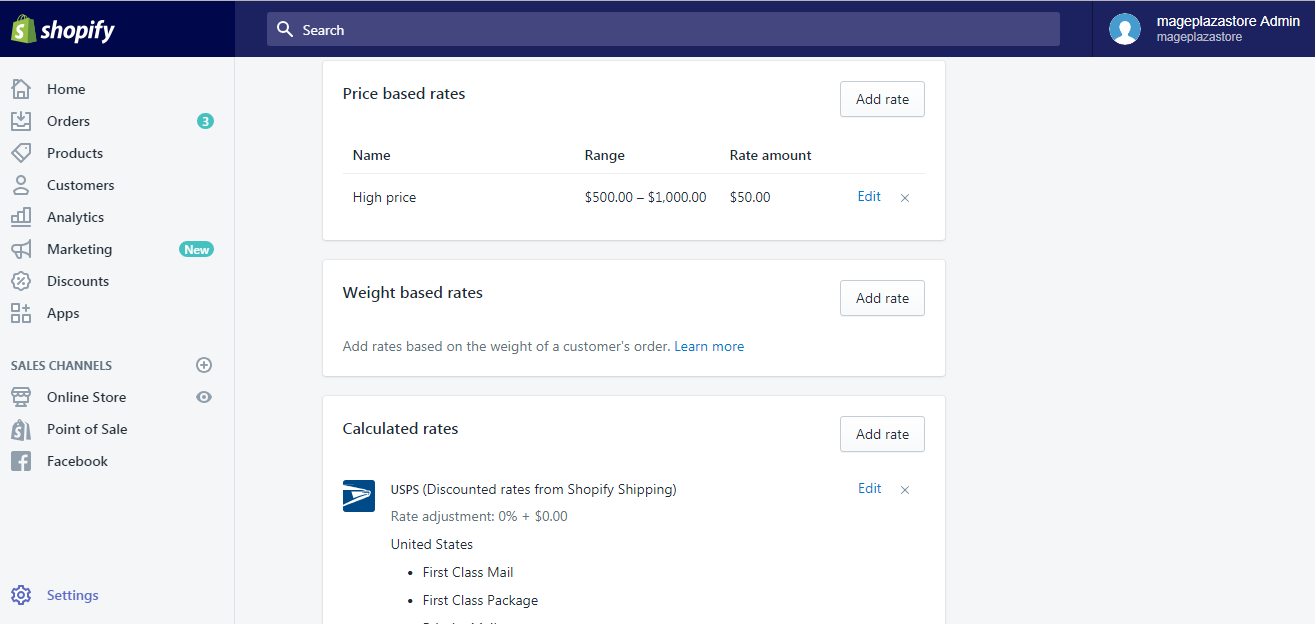
You could choose to do this later if you want.
- Note Calculated rates for your shipping zones could also be added here if you are using Shopify Shipping service.
Step 8: Save new shipping zone that you created
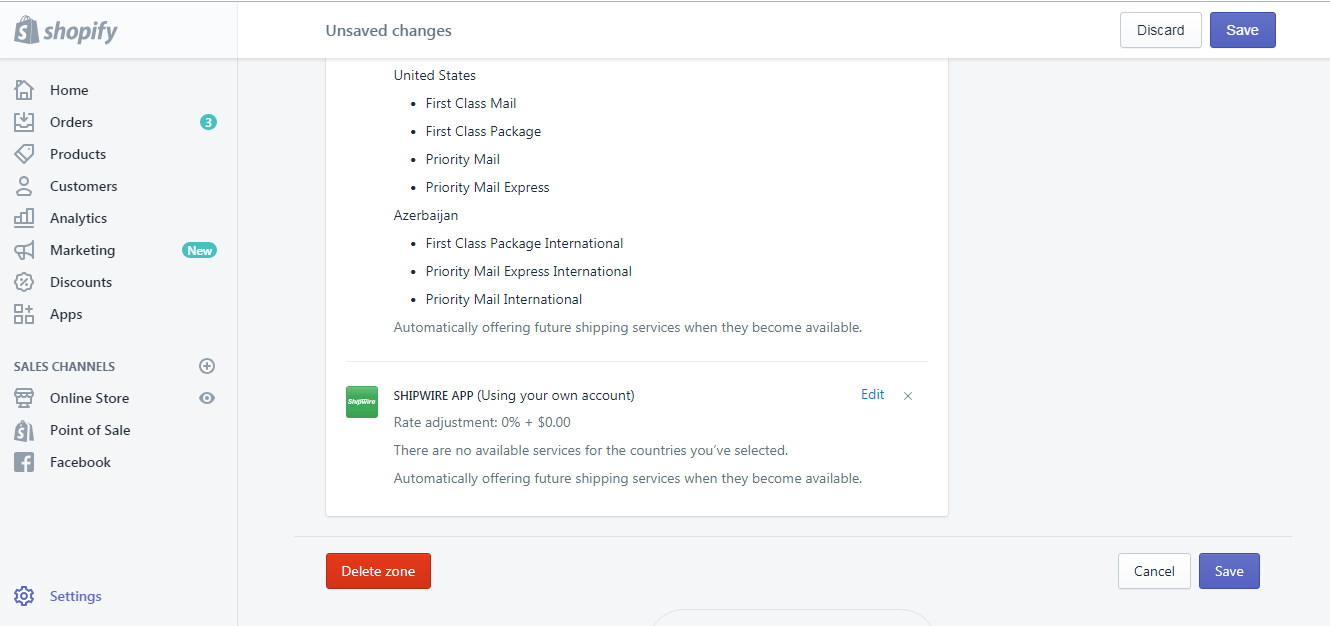
Once you have completed, scroll down to the bottom of the page and click Save to record your changes. The newly added shipping zone could now be viewed in the Shipping settings section.
To create a new shipping zone on iPhone (Click here)
-
Step 1: Go to Settings After logging into your Shopify account, go to the
Storesymbol in the bottom right corner and selectSettings.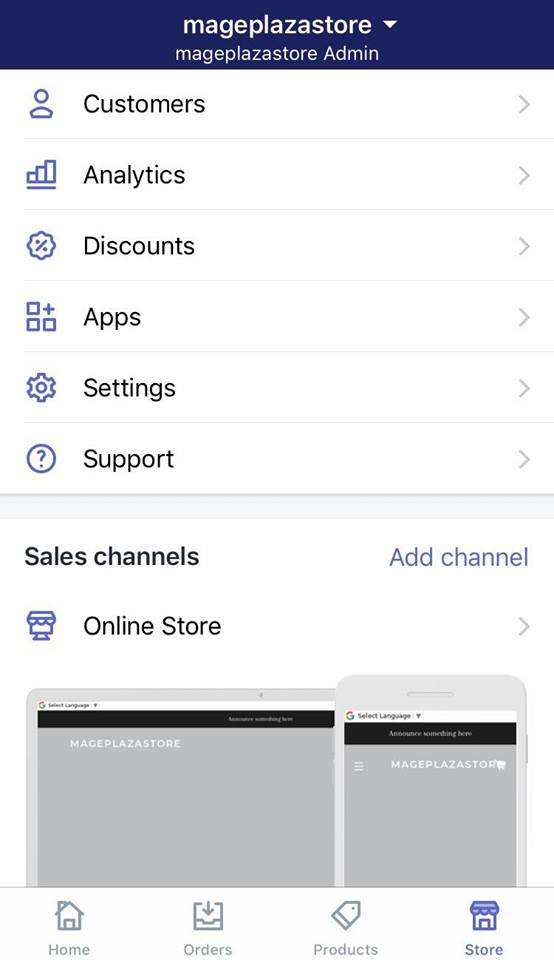
-
Step 2: Go to Shipping Next, in the Store settings section, a list of settings available to customize your store will be shown. Tap
Shipping.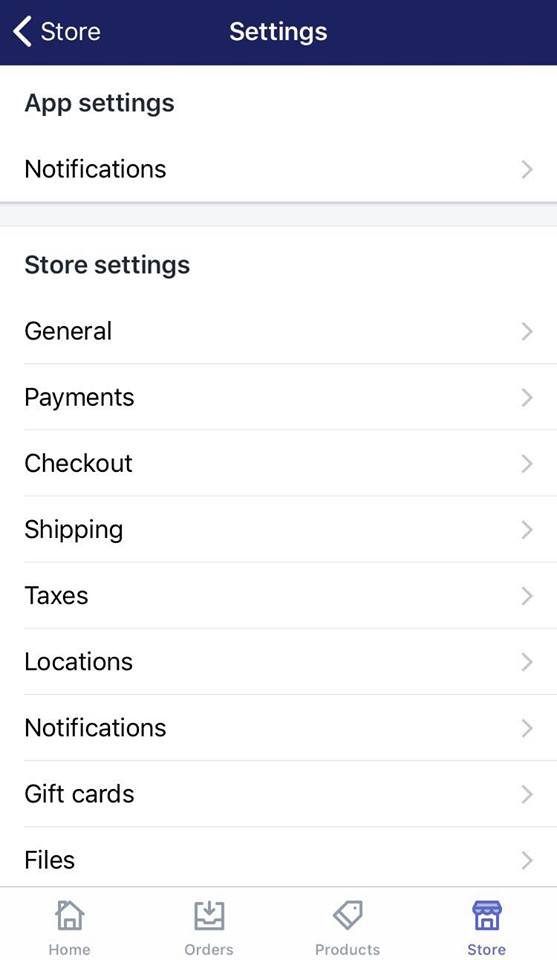
-
Step 3: Tap Add shipping zone Swipe down to the
Shipping zonesection, then selectAdd shipping zone.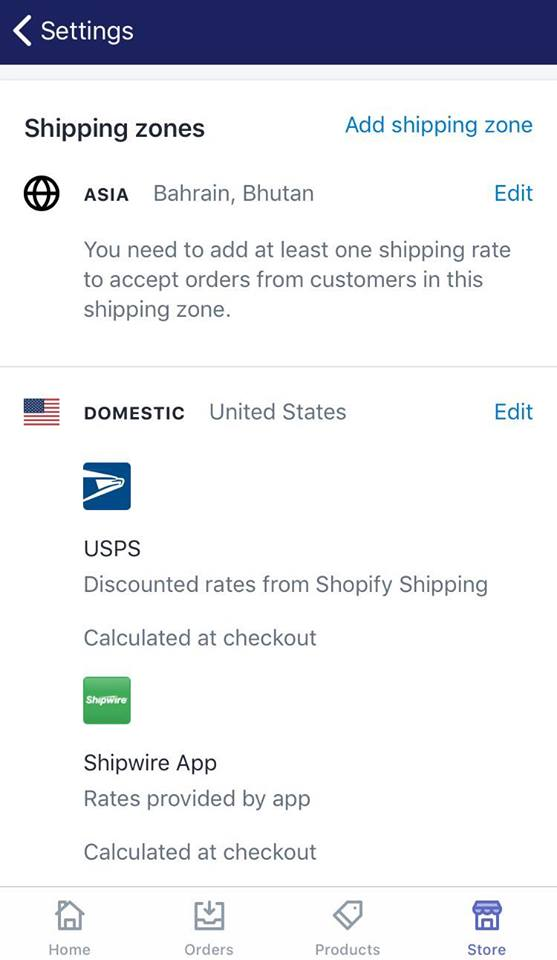
-
Step 4: Enter your new shipping zone name In the
Zone namebox, give your new shipping zone a name to differentiate it from others.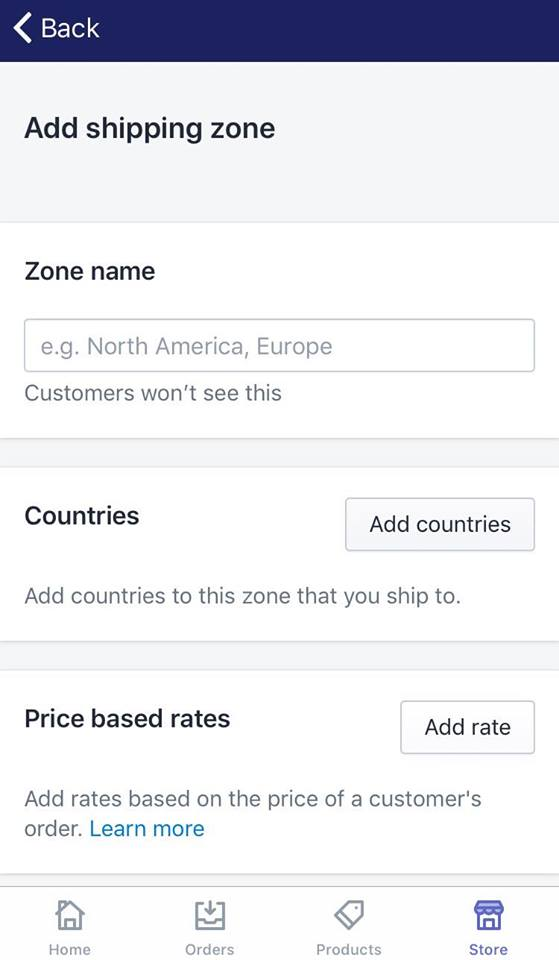
-
Step 5: Tap Add countries Right under Zone name, in the
Countriessection, selectAdd countriesto add countries to the zone you named above.
Caution Don't forget to review your tax settings after you update a shipping zone, as the default tax rates are calculated based on this.
-
Step 6: Add countries for your shipping zone A list of countries will now appear, categorized into continents: Asia, Europe, Africa, Central America, South America, Oceania, North America and Other areas. Select the countries you wish to cover in your new shipping zone, then tap
Add.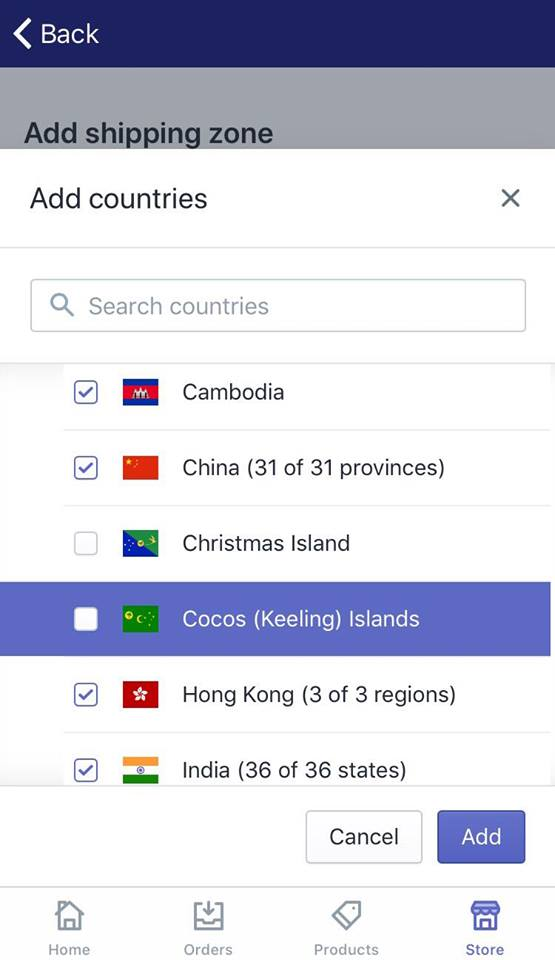
By selecting a large region like Asia or Europe, you will include all the countries in that region. If you want to exclude specific countries within that region, just uncheck the box beside them.
-
Step 7: Specify the shipping areas within a country if you wish To limit the shipping areas within a country to certain places, tap the blue
Editbutton beside the country name.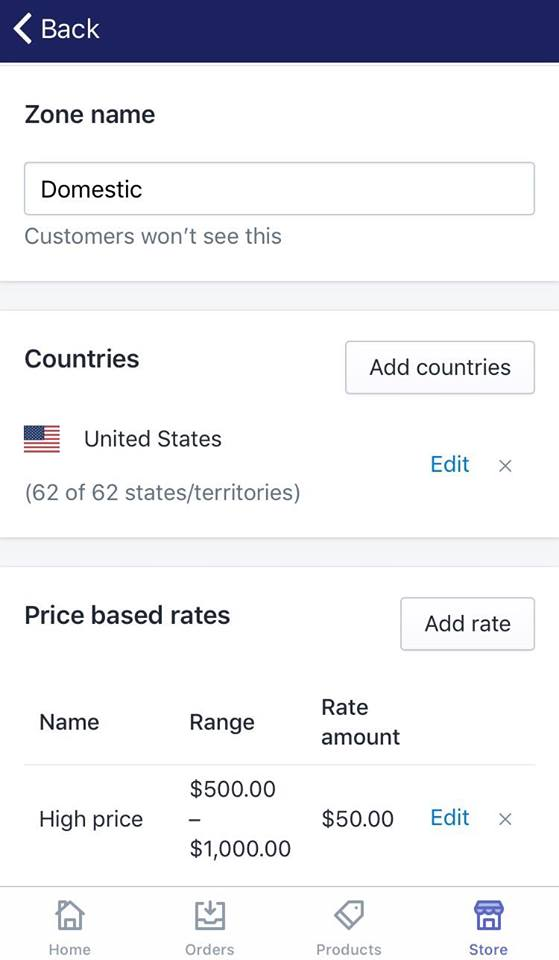
Check the boxes beside states or cities and provinces you want to include in your shipping zone. Uncheck if otherwise. Click
Doneto save your change. However, be informed that, in this section, some countries might not display separate states or cities and provinces. -
Step 8: Add price based rates or weight based rates to your shipping zone if you wish Shipping rates for certain areas can be manually customized either based on price or weight. To add manual shipping rates to your shipping zones, tap
Add ratenext to the type of rates you prefer.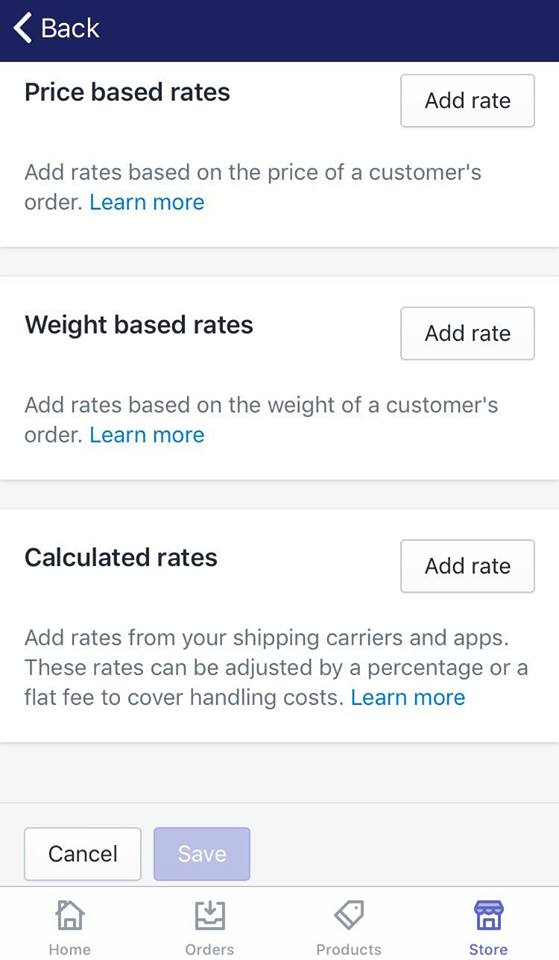
You could choose to do this later if you want.
- Note Calculated rates for your shipping zones could also be added here if you are using Shopify Shipping service.
-
Step 9: Save Once you have completed, swipe down to the bottom of the page and tap
Saveto record your changes. The newly added shipping zone could now be viewed in theShipping settingssection.
To create a new shipping zone on Android (Click here)
-
Step 1: Go to Settings After logging into your Shopify account, go to the
Storesymbol in the bottom right corner and selectSettings.
-
Step 2: Go to Shipping Next, in the Store settings section, a list of settings available to customize your store will be shown. Tap
Shipping.
-
Step 3: Tap Add shipping zone Swipe down to the
Shipping zonesection, then selectAdd shipping zone.
-
Step 4: Enter your new shipping zone name In the
Zone namebox, give your new shipping zone a name to differentiate it from others.
-
Step 5: Tap Add countries Right under Zone name, in the
Countriessection, selectAdd countriesto add countries to the zone you named above.
Caution Don't forget to review your tax settings after you update a shipping zone, as the default tax rates are calculated based on this.
-
Step 6: Add countries for your shipping zone A list of countries will now appear, categorized into continents: Asia, Europe, Africa, Central America, South America, Oceania, North America and Other areas. Select the countries you wish to cover in your new shipping zone, then tap
Add.
By selecting a large region like Asia or Europe, you will include all the countries in that region. If you want to exclude specific countries within that region, just uncheck the box beside them.
-
Step 7: Specify the shipping areas within a country if you wish To limit the shipping areas within a country to certain places, tap the blue
Editbutton beside the country name.
Check the boxes beside states or cities and provinces you want to include in your shipping zone. Uncheck if otherwise. Click
Doneto save your change. However, be informed that, in this section, some countries might not display separate states or cities and provinces. -
Step 8: Add price based rates or weight based rates to your shipping zone if you wish Shipping rates for certain areas can be manually customized either based on price or weight. To add manual shipping rates to your shipping zones, tap
Add ratenext to the type of rates you prefer.
You could choose to do this later if you want.
- Note Calculated rates for your shipping zones could also be added here if you are using Shopify Shipping service.
-
Step 9: Save Once you have completed, swipe down to the bottom of the page and tap
Saveto record your changes. The newly added shipping zone could now be viewed in theShipping settingssection.
Conclusion
Above is the guideline on how to create a new shipping zone on Shopify on Desktop, iPhone and Android. I hope it is helpful to you.
If you have any further concerns in terms of how to use Shopify to manage your store, drop by our Help Center to get your problems solved.
Related Posts:


