How to Customize Specific Email Templates
Email templates are the basic feature on Shopify. With email templates, communicating with a large number of customers in a short amount of time is in your grasp. However, before sending those to customers, you also need to learn how to customize specific email templates first.
Related Posts:
- How to customize specific SMS templates on Shopify
- 3 Steps to Add a Logo to your Email Templates on Shopify
- How to Choose Colors for your Email Templates on Shopify
Step 1: Go to Settings, select Notifications
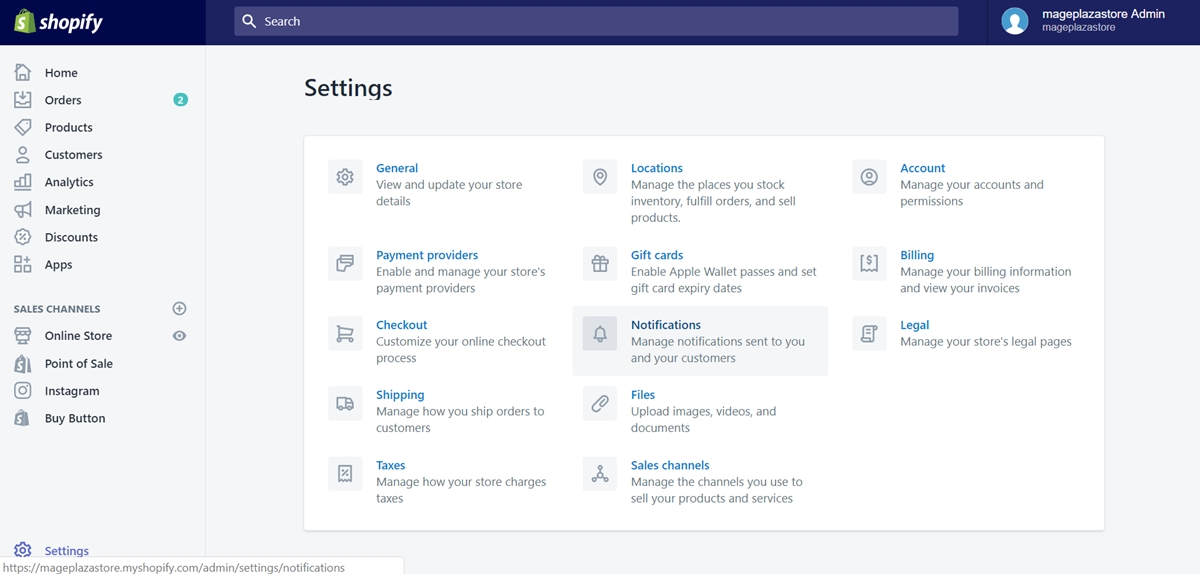
When you successfully access the Shopify admin interface, click on Settings with a gear icon at the bottom left corner of the interface. Once you do, select Notifications on the menu.
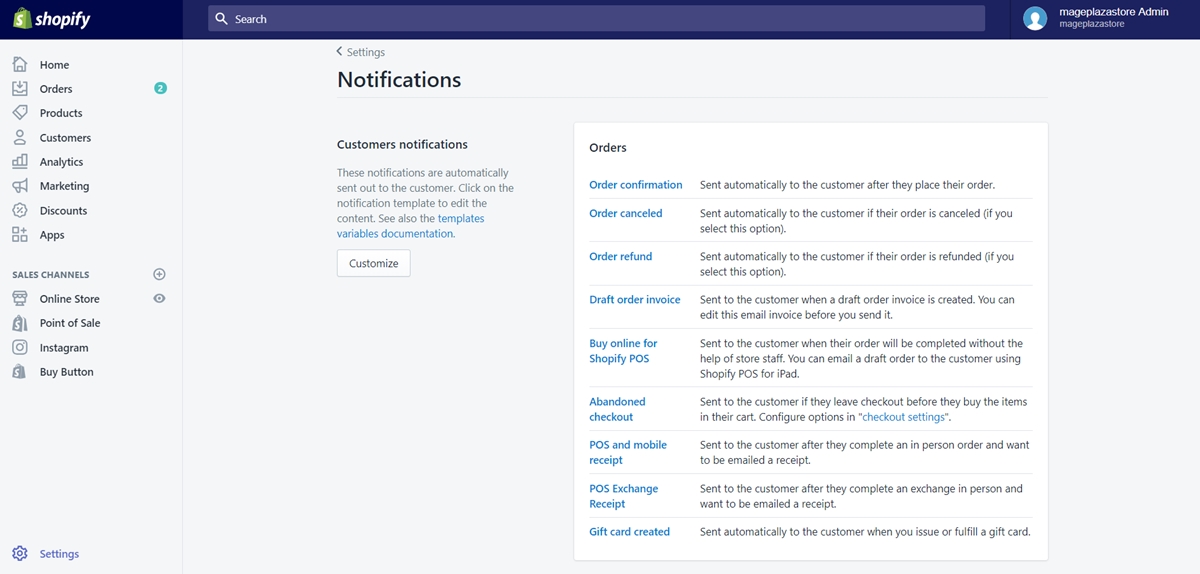
Step 2: Select the specific template you want to edit
In the Customer notifications area, on the right side, there are several types of notifications, such as Orders, Shipping, Customer. You can click on each blue line of specific notification to start editing.
Step 3: Start customizing email templates
After choosing the specific template, you will be directed to a new sector for drafting. In here, you can change the Email subject or Email body as well.
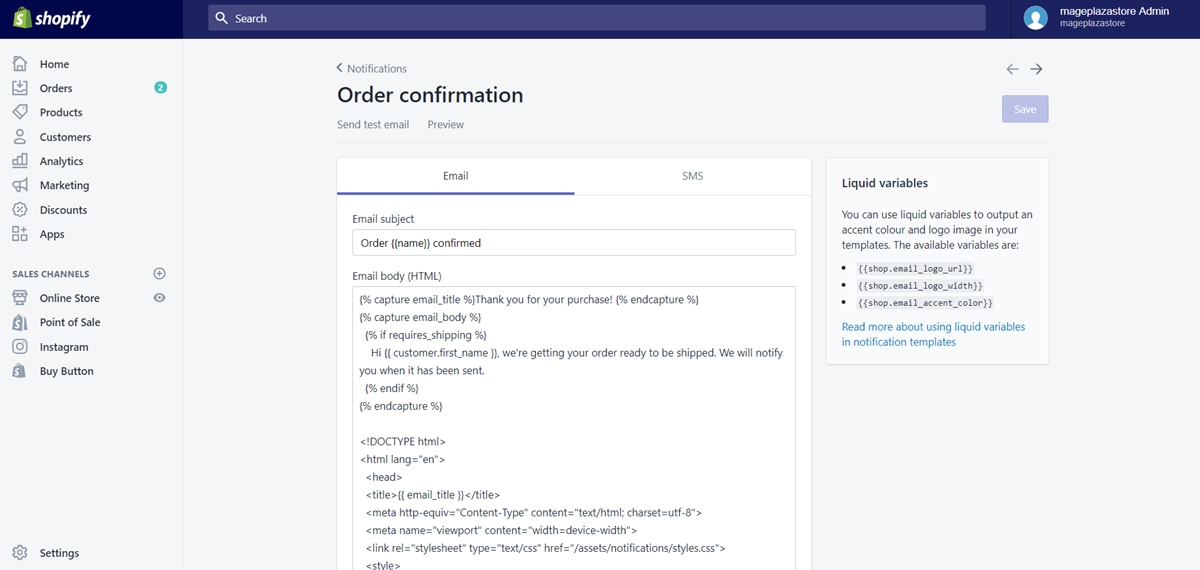
Step 4: Save your changes
When you finish editing, check the whole template to make sure there is no flaw. Scroll down to the bottom of the area.
Click Save to confirm your changes. You are also able to Revert to default if you want to decline those changes.
To customize specific email templates on iPhone (Click here)
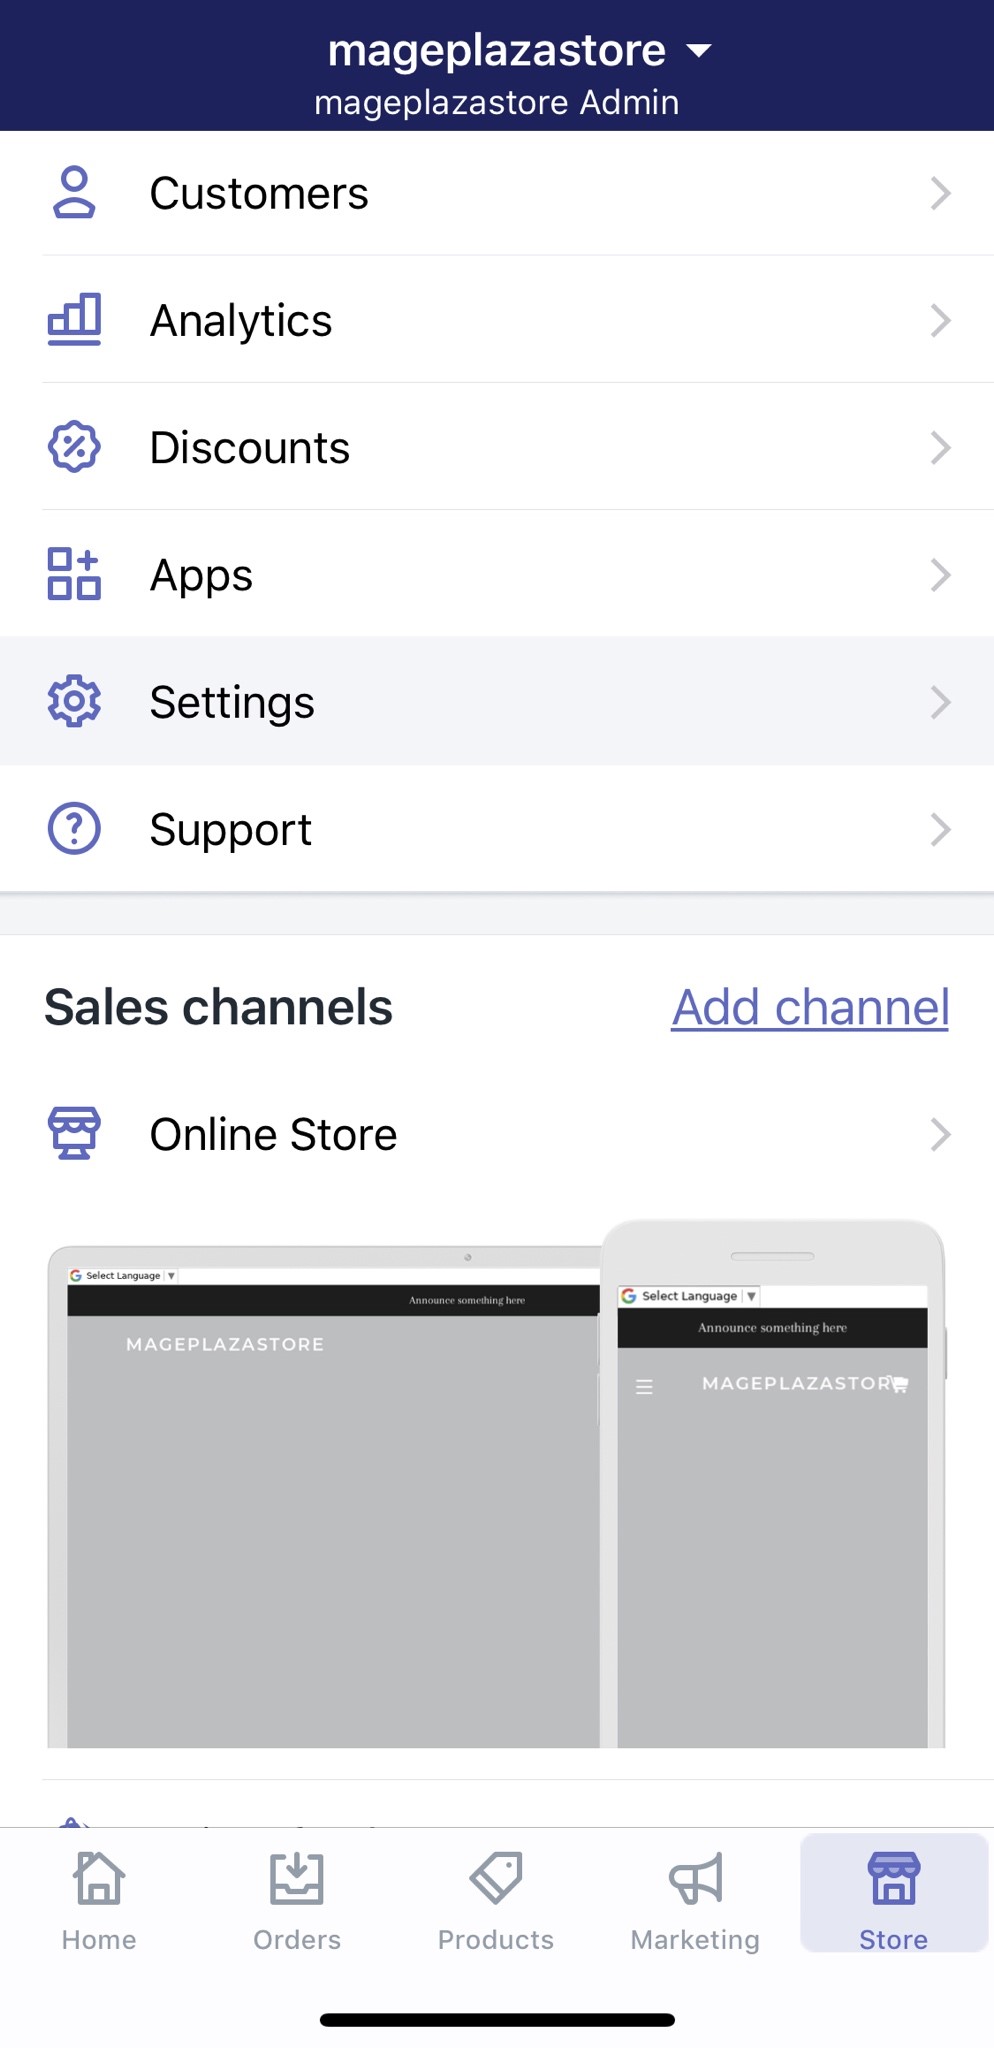
- Step 1: Go to Store, select Settings
After opening the Shopify app, you can take a look at the bottom bar. Tap on Store.
In the Store tab, select Settings with a gear icon on the menu.
- Step 2: Tap Notifications
Under the Store settings, tap on Notifications to start your sequence.
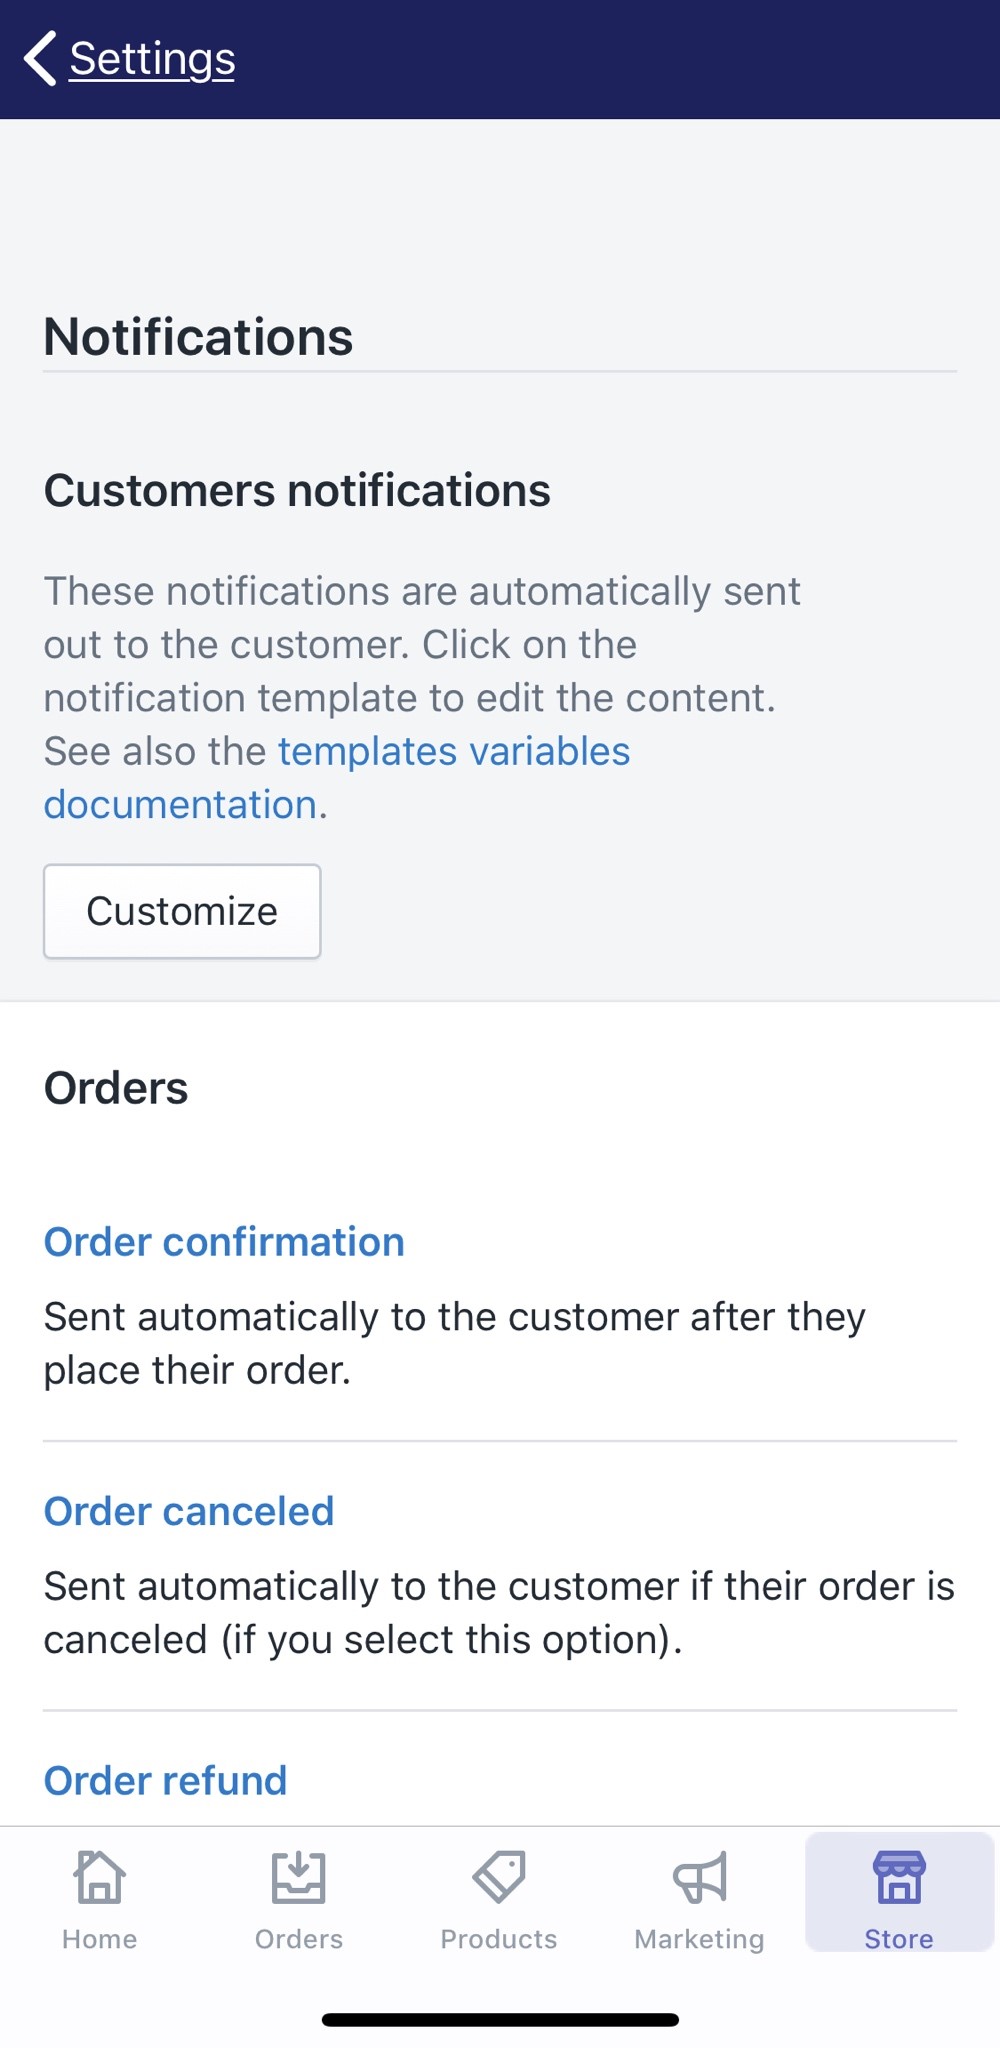
- Step 3: Tap on the specific template you want to edit
Under the Customer notifications area, you can edit several types of notifications, such as Orders, Shipping, Customer just by tapping on each blue line of a specific template.
- Step 4: Start editing
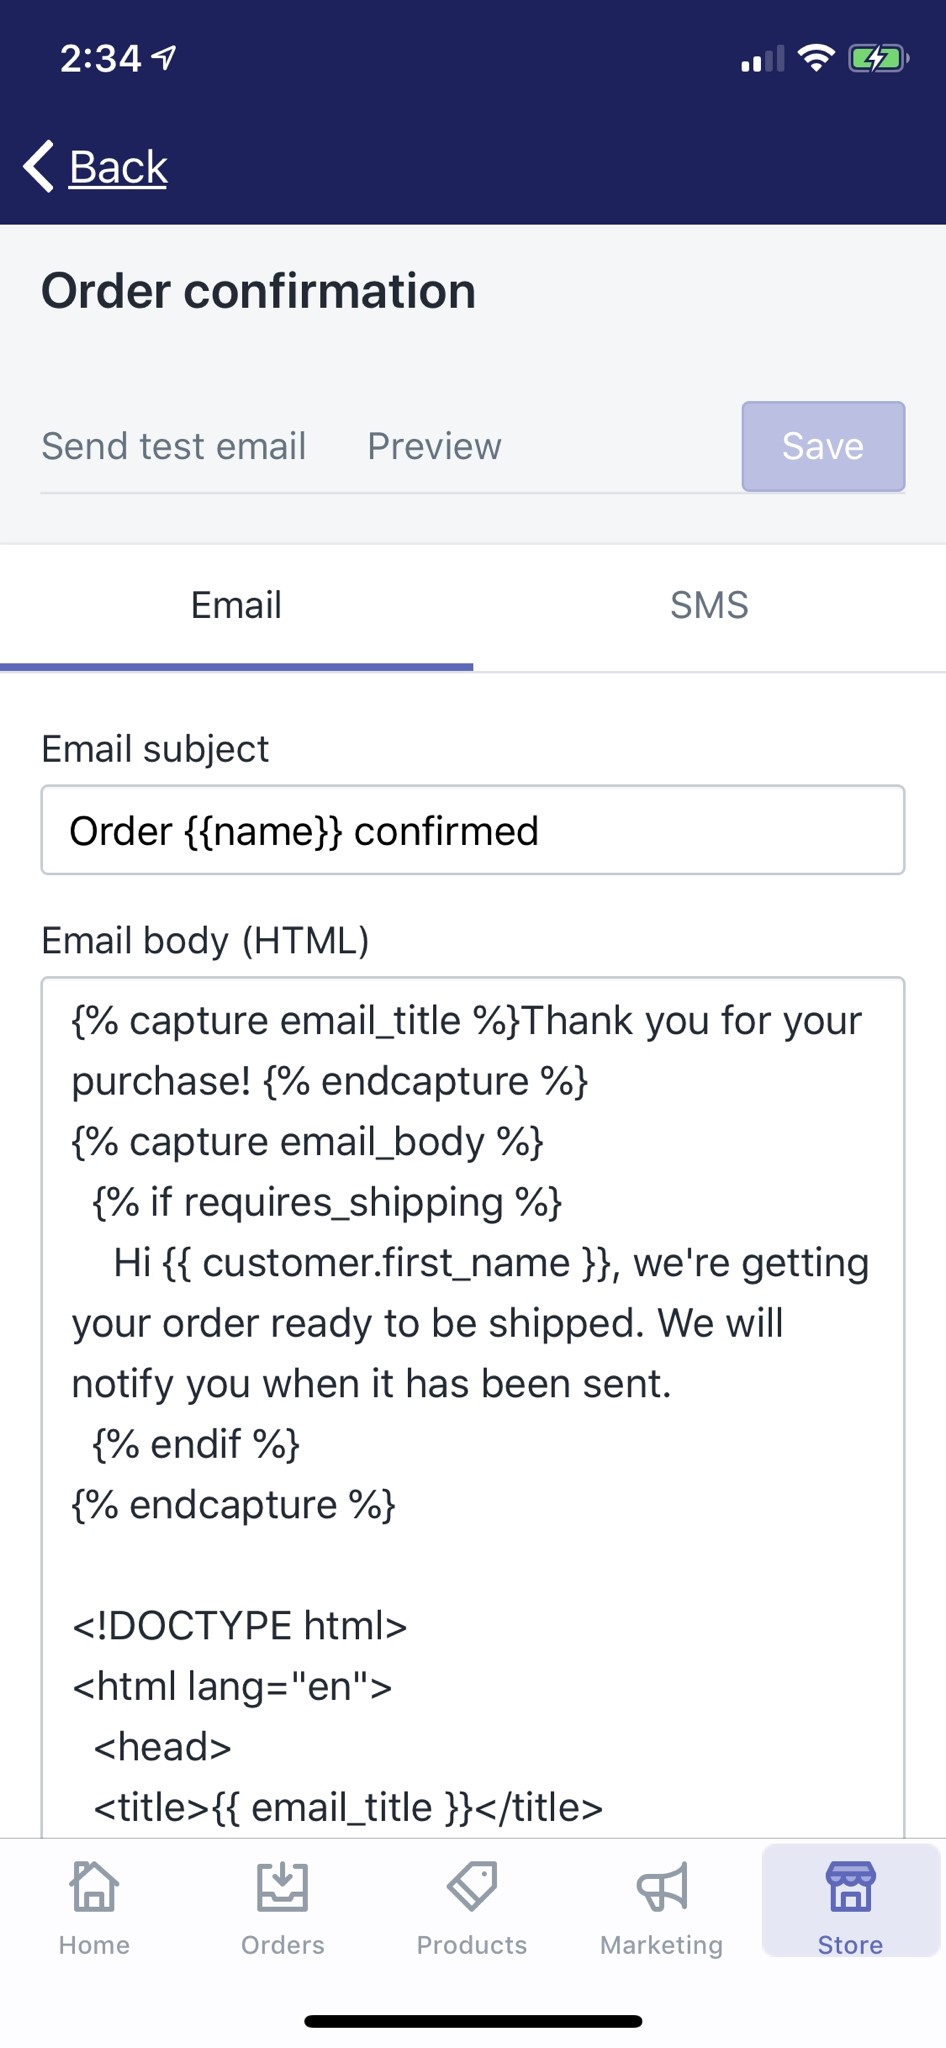
After selecting the specific template, you will access a new sector for drafting. In here, you can edit the Email subject, Email body.
Don’t forget to use Preview to make sure your desired changes would appear on the final template precisely. You can also tap Send test email to check your final template as a demo.
- Step 5: Save your changes
Tap Save to confirm your changes. Otherwise, you can tap Revert to default to reset those changes.
To customize specific email templates on Android (Click here)
- Step 1: Go to Store, select Settings
After opening the Shopify app, you can take a look at the bottom bar. Tap on Store.
In the Store tab, select Settings with a gear icon on the menu.
- Step 2: Tap Notifications
Under the Store settings, tap on Notifications to start your sequence.
- Step 3: Tap on the specific template you want to edit
Under the Customer notifications area, you can edit several types of notifications, such as Orders, Shipping, *Customer just by tapping on each blue line of a specific template.
- Step 4: Start editing
After selecting the specific template, you will access a new sector for drafting. In here, you can edit the Email subject, Email body.
Don’t forget to use Preview to make sure your desired changes would appear on the final template precisely. You can also tap Send test email to check your final template as a demo.
- Step 5: Save your changes
Tap Save to confirm your changes. Otherwise, you can tap Revert to default to reset those changes.
Summary
With Shopify, you can easily customize specific email templates. To online store management, an email template is a useful tool on most of the platforms connecting to the internet. It keeps the flow of communication between store owner and customers.
However, in order to perform this task, please keep in mind that you need to edit the codes precisely, and always check Preview to ensure the quality of the notification before sending it to your dear customers.


