How to Edit Static Sections on Shopify
Before you start to gain knowledge about editing static sections on Shopify, I suggest that you should figure out what static sections really are. I will take you through it by a brief. Static sections are locations which are specific in your online store every single time. You can’t arrange it over and over again or remove it. There is nothing you can do but editing.
So, here are some steps that you can take to edit static sections on Shopify:
How to edit static sections on Shopify
Step 1: Go to Themes section
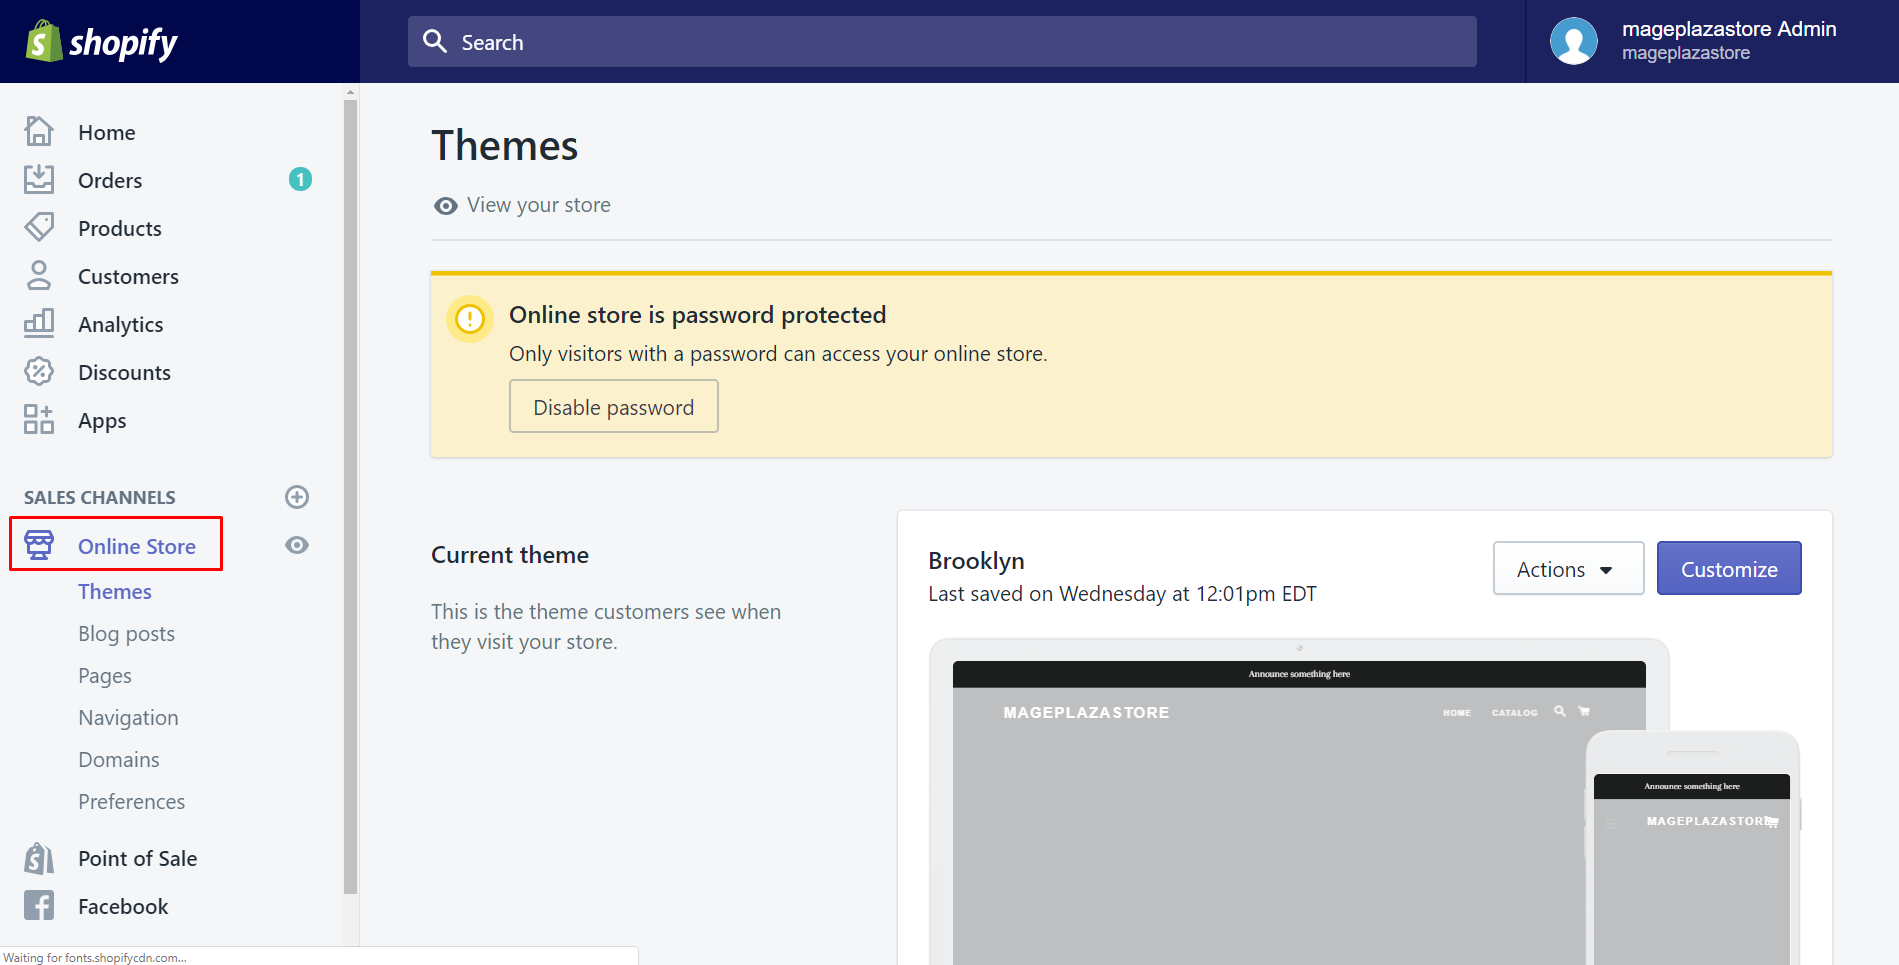
After logging in your Shopify account, you click Online Store under SALES CHANNELS. Then, it will automatically go to Themes section.
Step 2: Click Customize
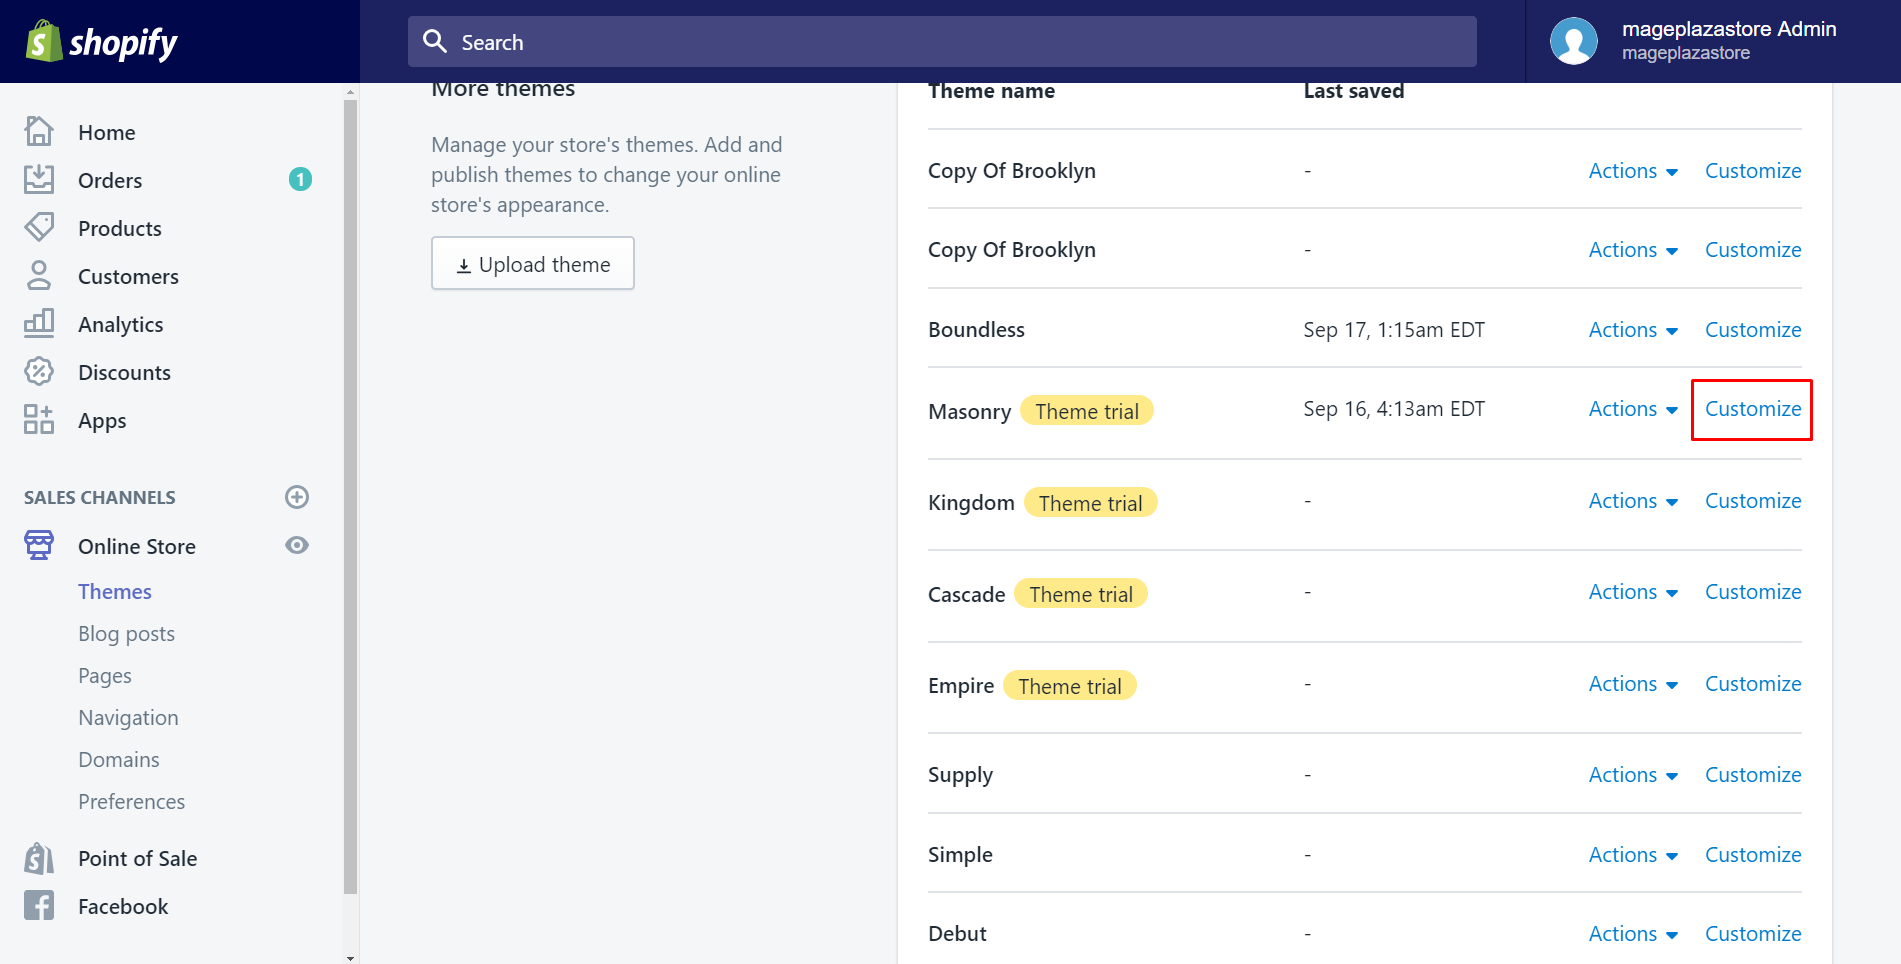
In this step, you scroll down to see all of your themes, then choose a theme that you want to edit first. After you’ve done, select Customize button of the theme that you’ve chosen. Such as, I select Masonry theme to be edited. As you can see, I click on the button which I’ve marked by the red rectangle.
Step 3: Select page to edit
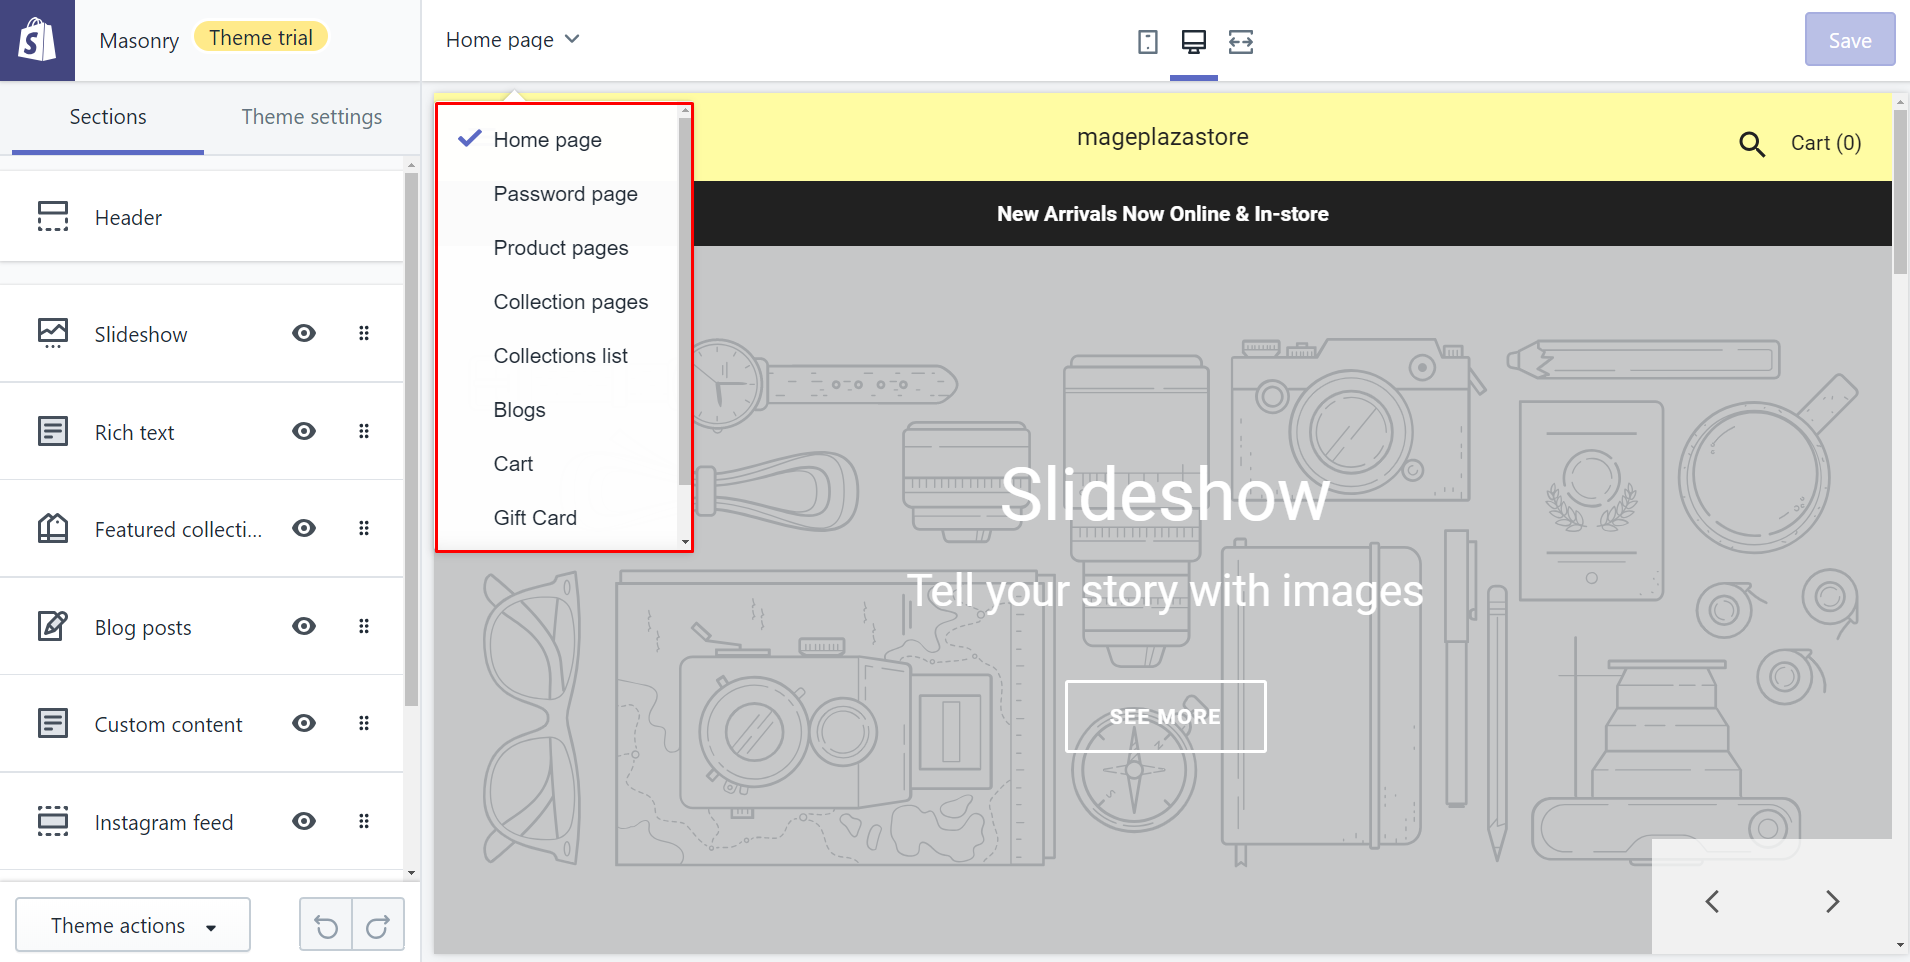
There is a drop-down menu on the screen which is used for choosing the type of page that you want to edit. Select the page you want to edit static sections on it because they are different on each page on your store. Any page also has the Header and the Footer sections, so you are able to edit them regardless of the kind of the page you’ve chosen.
Step 4: Select section to edit
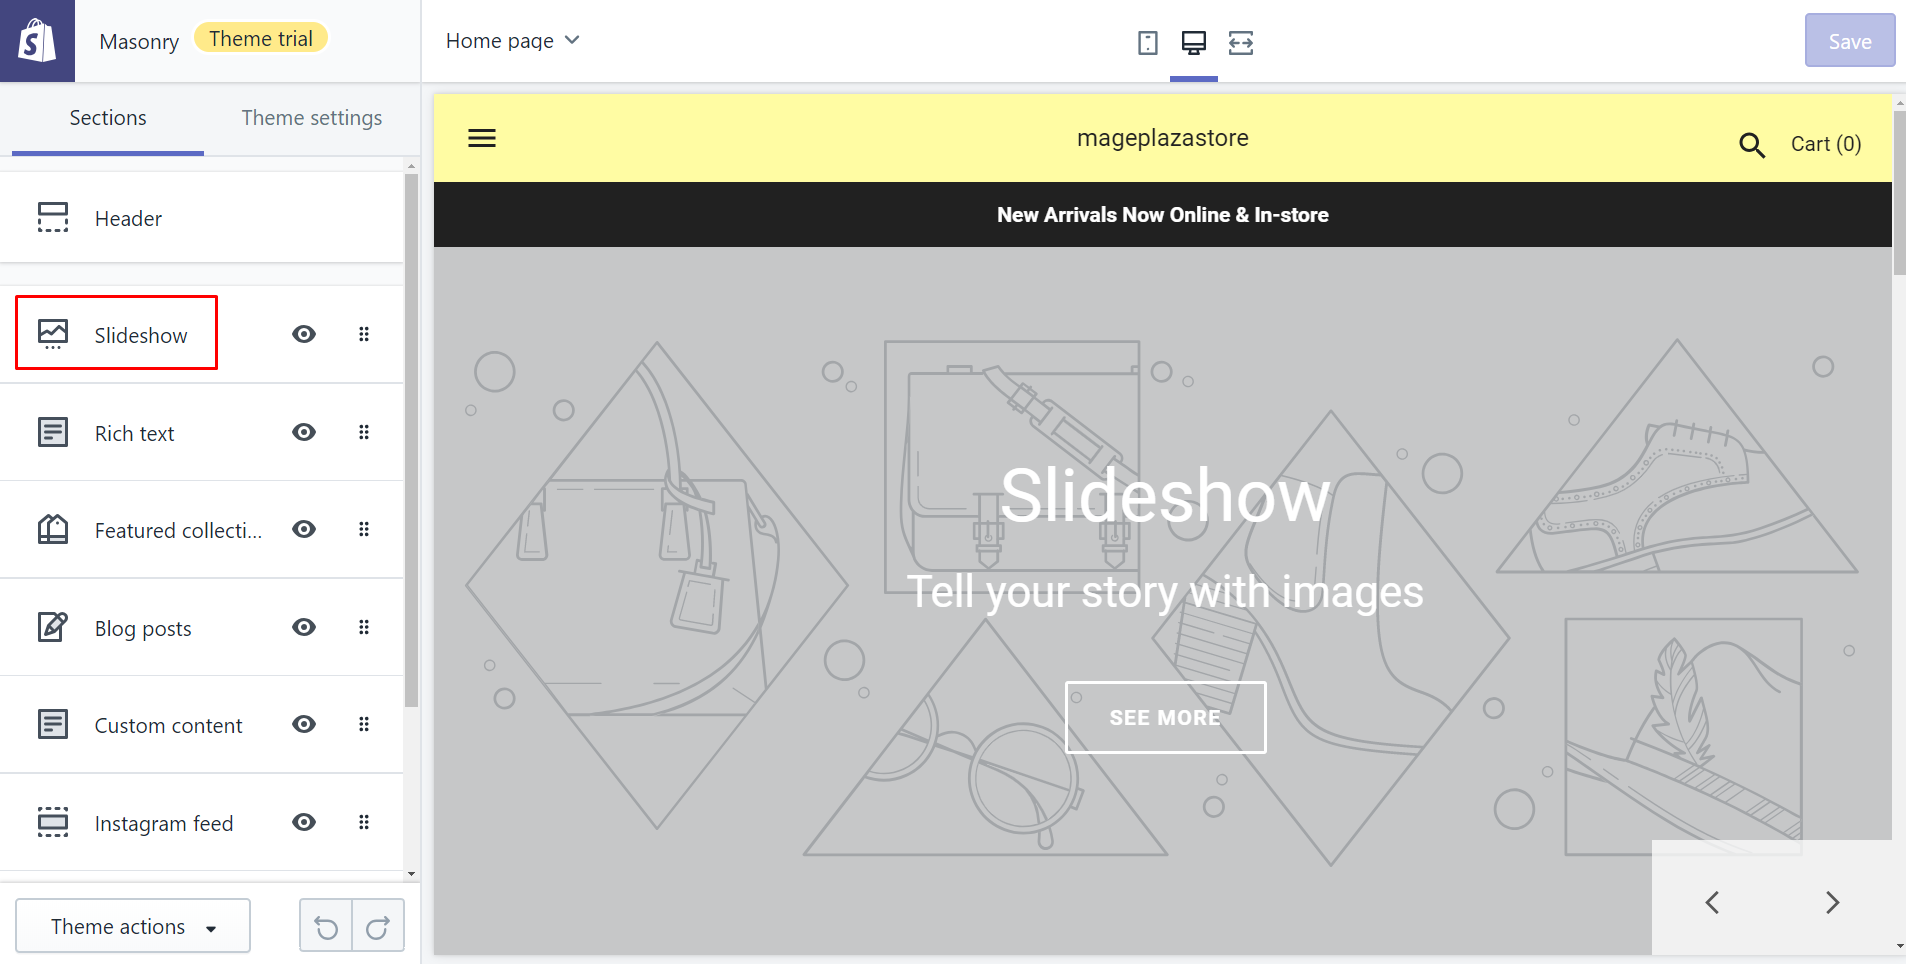
Selecting the section which you want to edit its content. For example, I choose Slideshow.
Step 5: Edit section
Then you customize the section by using tools on the left-hand side of the screen.

Step 6: Save changes
After all, tap Save to save all your works.

To edit static sections on Iphone (Click here)
-
Step 1: After logging in your Shopify account in the app, select
Store.
-
Step 2: Here is
Sales channelssection. Then tapOnline Storethere.
-
Step 3: Under the image of your theme, there is a button called
Manage Themes. Make sure to click on it and move to the next step.
-
Step 4: Now, take a look at all your themes you’ve already had. Then, choose one that you like most to edit. To carry out this, you should click
Customizebeside the theme. For instance, I want to customize the theme called Masonry, I tap Customize next to its name.
-
Step 5: We’d better make a decision about you want to edit static sections of which page. As on the different page, they are also different. We can do it by clicking
Previewbutton.
-
Step 6: Then a drop-down menu will appear. Now you should choose the specific page. There is a tick symbol which informs you which page we are editing.

-
Step 7: After selecting the page, you should click
Customizebutton in the bottom of the screen to back to customize our sections.
The box full of sections is shown. Select one of them to customize as long as it meets your taste and your requirement.

Then, you can edit as much as you want. For example, I choose Slideshow to be customized.

-
Step 8: You can edit as much as you want. After you’ve done, to guarantee that it will be saved, click
Save.
To edit static sections on Android (Click here)
-
Step 1: Select
Storefrom your Shopify app. -
Step 2: There is
Sales channelssection. Take notice of it and chooseOnline Store. -
Step 3: Choose
Manage themesunder the image of the theme. -
Step 4: Of all your themes, choose one that you prefer it to be edited. Then select
Customizebeside its name. -
Step 5: Click
Previewwith the eye symbol. Then a drop-down menu appears which allows you select the specific page that customized static sections are on. -
Step 6: Tap
Customizeto back and edit any sections you want by clicking on it. -
Step 7: After you’ve done, tap
Saveto finish all your work.
Summary
Above is a guide take you through how to edit static sections on Shopify. Thanks to this, customers will easily be attracted by your suitable arrangement and decide to buy your products. I hope you enjoy this post, and if you do, be sure to check out our other posts on themes as well. Thanks for reading.
Related Posts:


