How to Export Inventory (on Desktop and Mobile)
If you want to create a template with your uniquely identified products or maybe product variants for particular locations, of if you want to export your store inventory quantities to use later in other systems, you could always export a CSV file on Shopify.
Upon exporting this file, you could specify whether to export the data for a specific location or for all the locations in your list.
Depending on how large the size of your file is, it will be downloaded to your browser or sent to your email box.
For detailed instructions on How to export inventory on Shopify, check out this article below:
Related Posts:
- How to Import Inventory on Shopify
- How to Change the Fulfillment Location on Shopify
- How to Fulfill Orders for Multiple Locations on Shopify
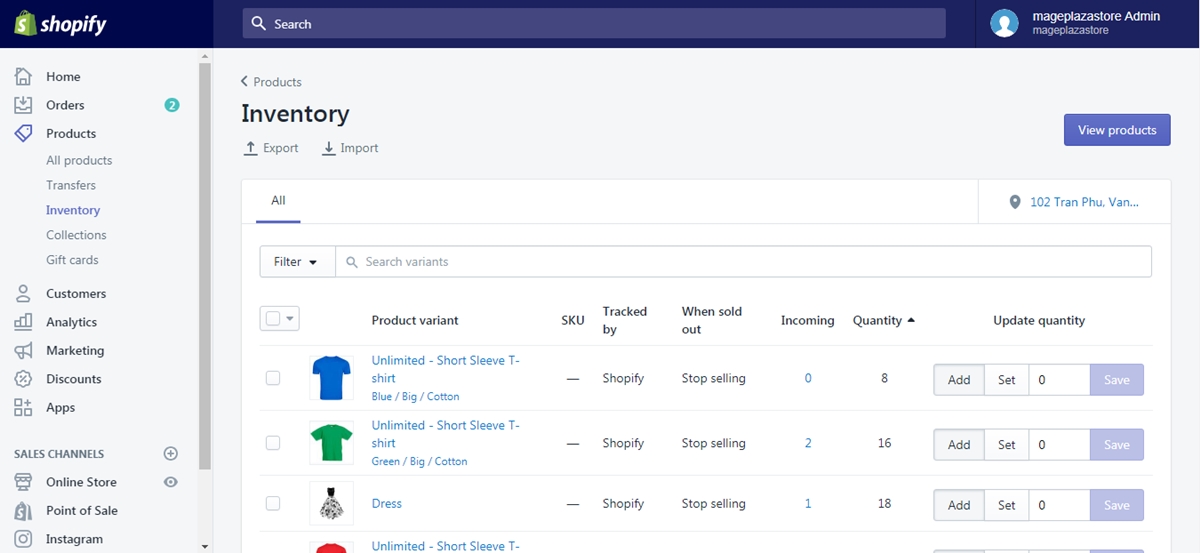
Step 1: Go to Products, then visit Inventory
First of all, log in to your Shopify admin account, then visit Products. In Products, go to the Inventory section.

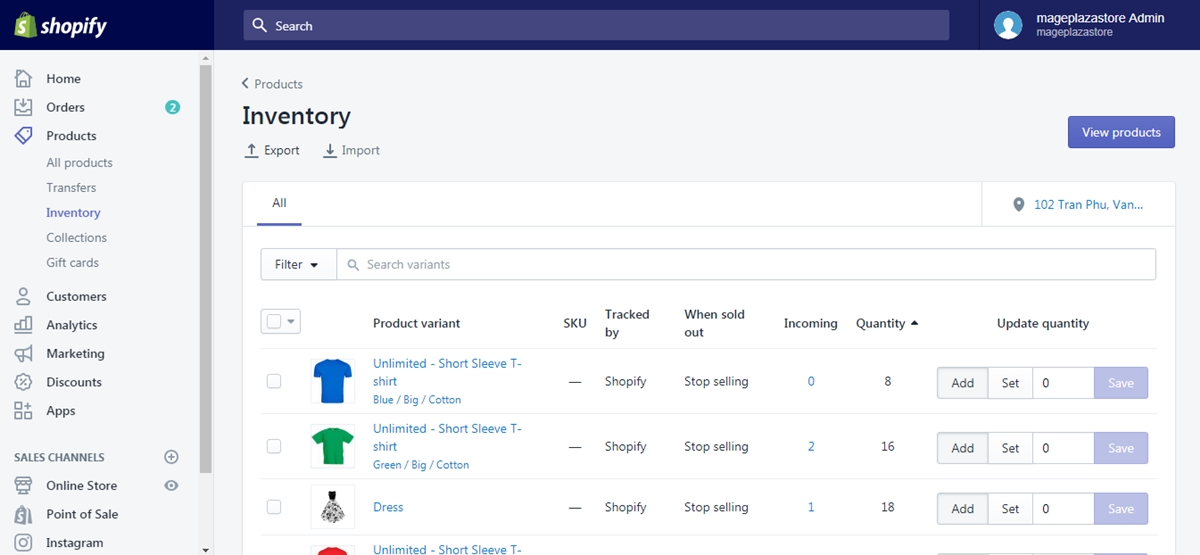
Step 2: Click Export
On top of the page, click Export right under the Inventory title.

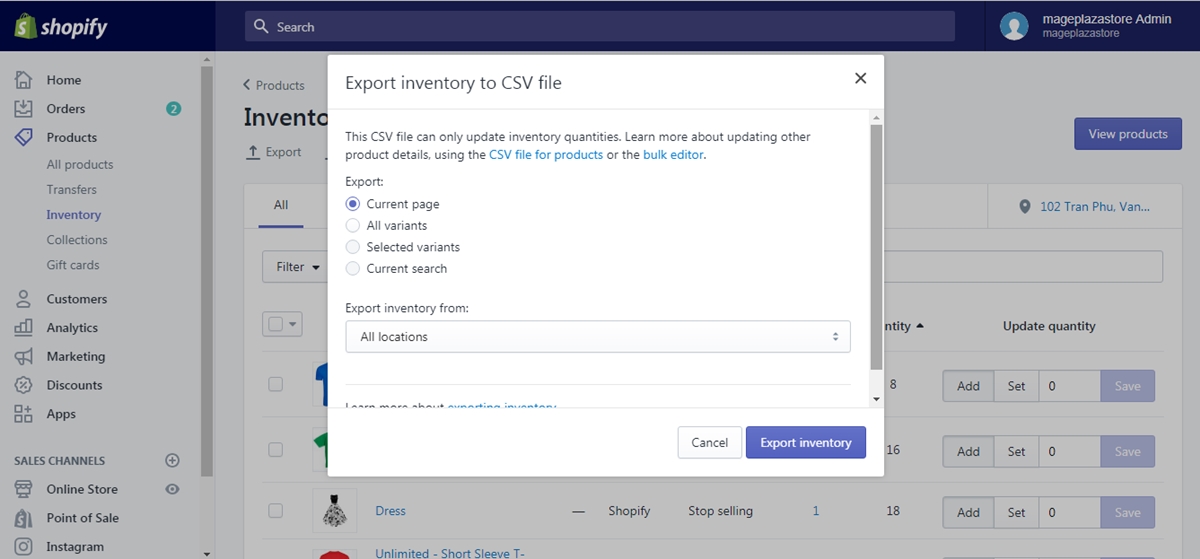
Step 3: Specify the location you want to export from
Specify all the details included in the dialog.

Step 4: Click Export inventory
When you are done, click the Export inventory button.
Conclusions
Those are the few simple steps with clear illustrations that guide you through How to export inventory on Shopify. Want to learn more about Inventory on Shopify, read Shopify Best Inventory Management Apps
If you find this instruction of great help, then do look for more articles like this at our Help Center.


