6 Steps to Link to a File in Page Content on Shopify
With the Shopify platform, you can use the rich text editor to link to a file in page content after uploading a file.
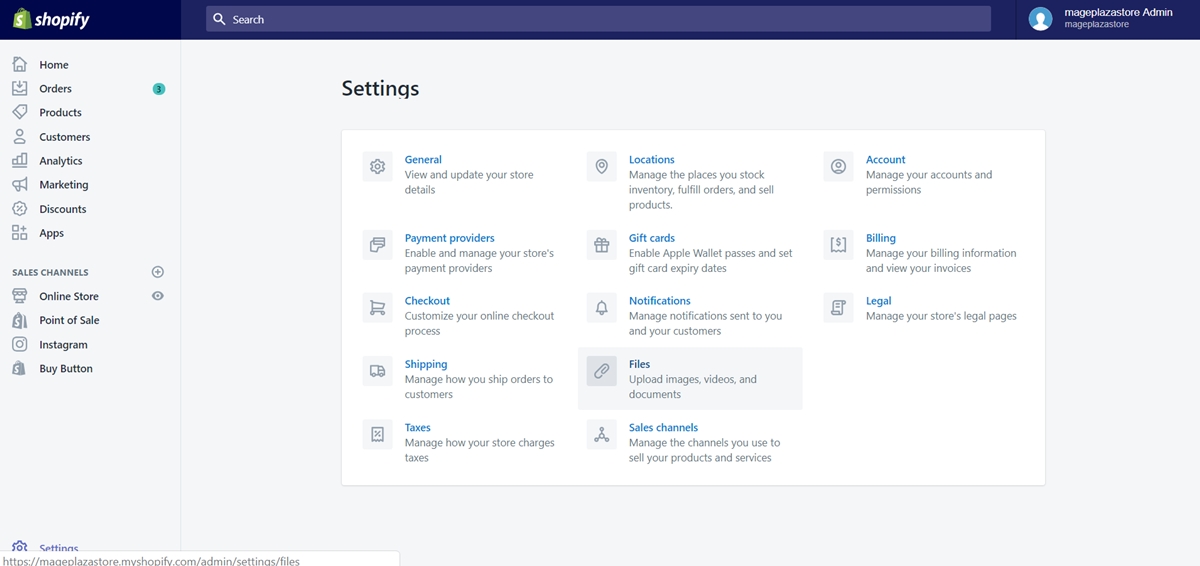
Step 1: Go to Settings, select Files
From the Shopify admin interface, click Settings at the bottom left corner of the screen.
Among the setting options, select Files.
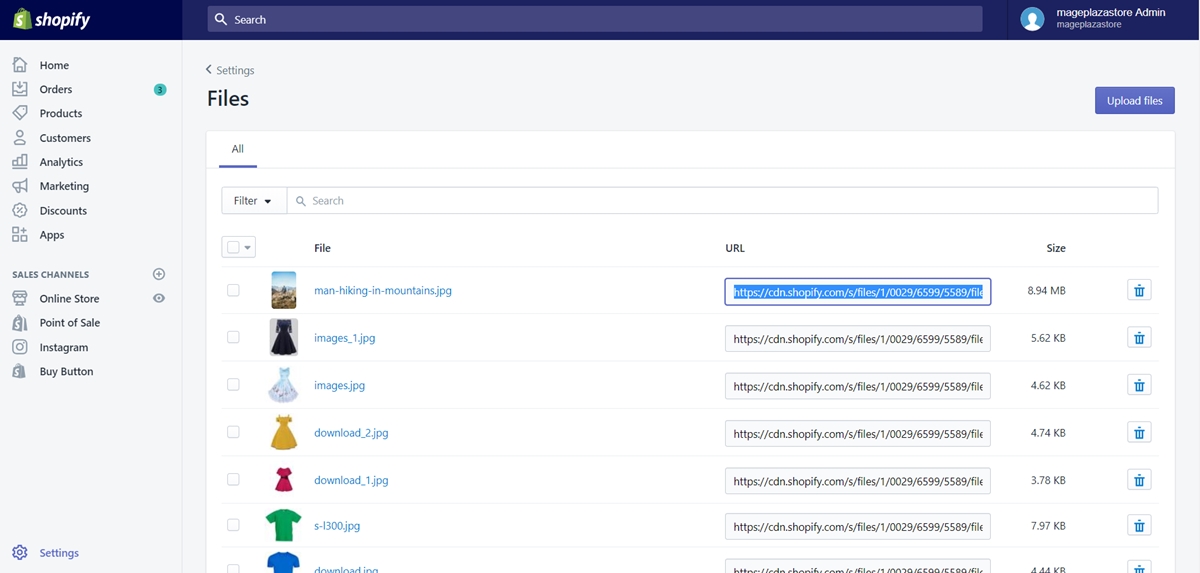
Step 2: Copy the URL
From the files list, copy the URL of the file you want.
Step 3: Go to wherever you want to add the file
Go back to the Shopify admin interface. Look at the left side menu, from there, you can choose wherever you want to connect the file with. It could be Products, Discounts, blog posts, anywhere you know the file suitable to be shared.
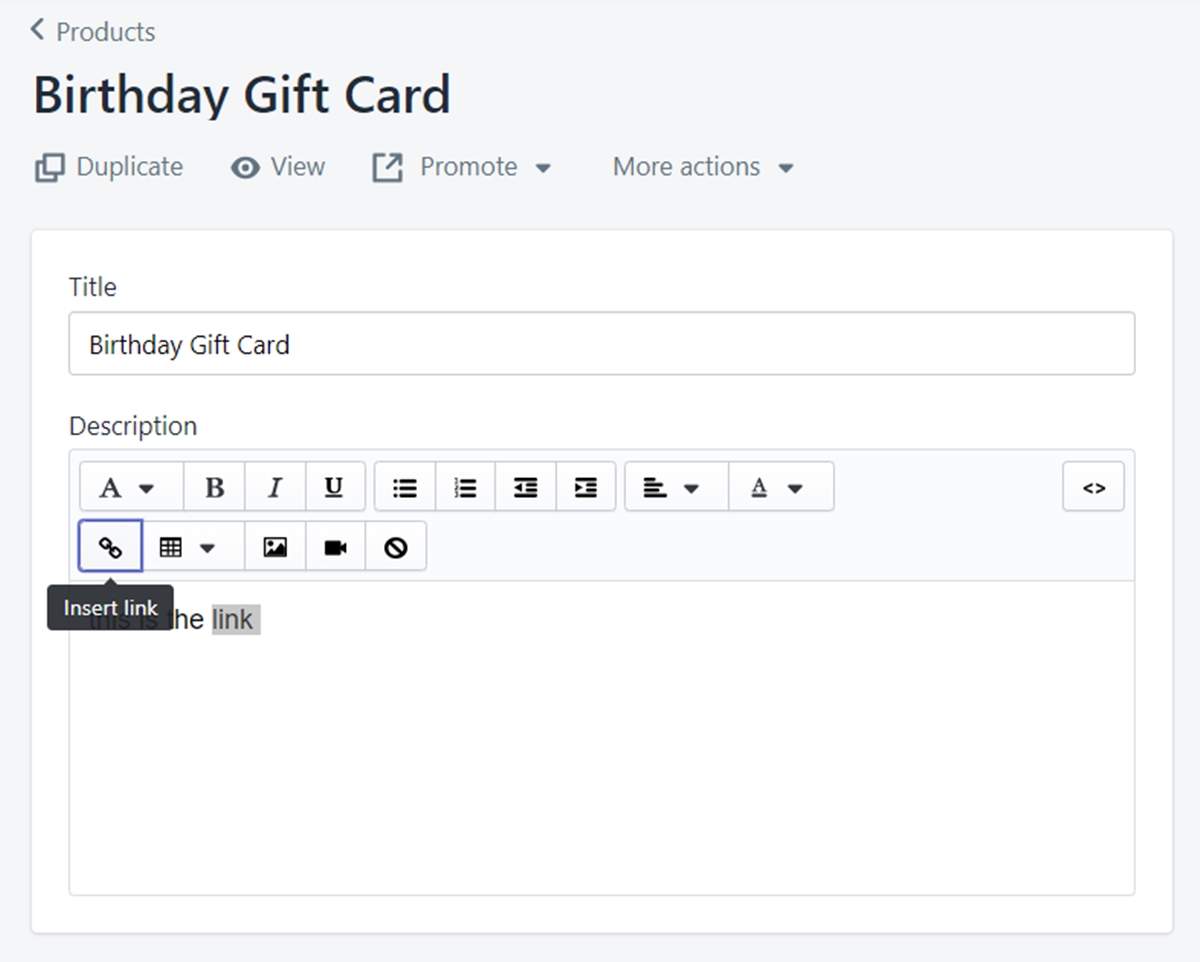
Step 4: Highlight the specific text and click Insert link
In the rich text editor field, highlight the text which you want to make a link to your selected file.
On the taskbar of the rich text editor, click Insert link to open the corresponding window.
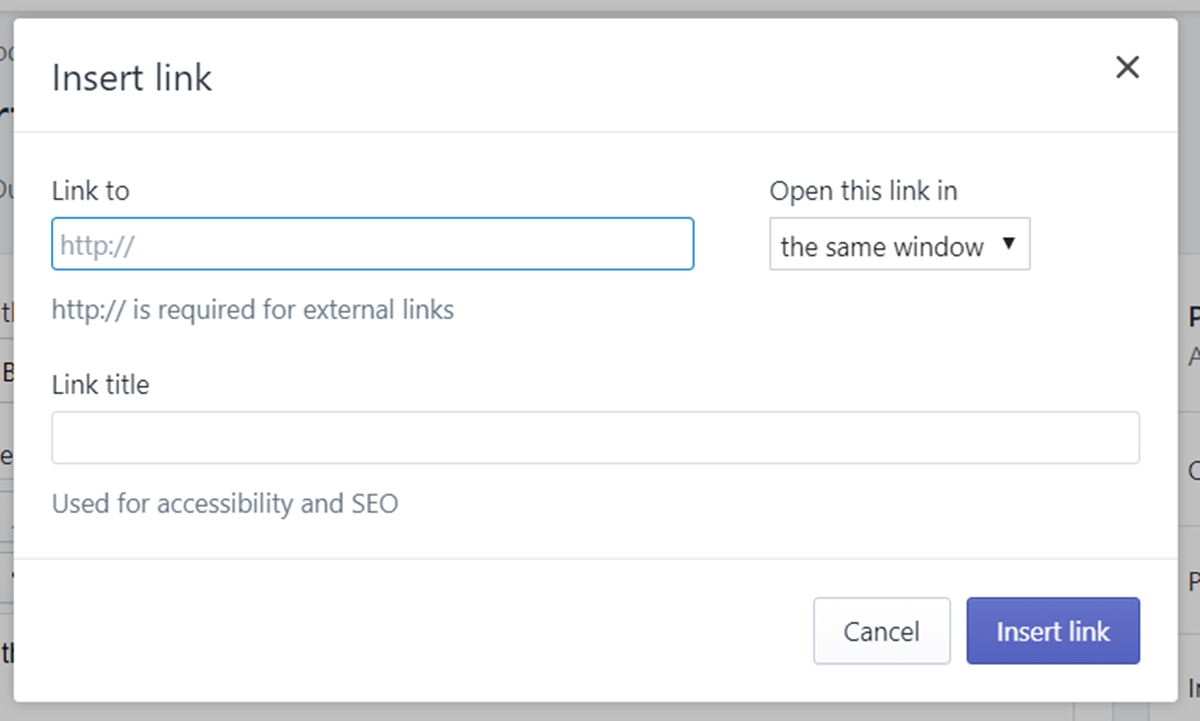
Step 5: Paste the URL
In the Link to blank field, paste the selected URL you have chosen before. You can leave the Link title field alone.
Note: The URL of the file need to begin with this structure:
http://cdn.shopify.com/
You may have to correct the structure of the URL.
Step 6: Confirm your edit
Click the Insert link button at the bottom right corner of the window to confirm your edit.
To link to a file in page content on iPhone (Click here)
- Step 1: Go to Stores, select Settings
After opening the Shopify app on your phone, tap Stores on the bottom bar.
In the Stores section, select Settings
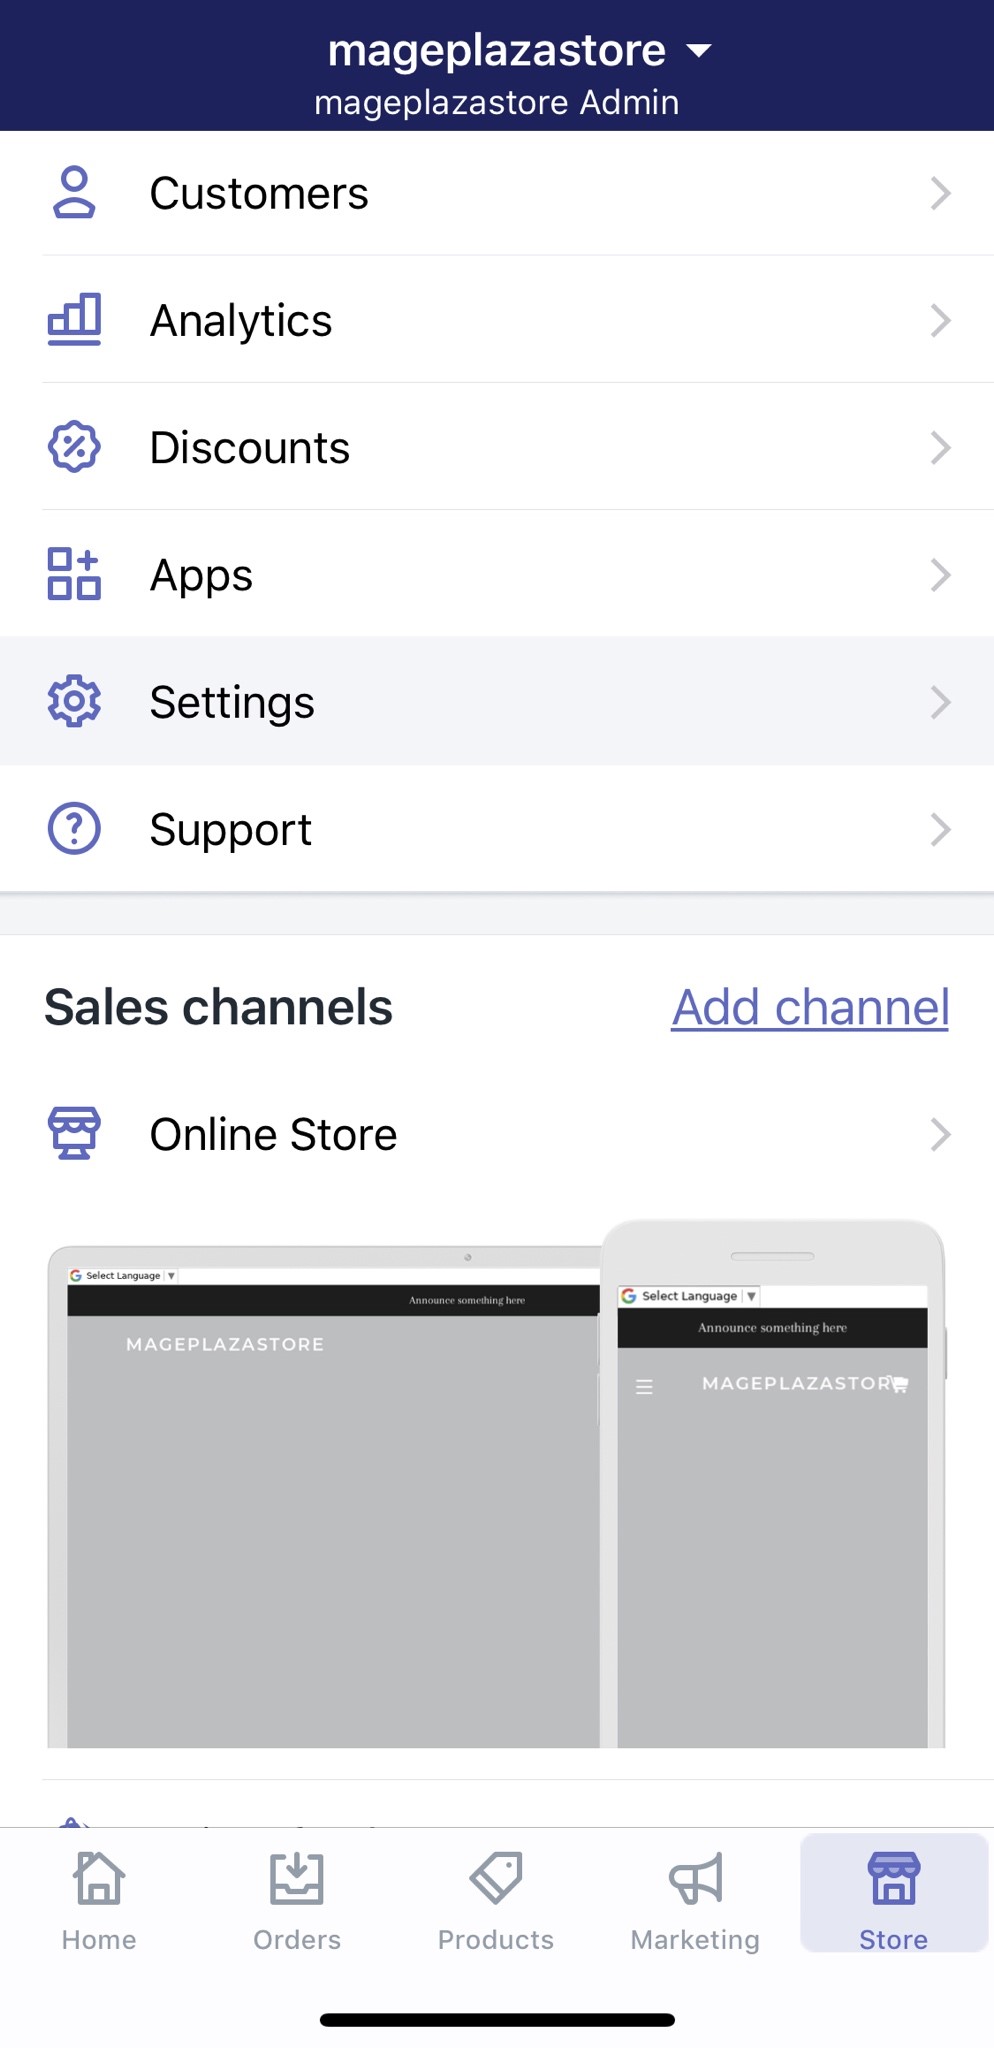
- Step 2: Tap Files
Under the Store settings with a lot of options, swipe down until you meet Files and tap on it.
- Step 3: Copy the URL
In the files list, copy the URL of the file you want to link from your text.
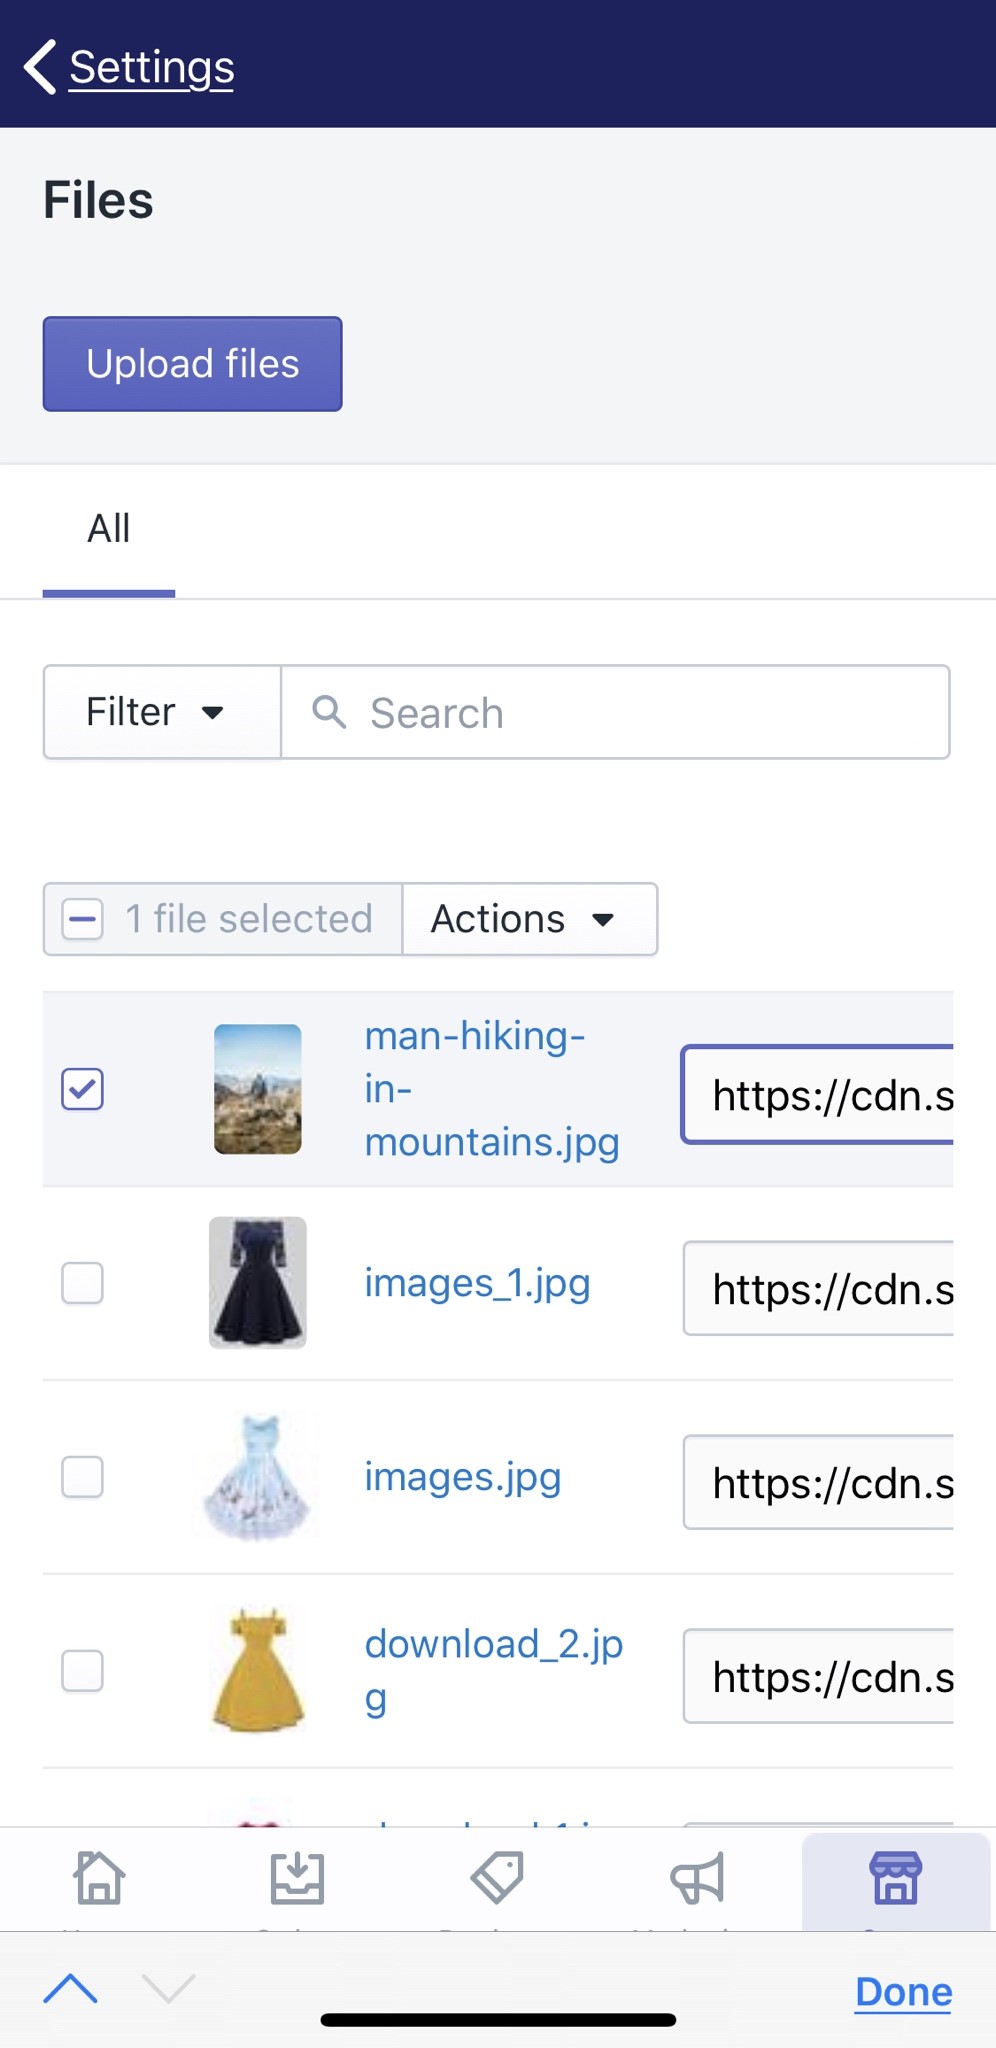
- Step 4: Go to wherever you want to add the file
Go back to the Store tab, then choose your destination to compose a text which you can link to the selected file. It could be Products, Discounts, blog posts, anywhere you know the file suitable to be shared.
- Step 5: Highlight the specific text and tap Insert link
In the rich text editor field, highlight the text you want to add the URL. Then, tap Insert link, it locates at the right corner above your virtual keyboard.
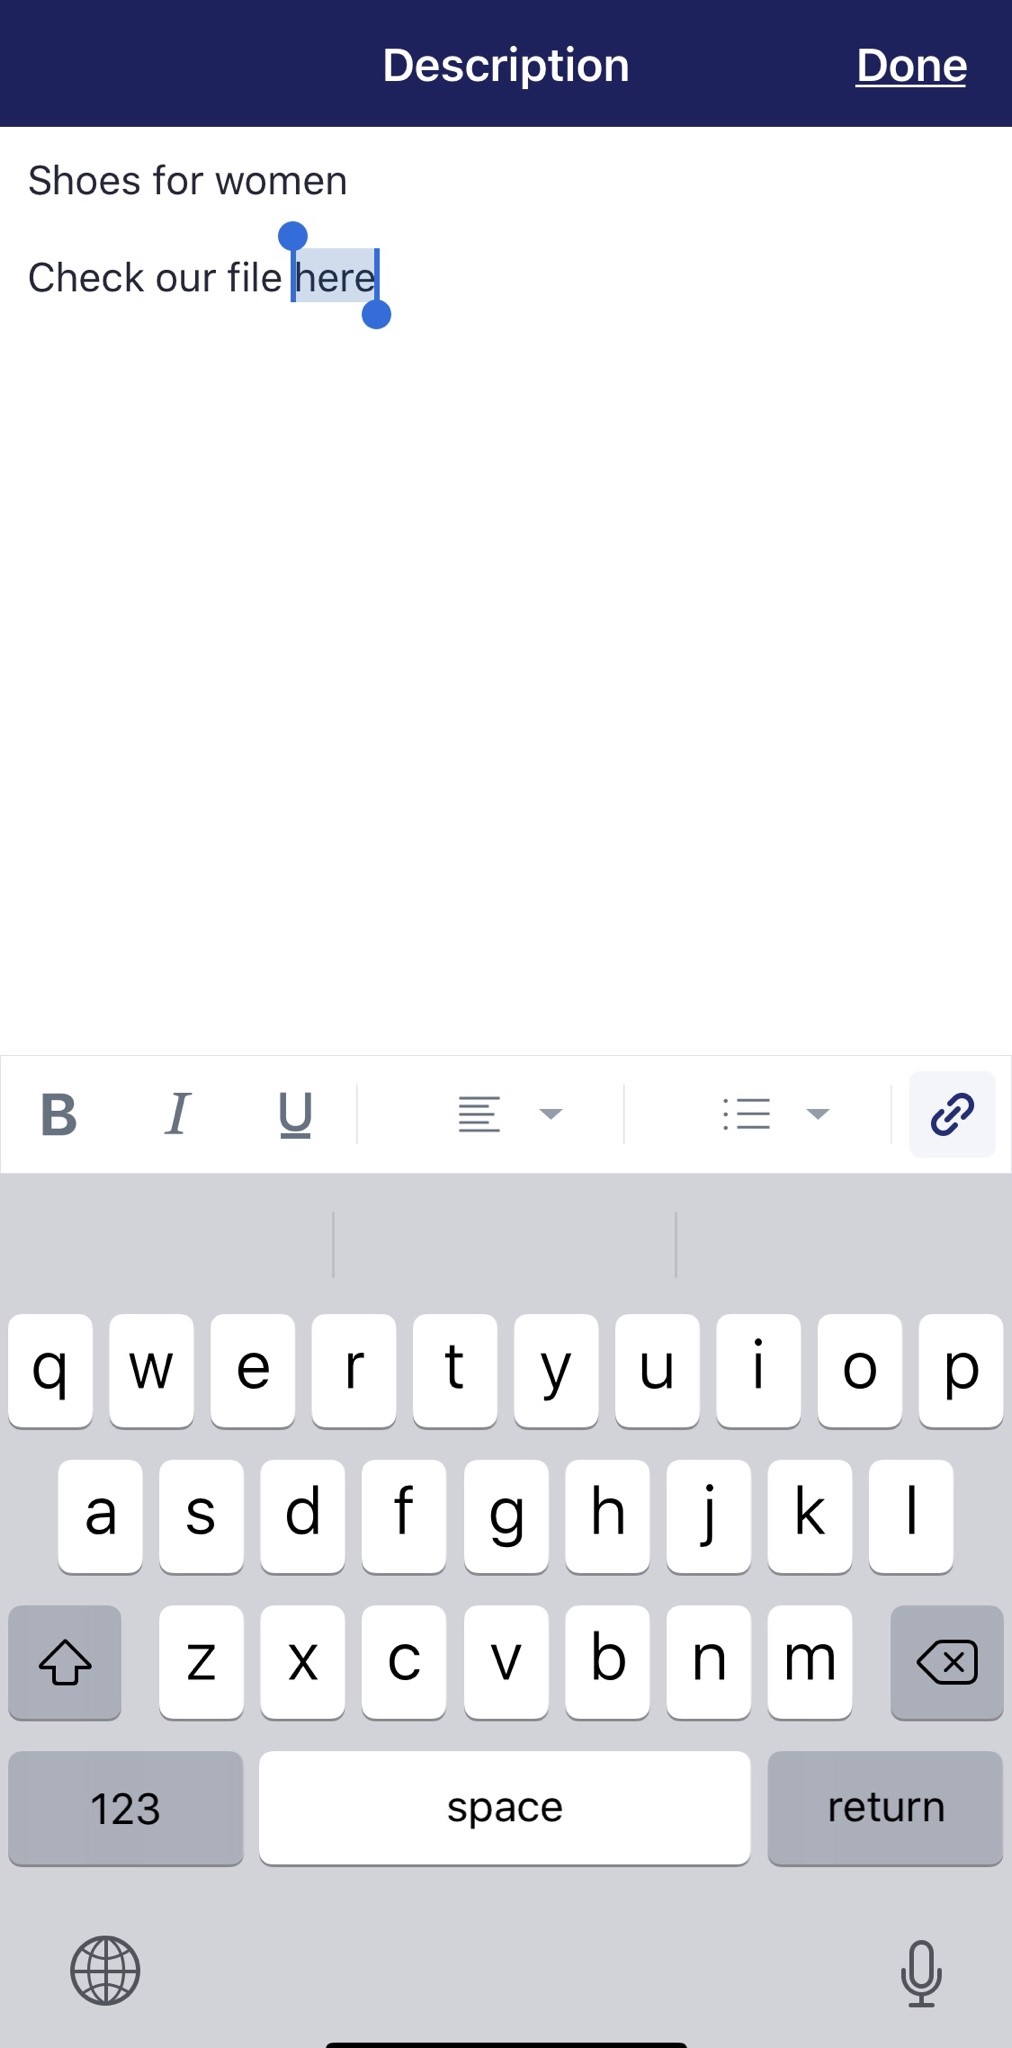
- Step 6: Paste the URL
The Insert link section will appear right after. In Link to, you can paste the selected URL that connects to your file back then. You can leave the Link title** blank field alone. If you want to Open link in new window, turn it on.
Note: The URL of the file need to begin with this structure:
http://cdn.shopify.com/
You may have to correct the structure of the URL.
- Step 7: Confirm your edit
Tap Done to complete your sequence.
To link to a file in page content on Android (Click here)
- Step 1: Go to Stores, select Settings
After opening the Shopify app on your phone, tap Stores on the bottom bar.
In the Stores section, select Settings
- Step 2: Tap Files
Under the Store settings with a lot of options, swipe down until you meet Files and tap on it.
- Step 3: Copy the URL
In the files list, copy the URL of the file you want to link from your text.
- Step 4: Go to wherever you want to add the file
Go back to the Store tab, then choose your destination to compose a text which you can link to the selected file. It could be Products, Discounts, blog posts, anywhere you know the file suitable to be shared.
- Step 5: Highlight the specific text and tap Insert link
In the rich text editor field, highlight the text you want to add the URL. Then, tap Insert link, it locates at the right corner above your virtual keyboard.
- Step 6: Paste the URL
The Insert link section will appear right after. In Link to, you can paste the selected URL that connects to your file back then. You can leave the Link title** blank field alone. If you want to Open link in new window, turn it on.
Note: The URL of the file need to begin with this structure:
http://cdn.shopify.com/
You may have to correct the structure of the URL.
- Step 7: Confirm your edit
Tap Done to complete your sequence.
Summary
Linking to a file in page content is a handy move to expand the topic of discussion. For example, there are a lot of things about your product that you cannot show all of those just in the description area of the product itself. You may also want to share a blog post, tips of use article, etc. Therefore, using the rich text editor to create connections from your content to other files is surely in need.
Related Posts:


