4 Steps to Upload a Background Image for Banner
At the checkout page of Shopify, there is always a banner that displays your shop name. The image of that banner can be changed base on what you think is suitable for your store. You can upload any background image for banner that you want. For instance, if what you sell online are clothes from a well-known brand, it is a good idea to choose an image which has that brand logo.
Related Posts:
- How to Add Background Image or Color to the Main Content Area on Shopify
- How to Add Background Image or Color to the Order Summary on Shopify
- How to Upload an Image File to your Online Store Content on Shopify
- How to Add a Product Image on Shopify
The below is my instructional writing on the topic how to upload a background image for the banner on Shopify. This writing will benefit you a lot so you should spend your time reading it carefully.
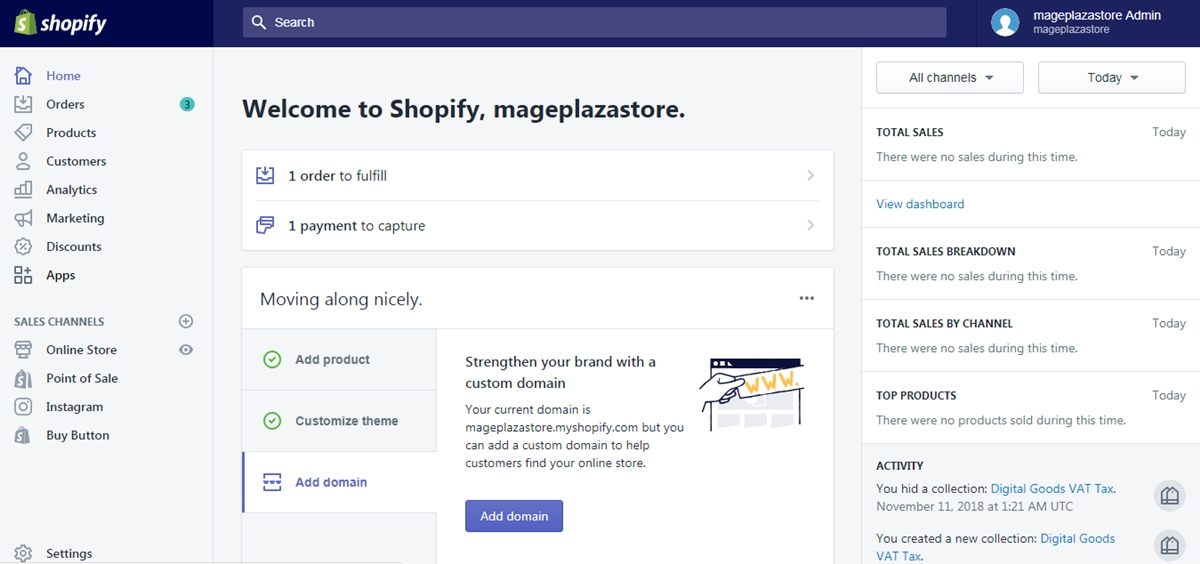
Step 1: Go to Settings -> Checkout
After you logged into your account, look at the left bottom of the screen and find the button named Settings and click on it to continue.
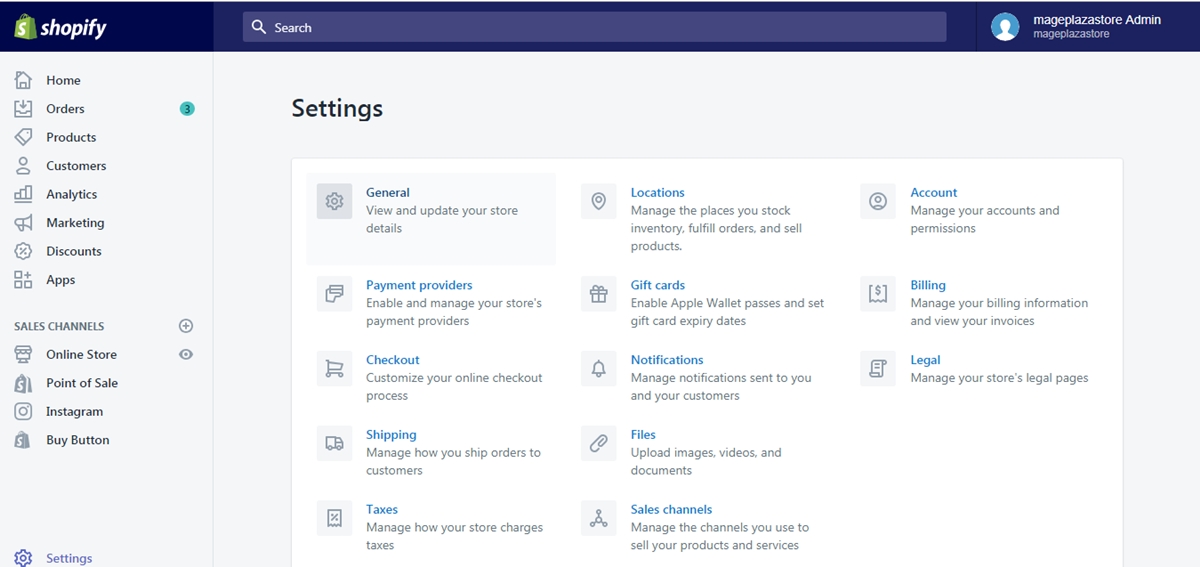
At the Settings page, find the Checkout button and click on it.
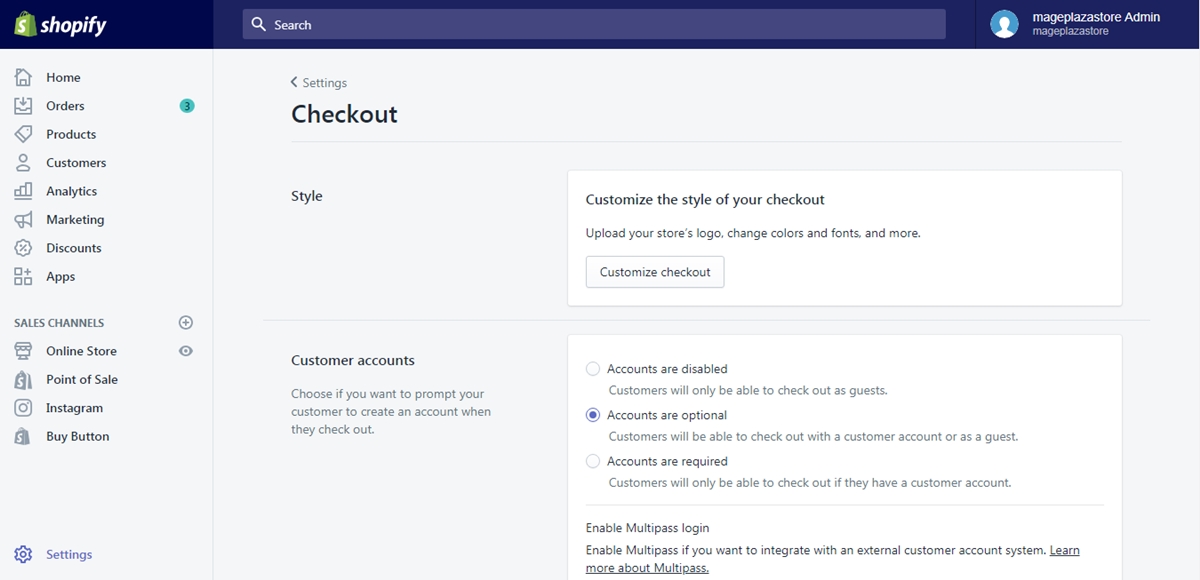
Step 2: Click Customize checkout
Inside the checkout page, you can see the Style area, in that area, click on the button named Customize checkout to see the theme editor.
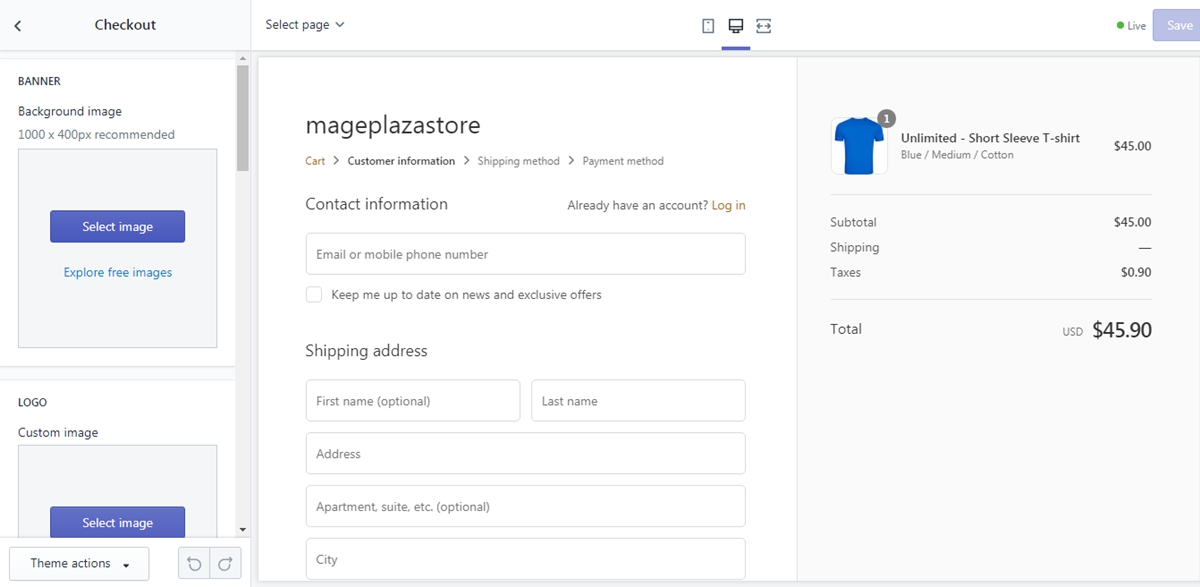
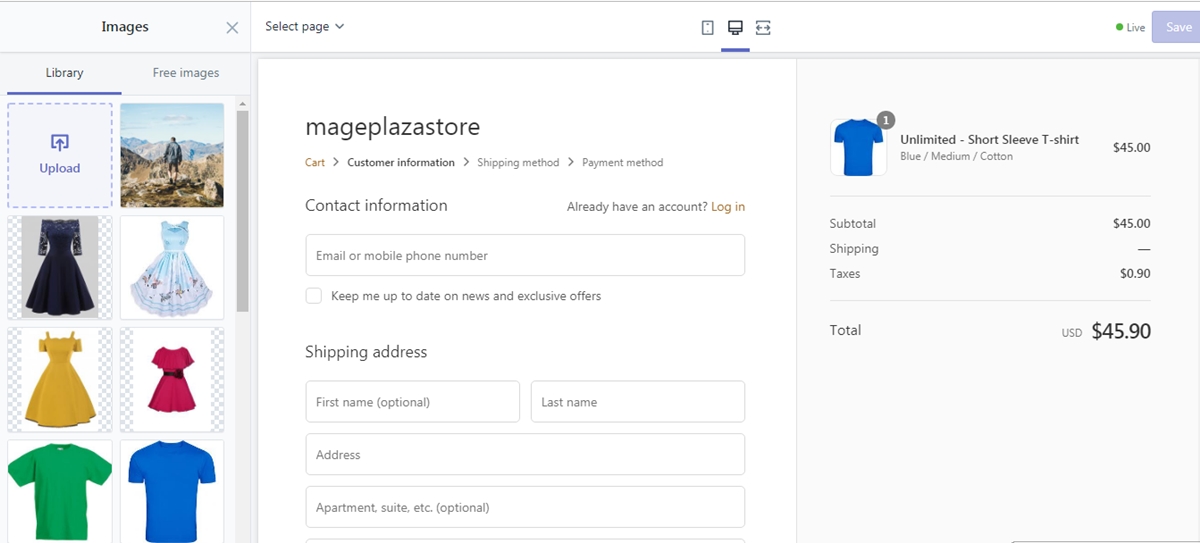
Step 3: Upload background image
On the left screen, notice a Banner section. In that section, choose Select image and continue to Upload or choose an existing image in the library.
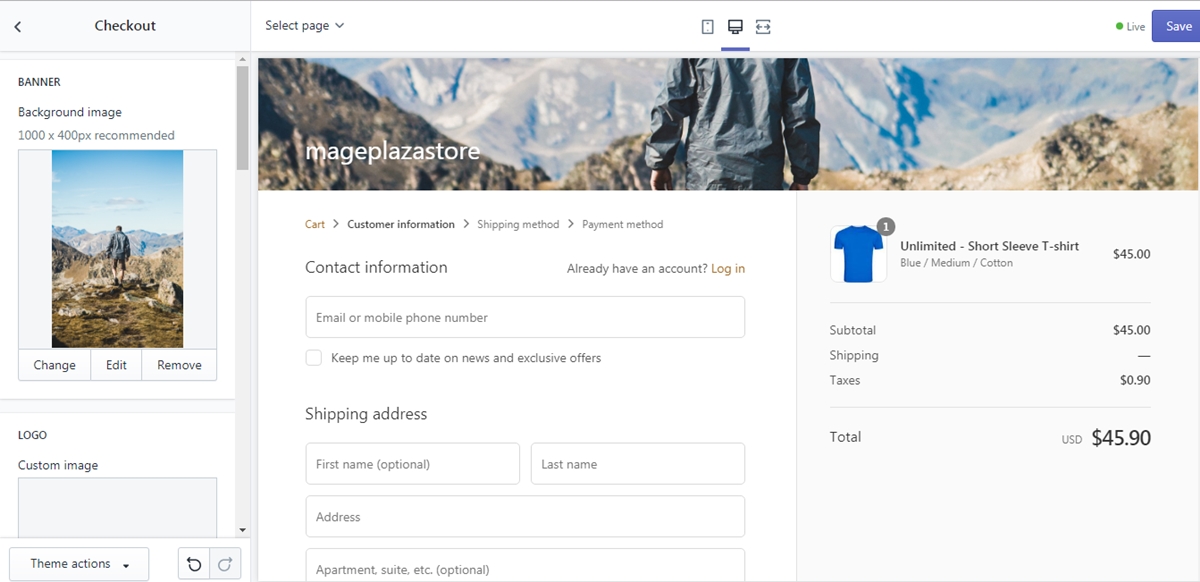
Step 4: Saving
Finally, click Save to save all your changes to the checkout page.
To upload a background image for the banner on iPhone (Click here)
- Step 1: Go to Store -> Settings
When you get access to the home page of your shop from the app, go to Store button and continue by tapping the Settings section on that page.
- Step 2: Tap Checkout
From the store settings section, you can see an option named Checkout. Click on that option to go to the next step.
- Step 3: Tap Customize checkout
Inside the page, there is a field named style. From that field, tap Customize checkout to see the theme editor.
- Step 4: Upload image
On the left screen, notice a Banner section. In that section, choose Select image and continue to Upload or choose an existing image in the library.
- Step 5: Saving
Finally, click Save to save all your changes to the checkout page.
To upload a background image for the banner on Android (Click here)
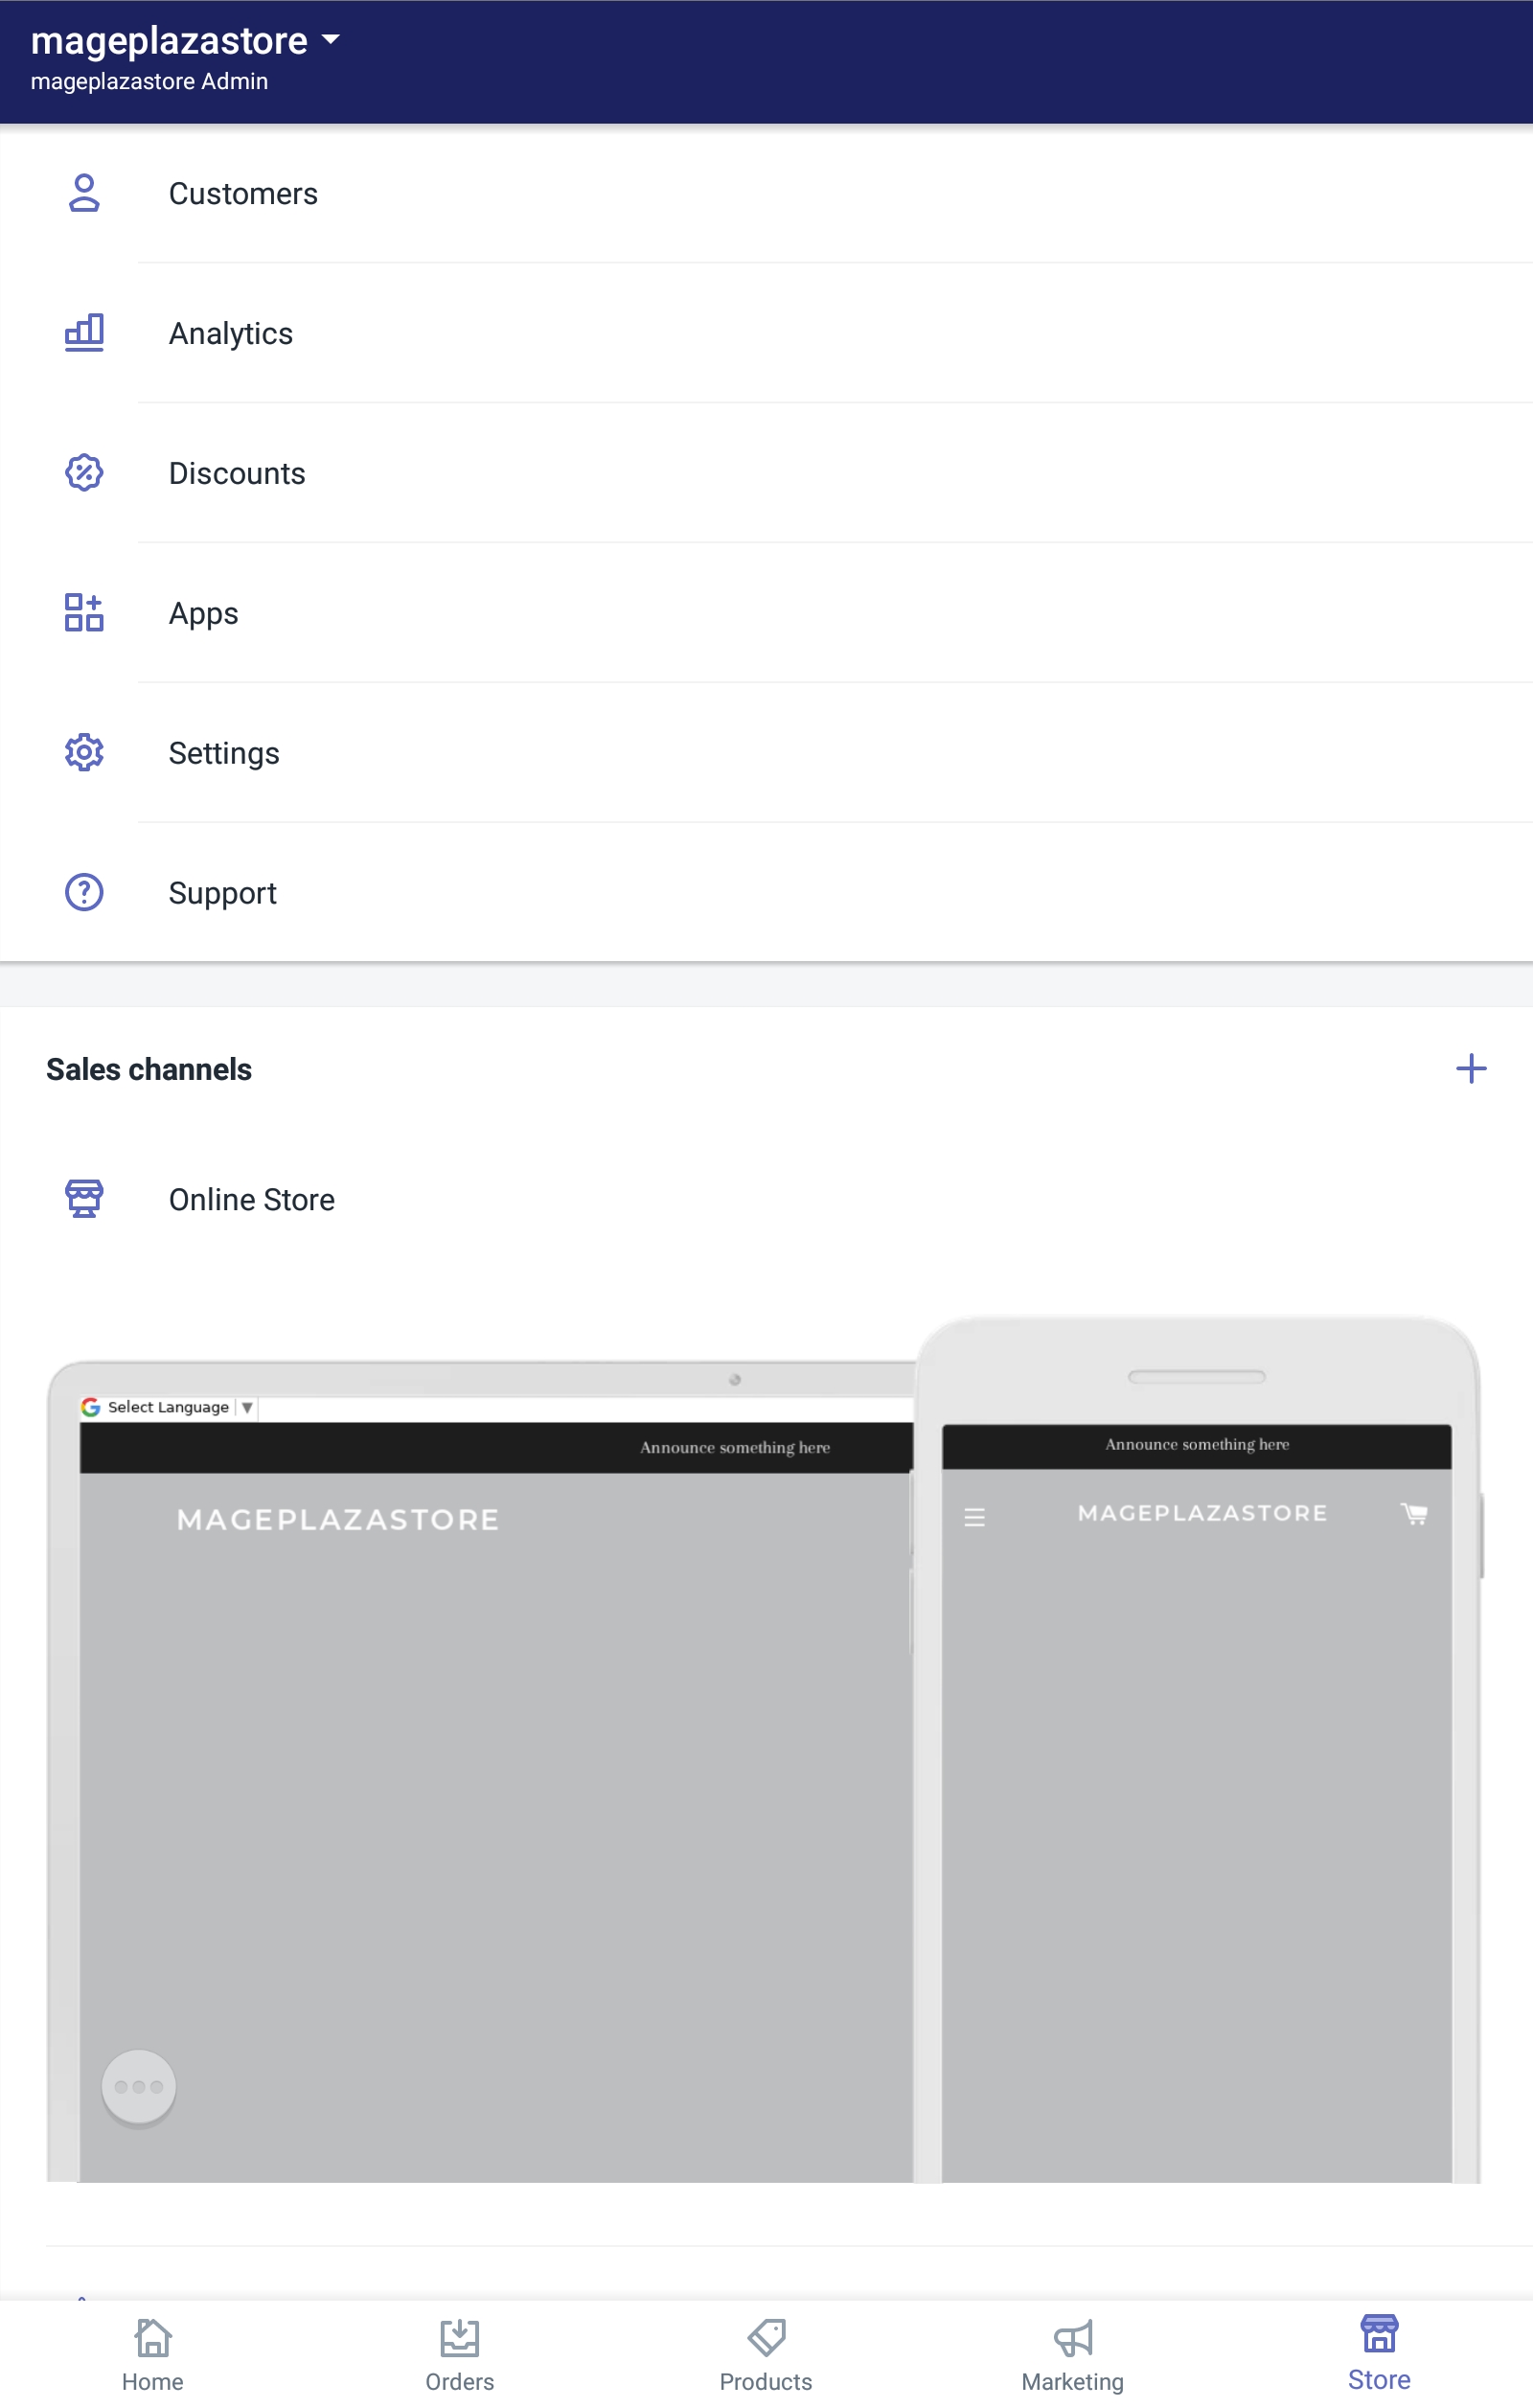
- Step 1: Go to Store -> Settings
When you get access to the home page of your shop from the app, go to Store button and continue by tapping the Settings section on that page.
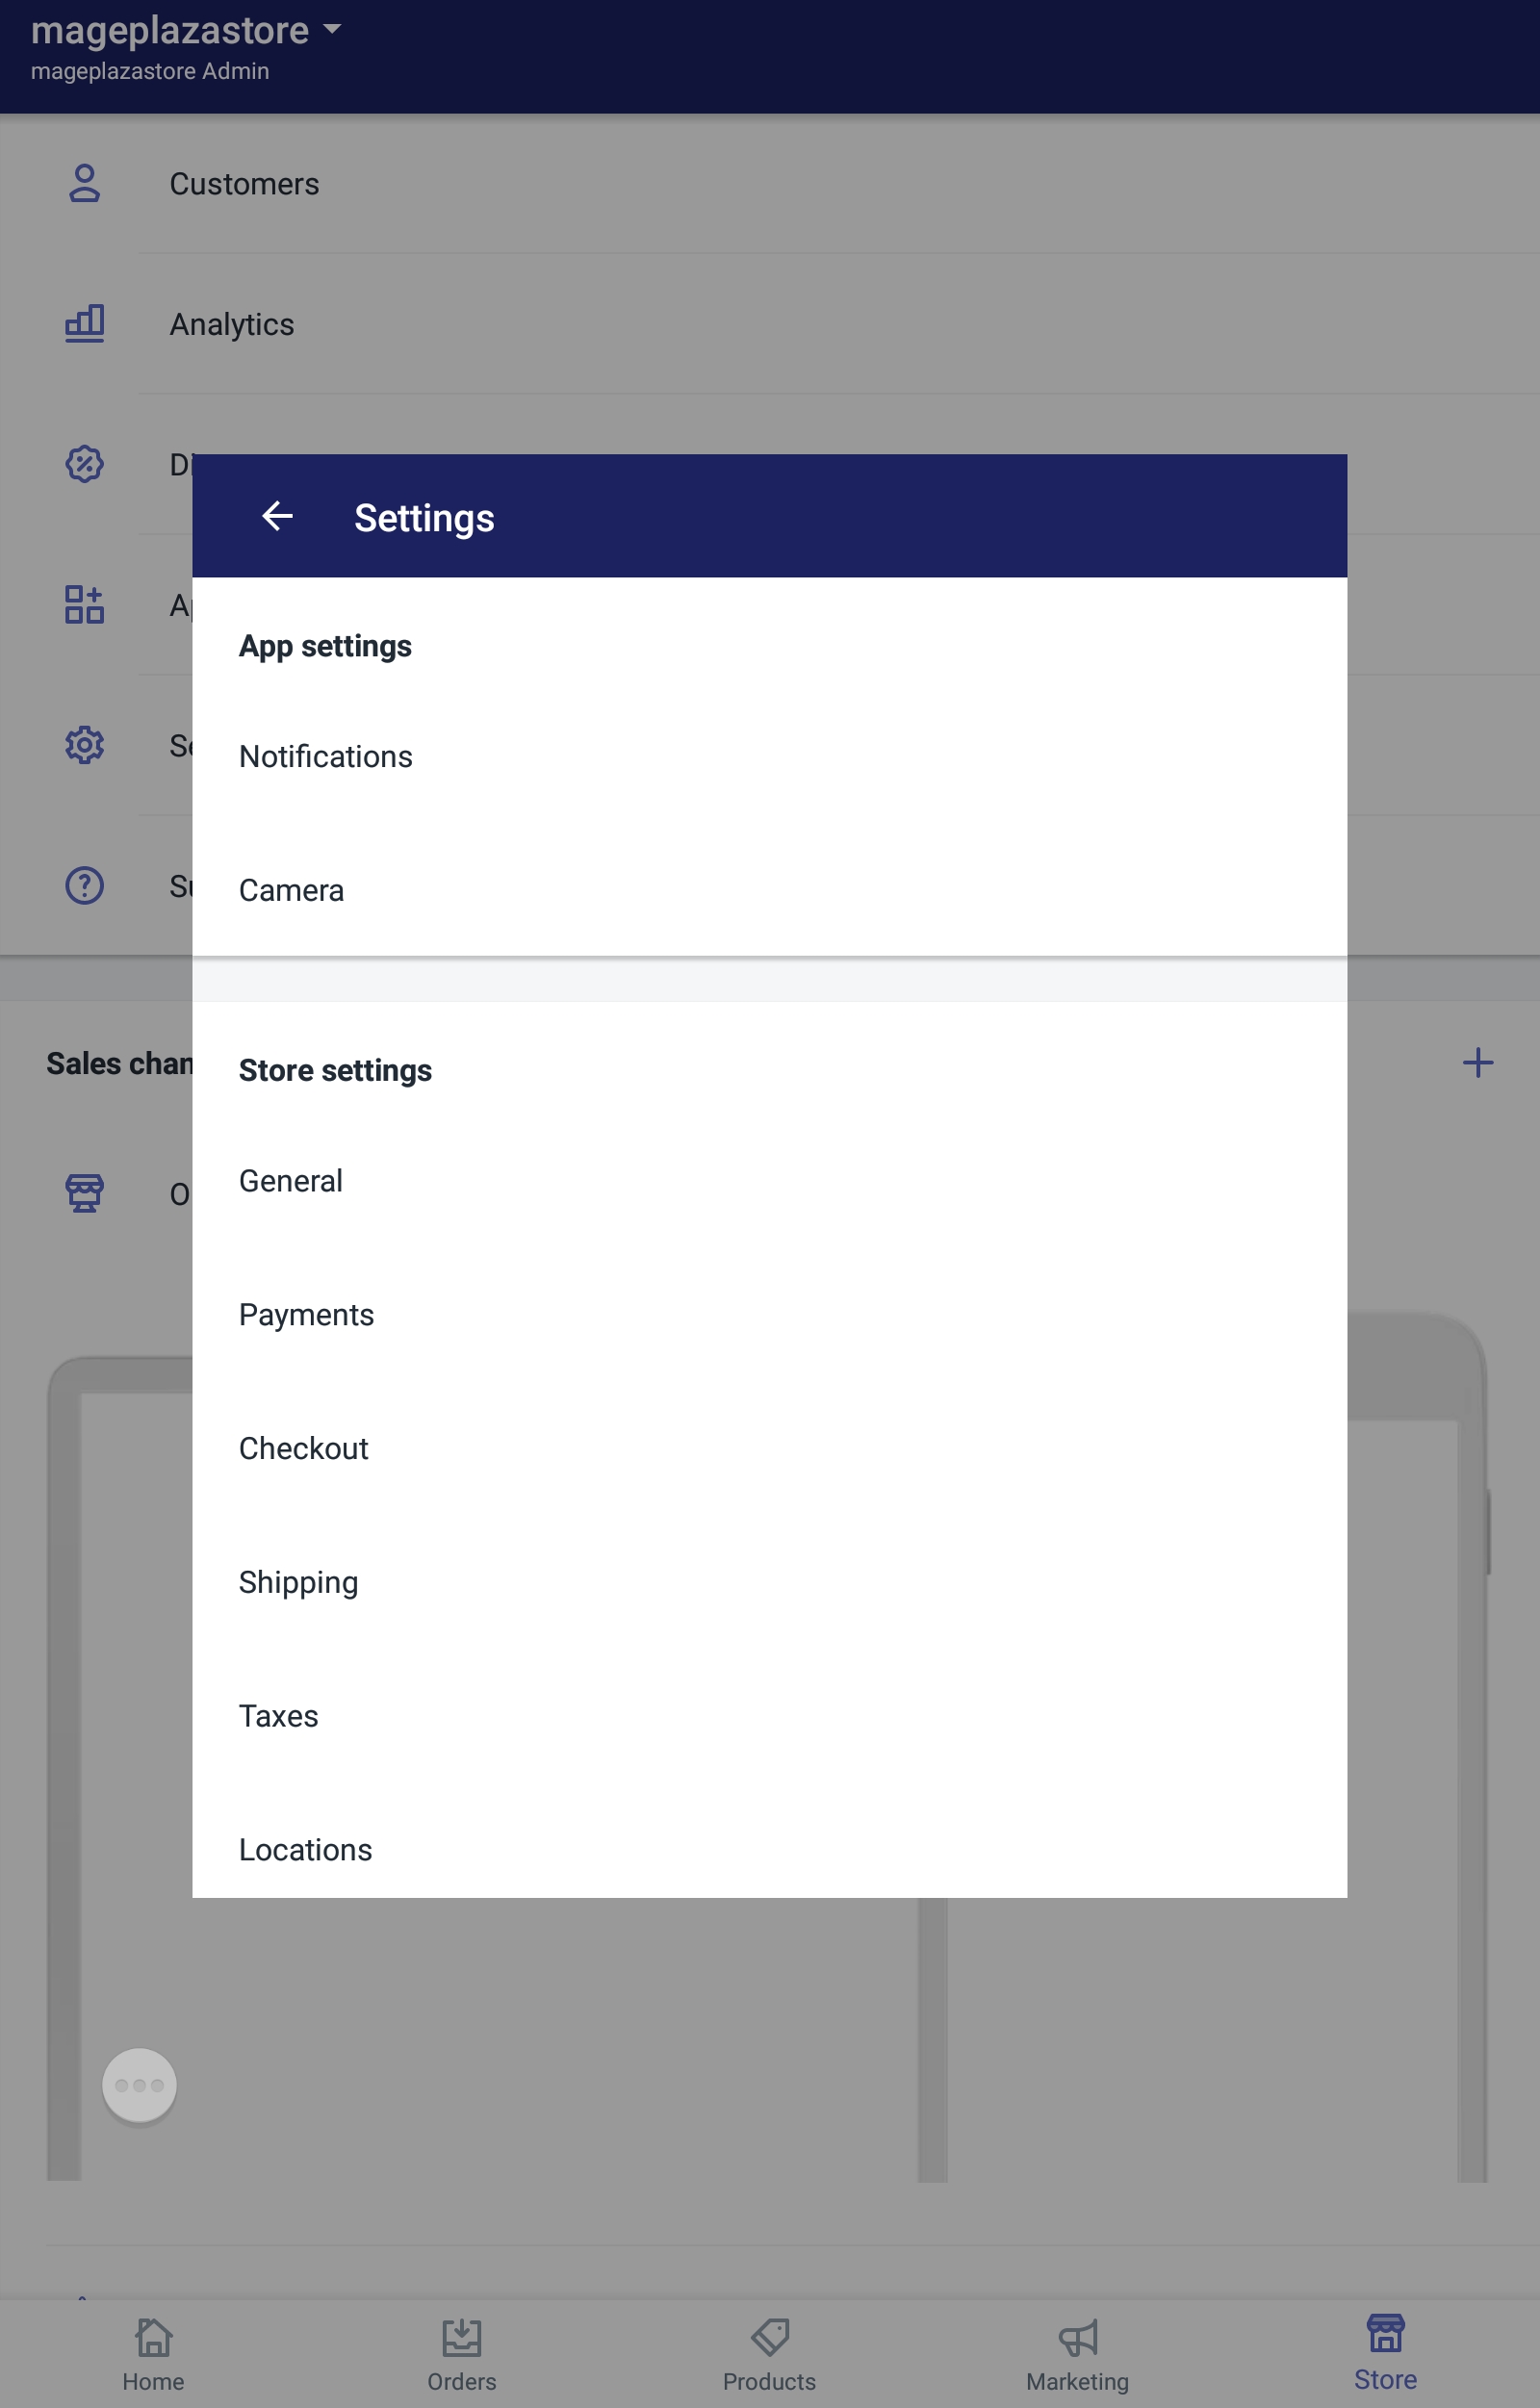
- Step 2: Tap Checkout
From the store settings section, you can see an option named Checkout. Click on that option to go to the next step.
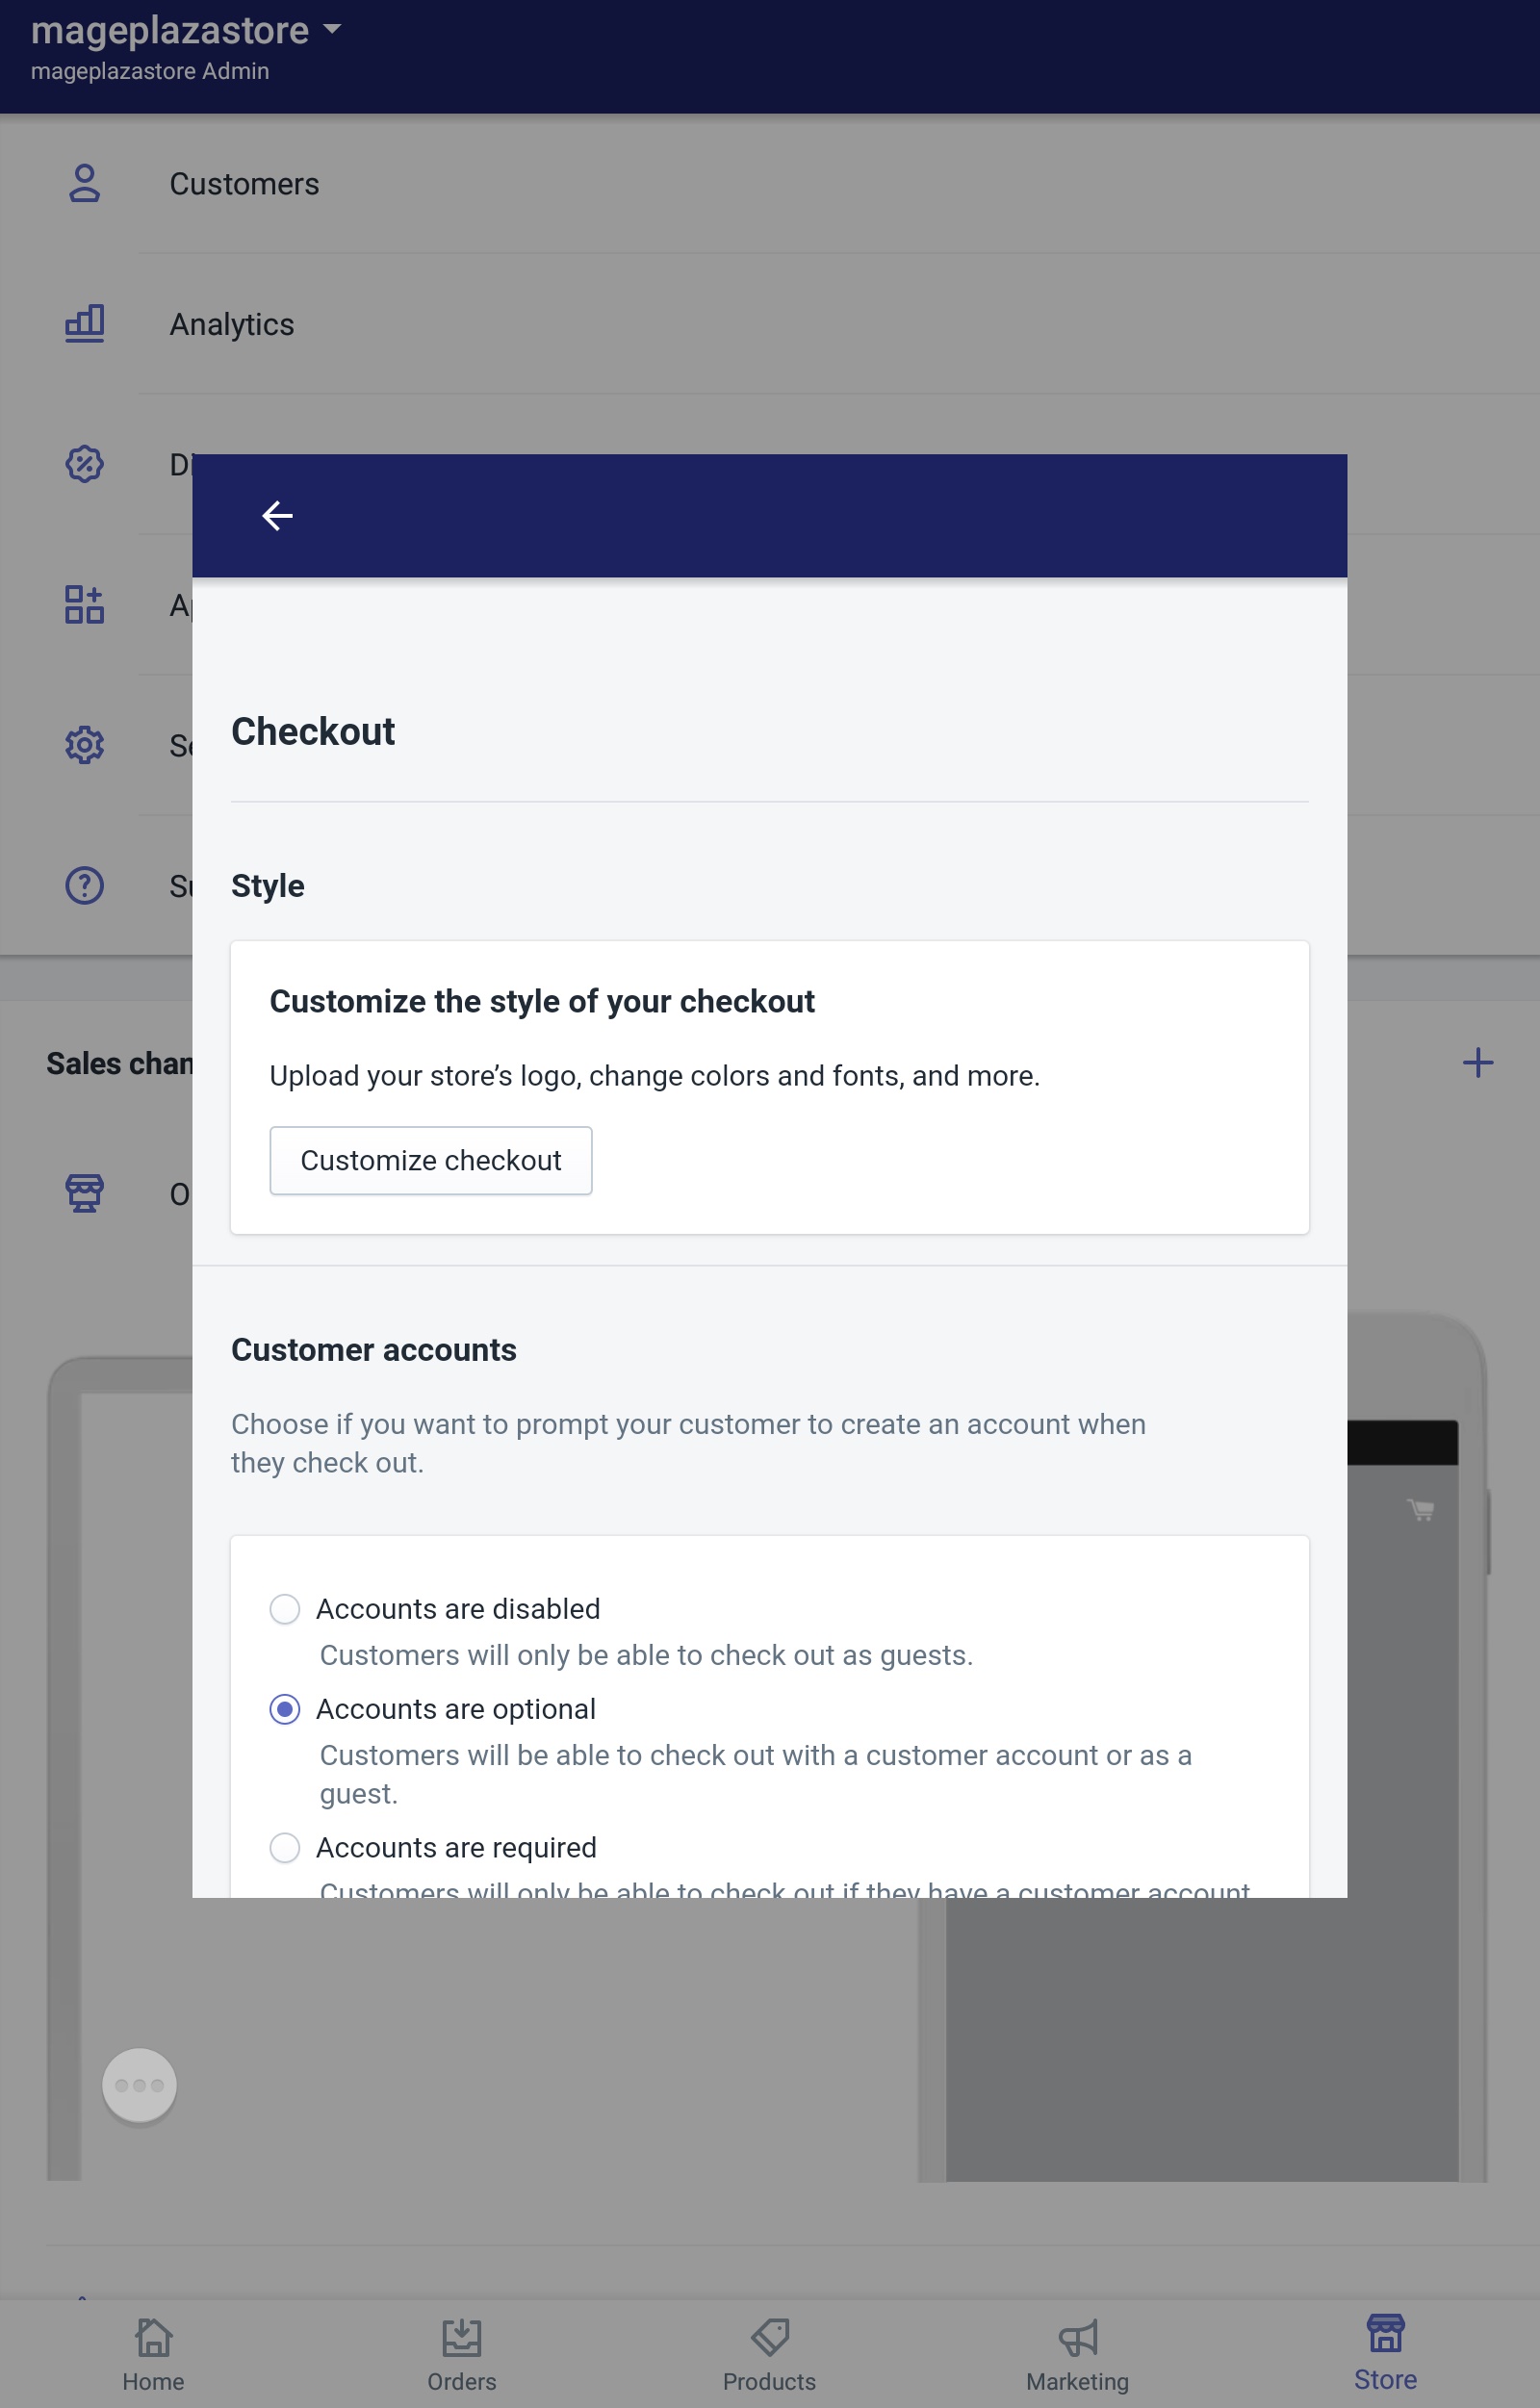
- Step 3: Tap Customize checkout
Inside the page, there is a field named style. From that field, tap Customize checkout to see the theme editor.
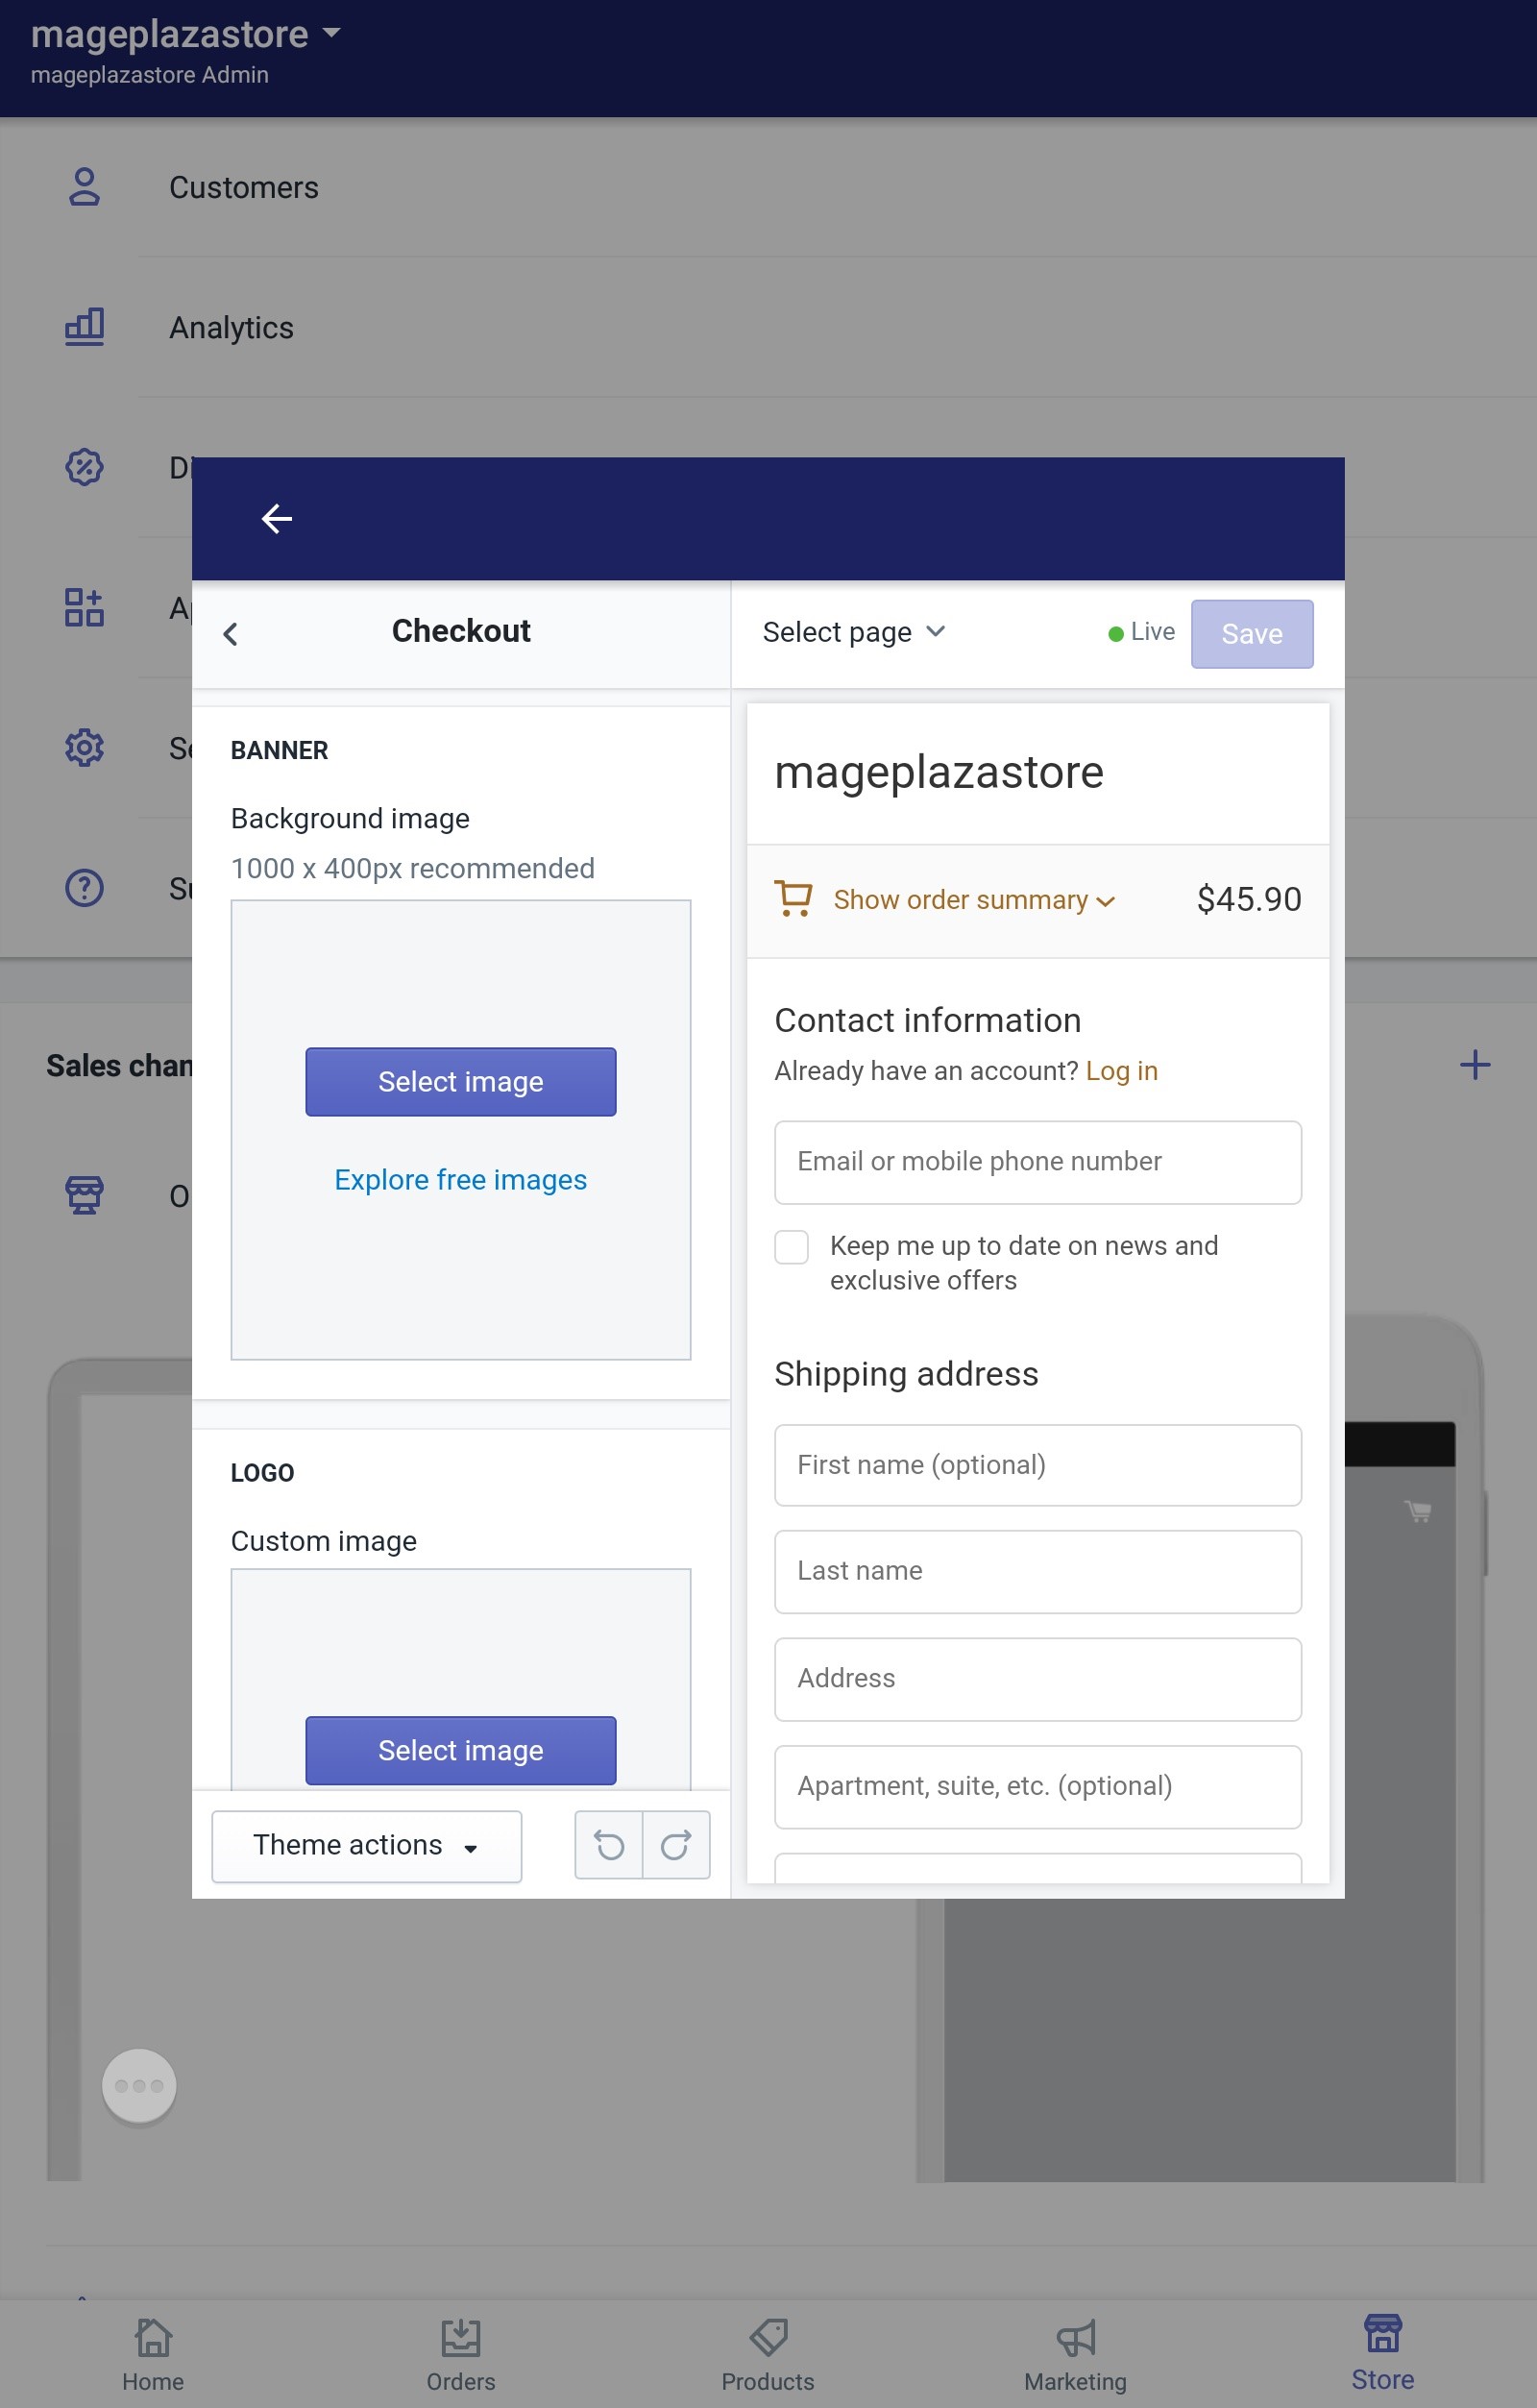
- Step 4: Upload image
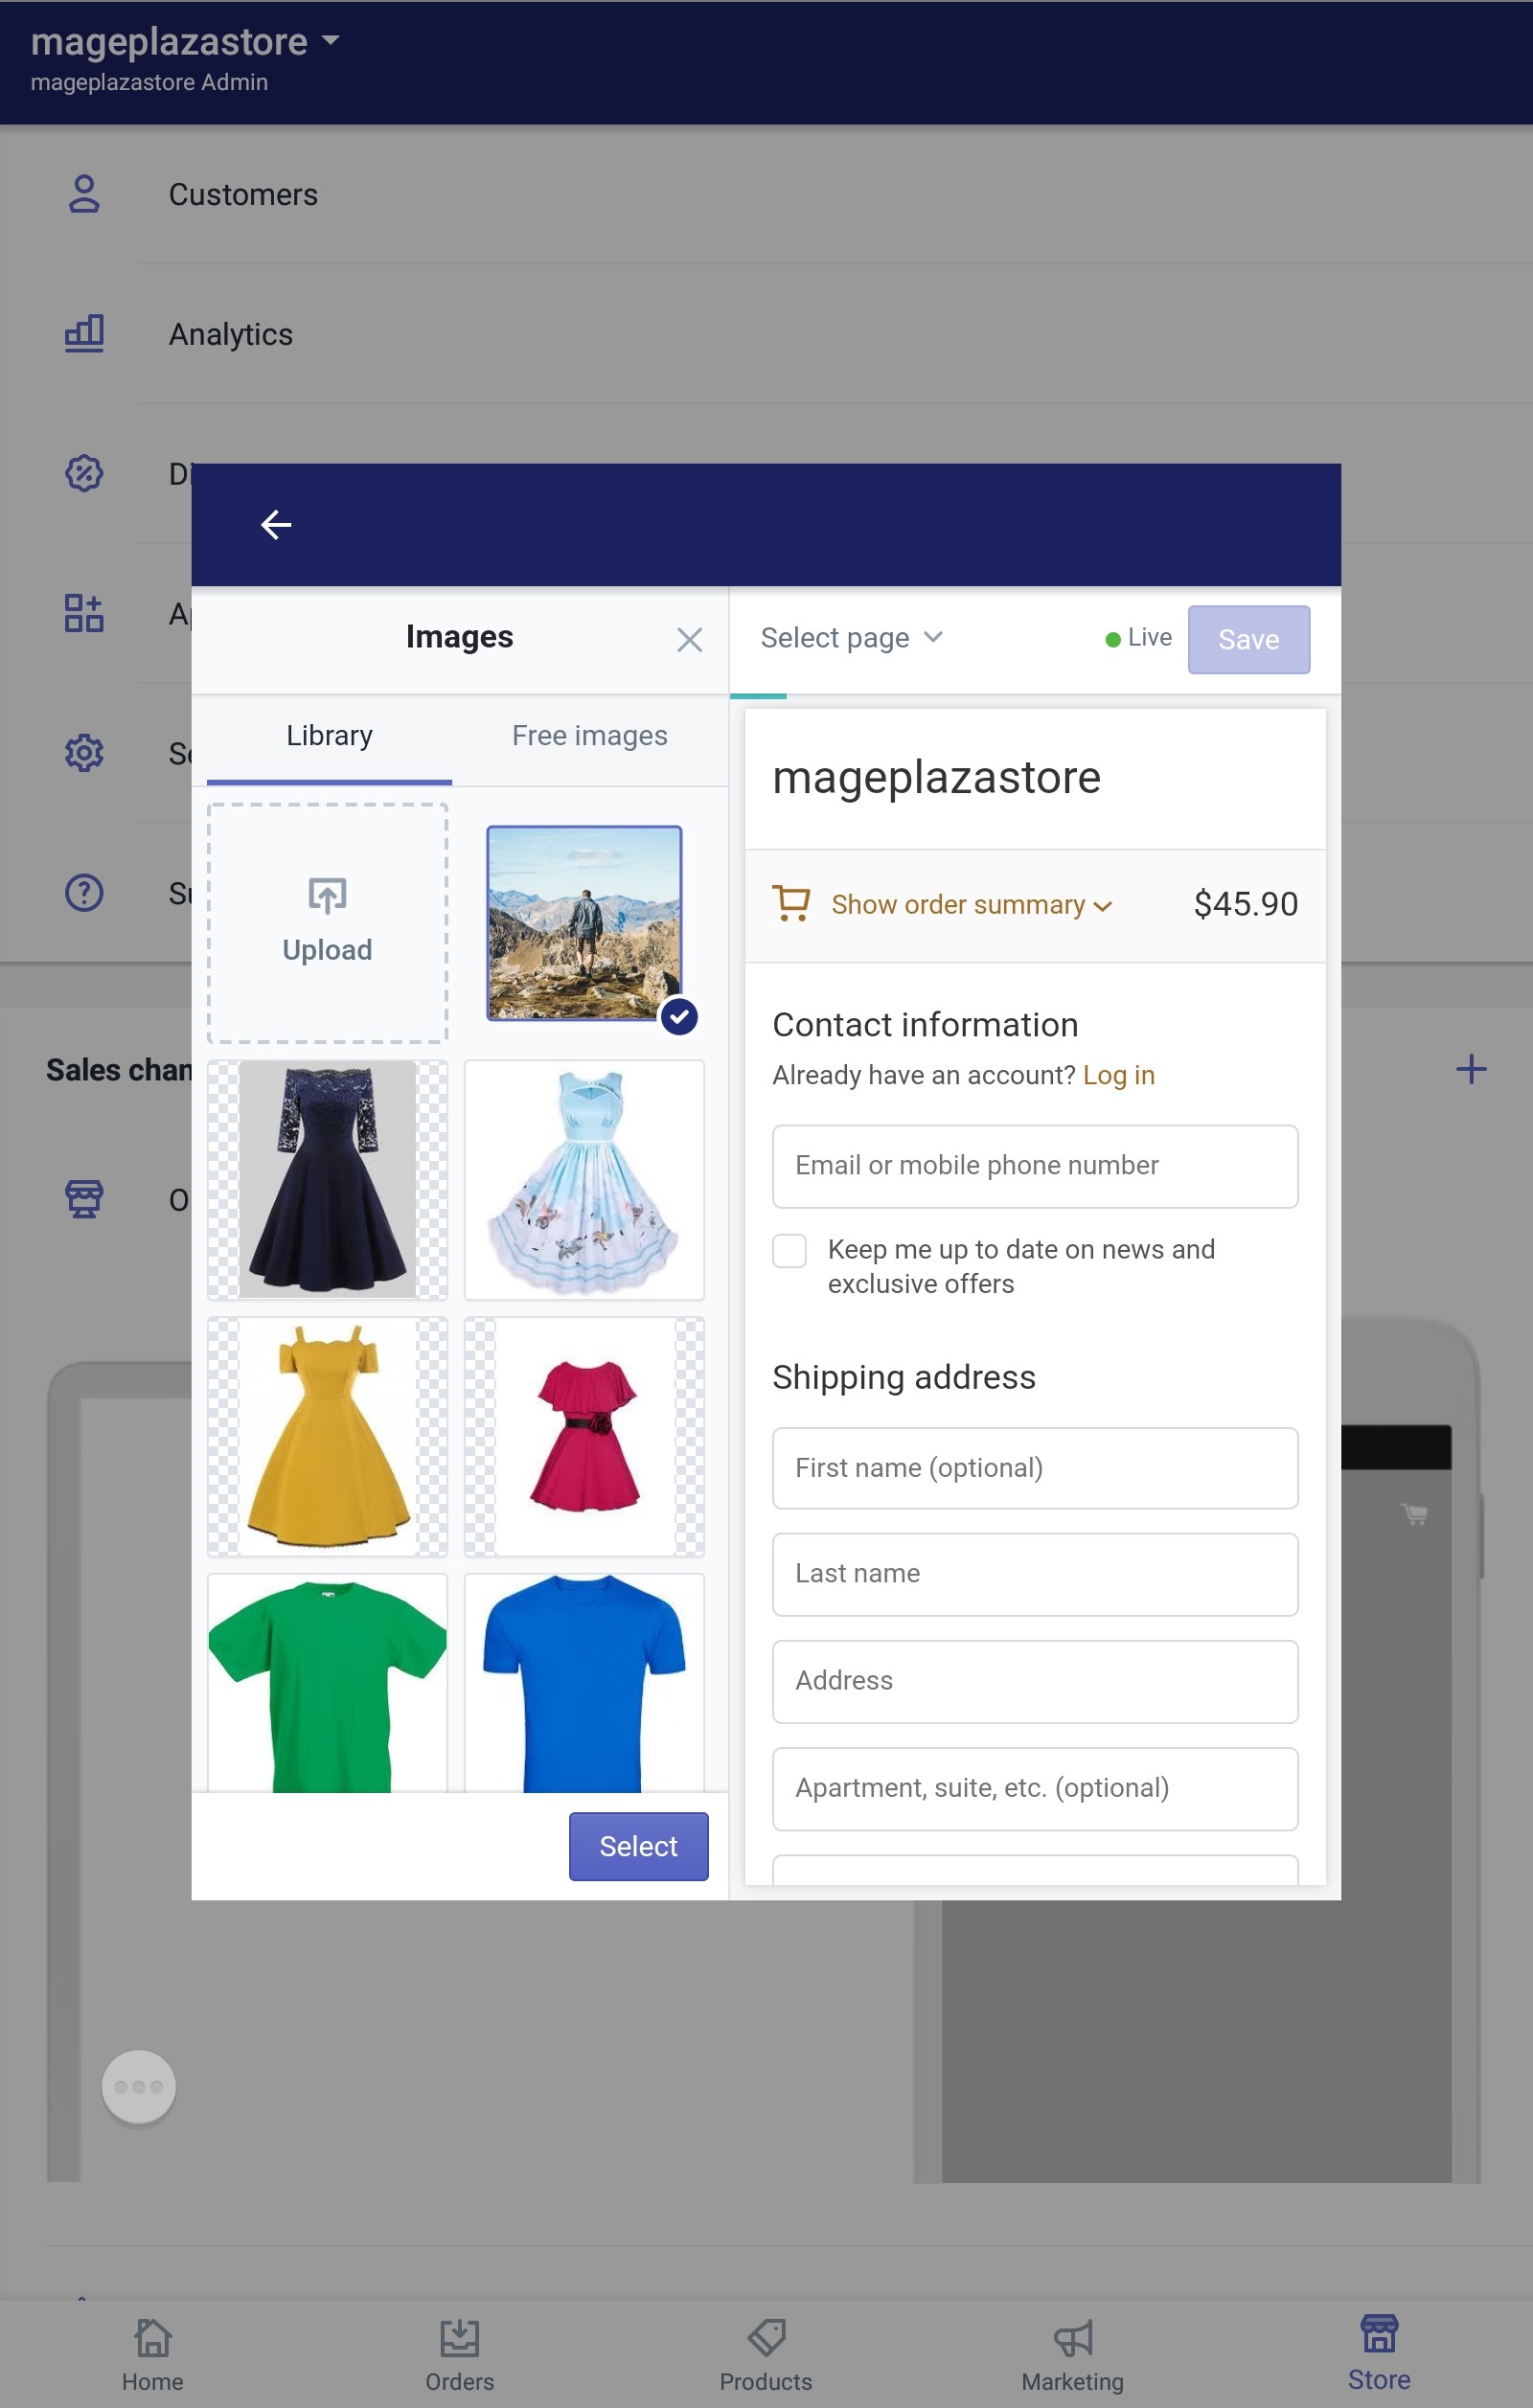
On the left screen, notice a Banner section. In that section, choose Select image and continue to Upload or choose an existing image in the library.
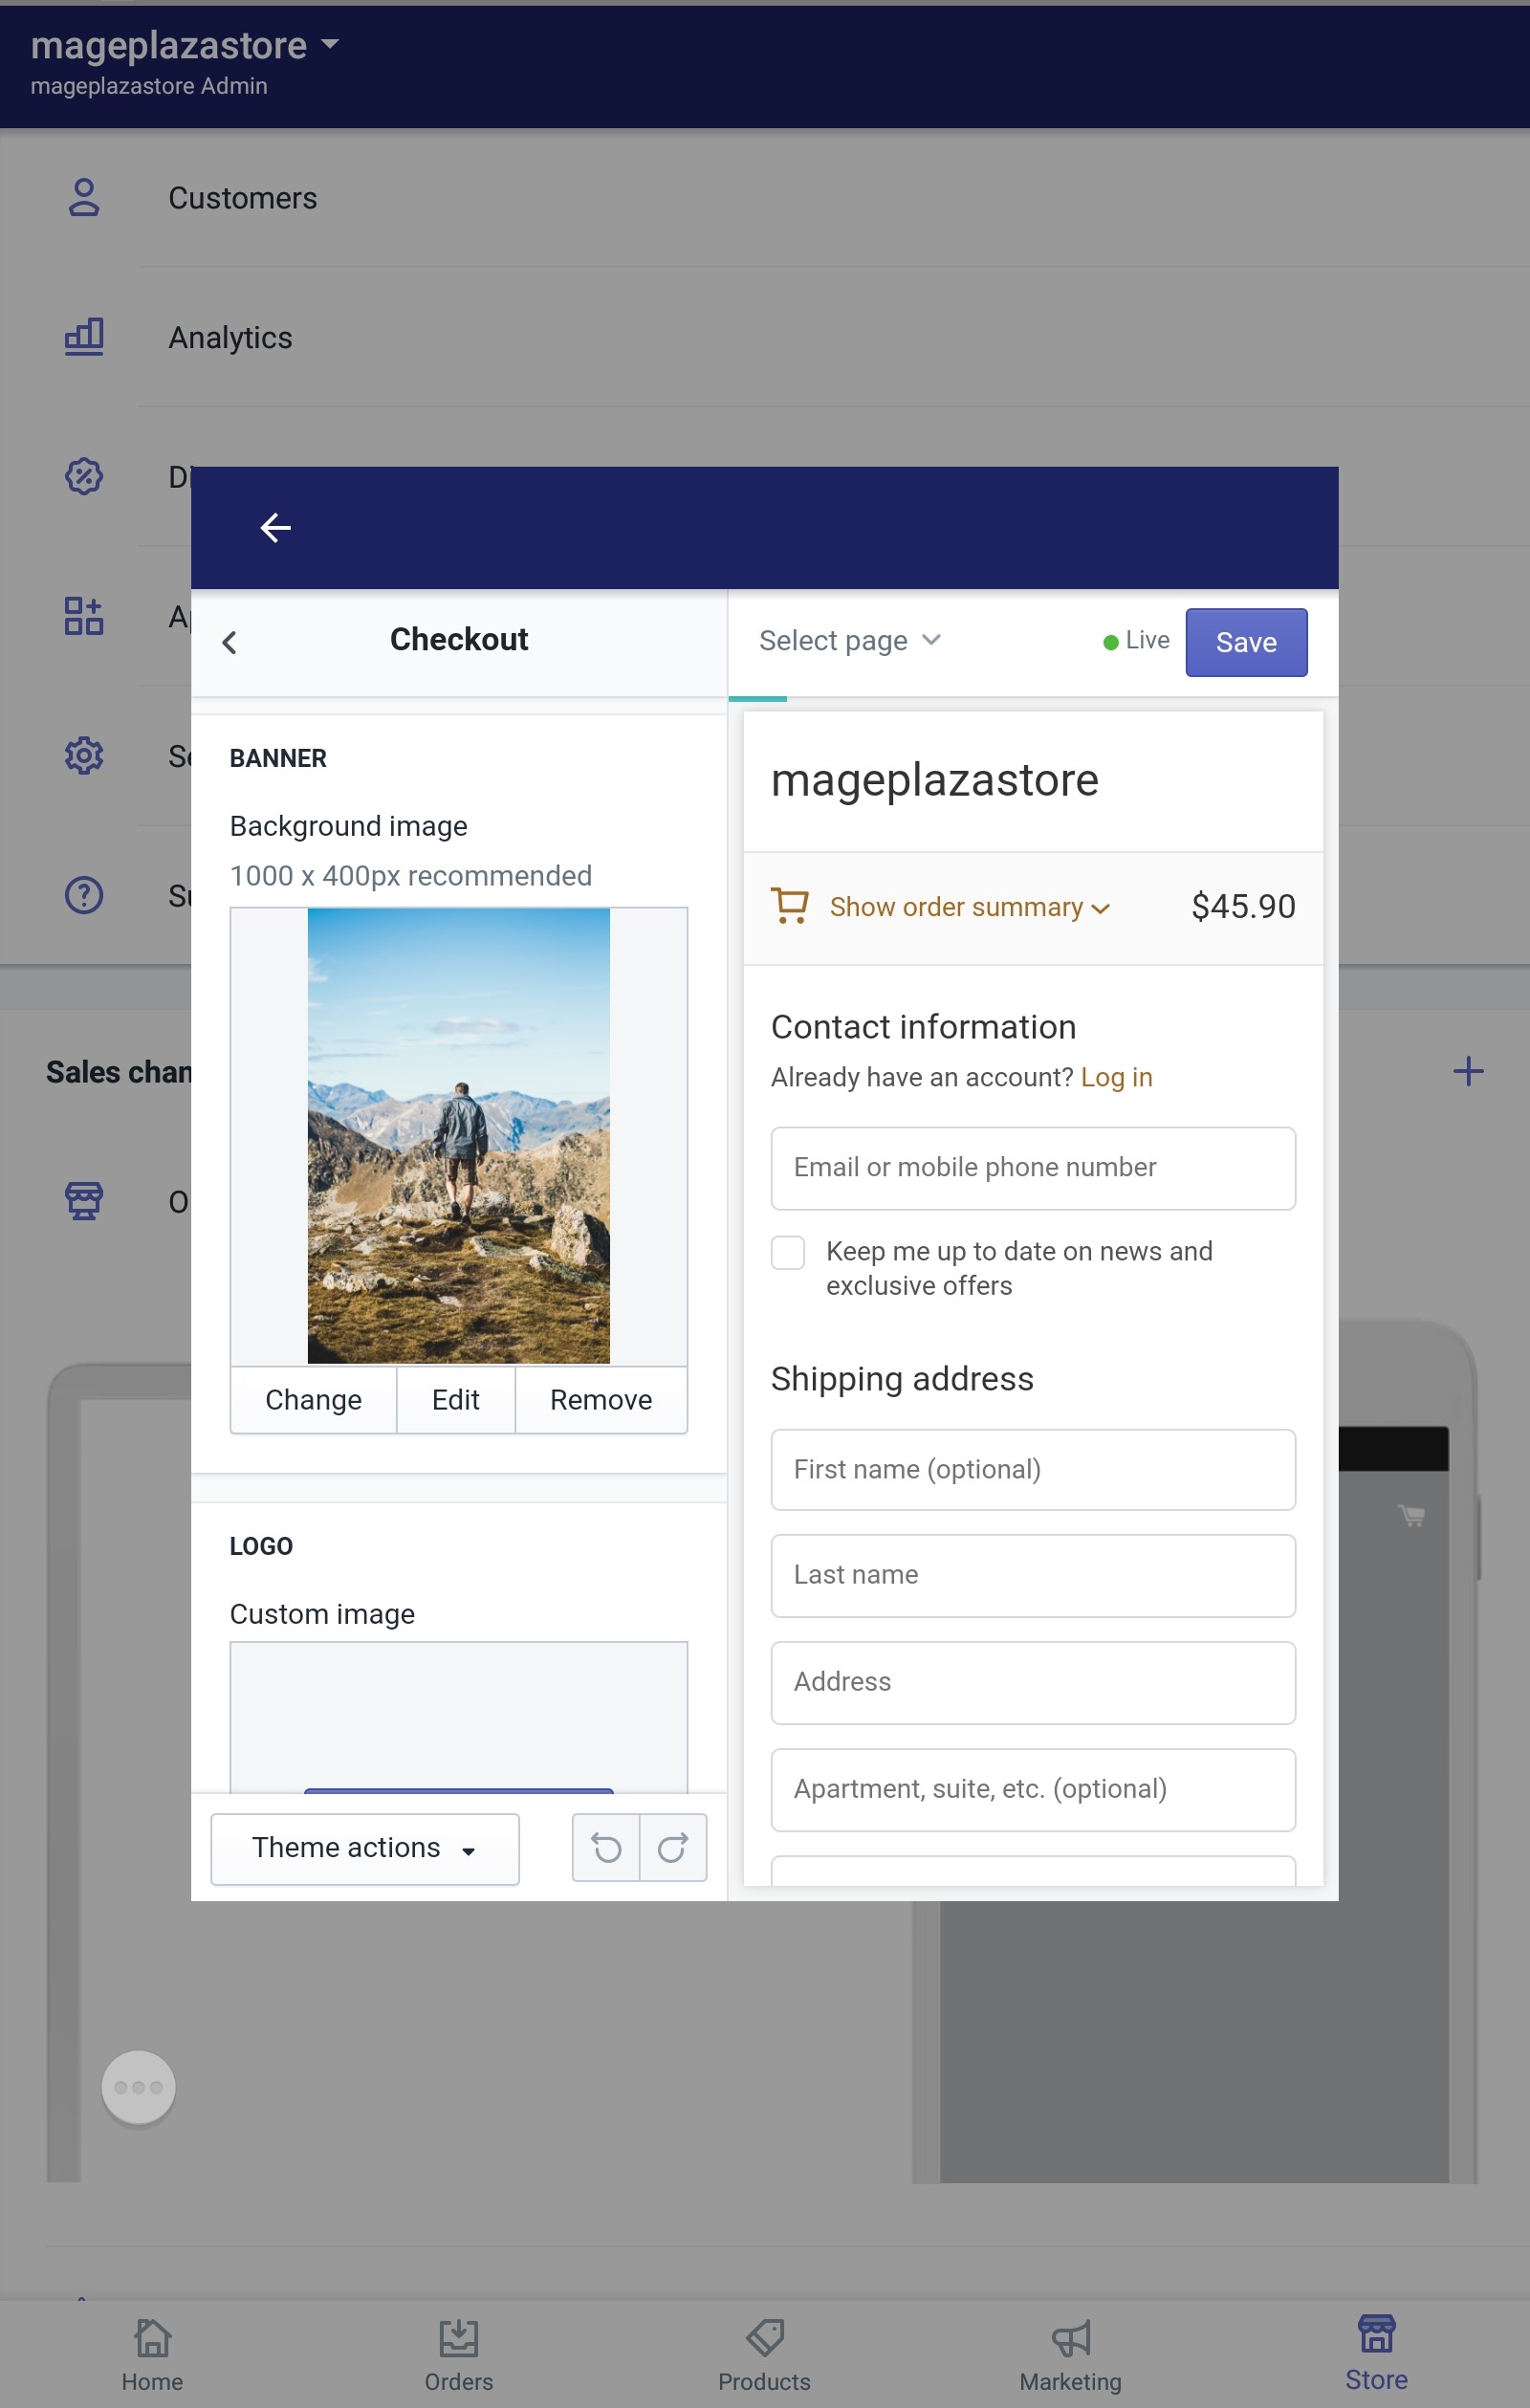
- Step 5: Saving
Finally, click Save to save all your changes to the checkout page.
Conclusion
To sum up, the above is my writing on the topic how to upload a background image for the banner on Shopify. I hope you enjoyed my writing and apply it to your store. To see more writing on similar topics, please check out our Shopify tutorials.


