How to Upload Images With the Rich Text Editor on Shopify
When you compose content with the rich text editor, there is no doubt the need of images to visualize the content. Images also make your articles more colorful and less boring, like all articles I have been composing. On Shopify, there are many methods to add images to your content, using image URL is one example. In this article, we will find out about the first method, upload images with the rich text editor.
Related Posts:
- How to use an image URL with the rich text editor on Shopify
- How to Move and Resize an Image in the Rich Text Editor on Shopify
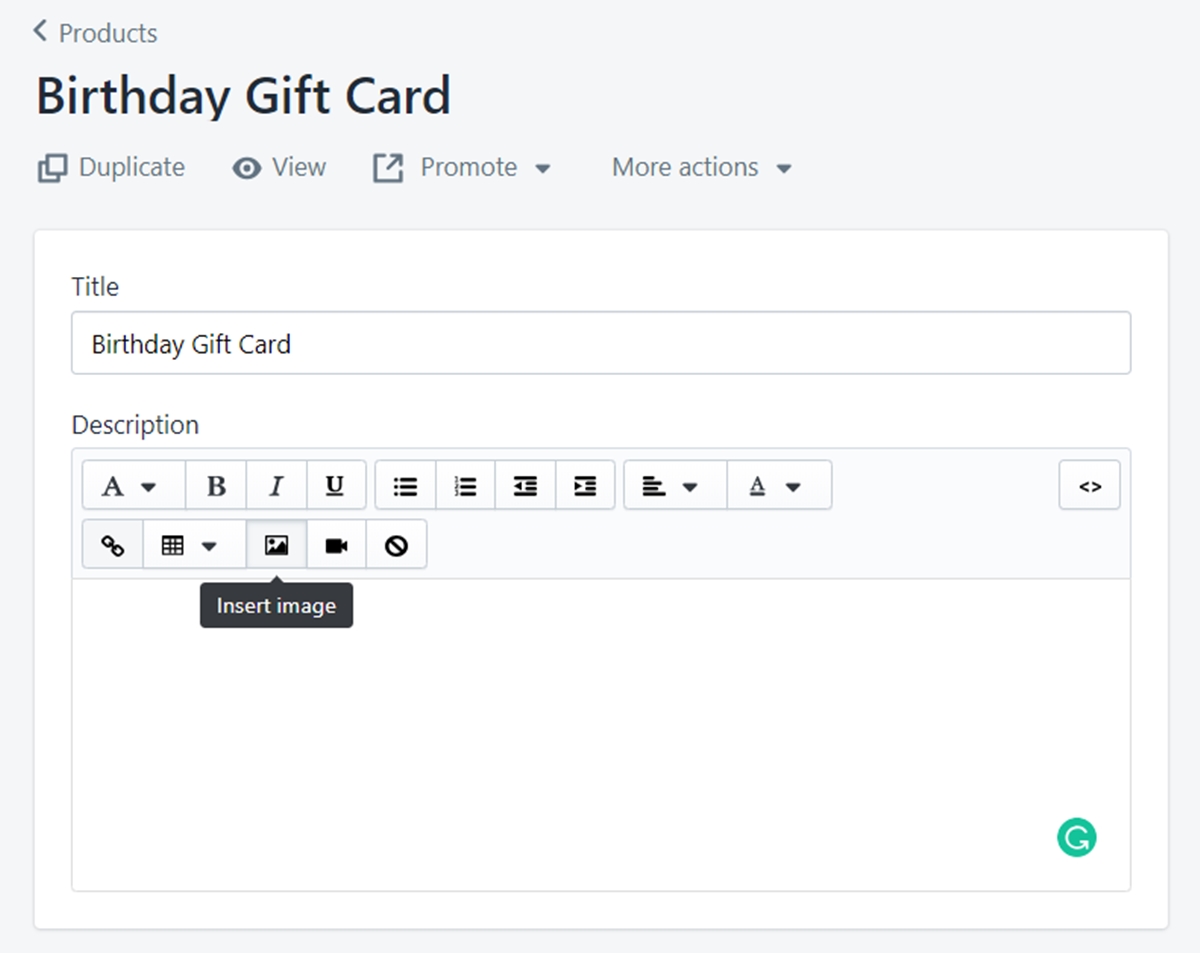
Step 1: Click Insert images from the rich text editor
From the rich text editor field, click Insert images to open the corresponding window for the sequence.

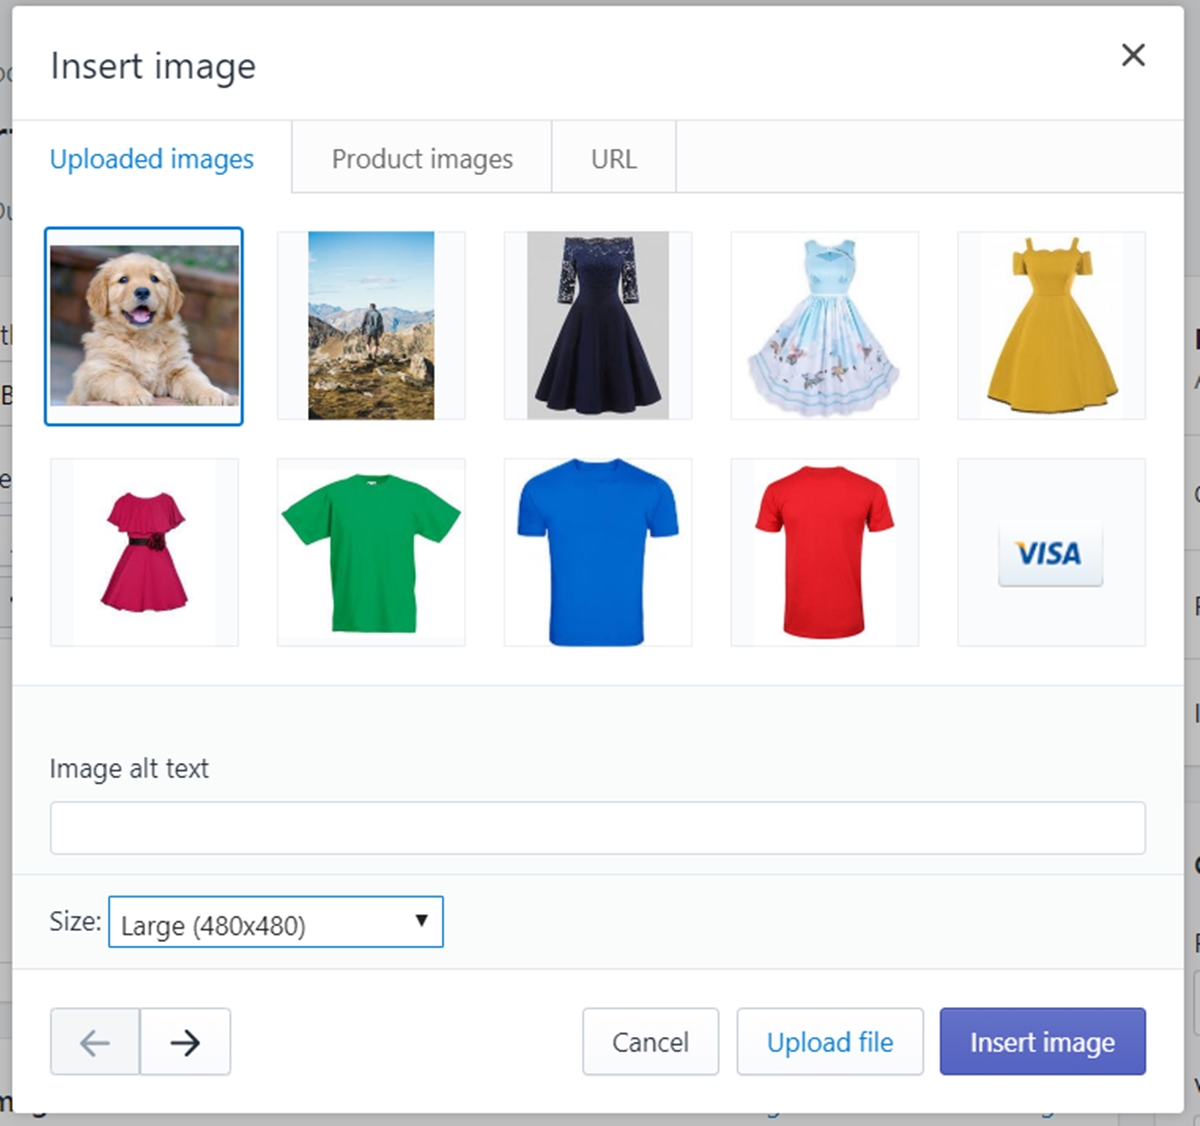
Step 2: Select Uploaded images tab and click Upload file
Make sure you are at the Uploaded images tab. Click Upload file at the bottom right corner of the window.

Step 3: Choose the image file from your device
After that, a browsing window will appear to access your device’s storage.
Select the image you want to upload.
It will appear in the Uploaded images tab. Once it does, click on it
Step 4: Set the size of the selected image
In the Size field, you can determine the display size of your image. Otherwise, you can set Original to keep the true size without any changes.
Step 5: Click Insert image
Click the Insert image button at the bottom right corner of the window to confirm your sequence.
Summary
Uploading images with the rich text editor is easy to perform. Notwithstanding its simplicity, the result it brings to you is magnificent. Adding images in your text will not only make it sexier but also help your customers to imagine your points and get the idea you want to share quickly.


