How to Use a Custom Logo on Apple Wallet Passes on Shopify
If you’ve enabled Apple Wallet Passes on your Shopify store and want to enhance their appearance with your brand’s custom logo, this guide will show you exactly how to do it. Follow the steps below to ensure your customers remember your brand every time they use their Apple Wallet.
Related Posts:
- How to use a custom banner on Apple Wallet Passes on Shopify
- How to Change Text and Background Colors on Apple Wallet Passes on Shopify
How to use a custom logo on Apple Wallet Passes
Step 1: Open Gift cards section
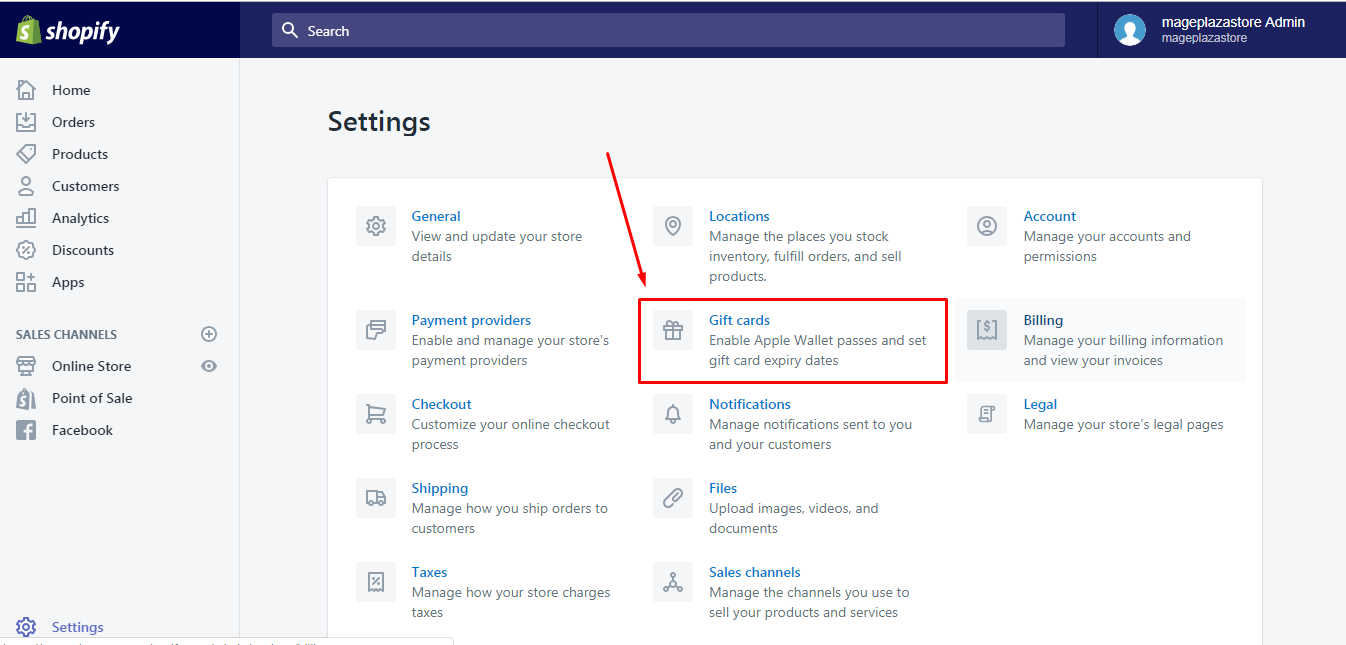
Go to Shopify website and log-in to your account. From the admin page, click on Settings then choose Gift cards in the list of options.

Step 2: Activate custom logo
In the Gift cards section, pay attention to Apple Wallet part. If you had ticked on the Enable Apple Wallet Passes, you would see the option Use a custom logo in the third place, under header and color settings. To activate it, check on the small box next to the text.
Step 3: Select photo for logo
You can select a photo for the logo from your gallery. All the changes for gift cards design will appear on the phone beside the settings that make it easier for users to adjust.

Step 4: Save custom logo
When any detail is edited, the system will ask you whether to save it or not. Remember to press Save to end the process. If the statement Gift card settings save successfully appears on your screen, it means you had finished.
To use a custom logo on Apple Wallet Passes on iPhone (Click here)
-
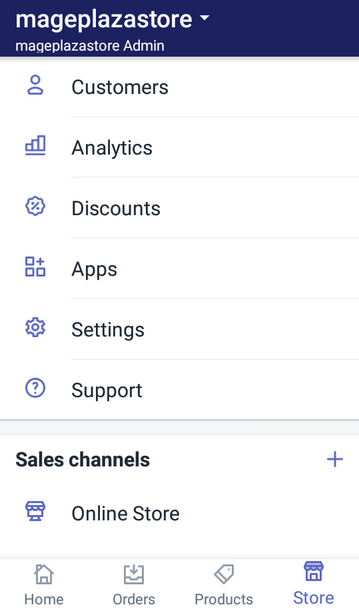
Step 1: Open your Shopify app, choose
StoreandSettingsrespectively. -
Step 2: In the list of settings, you can see that it includes three main parts, which are
App settings,Store settingsandAbout. FindGift cardsunder theStore settingssection. -
Step 3: In
Apple Wallet, tick on theUse a custom logoto enable it. -
Step 4: Pick out a picture from the gallery for your logo.
-
Step 5: Tap
Saveto record all changes.
To use a custom logo on Apple Wallet Passes on Android (Click here)
-
Step 1: Get access to your Shopify app, on the right corner of the display, choose the house icon which means
Storeand go toSettingsnext.
-
Step 2: In the
Store settingslist, tapGift cards.
-
Step 3: There are two more settings in the
Gift cards, look at theApple Walletat the second place. You will find the optionUse a custom logounder it, check on the box to activate.
-
Step 4: Another button will appear which allows you to choose a picture to upload for the logo.
-
Step 5: For finishing, press
Save.
Summary
Overall, this writing has provided you with the detailed step-by-step process of how to customize a logo on Apple Wallet Passes.There is a note that the system will automatically resize the uploaded image to 90px x 90px, hence, do not choose a large photo because it may change its content after resizing. A tip for selecting picture is to choose the one which has similar or closest dimension to the default size, for example, 100 by 100px. I also show the stages in three situations, for desktop, for iPhone and Android using that I hope you can complete the customization in the most convenient way.


