How to resize product image in Shopify
Most store owners now might agree with the fact that appealing product images are vital to the success of an online store. However, have you ever thought that if you are like many online store owners outside who are using premium Shopify themes and you have passed through the whole process of uploading your nice photos only to seek collection pages that are not lined up properly, what will you do to avoid this situation.
In this article, we will show you more details on how to resize product images in Shopify and shed light on ideal product image sizes with you.
What is a product image?
Product images are being shown on your online shop to allow your customers to see what your items will look like. As usual, images are used on the Shopify POS and another sales channel. You should take note that one of the best kinds for most product pictures is in JPEG.
If you want your images to appear exactly what you wish for, in fact, it will depend on your online store themes.
Read More:
- How to Add a Product Image on Shopify
- How to Change Product Image Size in Shopify
- Change Image’s Orientation on Shopify in 4 Easy Steps
Why is it important for an online store?
A product picture is known as one of the most important for eCommerce stores because it can help you generate an impression on your buyers. An image is a good way to enhance product descriptions, then making it become attractive for any visitors to the store. It is impossible for any shopper to feel your product, but they can somehow visualize the product image before making decisions to buy. Basically, in the period of visual culture, a picture is key to drive customers’ attention.
Product images are the major tool to aid you in convincing your customers since you sometimes cannot afford a salesperson. It is noticeable that there are a few products listed on your store that do not bear photographs, but instead, a good professional product description will come out. In this scenario, will your customers want to come back to your store as they have no idea about what they are given? You cannot turn your site visitors into customers and you have to clear about the fact that product images play an important role in speaking up for your stores and they are also not in the shopping cart of any customers.
How to add product images in Shopify
In Shopify, you are able to upload a maximum of 250 pictures for a product. As you insert a product pic, Shopify will automatically generate different sizes so that you can use them in various areas of your store theme. For instance, the large version of a product picture can be used on product detail pages where your customers wish to see and check your products in detail. The compact version of the same picture might be used on your collection templates, where you find that a bigger image is not necessary.
Here are simple and handy steps to add product images in Shopify:
Step 1: Choose items to see their detail pages
The first thing you have to do is to choose items to check their detail pages under the Product pages.

Step 2: Drop or drag images from your computer or add a new one
Next, in your Images section, you can drag or drop images from your own computer or click onAdd image.

In case you want to insert more than one pic, then the biggest pic that is shown is your item’s main image. You are able to set up a new main image by dragging different images to this place. Besides, you can sort other pictures by getting them dragged.
How to resize product images in Shopify
If you are feeling that your product images are looking funny and you are not used to imaging editing software, then thankfully, there remain several useful in-house Shopify tools that you can apply for from your admin section of the store to make your items become better.
Keep in mind that all kinds of product image alignment problems can be as a result of container images without similar size or crop-styles. One of the best things about editing an image from your Shopify admin is that you are not editing the original images, so you might become comfortable with making your image changes in just a low-stakes environment.
Whenever you get your product images uploaded, let’s offer some tags before adding them to their proper collection. In case you start with product photos that are not the same size, then in your Theme Editor, you can easily find the Collection page before enabling the Align height of product images settings. You had better look at your stores and notice which images look good and which one not looking good also.
Crop product images
In order to crop product images, let’s follow those steps below:
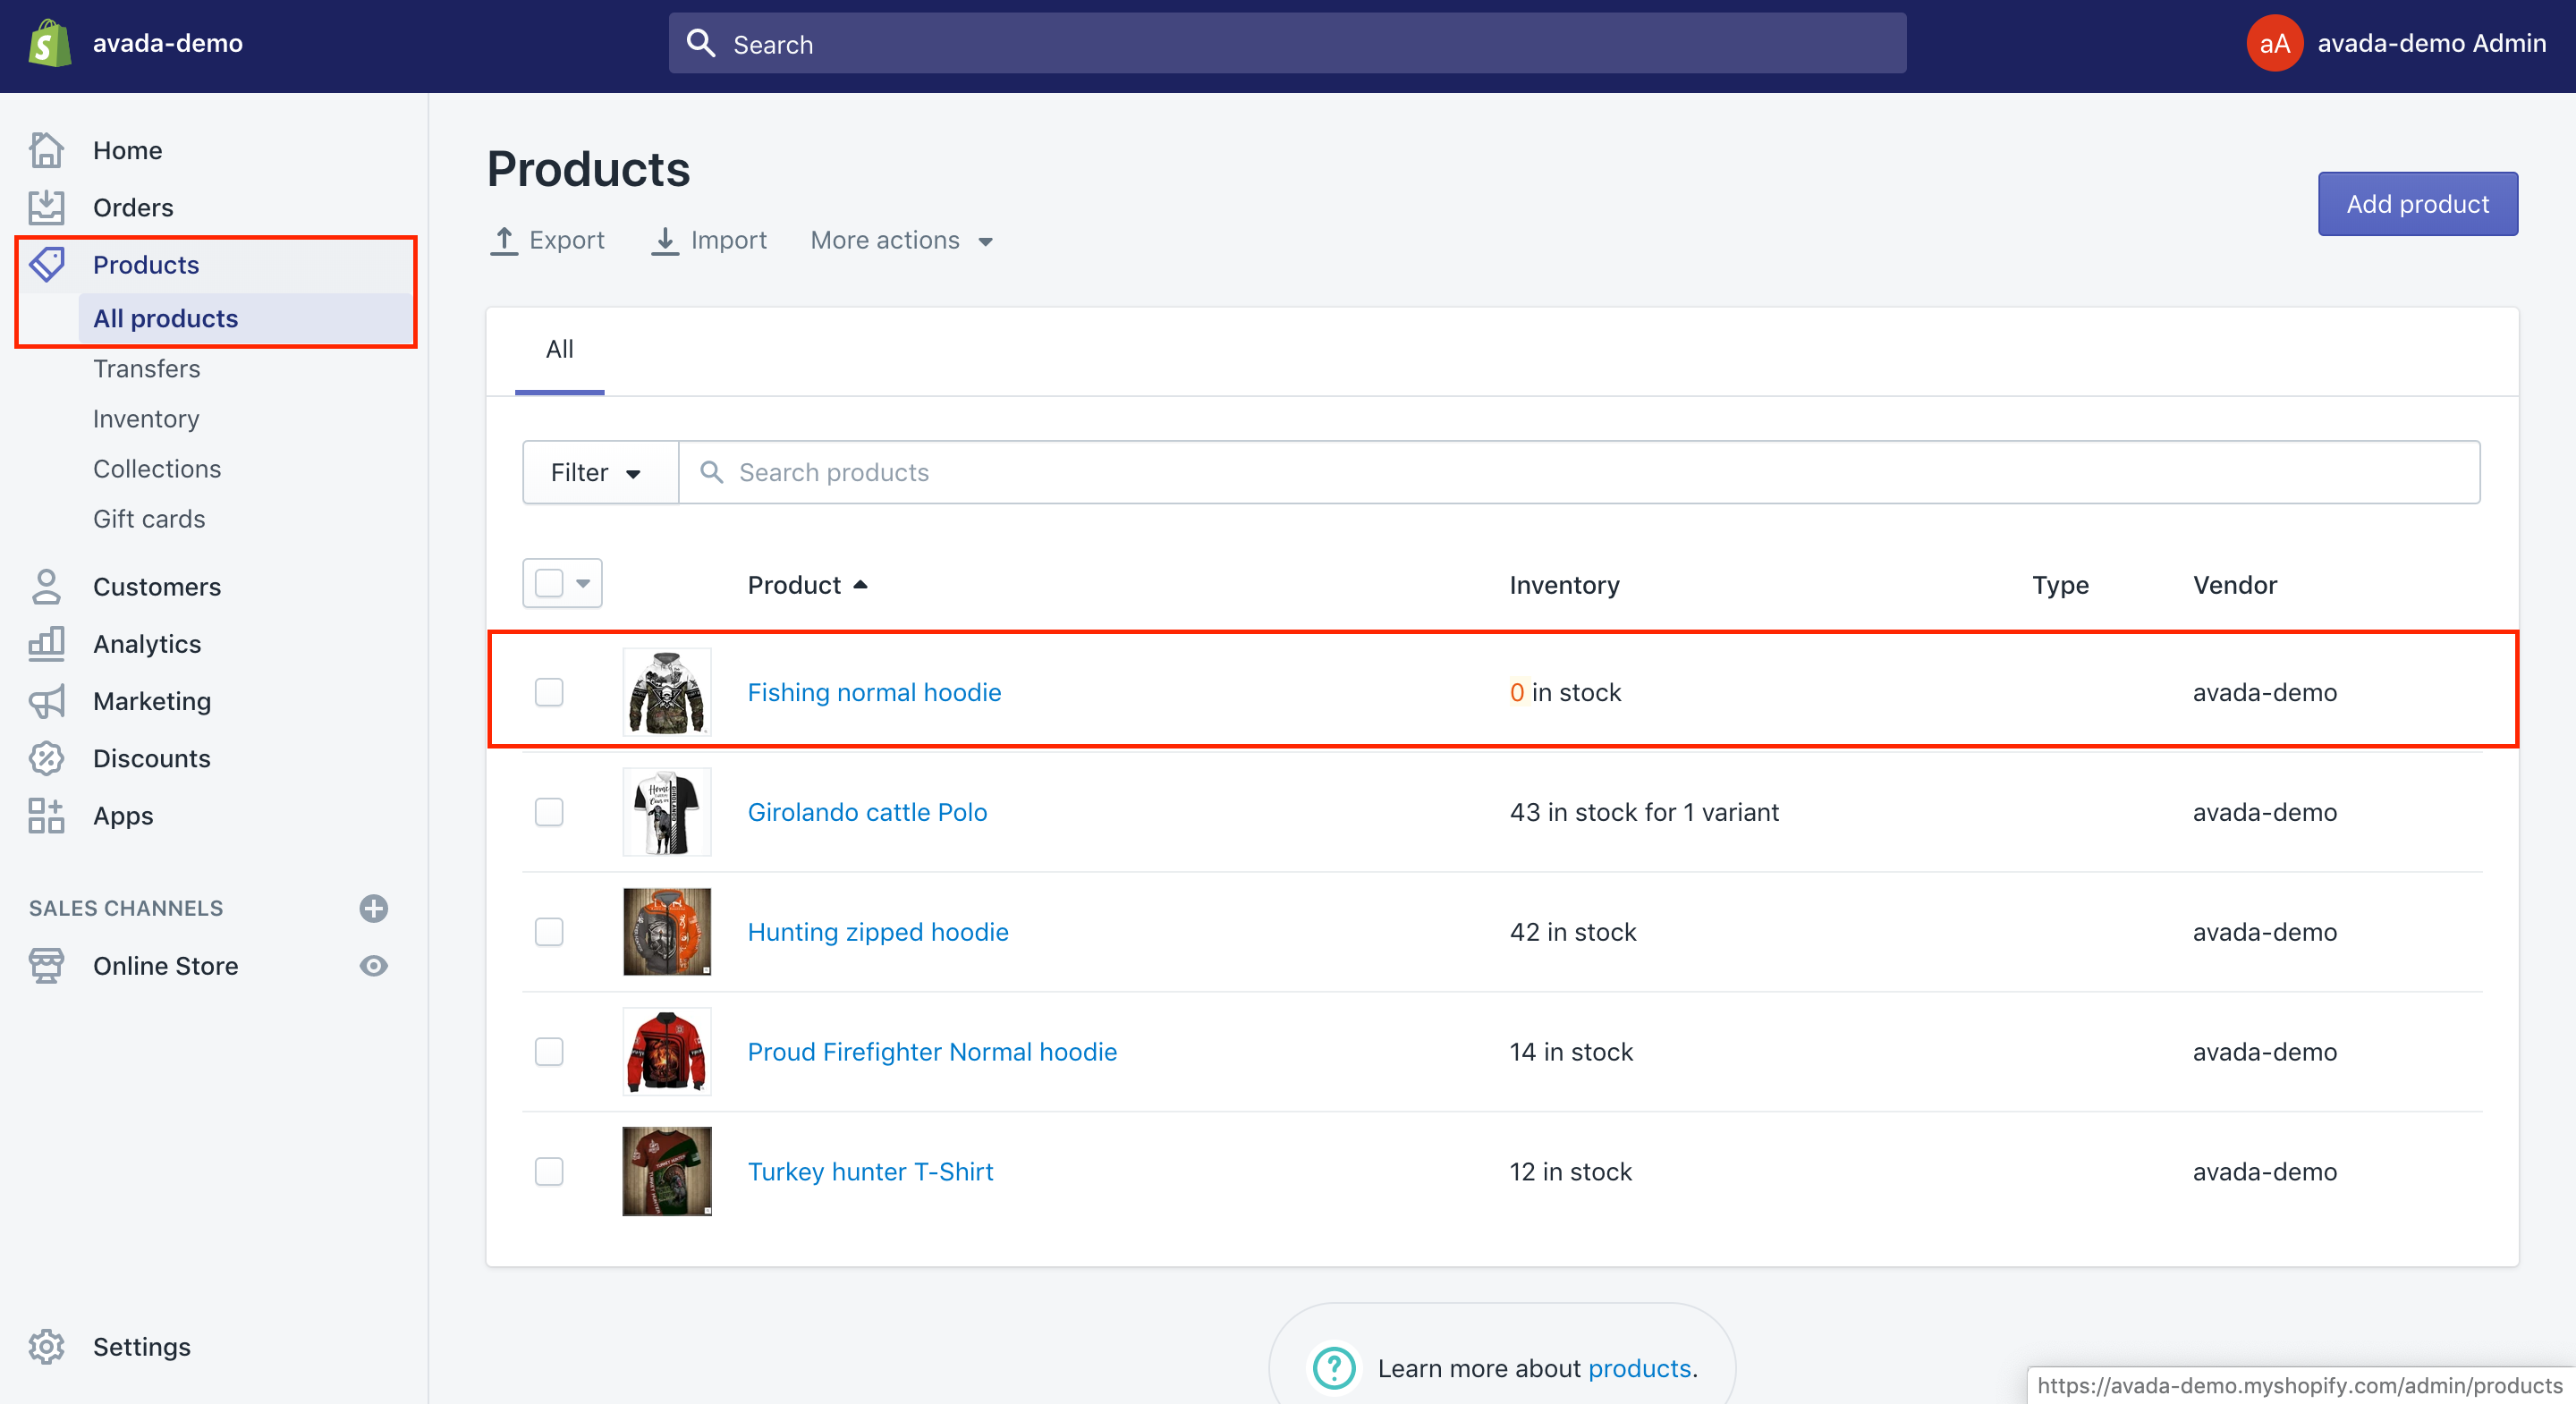
Step 1: Open Products section
Go to your Shopify admin and choose Products.

Step 2: Select products
Select products with images you want to edit.
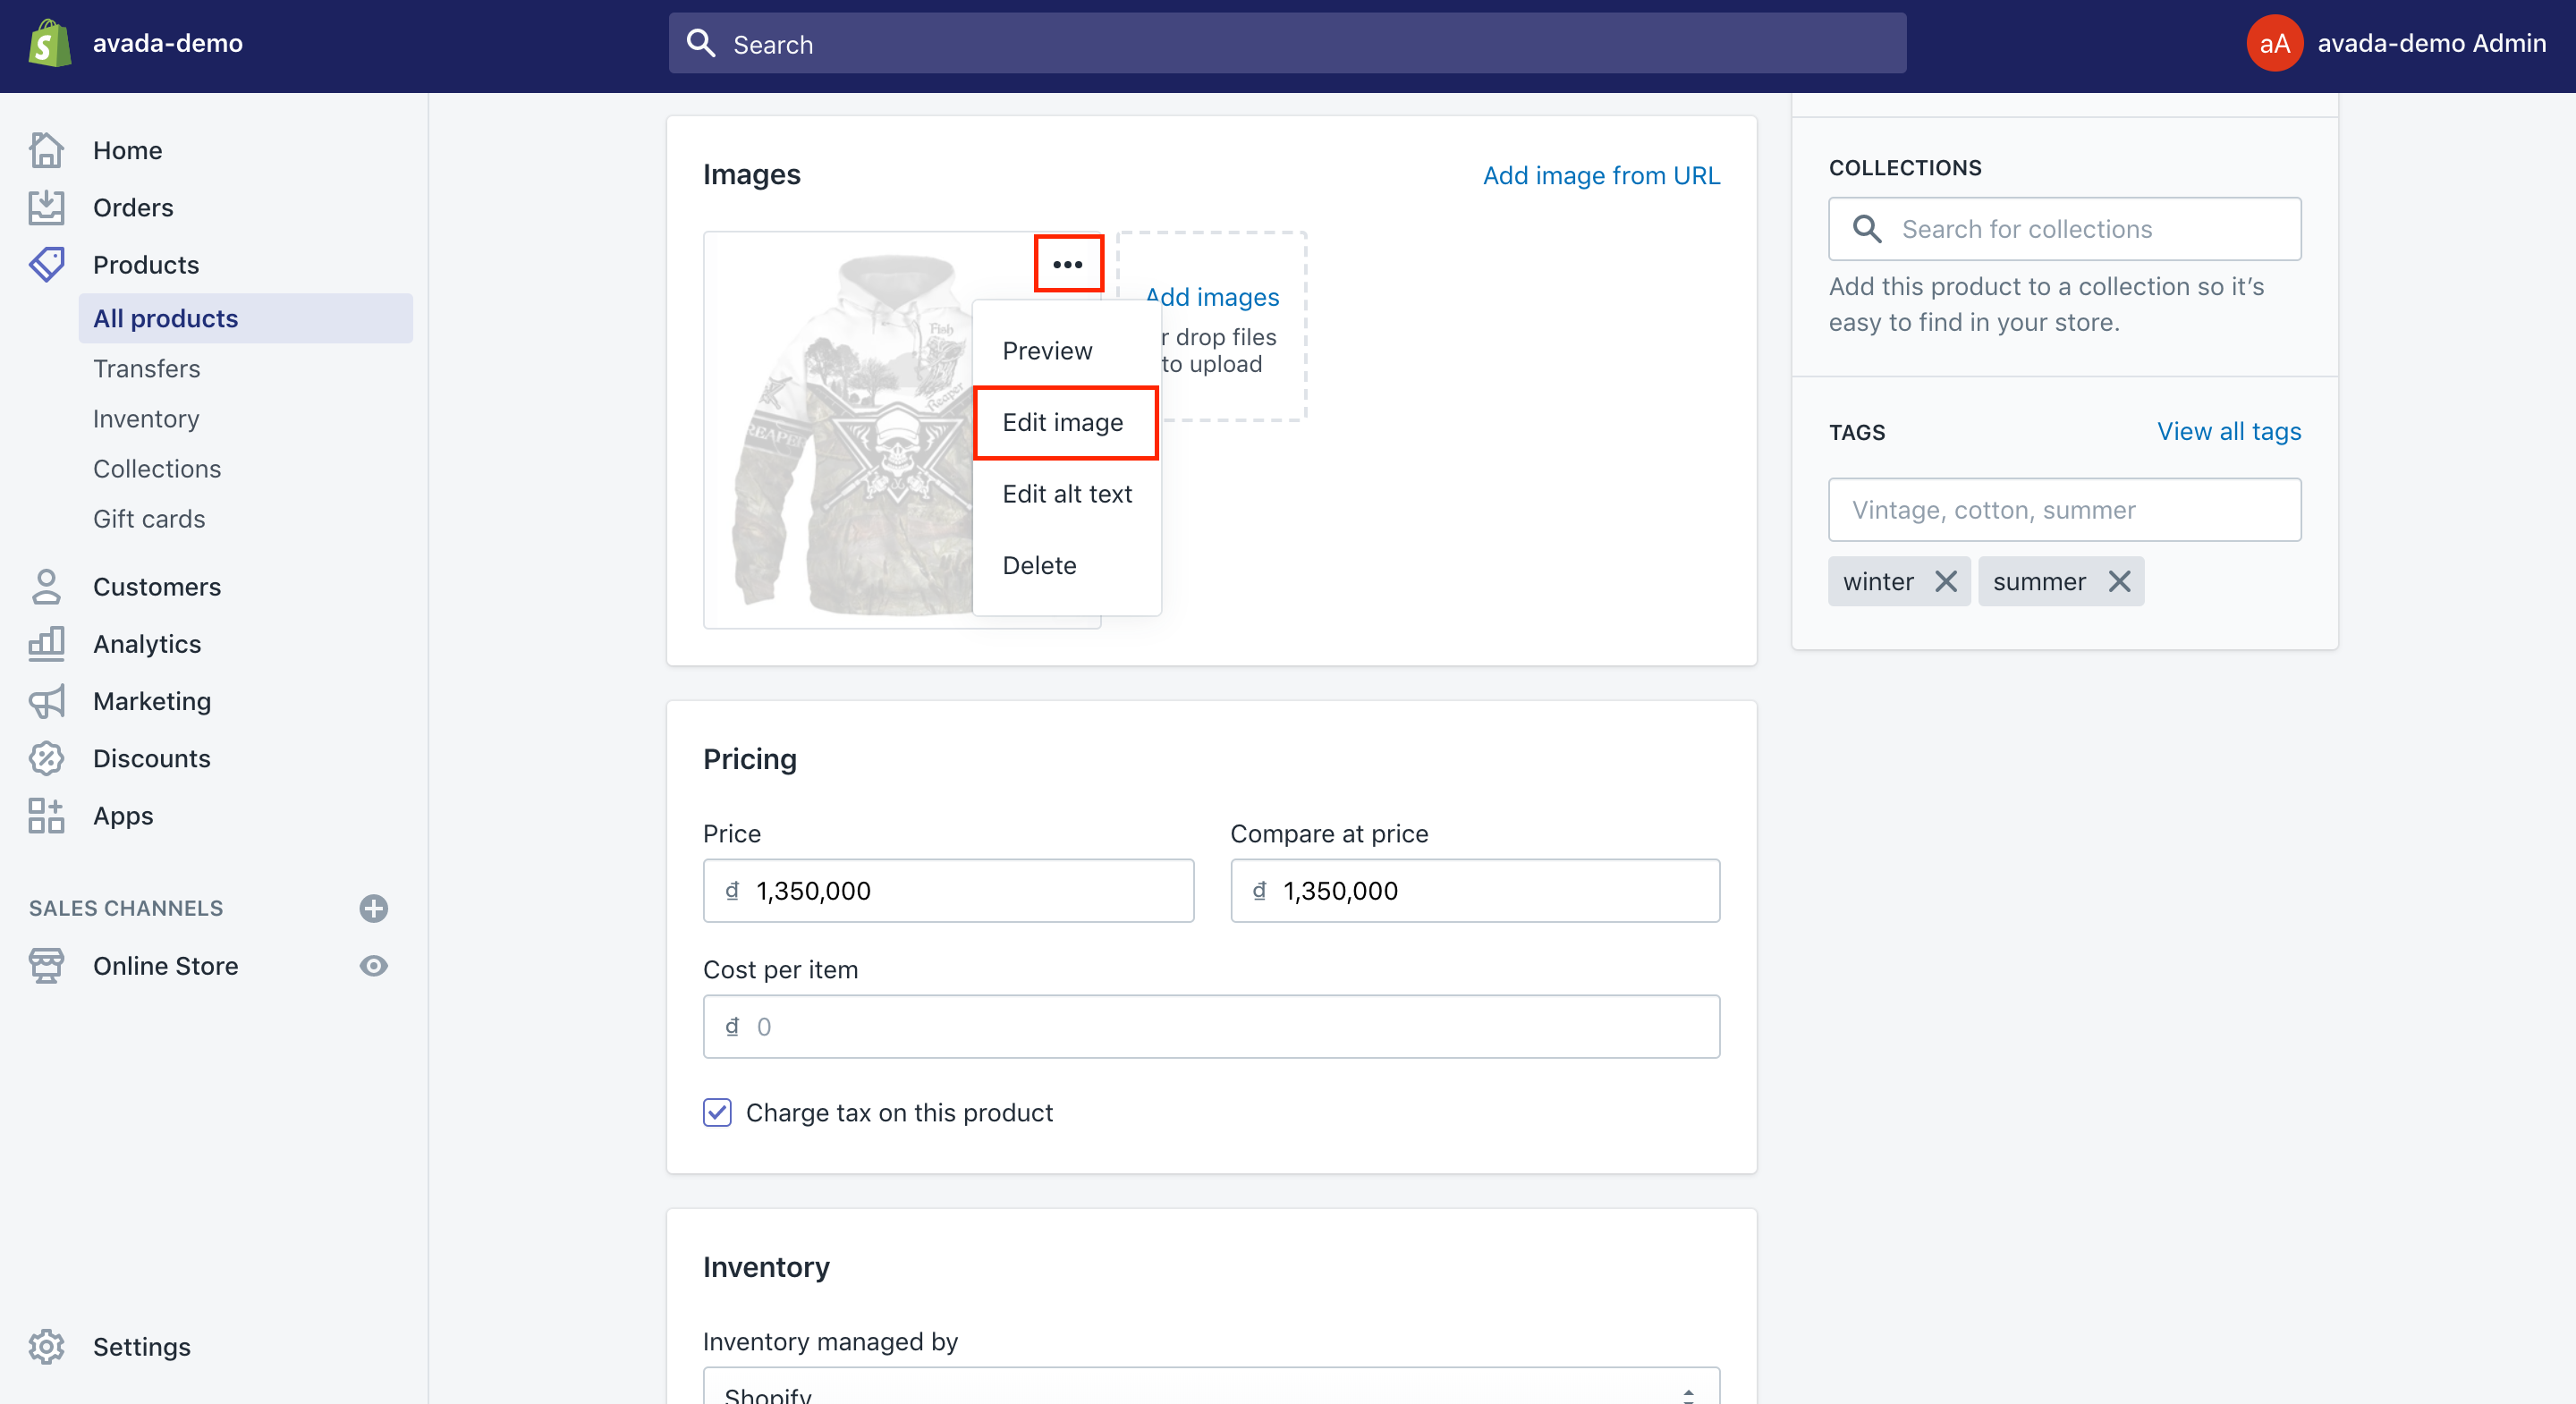
Step 3: Hover the images
Hover the images and you will see there are three little dots that you can click on.

Step 4: Select Edit image
Select Edit image from the three-dot menu.
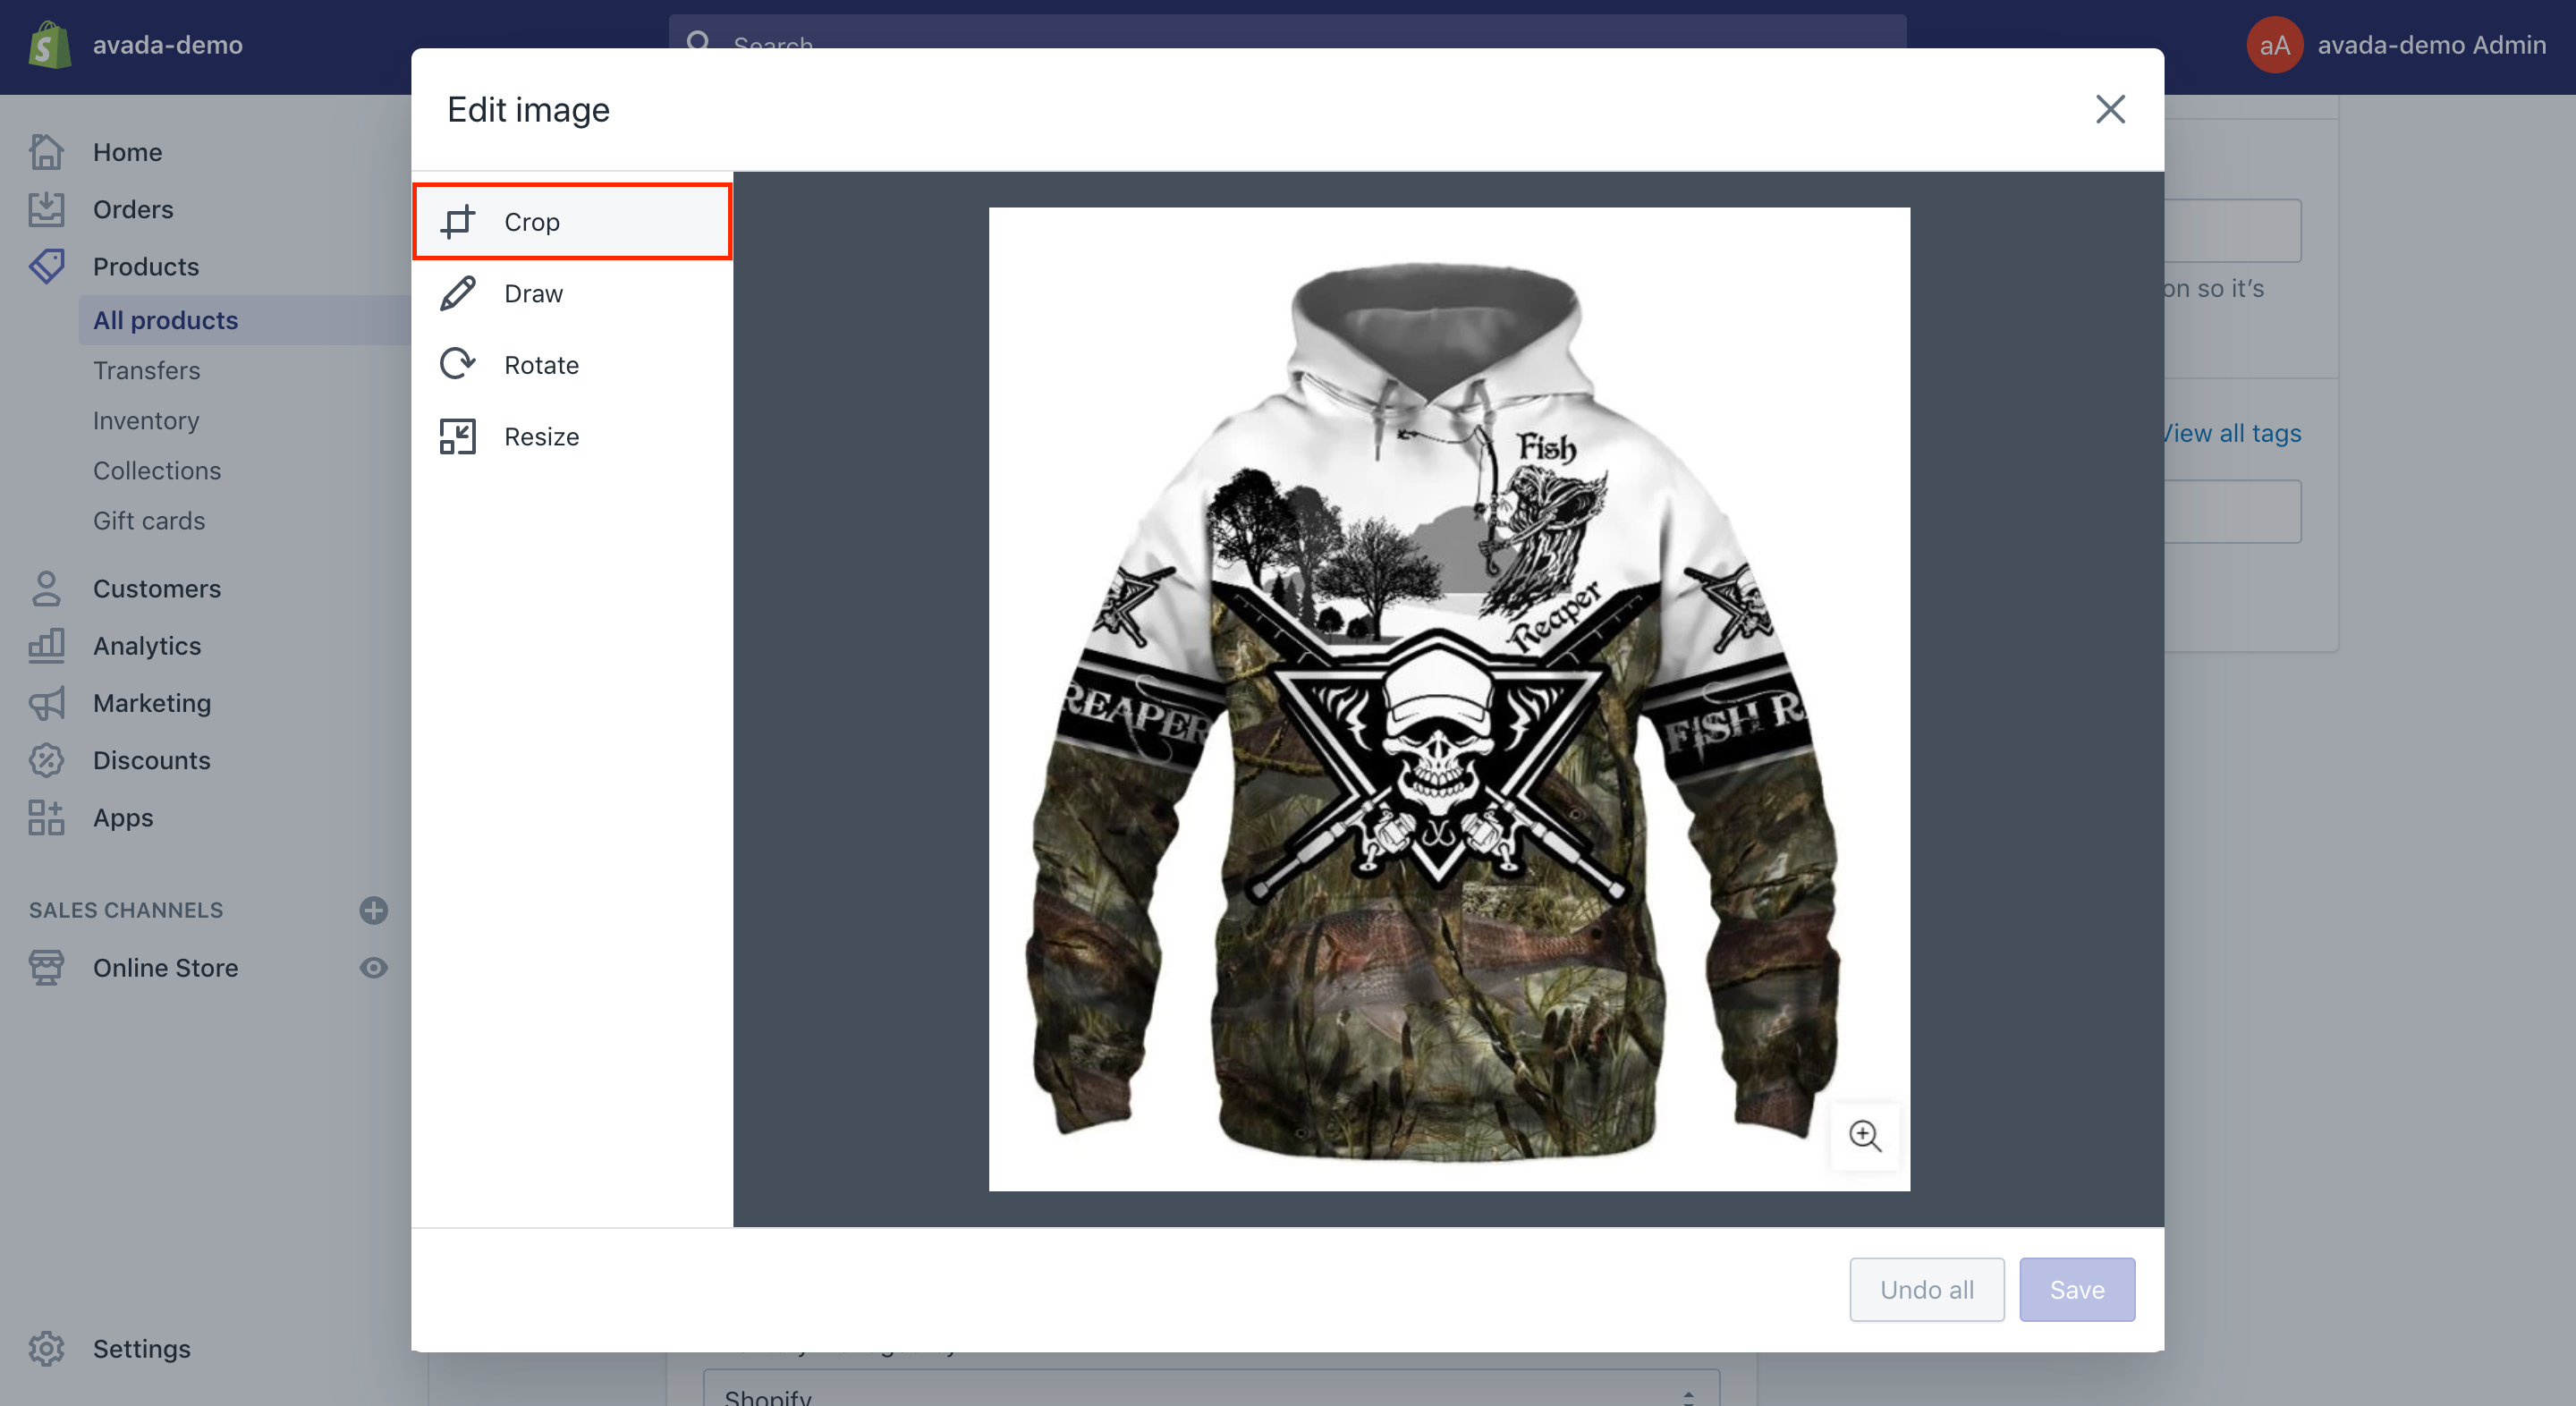
Step 5: Crop image
The Crop tool will let you keep the part of the picture you want. For instance, in case your image is loaded with unnecessary blank spaces, all you need to do is to click on Crop and select the position of the crop box over the parts of the images you wish to keep.

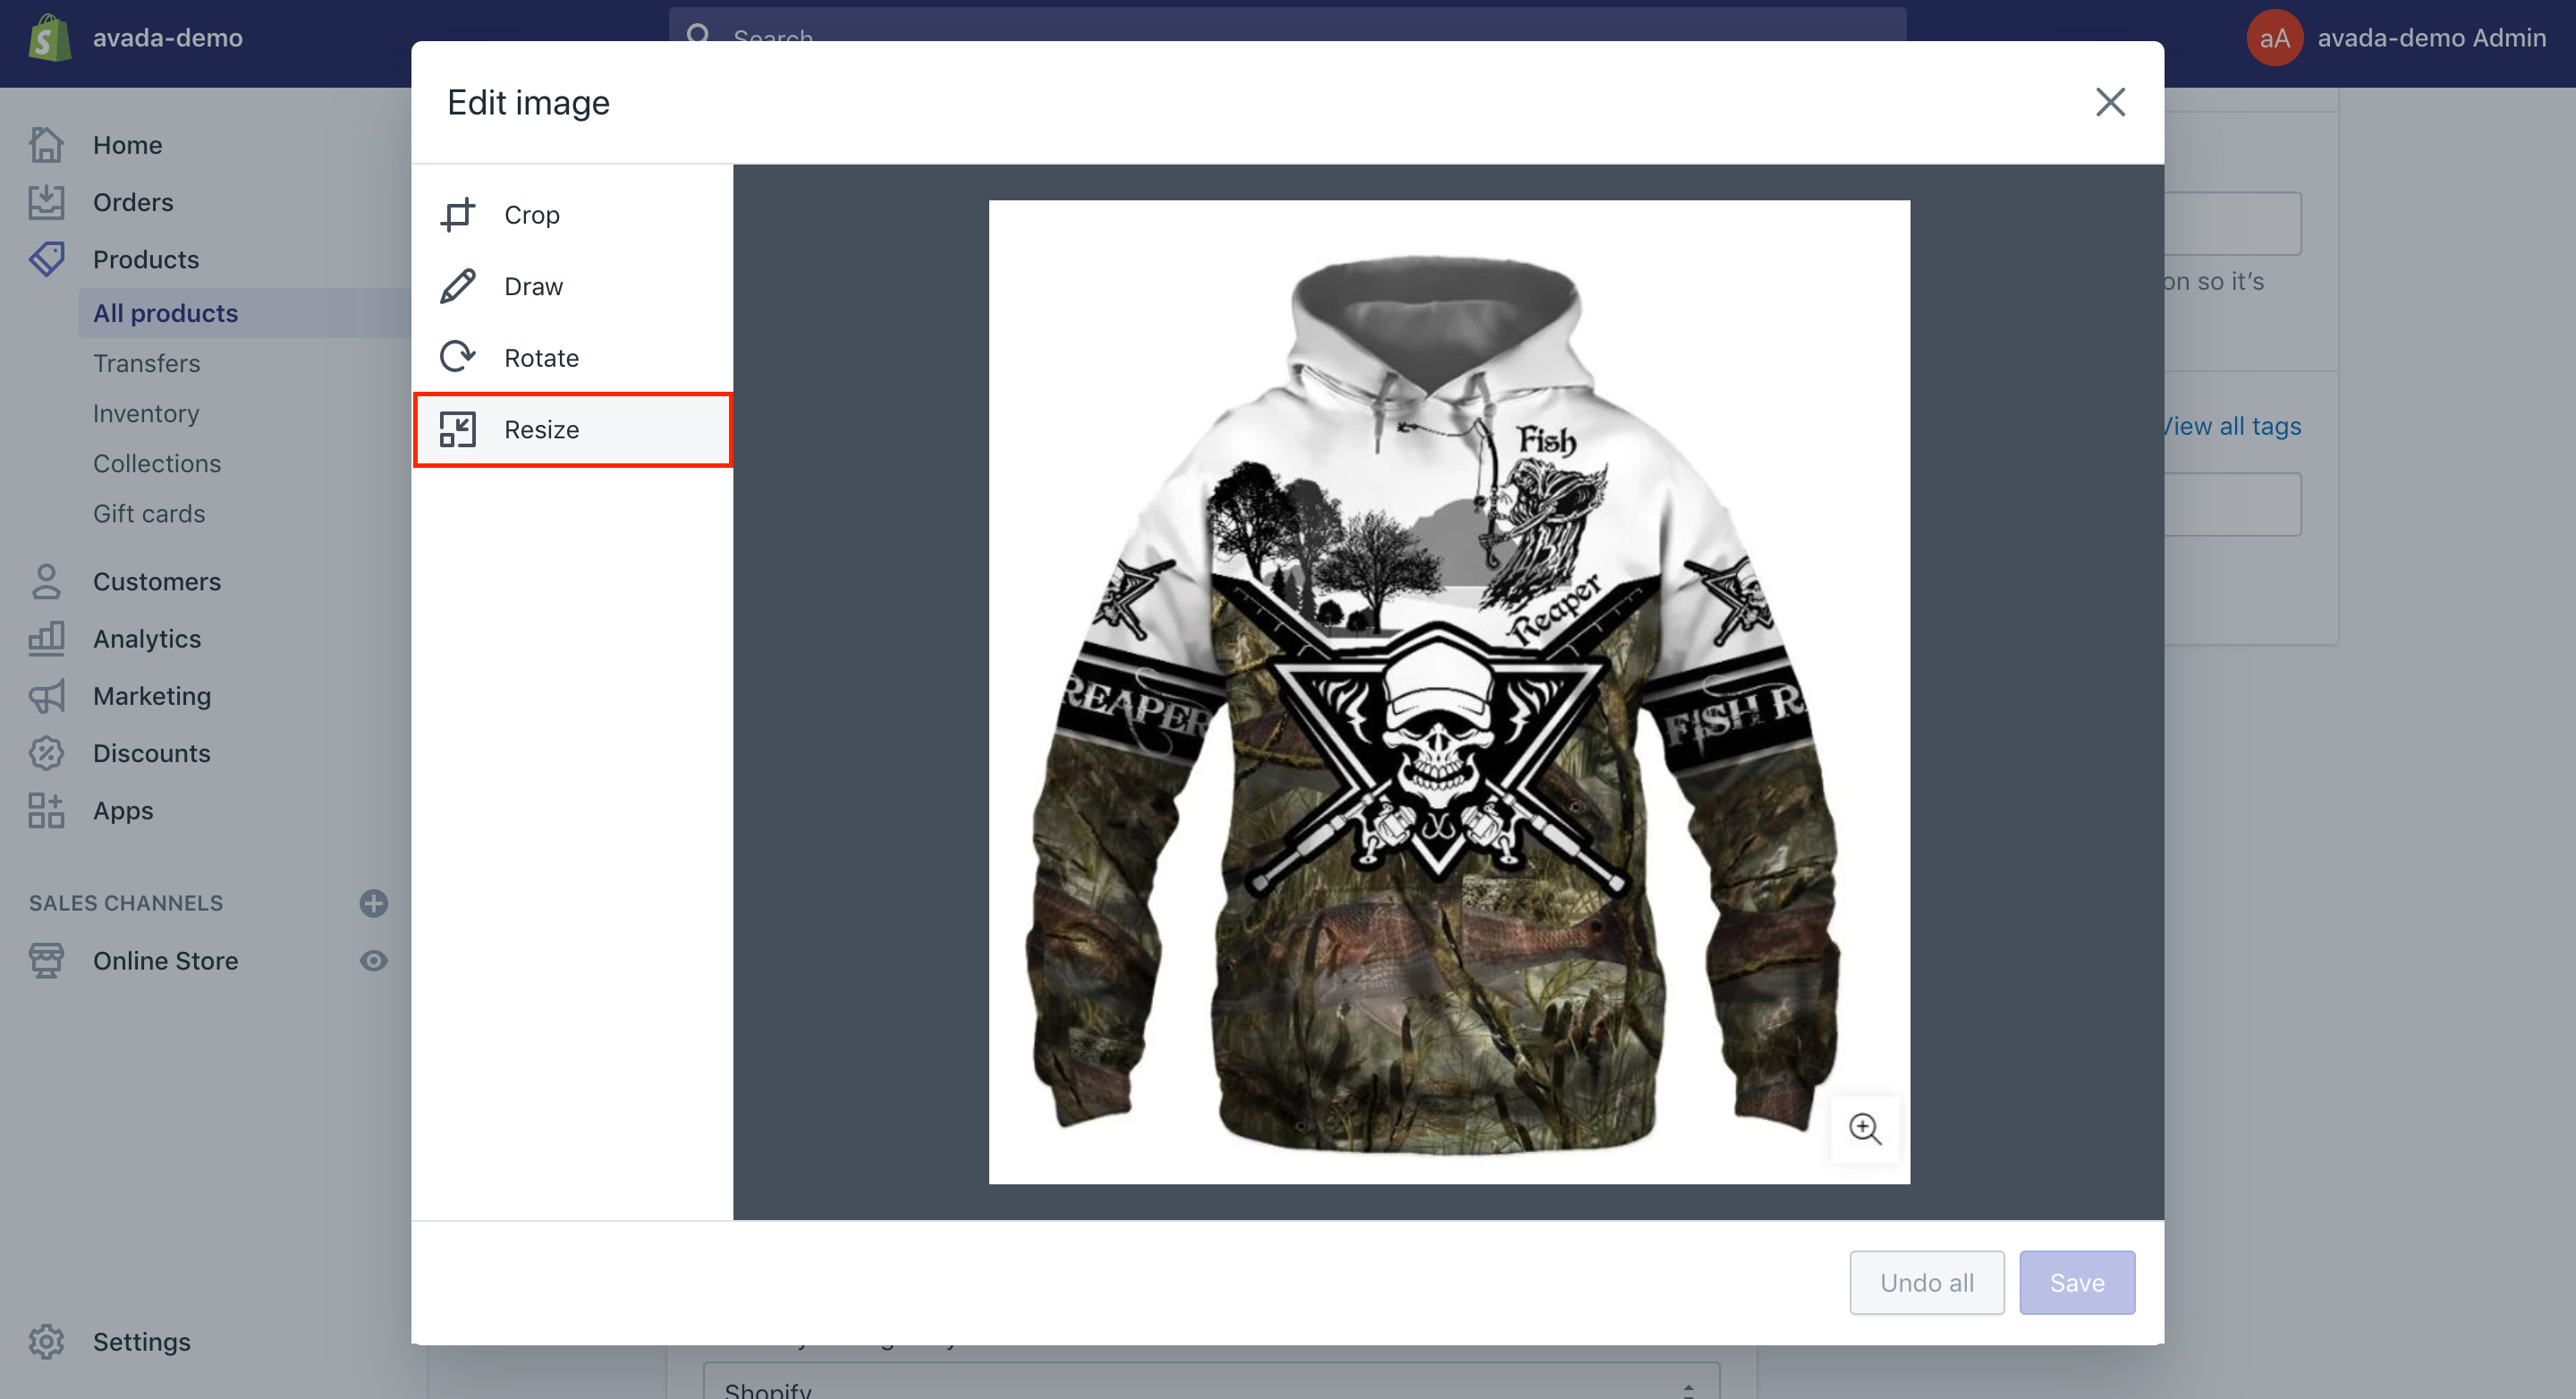
Resize product images
In order to resize product images, you had better choose Resize. You are able to change the photo dimensions that need to be consistent with the other photos you have in your store. Moreover, you can rotate as well as draw on your photos as well.

What is the best size to use for product images?
Regarding image sizes, you should bear in mind that your collection and product images can be up to 4472x4472 px or up to 20 megapixels. Collection and product images need to contain a file that is smaller than 20 MB that will be included in Shopify.
Higher resolution photos can look more professional to customers. For the square product pictures, a size of 2048 x 2048 always looks best.
Take note that the initial image for every product will be understood as featured or the main pictures. The featured picture will be displayed on collection pages, the checkout pages, the cart pages, and your homepage also.
As mentioned early, as a product image is shown on the collection pages, it will contain different sizes. In order to make your photos to be the same sizes as others, you have to apply a consistent ratio or height-to-width ratio for all pictures that you are using as your main images.
Now, many store owners may ask what the best size to use or product photo is. In fact, it depends on the quality settings of the photos, along with speed concern, then a good rule of thumb should be here to make your images from 1.5 to 2 times the size they are shown. Hence, this means your ideal product image size can be from 750 to 1,300 pixels wide.
Best Product Image Apps for your Shopify store
If you find resizing your product image by yourself not easy for you, then it is time you could search for the best product image apps for your Shopify store. We are having here 8+ Best Shopify Product Image Apps and 6 Best Product Image Resize Apps for your further reference. Let’s dig into that page and we hope you can find the most suitable product image apps for your store.
Conclusion
We hope that with our complete guide on how to resize product images in Shopify, you can complete your mission without having any troubles. To understand more about product images on Shopify stores, you can seek for more information on this eCommerce platform or let us help you with that. If you find this article helpful, don’t forget to share this on your social channels. We would love to hear more from you.
Related Posts:


