How to Select a Shopify POS Location in Less than 5 Minutes
In case you are having lots of locations, only the items stocked at the assigned location of the Shopify POS device are available for selling. Take note that the inventory count of the assigned location is updated when each product is restocked or sold on Shopify POS device. In this article, you will be shown how to select a Shopify POS location without having any trouble.
Step 1: Download Shopify POS app and log in
The first thing you need to do is to download the Shopify POS app from your App store and then log in your Shopify app.
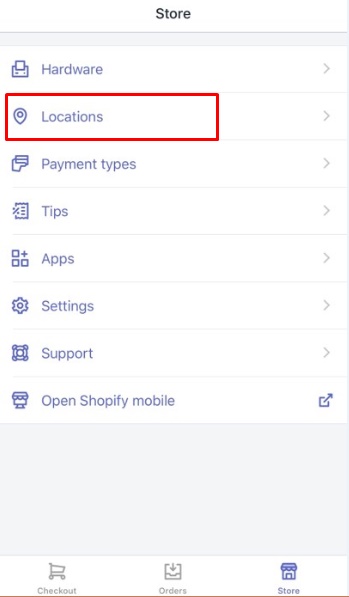
Step 2: Tap Store and Locations
Next, you can tap Store and then tap Locations.

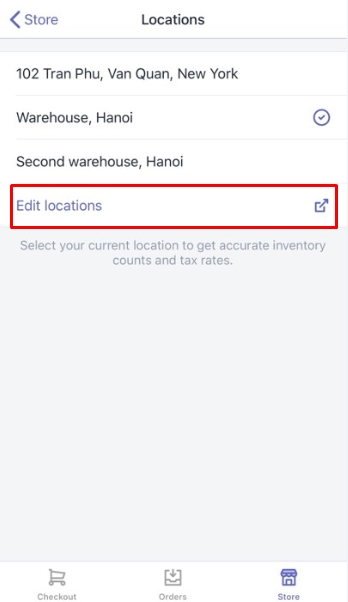
Step 3: Tap Edit locations
If your location is not available in the list, you have to create a new location. By tapping Edit locations, you can add a new location to your Shopify POS.

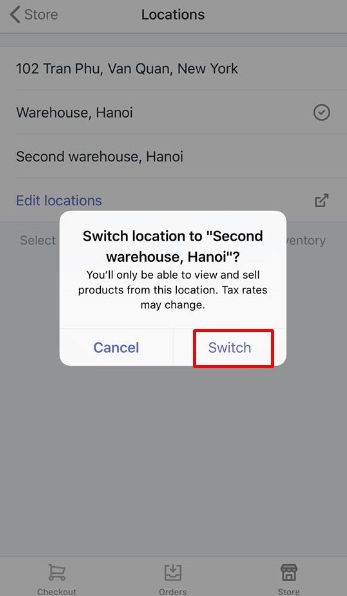
Step 4: Choose a location and tap Switch
In case your location is already on the list, you can tap the location you want and tap Switch to change the location.

Conclusion
As you can see, with the above steps on how to select a Shopify POS location on Shopify, you can easily make changes in the location set on the Shopify POS device. If you fail to perform these steps, you can contact us right away to ask for help and proper instruction. For further information, check out our posts on Locations.
Related Posts:


