How to Sell Ebooks in Shopify
If you are very fluent in writing, let’s take this good opportunity to earn extra cash by writing and selling eBooks in Shopify. Since you already knew that Shopify is regarded as among high-qualify eCommerce platforms, it is easy for you to create your own store to sell physical as well as digital products. Additionally, the Shopify platforms include a great number of different apps that can be widely used to start your stores. You will feel interested in this project as its whole process is operated automatically.
In this tutorial, the answer on how to sell eBooks in Shopify will be both satisfactorily and convincingly solved. Also, take note that what you will do next involves creating your store in a way you are not related to the sales process. Therefore, whenever your customers have an offer and complete their payment, they will receive the download link immediately and automatically.
Why are you selling eBooks in Shopify?
Digital products cannot be held, touched or tasted; however, people can even enjoy it from music to videos, ebooks to online, and many more. In fact, a digital item is known as the intangible asset or just a small piece of media that can be distributed online without the need for refilling inventory.
Digital items in general and eBooks, in particular, possess lots of benefits that can make them become appealing and attractive to sell. Nowadays, digital books emerge as a phenomenon and act as a powerful tool to provide you with a stable income on a regular basis. There exist three main reasons why online merchants might think of selling eBooks in Shopify.
First, eBooks are a business that you can run and manage on a low budget in Shopify. If you have a financial limitation that frequently makes you go “banana”, don’t worry since eBooks business has never requested your richness.
Secondly, eBooks have been gaining popularity. There is a fact that, currently, busy people prefer reading eBooks on the computer or mobile device because of its convenience to reading offline or printed books. Hence, you should not be afraid that eBooks are out-of-date. It develops with times, regularly changes, and catch up with to meet people’s high demands and their living standards.
Finally, eBooks are one of the profitable businesses that help you receive an amount of monthly passive income. If you possess high-quality and amazing books, it is certain that you have been successfully finding your own treasure.
Although eBooks business is not something very complicated, users have to notice that only interesting content is still the key leading to success and bring customers close to them.
How to sell eBooks in Shopify
Brainstorm your idea
In order to help you put your first step into this field, don’t start anything if you have not had any clear idea about this. The initial thing is to shed light on what you are going to write about. Let’s begin with a good and appealing topic since it is the first thing to draw your customers’ attention easily.
Regarding content, you need to make sure that it is well-prepared and well-written. In addition, the unique content plays an important role in ranking your posts with five stars thanks to your considerable effort. Don’t forget to separate your big topic into smaller ideas. Having subtopics allows you to concentrate on each story in the deepest way. After finishing your writing, do remember to proofread your book to guarantee that you have not got any spelling or grammar mistakes. For safety reasons, you can also ask your friends to double-check your book’s quality.
Reading up to hear, you might raise a question that what you will do to make money if you are not a talented writer. When it comes to this, you can have two choices. One, you can hire a freelancer to aid you in dealing with books on behalf of you or seeking personal label digital items and get them resold in Shopify.
Set up your store for selling ebooks using Digital Downloads app
Recommend:
- 6 Best Shopify Digital Downloads Apps
- How to sell Digital downloads on Shopify
When it comes to Shopify’s Digital Downloads app, you are able to get digital files uploaded such as songs, videos or graphic arts as goods in the store. As customers buy those digital products, they will get a link to have the file downloaded.
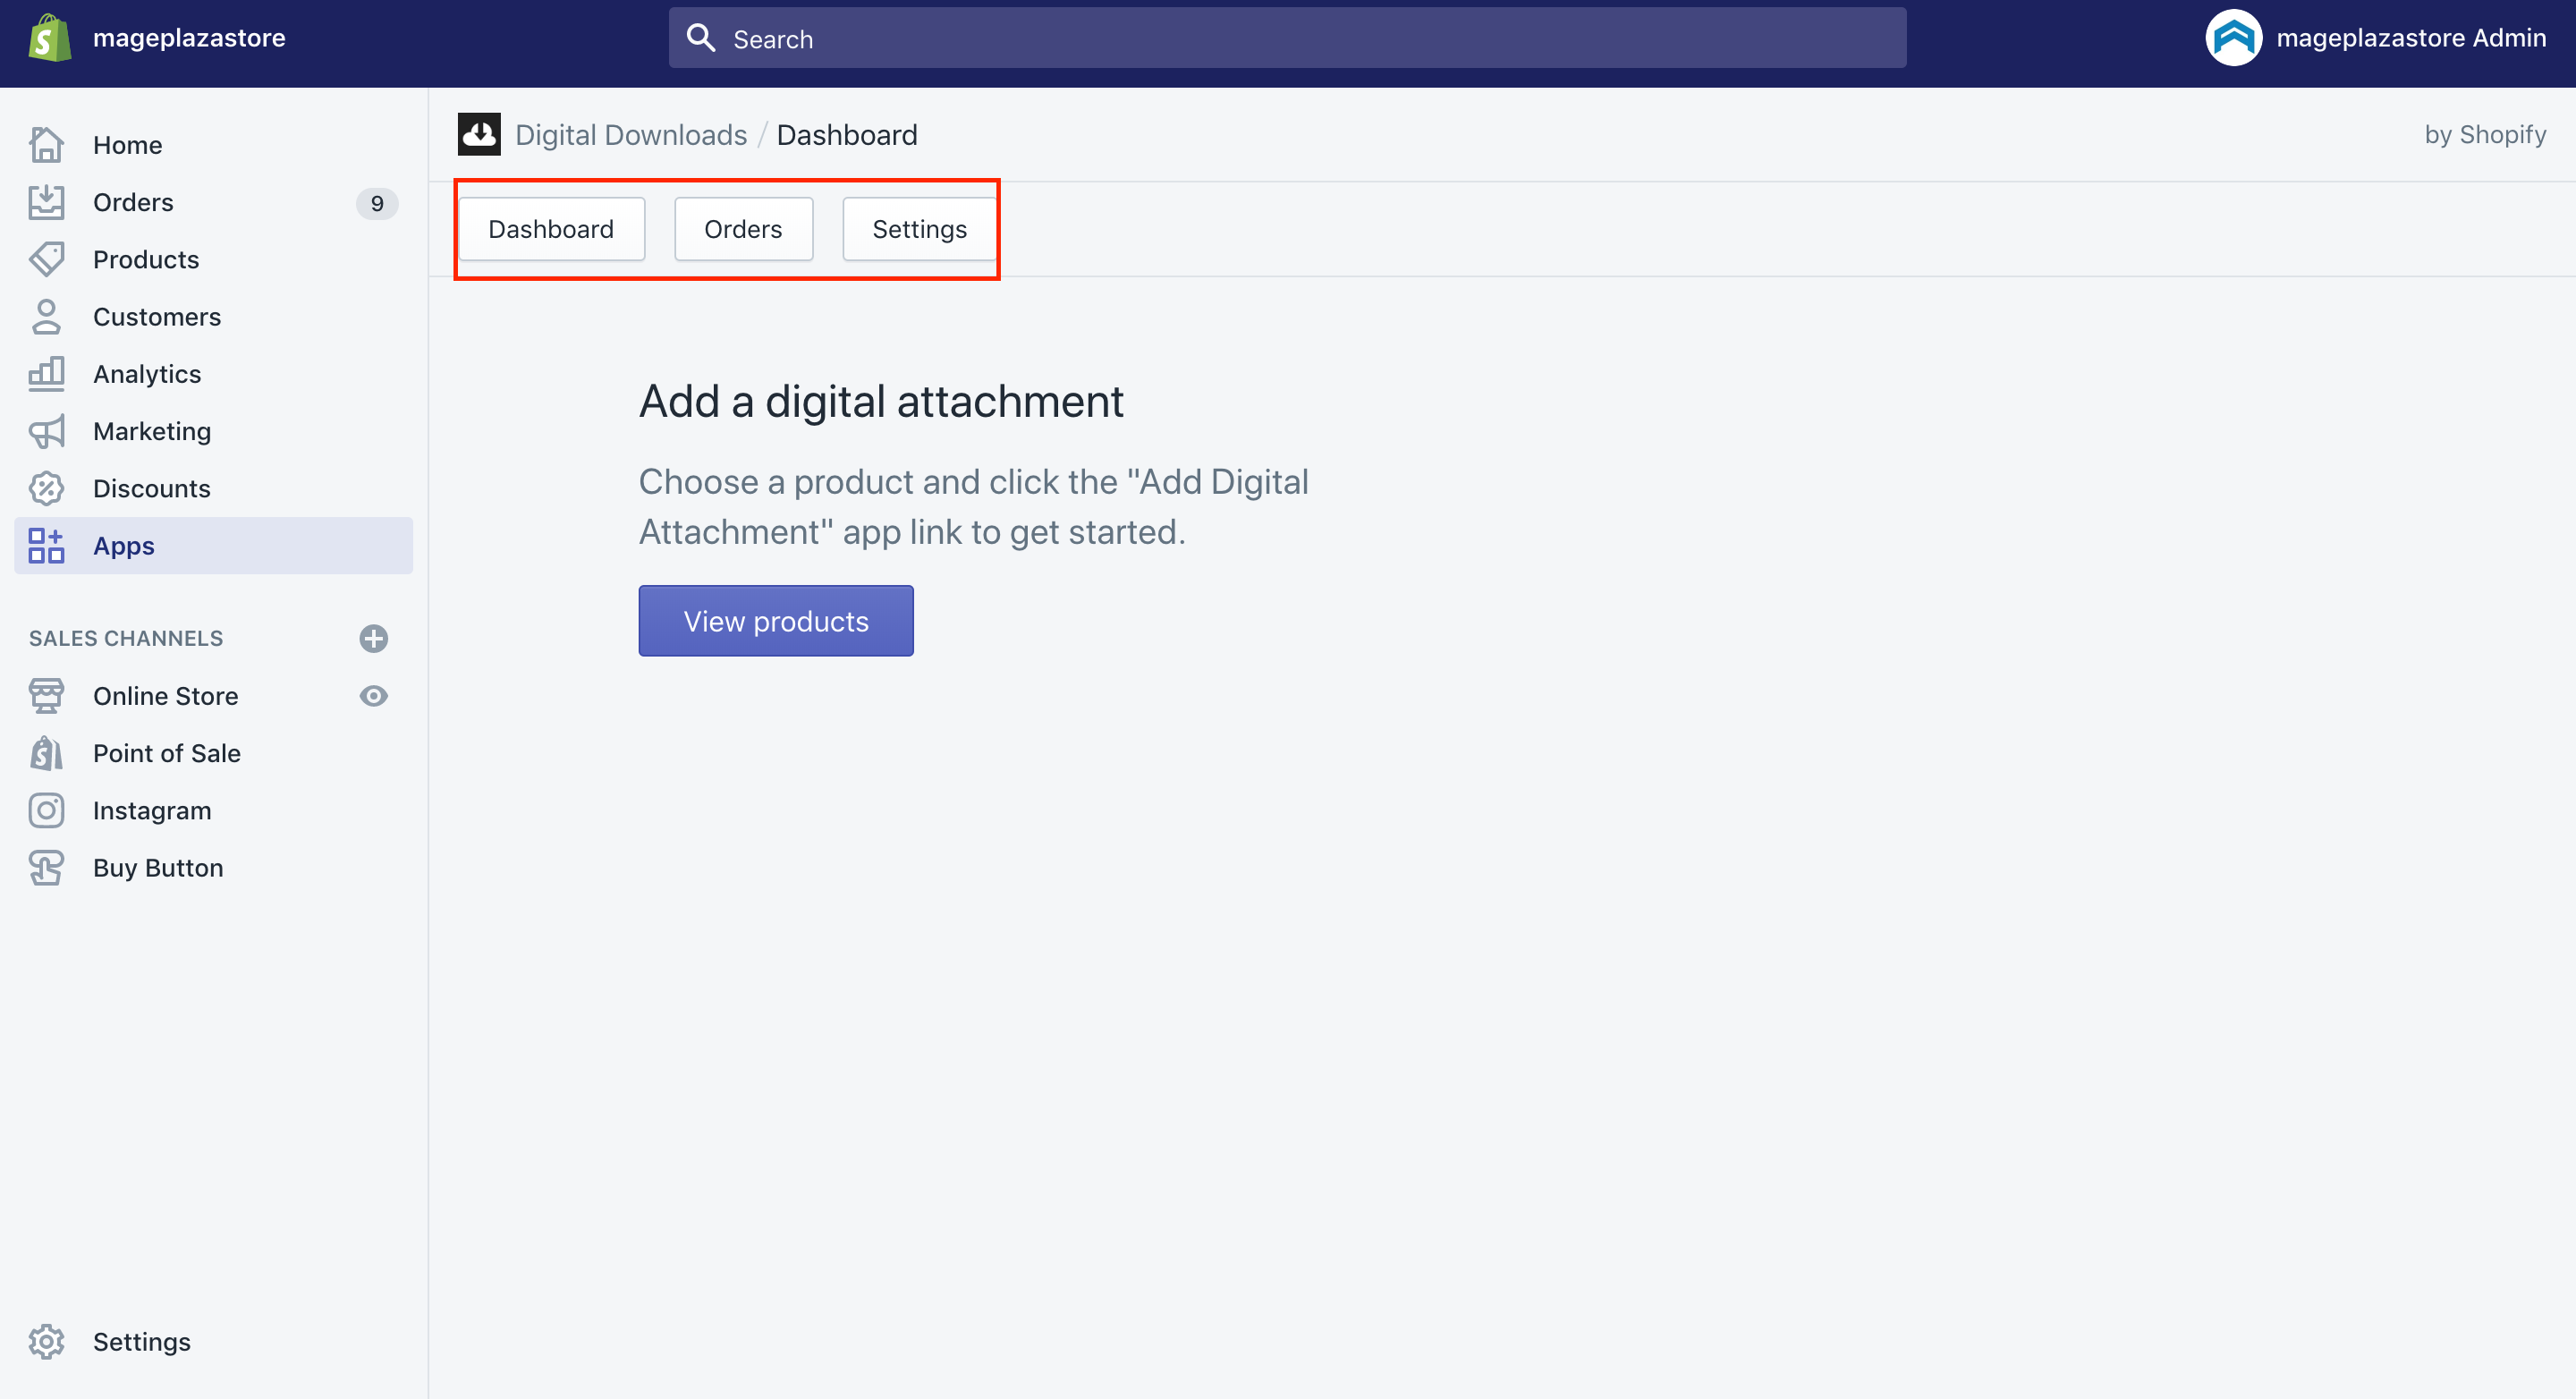
Additionally, you might see that there are three main sections in the Digital Downloads app, including:
-
Dashboard: where you can check, view, edit, and install digital products
-
Orders: where you are capable of seeing all of the orders consisting of digital items that are purchased in your store.
-
Settings: where you are allowed to personalize the email templates, along with checkout options.
Install a Digital Downloads application on your Shopify account
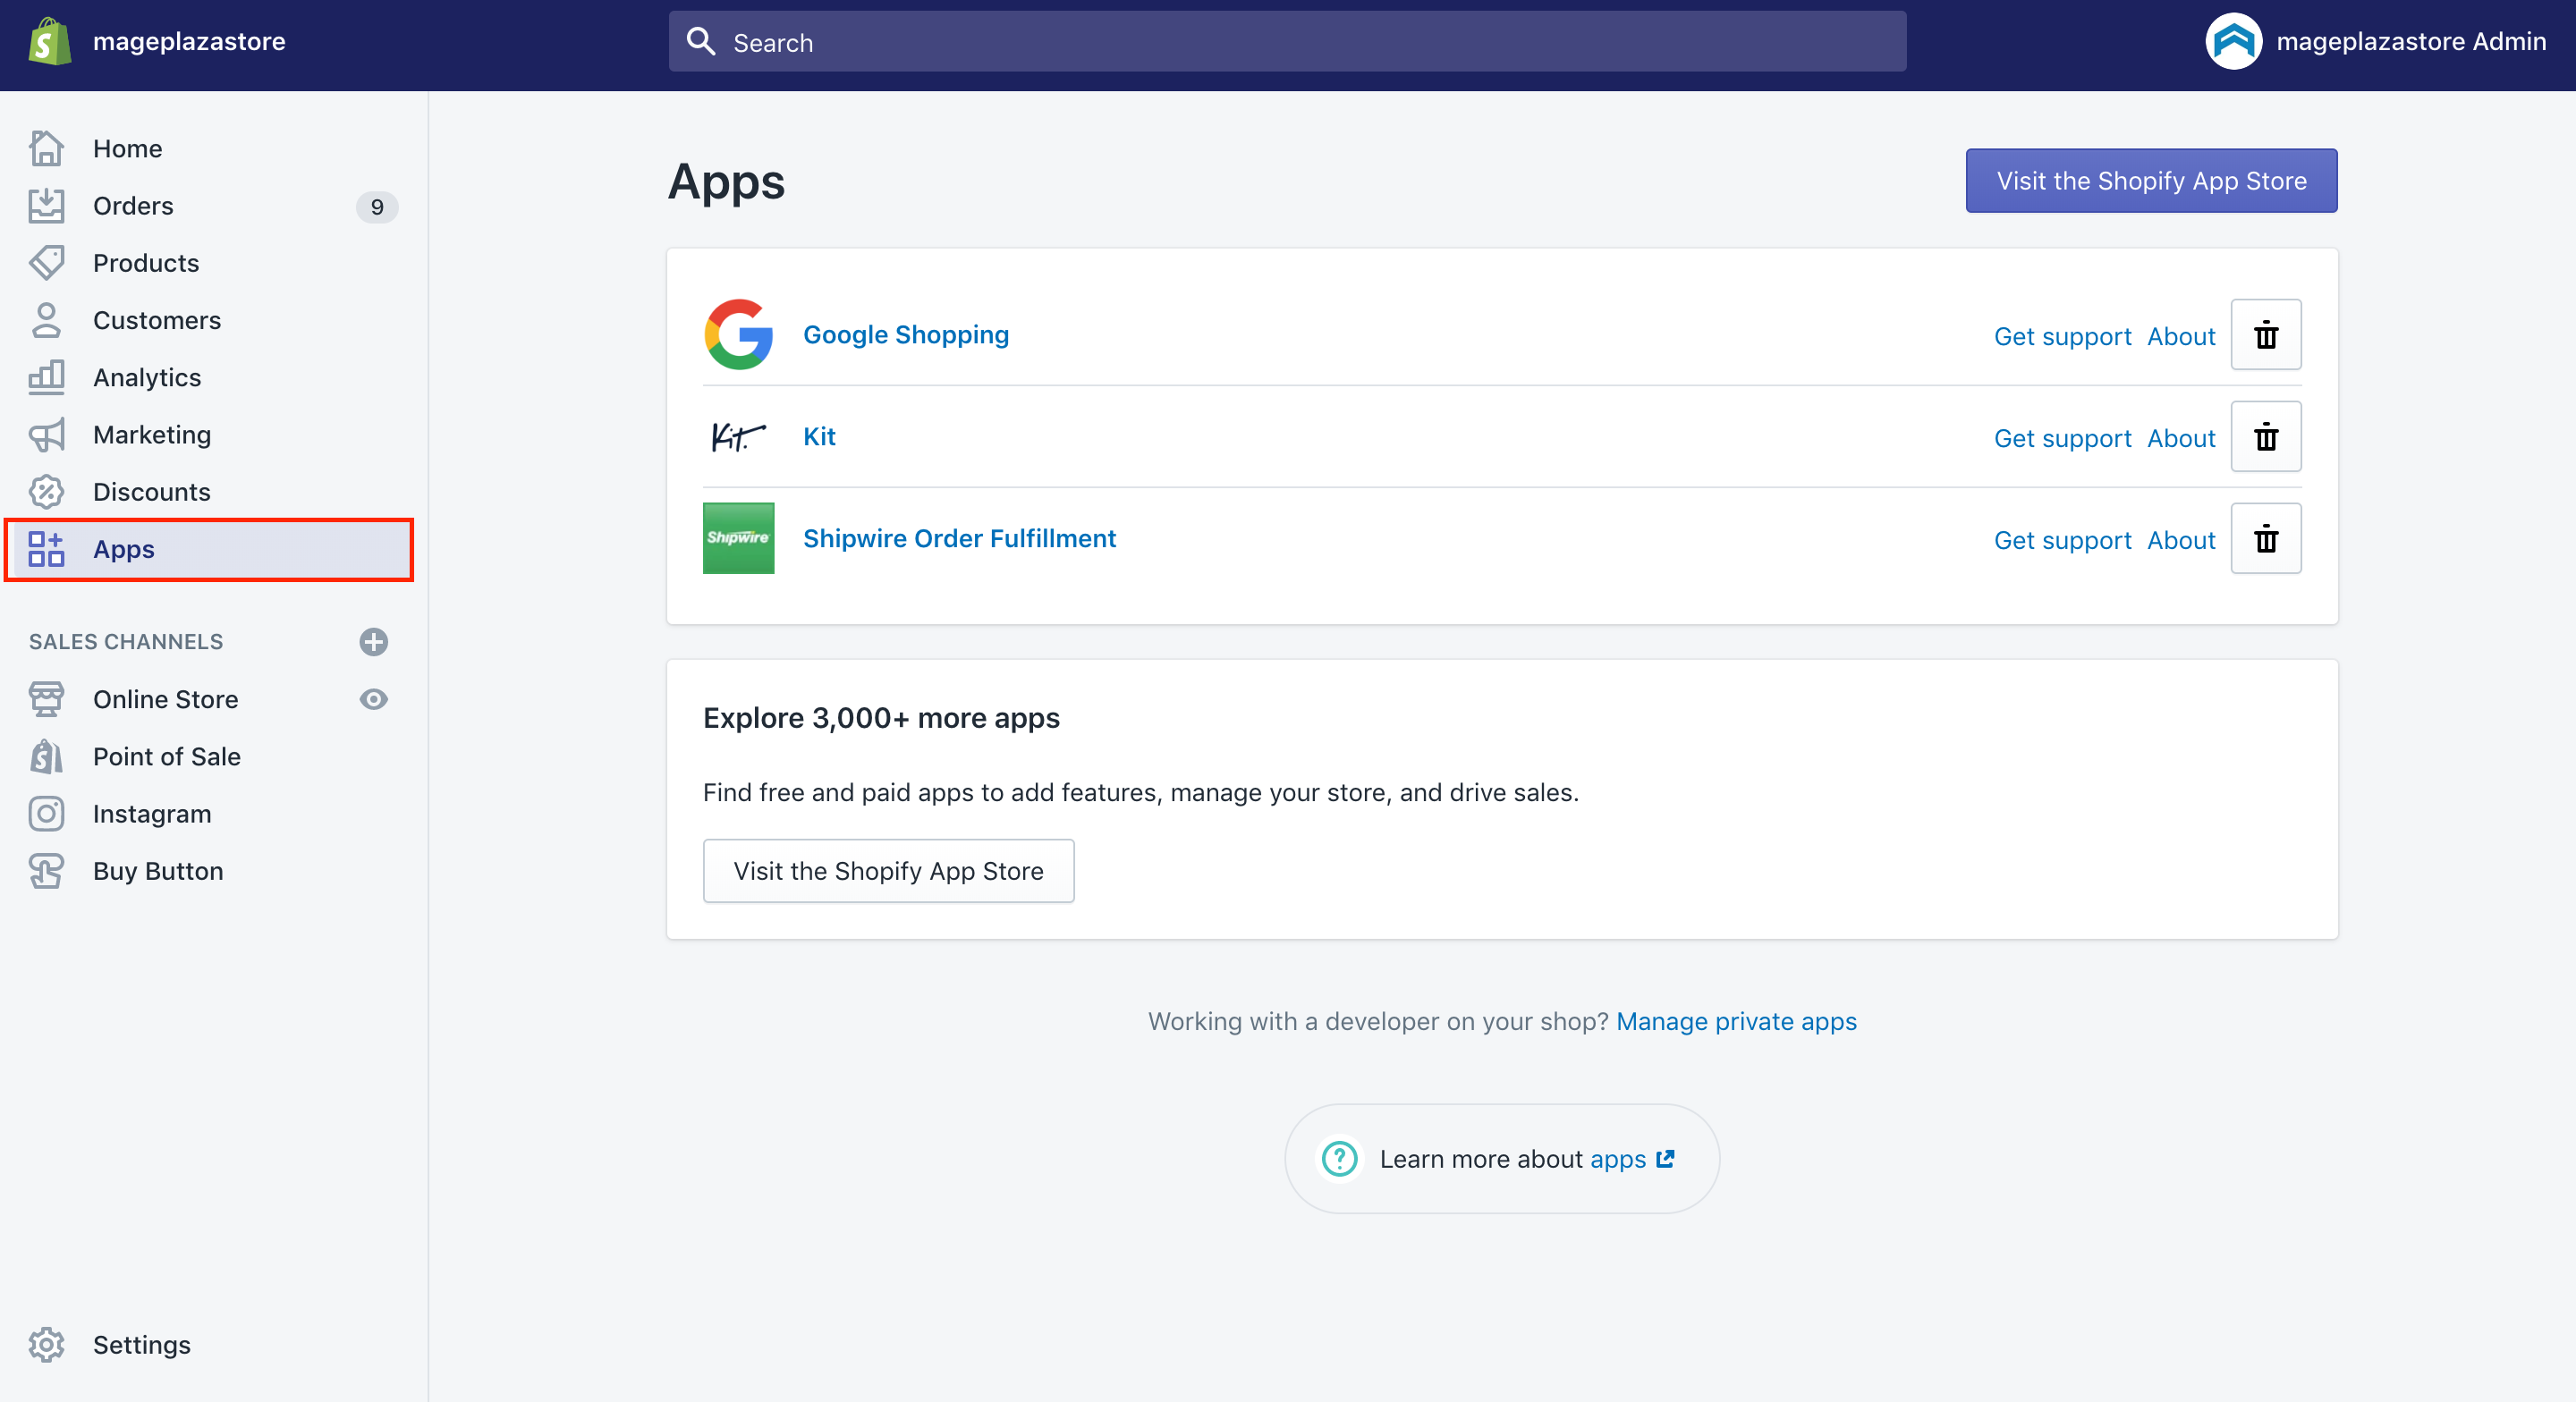
Step 1: Click Apps
The first thing you need to do is to click Apps from your own Shopify admin.
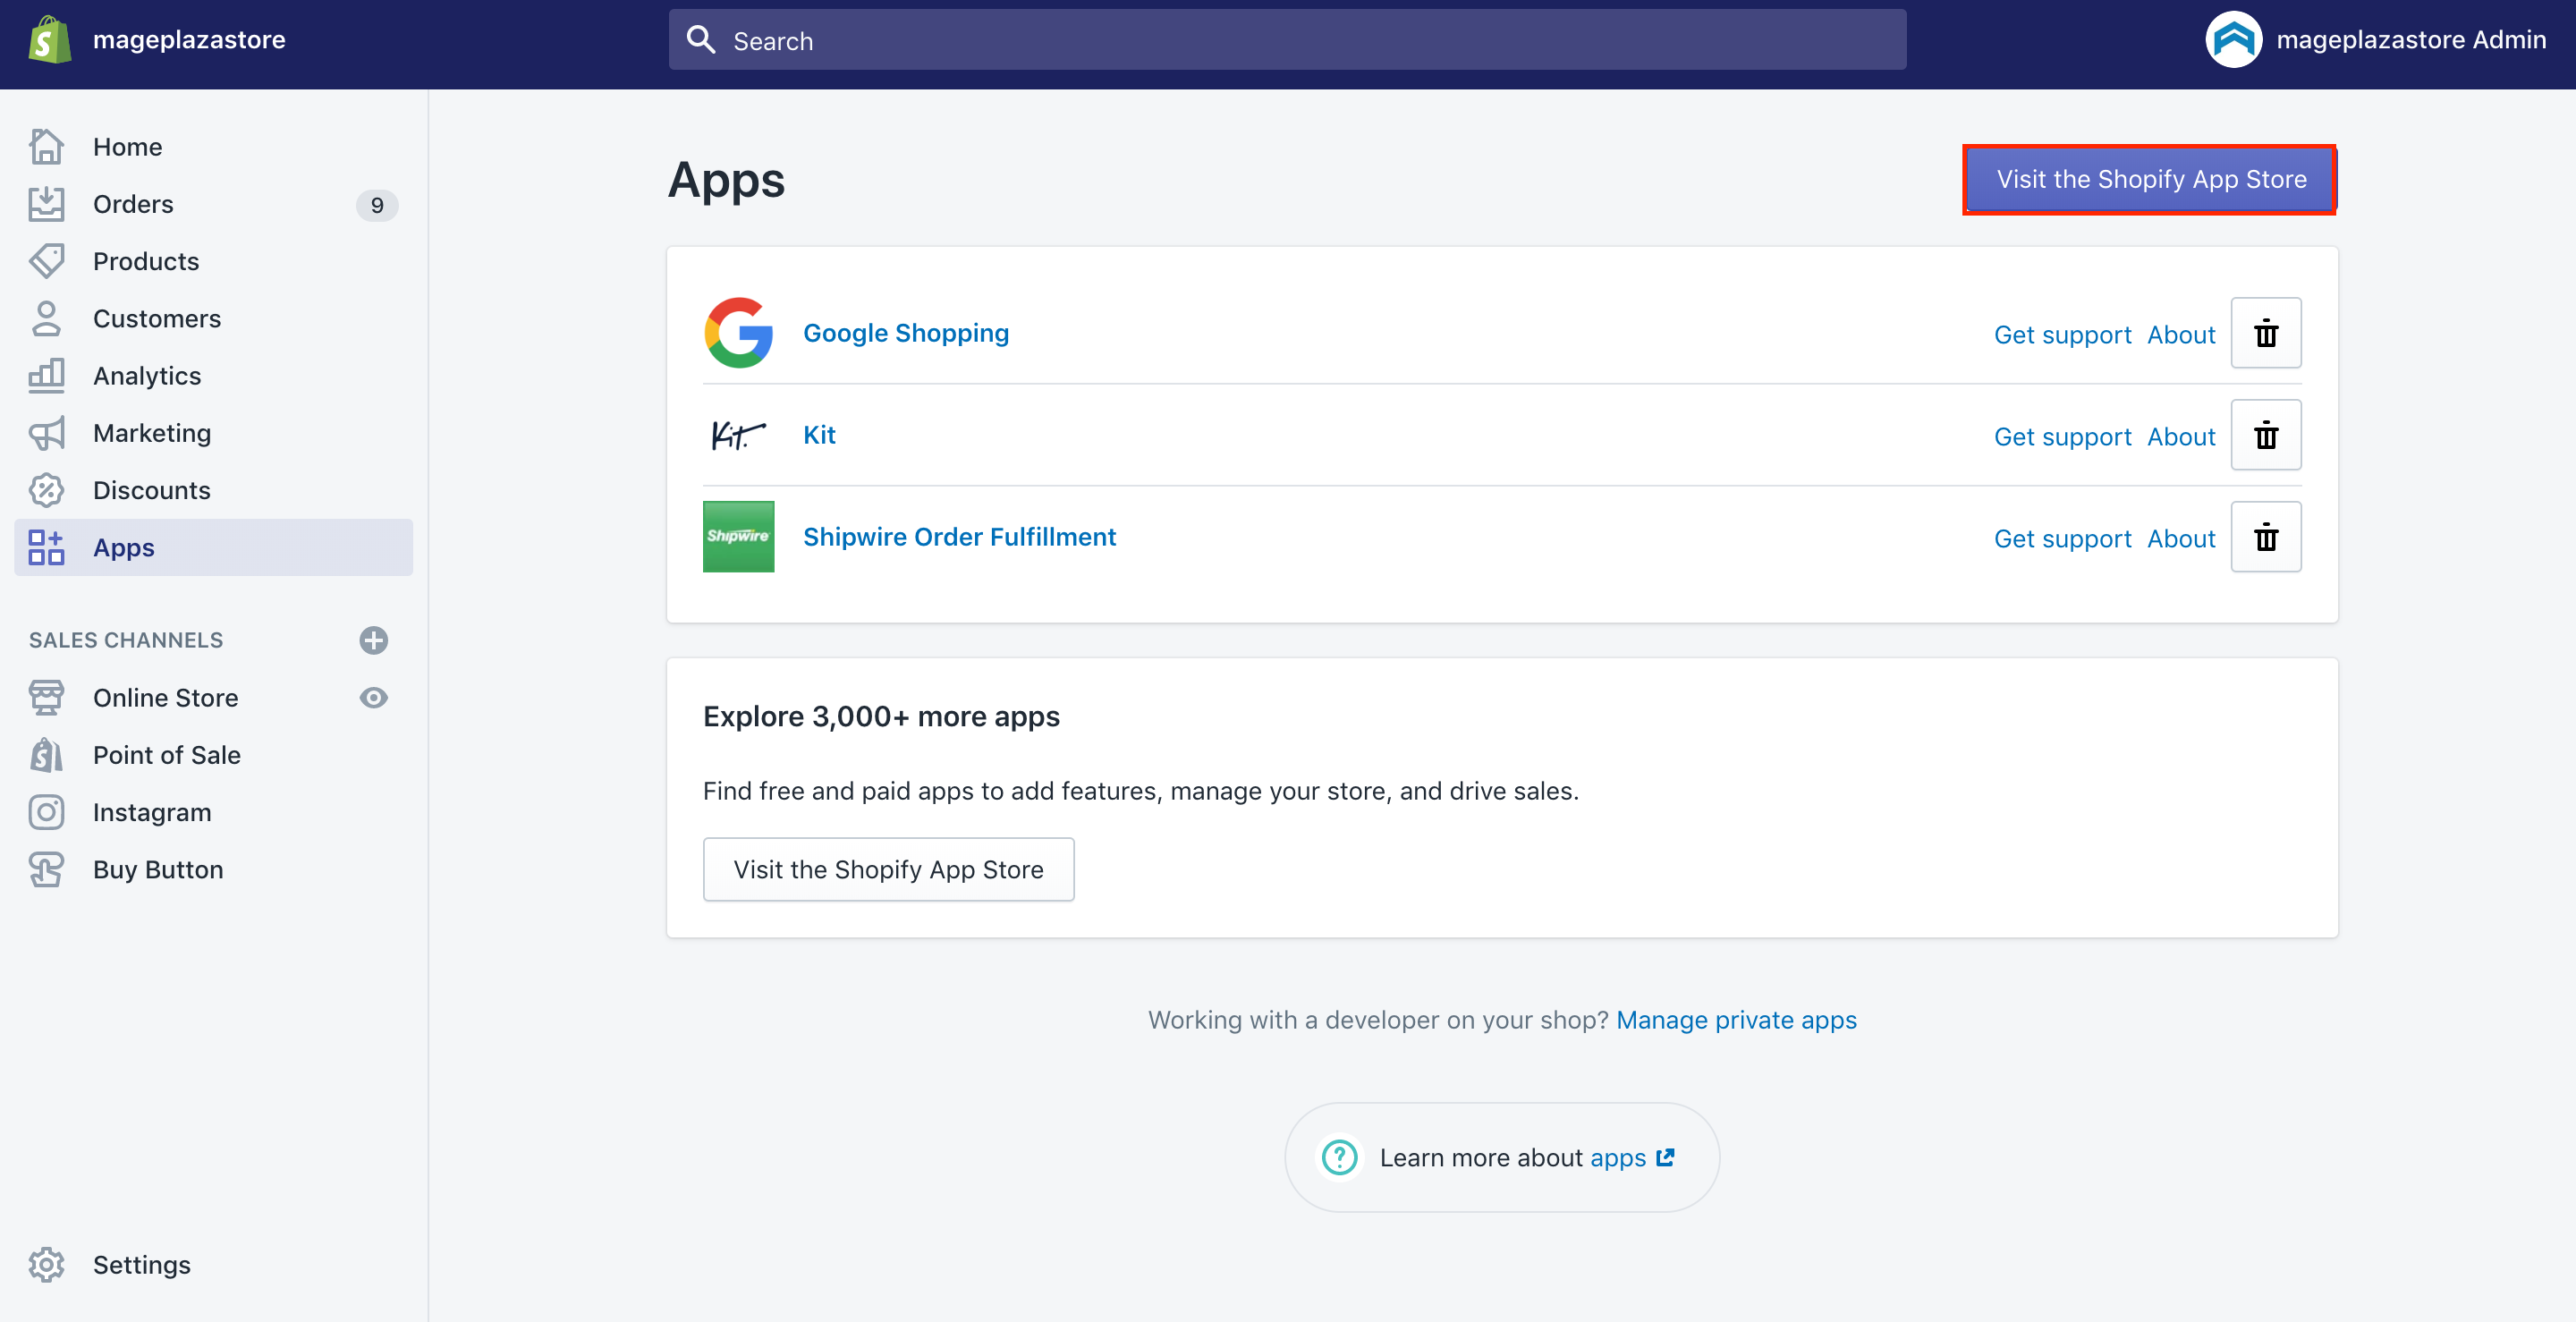
Step 2: Choose Visit Shopify App Store
Next, you can choose the Visit Shopify App Store.
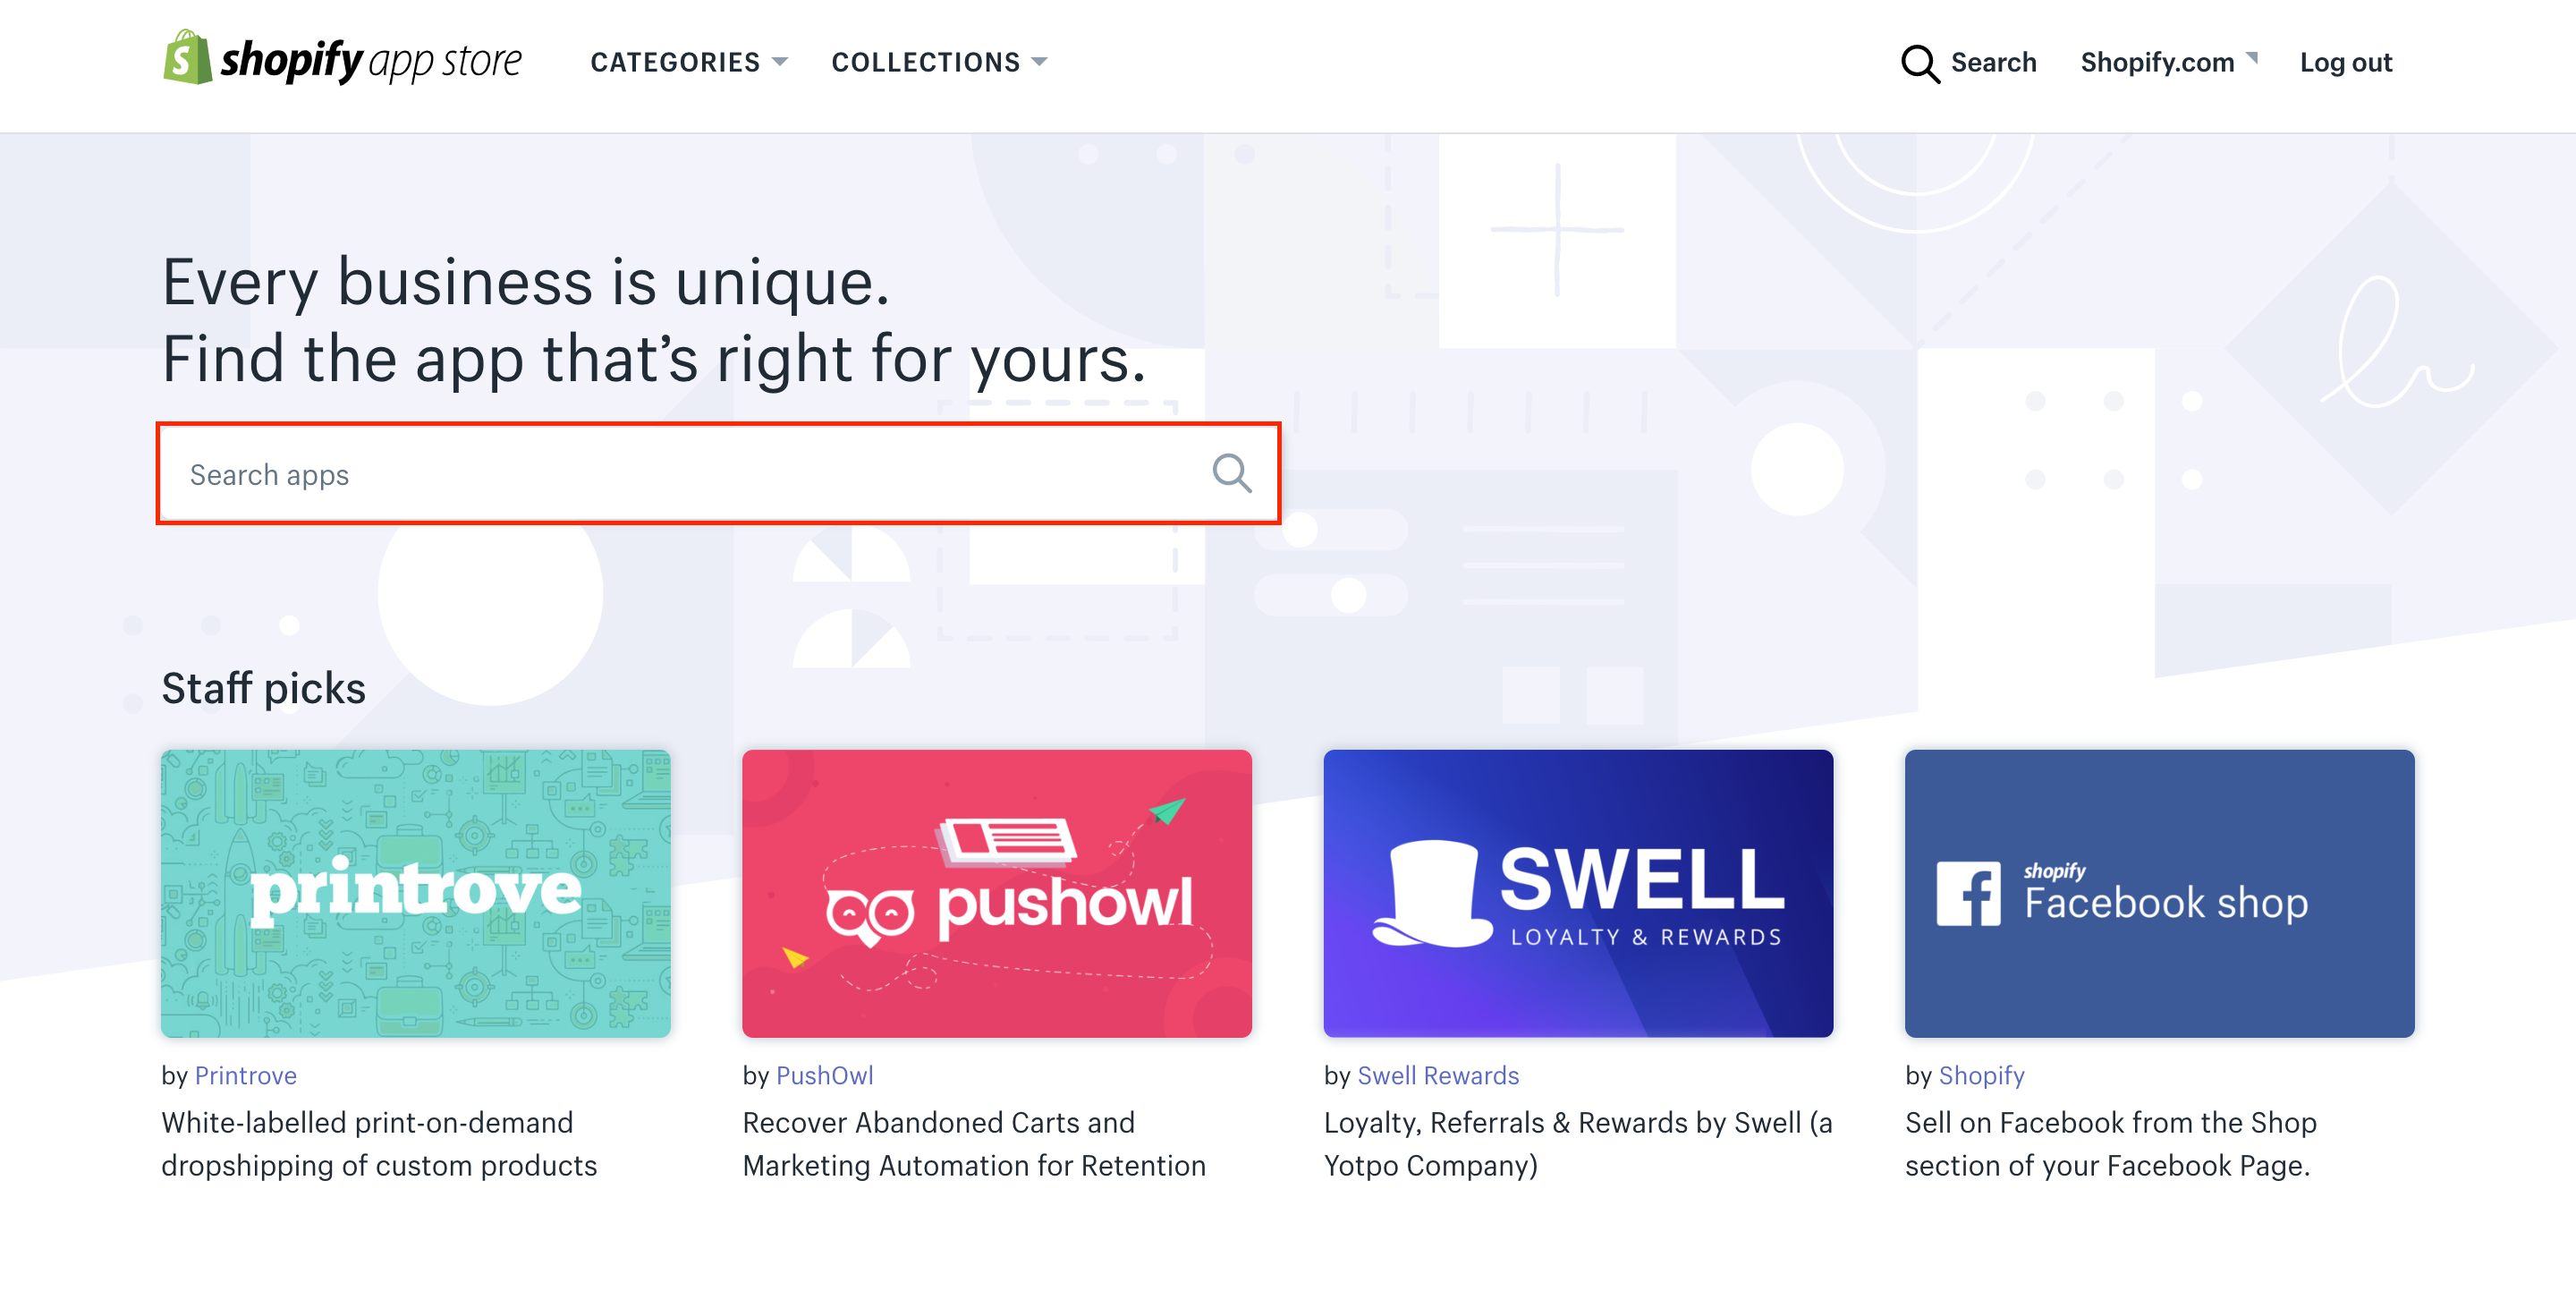
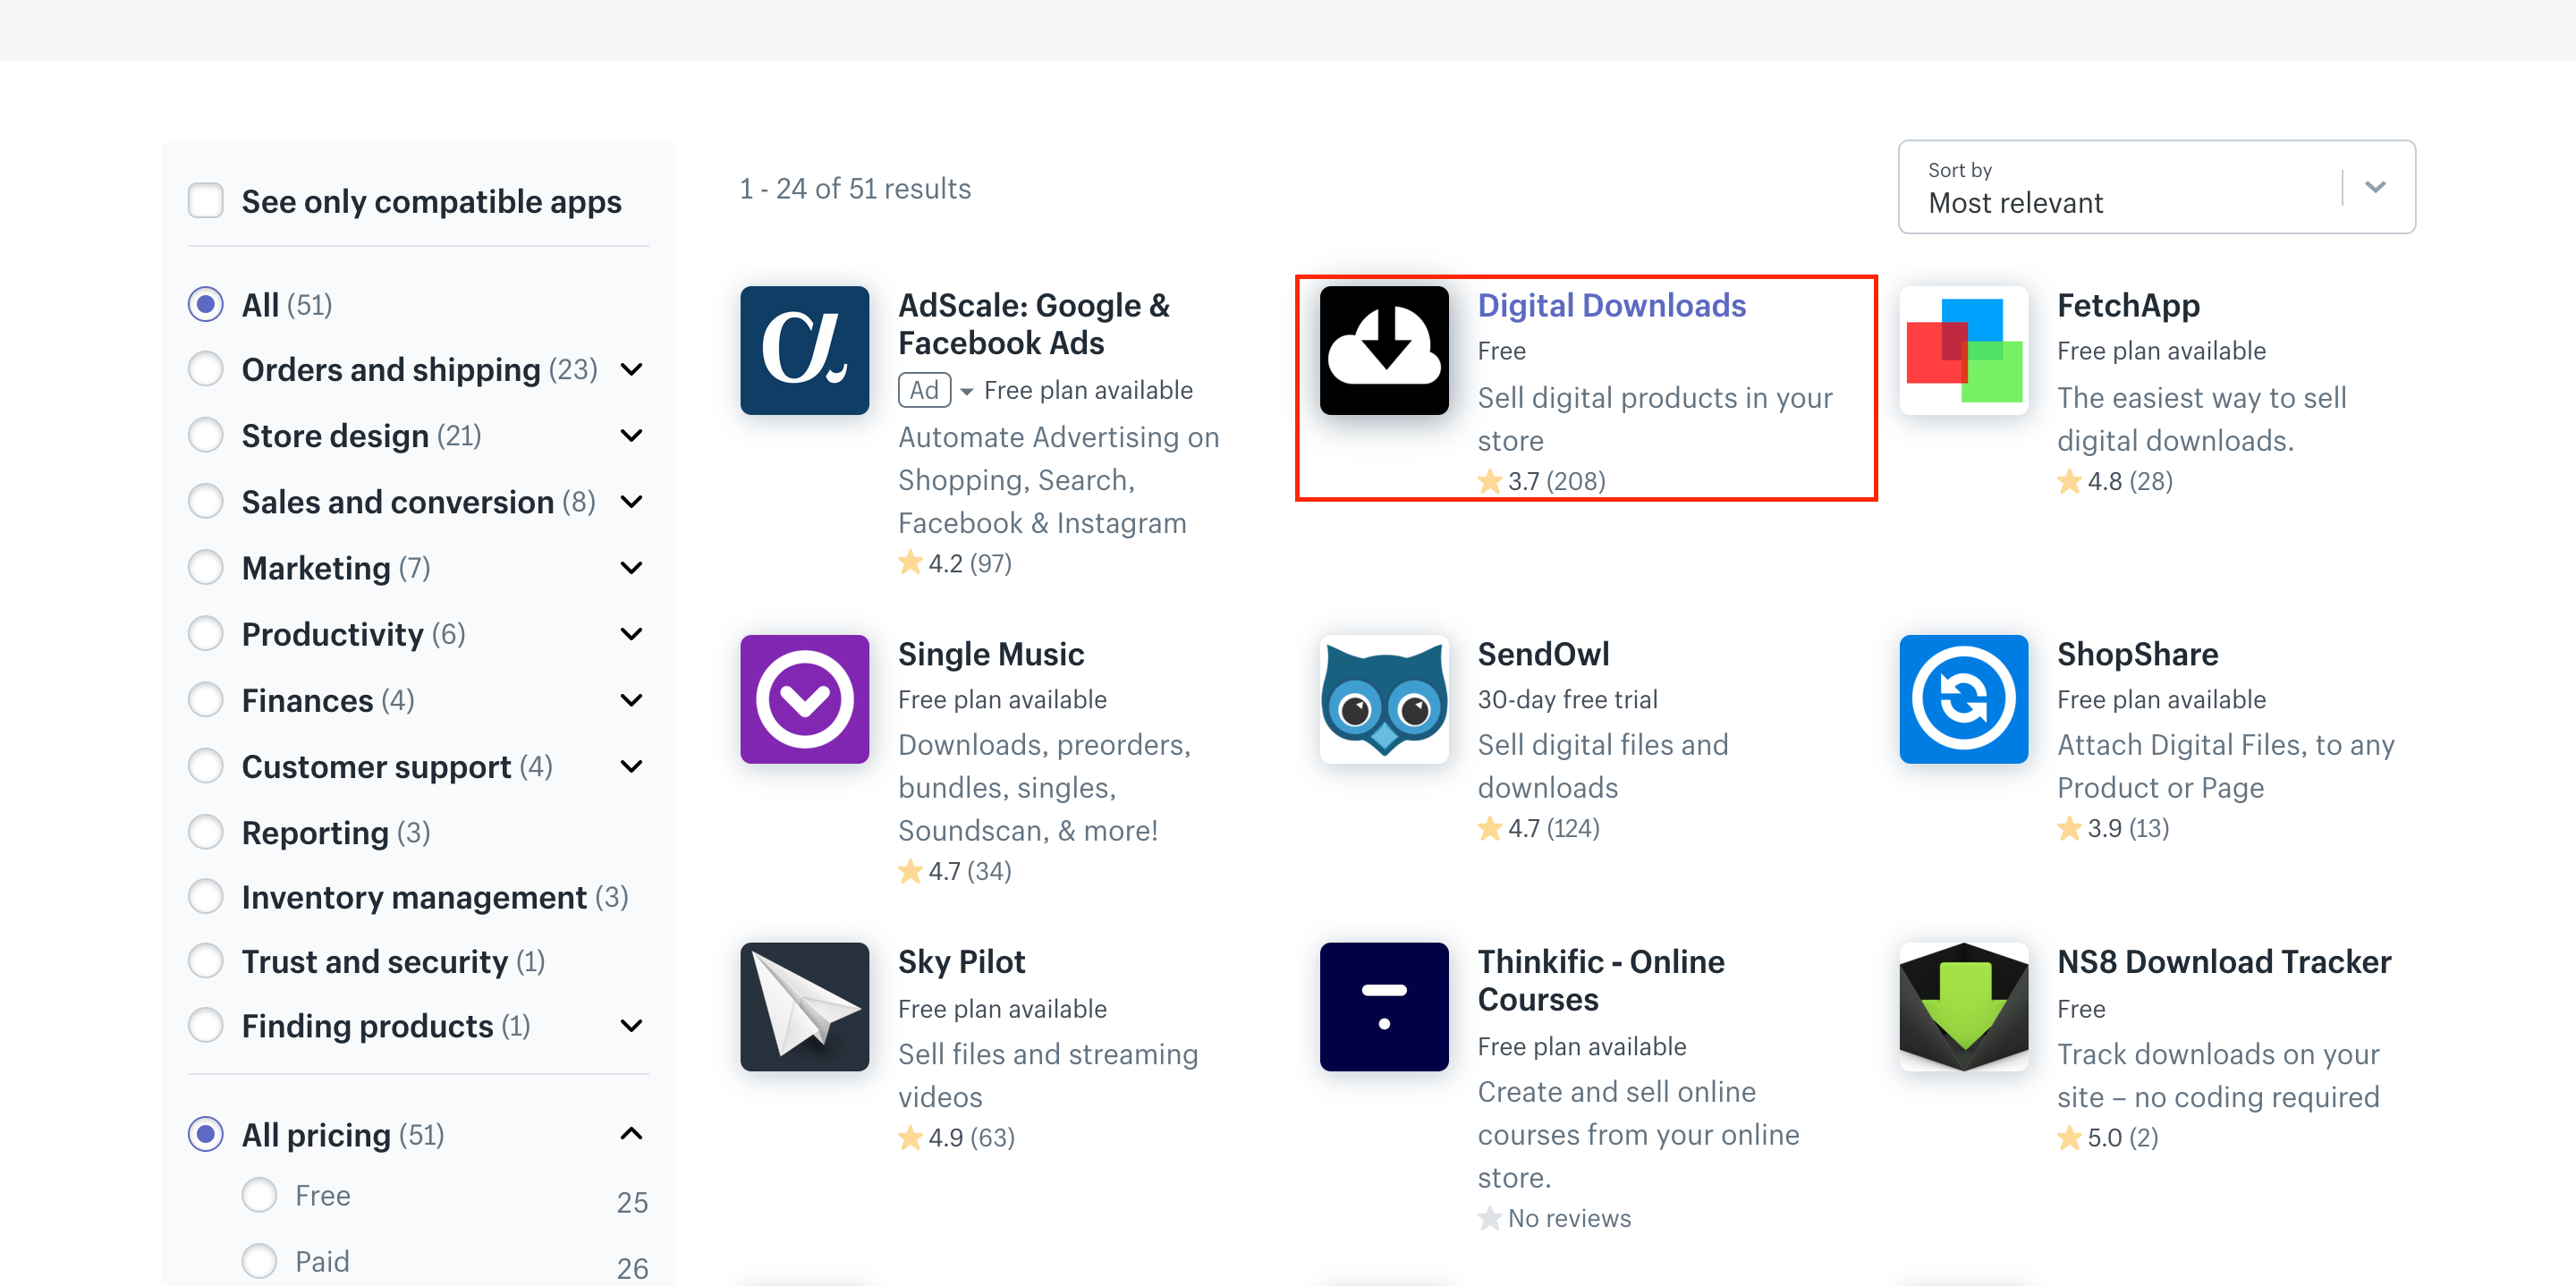
Step 3: Type Digital Downloads and select Digital Downloads
To keep going, you can type Digital Downloads before going to Digital Downloads from the drop-down menu.
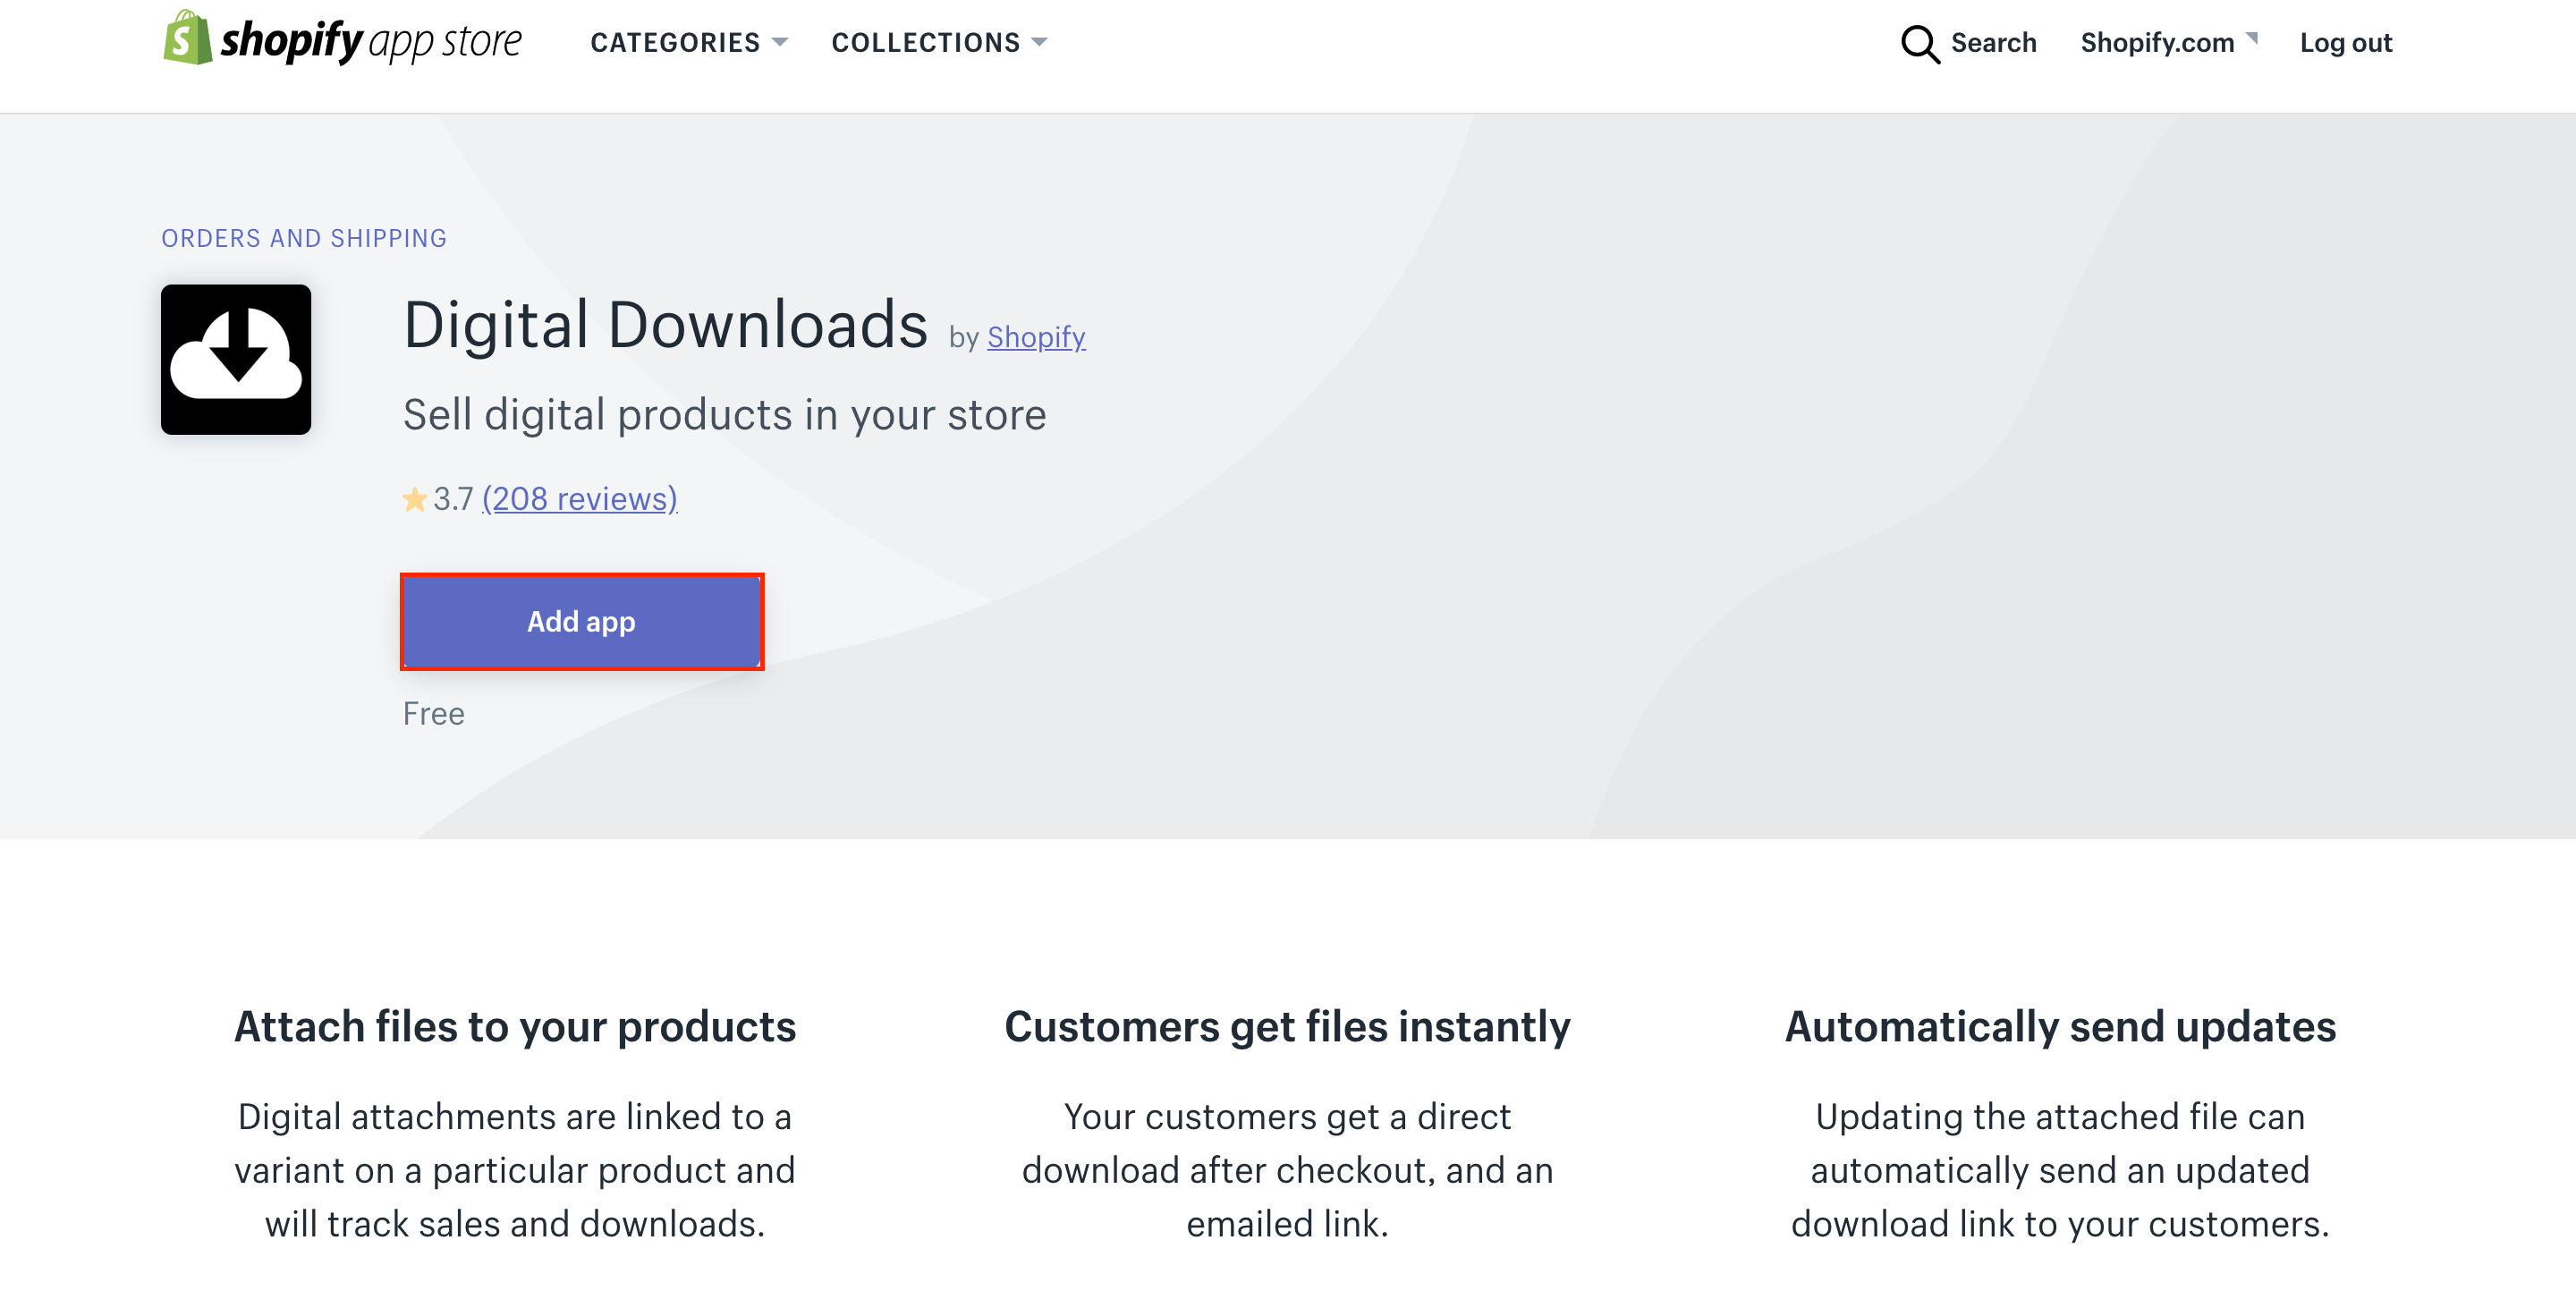
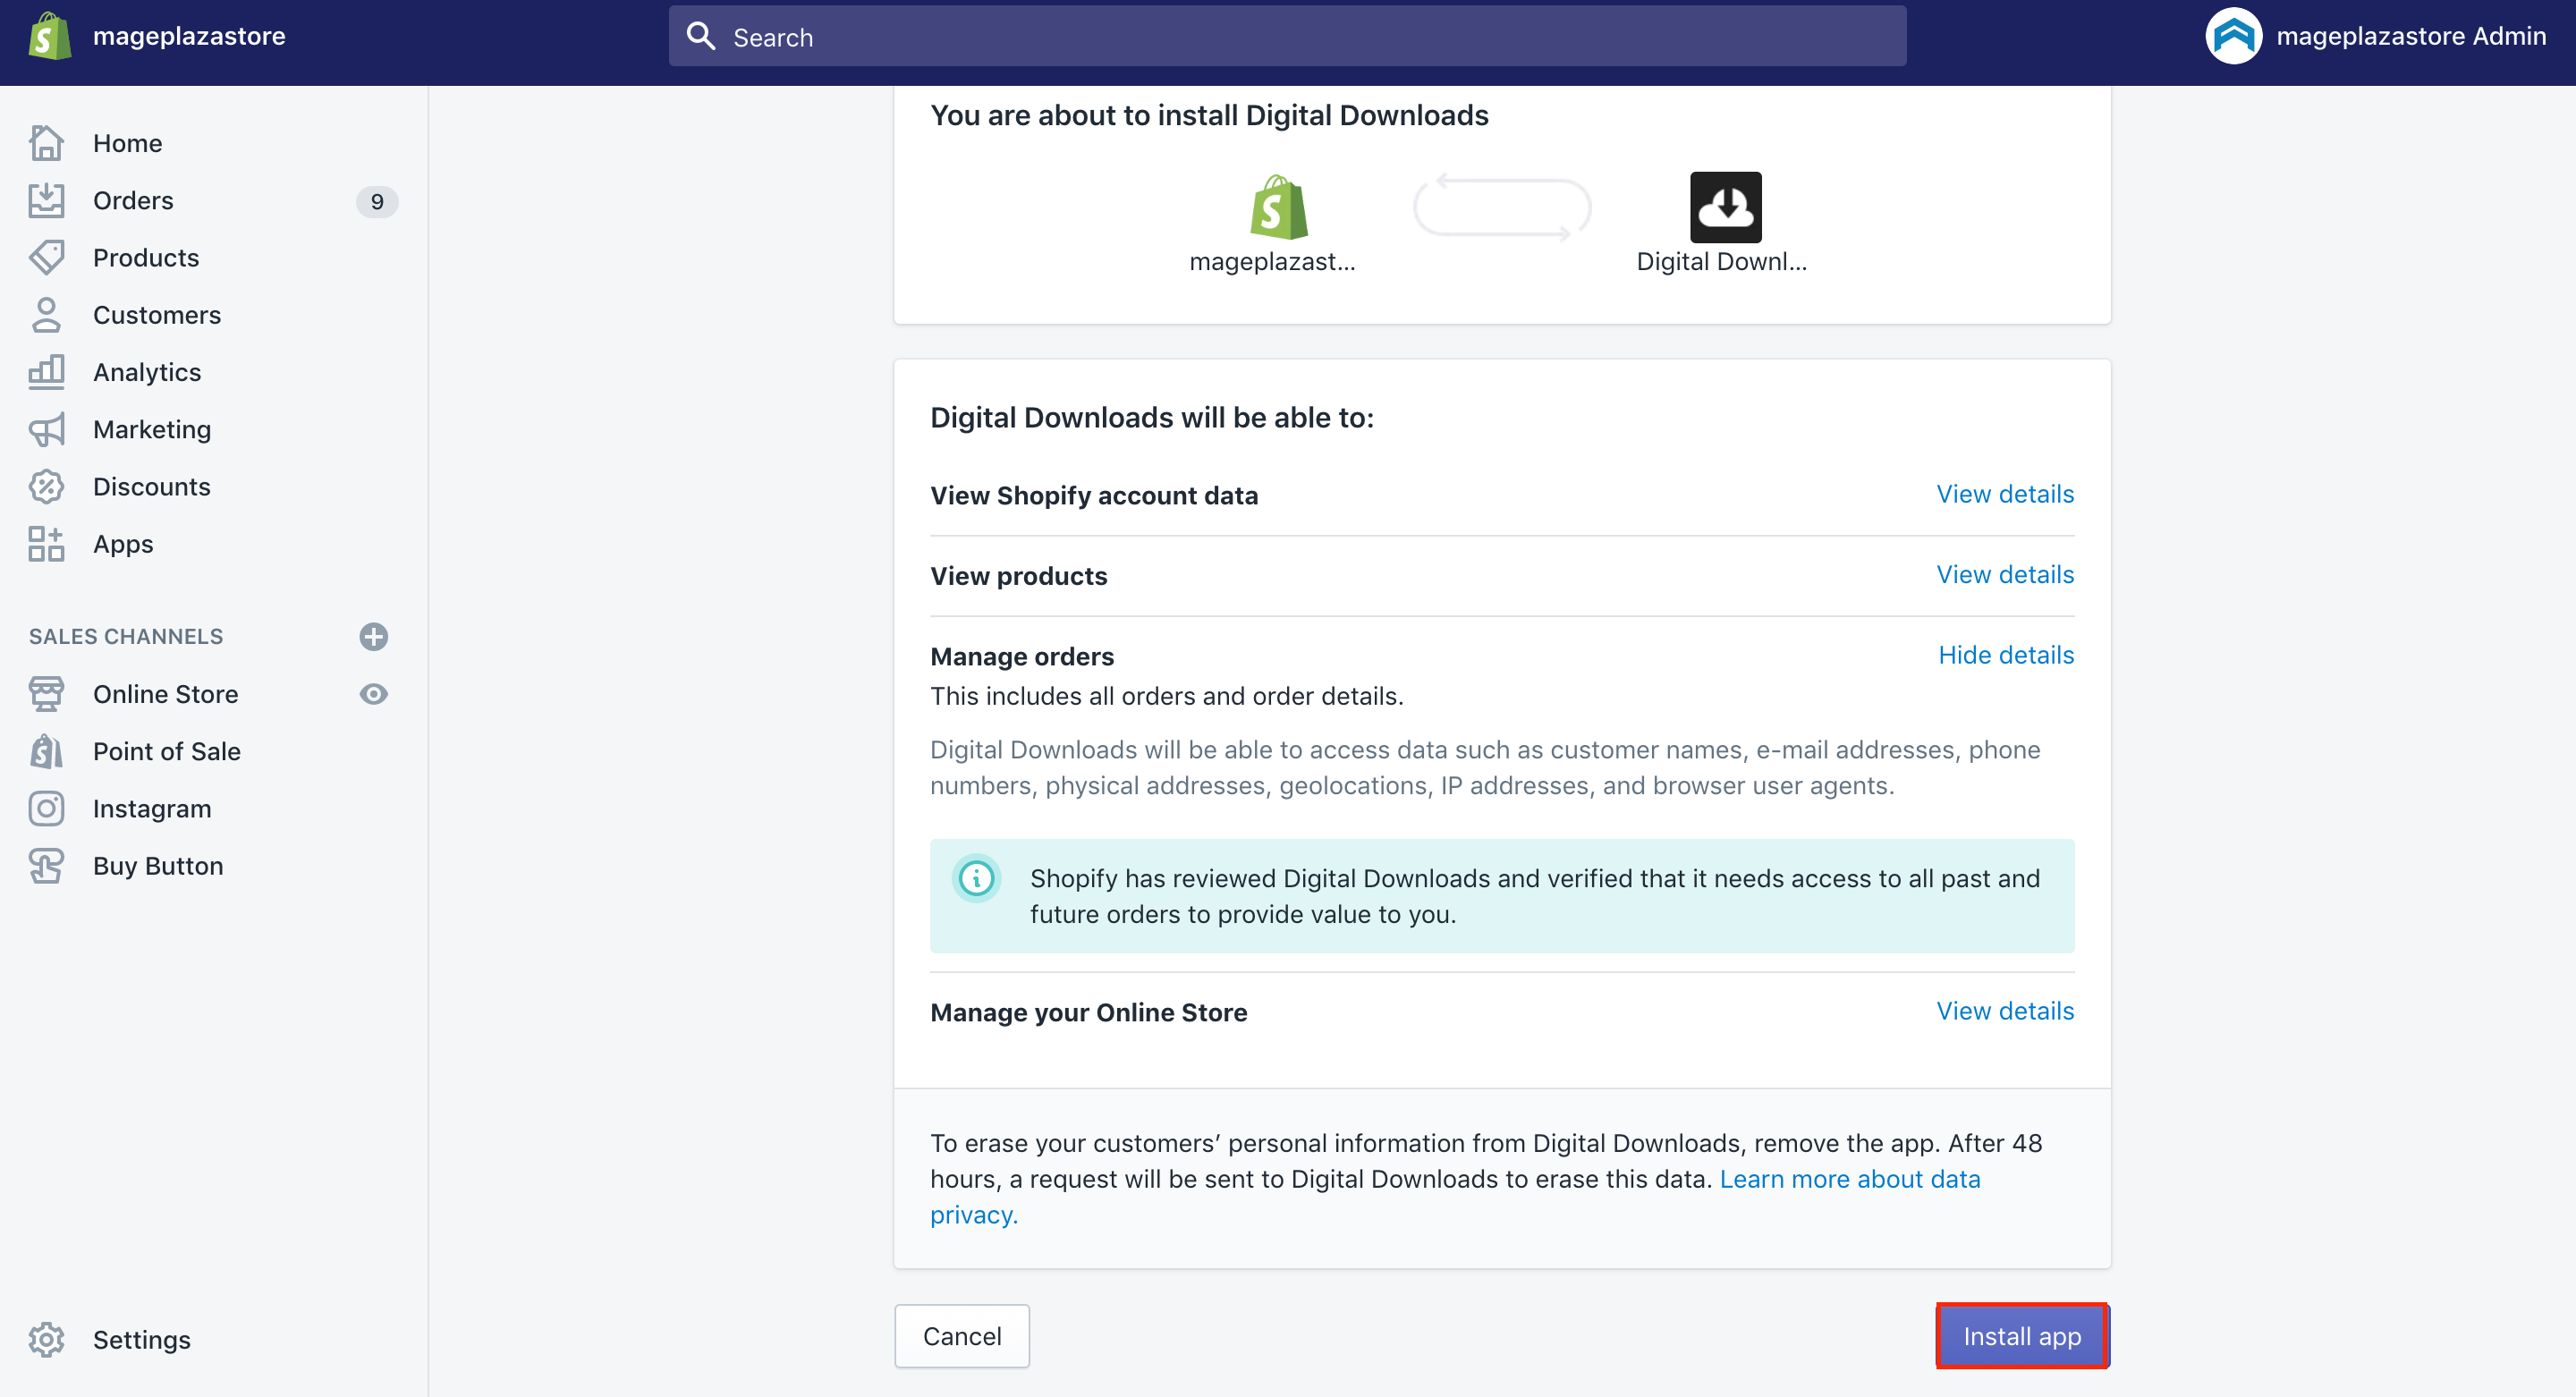
Step 4: Opt for Add app and Install app
After that, don’t forget to opt for the Add app, then click on the Install app to finish your task.
Add a digital product
In order to enable you to insert a digital product into your Shopify store, you first need to generate a product, then back to the Digital Downloads app to add digital attachments to the details page of your products.
Take note that you can only attach one file to each variant. Using a .zip file or other archive file format to get files bundled in line with file names.
Step 1: Click on Products
As being told previously, you should create a product by clicking on Products.
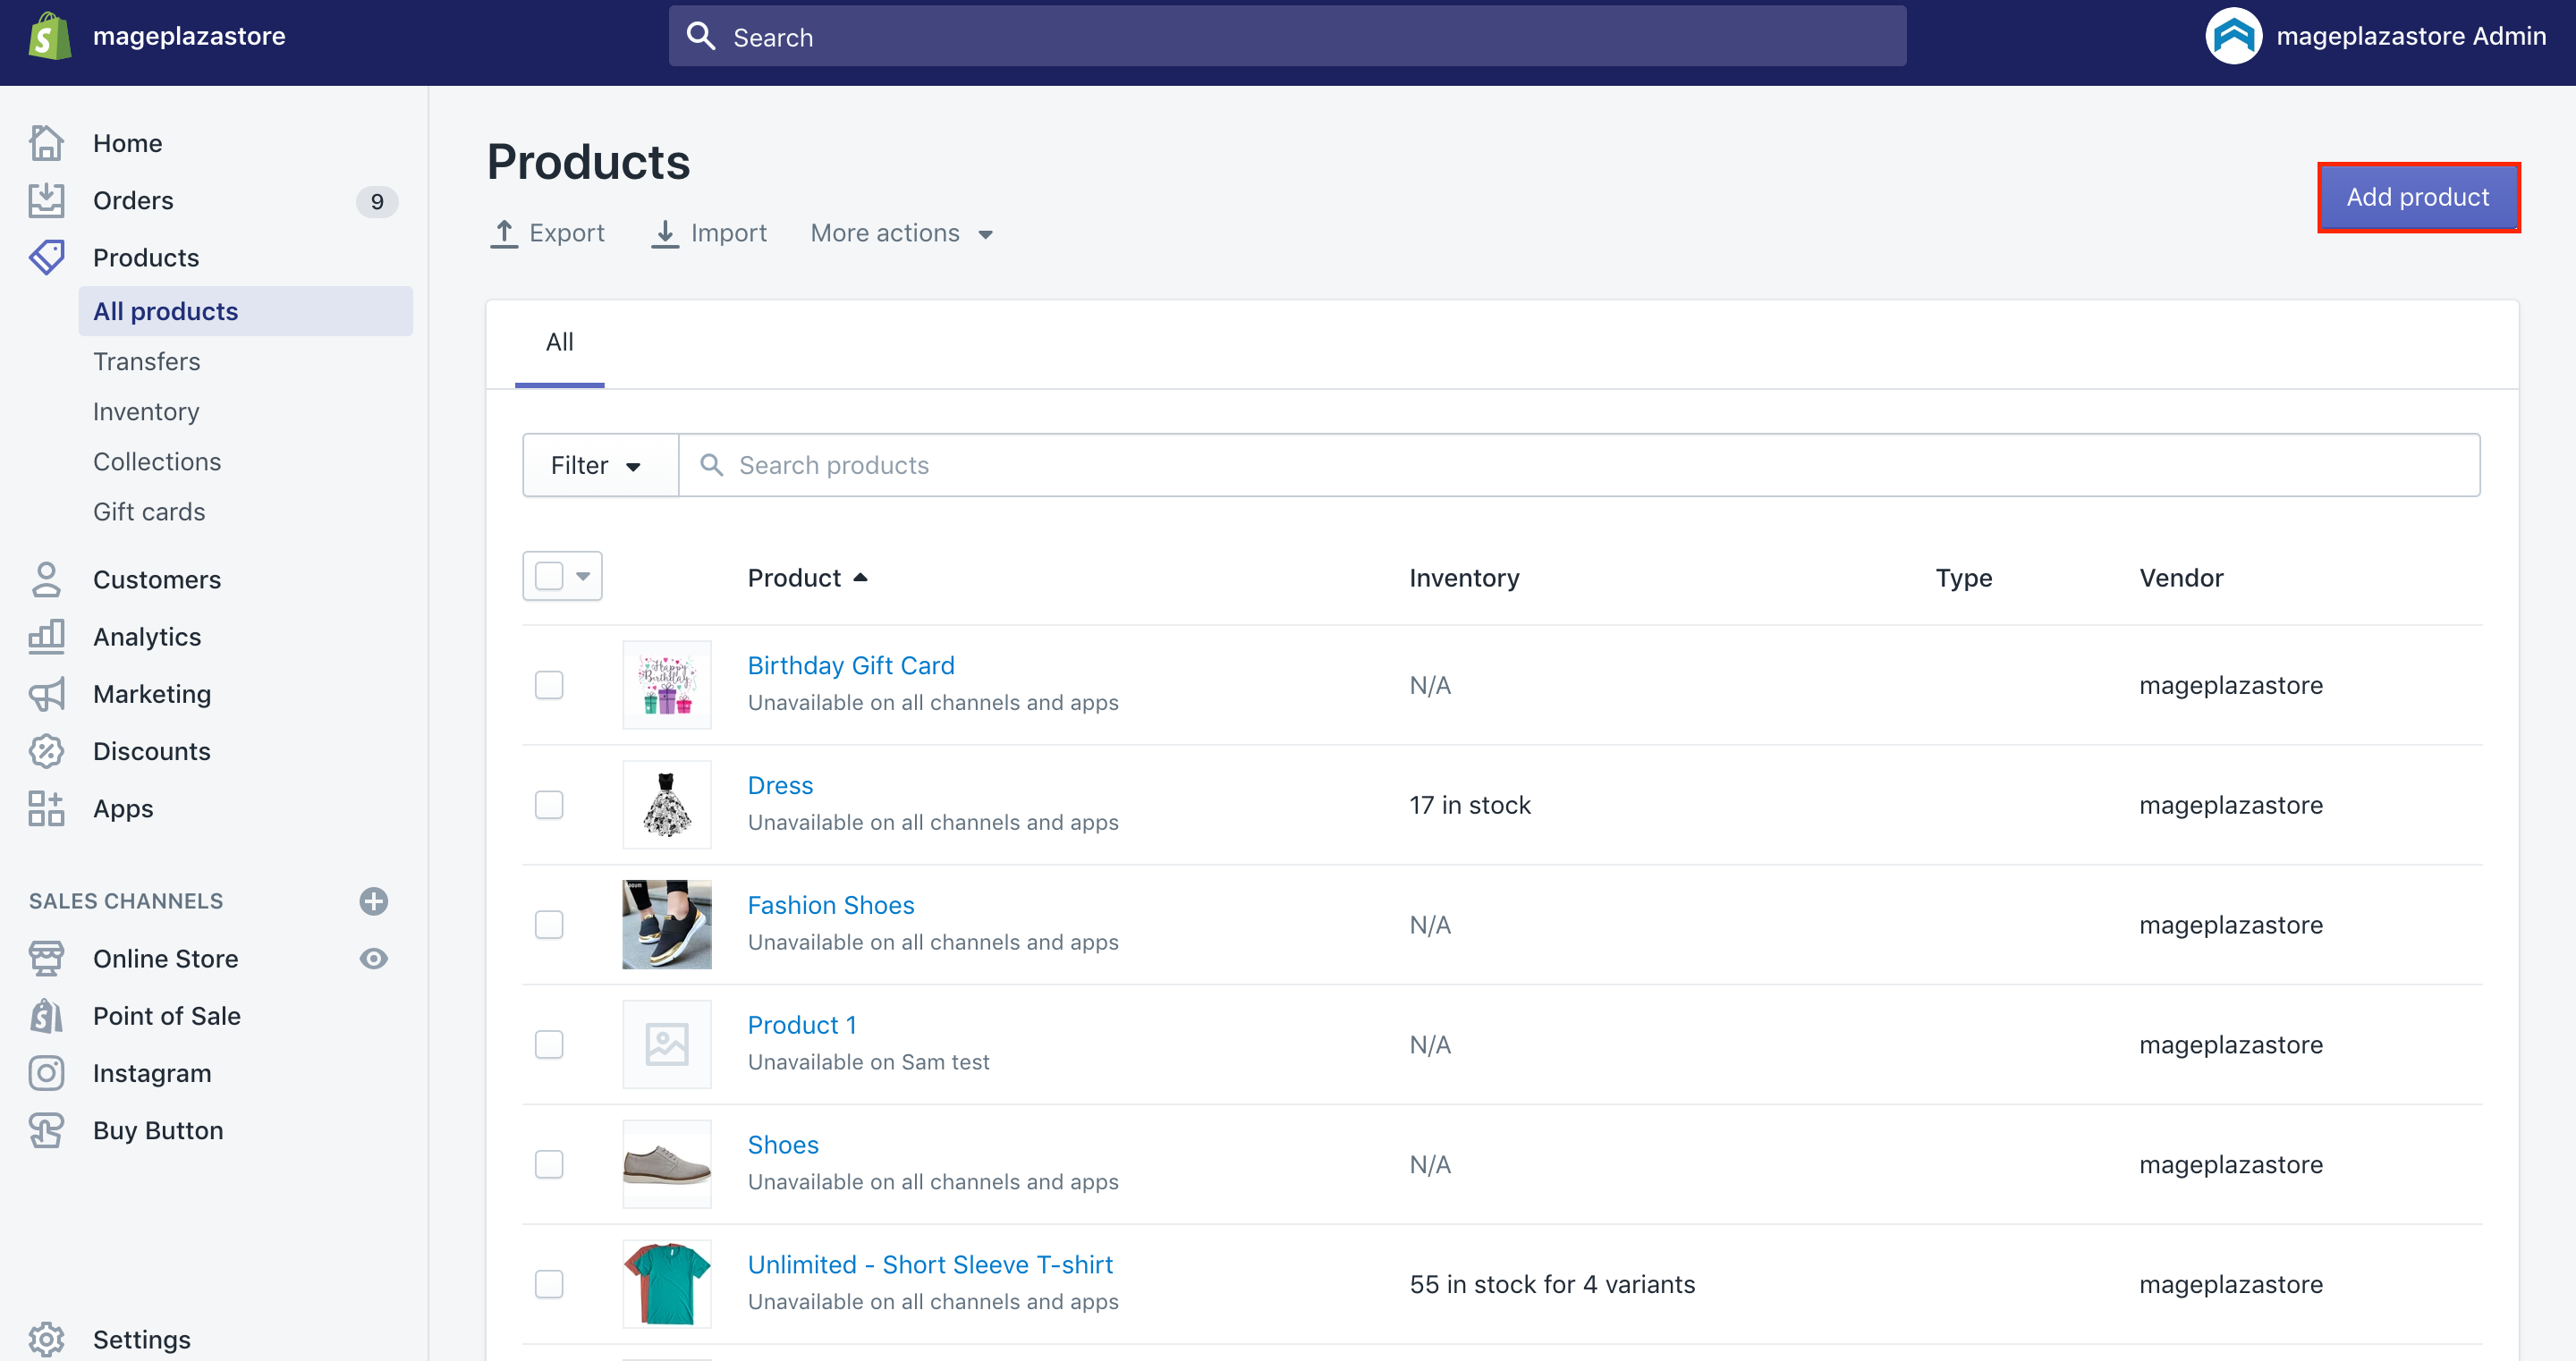
Step 2: Go to Add product
Then, go to Add product.
Step 3: Give customers your product’s information
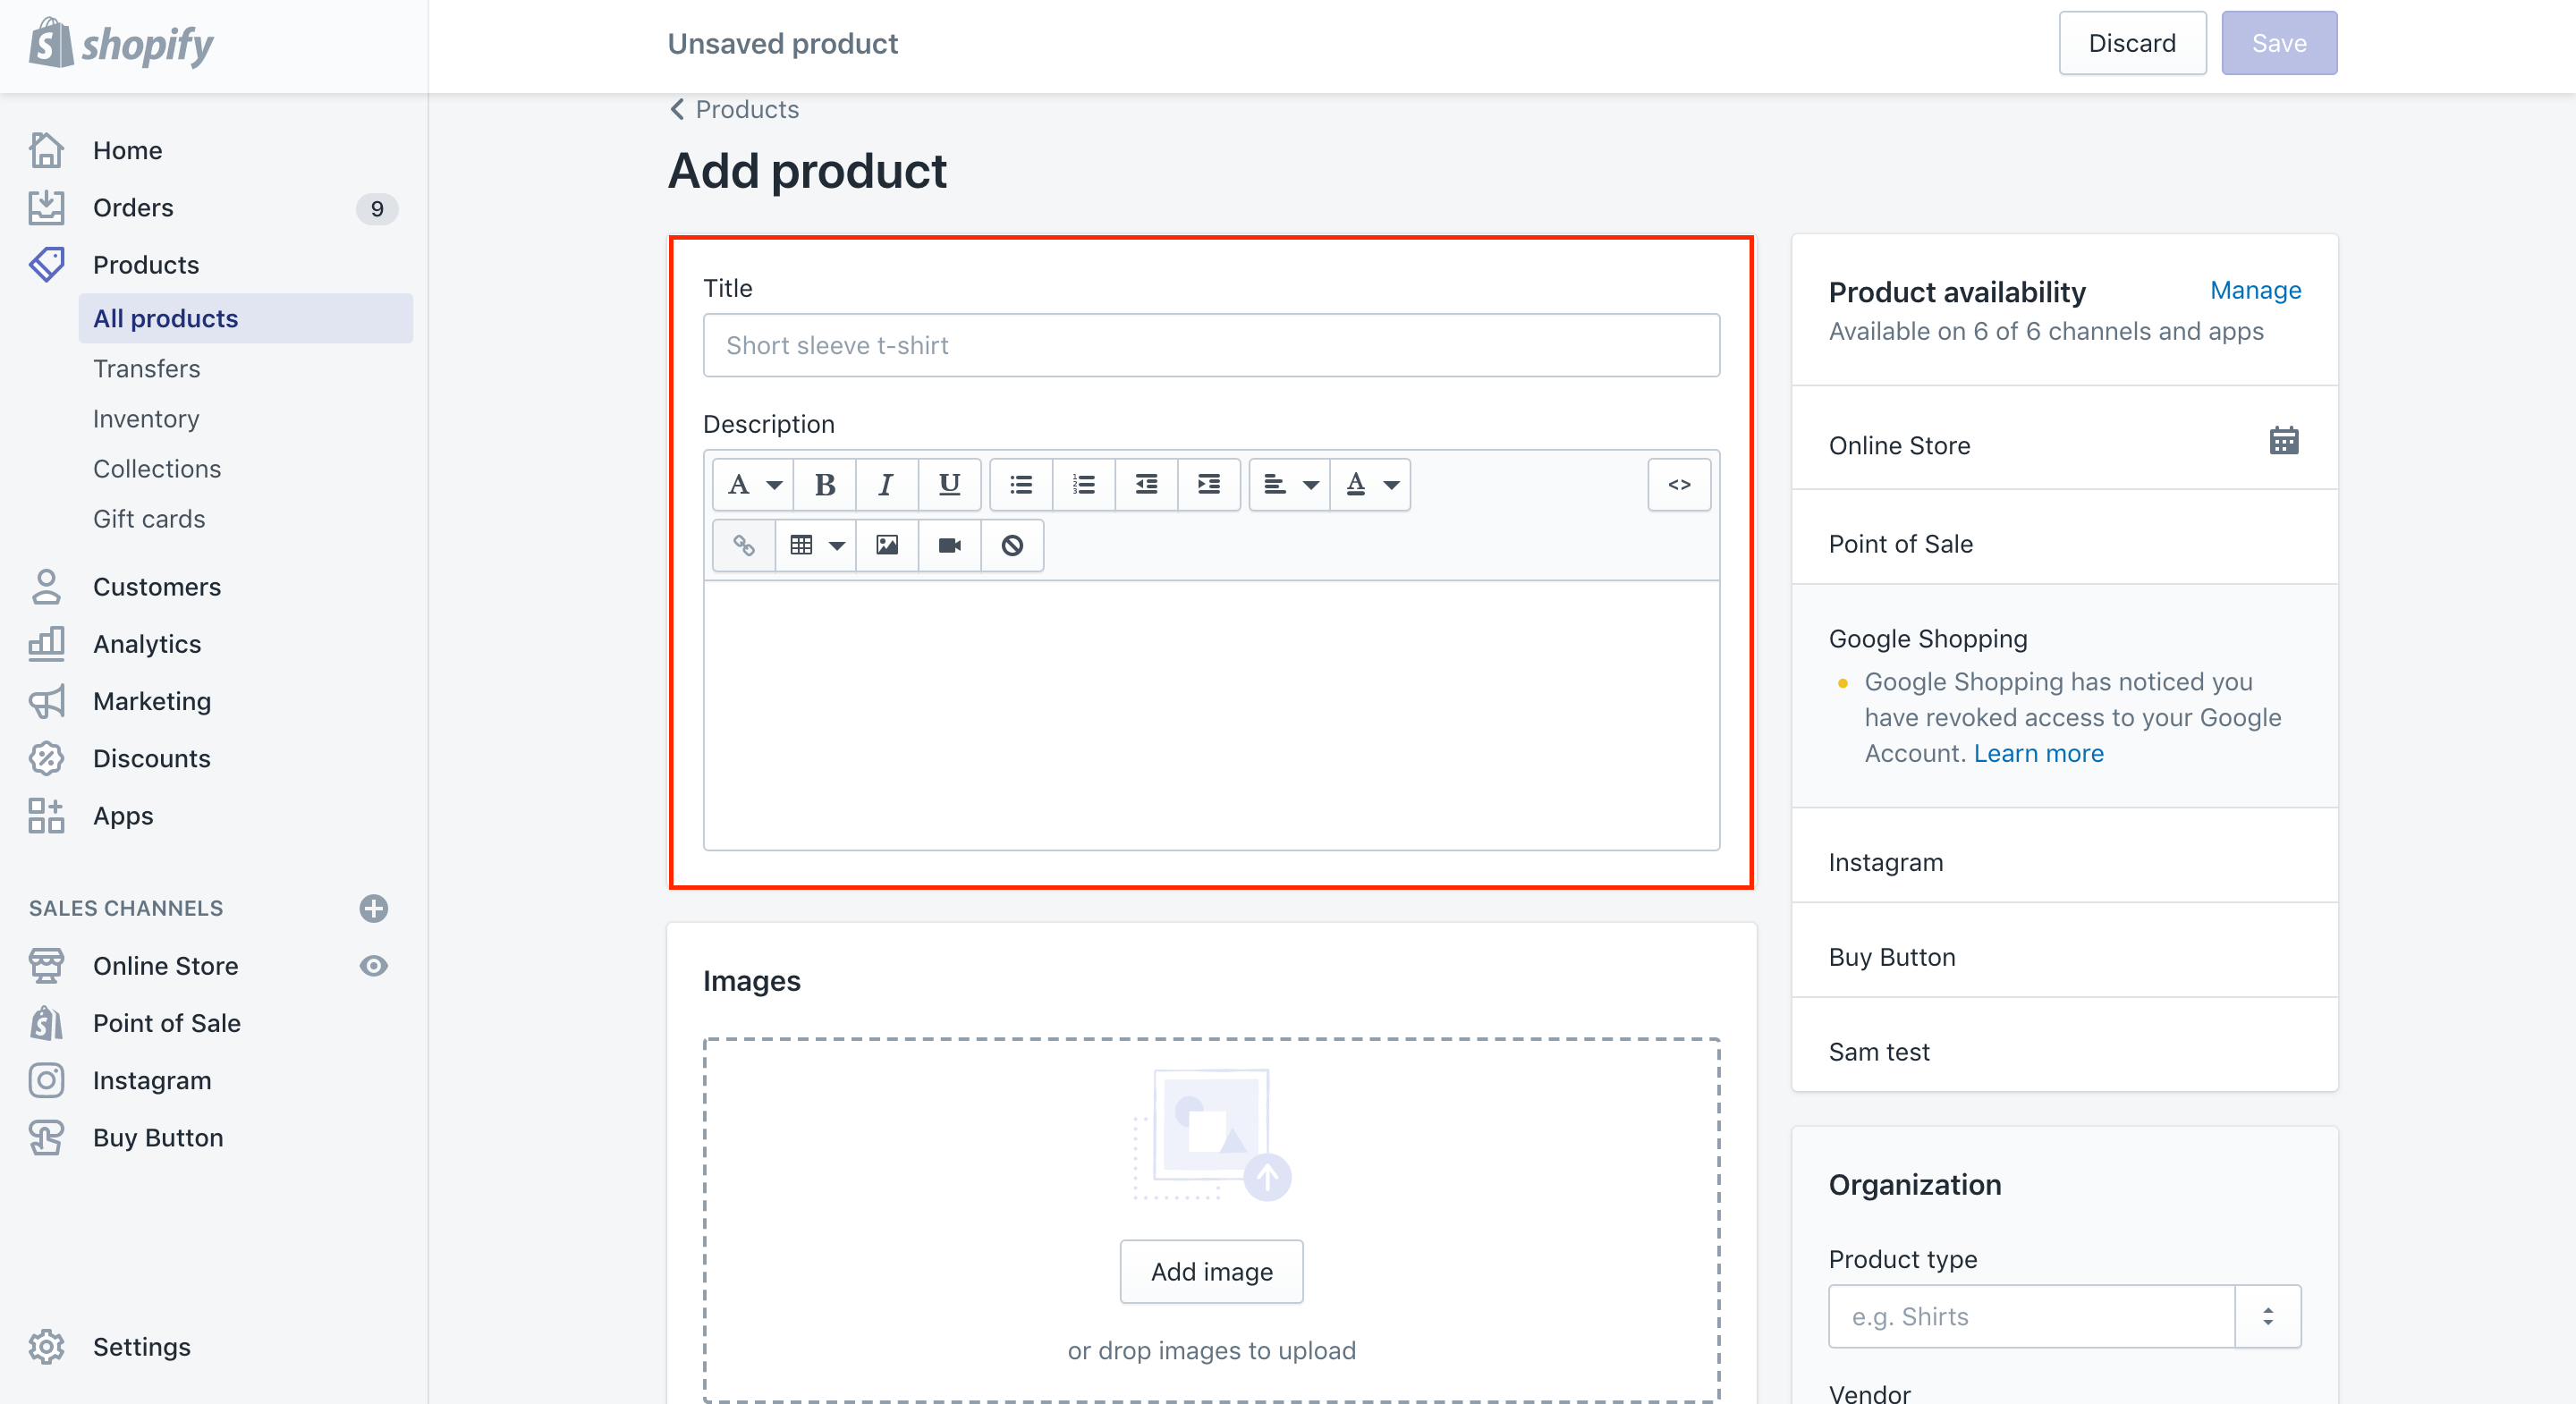
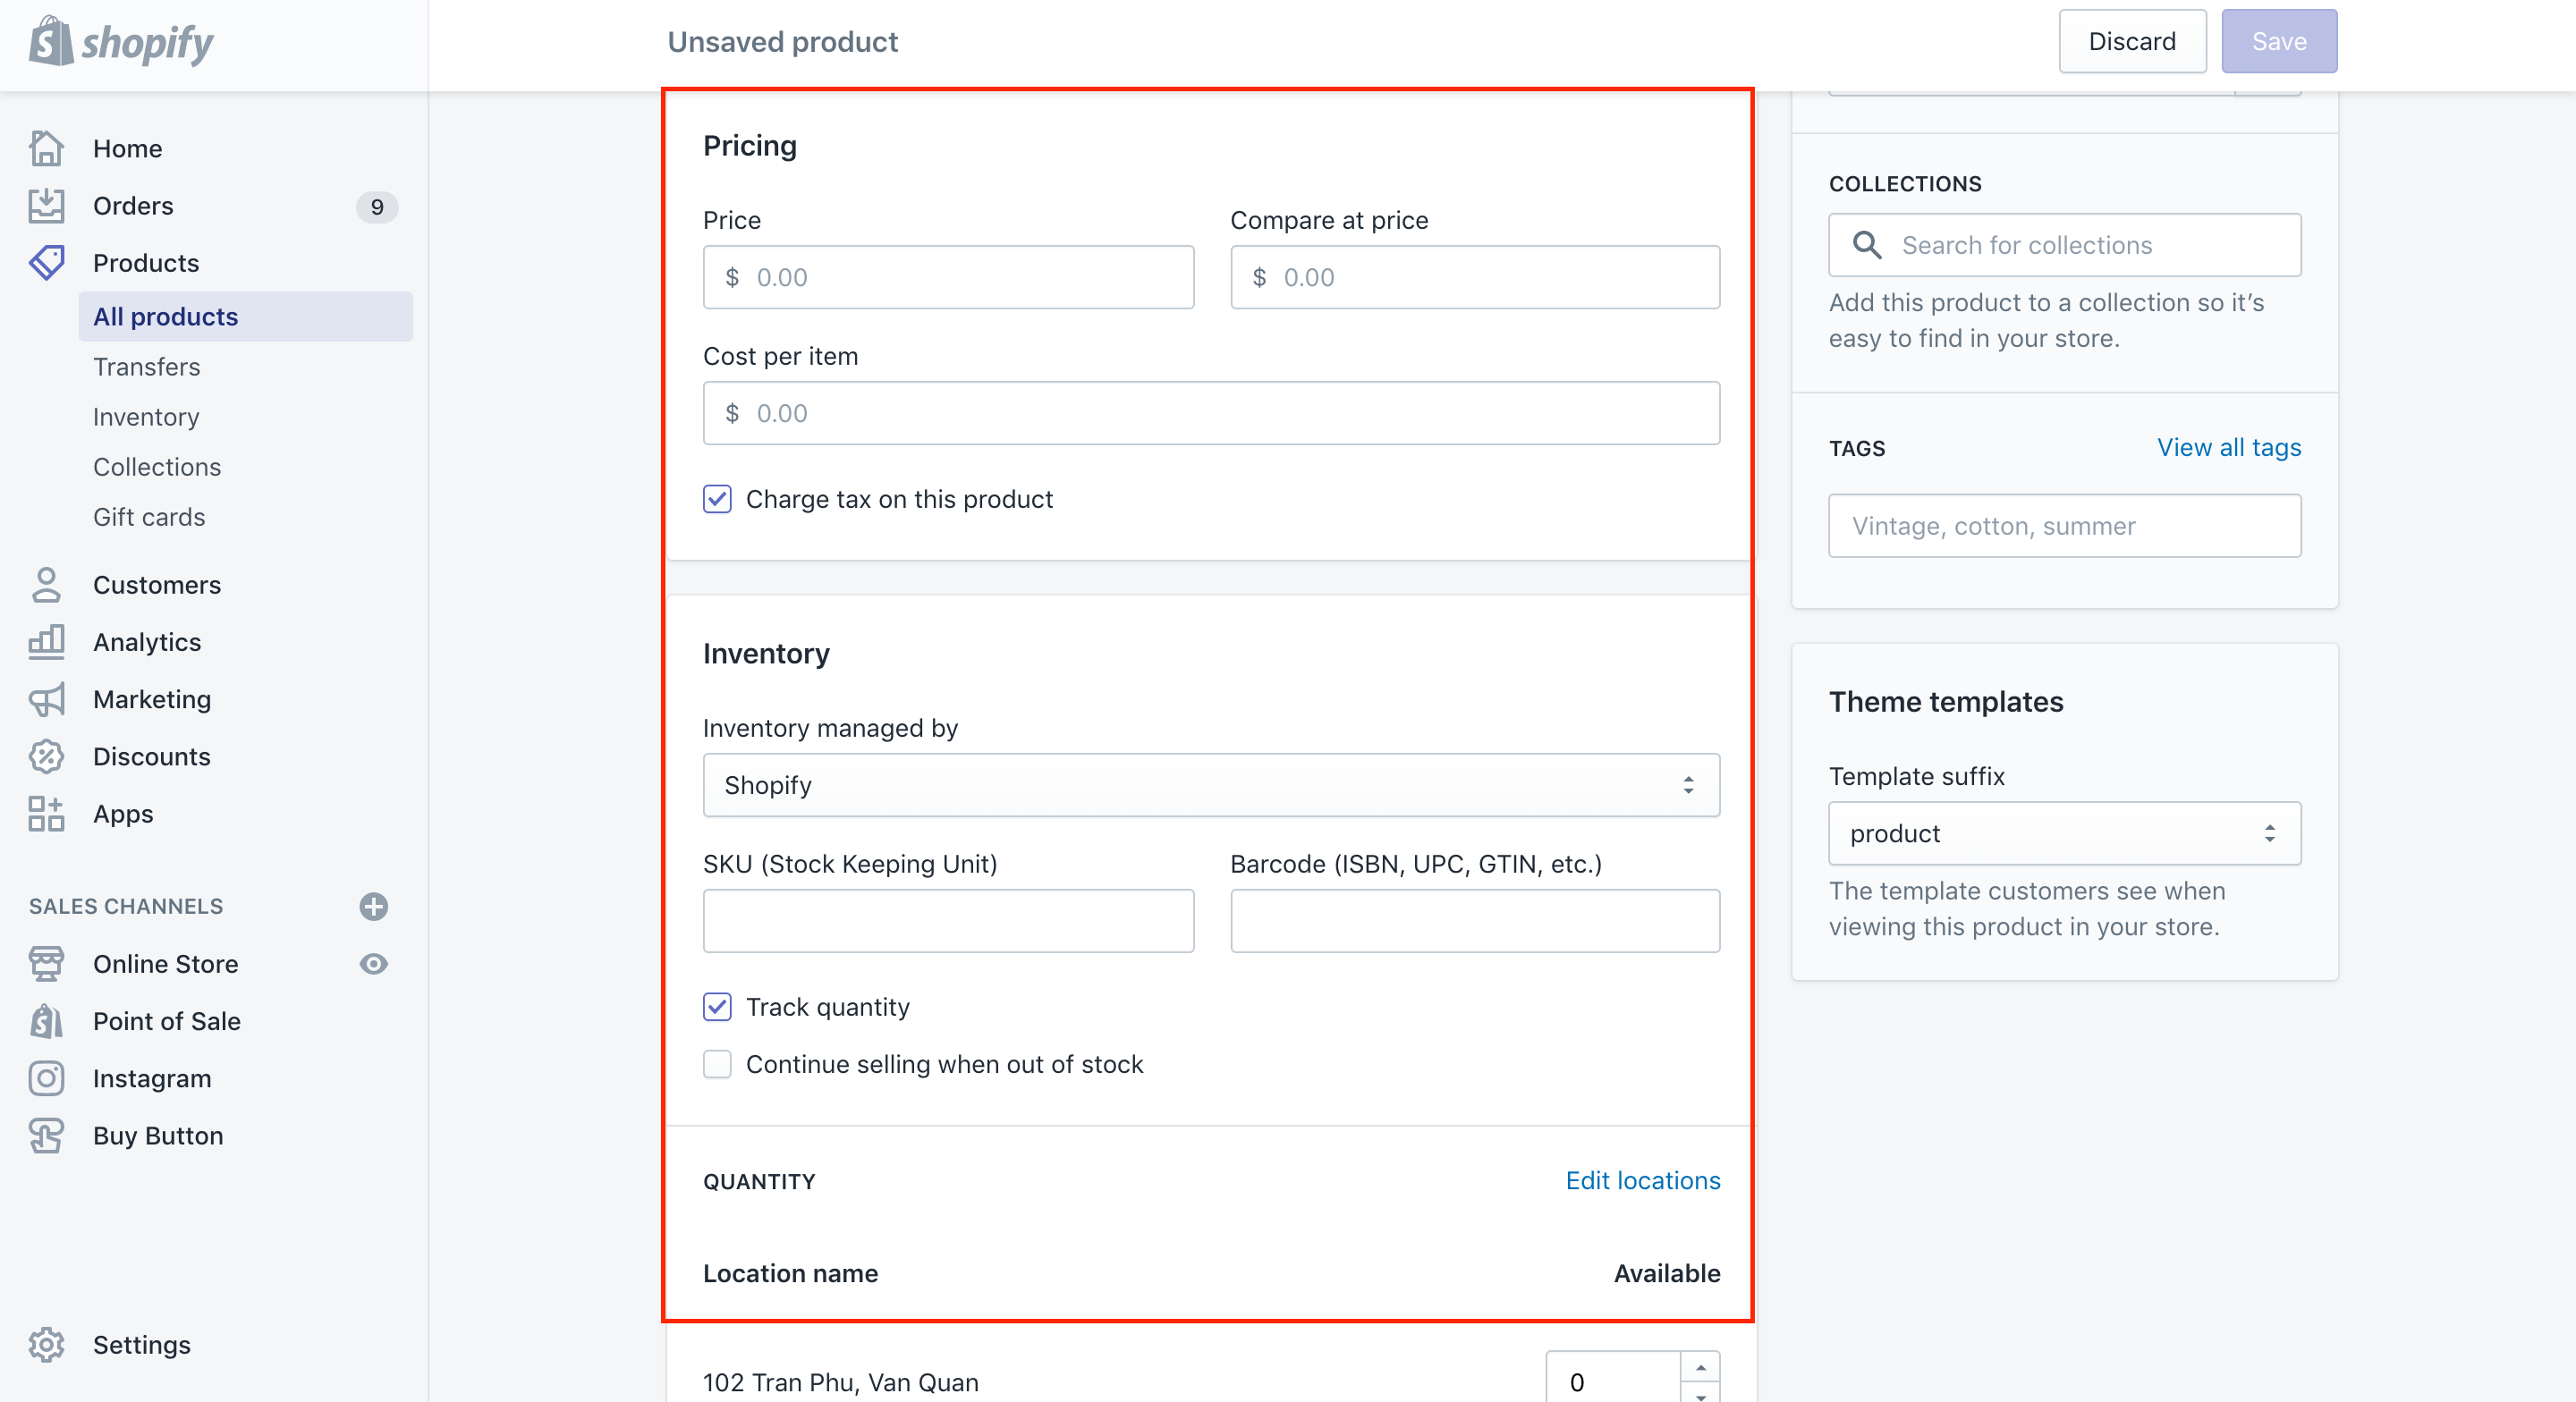
Next, it is time for you to provide your customers with your product’s information by filling in their title, description, and prices.
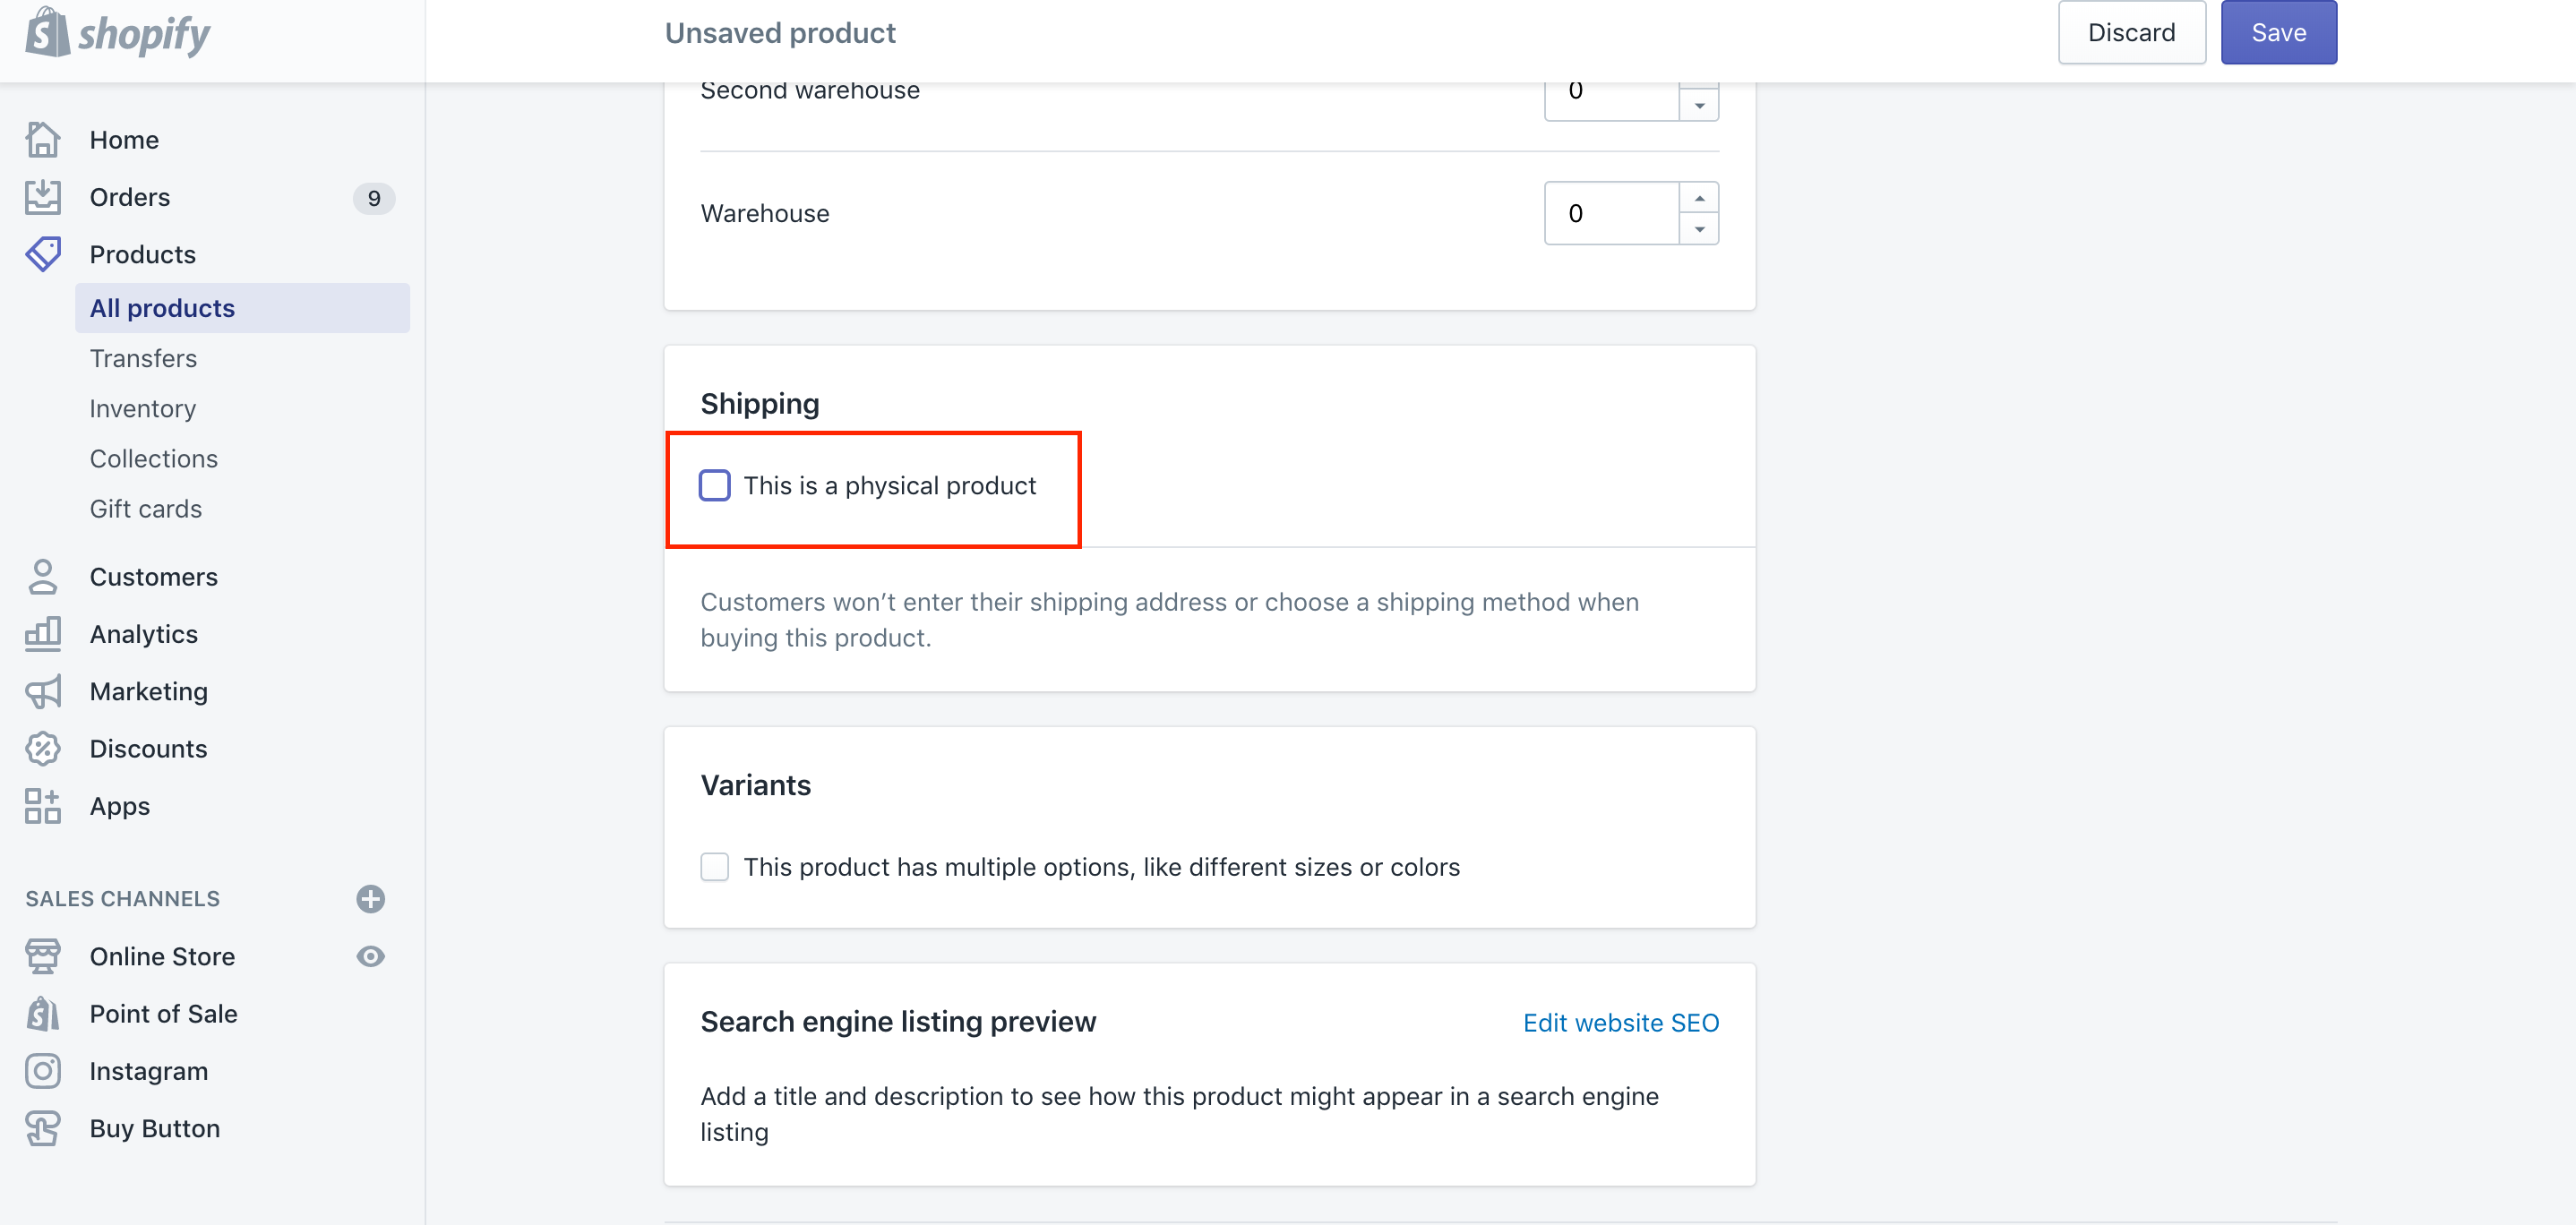
Step 4: Uncheck the box located next to This is a physical product.
To continue, you are able to uncheck the box located to This is a physical product under the Shipping heading.
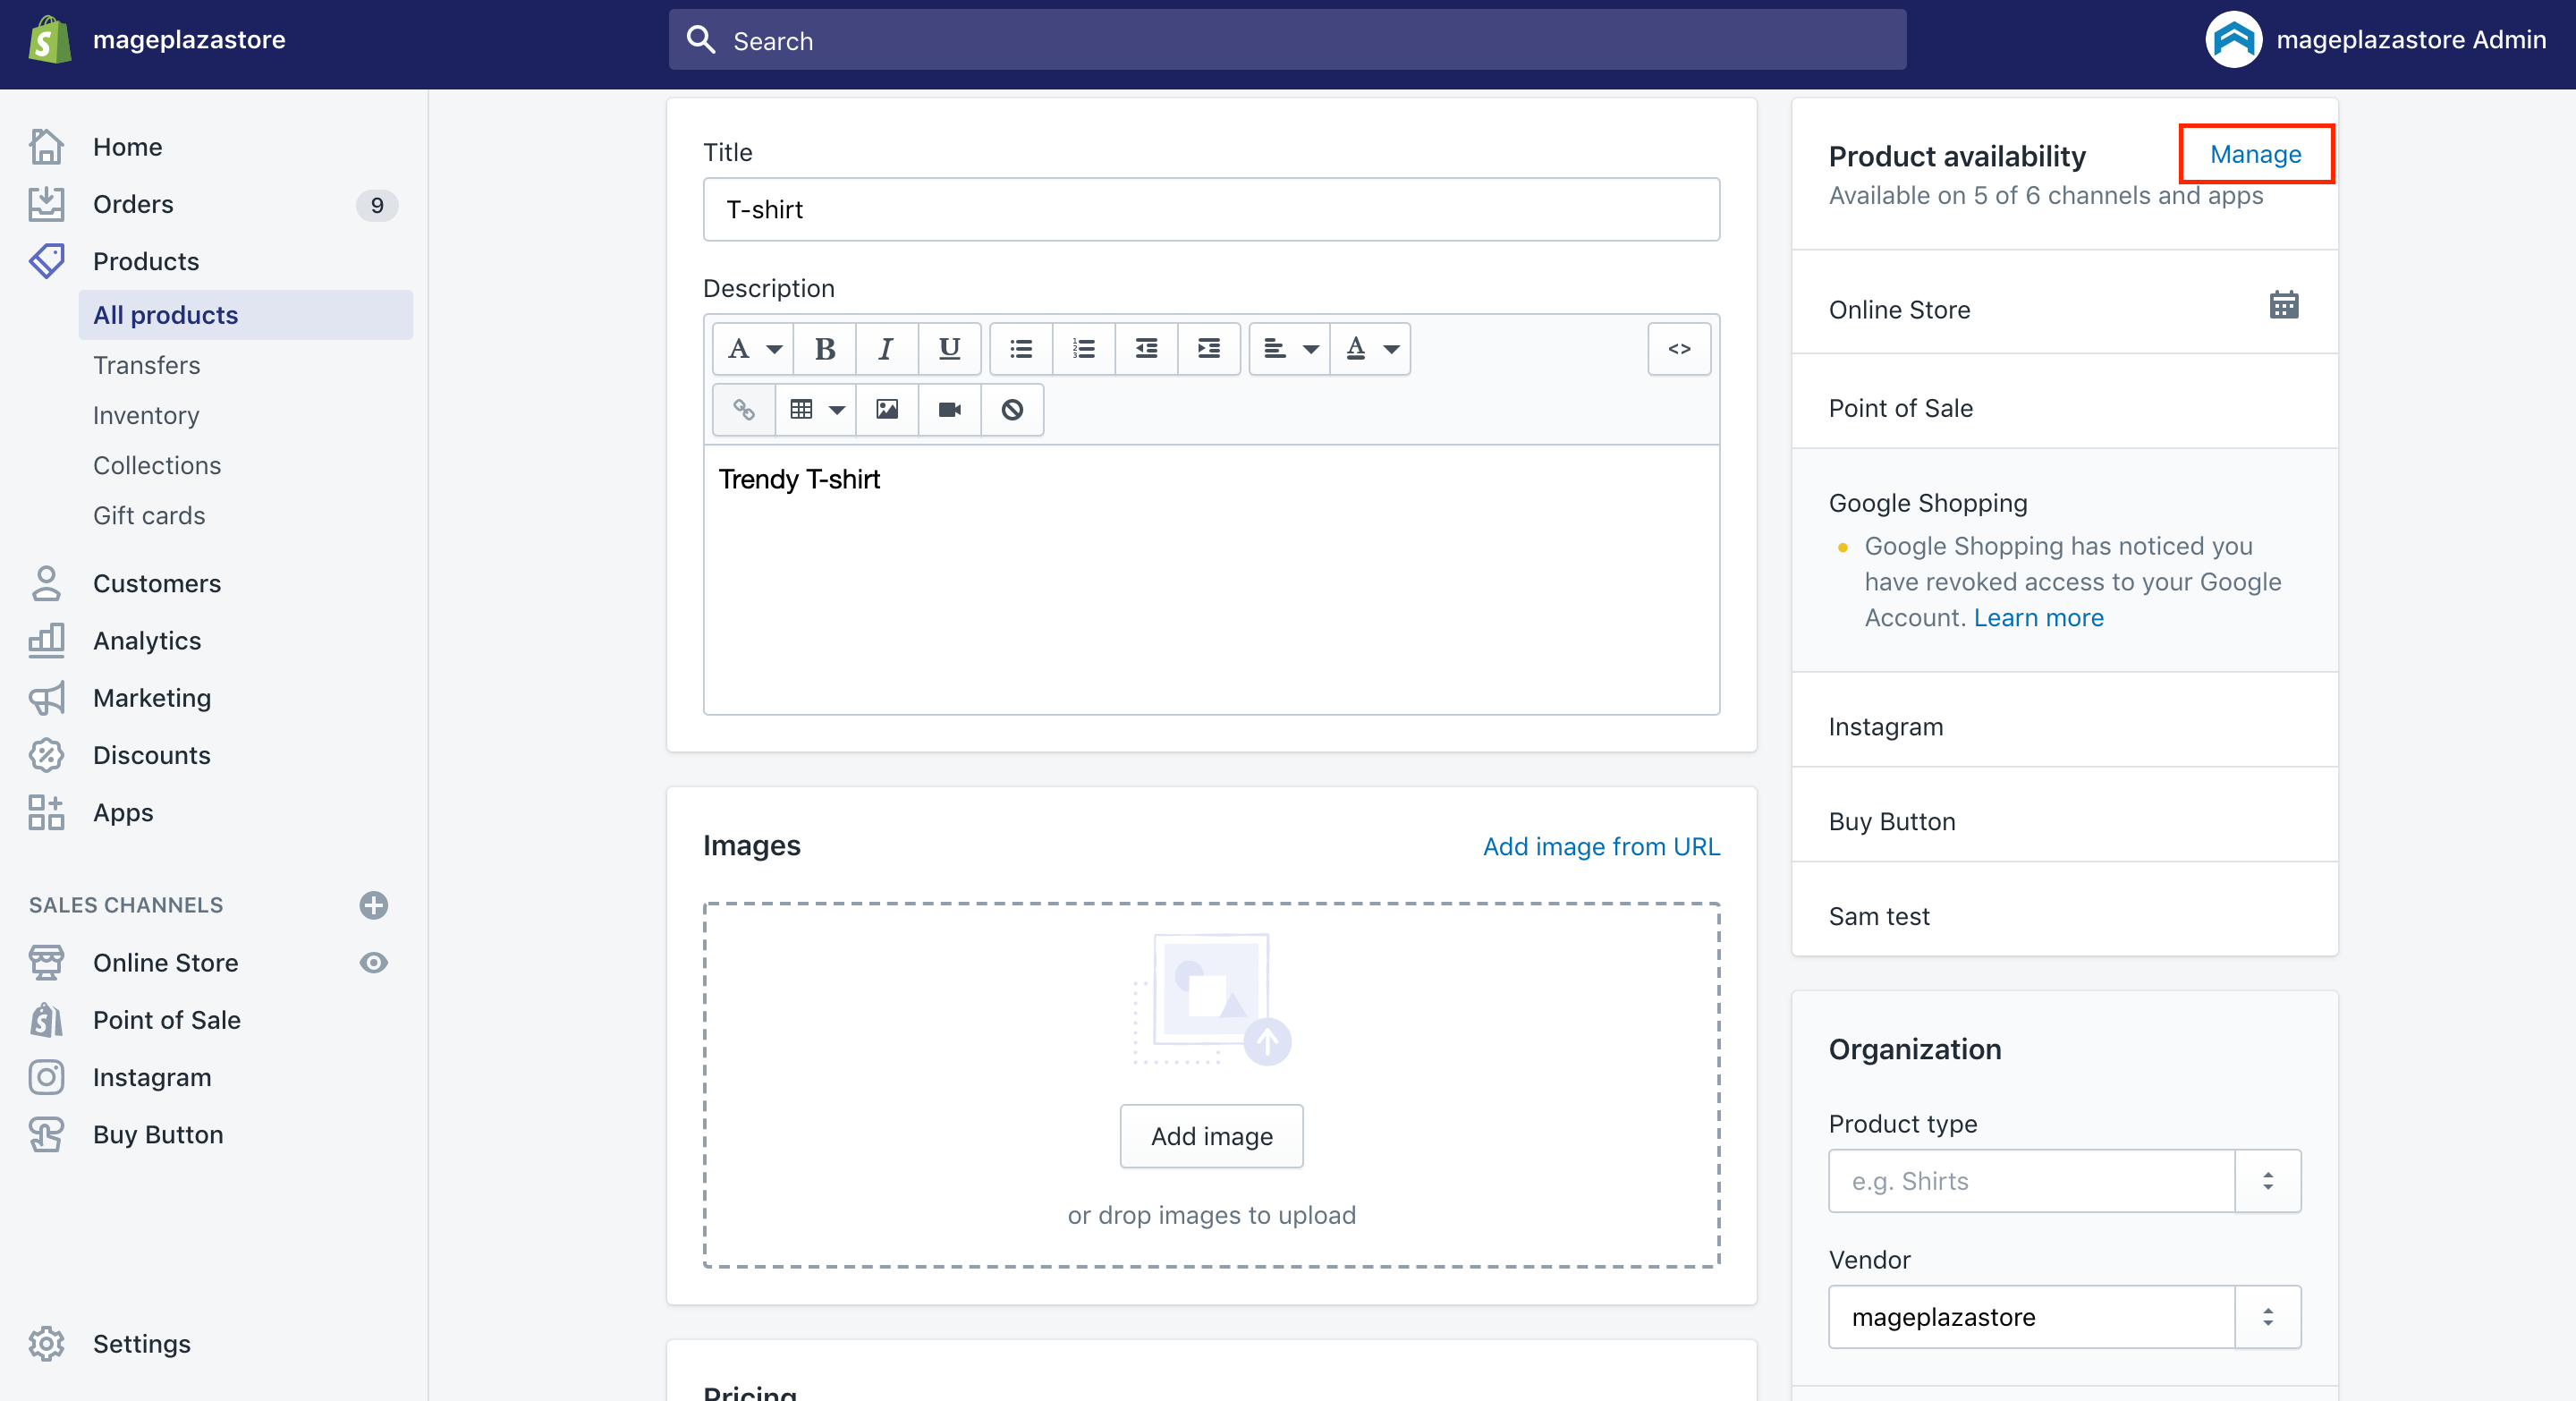
Step 5: Make products unavailable temporarily
In case you wish to make products temporarily unavailable until the addition of digital attachment, click on Manage, then uncheck the boxes beside your sales channels before tapping Done.
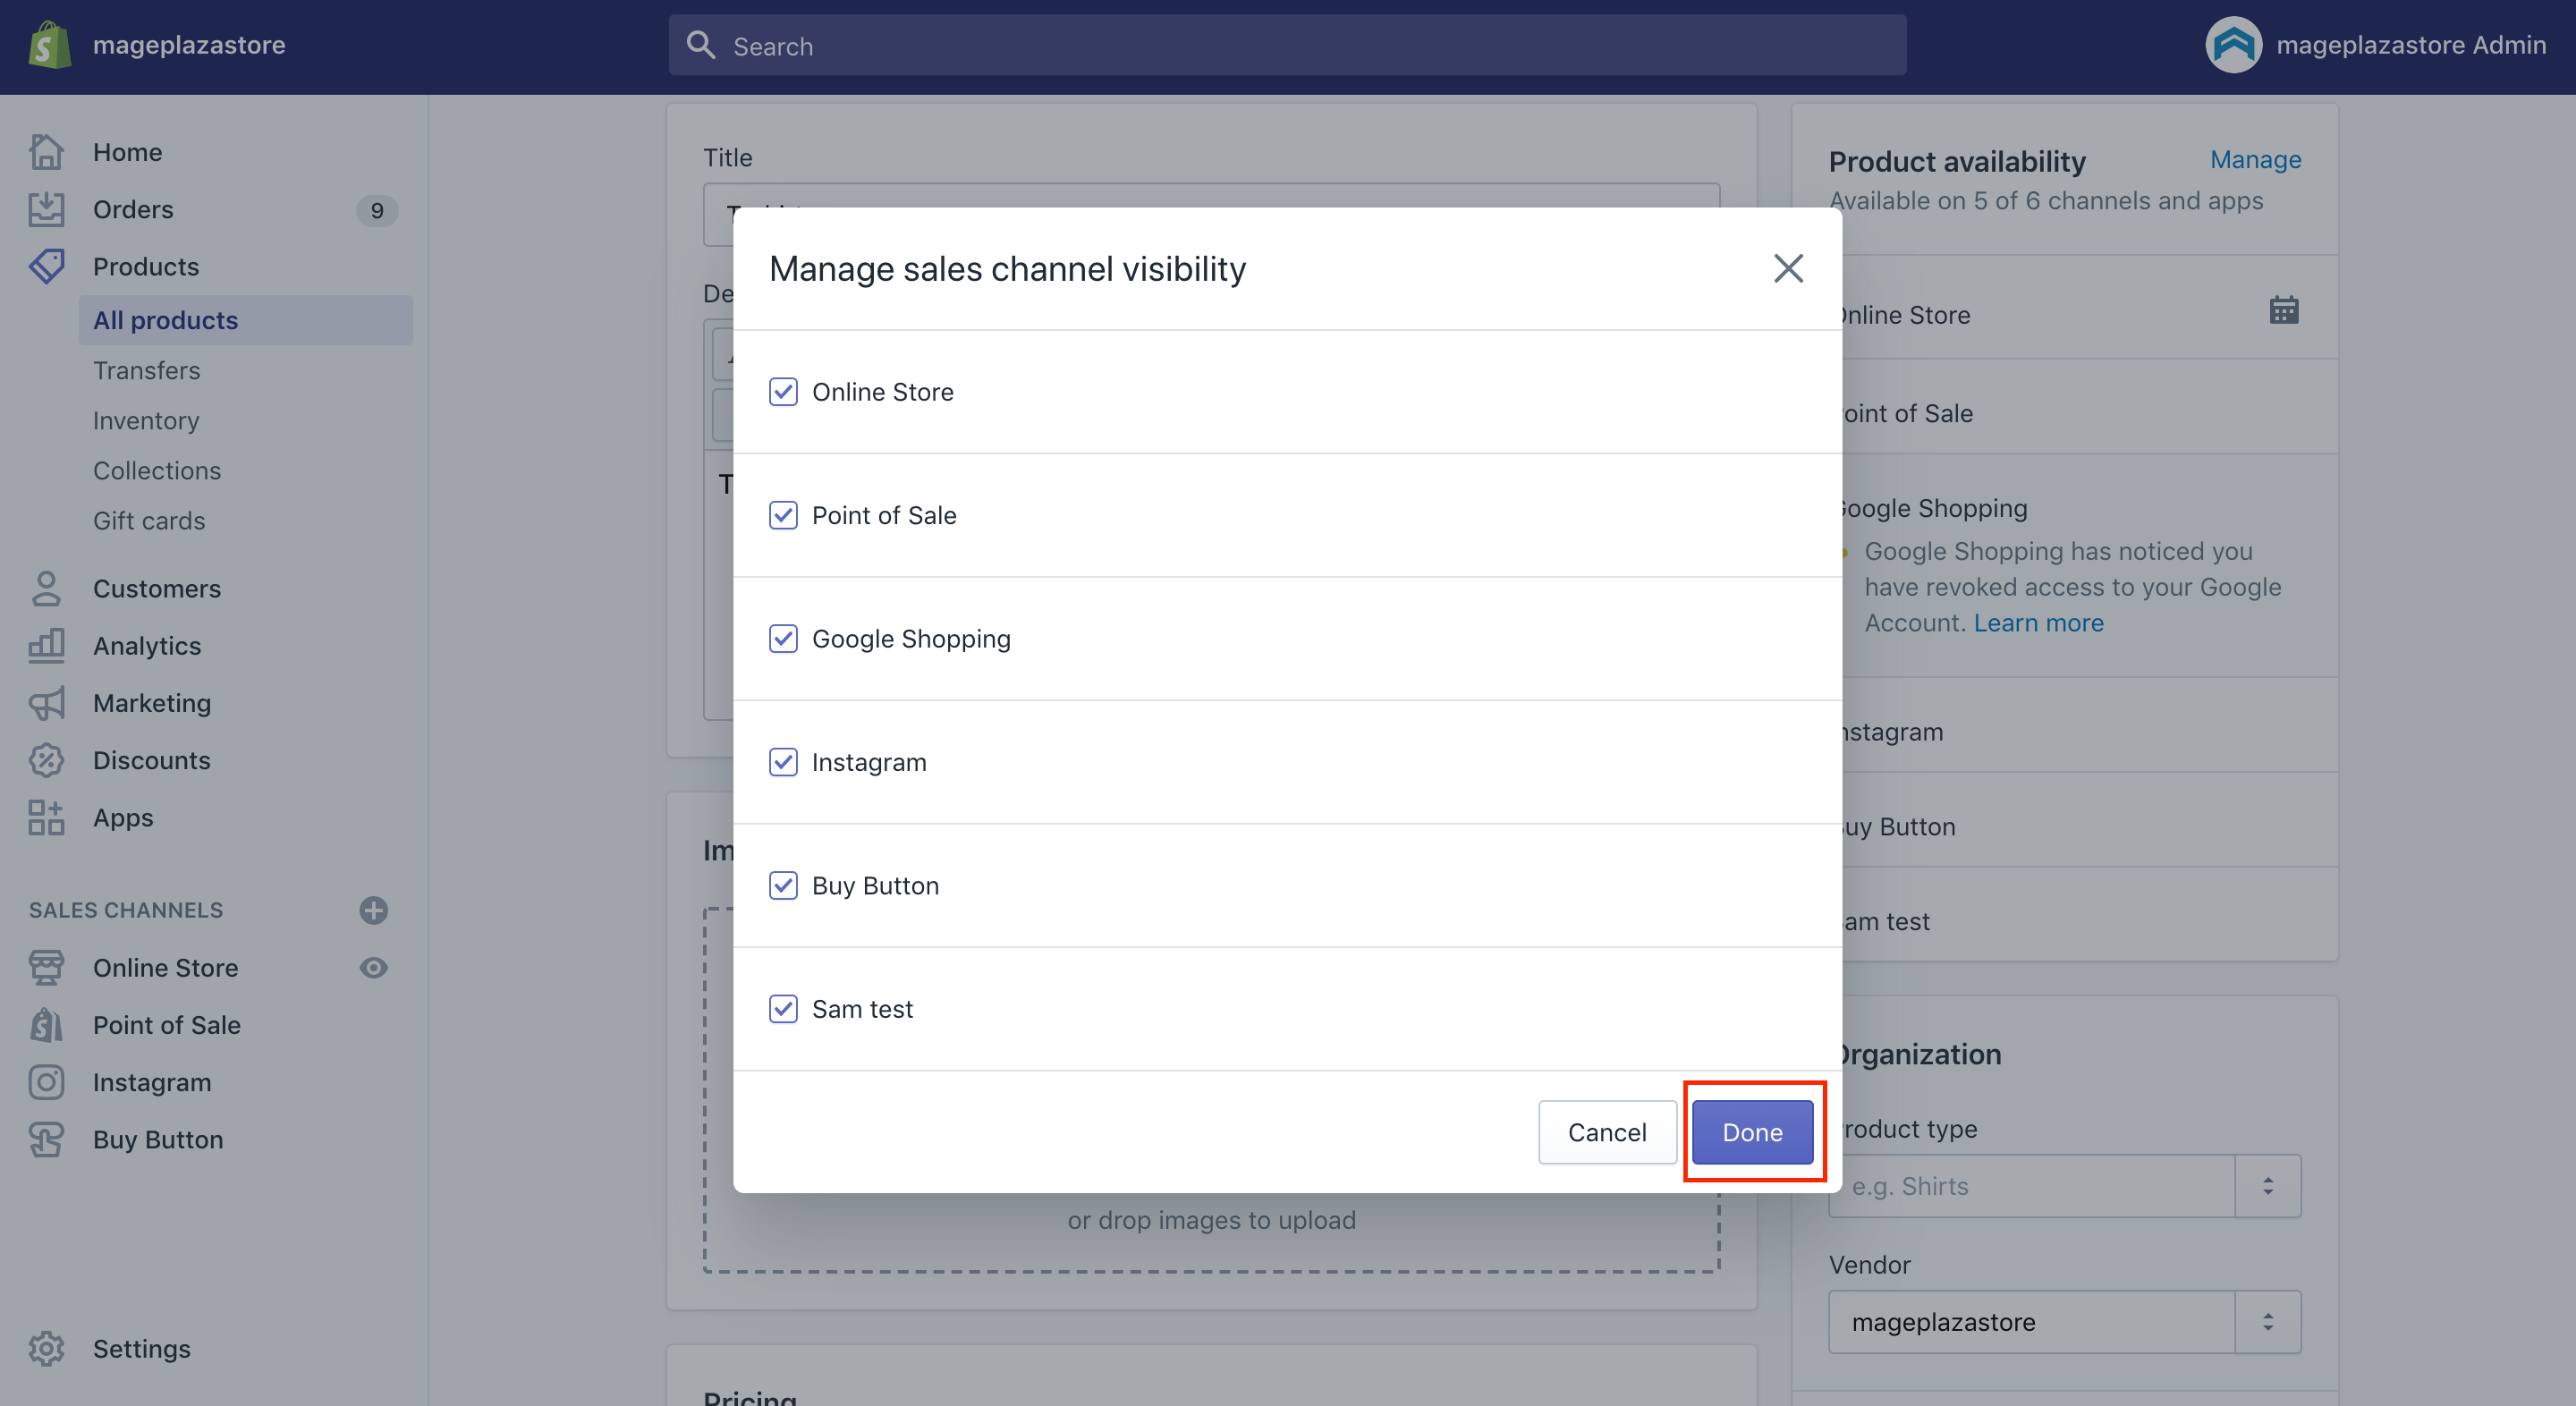
Step 6: Opt for Save product.
In this step, you can opt for Save product.
Step 7: Choose More actions
Choose More actions under the product title.
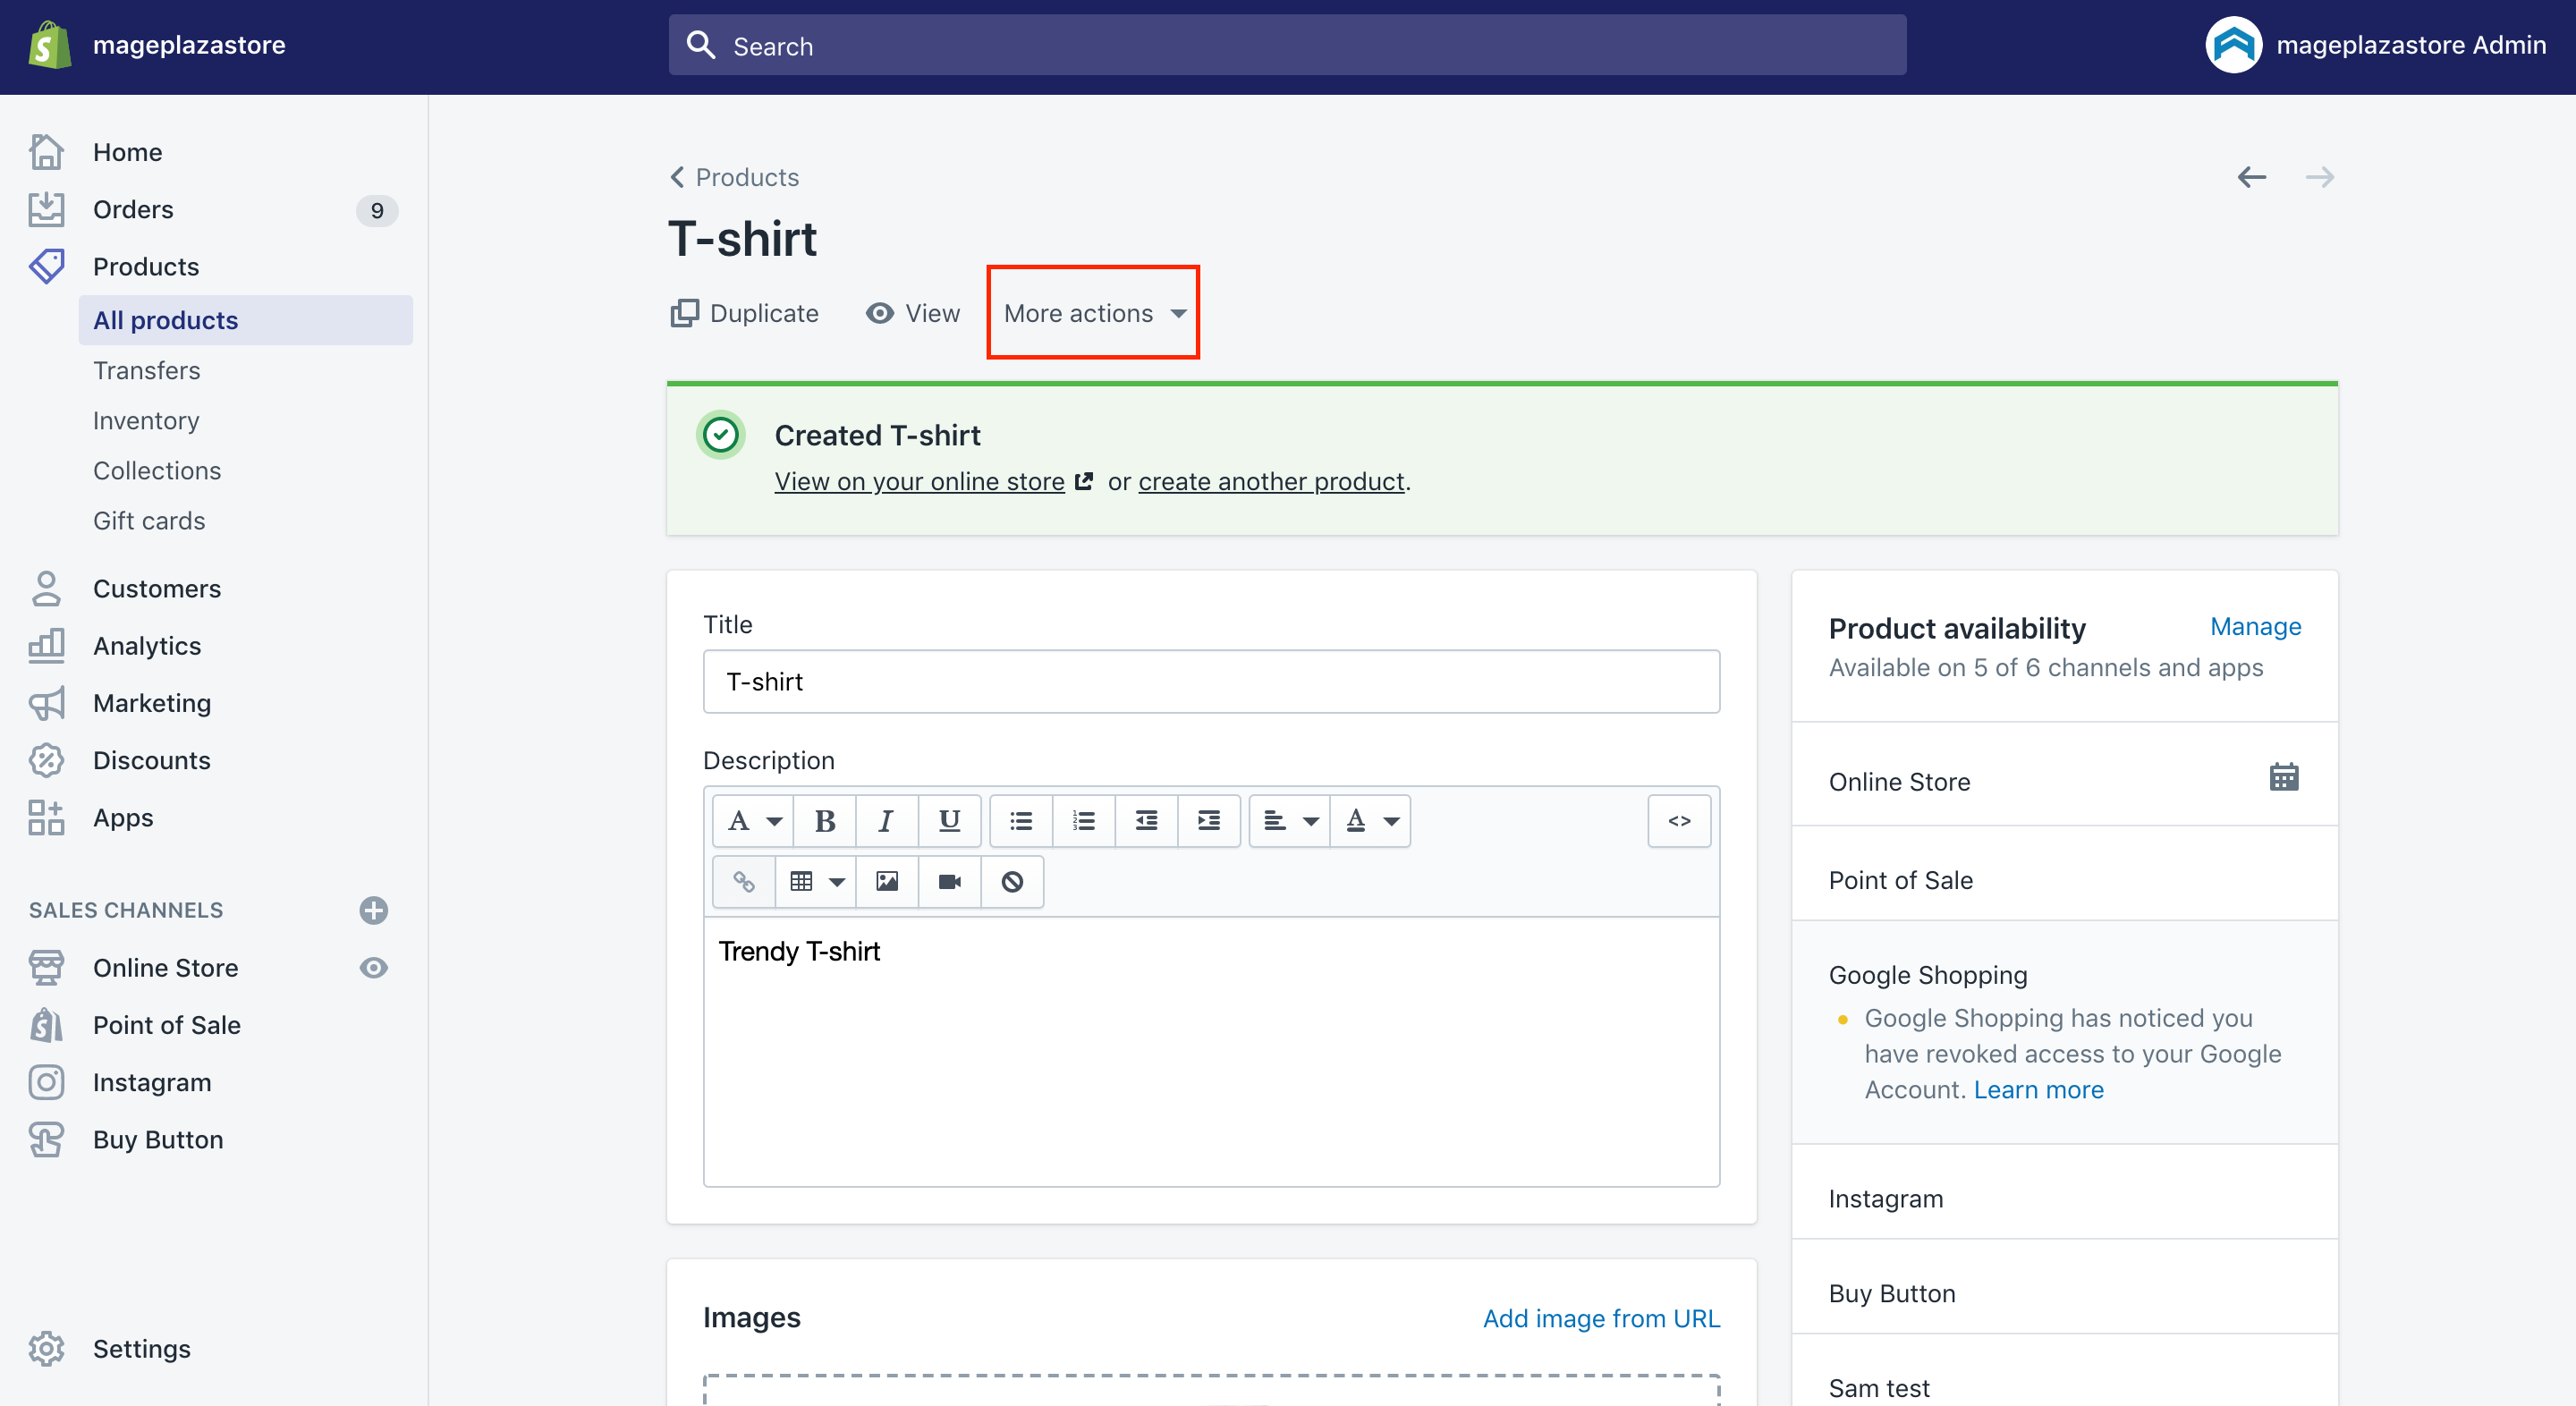
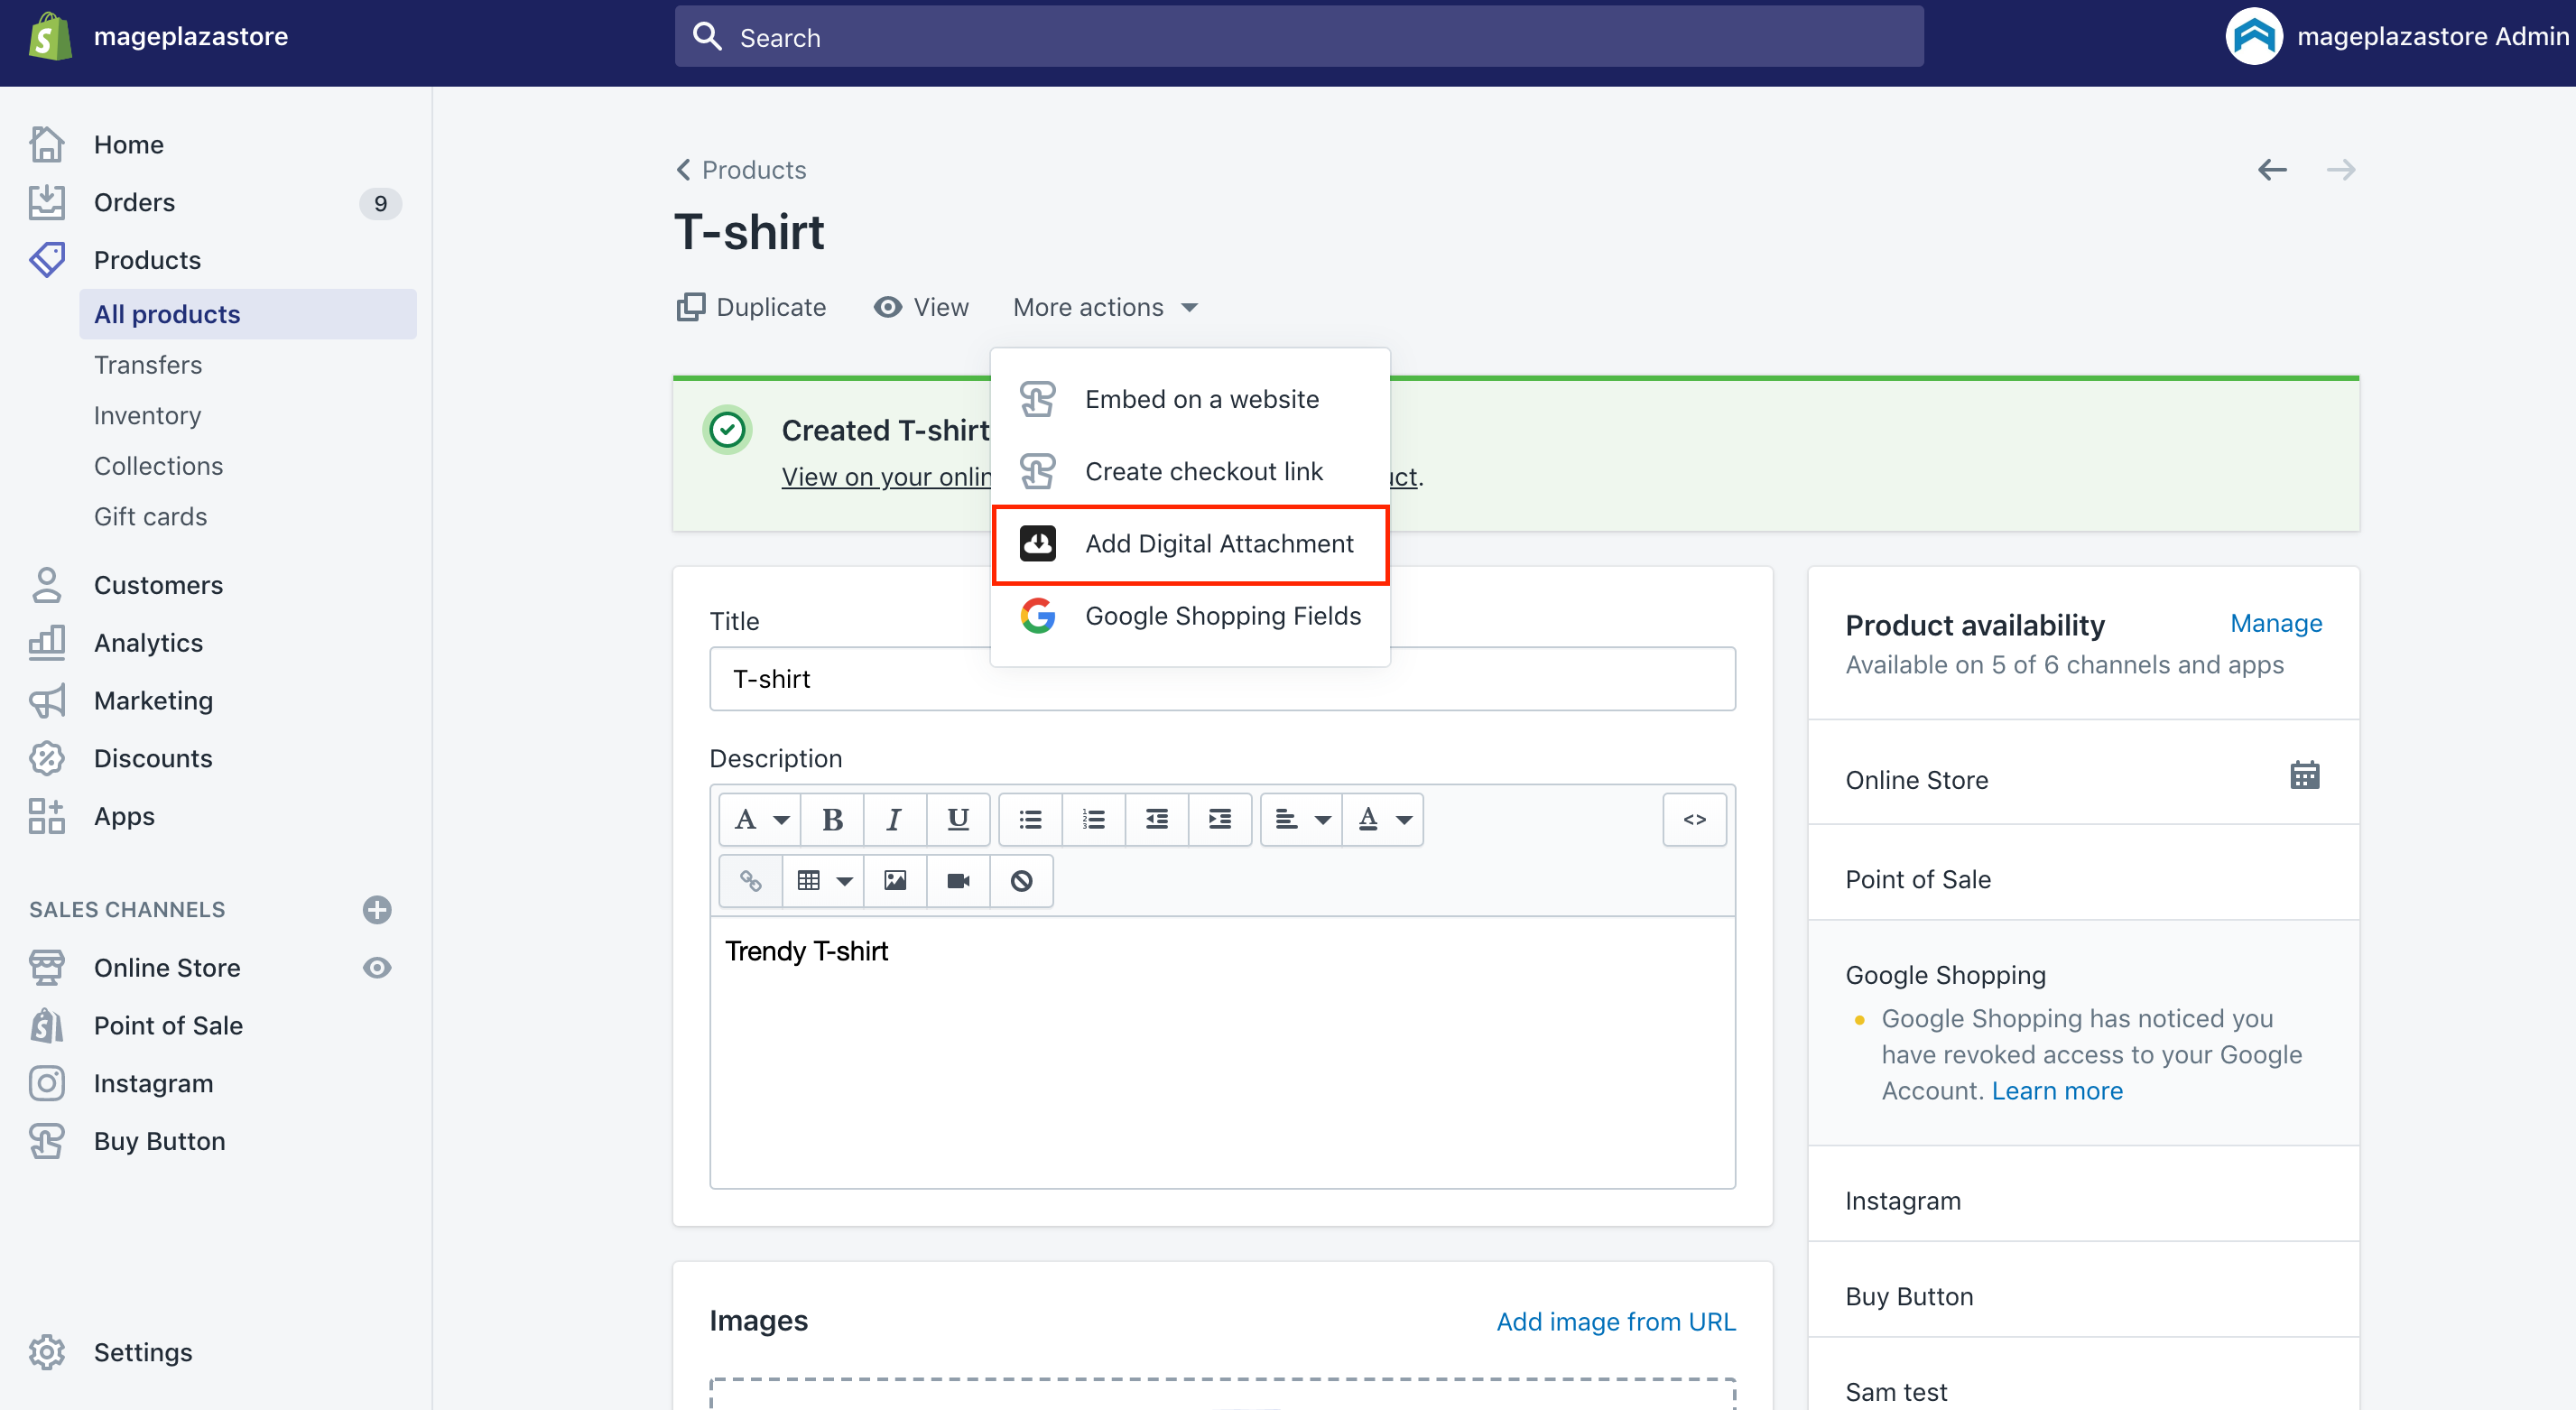
Step 8: Go to Add Digital Attachment
Don’t forget to go to Add Digital Attachment, which diverts you to the Digital Downloads app page.
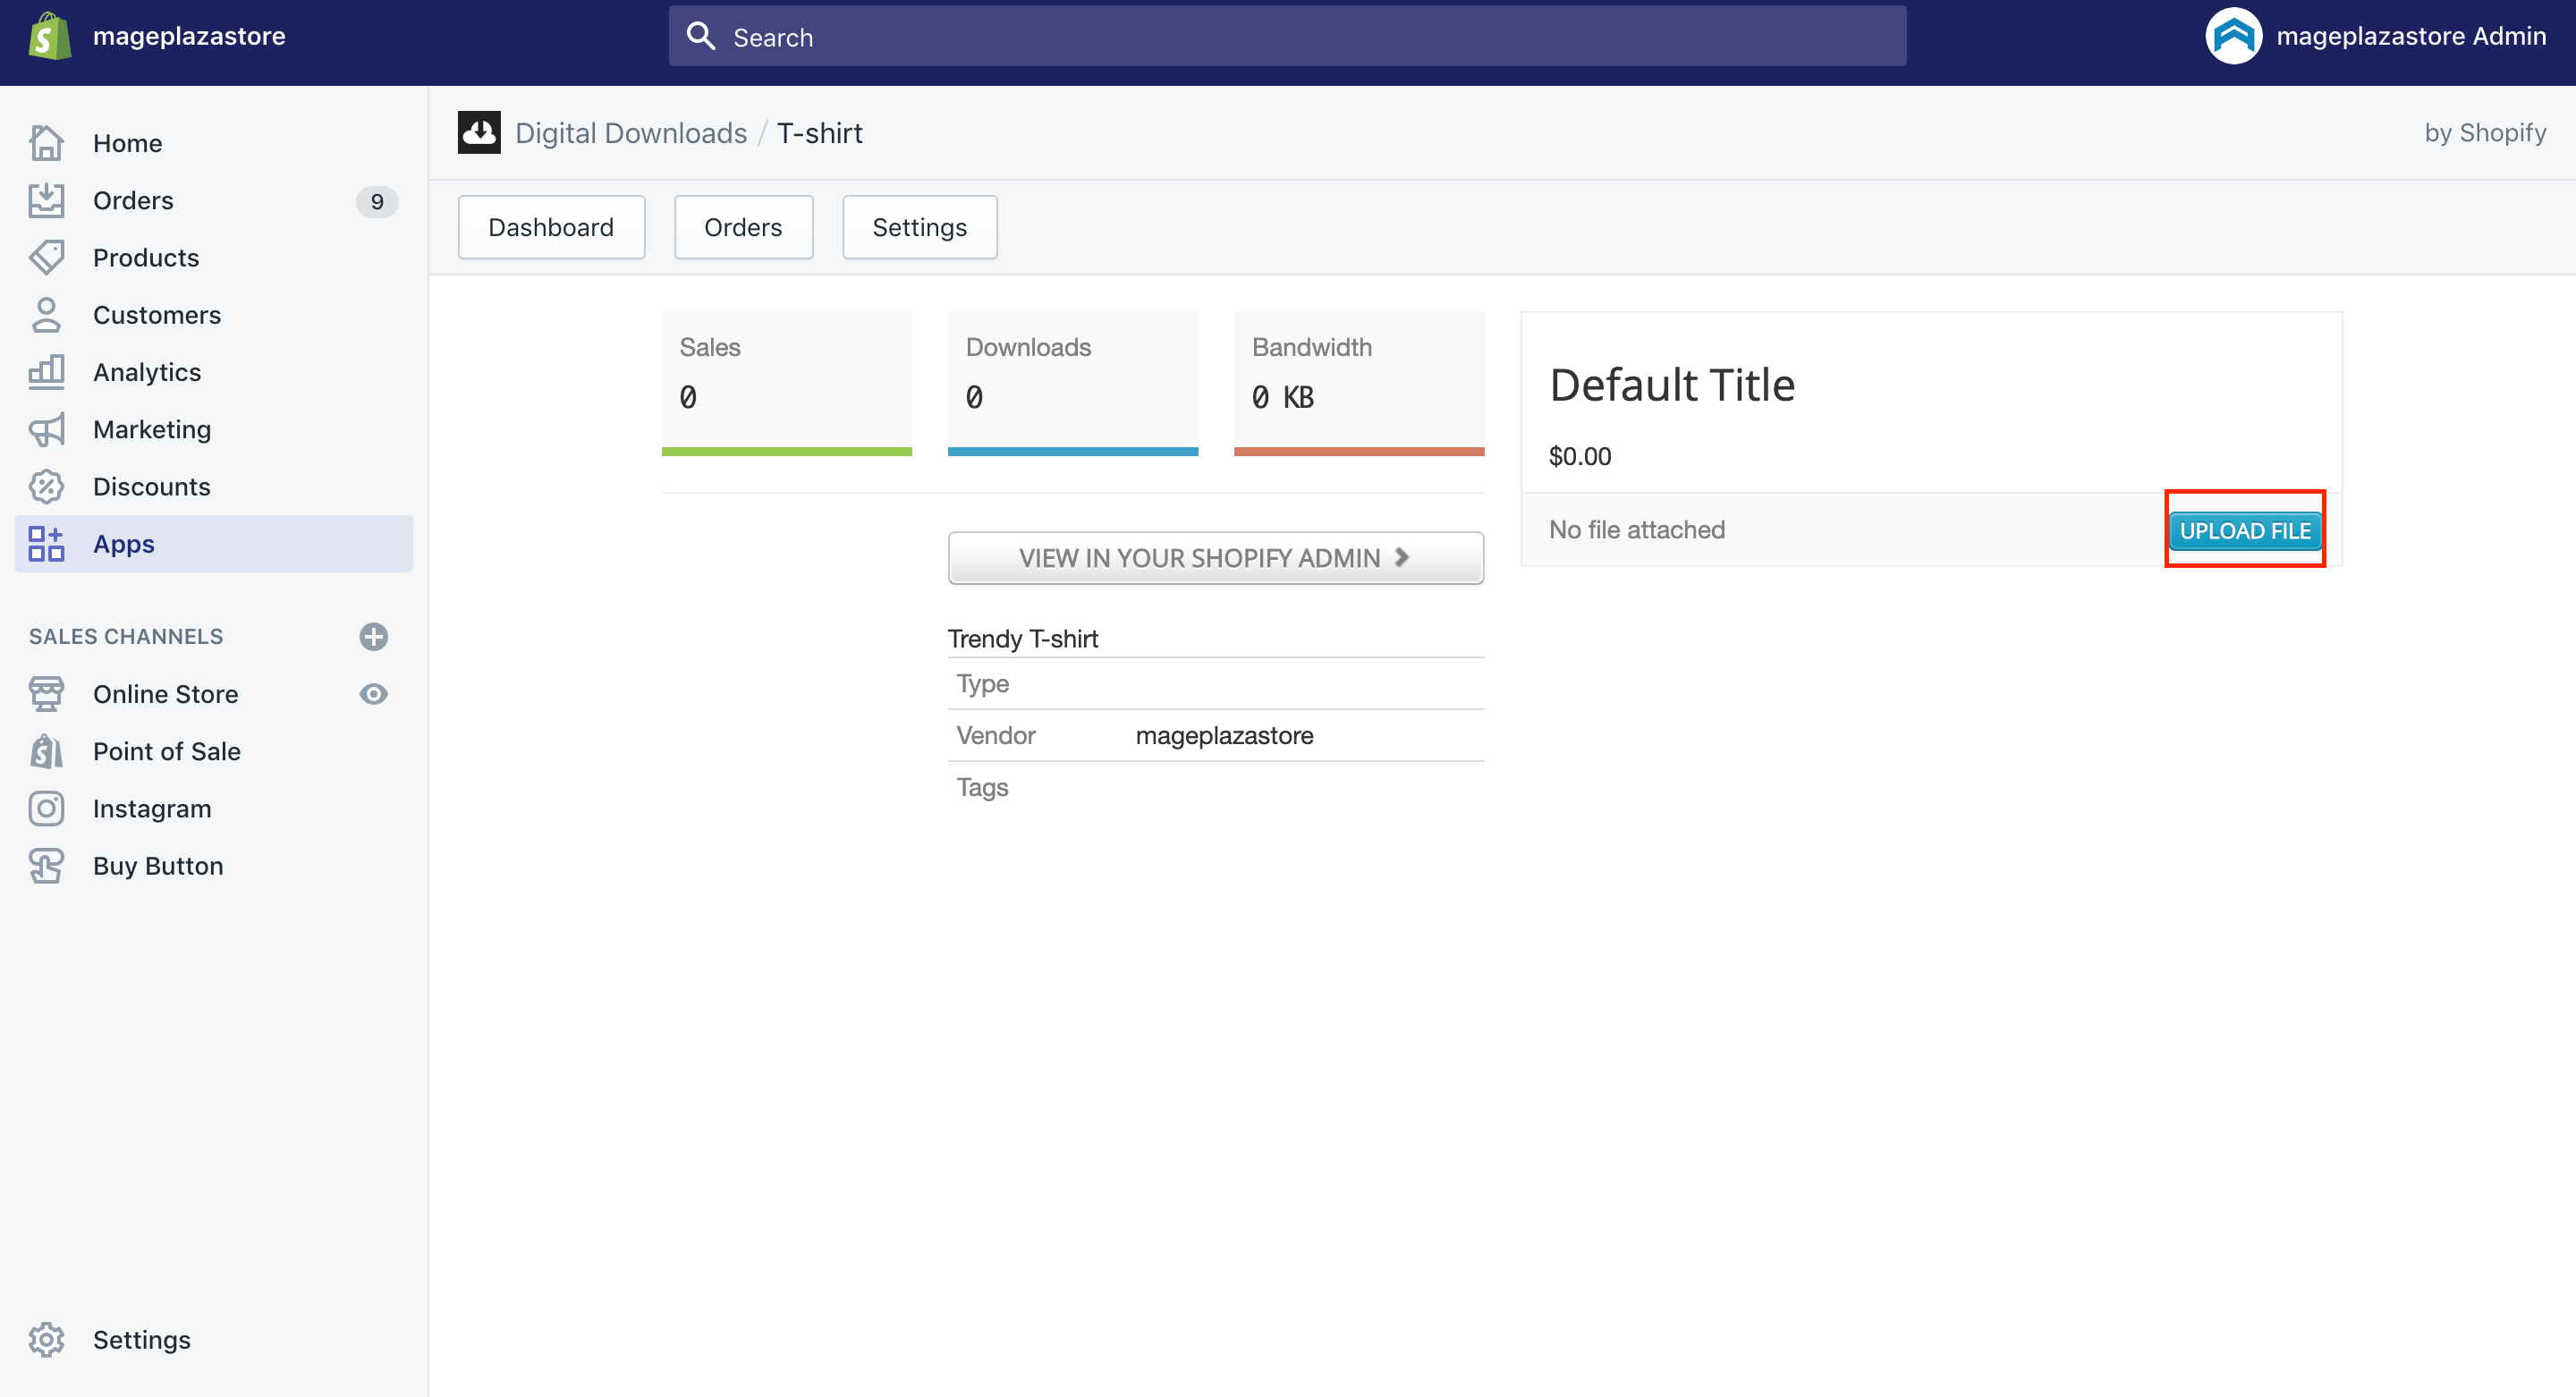
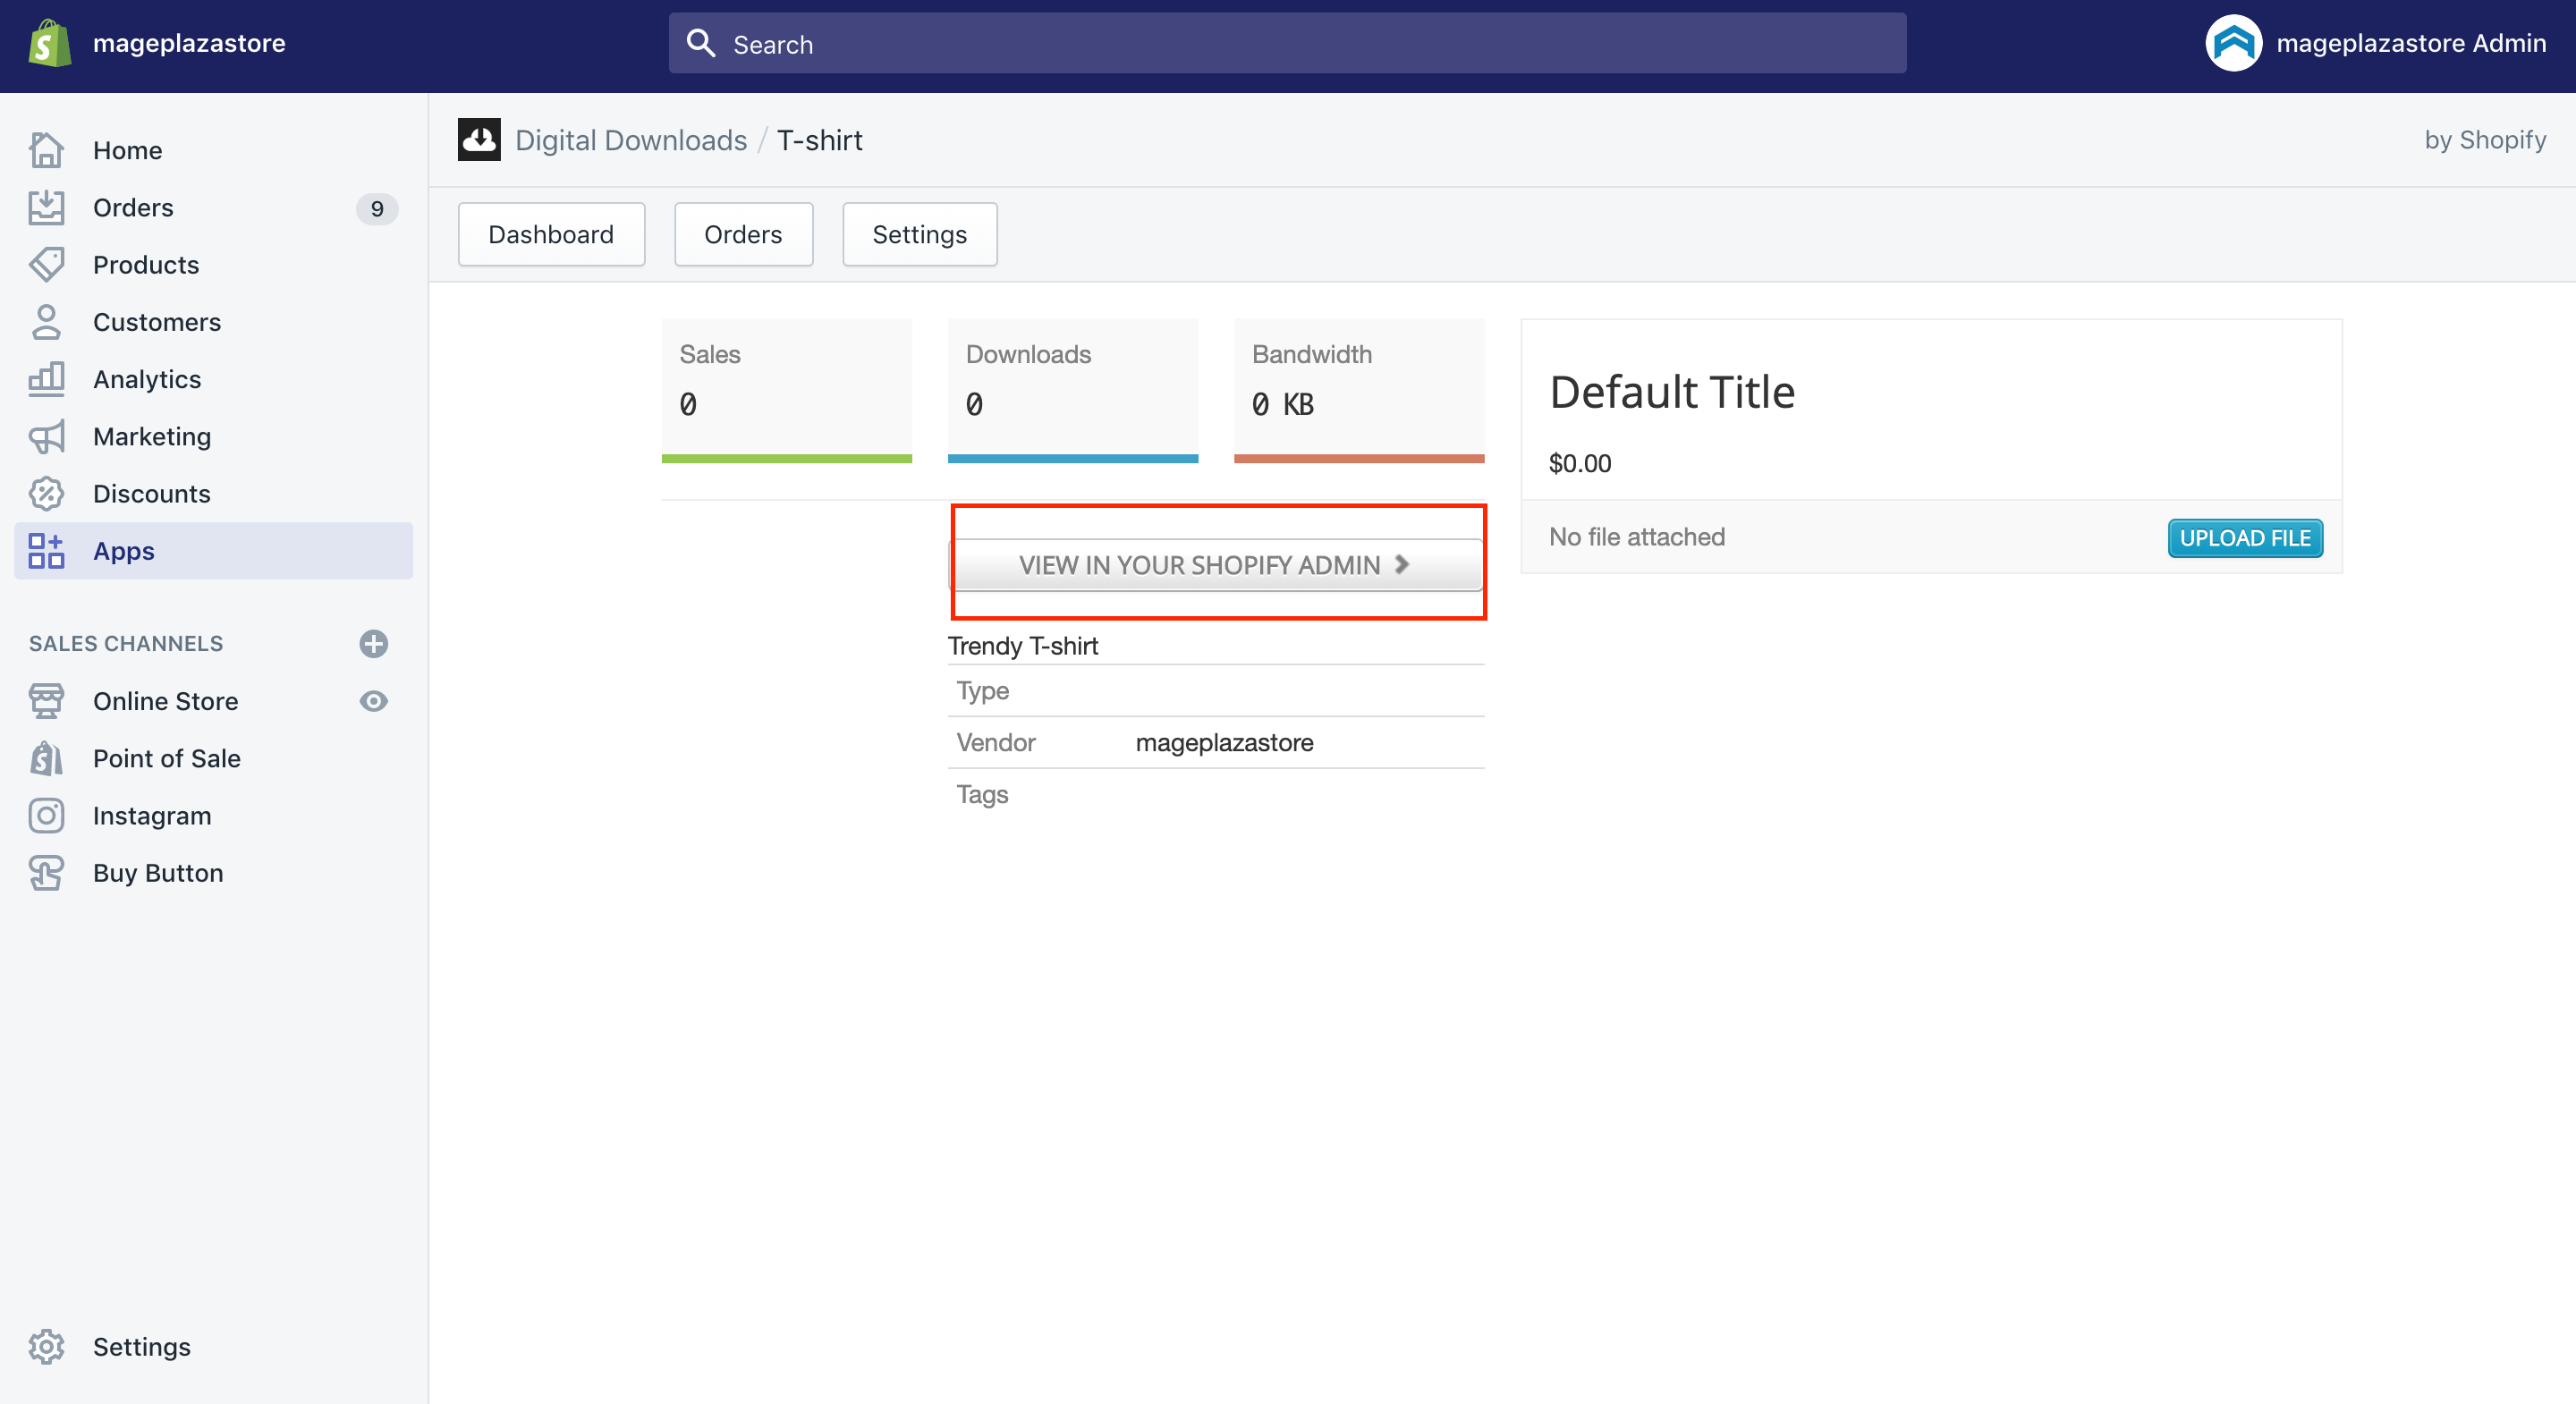
Step 9: Press Upload File
Press Upload File to get your files uploaded and select the file you really want to attach to your current product.
Step 10: Select View In Your Shopify Admin
You can select View In Your Shopify Admin.
Step 11: Make the product available
Finally, you have to make your product that is added to the attachment by doing the following steps:
-
Click
Managesituated next toSales channels. -
Press the box next to your sales channels where you want your product to be available.
-
Save
Doneto finalize your tasks.


Add a digital file to an existing product
At the same time as generating your digital products, you are able to get a digital download attached to your existing products. In fact, this contains physical items. For instance, in case you are selling your vinyl records, you can apply the Digital Downloads app to attach the MP3 album copy the customers need to download.
As mentioned early, you can only attach one file to each variant. Let’s use a .zip file or other archive file formats that can bundle your files under a filename.
Step 1: Choose Products
The first step is choosing Products from your Shopify dashboard.
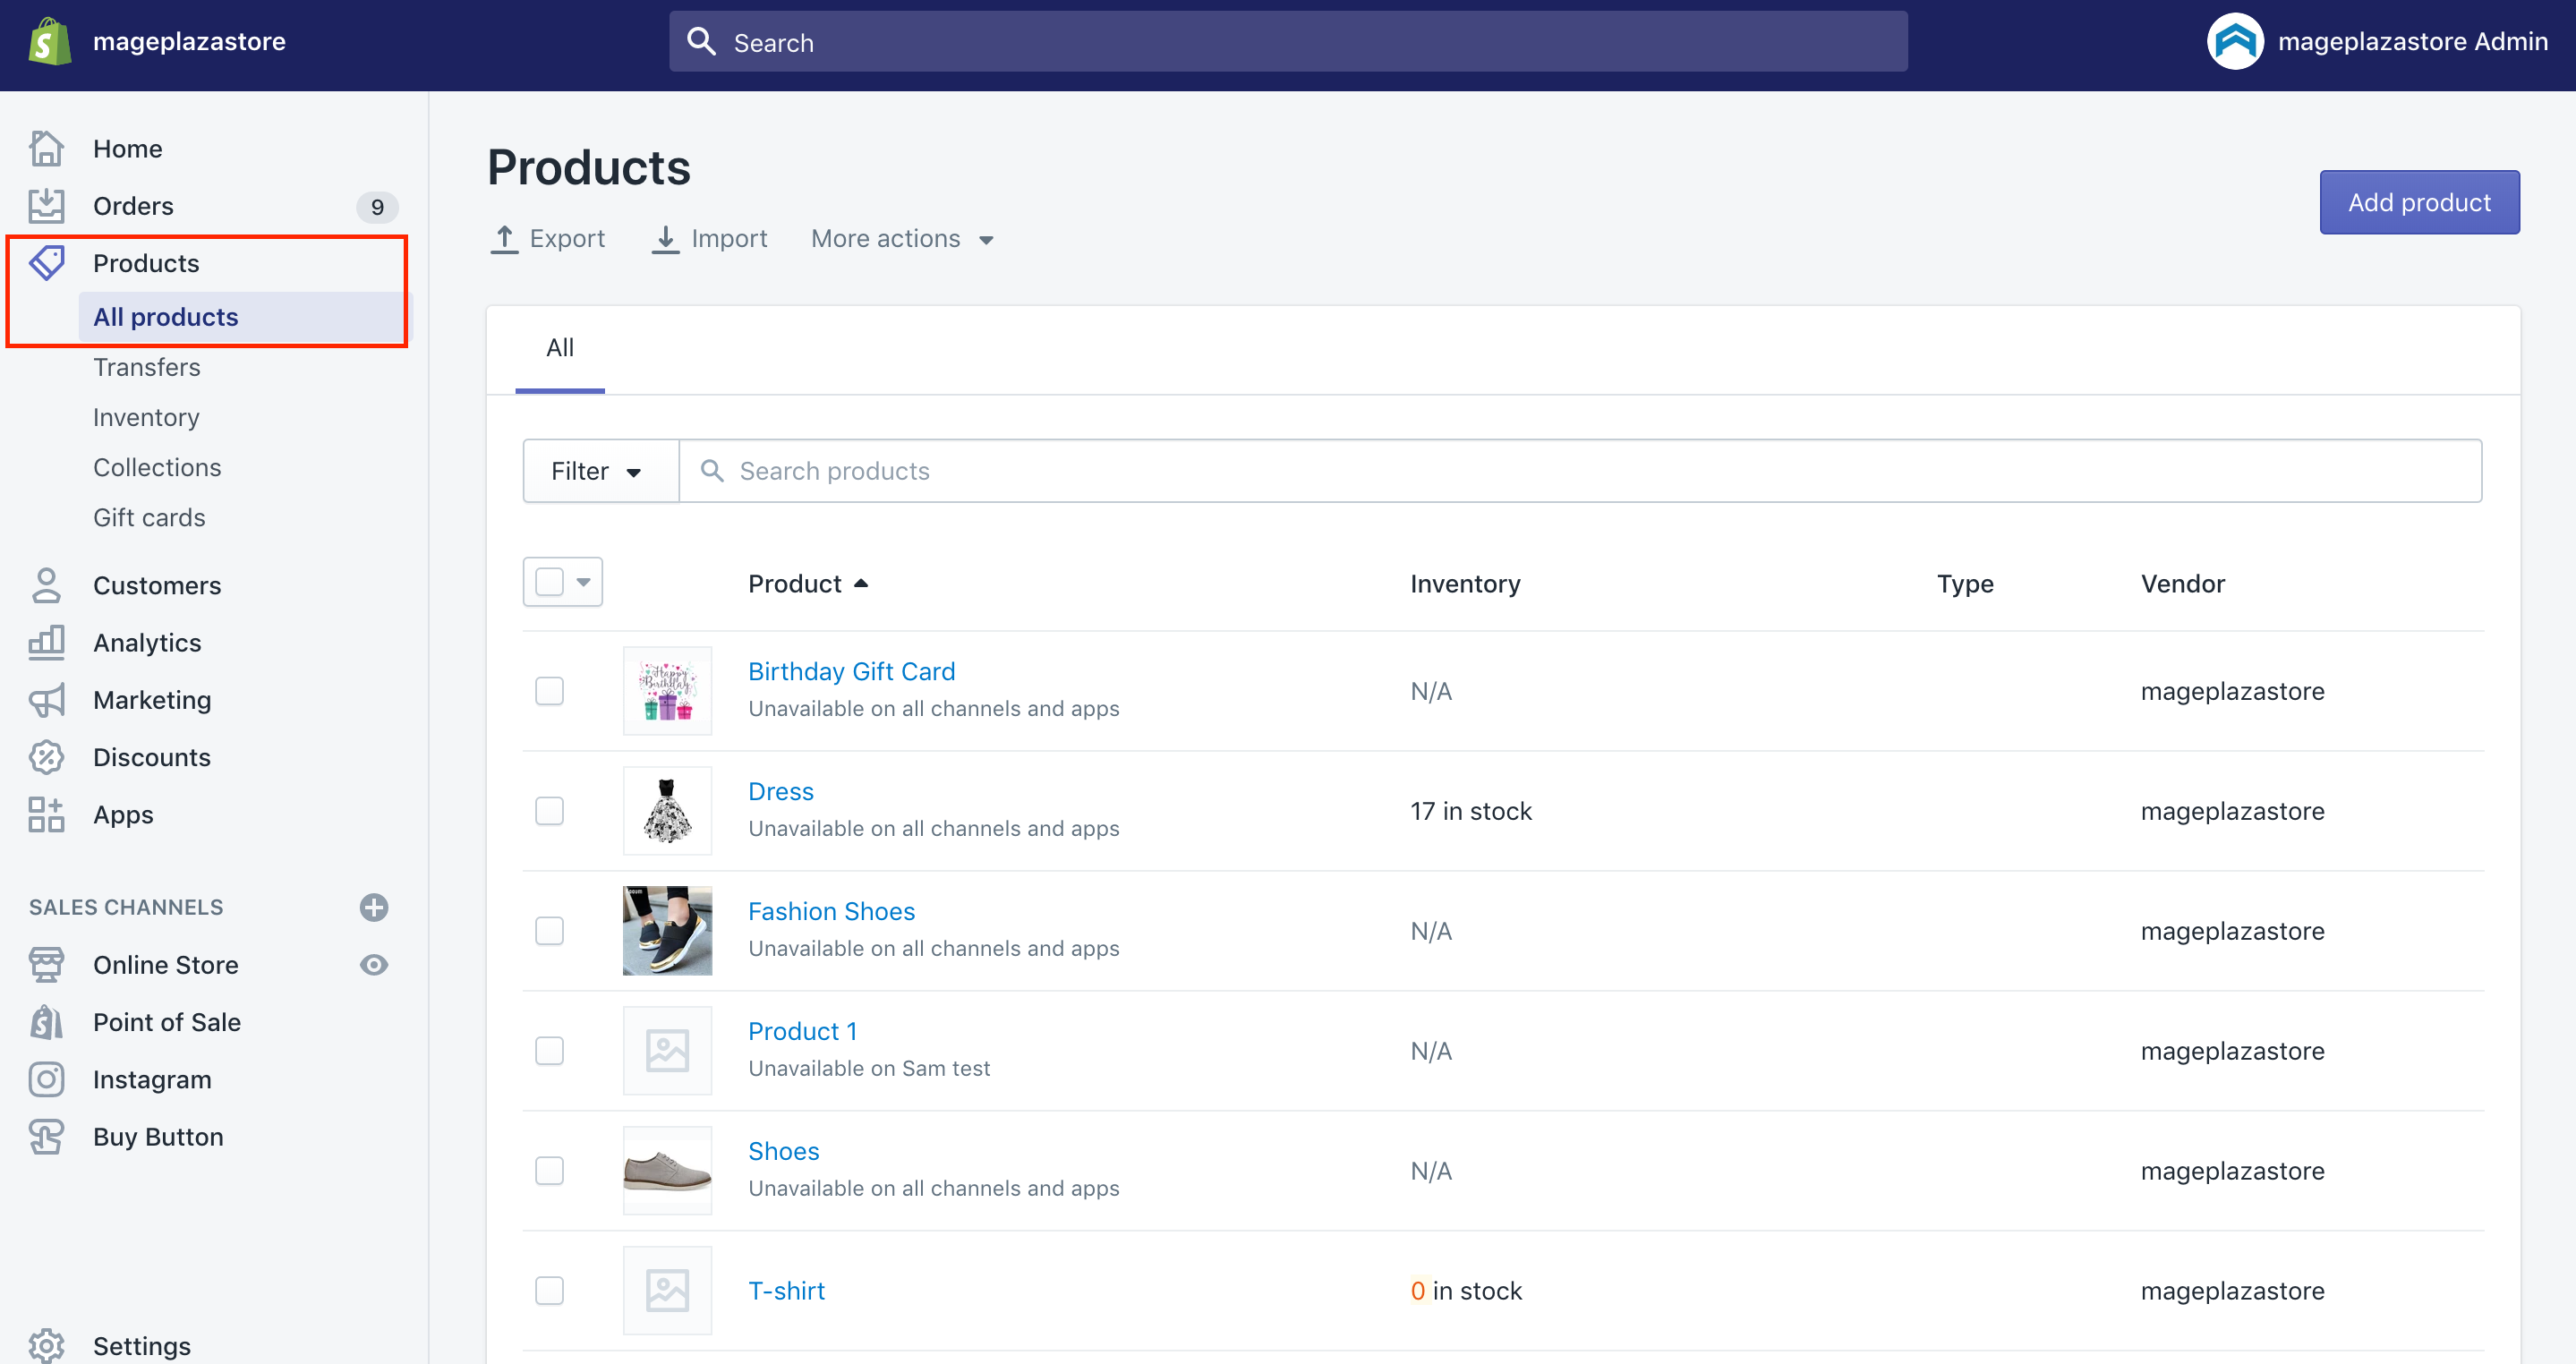
Step 2: Select product’s title
Next, you can select your product’s titles that you have a desire to add the attachment to it.
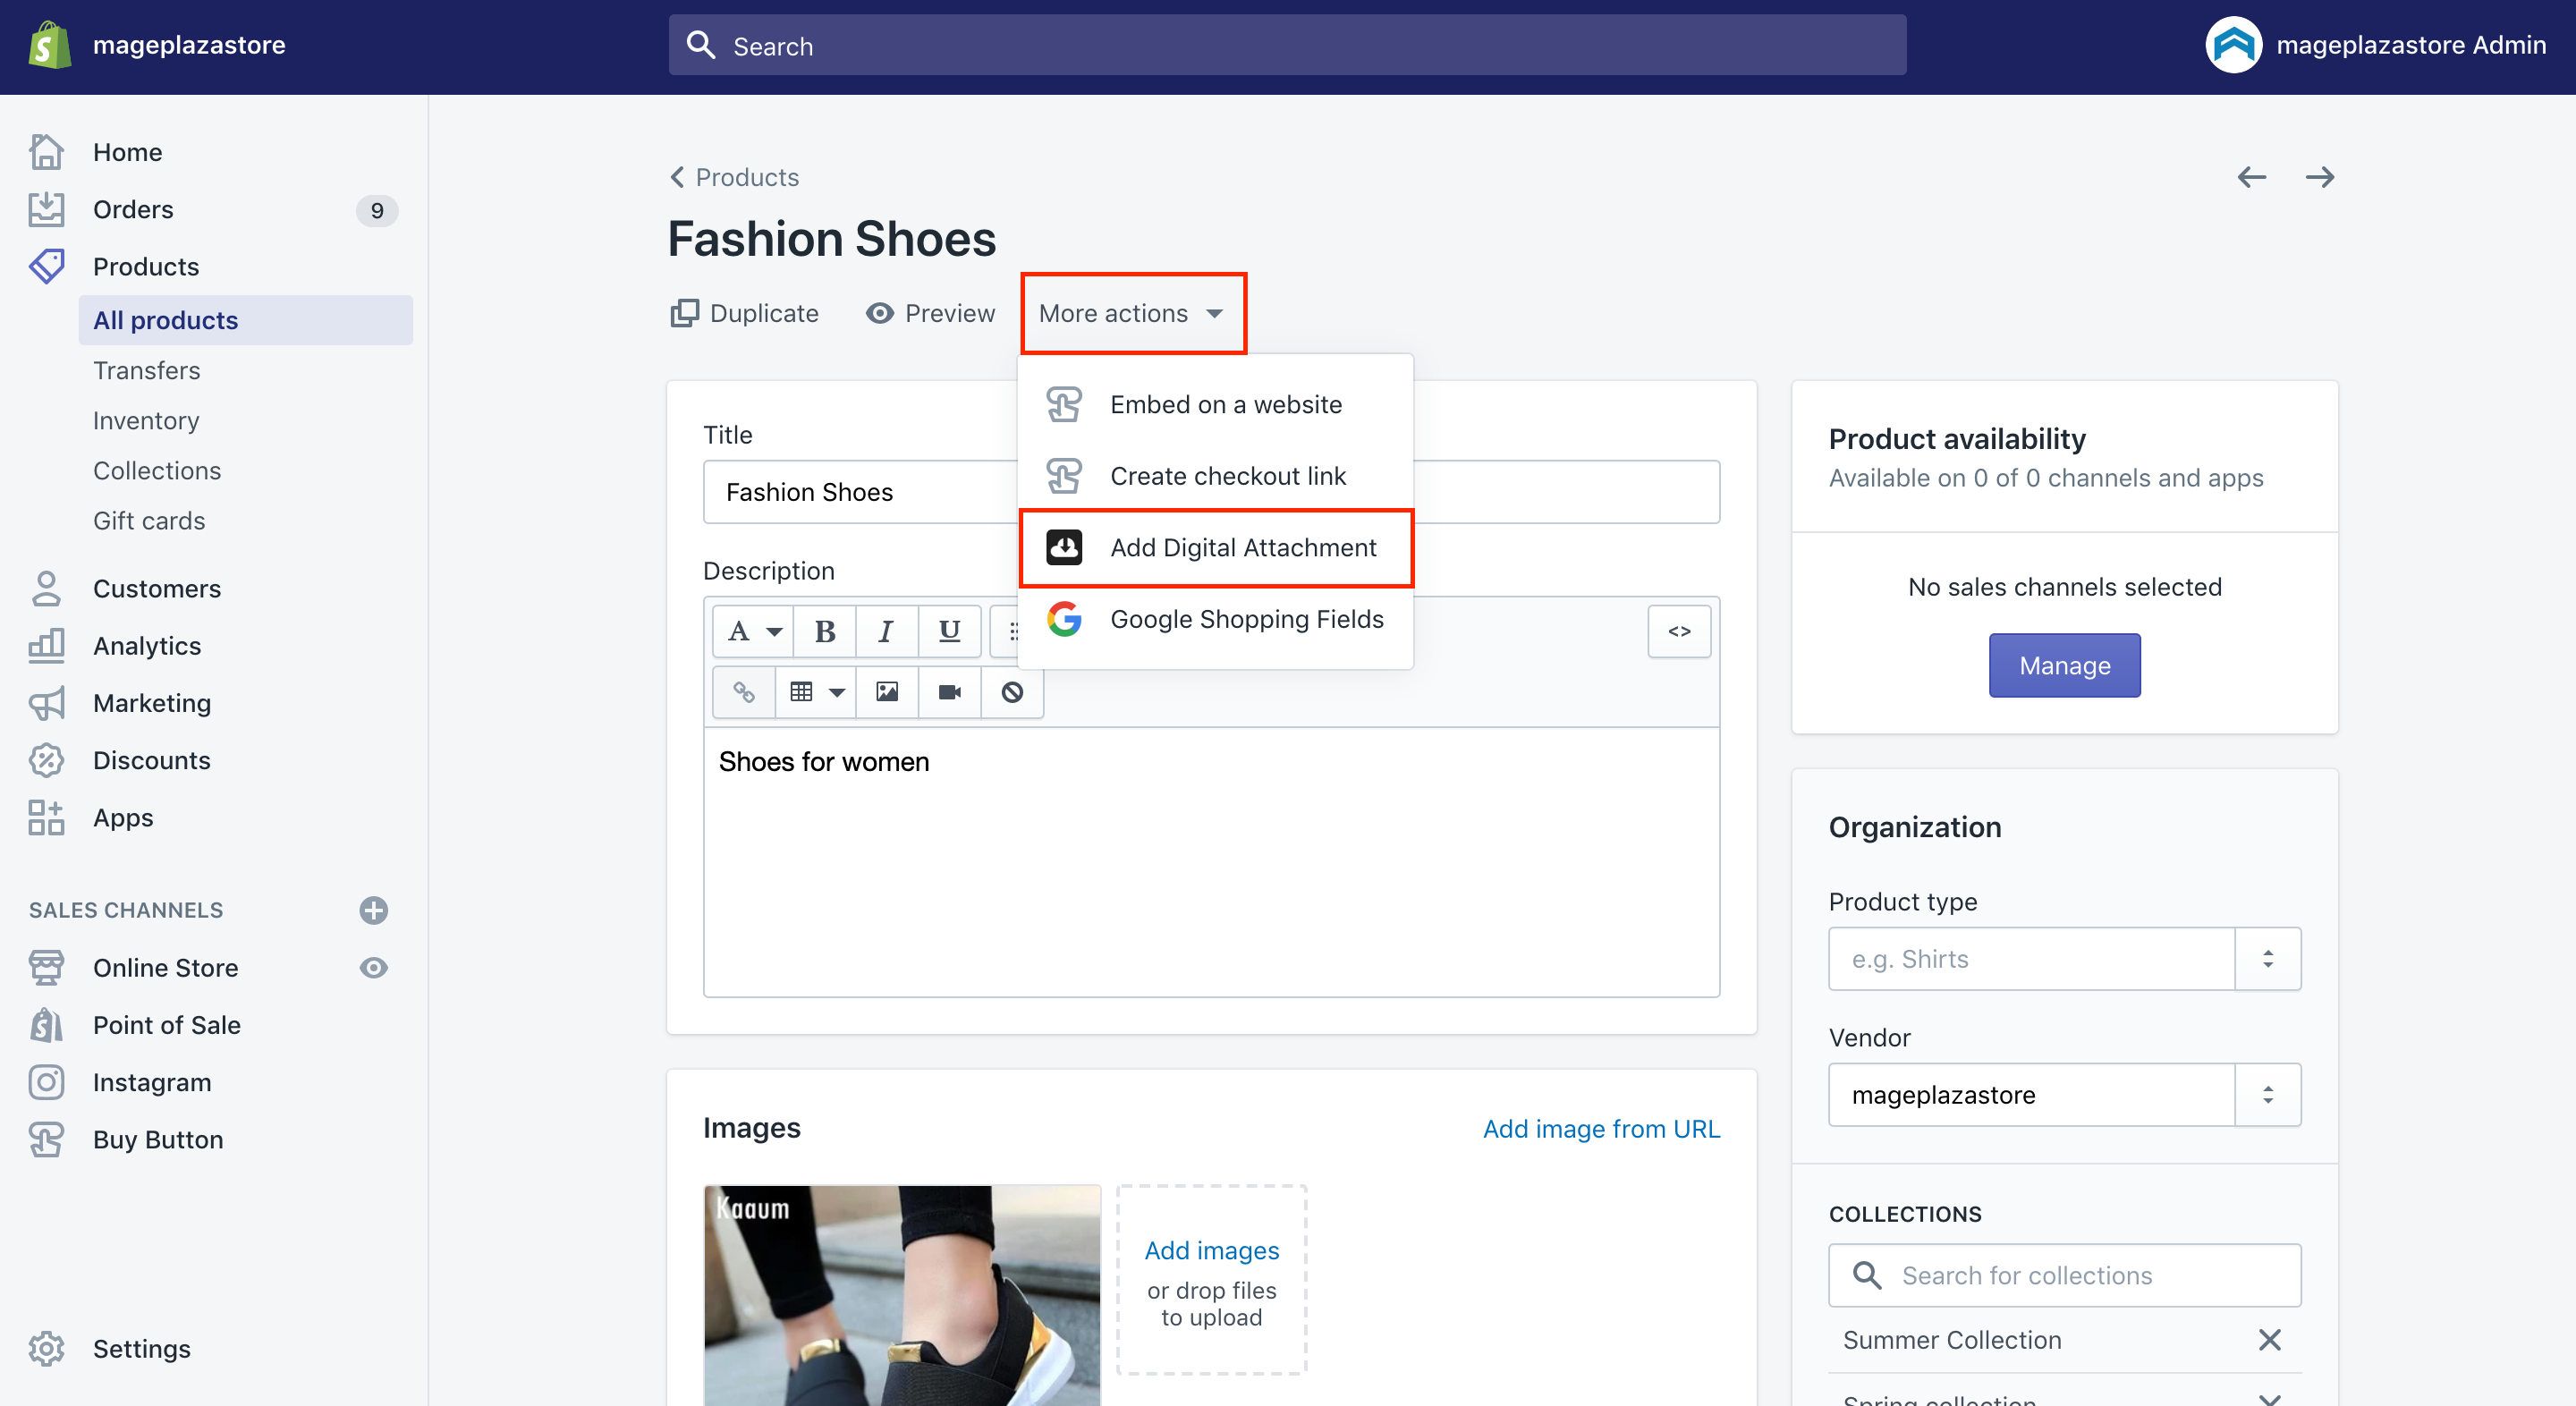
Step 3: Opt for More actions
In this step, let’s opt for More actions under the title of a product.
Step 4: Go to Add Digital Attachment
To continue, you can go to Add Digital Attachment that can take you to the Digital Downloads app page.
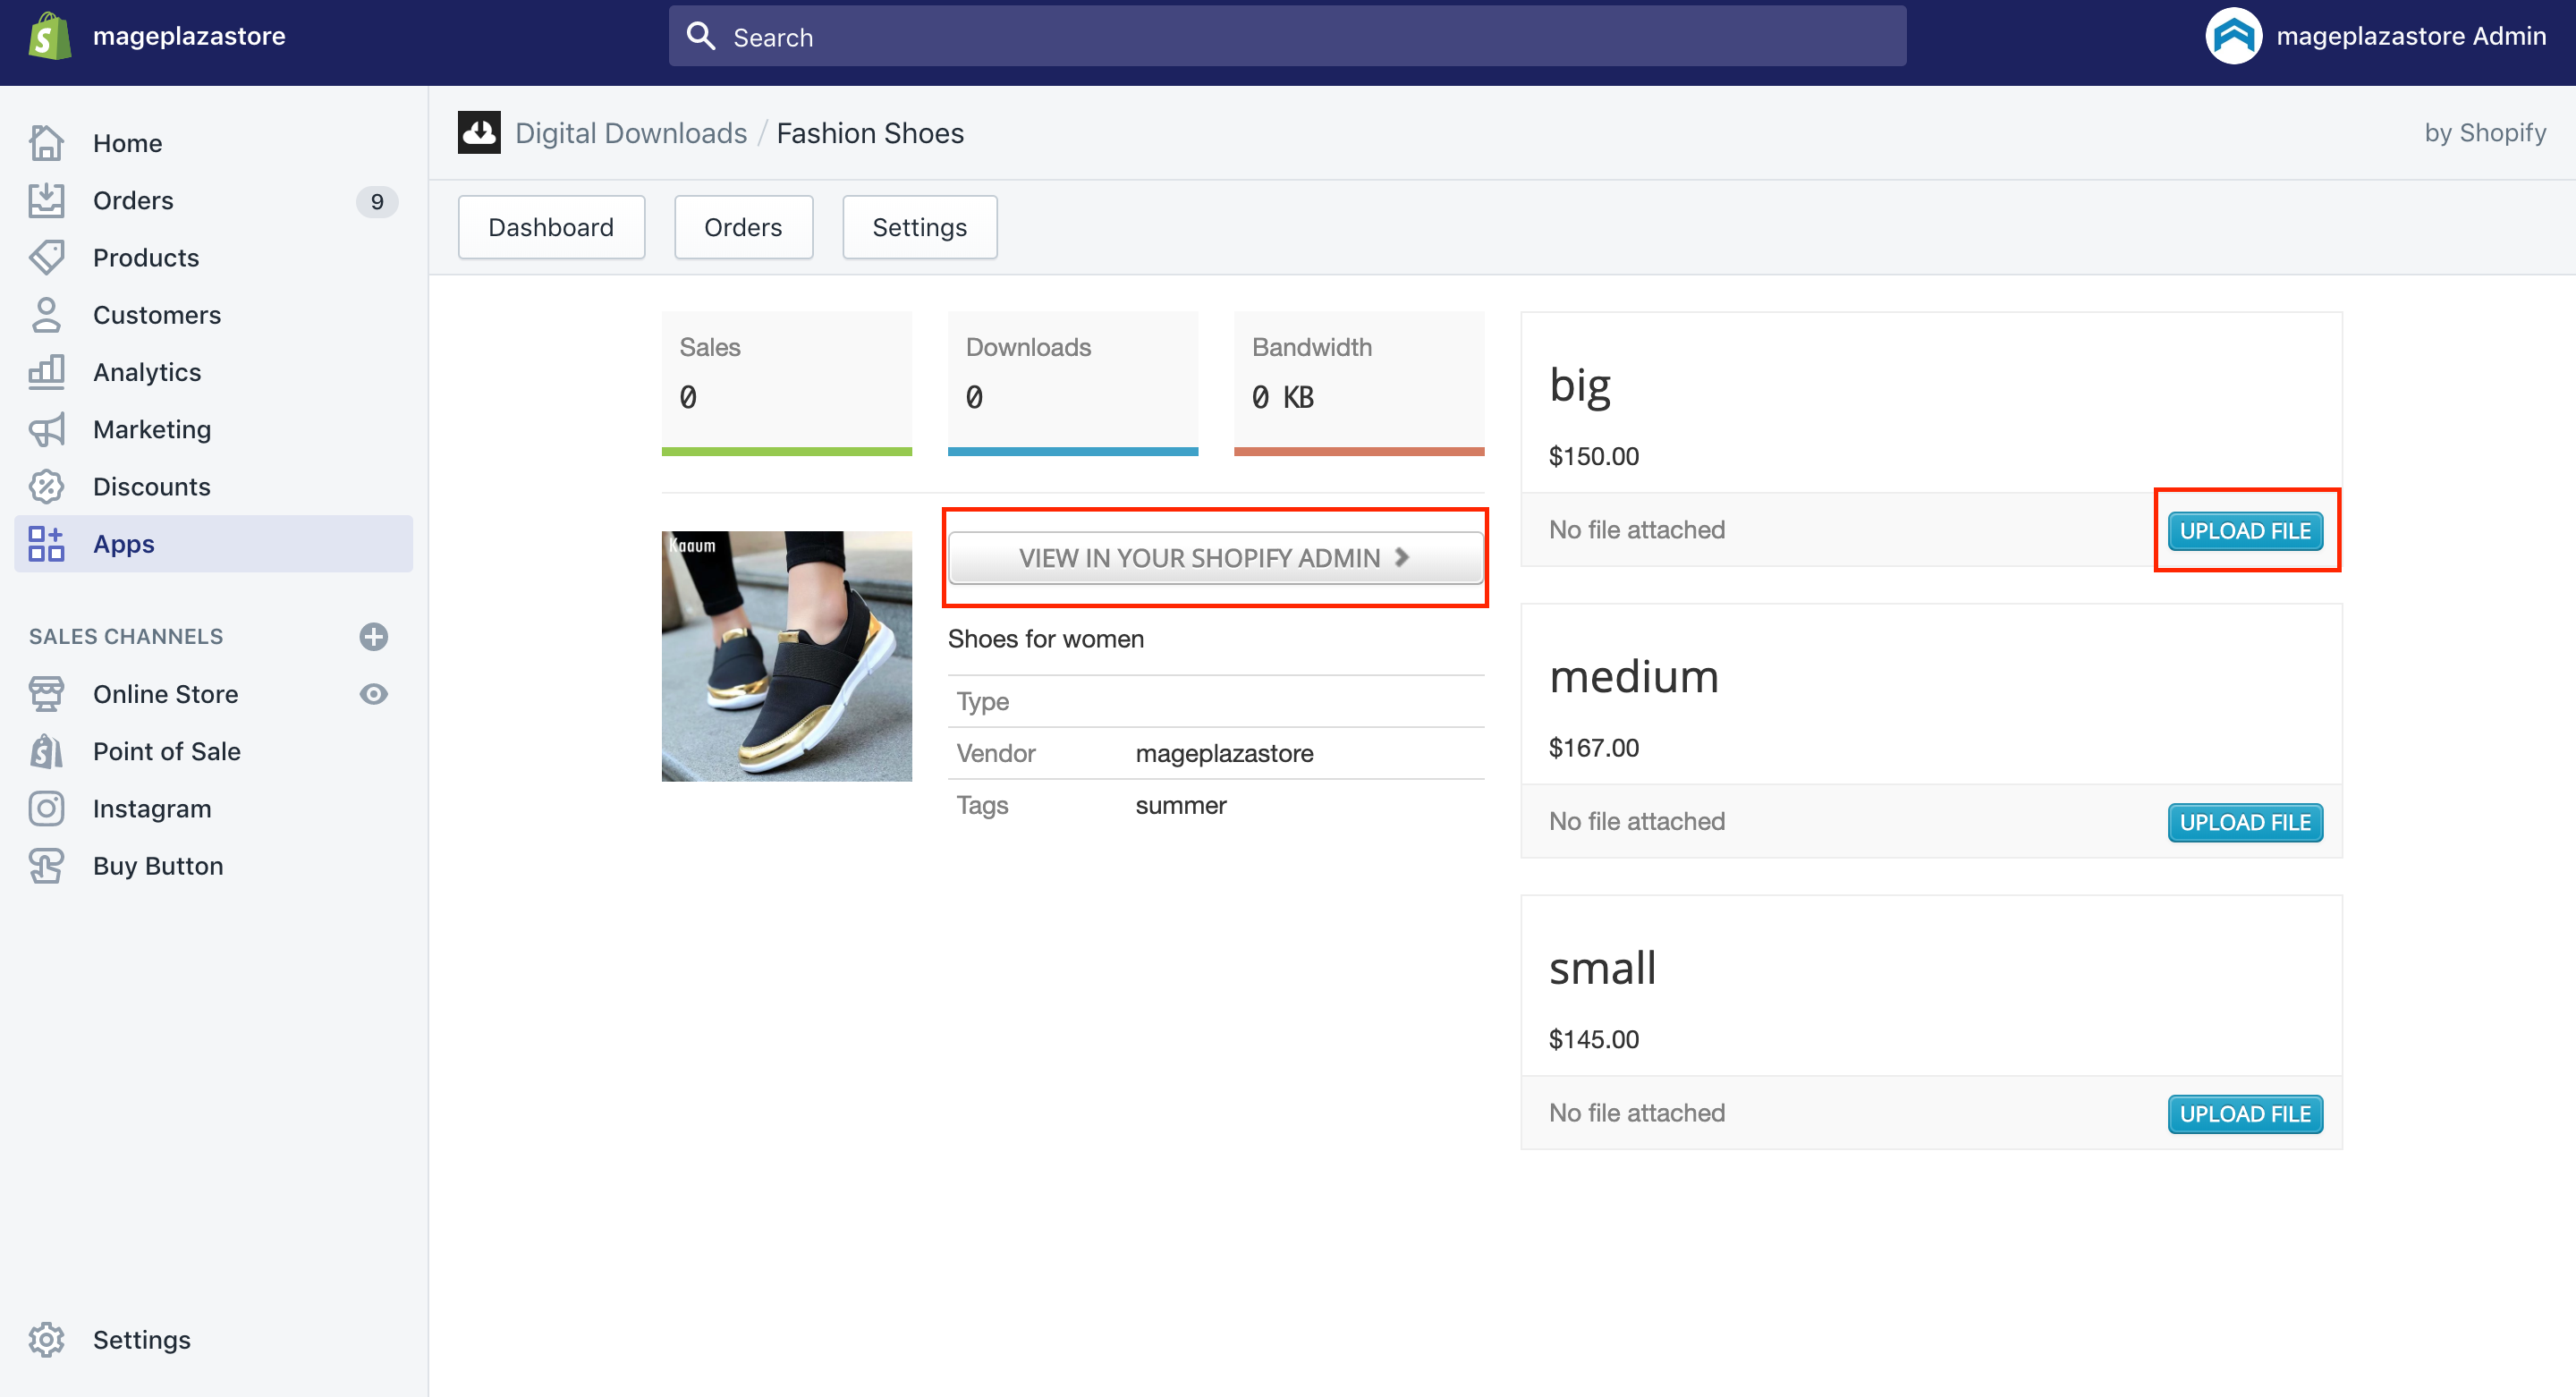
Step 5: Tap Upload file
Tap Upload file and get the file you want to get your attachment added to it.
Adjust the fulfillment settings for your digital products
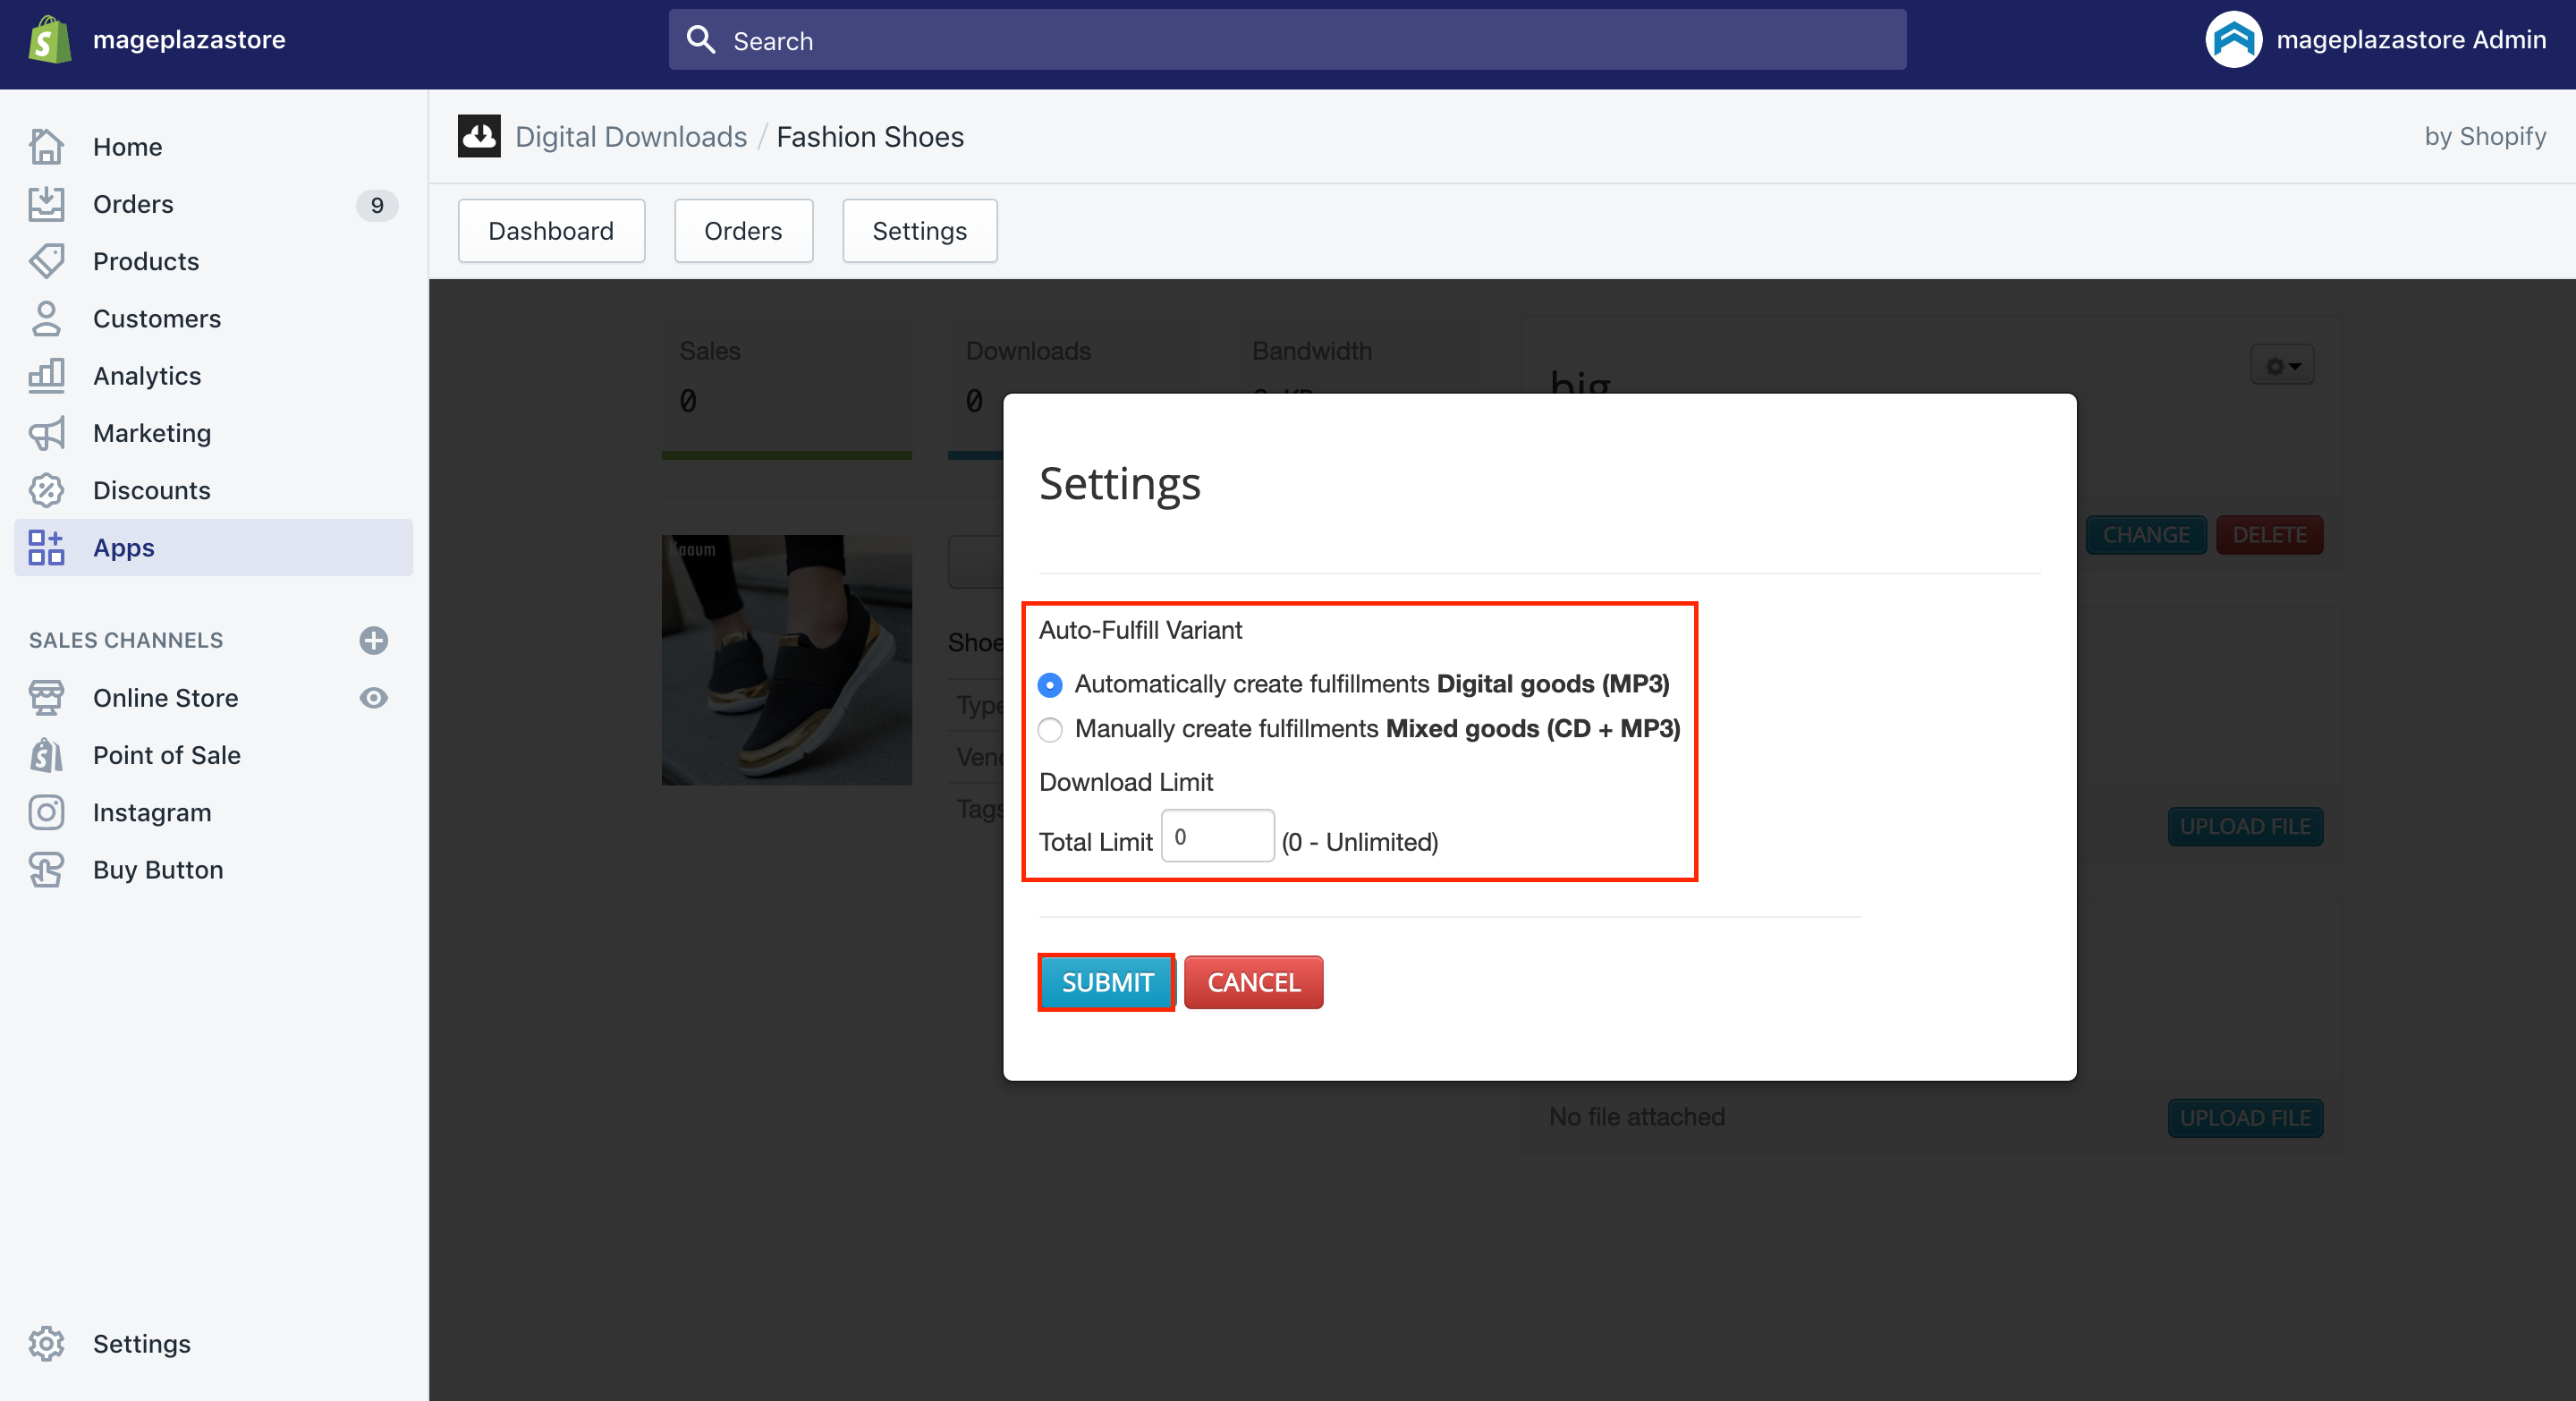
Shopify users are able to review the digital attachments as well as adjust the fulfillment settings on the Digital Downloads app page. As you can see, the options for this fulfillment of digital products include:
-
Automatically create fulfillments: If you choose this option, customers purchasing this product will receive an automatic email to tell them about a download link after every successful payment and this order will be marked as fulfilled. Suggested digital product to use these options which are MP3 or PDF.
-
Manually create fulfillments: If you choose this option, you have to manually mark the order as fulfilled before customers receive a download link email. You had better apply this option whenever the product is a combination of both physical and digital items such as a vinyl record with MP3 downloads.
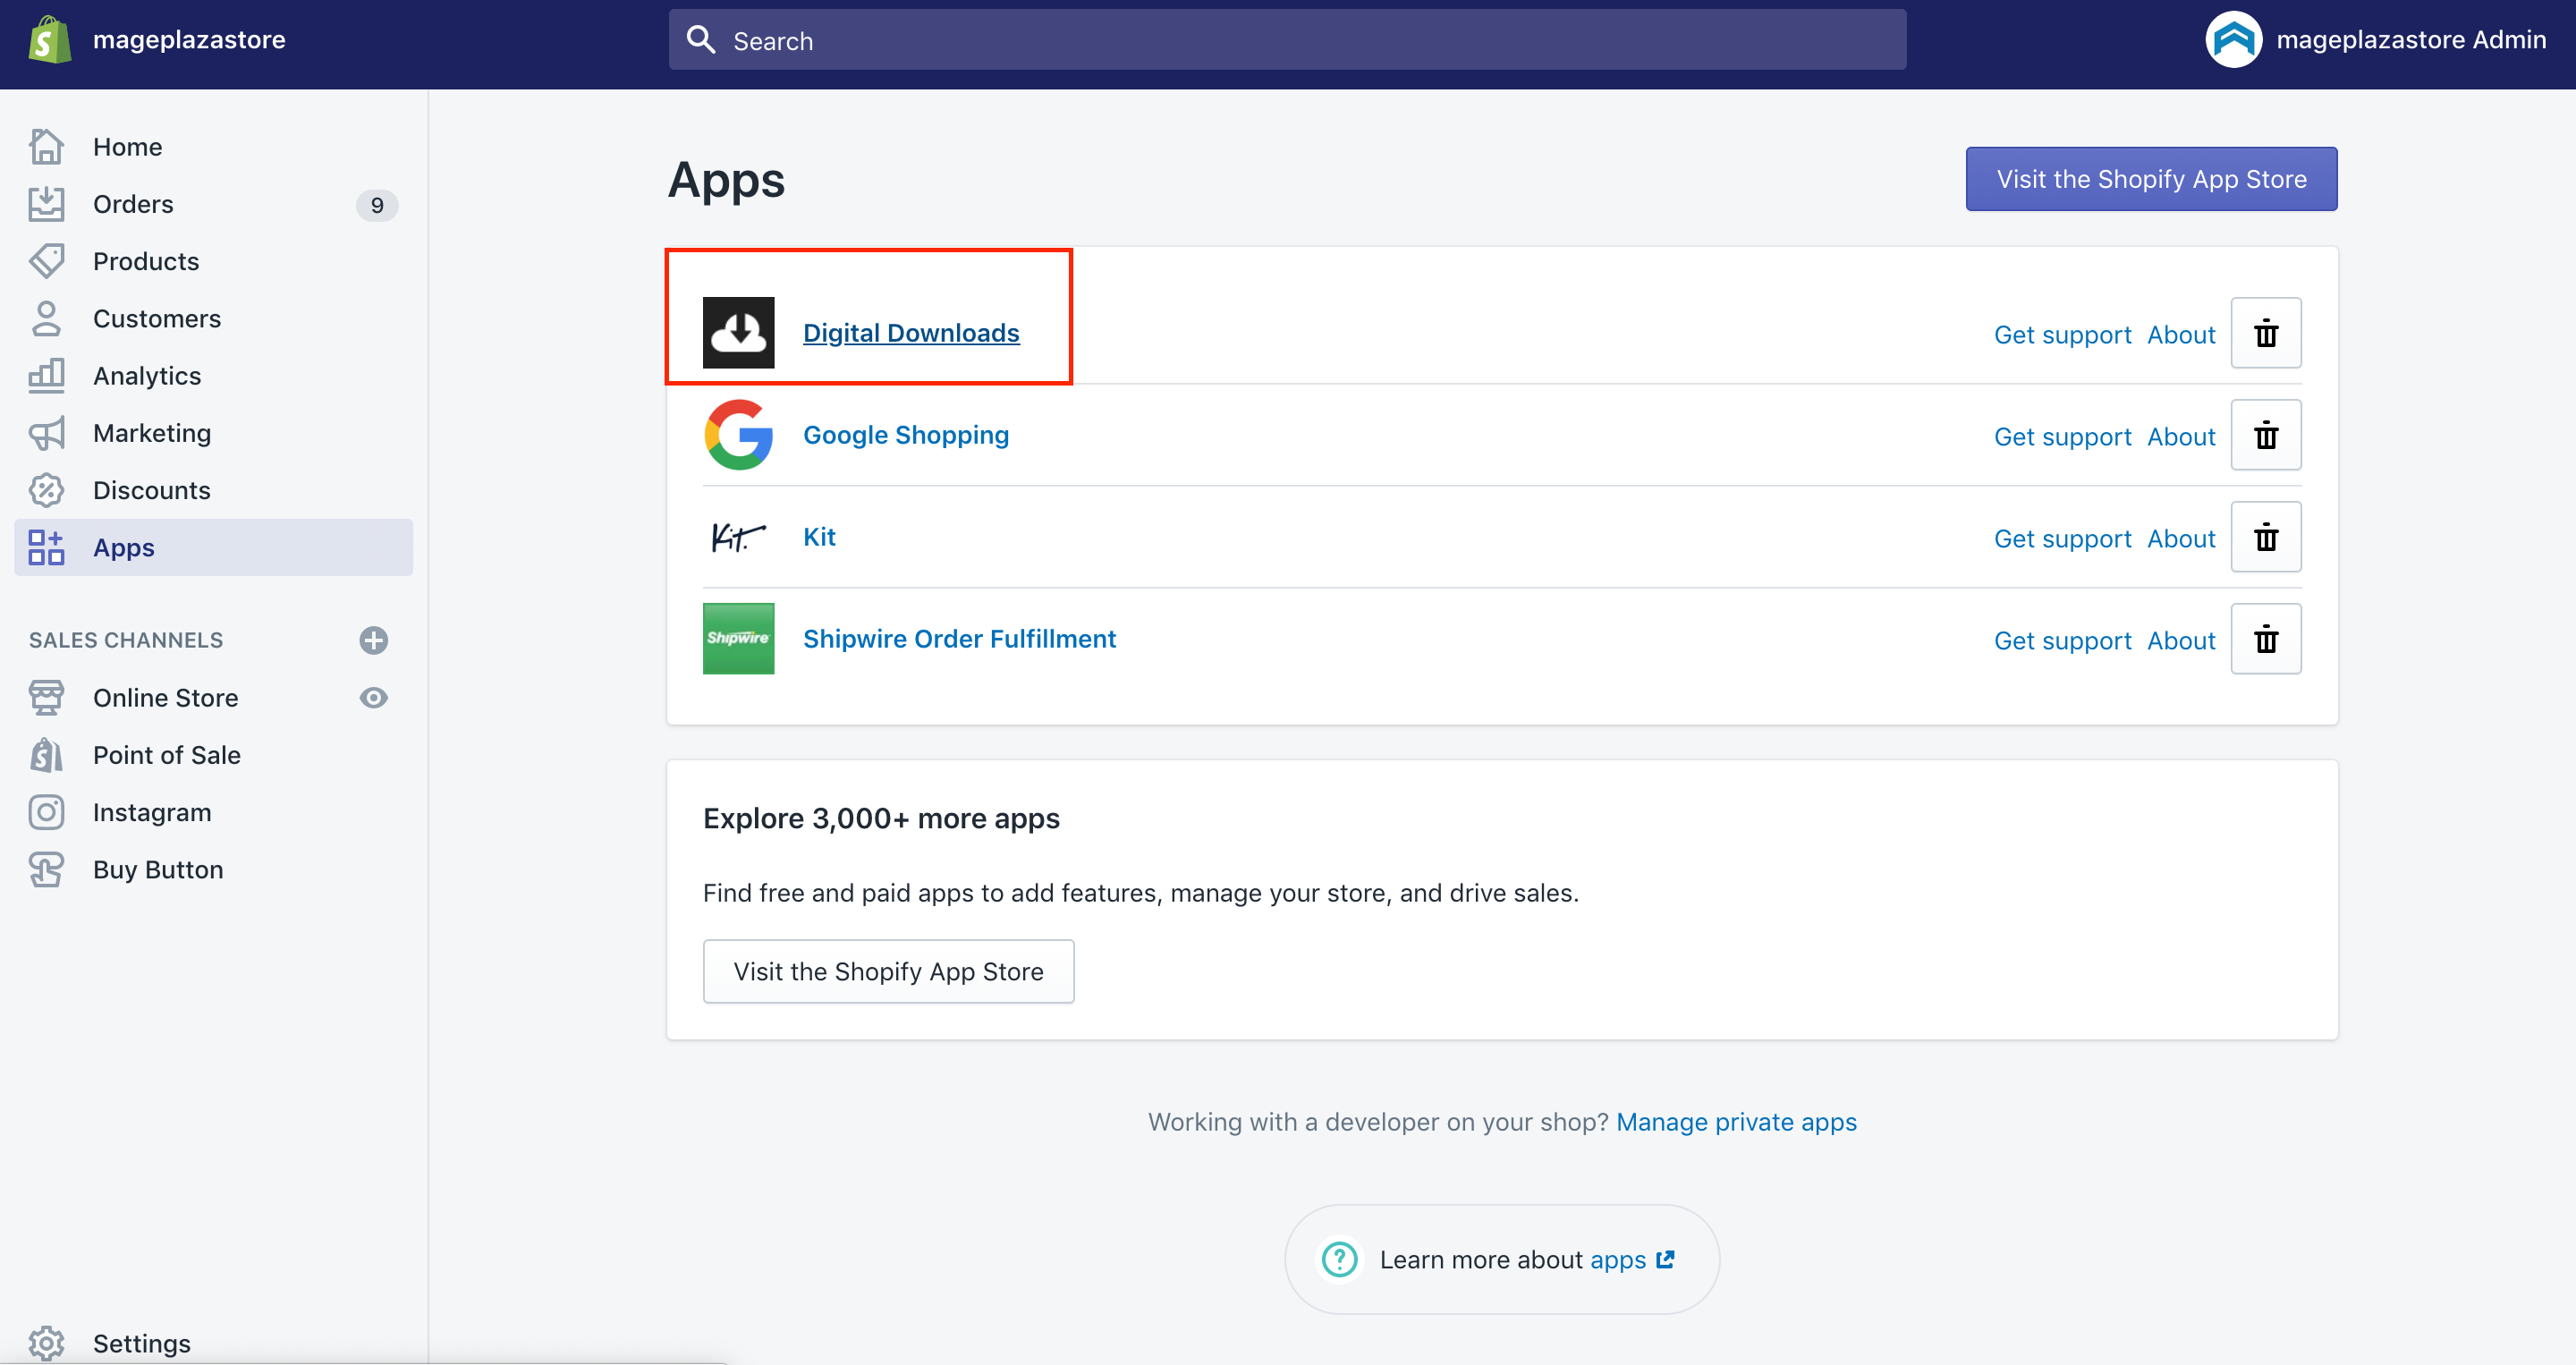
Step 1: Click on Apps
Clicking on ` Apps` from your Shopify dashboard is the first thing you must do.
Step 2: Select Digital Downloads
In this step, let’s select Digital Downloads and opt for a digital item you want to set the download limit for.
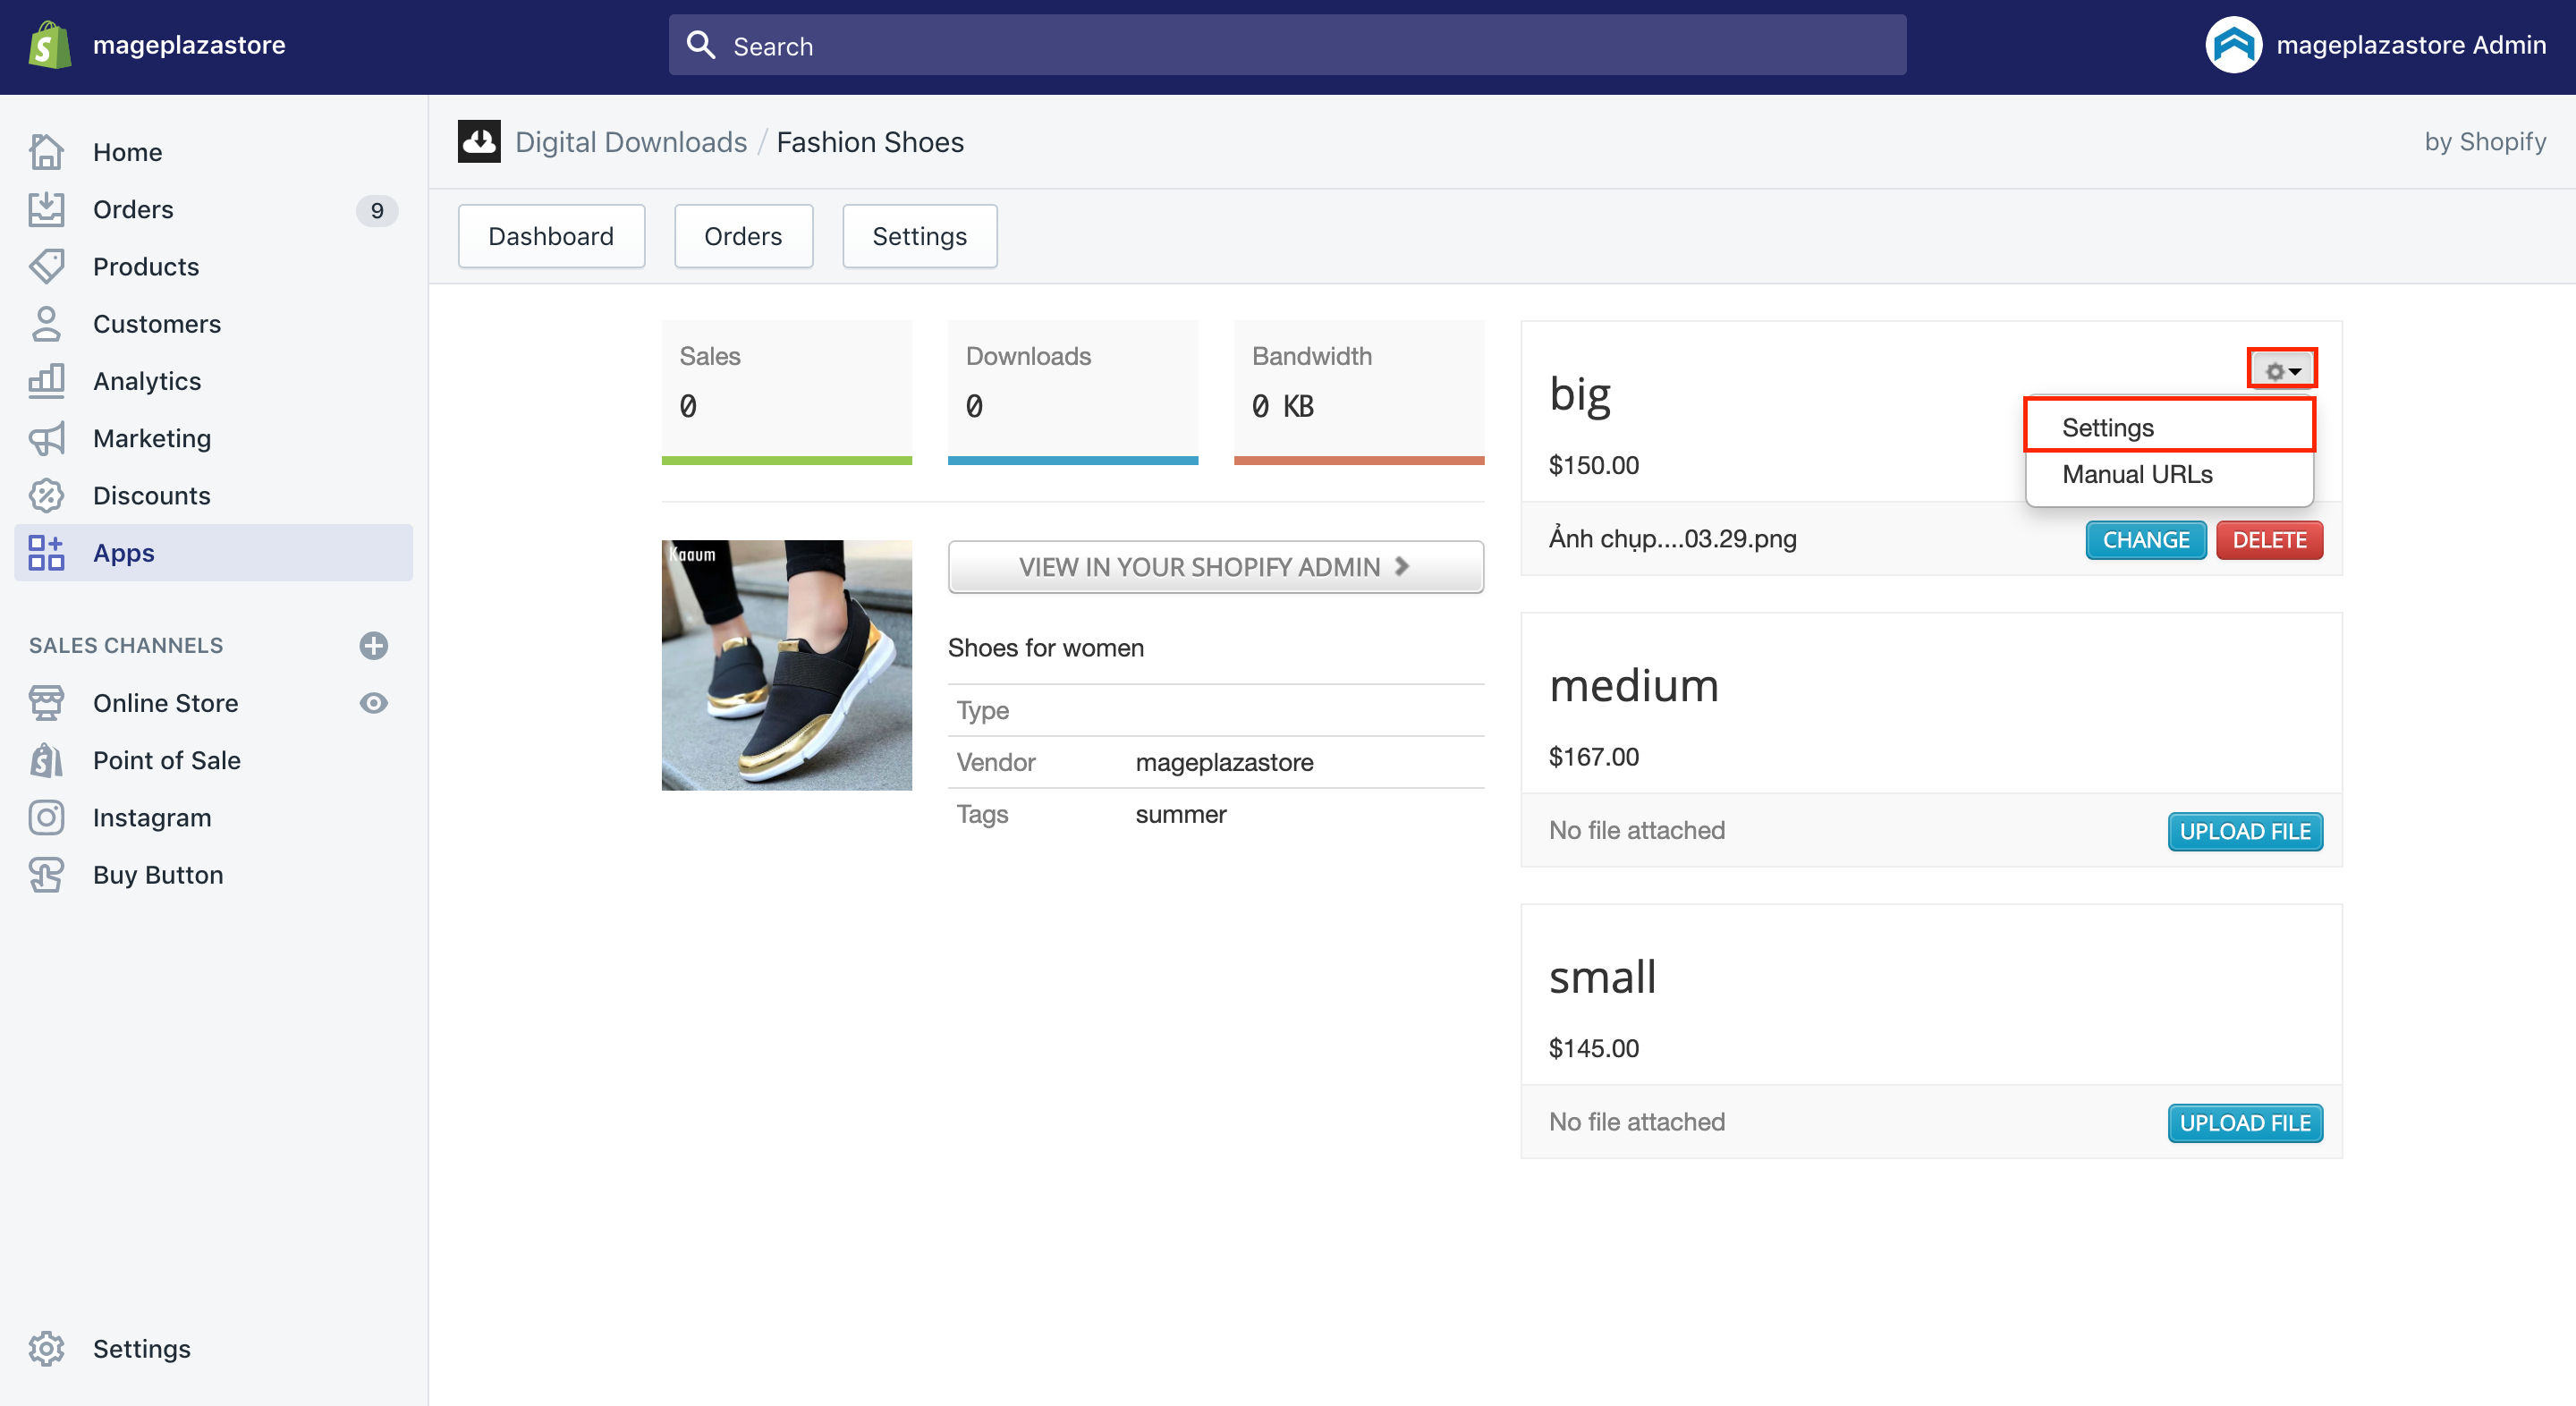
Step 3: Head to your favorite Digital Downloads
Next, you can head to your favorite Digital Downloads.
Step 4: Choose the gear icon and Settings in the drop-down list
Then, let’s choose the gear icon and Settings in the drop-down list.
Step 5: Go to the fulfillment option you want
Let’s go to the fulfillment option you want from the Settings dialogue box.
Note: There is a fact that if you want to both use Manual Fulfillment since the products have a physical component and send the digital component to customers after their purchasing immediately, you can send customers a manual download link.
-
Step 1: Choose Apps from the Shopify admin
-
Step 2: Select
Digital Downloads -
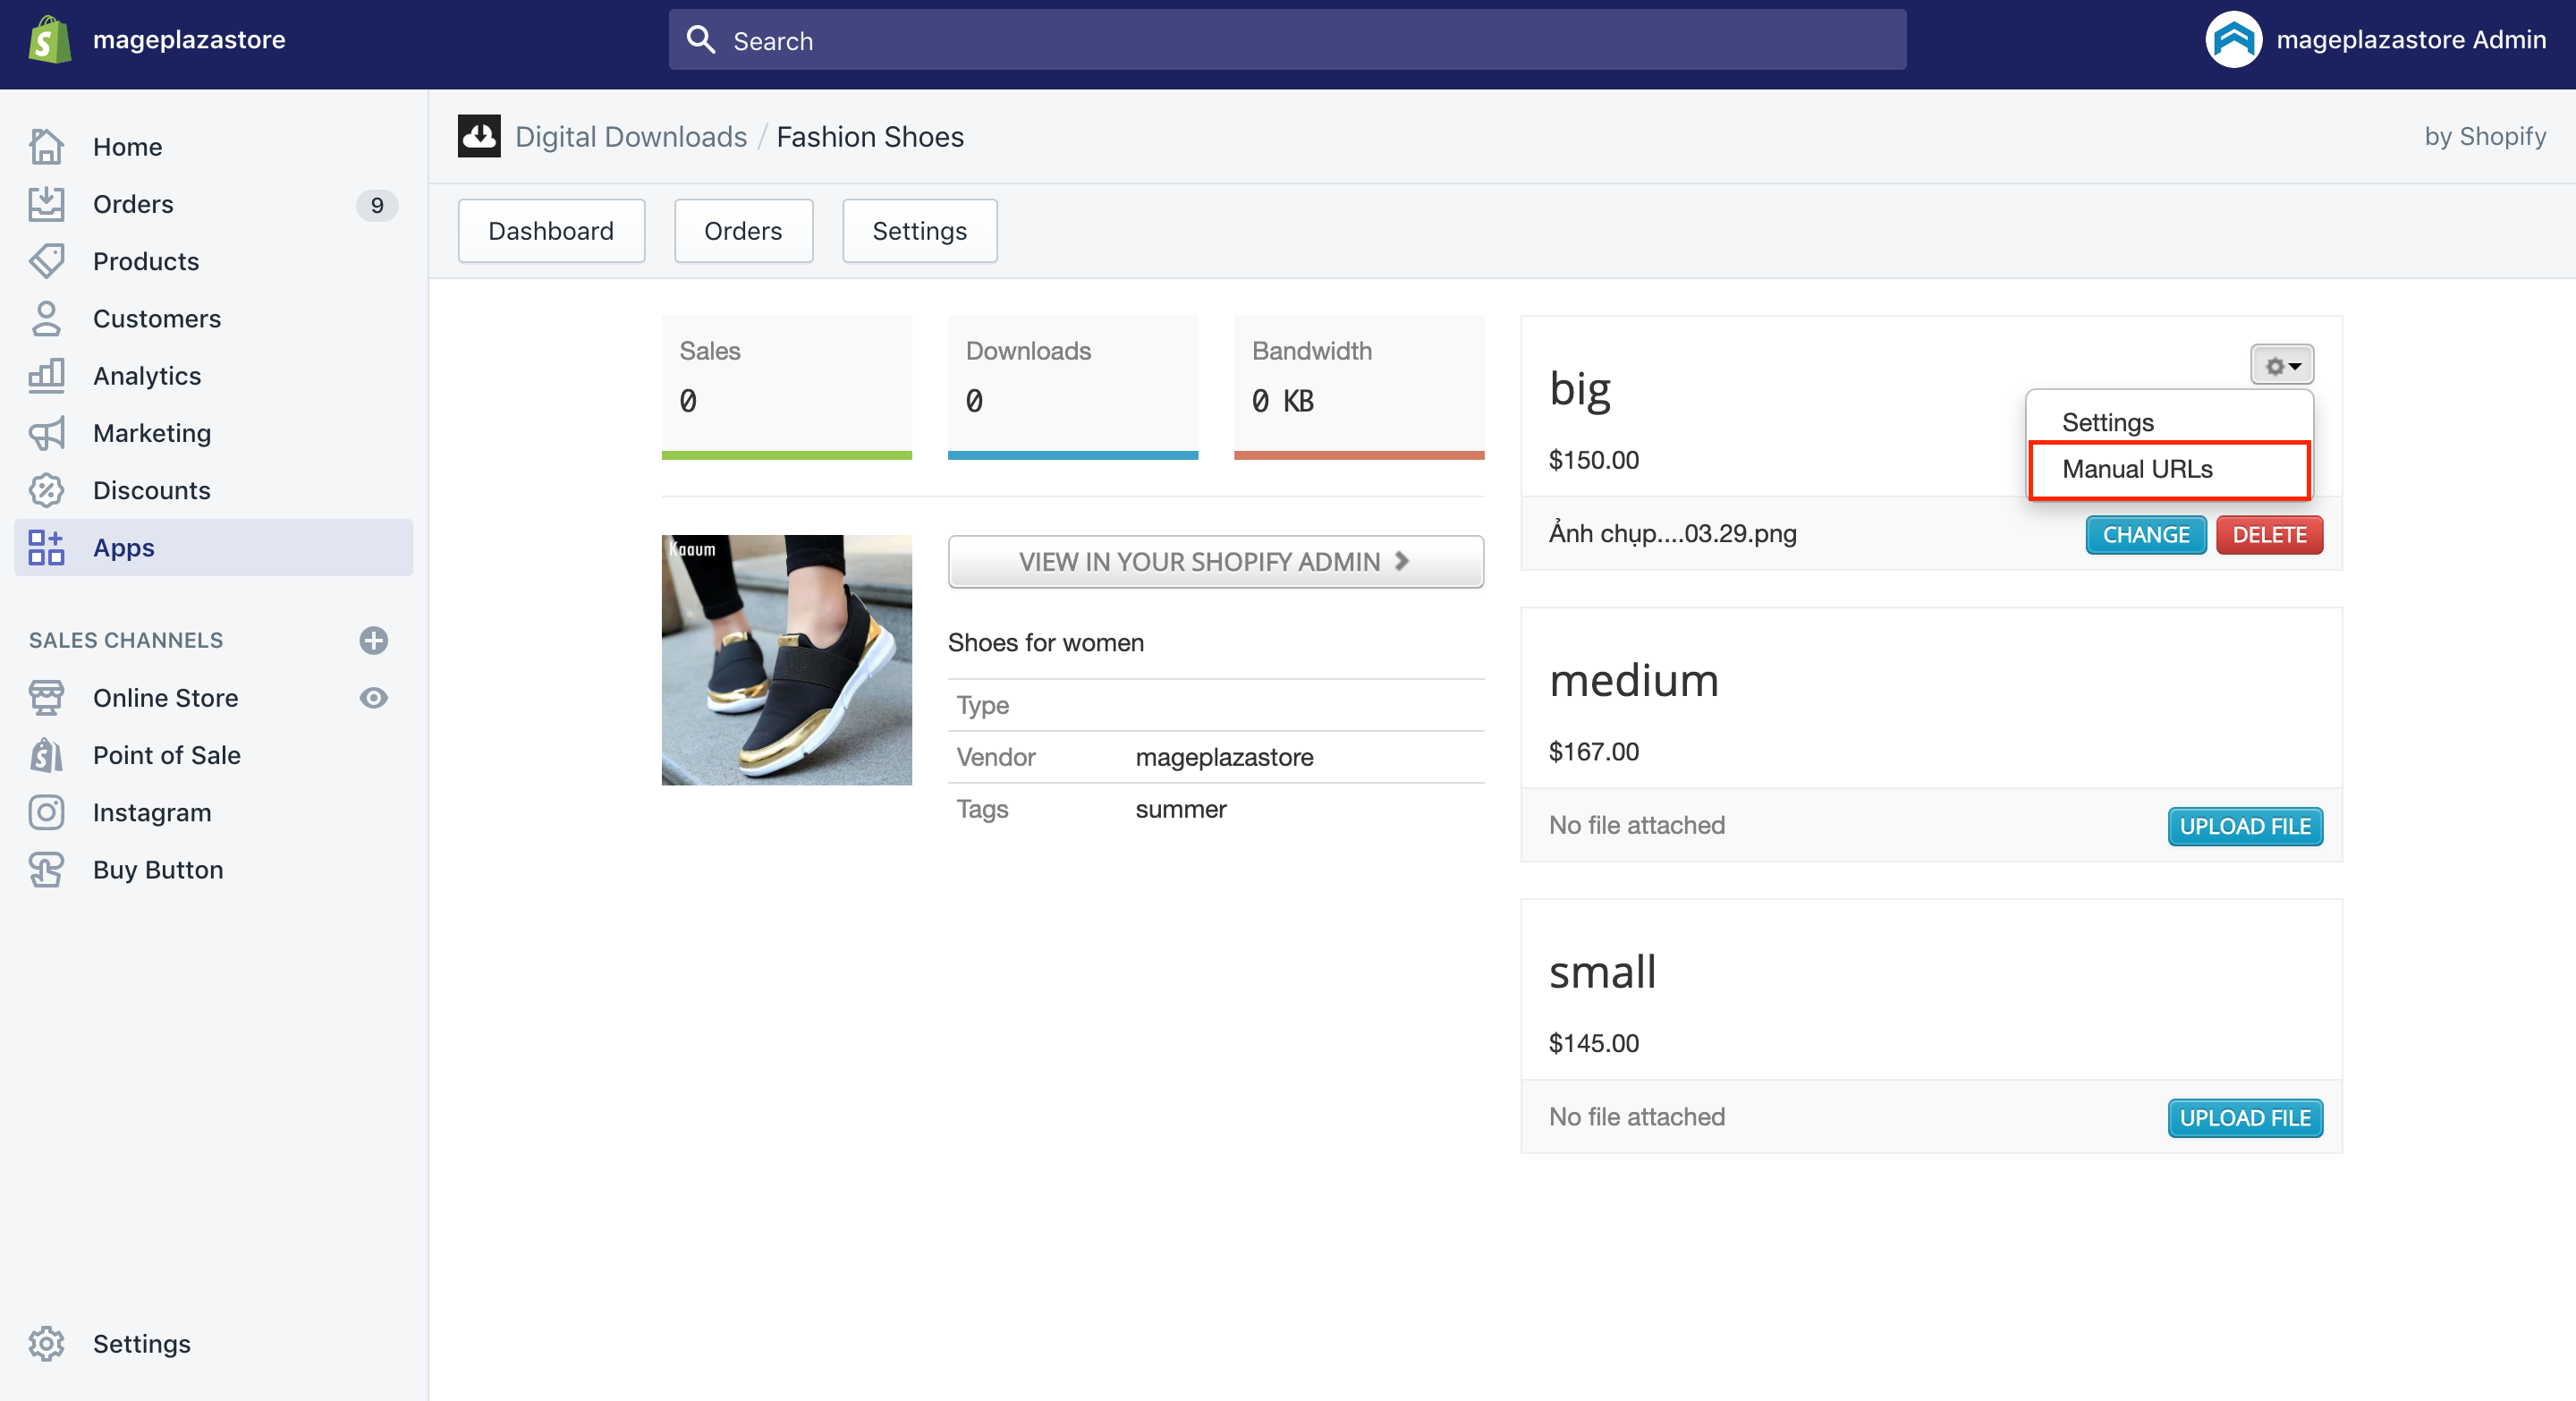
Step 3: Go to the name of the digital products you want to generate a download link for.
-
Step 4: Head to the gear icon and opt for
Manual URLs.
- Step 5: Click on
GENERATE URL.
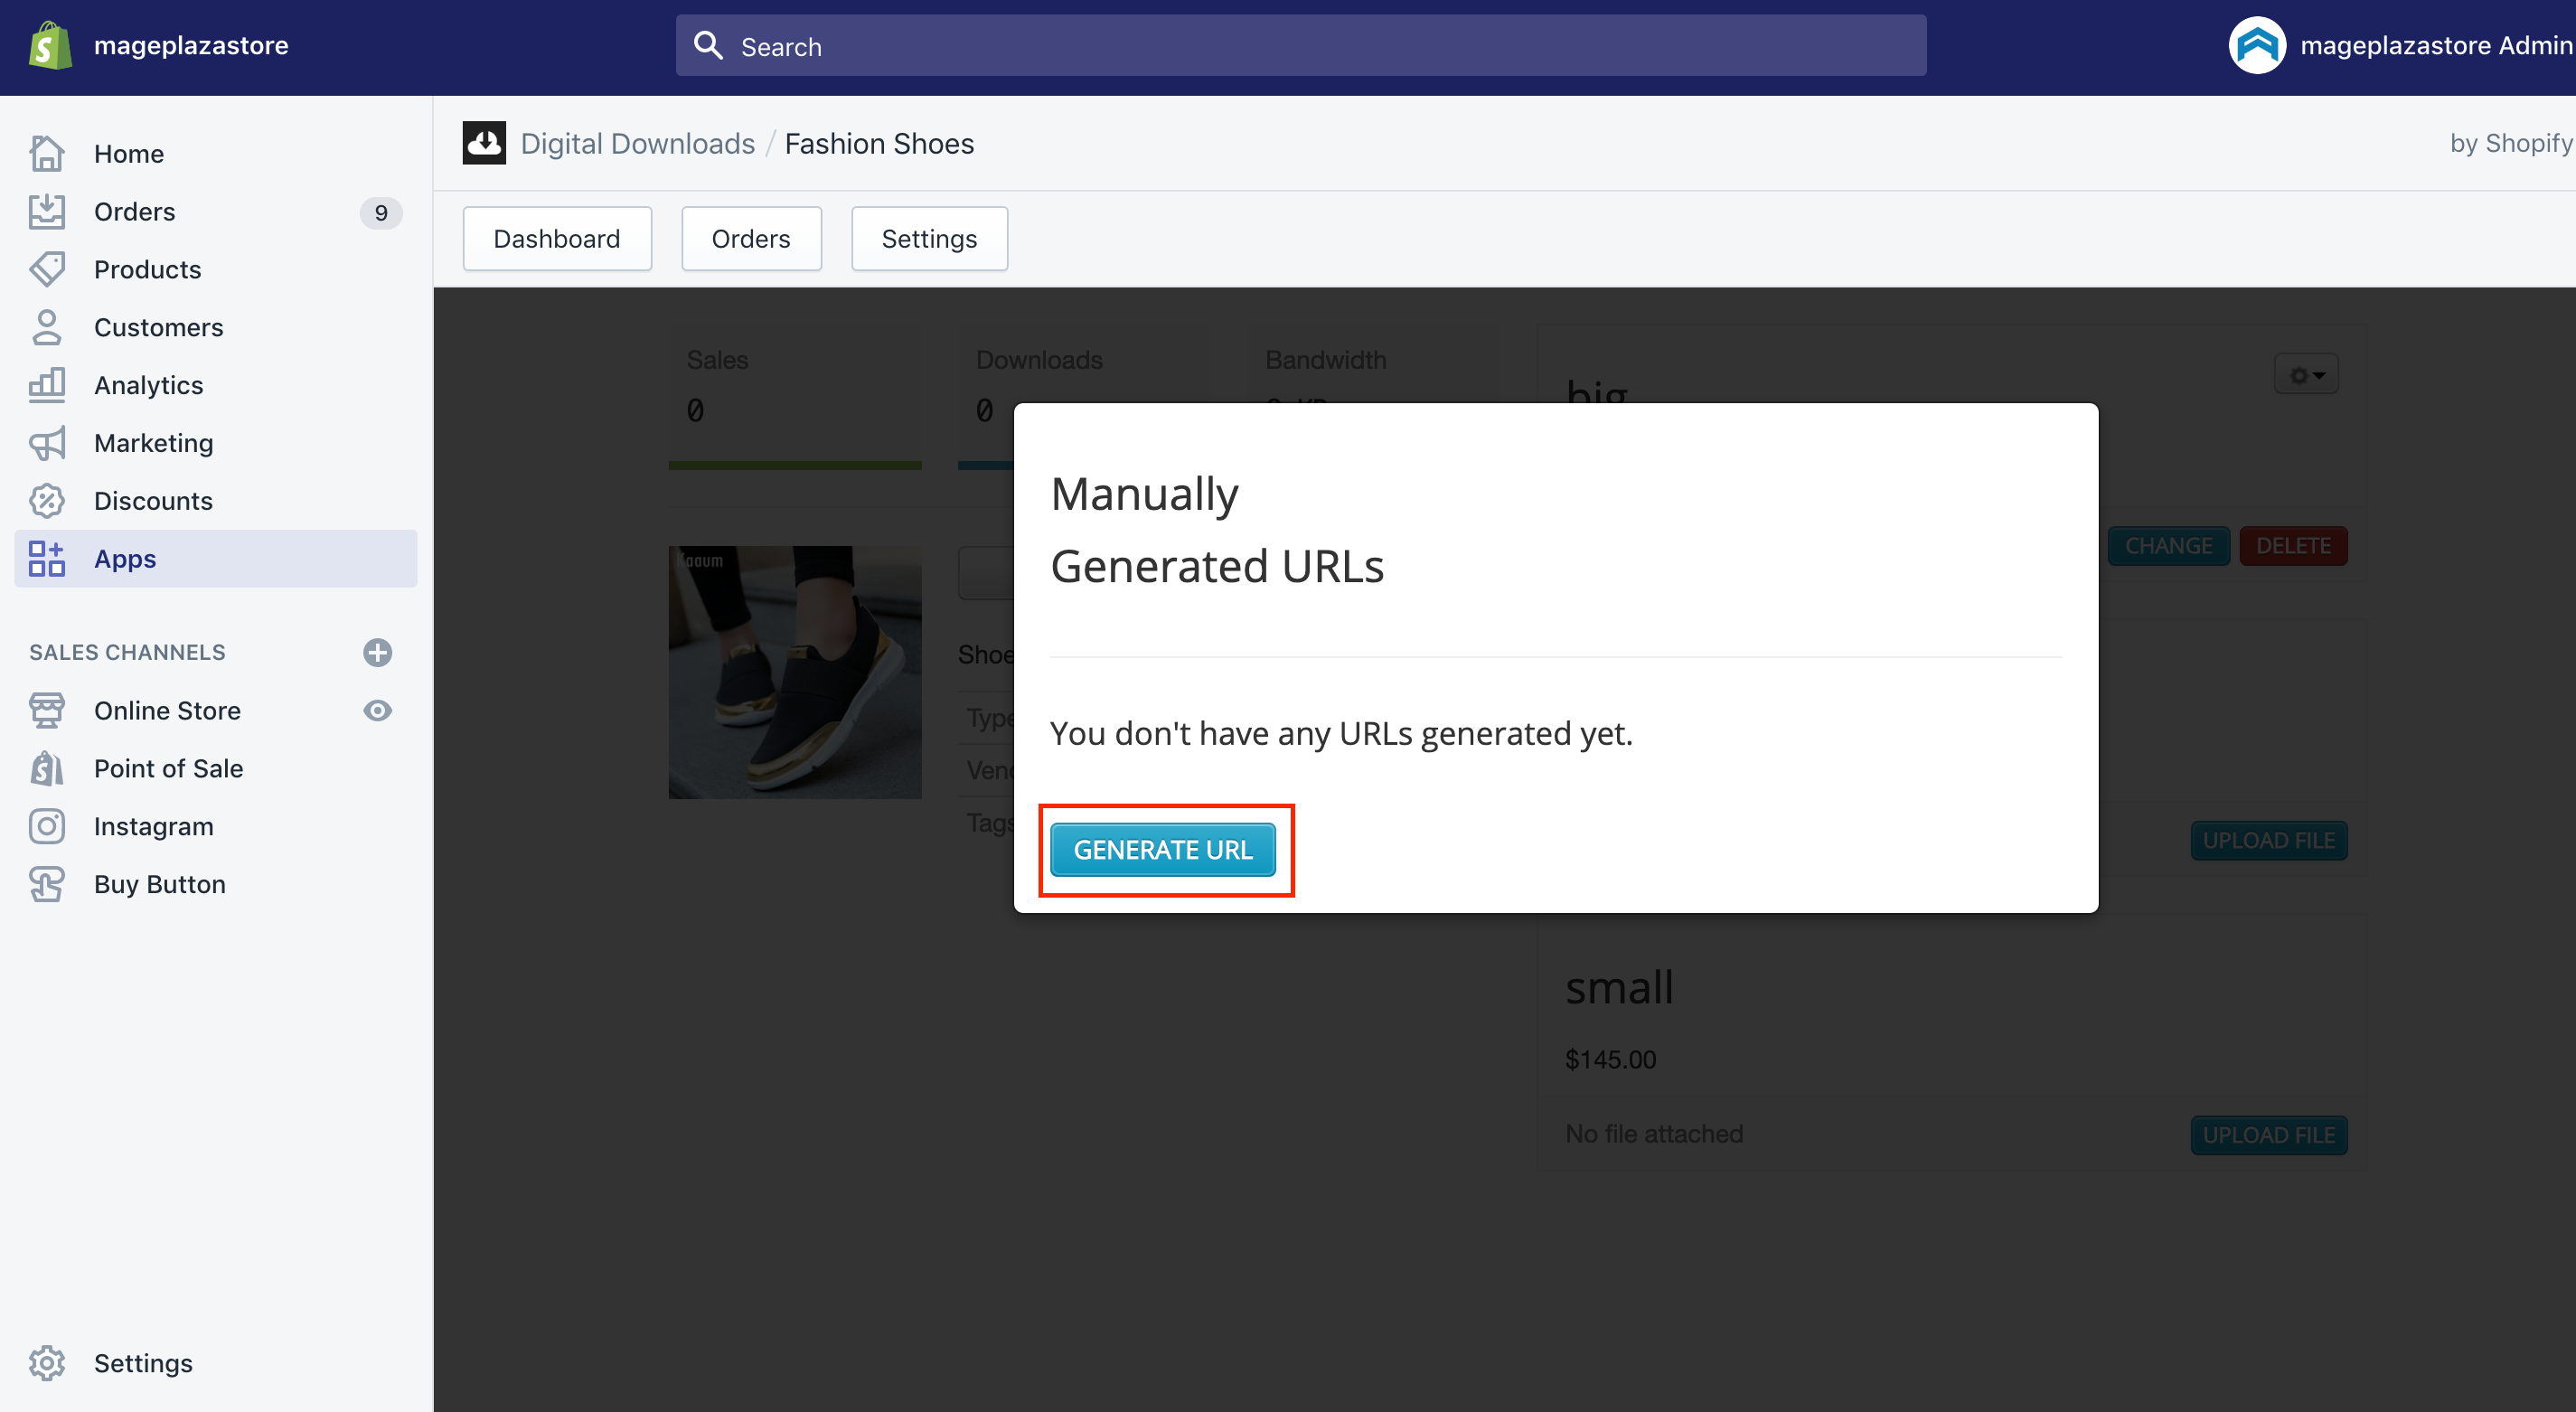
- Step 6: Get the URL copied and send it to the customers. This enables customers to download your digital attachment.
Note: Manual download URLS are used unlimitedly and allowing customers to download a file freely. Hence, you can easily disable the link just by choosing the trash button beside it.
Step 6: Click on Submit
Then, click on Submit.
Set a download limit
You can easily revise the digital attachments, then set a download limit on your Digital Downloads app page. Do remember that a download limit can control times in which customers can get a digital product downloaded.
Step 1: Click on Apps
Clicking on ` Apps` from your Shopify dashboard is the first thing you must do.
Step 2: Select Digital Downloads
In this step, let’s select Digital Downloads and opt for a digital item you want to set the download limit for.
Step 3: Choose the gear icon and Settings in the drop-down list.
As you can see, you must choose the gear icon, then Settings from the drop-down list.
Step 4: Type the times you want the customers to download your file.
Next, you are able to type the number of times you want your customers to download your file.
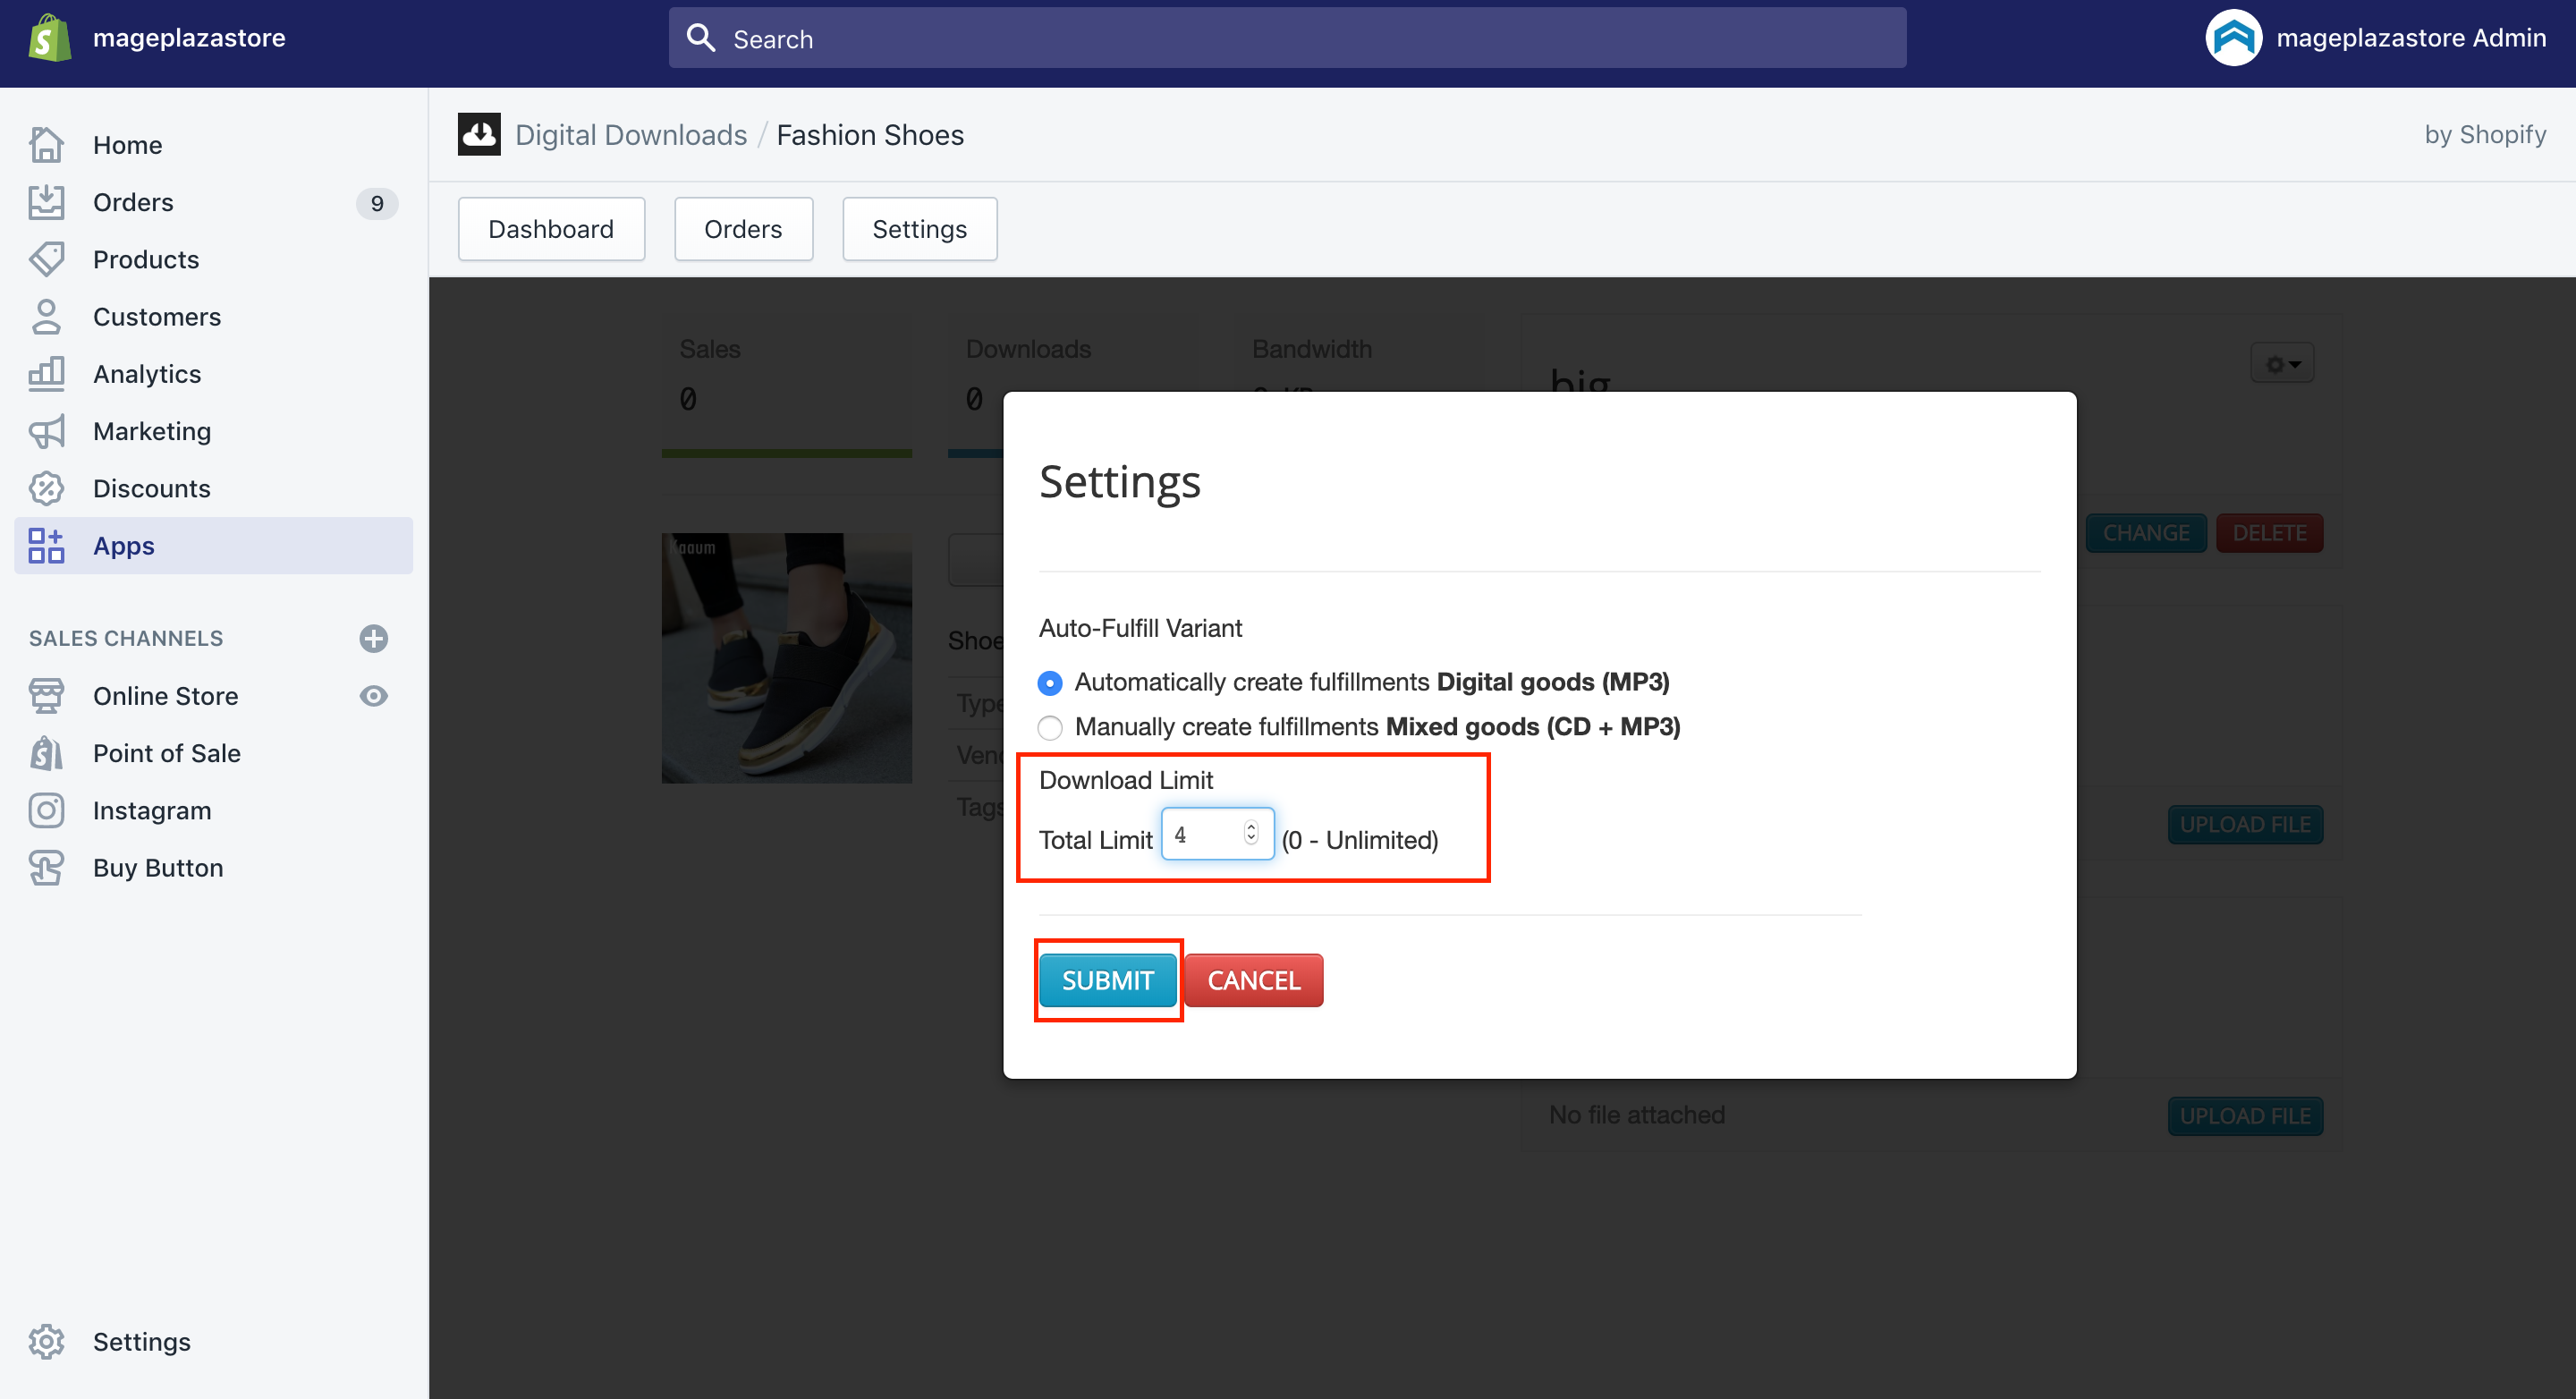
Step 5: Click on Save
Click on Save to save your work.
Modify Digital Downloads Order
In this part, the Orders section will bring you with backgrounds of orders that include your digital downloads which are purchased via your store. That section will show you:
-
date and time
-
order number
-
customers’ name and email
-
the number of downloads each order
Like the Orders page in your admin, you can choose every entry to check your order’s details:
Every order will display you:
-
customer name and email
-
selection to resend the fulfillment email
Do remember that the Orders area will inform you that the download is completed, the customers’ IP, and which operating system and browser are used to get the digital items downloaded.
Resend a download link
-
Step 1: Choose
Appsfrom the Shopify admin. -
Step 2: Click on
Digital Downloads. -
Step 3: Select
Orders.
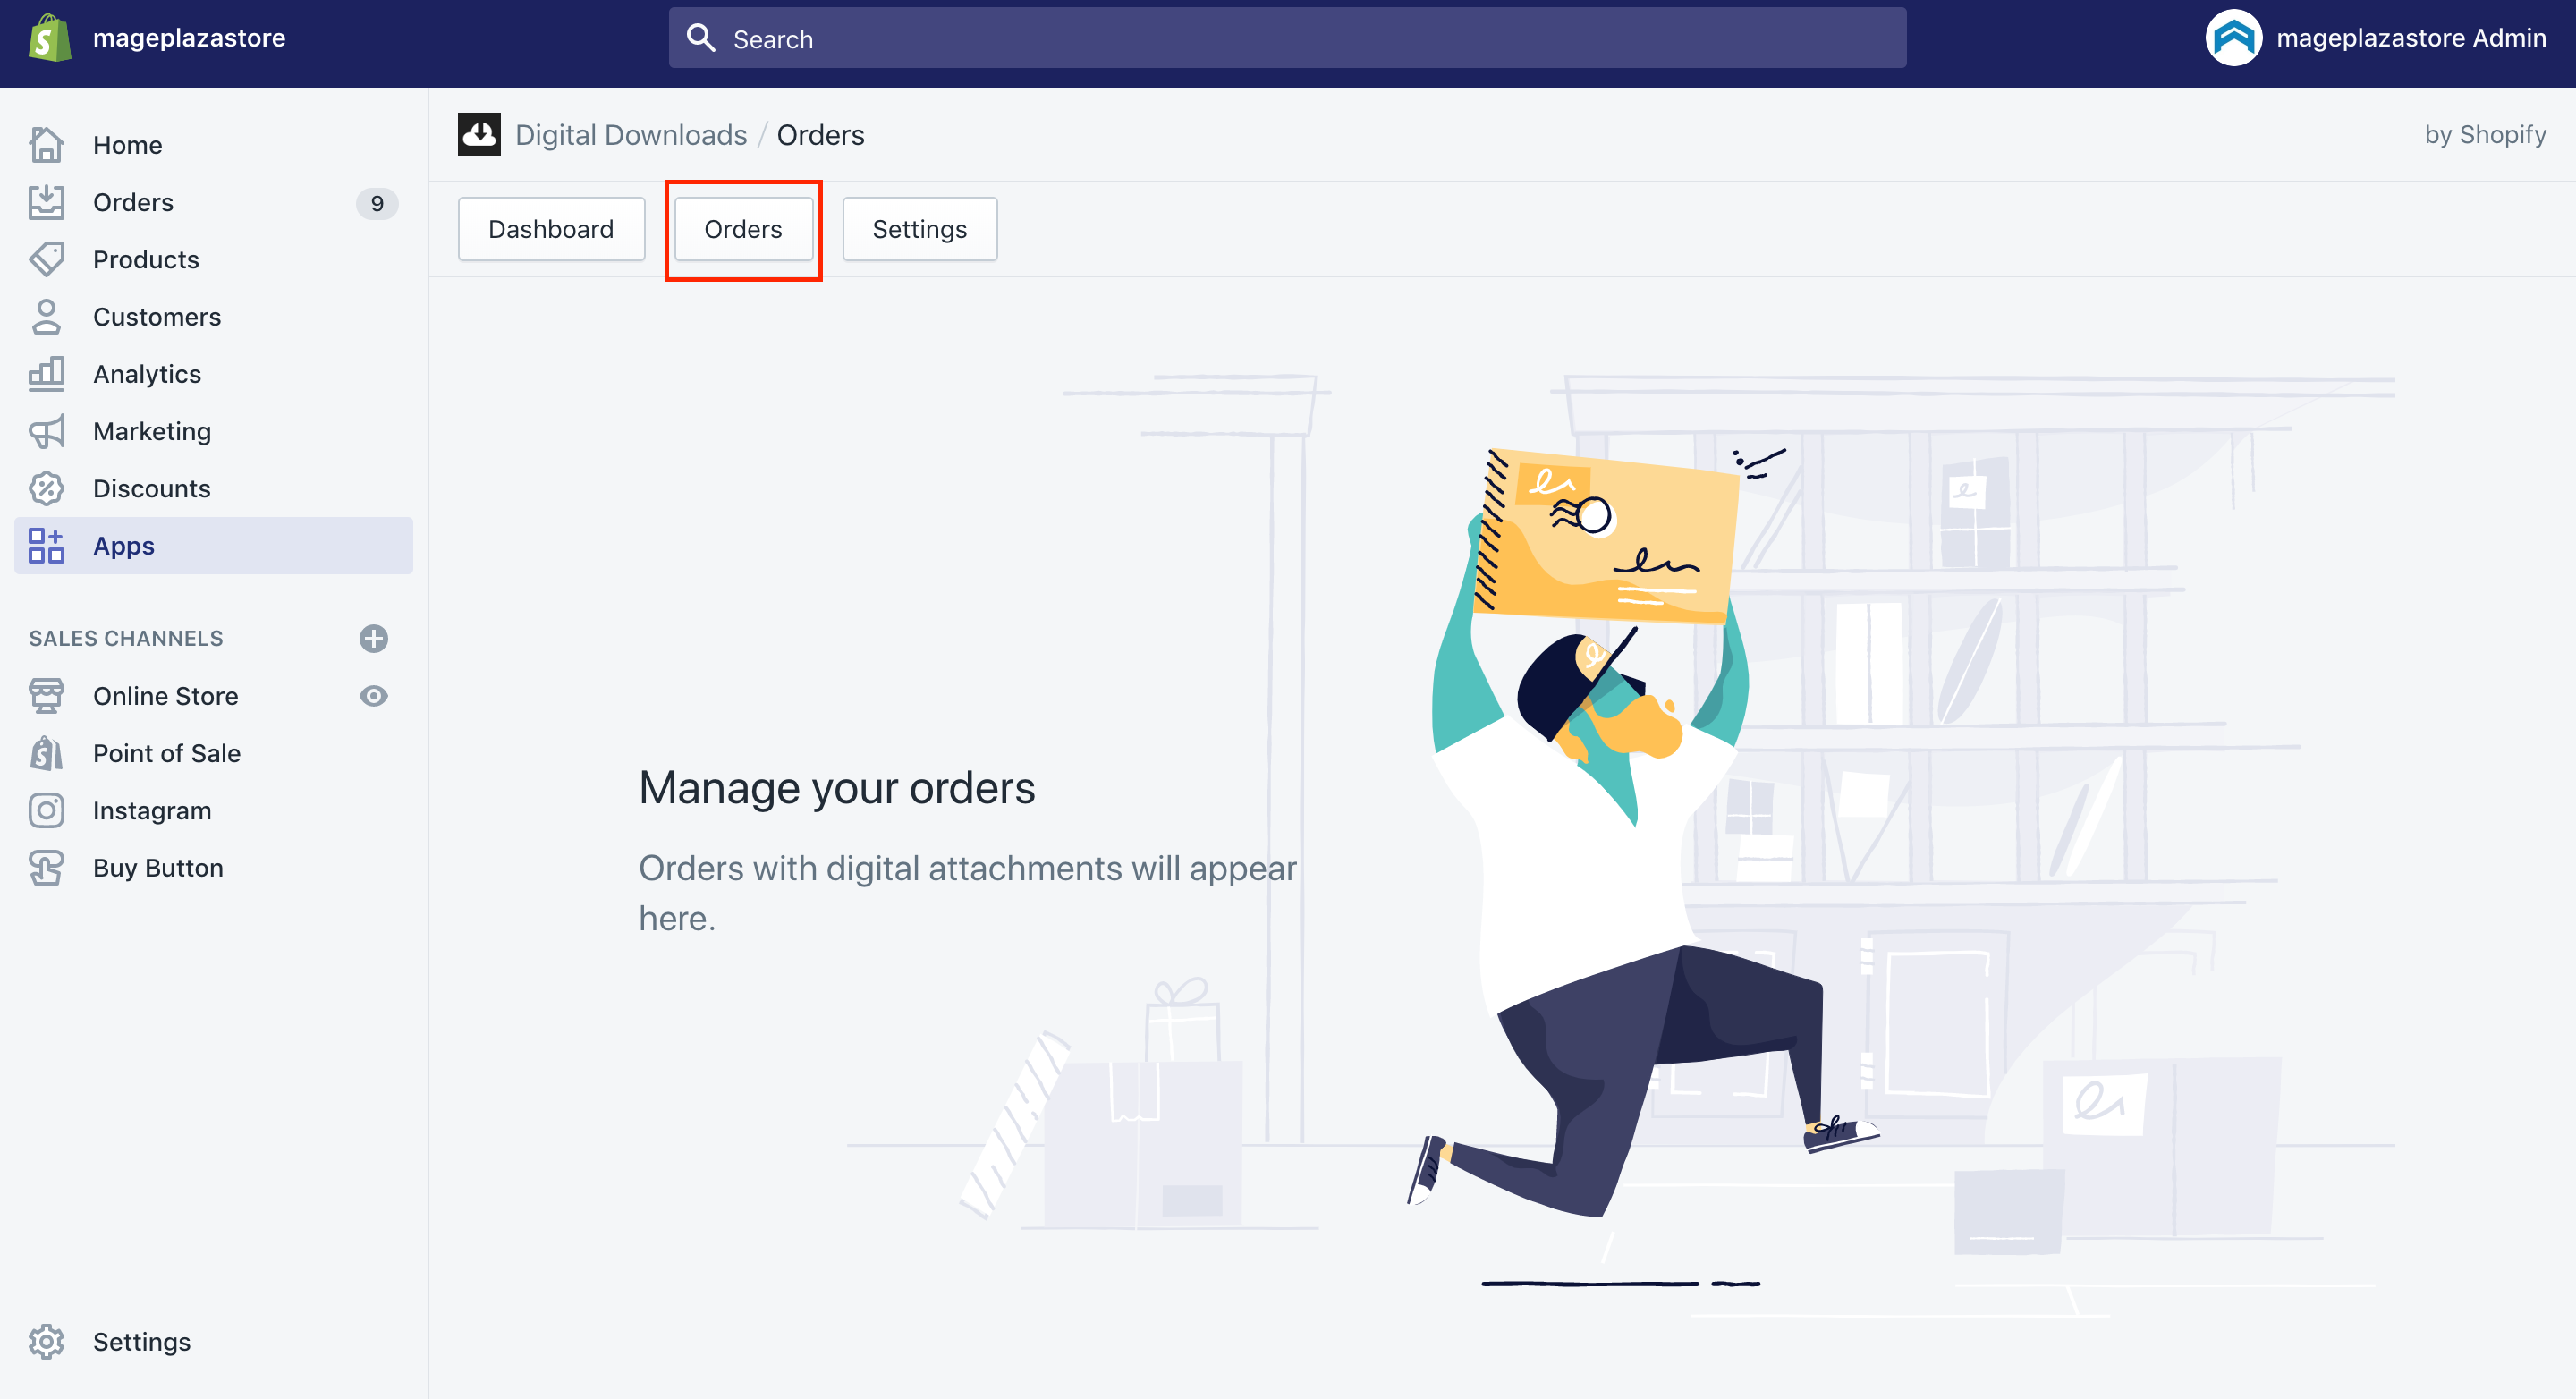
-
Step 4: Opt for your order quantity you want to resend the download.
-
Step 5: Go to
Resend Download Email.
Cancel a download
Besides resending a download link, you can cancel your customers’ download link to prevent them from downloading this product. Follow the below steps:
-
Step 1: Choose
Appsfrom the Shopify admin. -
Step 2: Click on
Digital Downloads. -
Step 3: Select
Orders.

-
Step 4: Opt for your order quantity you want to cancel the download.
-
Step 5: Go to
Cancellocated under theDownload Detailsheading.
Export a CSV file of orders
Regarding a CSV file of orders, the CSV file export option is located at the bottom of the Orders page, which can help you create a spreadsheet file of many digital orders processed by the apps. That means there still exists a record of customers’ orders in the report despite the fact that the product has not been downloaded yet.
You might want to know what the report includes. Here is the list:
- order date and time
- customer’s first name and their email address
- number of downloads
- checkout ID linked to the order
- total number of lines where you can add the items in the order
- order total (containing tax and shipping)
- SKUs added in the order
- date of latest update
- order number (mentioned as the title)
Obey the following steps to help you export the CSV file:
Step 1: Click on Apps
As usual, let’s click on Apps from your Shopify admin.
Step 2: Choose Digital Downloads
The second step is choosing Digital Downloads.
Step 3: Select Orders
To continue, let’s select Orders.
Step 4: Head to Export your orders
Then, to finish, you can head to Export your orders.
Edit email templates
If you are reading this, you might be concerned about how to edit email templates.
The Settings area will offer you ways to get your emails personalized so that you can send them to the customers. Also, there will be two email templates that are connected to digital products.
-
Downloads ready: Your customers will receive this email as they are informed that their digital items are ready to be downloaded.
-
Attachment updated: Your customers also get this email as the digital items that they have already purchased are getting updated.
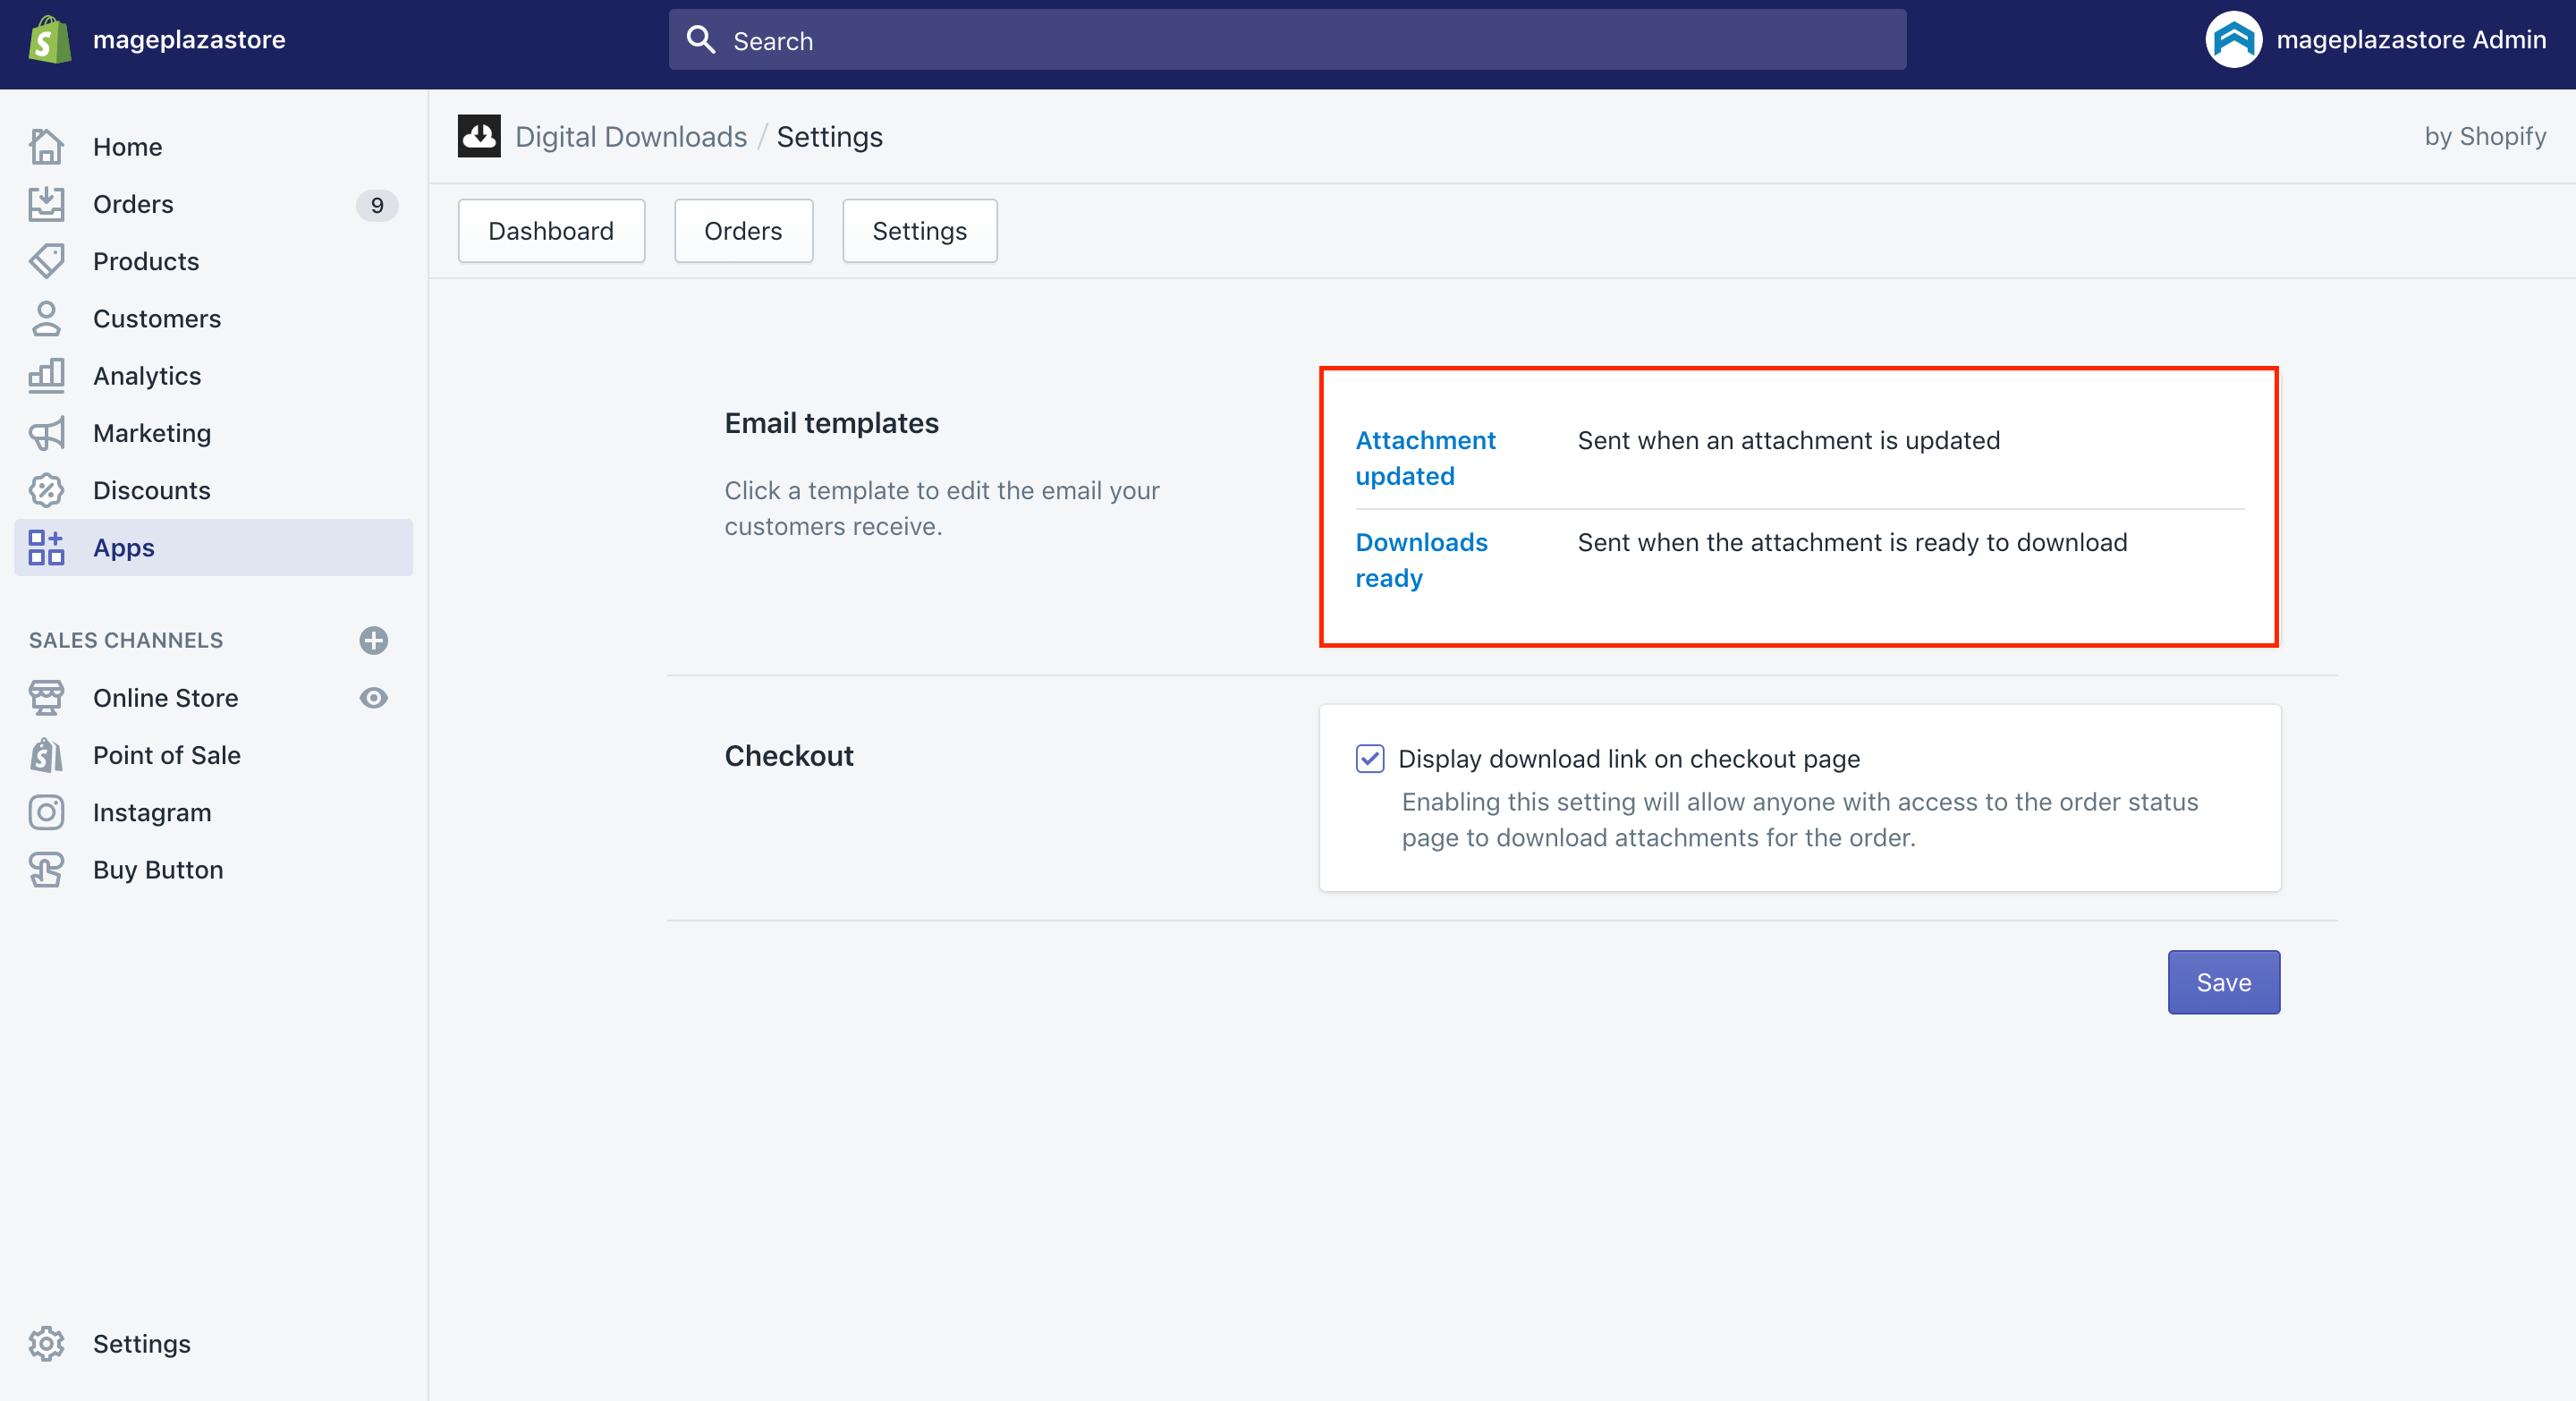
Follow the below steps to edit the email templates:
Step 1: Click on Apps
As usual, let’s click on Apps from your Shopify admin.
Step 2: Choose Digital Downloads
The second step is choosing Digital Downloads.
Step 3: Head to Settings
Next, you are able to head to Settings.
Step 4: Select the email template name you like to edit
Then, select the email template name you want to edit.
Step 5: Make a desired change.
In this step, you can make changes to meet your expectations.
Step 6: Click on Save
Don’t forget to click on Save to complete their task.
Display a download link on the checkout page
Users are able to set if their customers can download their digital products directly from the checkout page or not by following these simple steps:
Step 1: Click on Apps
As usual, let’s click on Apps from your Shopify admin.
Step 2: Choose Digital Downloads
The second step is choosing Digital Downloads.
Step 3: Head to Settings
Next, you are able to head to Settings.
Step 4: Check or uncheck the box
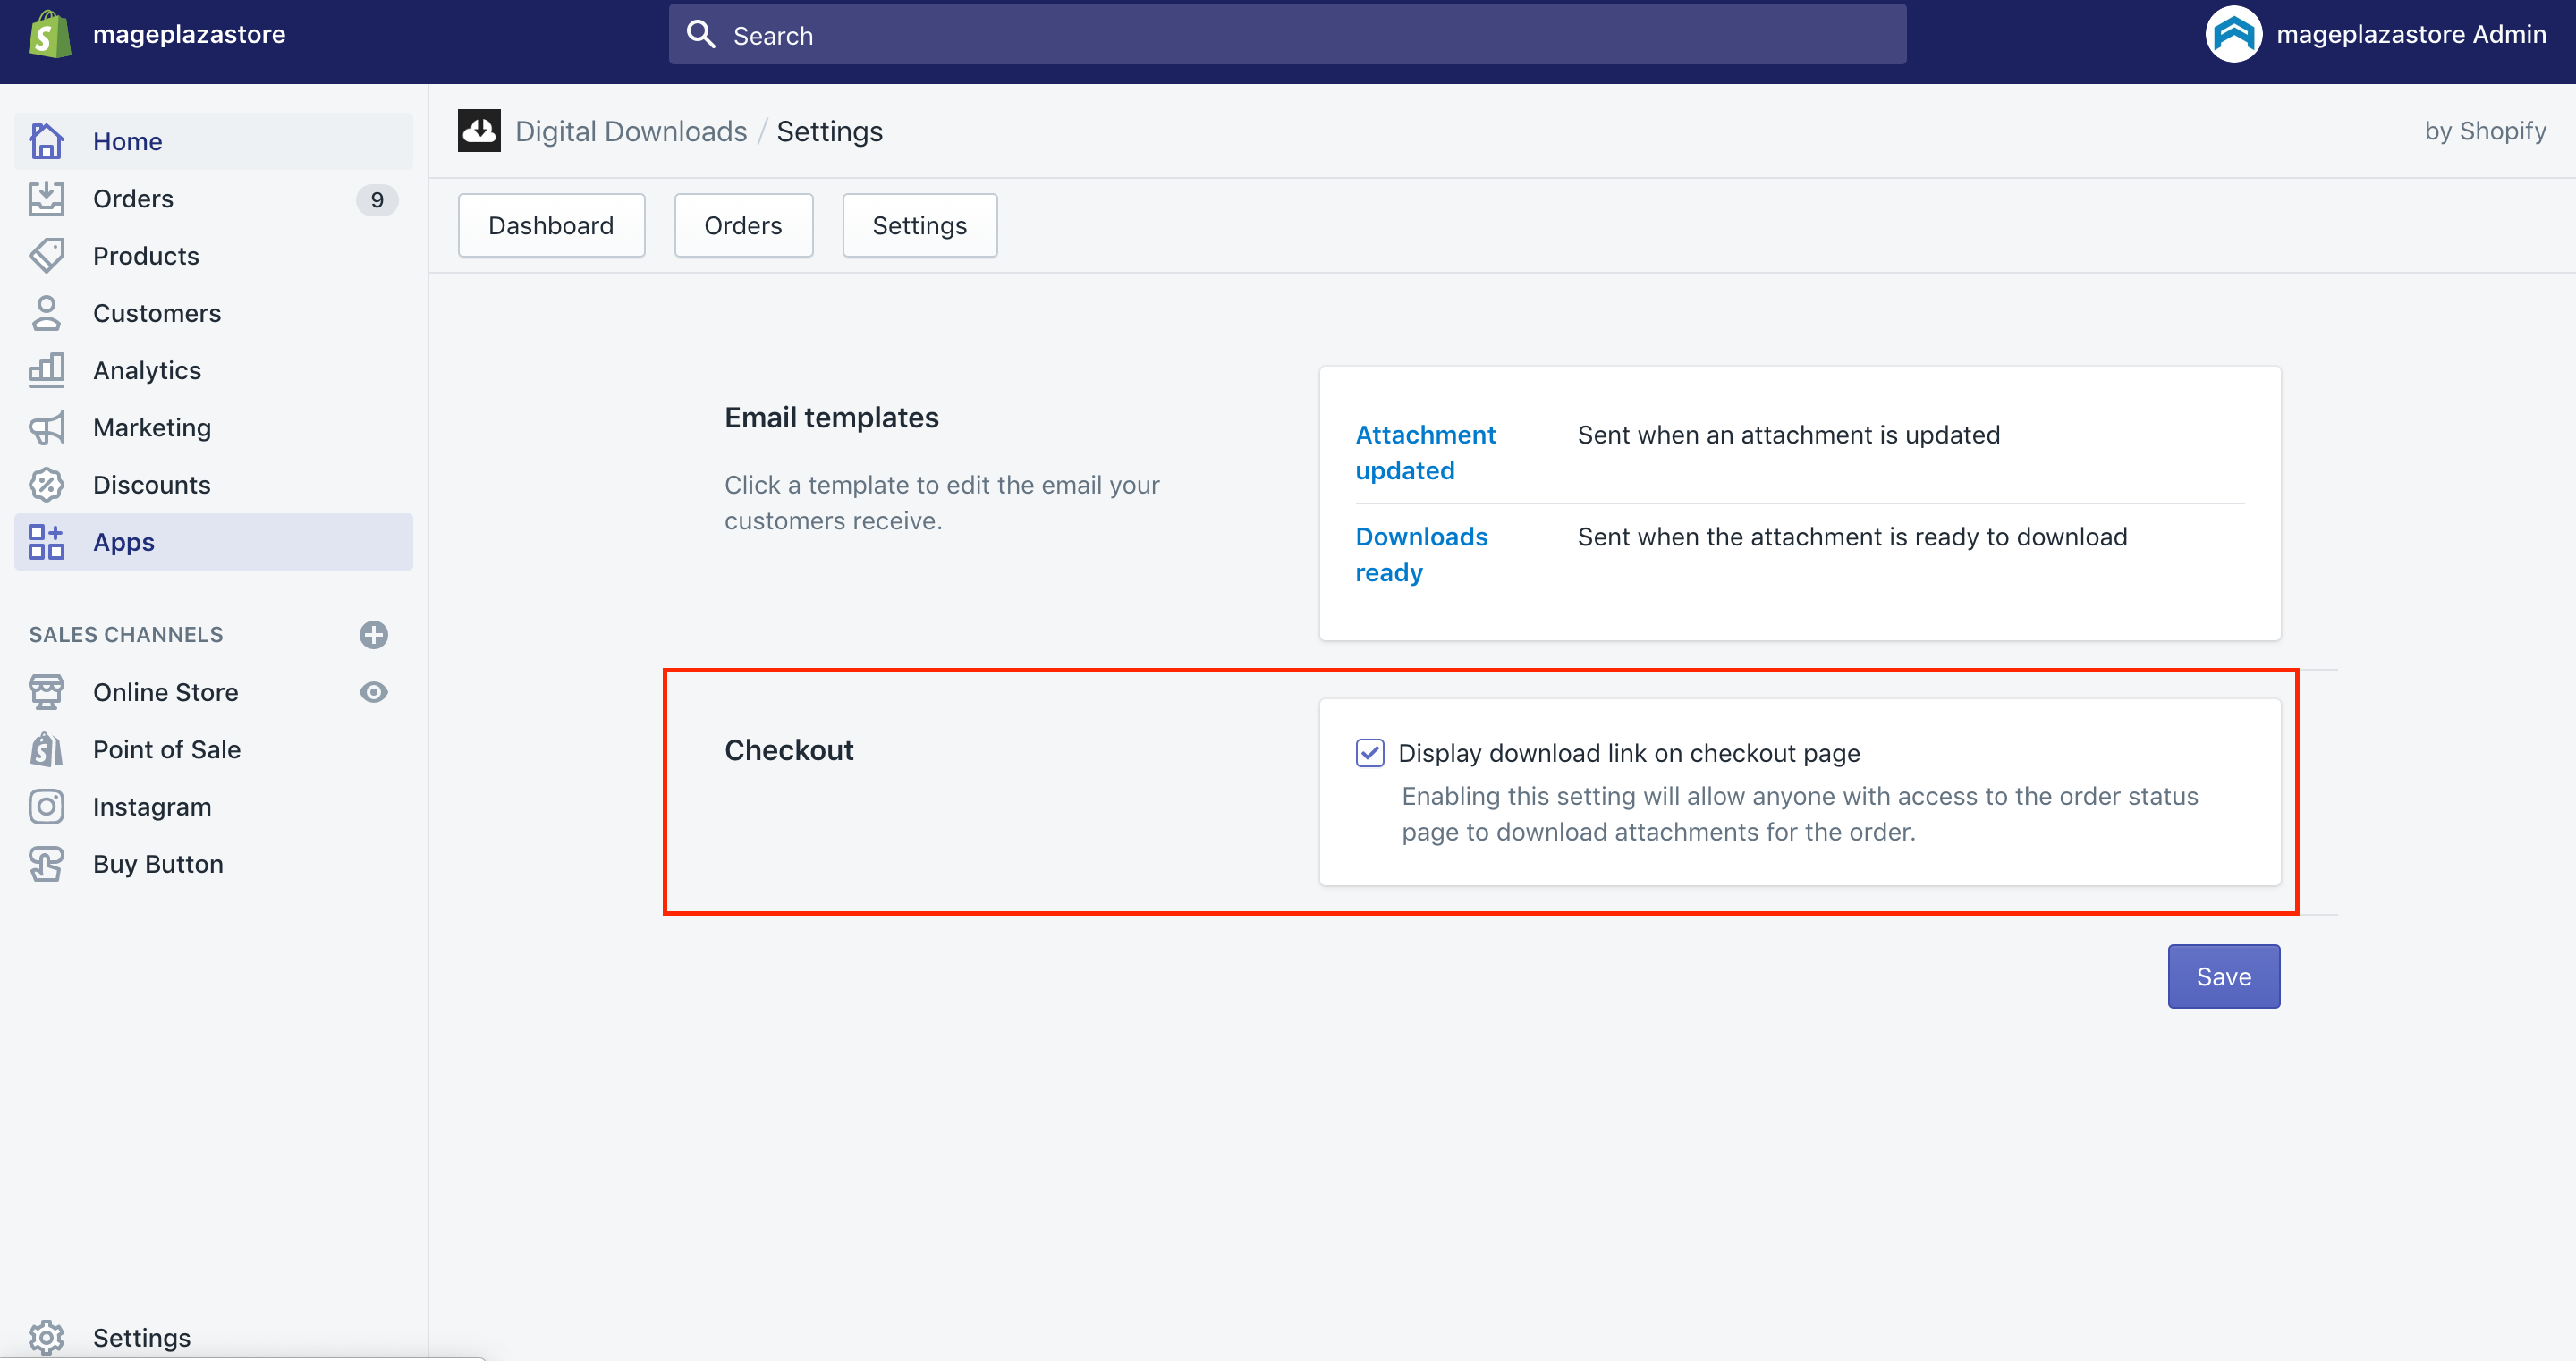
Then, located next to the Checkout, you can check or uncheck the box beside Display Download Link on checkout page.
-
In case you check the box beside
Display download link on checkout page, your customers will see aDownload nowlink located on the confirmation order page. At the same time, they also receive emails to allow them to download the file. -
In case you uncheck the box beside
Display download link on checkout page, your customers will not see theDownload nowlink on the confirmation order page. In this situation, they will receive the email that allows downloading the file.

Step 5: Press on Save
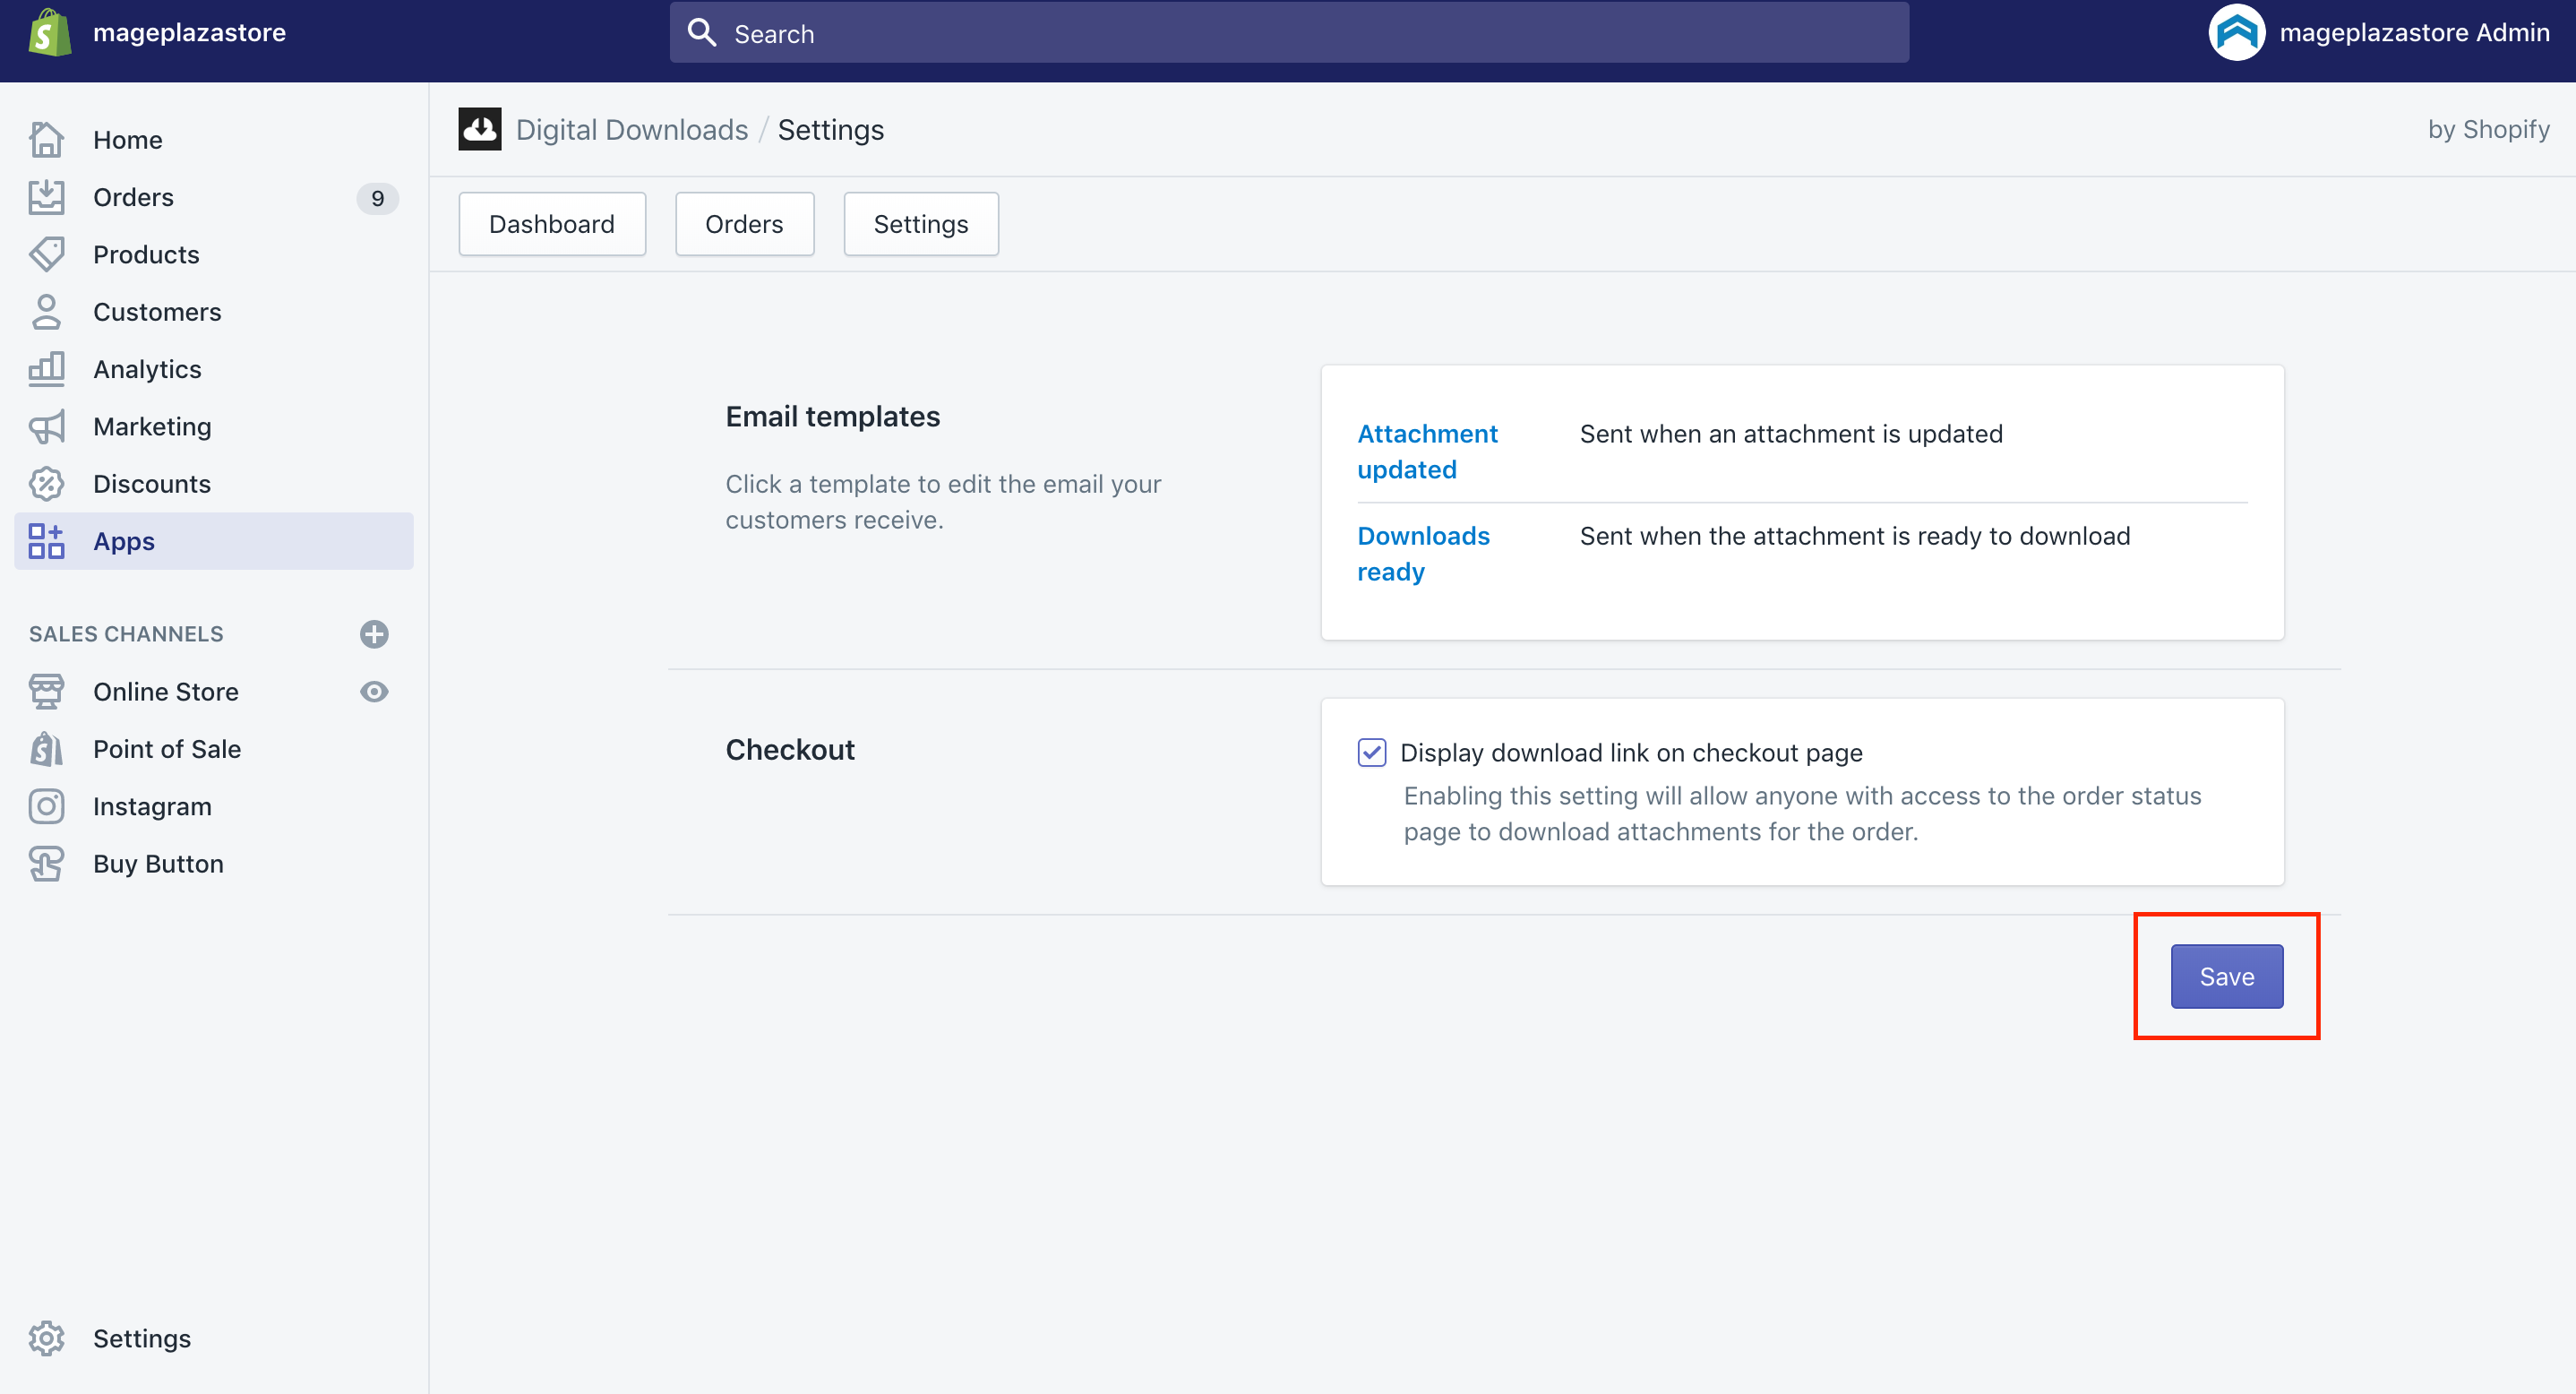
To save what you have done, press on the Save button.
Apps to help you sell more ebooks in Shopify
Product Reviews
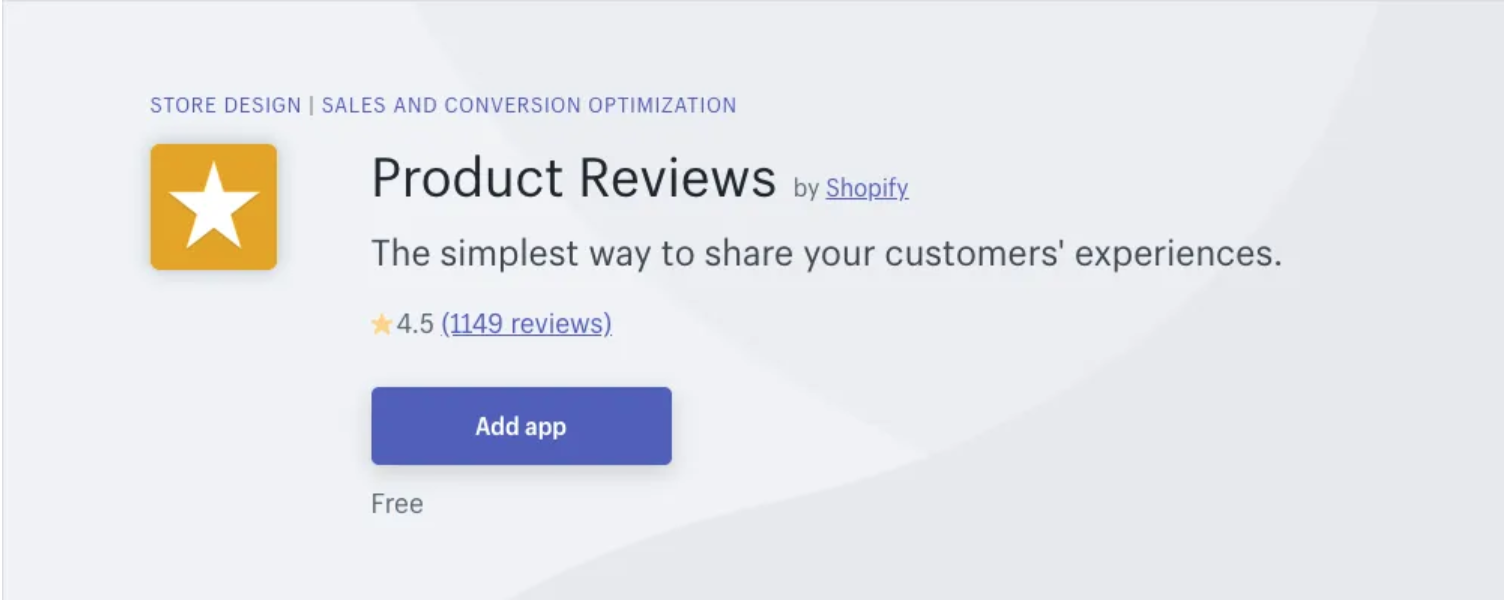
As far as we know, Shopify is offering you a great number of apps; however, Product Review is the simplest while others are free to use. The importance of seeing reviews plays an essential role in making buyers come with their final decision about purchasing the products, even books. There is no doubt that potential readers are more likely to buy your books if they can see that others enjoy your books too.
While Product Reviews App does not provide users with service imports, it also applies SEO friendly formatting and gives you a quick way to add reviews. In case you still want to have a product review App without importing reviews from different sites, you might have to pay fees to the App provider.
Shopify® POS

The Point of Sale options, in fact, is an extra service you can add to your Shopify store. In addition, Shopify POS does not contain a mobile app so that you can take the retails on the way. Shopify POS sells a mobile card reader for around $49 and with this useful tool, you can easily use the existing Shopify store to manage your sales. This will include print-on-demand sales as well as selling copies. It is certain that you can see that many vendors take their payment via the smartphone, along with mini-card readers. The function of selling books, no matter what the setting is makes Shopify POS become one of the most powerful apps.
Buy Button
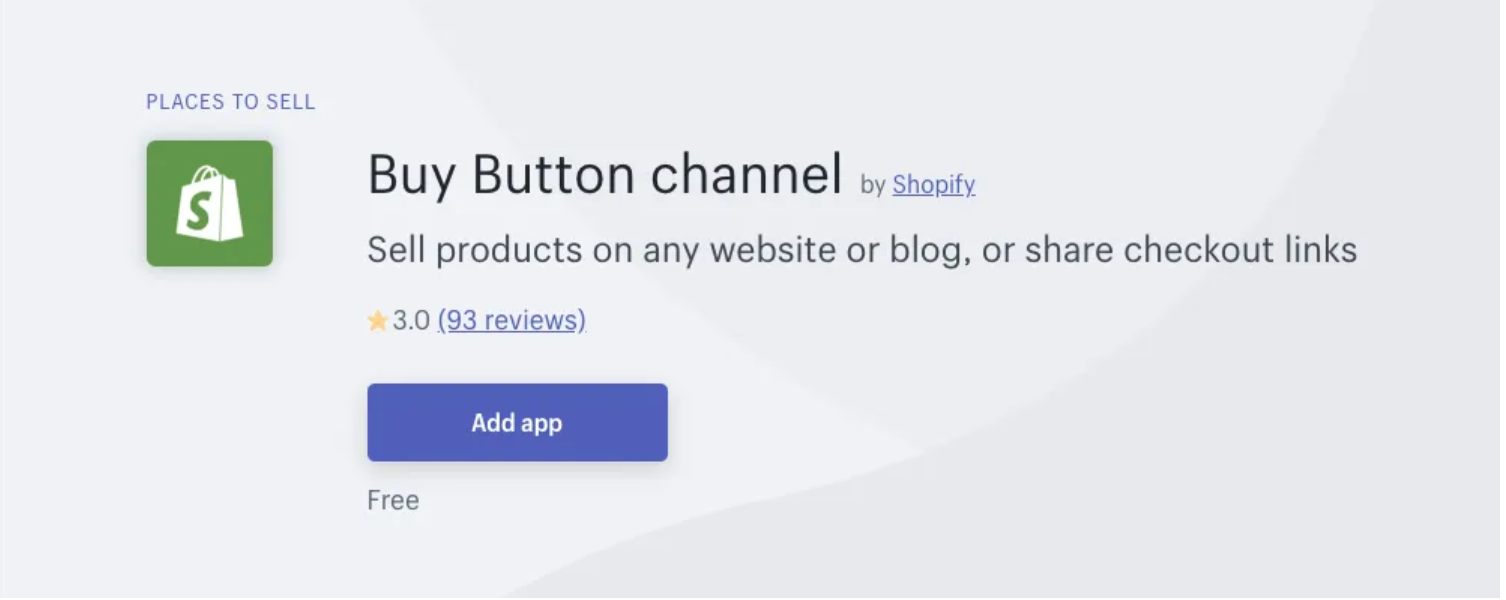
In fact, Pay Button app is designed ty Shopify to provide you with a simple buying button that you can insert anywhere. All you need to do is to install the app and choose the option to get the Buy Button line of HTML copied for your own product. After that, you can add this HTML to your blogs or websites. This product’s picture and link buying will be automatically created.
It is also important to notice that Buy Buttons are part of the Shopify Lite plant. This enables you to sell on your own sites through Shopify’s eCommerce for little investment.
Facebook Channel

Another Shopify app that can be built is the Facebook Channel app which supports you in connecting your stores to the Facebook business page so that you can sell on your social media. If you tend to invest in marketing on Facebook, the Facebook Channel app is a must to give your followers the capability to buy without leaving the site.
Instagram Channel
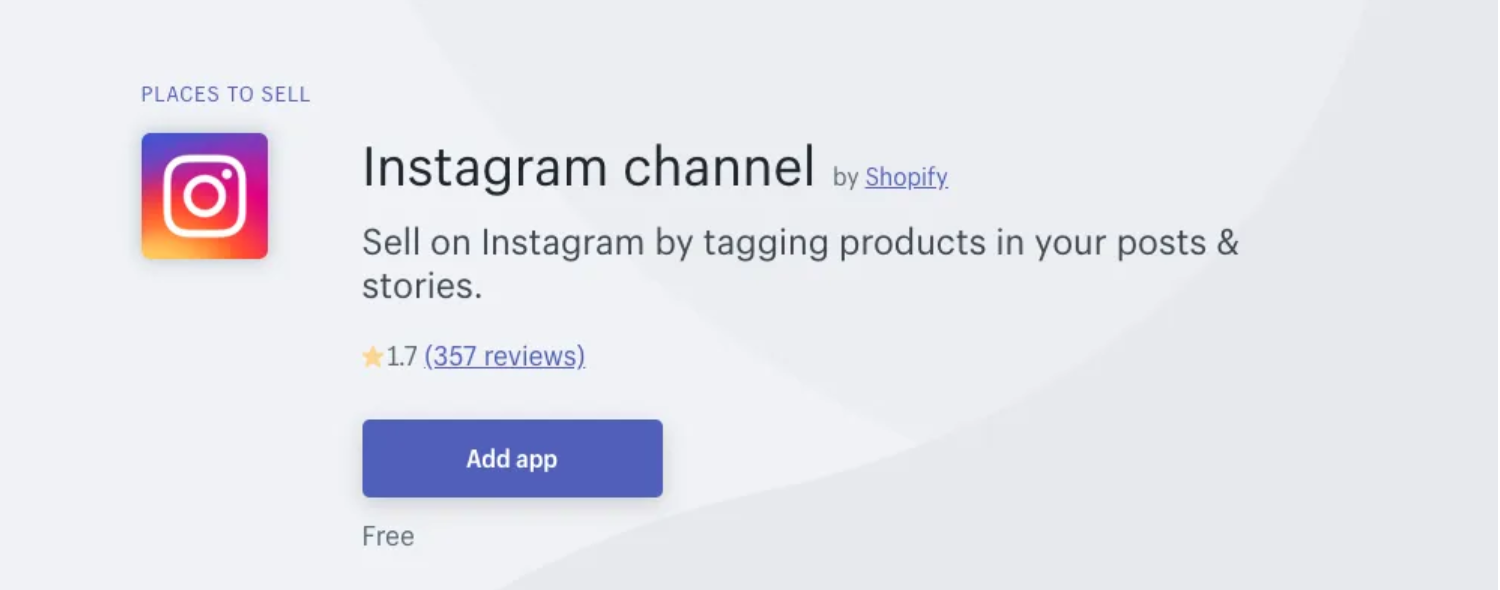
Like Facebook Channel, Instagram Channel app enables you to connect your items to your Instagram feeds as well as make sales on your social media sites directly.
As you might not know, adding social selling can be beneficial for many creators, particularly those who depend on the digital world to help spread their power. If you are active on your own social channels, why don’t you take advantage of them to sell directly? This is one of the greatest ways to improve your sales and simplify all of the process.
Recommend: 6 Best Shopify Digital Downloads Apps
Conclusion
We hope that this above article somehow makes you understand completely about what digital products are and how to sell eBooks in Shopify. Additionally, some powerful Shopify apps are also introduced to aid you in quickly boosting your sales and get all processes to become simple.
If you have any questions, don’t hesitate to contact us via email. We would love to hear from you and are willing to assist whenever you need help.
Related Posts:


