How to Set Up ReCharge on Shopify store
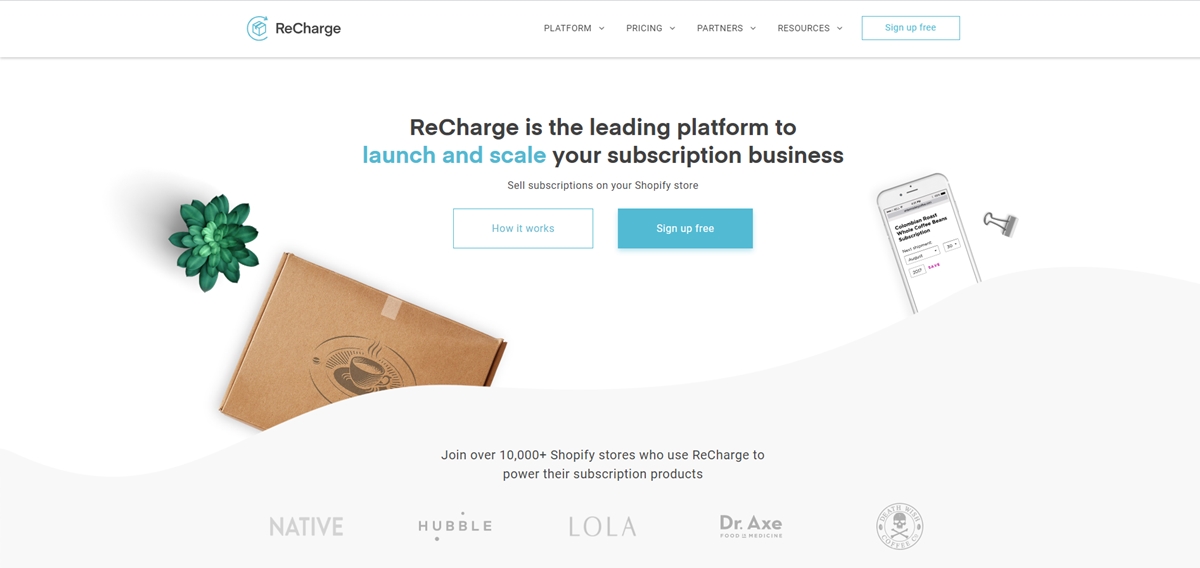
ReCharge is an amazing app that makes selling subscription products easy and convenient. This tool will benefit both merchants and customers in Shopify store. ReCharge will support the merchants with recurring products and subscription boxes. Besides, the customers will find it easy and simple to manage their subscription directly from your website. Therefore, it’s necessary for you to learn about detailed steps to set up ReCharge the most quickly.
In this writing, we would like to help you understand what ReCharge is and how to Set Up ReCharge for your Shopify store successfully. Let’s get it started now! Related Posts:
- How to Deactive Manual Payment Methods on Shopify?
- Accept & Enable Apple Pay on Shopify store
- Test Checkout Process on Shopify
What is Recharge Payment?

ReCharge is a recurring paying app designed for Shopify only. It provides physical subscription products for stores and optimizes customer checkout process.
Using ReCharge, there’s no need to worry about forgetting an order because it will repeat your customer’s subscription orders by your parameters and save them to your Shopify Orders. In addition, you can use subscription rules for the configuration. Then, you are able to overhaul the frequency and time of the customer is charged. You can also offer discounts, set cut-out dates and offer gift subscriptions.
The ReCharge customer portal consents your customers to control their subscription directly from your store. Besides, you can prevent subscribers from skipping and canceling. This app even aids in designing user-definable, brand-friendly notifications.
ReCharge’s Inventory Management Systems will automatically merge into the eCommerce inventory system of your platform and use SKU checking your store’s stock counts continually.
With the aim of capturing and ensuring a safe customer’s credit card vault with the payment processor, customers need to pay some fee for signing up when they purchase a ReCharge subscription product. Next, your orders will be automatically updated so you can carry out and control them from Shopify. ReCharge will also link the orders to all Shopify integrations including fulfillment, stock, accounting and so on.
How does ReCharge Work with Shopify?
ReCharge allows users to create recurring billing choices for their products on Shopify. When customers check out, a separate Recharge page will appear to implement payment. Both Shopify and ReCharge will take responsibility for managing and control customer accounts independently.
The customers using ReCharge just have to pay $39.99 USD per month and an extra fee per recurring order depending on your business’s size.
How to Set Up your Shopify store’s Recharge Payment
Step 1. Add Recharge include to the product page
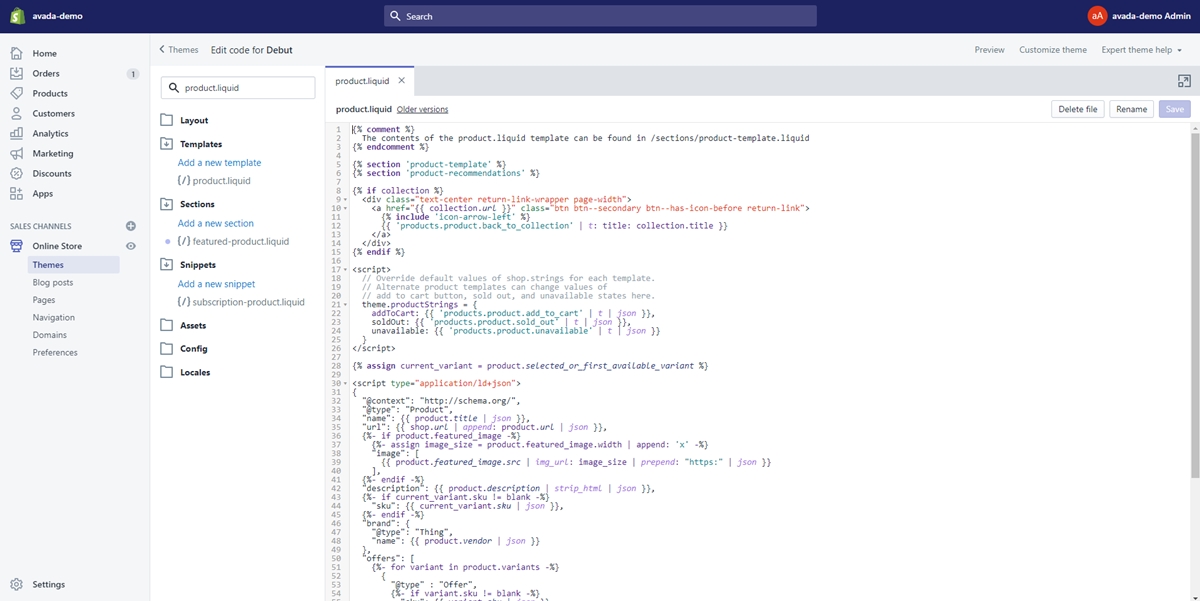
In your theme files, choose the file where the product form begins such as product.liquid, product-form.liquid or product-detail.liquid.

Find the form tag with an action attribute set to /cart/add. Look at this example:
<form id="add-item-form" action="/cart/add" method="post"><br>
Enter the code in the line below the form:
{% if product.available %}{% include 'subscription-product' %}{% endif %}

Step 2. Insert code to form on product page
Enter the following code: data-productid="{{product.id}}" in the form tag, provided that the result will look like this:
<form id="add-item-form" action="/cart/add" method="post" data-productid="{{product.id}}">
In the same product.liquid file, find a select/ an input with the attribute name=”id”. For examples:
<select id="product-select-{{ product.id }}" name='id'><br>
<input type="hidden" name="id" value="{{ product.variants.first.id }}" />
Add data-productid="{{product.id}}" to all of those you can look for. The result should look similar to this:
<select id="product-select-{{ product.id }}" name='id' data-productid="{{product.id}}"><br>
<input type="hidden" name="id" value="{{ product.variants.first.id }}" data-productid="{{product.id}}" /><br>
Step 3. Add the ReCharge include to the cart page
Go to the cart.liquid file. Enter the following code at the top of the file:
{% include 'subscription-cart-footer' %}
It’s necessary to hide your additional checkout buttons on your cart page. To implement this, you need to look for this IF statement:
{% if additional_checkout_buttons %}
 ..... THEME CODE ......
                        {% endif %}
Add one tag with the attribute class = “additional-checkout-buttons”. The result should be:
{% if additional_checkout_buttons %}
        <span class="additional-checkout-buttons">
      <div id="additional-checkout-buttons">
          <span>{{ 'cart.label.other_payment_types' | t }}</span>
          {{ content_for_additional_checkout_buttons }}
      </div>
    </span>
{% endif %}<br>
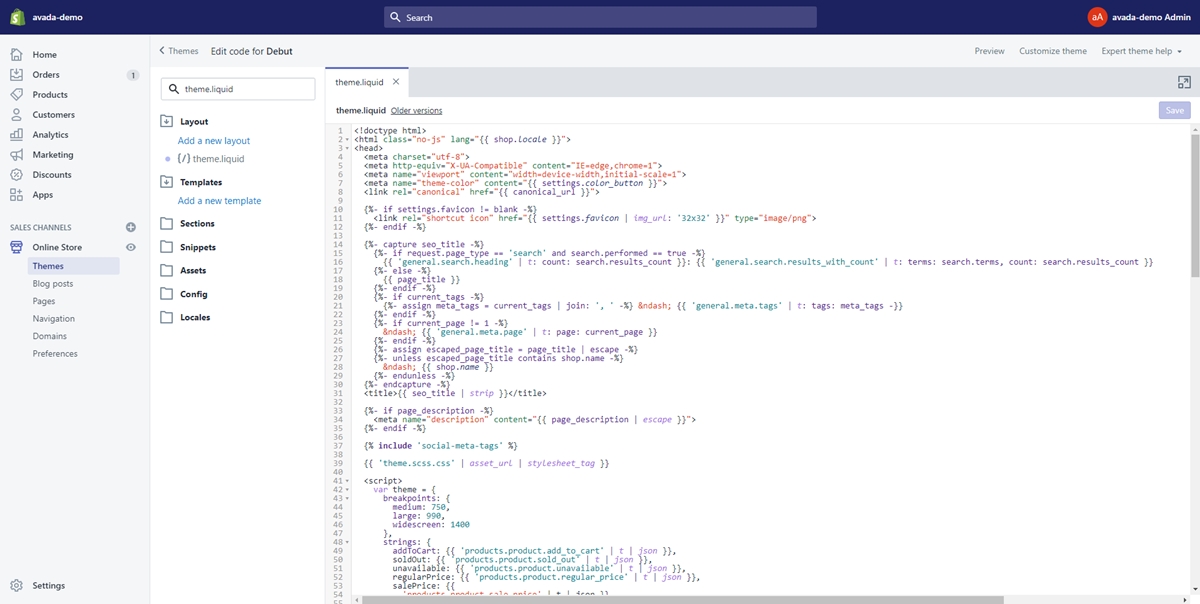
Step 4. Add the ReCharge include to the theme.liquid
Open your theme.liquid file and go to the bottom of the page.

Enter the following line above the closing body tag:
{% include 'subscription-theme-footer' %}
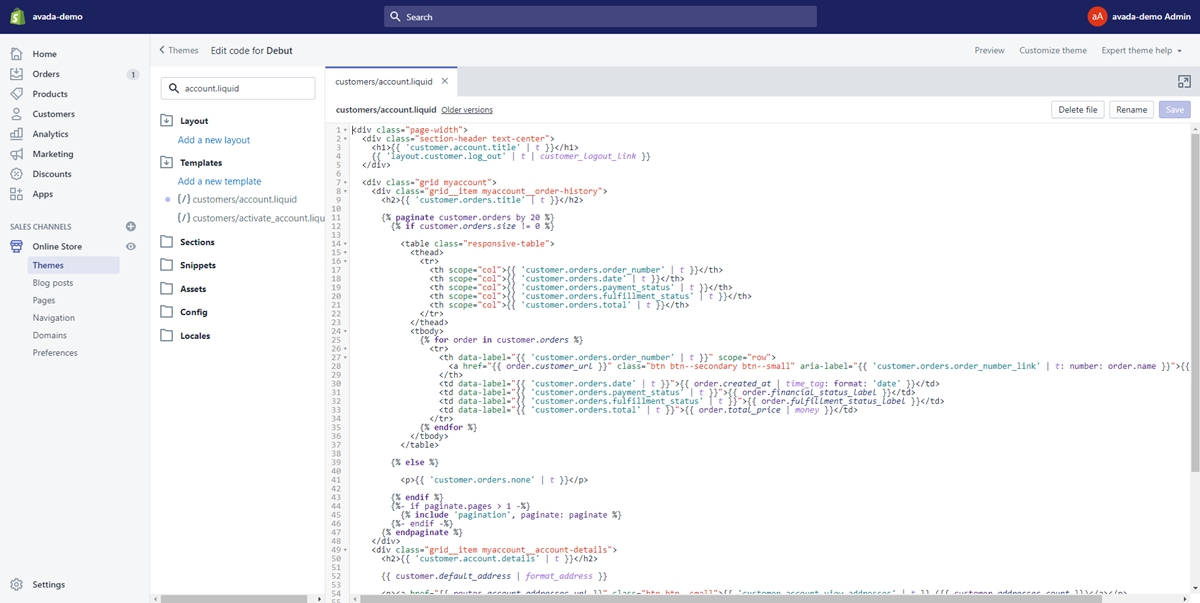
Step 5. Add the ReCharge code to customers/account.liquid
Open the customer template named account.liquid in the Shopify Theme editor.

Enter the code below the line that has the Customer name:
{% if customer.metafields.subscriptions.customer_string %}
<!--BeginRechargeCode-->
<p><a href="/tools/recurring/customer/{{customer.metafields.subscriptions.customer_string}}/subscriptions/">Manage Subscriptions</a></p>
<!--EndRechargeCode-->
{% endif %}<br>
The customer can enter the Customer Portal directly into their accounts by that code. Only customers buying a subscription product can see this link.
Step 6. Add the ReCharge code to ajax-cart-template.liquid
If there is no snippet called ajax-cart-template.liquid in your theme, you can skip this step. If you have this file, you will have to go into it and enter the code below at the end of the file:
<style>
 #AjaxifyCart .additional-checkout-buttons, #ajaxifyCart .additional-checkout-buttons {
    display:none;
}
</style>
{% if template != 'cart'  %}
    <script src='//ajax.googleapis.com/ajax/libs/jquery/1.7.2/jquery.min.js'></script>
    <script>
    rjQuery = jQuery.noConflict( true );
    var subscription_active='{{shop.metafields.subscriptions.subscription_active}}'
    function get_cookie(k){return(document.cookie.match('(^|; )'+k+'=([^;]*)')||0)[2]}
    if (get_cookie('recharge')=='true' || subscription_active=='true') {
        rjQuery('body').on('click','form[action="/checkout"] input[type="submit"], #ajaxifyCart [name="checkout"], #AjaxifyCart [name="checkout"], #shoppingBagInner [name="checkout"]', function(e){
            e.preventDefault();
            window.location.href = '/cart';
        })
        rjQuery('.additional-checkout-buttons').hide()
        rjQuery(document).ready(function(){
            rjQuery('.additional-checkout-buttons').hide()
        })
    }
    </script>
{% endif %}<br>
Step 7. Add a product to your subscription
You can add a product to a new or existing order to overhaul the integration and ensure whether the integration is well-installed. You can add your additional products at other times.
Step 8. Preview the app on your store
Modify the URL of the product you have added so it has ?recharge=1 at the end. Then you can preview the subscription option.
Tip: You had better run a test transaction before going live.
Conclusion
Through this article, we hope that you can deeply understand what ReCharge Payment is and know how to Set Up Recharge on your Shopify store. We believe that this excellent app will support your business effectively and bring you a wonderful experience with Shopify.
If you still have any concerns or questions, please contact us for more helpful information. We’re very glad to serve you.


