Shopify Packing Slip: Everything You Need to Know
As the digital world is increasingly becoming popular, which enables you to purchase online, receive your receipt via email, and have the ability to access your complete buying history all on your Shopify platform. So, in order to run your business more smoothly, fulfilling orders quickly and accurately is an important factor in running an online business. That’s why Packing Slip was invented as a customizable sheet to indicates what and how many items are in a shipment to help to communicate what has been sent to the customer.
However, consumers and merchants nowadays have paid less attention to the Packing Slip on Shopify, but I still think it is still a common part of the packing process in many eCommerce shipping operations. So, I have this article today to carefully provide all necessary information that you need to know about Packing Slip, how to deal with it as well as its role in your eCommerce Shopify store.
What is Shopify Packing Slip?
A Shopify Packing Slip is created as a complete list of all items included in a shipment order, which is sent to the shipping department to instruct the buyers to add the inventory needs to be sent out to complete the order. A packing slip is different from an invoice as it is normally used to denote the physical goods being received. Meanwhile, an invoice shows the financial document of the order, which has information like how much money each product was sold for, the payment terms, payment method, and many more.
Specifically, packing slips is what keep you organized no matter you are shipping one order at a time or multiple. Normally, when you prepare the orders that are ready to ship, then you need to print the packing slip to note everything that the customer ordered, also the shipping label for them. Next, you need to pick the items in the orders, pack them up, and then just ship it.
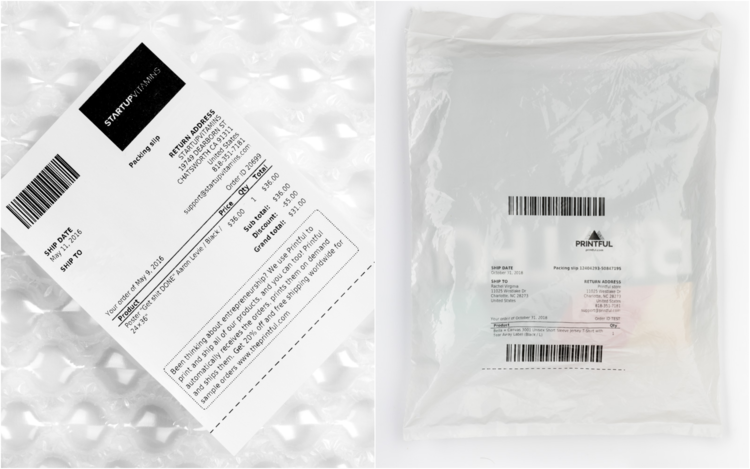
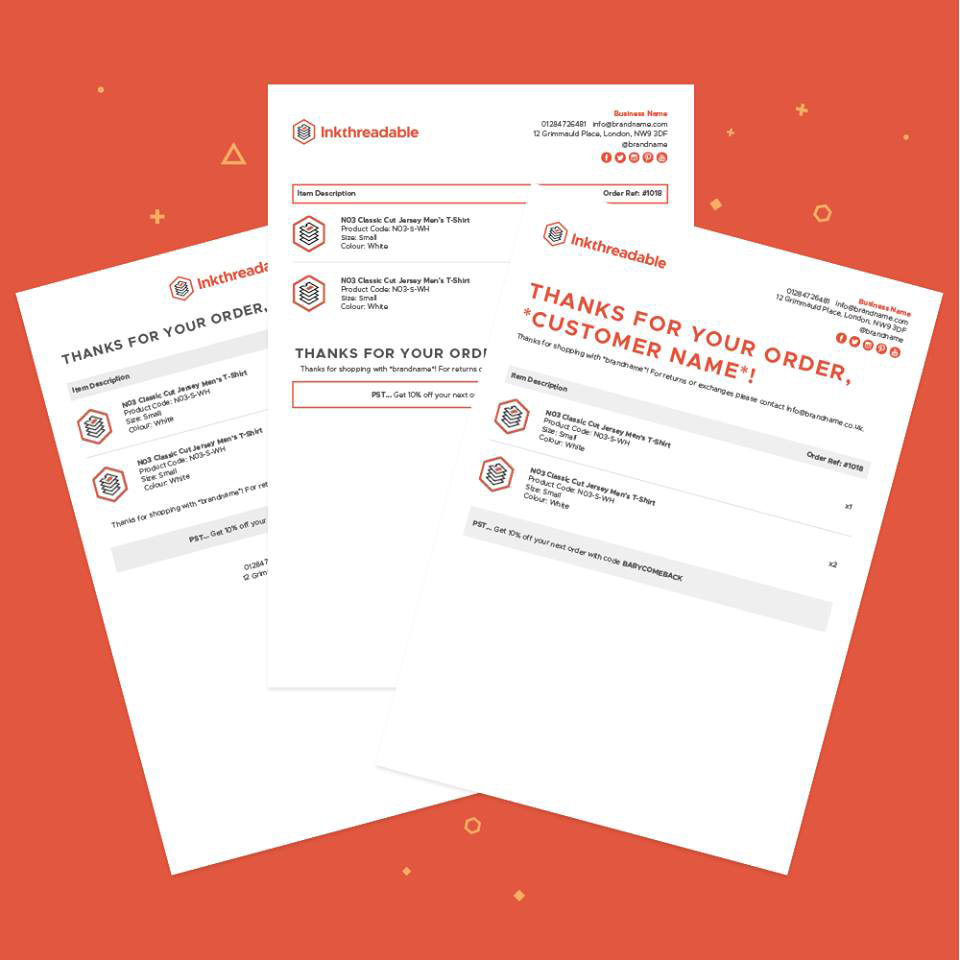
On Shopify, a packing slip is normally printed in two sizes, either 4x6 or 8x11. It can be customized to include your store name, logo, or additional notes for customers. Also, Shopify notifies that they will add more features like multiple template support and bulk printing for Packing Slip in the days to come.
Why is Packing Slip Important?
Make sure the shipment has everything
As you can see, while fulfilling an eCommerce order, merchants should check and double-check it during the process before they seal and label a box. Then, in that process, the packer takes charge of verifying the quality of items inside to be exactly like what the customer ordered including the counts of multiple SKUs. So, in this case, merchants should have a packing slip to reflect every detail of all ordered items, as well as record the physical items of those products. When all things are verified, the packing slip can be placed in the orders’ box and retailers can ship them.
Track all items in the order
In some cases, the size of the order and products and the location of different SKUs among different locations might split an order by putting some items in different boxes to send to customers at different times. So, in case there are multiple boxes being separated, a packing slip is what you need to track all the items and help you and your recipient stay organized instead of being worried.
Identify damaged items
With the Packing slip, when there is a damaged item happens, then it will help to identify and sort the item out easily. A Packing slip will confirm whether a fragile item is broke or the entire package was damaged in transit. Then, it will show up as a backup to help speeding up the package’s refund or to resend the procedure.
Confirm that all items were received
As you can see, packing slips helps a lot in identifying missing items, then it also is so useful in ensuring that all ordered items were received as well. It is like a paper trail or record of what is included in the shipment, then, when you can see the eCommerce order tracking to confirm whether they are all been delivered.

Enable estimating the value of a shipment
This would be helpful for international shipments. As in this case, the buyers often utilize the packing slip to calculate the value of a shipment. Nevertheless, in this case, a commercial invoice that has the description of goods, their value, the seller’s and shipper’s shipping destinations, and so on will be more preferable by customers.
How to Print Packing Slips on Shopify
After starting with the fulfillment process, the Packing slips should be print out. These should include all the items being sent in a specific shipment. Even when you have many shipments for an order, you will have to print packing slip separately. I will present two sections of printing packing slips on Shopify as the process will differ before and while purchasing a shipping label.
Print packing slips before buying a shipping label
Step 1. Navigate to Orders
When you have already been in your Shopify admin, click on the Orders button to open it.
Step 2. Choose the order
After that, just click on the order that you want to print a packing slip for, you can choose multiple orders at the same time.

Step 3. Click Create shipping label
In case you are using Shopify Shipping, which is created especially for stores based in the United States or Canada, then just click on the Create shipping label button, which is shown in the Unfulfilled section.
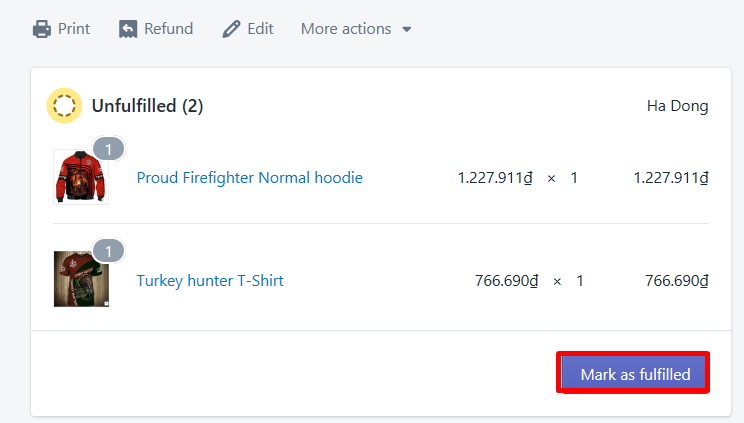
Step 4. Click Mark as fulfilled
In case you are not using the Shopify Shipping, choose the Mark as fulfilled button below the products.
Step 5. Choose Print packing slip
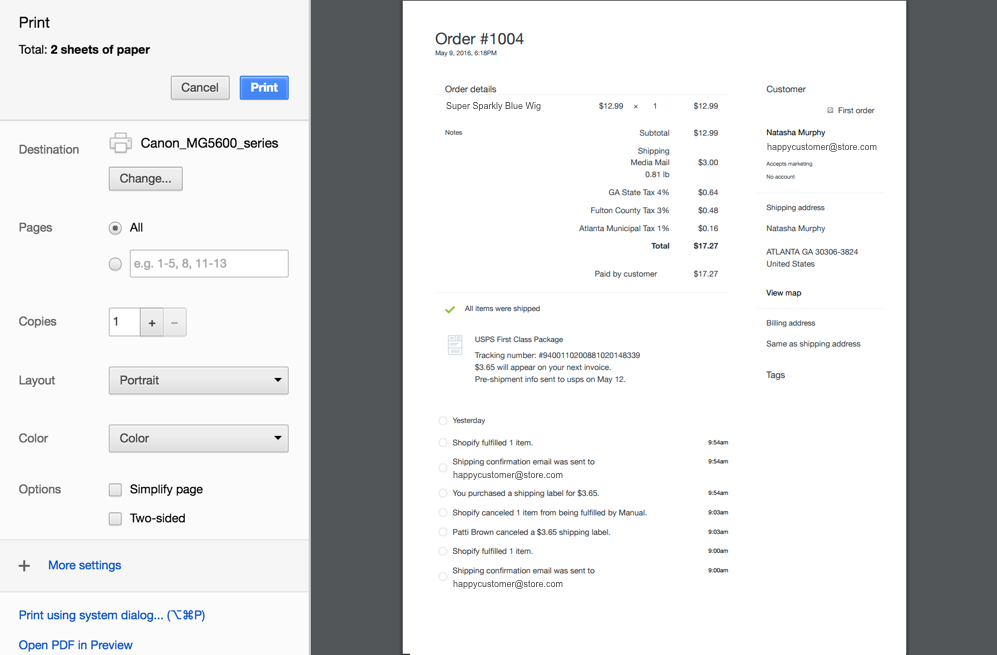
Subsequently, just hit a click on the ` Print packing slip` button.
Step 6. Choose to print

Finally, simply click Print to print the Packing Slips.
Print packing slips while buying a shipping label
Step 1. Navigate to Orders
When you have already been in your Shopify admin, click on the Orders button to open it.
Step 2. Select the order
Next, just select on the order that you want to print a packing slip for by clicking it, you can choose multiple orders at the same time.

Step 3. Click Create shipping label
In case you are using Shopify Shipping, which is created especially for stores based in the United States or Canada, then just click on the Create shipping label button, which is shown in the Unfulfilled section.
Step 4. Click Buy shipping label
After that, hit a click on the Buy shipping label option.
Step 5. Select Print packing slip
Choose Print packing slip to finish the next step.
Step 6. Click Print
Finally, click Print to get your packing slips printed.
How to Edit Packing Slips on Shopify
There is a template language called Liquid created by Shopify, which is utilized by your packing slips. If you are the person who can do well with HTML, CSS, and Liquid, then the packing slips variables are what you need to adjust your packing slip template on Shopify.
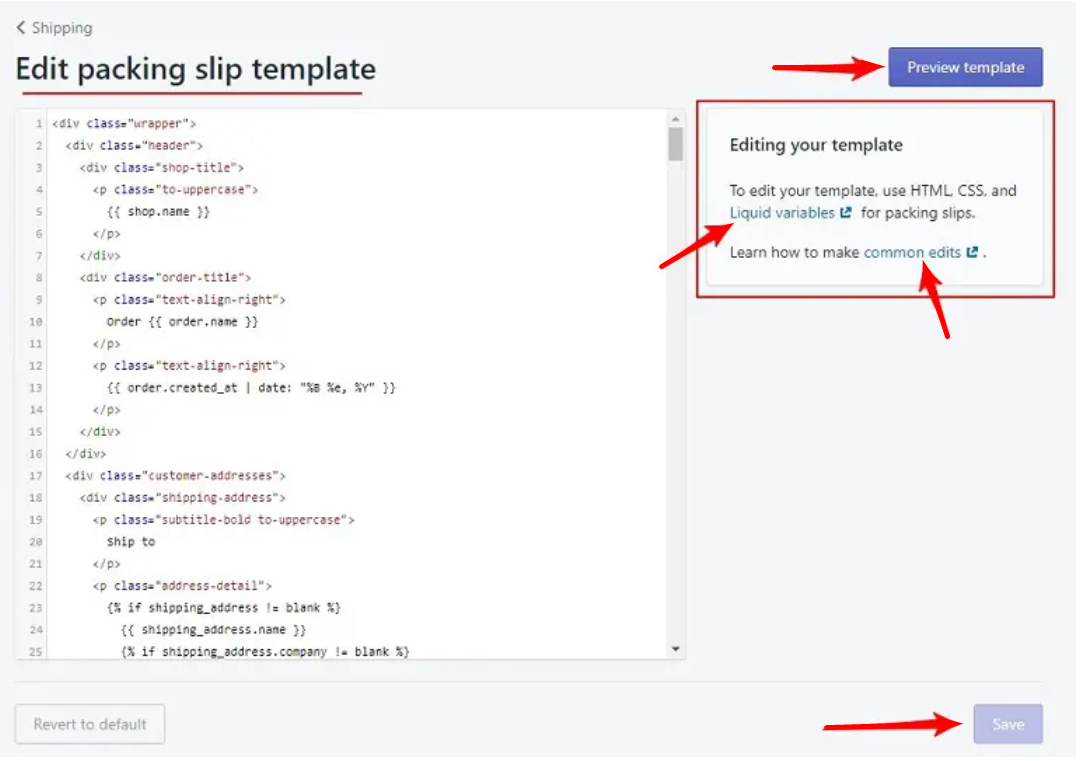
The method is simple, you just need to open the Packing slips section from your shipping settings on Shopify. After that, click the Edit button to adjust the packing slip templates. At the same time, you can just click the Revert to default button to be able to revert the packing slip back to the default template while editing. In case you want to insert the logo to your products or delete the product images from your packing slips or any other customizations, just edit the template code to do so.
Conclusion
In conclusion, Shopify Packing Slip is what represents the valuable opportunities to connect with your customers. It can fully be leveraged to drive future sales, also to manage customer expectations as well.
Hopefully, the article today can help you in understanding Shopify Packing Slip in some ways. So, it’s time for you to start creating your own store’s packing slips for every order. However, if you still have something in your mind, just inform us so that we will clearly explain it to you.
Don’t forget to visit our AVADA website regularly to get more useful knowledge while selling and shopping on Shopify.


