How to test Checkout Process on Shopify?
When you are setting up your Shopify eCommerce store, making sure about your checkout process running well when customers buy a product is really important. As in some cases, it might cause the store owner not being able to actually accept money, which is a shortage for the success of your business.
In fact, there are many new store owners who are uncertain whether their payment gateways work or not. It is necessary for them to find a way to prevent customers from running into any trouble when deciding to pay for the product they plan to purchase. Luckily, there is a very easy way around it, that is testing the Checkout Process on Shopify.
Related Posts:*
- How to Deactivate a Manual Payment Method on Shopify?
- How to Use Shopify Card Reader?
- How to Set Up Shopify Payment?
How does Shopify process checkout?
Shopify checkout is utilized to accept orders and then you can take payments online while selling. How does Shopify process checkout? First, when products are done added to a customer’s cart. After that, Shopify will use your checkout to fill in their shipping information and payment details before they place the order.
Next, the customer will soon reach the payment method page of the checkout. Then Shopify will check their cart against your store’s inventory levels. In case your inventory is available, it will be held for the customer during their payment completing process. In case the inventory is unavailable, there will be an error message shows up to notify you. If your payment is failed, then Shopify will release a hold-up until the payment method page is reached again.

In your Shopify admin, Shopify also enables you to view and change your checkout settings from the Checkout settings page. During this step, you will be enabled to manage the way you want to get your customer email addresses for promotional marketing as well.
Why should place test order?
Why should you place a test order first? Because your checkout can have flaws while you are processing it, so a test order should be placed to ensure that your checkout process and settings for order processing, inventory, shipping, email notifications, and taxes are all correct.
Also, you will not be charged for a test order. If you have any order being canceled and refunded, it will not be paid out or subjected to transaction fees. So, it is advisable to place at least 1 test order during setup, or whenever you make changes to your payment settings.

You can place a test order in three ways:
- Simulate a transaction via the Shopify’s Bogus Gateway.
- Utilize a real payment provider, immediately cancel and refund the order after that.
- Test your configuration by enabling these instructions in case you’re using Shopify Payments.
How to test checkout on Shopify by placing a test order?
By simulating a transaction
There is also a more detailed instruction here on our website to Place Test Order by Simulating Transaction
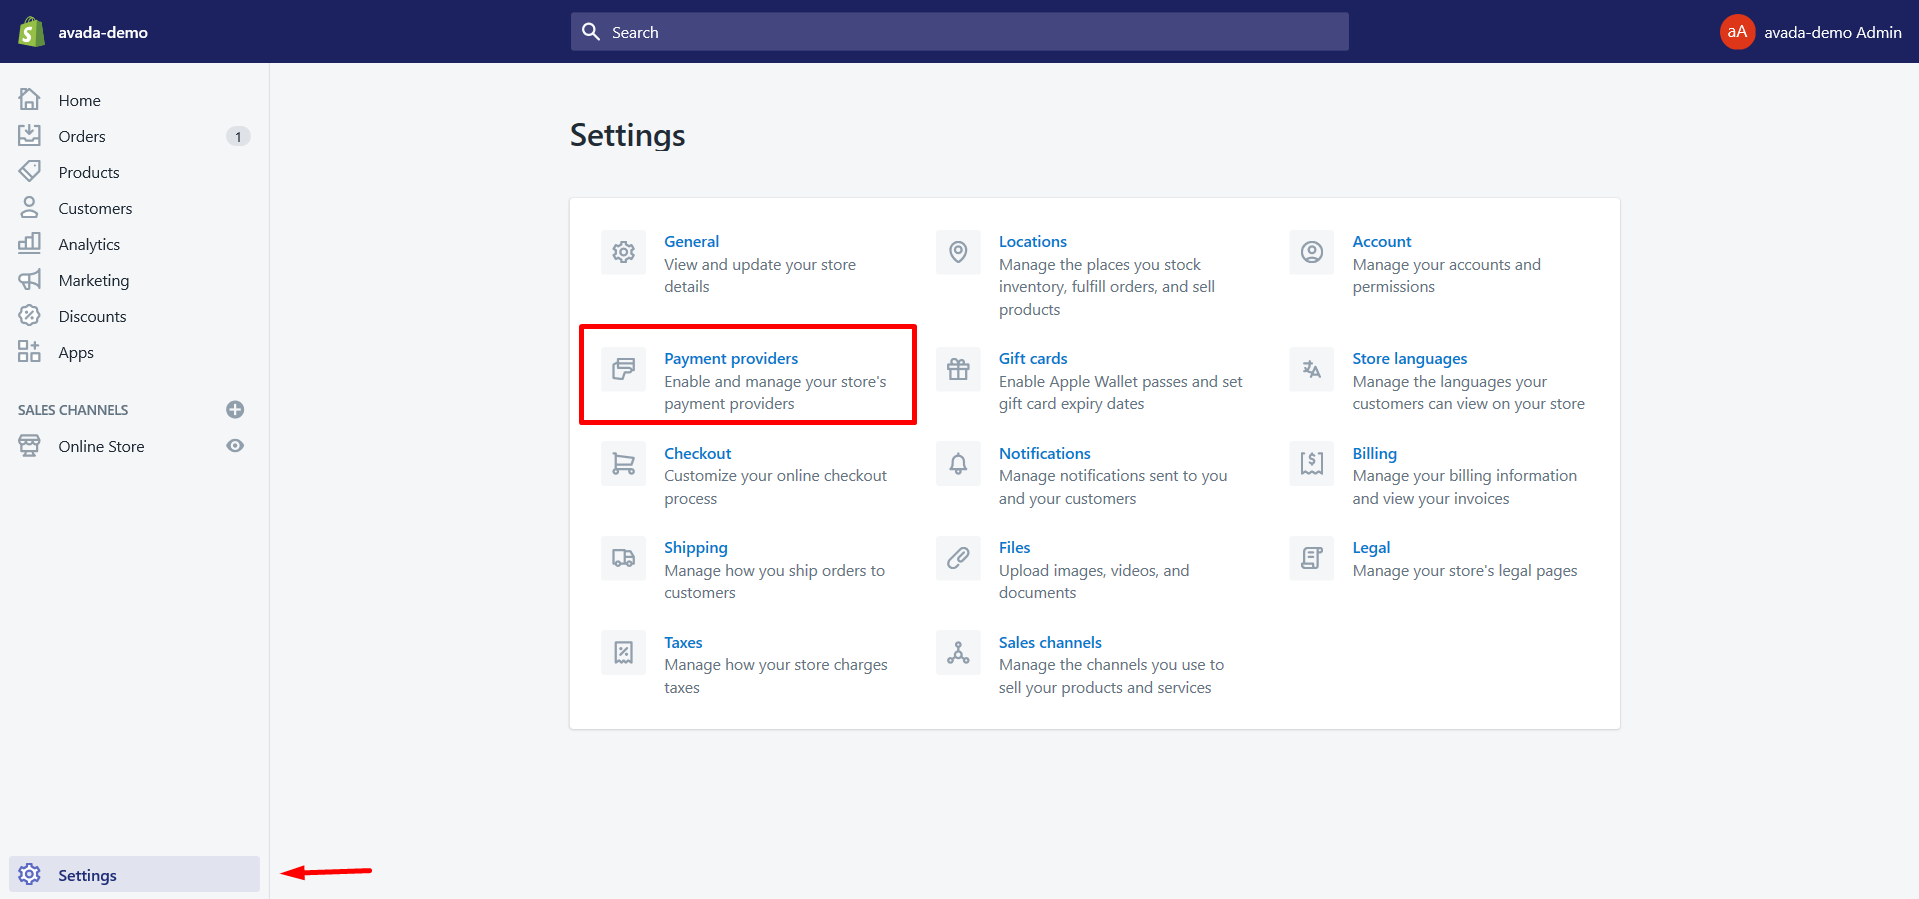
Step 1: Select Payment providers
At first, you need to log in to the admin account of Shopify, look at the Settings section. After that, the Settings list will appear then click on the Payment providers which is the second option in the first column.

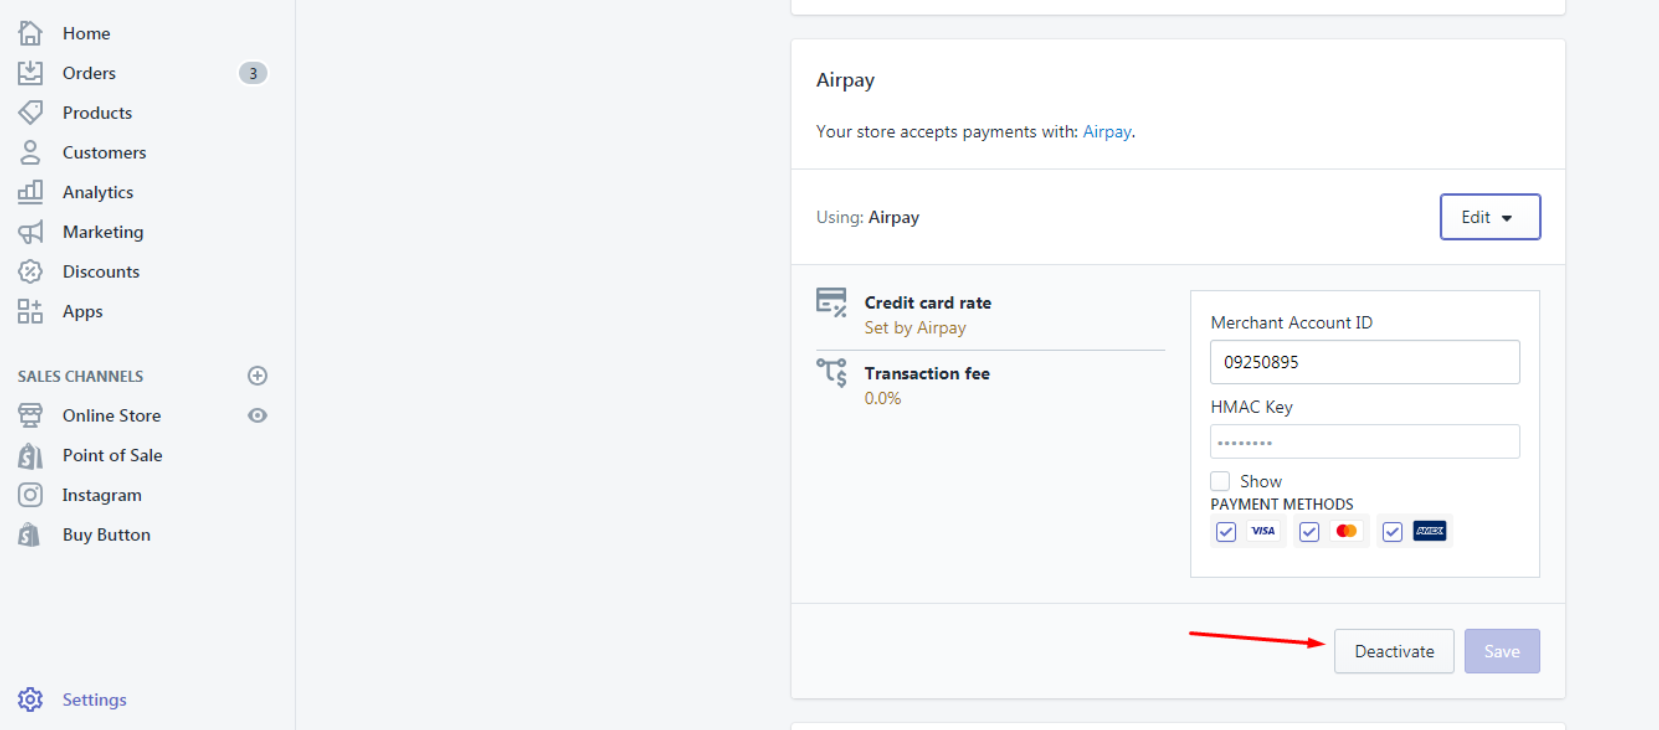
Step 2: Choose Deactivate
If you currently have a credit payment provider activated, you have to disable it before moving on to the next step. In order to do this, choose Edit and click on Deactivate respectively to complete your selection.

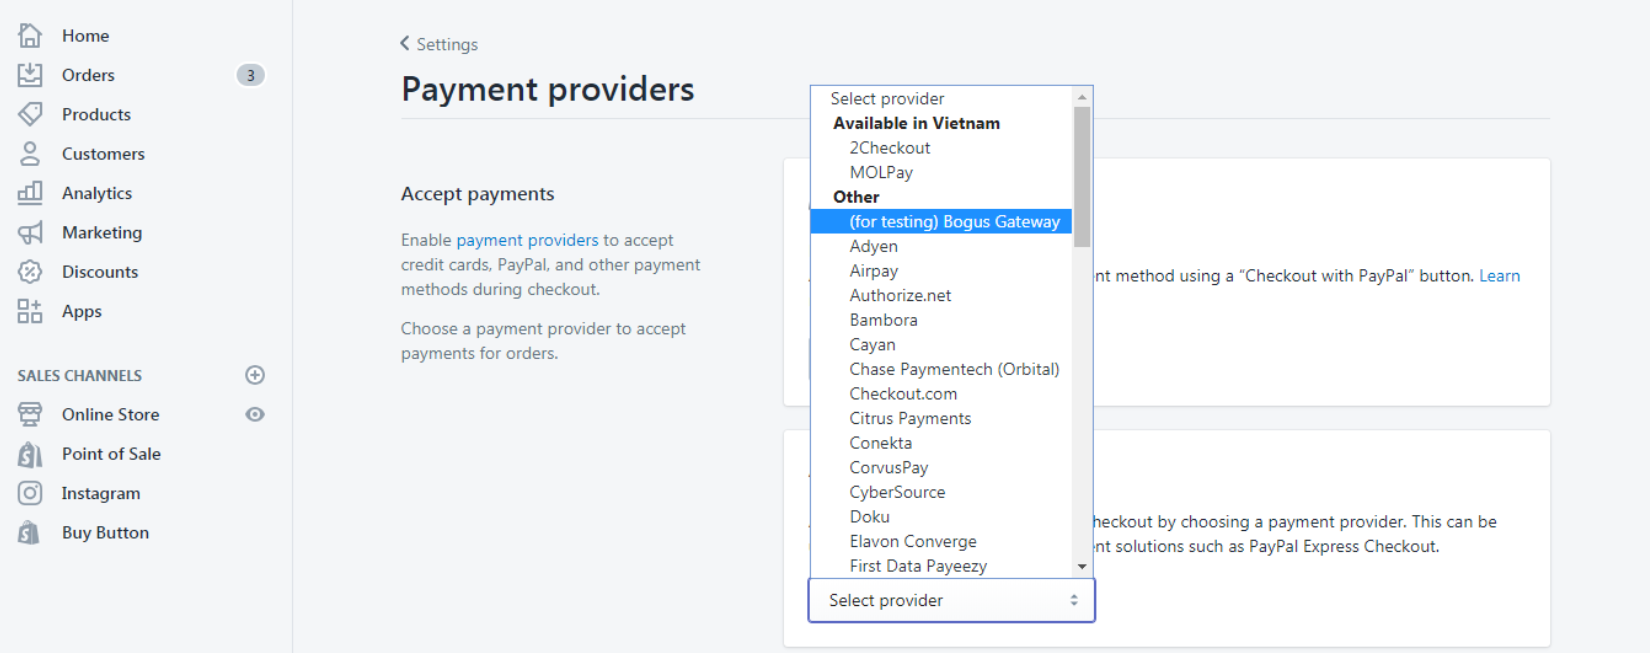
Step 3: Set provider as Bogus Gateway
There will be the Accept credit cards section shown up. Next, you have to click on Add a provider and then choose a third party credit card provider. Subsequently, choose to open one provide in the Provider drop-down menu.

Step 4: Press on Activate
Next, click on Continue, and Activate to enable its use.
Step 5: Add the information
Navigate to your online store and place an order as the customer want you to. At the checkout stage, instead of genuine numbers, you need to enter the following credit card details instead:
| Field name | Details to enter |
|---|---|
| Name on card | Enter Bogus Gateway |
| Credit card number | There are three different types of transaction: 1 (simulate a successful transaction), 2 (simulate a failed transaction), 3 (simulate an exception) |
| CVV | Enter any 3-digit number (for example, 111.) |
| Expiry Date | Enter any date in the future |
Step 6: Change back to your payment provider
When you are done with your testing, hit a click on Change provider that you see on the Payment providers page of your Shopify admin in order to reset your payment provider.
Test with a real transaction
Step 1: Set up the payment provider
First and foremost, you need to make sure that your payment provider was set up.
Step 2: Make a purchase
Pretend you are a customer, then make a purchase from your store , and complete checkout using genuine credit card details.
Step 3: Log in to your payment provider
In case you’re using a third-party payment provider, you need to log in to your payment provider. Then, of course, you need to make sure that the funds were processed.
Step 4: Cancel and refund the order
When you find things are going well with your process, just cancel the order as soon as possible so as to get yourself refunded and avoid paying any transaction fees.

Shipping test
Making a shipping test to ensure that your shipping settings are correct with a test order is also recommended. For instance, when you have free shipping for a certain order value, it is advisable to test an order that would qualify the free shipping settings to make sure that you have already had your shipping discount applied.
Conclusion
On the whole, having a Shopify checkout test is so helpful to help none of your customers run into any complications while buying your products. What you need to know about that aspect are all presented above in our article today. I hope you can run your checkout process testing well.
If there is any information that you want to be explained more, let us know. We are always willing to help you.


