How to Add a Blog to a WooCommerce Store?g
WooCommerce is a phenomenal WordPress plugin that can create a fully functional online store. WordPress, as you may know, is a blogging platform, and when you add WooCommerce, you have a storefront, but it remains a blog. As a result, adding a blog to your WooCommerce store is rather easy.
In today’s article, we’ll show you how to add a blog to a WooCommerce store. Let’s get started!
Why You Should Add a Blog to Your WooCommerce Store?
Including a blog in your WooCommerce store brings about numerous advantages:
- Blogging keeps your audience informed of new product launches, news updates, and so forth.
- Blogging increases the amount of content on your website, which drives more people to find your site.
- Blogging facilitates the mechanical promotion of your website. Your content encourages backlinks and visitors from search engines, increasing your website’s exposure.
How to Know if You Already Have a Blog?
When you install WordPress, you basically have a blog, but only in a technical sense.
Perhaps you’ve been ignoring it because there’s nothing on it, and it’s hidden from public view. It may even have content, albeit it may be so old and out of date that it is no longer worth retaining.
As a result, you should first assess the present status of your blog.
- Navigate to the WordPress dashboard. Look for the Posts section and click Add New to open the new post window.
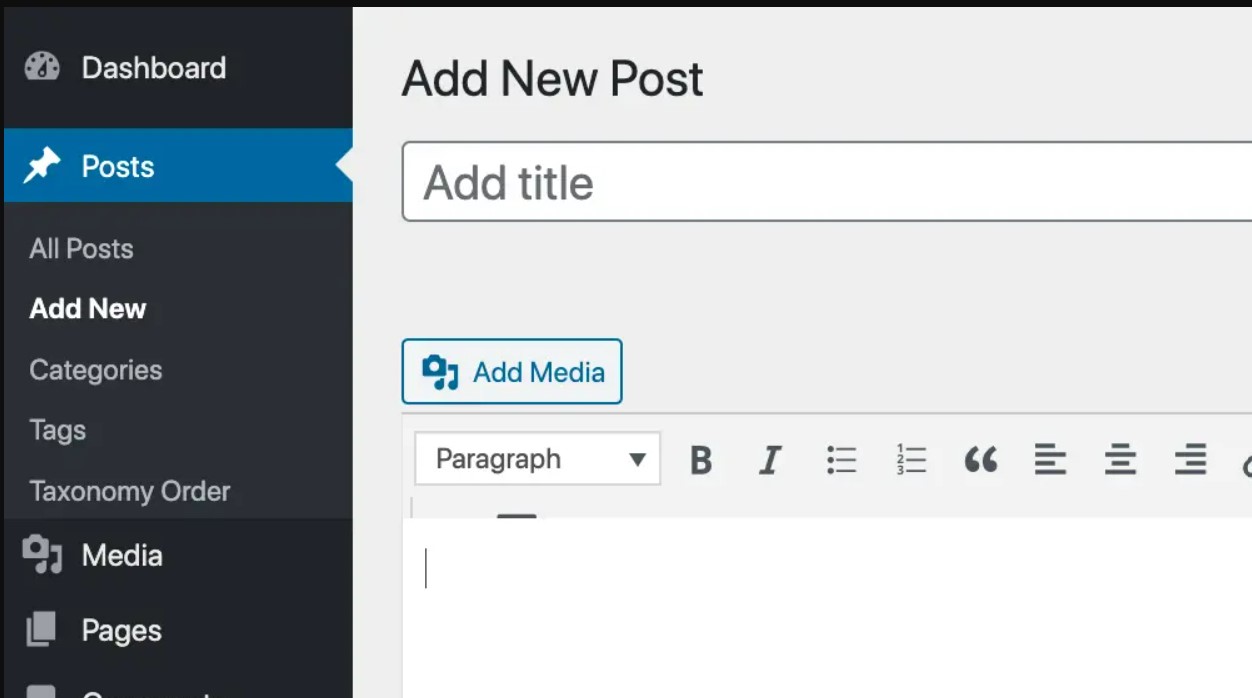
- Identify if you are using an older version of WordPress or the newer version with the block editor.
The previous version of WordPress just had a title box, a box full of formatting choices, and a compose box, as well as a lot of sidebars. The block editor is neater, enabling you to add particular blocks to your post to fulfill specific functions, such as text, image, and title.
If you’re still using an outdated version of WordPress, you should think about upgrading. You should consult with your developers to ensure that your WooCommerce storefront is not negatively affected and that your theme continues to function properly. Older versions of platforms lack compatibility with plugins over time, and they might also pose security risks.
-
Hover over “Posts” and select “Add New.” Enter a title, a text block, some text, and publish.
-
Now go to the live, published post you just made.
What do you think of the post thus far? Is it the same theme as your WooCommerce storefront? Is there any more content that may be accessed via the previous/next buttons, category pages, or breadcrumbs?
What If You Have an Old Blog
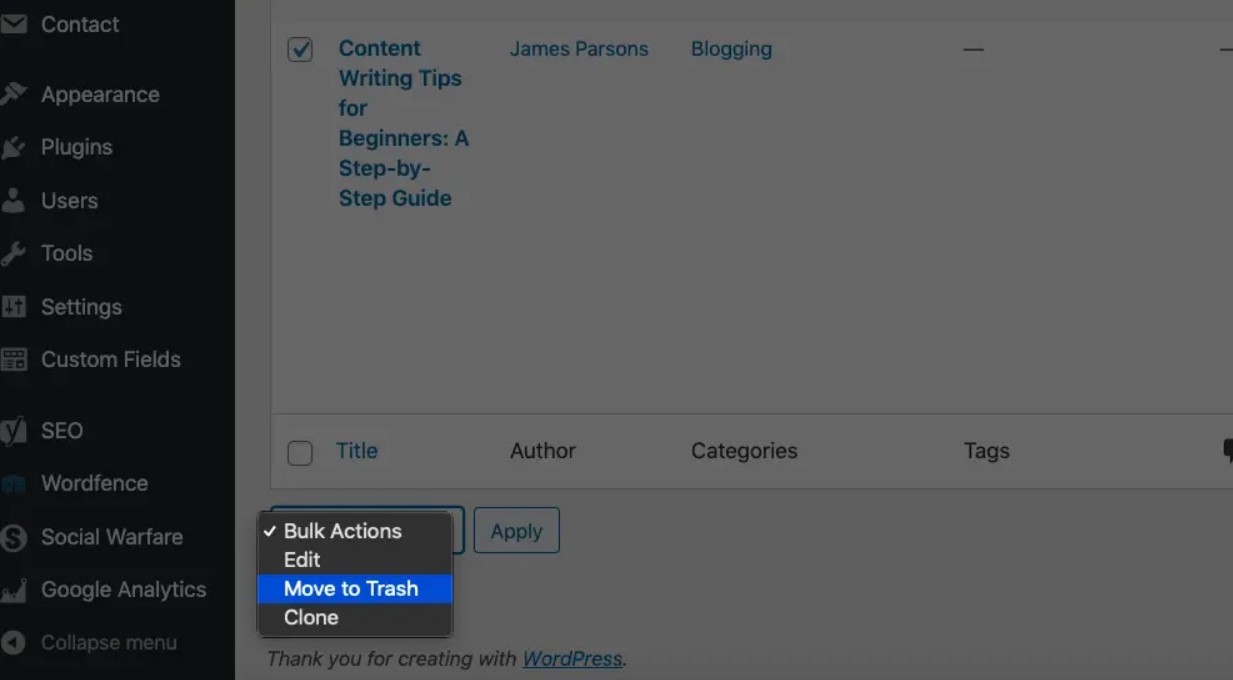
If you already have a blog, you must determine if you want to delete the old content or preserve it for SEO benefits.
Removing posts that have little content and don’t match your brand’s image may be the best option. It’s worth noting that before removing any posts, you should check to see whether they have any backlinks with a tool like Ahrefs to ensure you aren’t throwing away any valuable backlinks.
What If You Don’t Have a Blog
If you don’t yet have a blog, you should create one right now. But first, you must assess whether you have a blog theme and whether that theme is suitable for your storefront.
Many WooCommerce themes are also WordPress themes, giving your blog and store a cohesive design.
How to Add a Blog to Your WooCommerce Store?
Your shop is likely to be hosted at your root domain (www.example.com) rather than a subdirectory (www.example.com/store) if you’ve been utilizing a WooCommerce storefront.
It implies that visitors to your website will be directed to your e-commerce store. As a result, if you want visitors to read your blog, you’ll need a link to it somewhere else on your store page.
As a result, we’ll now show you how to accomplish this utilizing the WooCommerce Customizer.
Step 1. Identify your blog URL
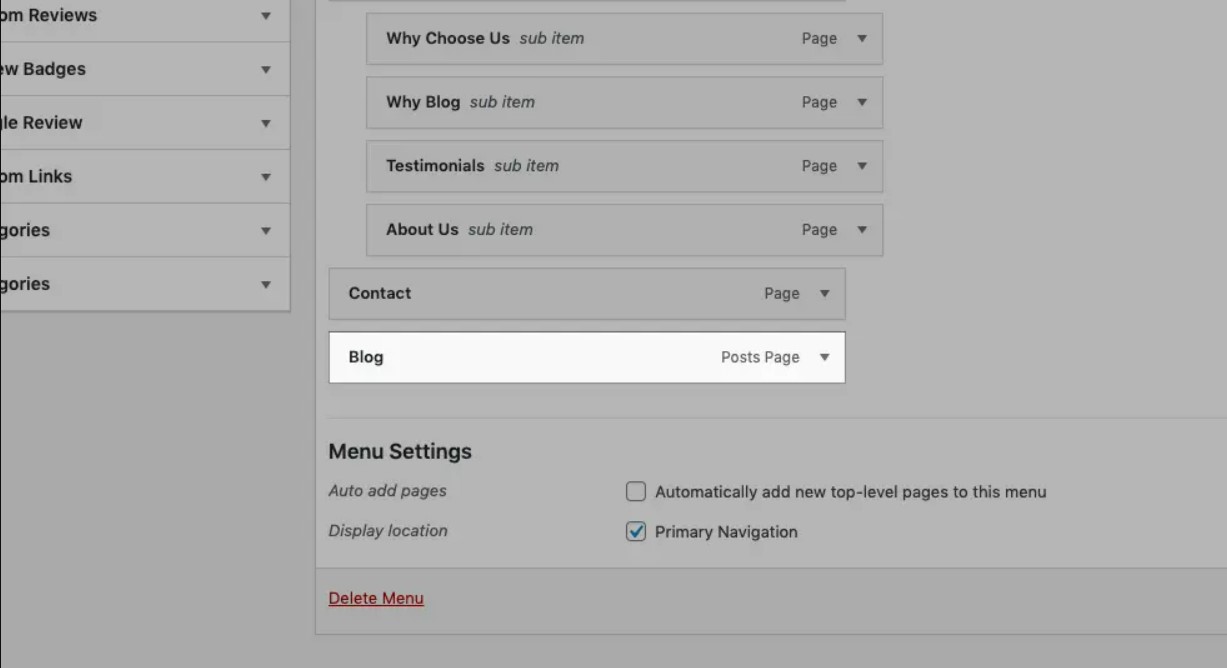
In many situations, your blog’s URL will simply be a subdirectory of your domain and will appear when you put in www.example.com/blog. If it isn’t there, you’ll have to look through your WordPress settings to see where it was placed.
Once you have your blog’s URL, copy it and save it somewhere safe for later use.
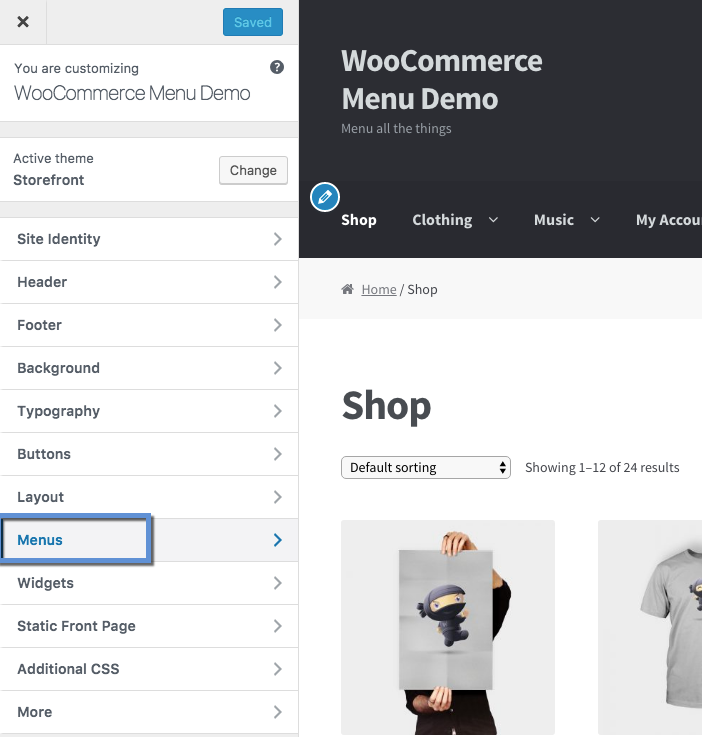
Step 2: Navigate to the Menu Settings
You need to go to Appearance > Menus.
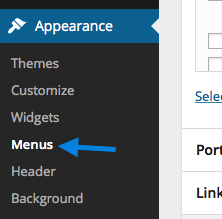
Or else, you can use the Customizer and choose Menus:
Step 3. Add links
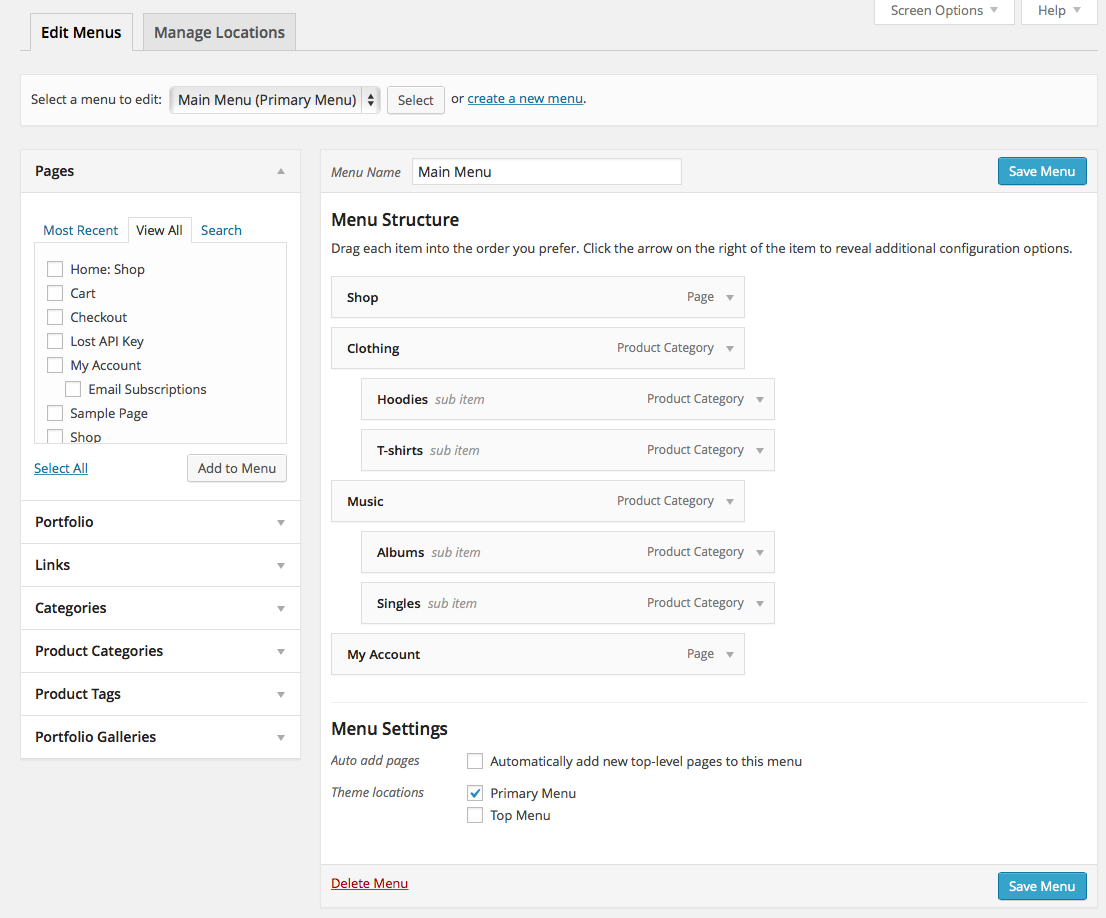
All of your major pages will be used as menu item headings by default in your menu. Depending on the layout of your storefront, you may also have customized menu items or sub-items built.
If you haven’t previously done so, start by making a menu and then adding items to it. You can build as many menus as you like, but you can only attach them to already-existing locations.
Here’s how the same menu appears when you go to Appearances > Menus:
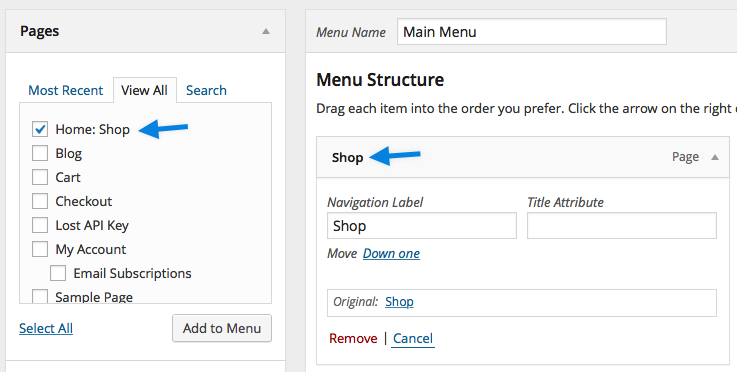
You must now include a “Home” link in your menu.
To create a “Home” link, click View All in the Pages panel. If you designate a page as your home page in the Settings > Reading settings, it will appear under all pages with the text Home: [Page Title].
Final Words
Adding a blog to your WooCommerce store can be really beneficial to your online business in the long run. So we hope that our article brings you lots of useful information.
Please feel free to reach out to us in the comment section below if you have any questions. We would love to help you out!
Thank you so much for reading, and we’ll see you in the next article.


