How to Connect Your WooCommerce Store to Gooten
It might be challenging to identify which print-on-demand service is ideal for your eCommerce business when it comes to these specific services. There are so many limitless choices and things to experiment with. Gooten, which is sometimes referred to as a wonderful POD service, enables you to produce stunning designs and prints for your items. It allows you to place your prints on several goods other than clothing and posters.
That is why in today’s tutorial, we will show you how to connect your WooCommerce store to Gooten. There will be detailed guidelines with important information and troubleshooting tips. So, let us dive in!
Gooten - An Overview
Gooten is a New York-based print-on-demand firm with global dispersed manufacturing and logistics. It joined the market in 2015, recognizing that eCommerce firms require assistance in scaling more effectively. Gooten leveraged its technological skills and collaborated with manufacturers worldwide to bring the print-on-demand concept to reality.
Gooten, like other POD services such as Printful or Printify, lets you pick, upload, and test a few unique designs on various items to see how they turn out. If you’re pleased with the results, you may sell them in your business just as effortlessly and fast. Once everything is up and running, sit back and let your customers browse your items and shop.
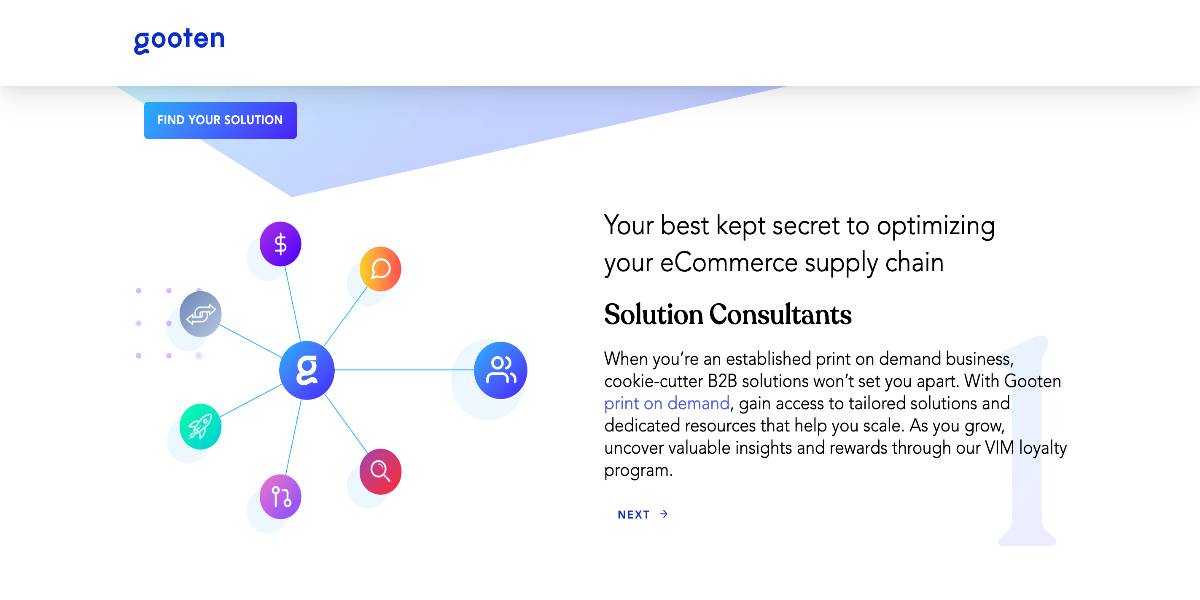
Some outstanding features of Gooten:
- Unlimited connections: You may add as many stores as you like as long as they are from Etsy, Shopify, or WooCommerce.
- Simplified product management: You can manage all of your items with Gooten even if you have several stores on different platforms. You are not required to check in to each of those sites regularly. You may use Gooten’s product management system to handle everything from writing descriptions to setting up categories and tags to maintaining SKUs and mockups.
- Provide specific options and tools: Gooten allows you to personalize items by adding neck labels and generating branded packaging slips.
- Report business data: You must examine your data to develop more successful company plans. What are the expenses of your company in terms of items, time, people, and technology? Gooten’s OMS allows you to export data so you can perform your analysis.
- Standard orders: Gooten also enables manual and one-time charges through your Gooten account without needing a shop integration.
- Optimized management systems: Gooten is an attractive solution for keeping all of your orders in one location if you want to optimize your sales potential by utilizing several channels. The Gooten Order Management System (OMS) consolidates all of your demands for fulfillment into a single, centralized system.
How to Integrate Gooten With Your WooCommerce Store
Although they are two different eCommerce platforms, it is straightforward and quick to connect your WooCommerce store to Gooten. Please follow the steps outlined below:
Step 1: Install and setup the plugin
First, in the WordPress admin panel, install the ‘Gooten Shipping for WooCommerce’ plugin. On your main dashboard, navigate to the Add New section. After that, type in the plugin name in the searching box and start the installation.
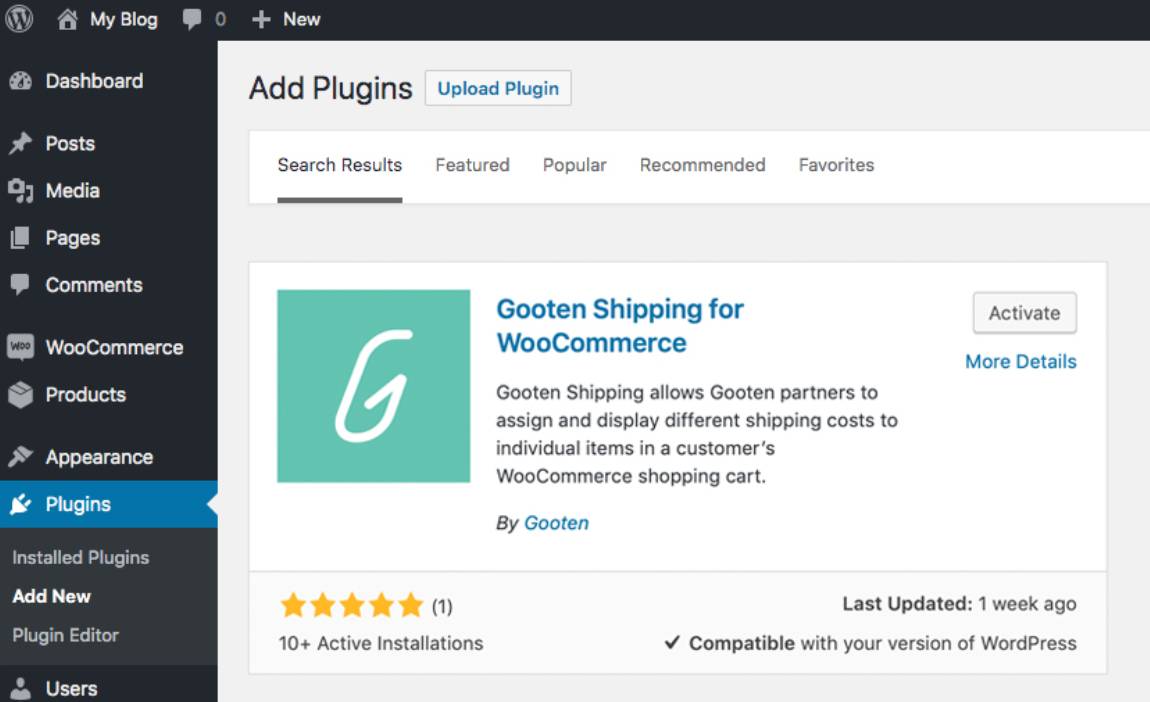
Once the plugin is activated, go back to your WordPress dashboard and head to the Settings section. On the Settings page, select the Permalink Settings. Next, click on the Post name option under the Common Settings section to finish the setup process.
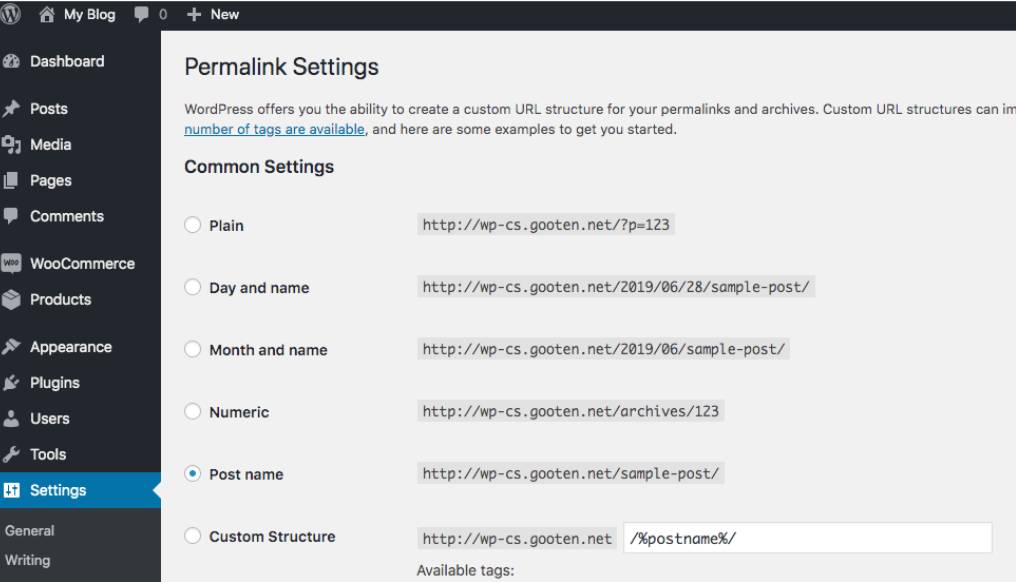
Step 2: Connect WooCommerce to Gooten
Now, it is time to connect your WooCommerce store to Gooten. Log in to Gooten Admin, navigate to your Stores page, and select the Connect new storage option. You will see the list of different eCommerce platforms. Scroll down and select the WooCommerce option.

Then, for installation, enter the URL of your WooCommerce store and click Connect store. The domain name you provide should exactly match the name of your website. This may be changed in your settings.
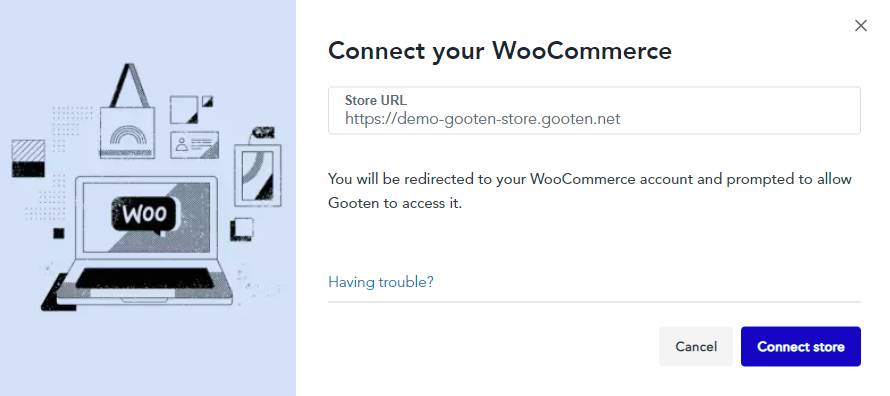
You can install as many stores as you like, but please remember that you can only link one WooCommerce store to one Gooten account. You’ll be sent back to your WooCommerce store, where you’ll be prompted to provide Gooten access to your site. To complete the connection, select the Approve button.
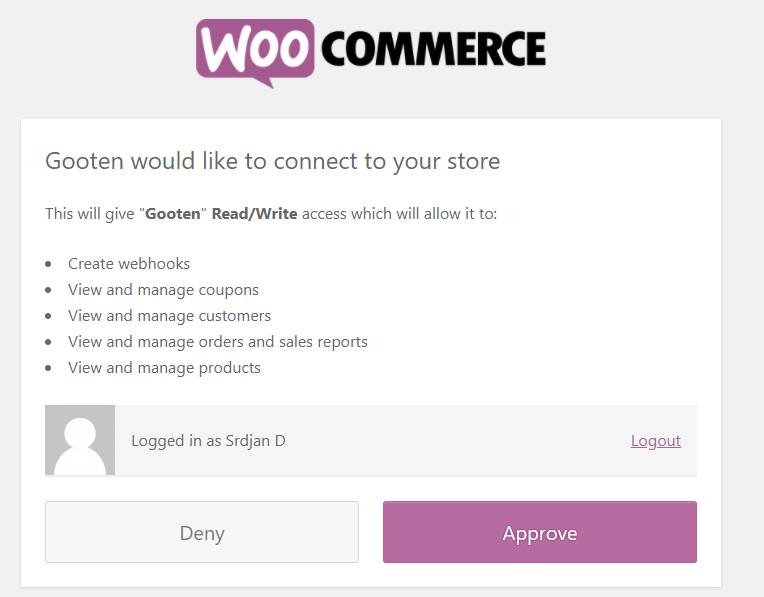
Your shop will now be connected, and any existing items synced or produced with Gooten will display on the WooCommerce tab in the Product Hub. Once your store is linked, you may begin generating, synchronizing, and fulfilling items.
Step 3: Configure new products in WooCommerce and Gooten
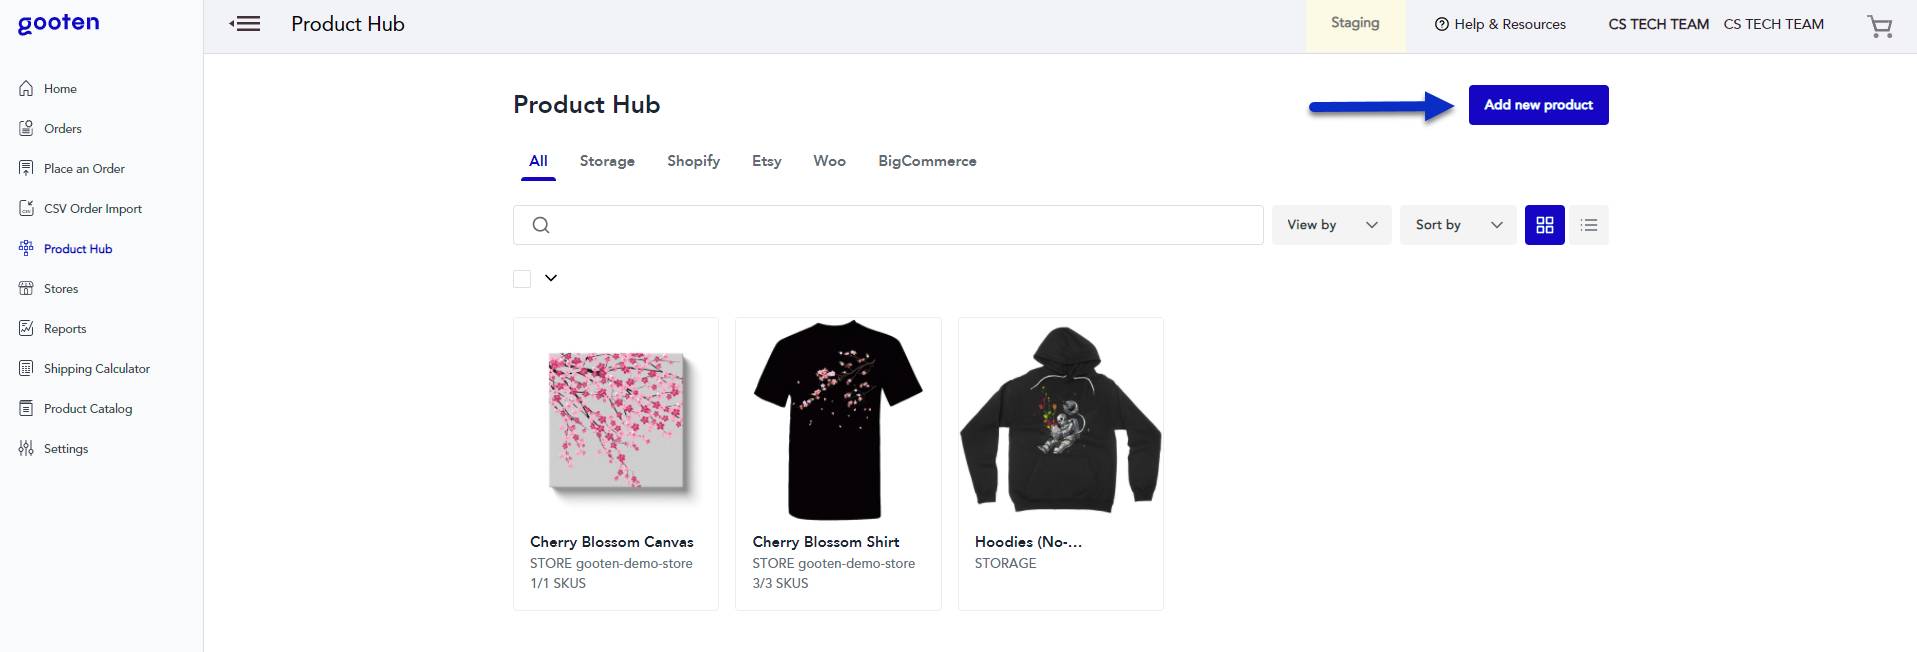
After connecting your store to Gooten, you can begin generating new products in the Product Hub. Begin by clicking the Add New Product button, then go through the Product and Design pages until you reach the Product Details page’s for the last step. Before publishing the product to your WooCommerce store, you will be able to change the product name, description, SKUs, and pricing here.
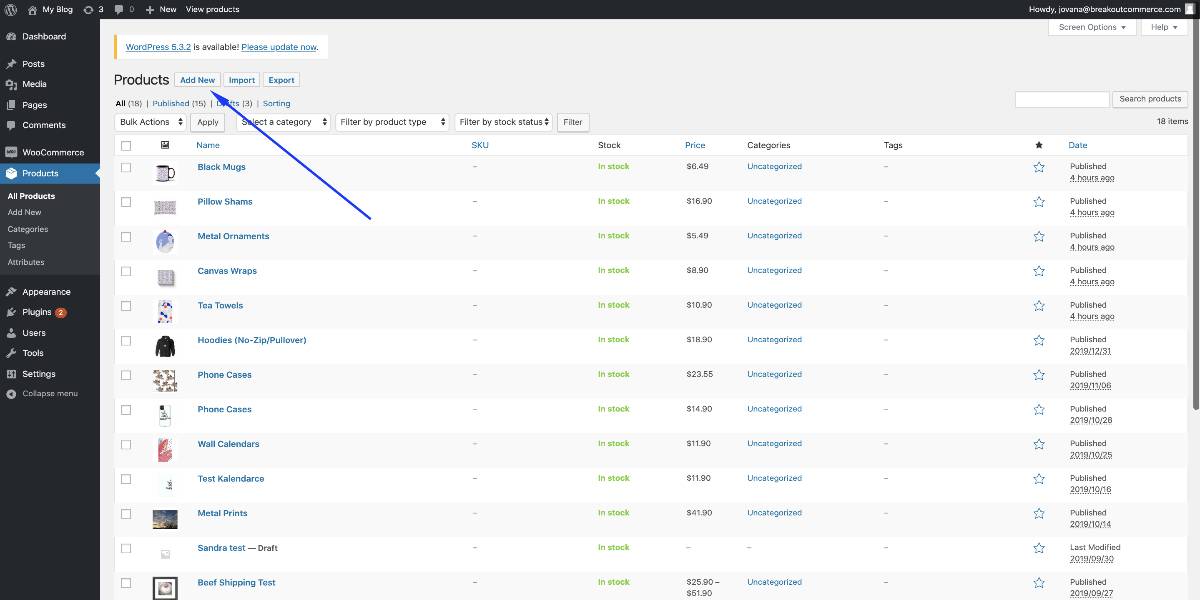
On the other hand, you can also configure new products from WooCommerce. Navigate to the Products tab and click the Add New button to add new products to your store.
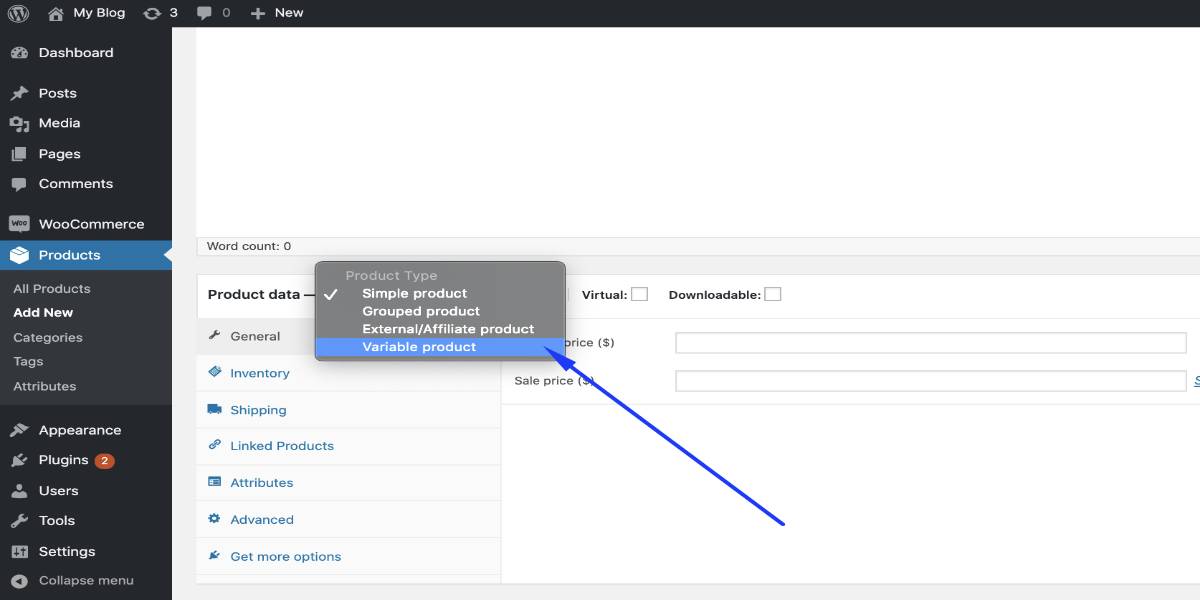
Next, enter the name field (description, category, and tags are optional). Then set the product type to “Variable product” if you wish to add variants to this product.
It is necessary to note that you won’t be able to create variations if you don’t add attributes. Attributes are product choices in the Product Hub, and as such, they change based on the product selected. For each version, provide the SKU and price. If they are left blank, the Gooten system will automatically populate this data when you attach the product, and you will be able to make any required adjustments at that time. When adding SKUs to your WooCommerce items, keep in mind that each product must have a unique SKU. For example, if you design six cup variants, each one will require a unique identifier to be added to the SKU, such as mug beach theme or mug unicorn.
Step 4: Link the products
Orders for items published on your WooCommerce site that is not linked to your Gooten account will not be received by Gooten. That is why we need this step to complete the synching process. To sync existing products, create or add new variations for items in WooCommerce to connect with Gooten. After you’ve saved those newly generated variations, navigate to your Gooten Product Hub for that store, choose the WooCommerce tab, and then click the Sync product button.
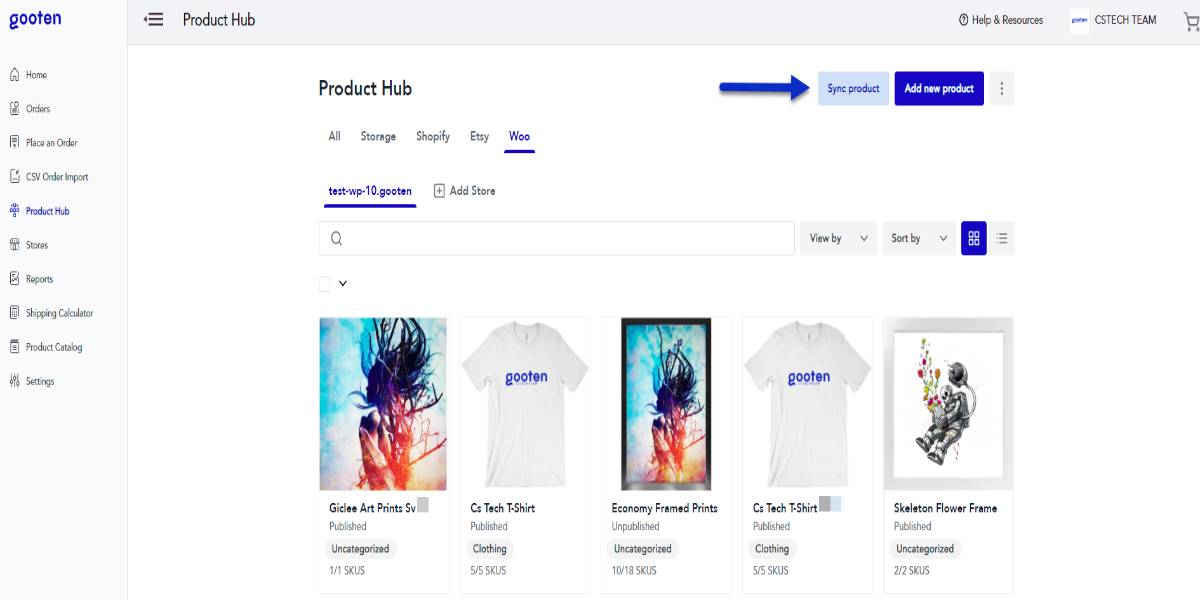
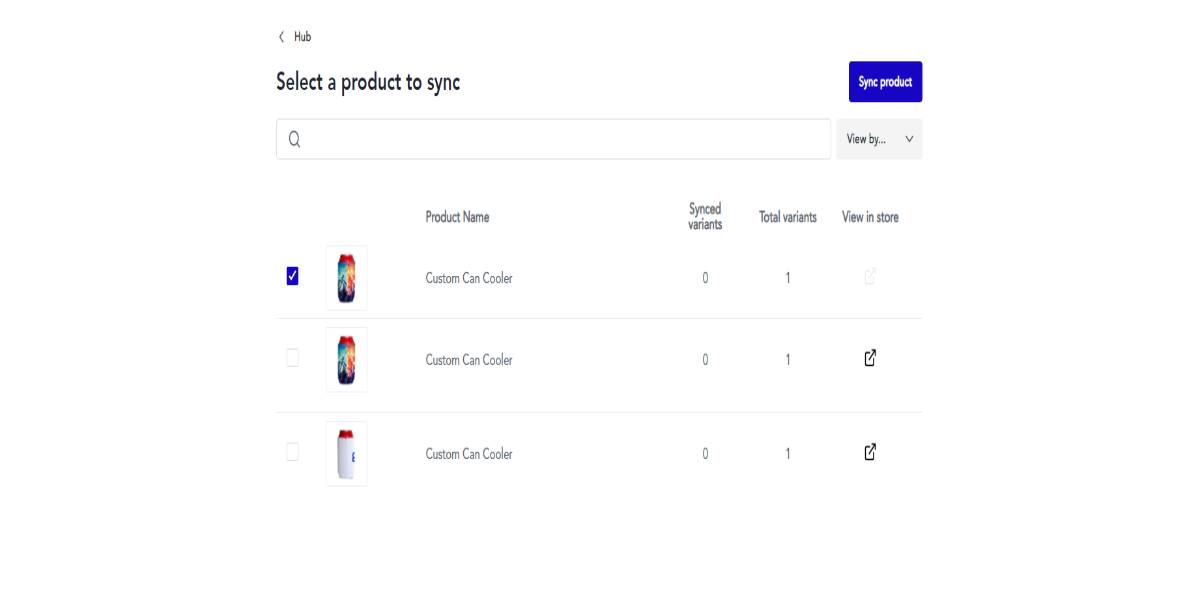
Next, choose the product you want to display on Gooten.
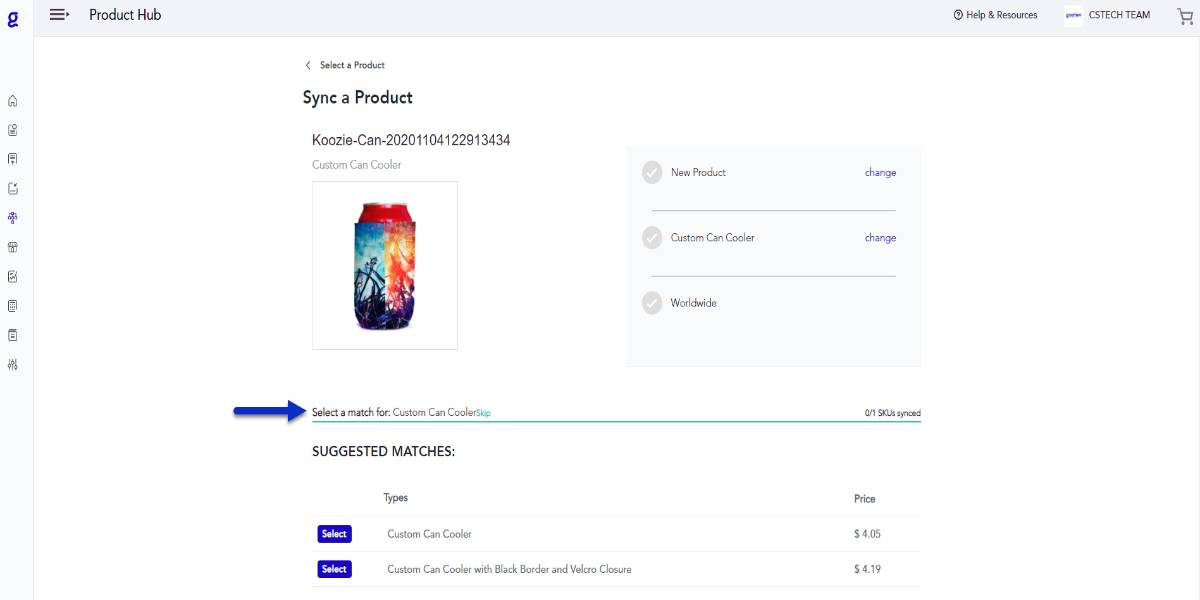
Choose a matched product SKU to connect to your WooCommerce product variation. Repeat this step for each version, or select the Skip option if you prefer to exclude any of them from the synchronizing procedure.
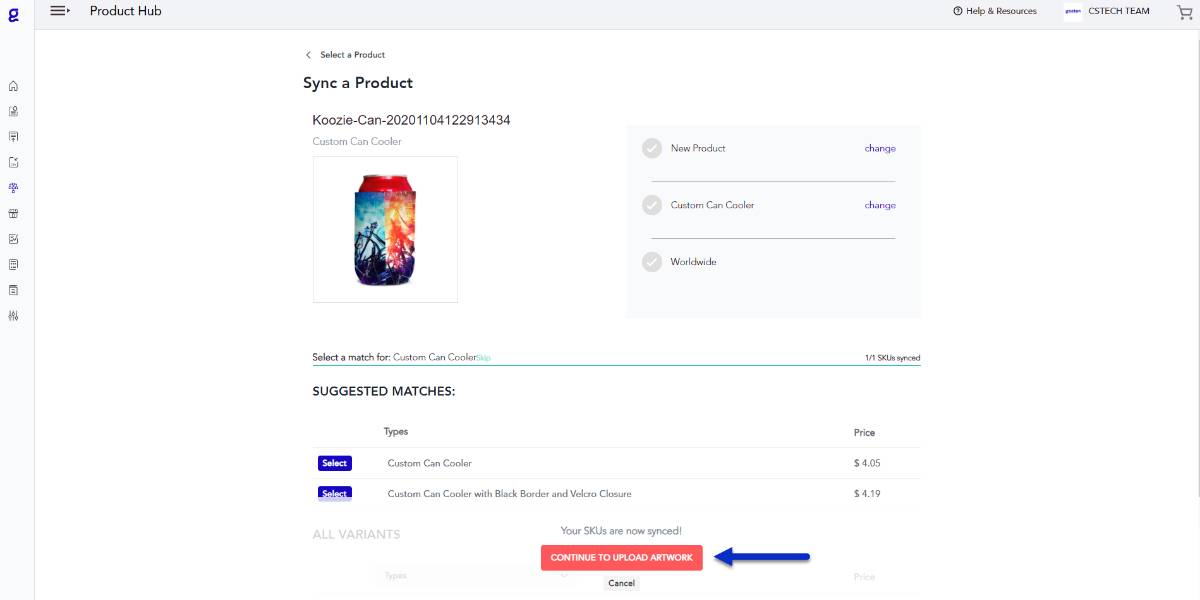
After linking the variations, click the Continue to upload artwork option to create the product and finish the synchronization process.
Important Notes
Shipping prices
Be warned that if shipping rates rise, Gooten will not immediately update your product pricing to reflect the higher delivery costs. If you want to accommodate any increases in shipping rates in your product, make sure to manually adjust your product prices in your store.
Email notifications
WooCommerce delivers order confirmation emails to the person who made the order. WooCommerce will automatically collect the shipping details from the Gooten system and send a shipment notification email to your client once the purchase is marked as fulfilled in the main dashboard of both platforms.

Gooten sends tracking numbers to WooCommerce once the order has been dispatched. Please keep in mind that the procedure has some limits:
-
WooCommerce does not permit partial fulfillment of orders or the submission of duplicate tracking numbers. When one item receives a tracking code, the entire purchase is recorded as finished and sent on the WooCommerce end, which sends the message to the client.
-
If you have products fulfilled by several POD providers in the same order, each finished and shipped item will mark the order as fulfilled and notify your client. Once the remaining products have been completed and shipped, WooCommerce will not issue any more shipping alerts.
There is an option to configure email notifications from Gooten. However, your client would get double shipment notification emails if you have configured email alerts from both Gooten and the WooCommerce platform. We recommend that you enable email alerts for only one of those two choices.
Troubleshooting Guides
Connection issue
Using a hosting provider that isn’t optimized for the Gooten platform might lack connection because each hosting provider has distinct rules/policies, leading to the URL blocking from WooCommerce.
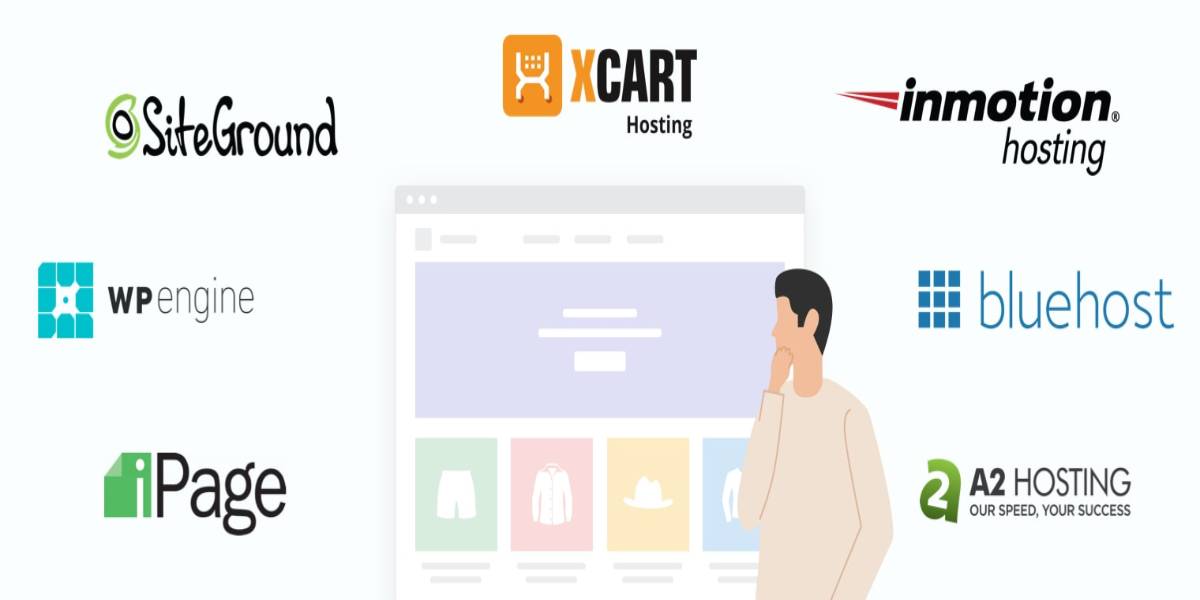
To solve this issue, we recommend using Bluehost, DreamHost, Liquid Web, Kinsta, SiteGround, and WP Engine instead of using Afrihost. After that, follow these instructions below for each situation:
- If you encounter this problem when attempting to log in (after connecting your shop), try disabling your plugins one at a time. After successfully logging in, you may reactivate the plugins on your site.
- If the issue occurs when connecting the store to Gooten Product Hub, access the console (Right Click -> Inspect). If you receive the Dev Tools failed to parse the source map error, disable any plugins that may be deactivated in your WooCommerce admin, and then roll back to the previous version of the Woo-commerce plugin). After that, reconnect to the shop once again.
Shipping issue
You may receive a notification that reports some areas are not included in the shipping section. The integration allows you to ship to the following countries: US, AU, CA, CH, DE, ES, FR, GB, IT, JP, MX, NL, NO, NZ, and SE. These shipping zones will be expanded in the future. For the time being, orders shipping outside of this list can be placed using a specific form from Gooten called Custom Order Form.
When a store is linked, and a product is generated, shipping zones and delivery methods are created. Another way to resolve this issue is to open the product in your WooCommerce admin and look for the shipping class under ‘Shipping’ (Gooten-xxx). In your WooCommerce Admin, go to ‘Shipping Classes’ and remove that shipping class. Finally, if you rebuild the same product using the Gooten portal, it will send shipping charges for that product class to WooCommerce and apply them to each delivery zone.
Fulfillment issue
Another common issue is the delay of some orders. To solve this problem, check to see if the order’s payment was successful. Gooten will reject orders with outstanding or failed charges.

The Gooten integration gets webhooks from your WooCommerce hosting service. The timing of these webhooks is entirely dependent on your hosting provider. If your successfully made orders are not showing up in your Gooten account, don’t hesitate to contact your hosting company for assistance.
Product issue
Last but not least, there will be some errors that can happen when creating a new product. Here are three standard solutions:
- Contact WooCommerce support and ask them to enable POST requests for API.
- Delete the items you can’t modify and rebuild them in the Gooten Product Hub.
- Your WooCommerce URL most likely includes a subfolder. Change the name of your site to one that does not include subfolders.
Conclusion
eCommerce is a booming sector, and nothing is better than to capitalize on it than to launch your eCommerce venture. Print-on-demand is a feasible alternative since it eliminates the need to maintain a product inventory. Gooten will only print your items if you place a purchase.
We hope that this article will clear your mind on how to connect your WooCommerce store to Gooten. You may not hear about Gooten as much as you do about Shopify, Amazon, or eBay, but it’s a wonderful choice for eCommerce newcomers. The signing up is free, and you may link numerous stores from other eCommerce platforms. Moreover, you have a variety of product selections and the ability to define your profit margins.


