How to Create a Contact Form for WooCommerce
Have you ever wondered why you need a contact form for WooCommerce? Whether just publishing an email address on WooCommerce is really convenient for businesses and customers or not? The fact is that email has been used for WooCommerce as a basic way for a long time, but it also generates some problems for businesses, particularly the frequent receiving of spam emails. This is really annoying, isn’t it?
Instead of using an email address for WooCommerce, publishing a contact form to communicate with customers is a better option nowadays since it provides more flexibility than a typical email. So, do you want to keep in touch with your customers by including a contact form on your WooCommerce?
Every WooCommerce should have a contact form so that people may quickly connect you about your products and services. Many people still believe that creating a contact form is complicated, but it can be done quickly and easily with the appropriate builder plugin.
In this post, we’ll show you how to create a contact form for WooCommerce and highlight its importance.
Why do you need a contact form for WooCommerce
Normally, people used to add their email address on a contact page, so customers can contact them. However, it seems not as efficient as a contact form. If you use a contact form, it enables an email message to be created and sent to your inbox. This allows you to quickly receive messages from visitors without disclosing your email address to spambots.
The top three reasons why using a contact form is preferable than putting your email address on a website are listed below.
- User-friendly
- Reduce spam emails
- Consistent information
Now, it’s time to have a look at how to create a contact form for your WooCommerce!
How to create a contact form for WooCommerce
Step 1: Choose a contact form plugin
Firstly, you need to choose a contact form plugin for your WooCommerce. In this post, we choose the WPForms plugin as an example to show how to create a contact form, so you can easily visualize and refer to the steps. Actually, you are free to use another plugin if you want. We’ve also included a list of the most popular plugins currently, so you can find the one that’s good for you.
This is the image of WPForms’ homepage.
Step 2: Install and activate the plugin
To begin, open your WordPress dashboard, go to Plugins > Add New At the search bar, type WPForms and click Install Now
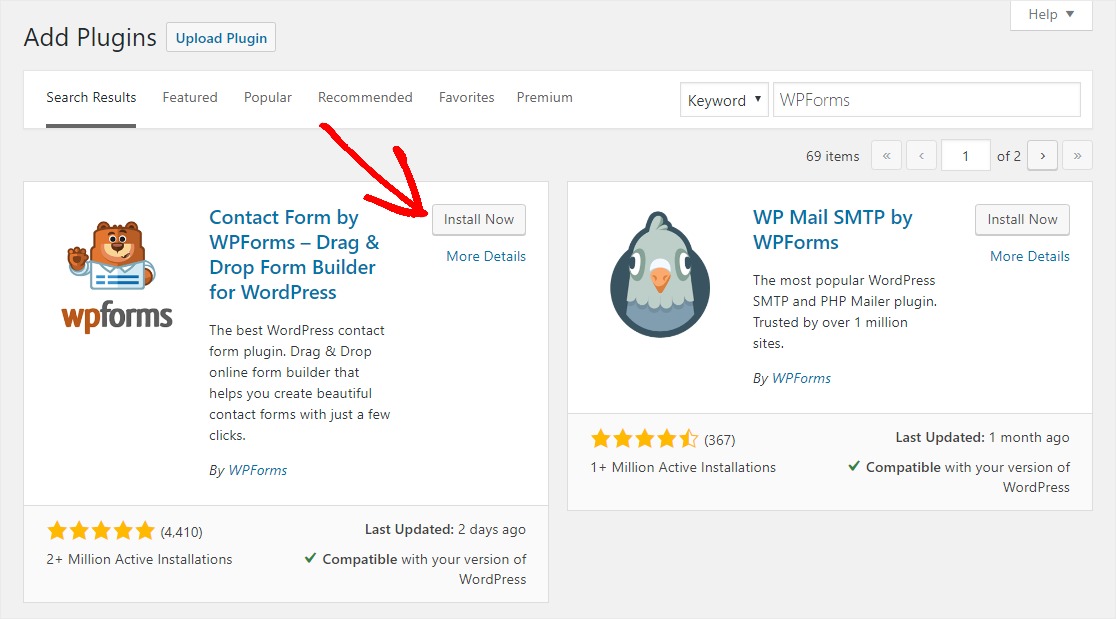
After you’ve installed it, click the Activate button to finish the installation.
Step 3: Create a contact form
Creating a contact form by going to WPForms > Add New
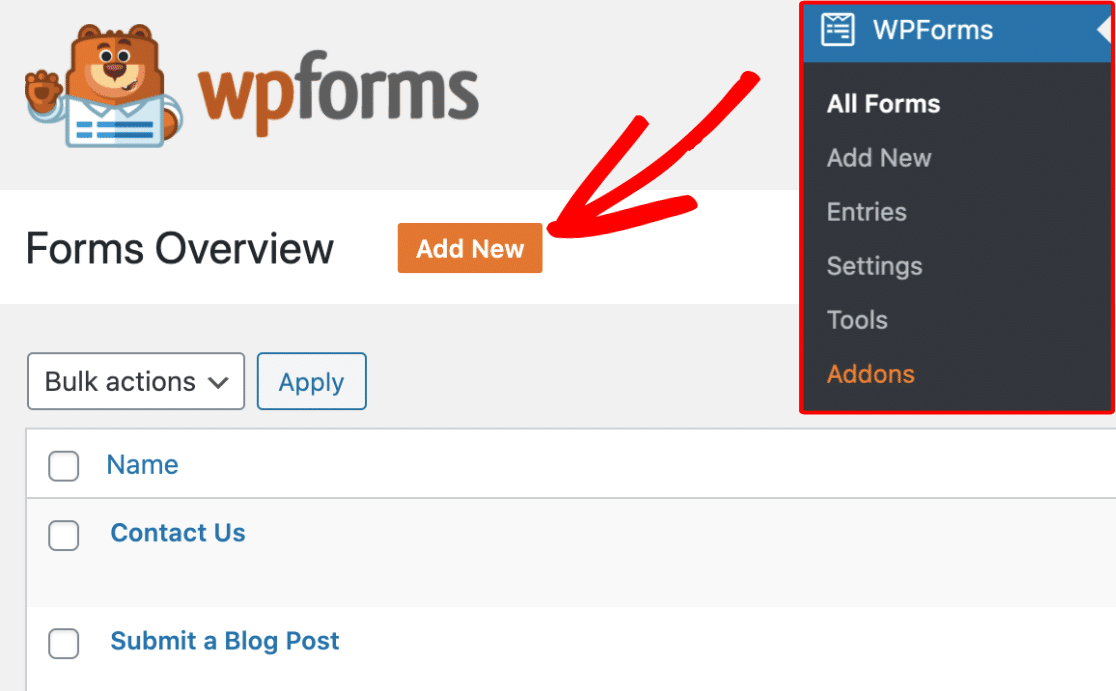
Then, it’ll open the form setup page for you to type your form name and choose the Simple Contact Form. This will launch the WPForms drag-and-drop form builder, where you will find a ready-to-use basic contact form. It has the basic fields Name, Email, and Message box.
Furthermore, you can also add more fields to your contact form by dragging them from the left to the right-side panel. With WPForms, you can only use standard fields. WPForms Pro is needed if you want to use Fancy Fields and Payment Fields. It has more advanced forms such as order form, donation form, survey form, etc.
You can easily personalize the form by dragging and reordering the fields. You can also customize the form fields by going to the Field Options tab.
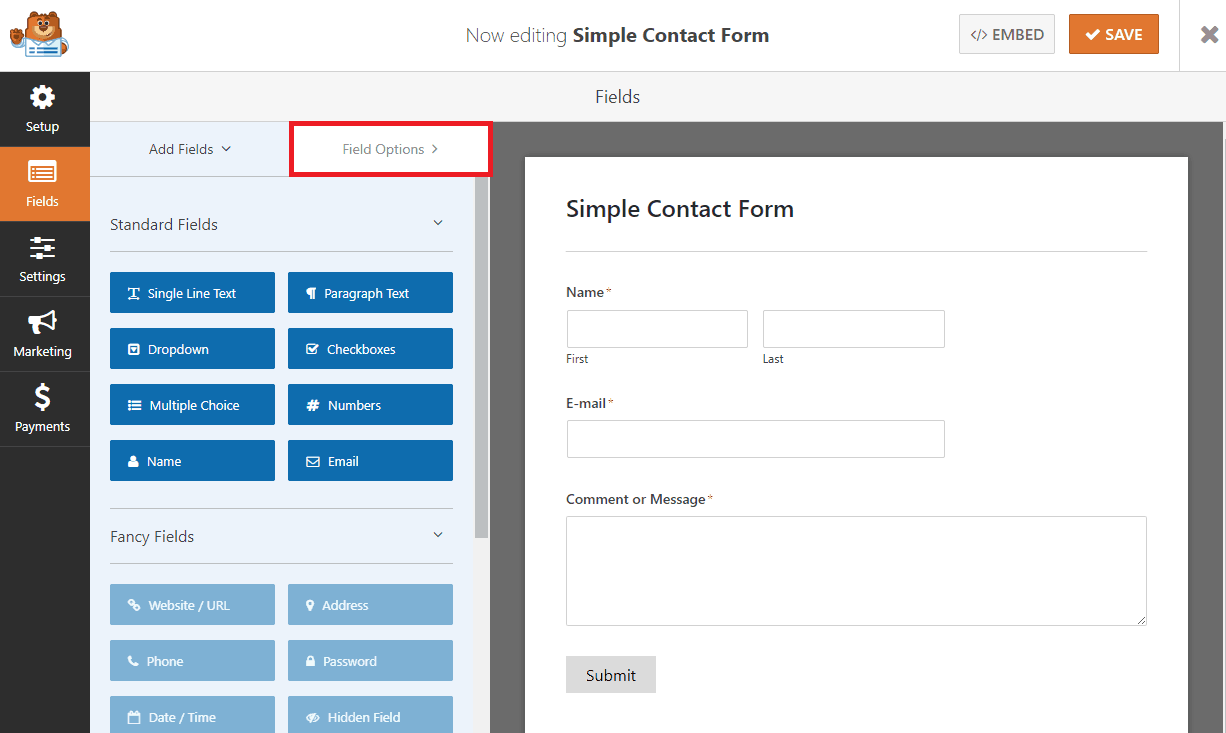
After customizing, click on Save!
Step 4: Configuring notifications and confirmations
After the form has been built, the following step is to configure the notifications and confirmations.
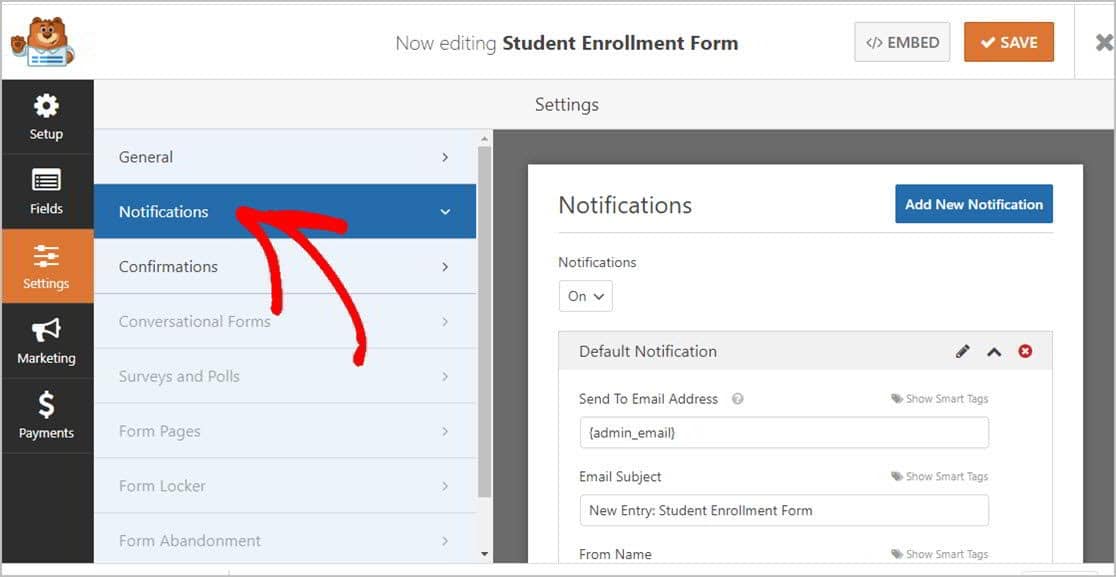
A form notification is an email that you will receive after a user submits a message through your contact form. To do that, go to Settings > Notification, and you will see the default settings. If you don’t want to change anything, just keep this default and the administrator email will receive the message.
On the other hand, visitors will get a form confirmation after sending a message through your contact form.
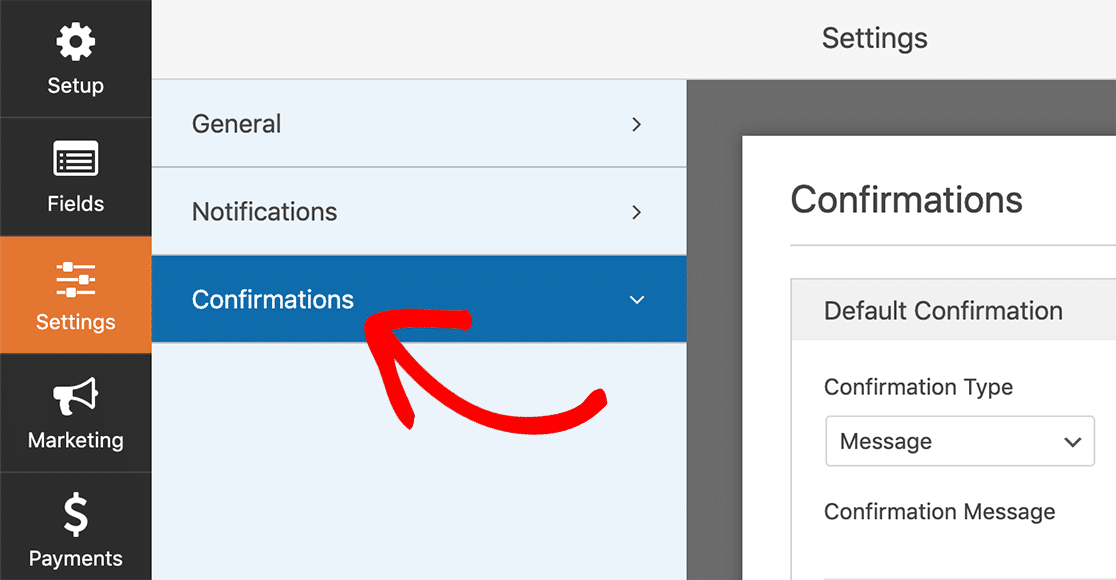
By default, the form confirmation type is message, which you can keep as is or edit to Show page or Go to URL. Don’t forget to click on Save if you edited! To configure the form confirmation, go to Settings > Confirmation.
Step 5: Add your contact form in a page
In your post or page editor, click on Add Form.
A dialog box will appear to choose the contact form and then click on the Add Form. To add a form to a page, we’ll use the WPForms block. Seek for WPForms and click to add it by clicking on the add new block button.
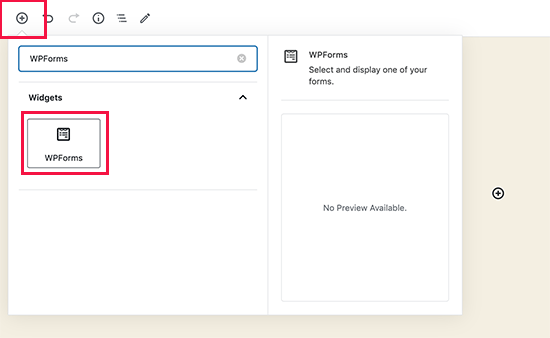
Your page’s content will include the contact form. You need to click on the drop-down menu to select the form you created earlier.
WPForms will show a preview of your contact form within the editor. Now you can save or publish your page and view it live on your website.
4 Best plugins for creating a contact form for WooCommerce
We’ll show you several plugins for creating contact forms that get a lot of positive feedback and high ratings in the section below.
Contact Form 7
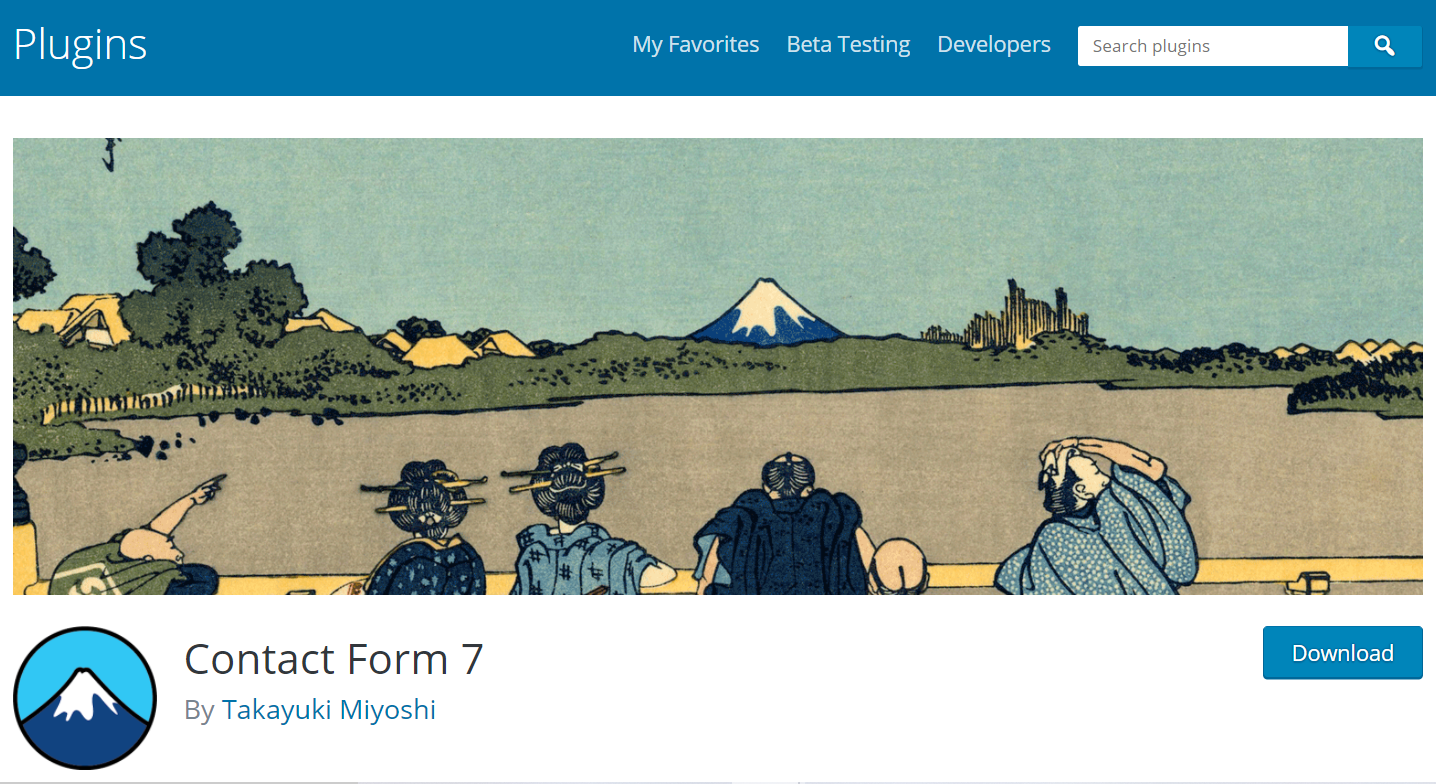
Contact Form 7 is one of the most favorite plugins for creating contact forms that has more than 1 million active installs. This plugin is free and it can manage multiple contact forms. In addition, you can easily adjust the form and the mail content by using simple markup.
Highlight features:
- Diversity in forms management
- Easily change the form and email contents by using basic markup
- Supported by various free third-party plugins
- Allow using shortcode to place a contact form in any post or page
- Supporting Ajax-powered submission, CAPTCHA, Akismet spam filtering
Price: Free
Ninja Forms
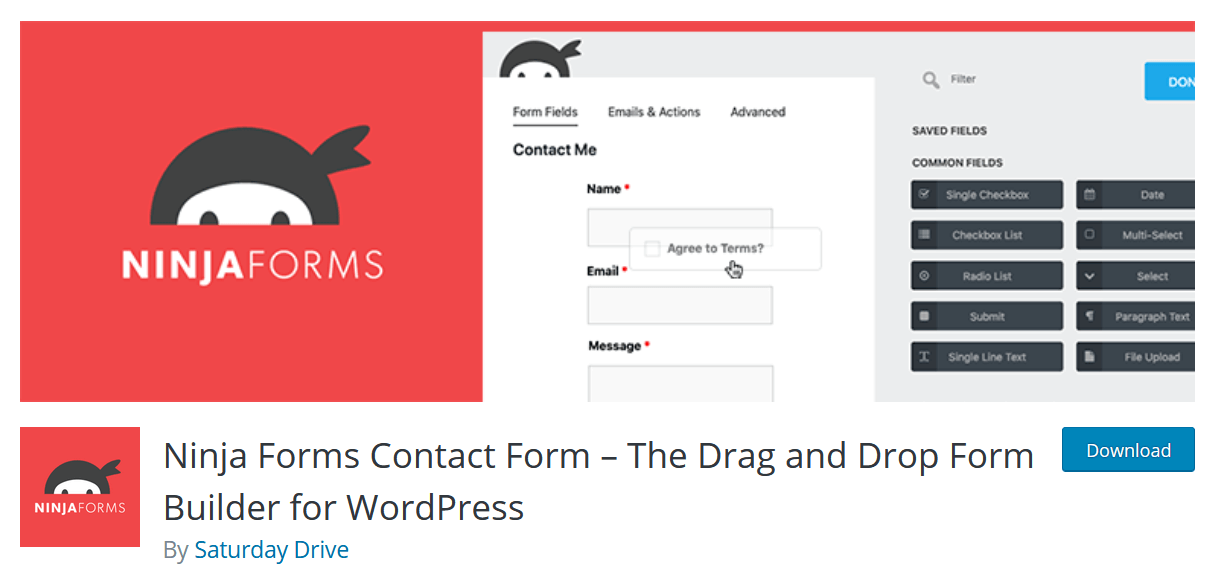
Use Ninja Forms to design gorgeous, user-friendly forms that will make you feel like a professional web developer! Ninja Forms is a fantastic and powerful tool for creating contact forms for WooCommerce due to its extremely easy, intuitive, drag-and-drop interface. Besides, Premium extensions are available to enhance Ninja Forms capability, such as integrating with Campaign Monitor, Freshbooks, Salesforce, SMS alerts, and so on.
Highlight features:
- Providing a variety of drag and drop fields, row and column layouts, and multi page forms
- Allow sending or exporting submissions as a PFD, Microsoft Excel file, even Google Sheets
- Customizable email notifications from any form
- Built with accessibility and mobile responsiveness in mind
- Using pre-built templates to get started fast
Price: Free
Formidable Forms
Formidable Forms is the greatest forms plugin for completing more tasks in less time. This plugin enables building simple contact forms or complex multi-page with file uploads, conditional logic and calculations.
Highlight features:
- Provide a simple drag-and-drop form builder
- Provide a variety of forms
- Allow entries to be transformed into lists, directories, calendars, and strong front-end content
- Collect multiple sets of data like team registrations, work history, and events with repeater fields
- Automatically populate fields with saved entries, user meta and much more
Price: $35
Visual Form Builder

Visual Form Builder is a plugin that allows you to create and manage all types of forms for your website in a single place. It is designed for fast and easy form builder. It simply takes a few minutes to create a completely working contact form, and you don’t have to write a single line of PHP, CSS, or HTML! Besides, this plugin includes a reasonably priced premium edition, but the free version has a lot to offer as well.
Highlight features:
- Supply simple, yet effective, logic-based anti-SPAM system
- Send form submissions to multiple emails
- Embed multiple forms on a post/page
- Arrange your fields in two, three, or a mixture of columns
- Using shortcode to insert any page or post
Price: Free
Final Words
It can be concluded that WooCommerce contact form’s role is extremely essential, not only in providing the greatest experience for customers, but also in making it easier for sellers to handle business in general and contact customers in particular. We highly recommend you use a plugin in order to create your own beautiful contact form quickly. The plugins we mentioned in this post can all help you create a contact form.
We hope this guide helps you know how to create a contact form for WooCommerce and be able to choose the best contact plugin as well.
If you have any concerns, please leave them in the comments section below!


