How To Create a WooCommerce Custom Single Product Page
WooCommerce, created for small to large-sized online retailers using WordPress, is now the most popular e-commerce platform. The plugin allows you to effortlessly establish a store and sell any goods, from physical to digital. Customer data and sales reports are also entirely controllable from your WordPress dashboard. In terms of product page layout, because WooCommerce must meet the needs of nearly all company kinds, it must give a simple default one that anybody may use.
Since then, you’ve created various product page designs to meet unique requirements. In this scenario, a visual editor is useless. WooCommerce makes use of a single template file for all product pages. When you style an individual product page template, the modifications will be applied to all pages. That is why today’s article will show you how to create custom single product pages in WooCommerce. Before we get into the processes, let’s go through some of the reasons for altering the WooCommerce default product pages.
Why you need to create a custom single product page in WooCommerce?
Before we get to the method, it’s vital to understand why we’re changing the WooCommerce default product pages. These primary explanations help to explain why:
- Create an appealing visual shop: It is important to note that not all items are identical. As a result, using various layouts will improve the user experience and make your product pages more visually appealing. However, this is dependent on the items in your shop. For example, the female cloth product pages should not appear the same as the male fabric product pages if you sell clothing.
- Keep a step ahead of your competitors: Having a visually appealing product page will set your products out from the competition. This can aid in shifting people to your business, and you will become a game-changer in your sector.

Without further ado, let’s look at how to alter the single product page layout in WooCommerce.
How to create a WooCommerce custom single product page
Because this guide focuses on customizing the product page, we’ll go over the basic WooCommerce setup and how to add new products. It would be best to have WooCommerce installed and a few relevant goods on your site following the installation.
Step 1: Take a look at the default product page in WooCommerce
The standard WooCommerce product page has two primary columns: the product image on the left and the product name and description on the right. This is how it appears in practice.
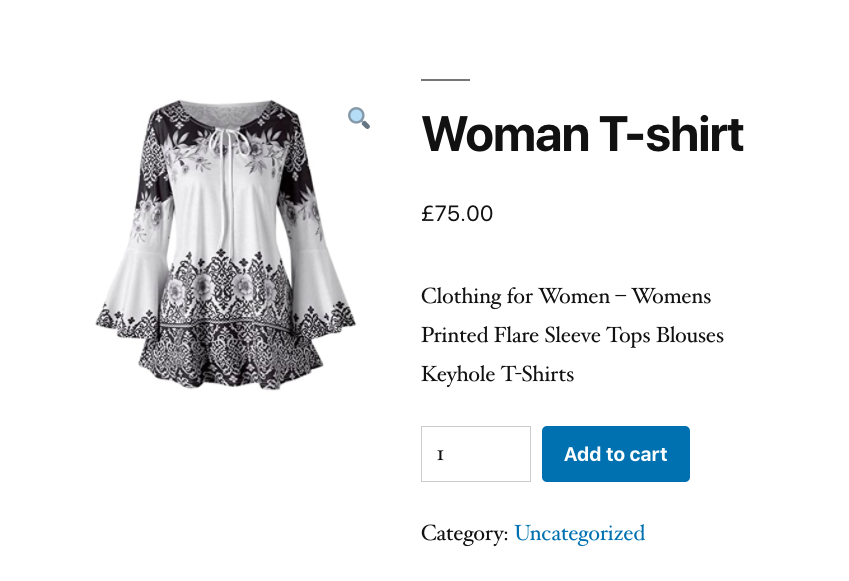
You may change the product page template in various ways, such as adding a shopping cart column on the right or showing more than one product image on a page. Including the product’s rating is another excellent idea.
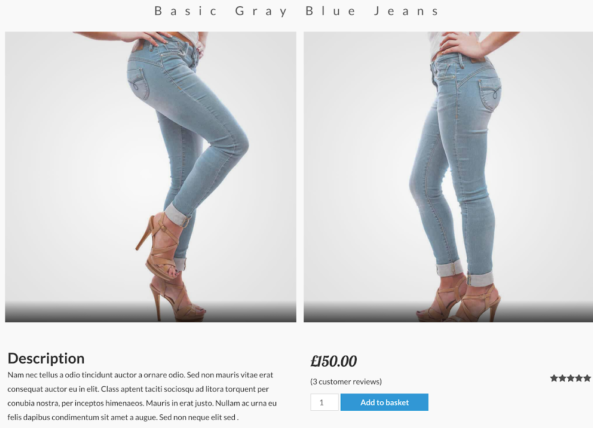
You may manually modify individual product pages in WooCommerce or utilize a third-party plugin to do so. While the former does not necessitate outside assistance, the latter spares you from coding and technical troubles. However, the difficulty with this solution is code overwriting when upgrading the WooCommerce plugin. When the plugin is upgraded, all code and customization will be erased. Before going this route, you should think about it thoroughly.
Step 2: Install the plugin
You must install the WooCommerce plugin and enable it on your WordPress site to alter the WooCommerce product page layout. Today’s tutorial will use the Elementor for WooCommerce to accomplish our goal. To install Elementor plugins and its Pro version, follow these steps:
- Elementor and Elementor Pro plugins are available for download.
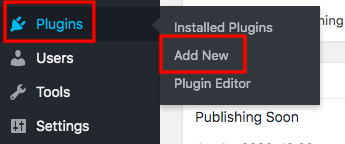
- Navigate to the Plugins section of your WordPress admin dashboard and choose Add New.
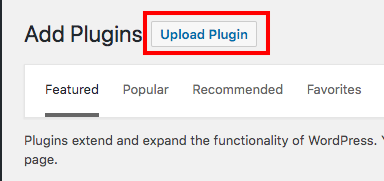
- Select the zip files you just downloaded by clicking Upload Plugin.
- Install and enable the plugins.
Step 3: Choose or create a custom single product page template
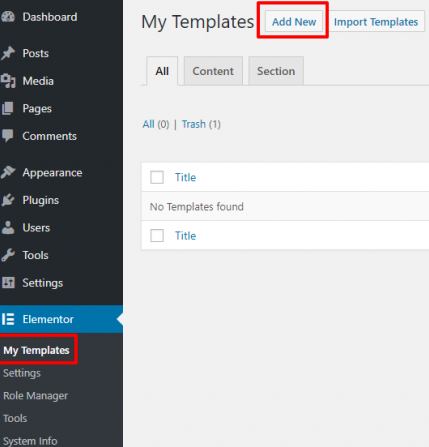
Navigate to Elementor > My Templates and press the Add New button. Select Single as your template type, then click new template.
Elementor will then ask you to start with various pre-designed blocks.
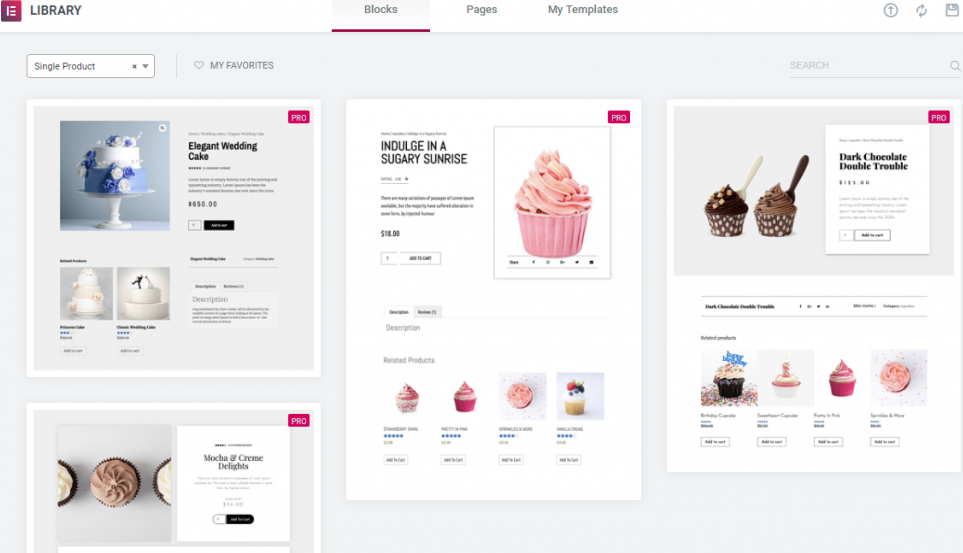
The most straightforward approach to begin is to select one of the pre-designed product page templates and adjust it to meet your website. Product pages come in a variety of designs to pick from. Switching to a full-width template will ensure that you are working on a full-width product page before you begin adding widgets. You have complete control over the layout and appearance of the product page when using Elementor. The second alternative is to build it from the ground up. The specific widgets for the product are shown in the editing panel.
Step 4: Configure some additional features
It’s time to start putting together the items that will make up your product page. For this tutorial, you will only utilize the Elementor widgets listed below and no additional plugins:
- Product Title widget
- Woo Breadcrumbs widget
- Product image widget
- Product rating widget
- Short description widget
- Product price widget
- Add to cart widget
- Product meta widget
- Product data tabs
- Product related
- Upsells widget
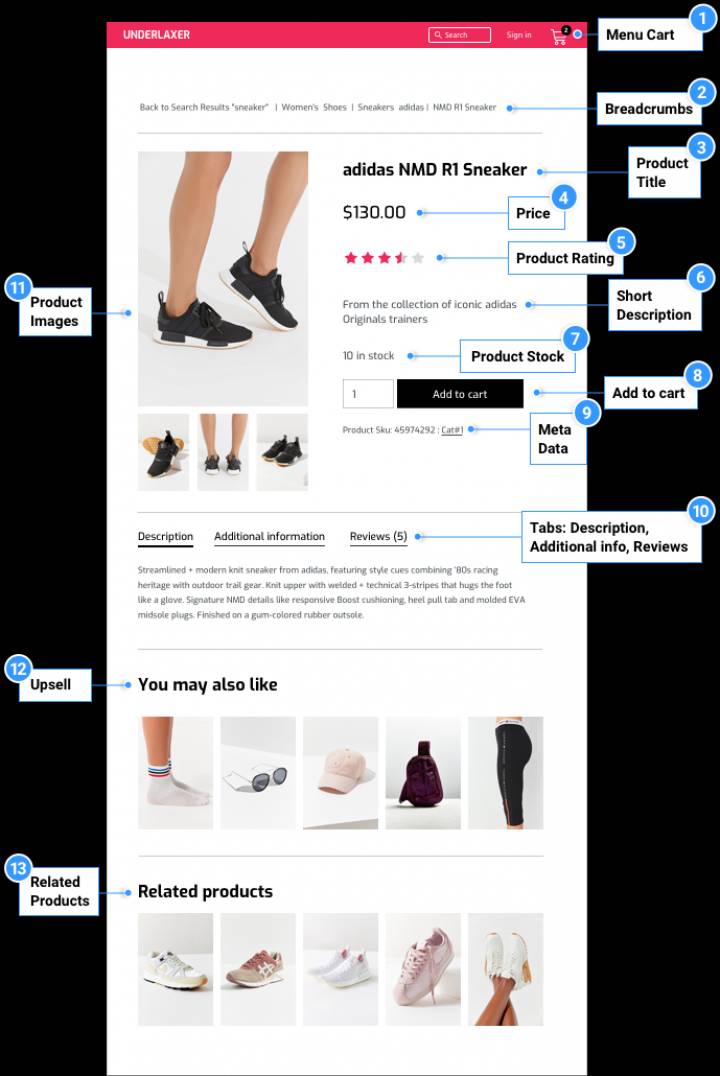
You have total control over the layout and can move items around as you see fit. You may use any additional widget to improve the effectiveness and engagement of your product page. Share buttons, call-to-action widgets, featured images, drop-down menus, and so on. Custom fields may also be added to the template using the dynamic content capability.
Step 5: Preview your custom page
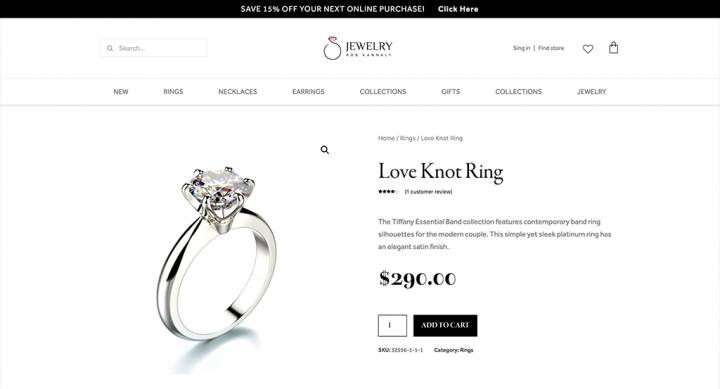
It is recommended that you evaluate your product template with numerous different goods to ensure the correct design. On the bottom left panel, click the eye icon, then settings. Select the product you wish to display from the Preview Settings menu. Now, apply and check to see how it appears.
Step 6: Publish your changes
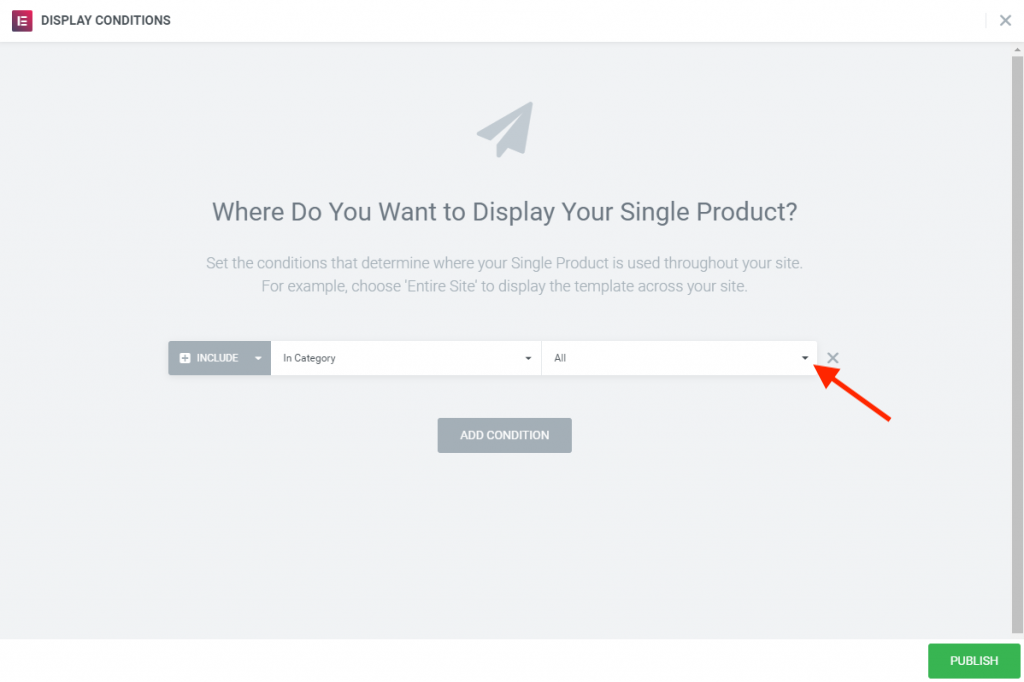
This is where you define the criteria under which your product template will display. The template will affect all of your site’s product pages by default. You may also narrow your search to a particular product category. When you click Publish, your single product will be live!
3 other best plugins to create a custom single product page in WooCommerce
JetWooBuilder
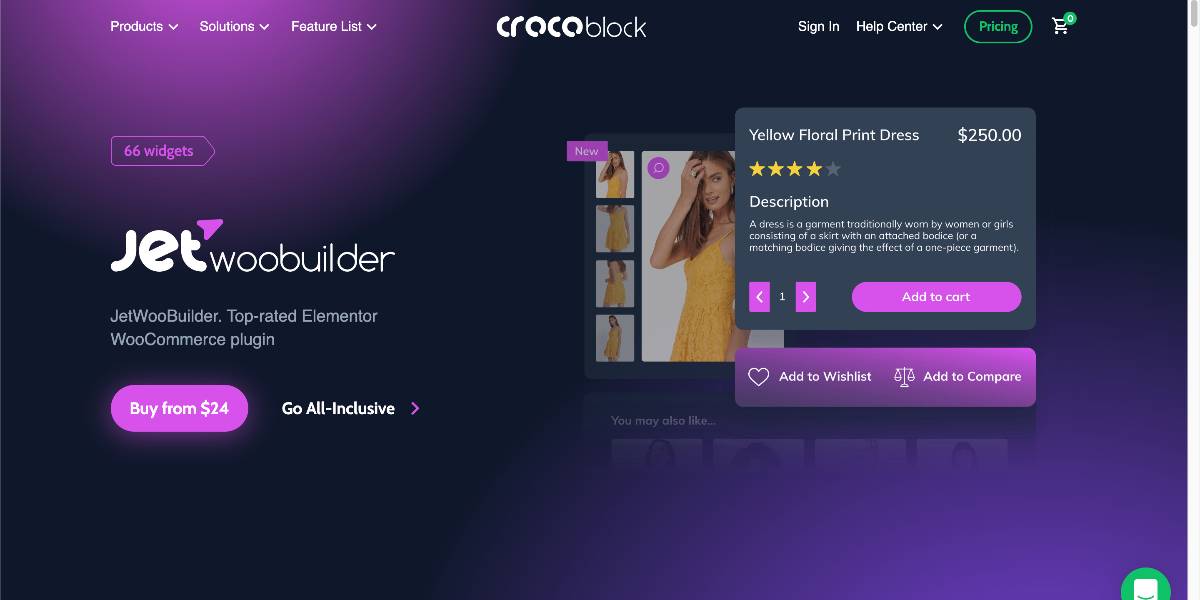
JetWooBuilder may be an excellent choice for creating a fully customized e-commerce website due to its ability to develop unique templates for all WooCommerce vital sections. JetWooBuilder, unlike Divi Builder and Elementor Pro, does not allow you to set a custom single product template to specified product(s), product categories, and tags. However, you may choose a custom template when you add a new product. In other words, if you wish to use multiple templates for different items, it is also doable. JetWooBuilder is an Elementor add-on that relies on Elementor to function (Elementor Pro is not required).
Outstanding features:
- All JetWooBuilder widgets are organized into groups so that you may utilize the appropriate ones when creating specialized store pages.
- Display product categories as a grid or a full-fledged carousel as needed to make things easier.
- Style and content customization settings represent WooCommerce product categories and tags as tiles.
- Feel free to change the default sales pages to “look and feel” the way you want them to and help you make money.
- Use the Shop Page widgets to create a suitable template that showcases all products to their most significant advantage.
Price: If you are a newcomer, the $24 single site subscription will fit your primary demand. On the other hand, the All-inclusive set at $130 will be the best choice for medium and large online businesses.
Divi Builder
Elegant Themes’ Divi Builder is a premium page builder. It includes a WooCommerce builder that allows you to design custom templates to replace WooCommerce’s default templates. A single product page is one of the custom templates available in Divi Builder. When you create a custom single product page using Divi Builder, you may attach it to a particular product(s), product categories, and product tags. You may include components such as an add-to-cart button, breadcrumbs, product pricing, and so on.

Outstanding features:
- It adds a sophisticated design interface to WordPress that both novices and professionals adore.
- Allows you to customize every aspect of your website.
- Divi makes website creation faster and more efficient. It will boost team cooperation and streamline your design process.
- Divi seamlessly integrates with WooCommerce, providing the beauty you can accomplish with Divi’s visual builder on posts and pages to your store and product pages as well.
- Divi’s robust design capabilities, paired with its built-in portfolio post types and modules, provide companies and creatives alike with everything they need to showcase their work with the same degree of artistry that it was created with.
Price: Divi is having a 25% sale off until next week. By default, it has two options for eCommerce businesses. The Yearly subscription costs $67, and the Lifetime subscription costs $187.
Brizy Pro
Brizy is a primary, lightweight WordPress page builder. Brizy’s pro edition also can build custom templates for WooCommerce components, such as the single product page. You may also use Brizy Pro to add elements like breadcrumbs, product stock, and SKU to a bespoke single product page. Brizy Pro, in addition to the WooCommerce builder, has additional essential features such as a giant menu builder, the ability to design custom header and footer, the ability to link with third-party marketing tools, and so on.

Outstanding features:
- Brizy enables you to turn clicks into clients quickly.
- With our super-fluid and contemporary animations module, you can add motion and interactive beauty to your websites.
- Easily change colors and fonts throughout your whole site in seconds rather than hours.
- Brizy offers numerous extra functions that can add up to large prices when purchased separately.
- Just as in Photoshop, you may use the Position Absolute function to set any element precisely where you want it.
Price: If you are a beginner, the accessible version of Brizy will fulfill your basic requirements. Furthermore, at the cost of $49 per year, the Pro version will be suitable for bloggers or medium online businesses.
Conclusion
Instead of utilizing WooCommerce’s default product design, you may develop a custom product layout to attract more consumers and outperform your competition. Elementor WooCommerce Builder turns out to be the simplest way to style the look of a single product page. Adding code to the theme files saves you a significant amount of time and work. It is also effortless to remove or add new page elements.
We hope this tutorial will help you understand how to create custom single product pages in WooCommerce. The WordPress world has joined the page builder realm within the last several years. This is the era in which you may develop a completely personalized professional website without knowing how to code. Some page builders, such as Elementor, Brizy, and Divi Builder, have a WooCommerce builder that allows you to design bespoke WooCommerce layouts visually.


