
How to Customize Checkout Fields in WooCommerce
By Sam Nguyen

In this article, we’ll walk you through how to customize your checkout page to meet the needs of both your target audience and business.
Being an owner of an online business, the checkout process is one of the most essential parts that you have to focus on to bring a satisfying user experience. According to research in 2020, more than 60% of eCommerce shopping carts are abandoned at the checkout process. Thus, the checkout page is a key that you optimize to increase the conversion rate.
In this article, we will introduce you to an easy method to edit the WooCommerce checkout page using the plugin.
Actually, using programs is one more way; however, it is too complicated and requires much academic knowledge to design the page. Then, a tutorial on How to customize checkout fields in WooCommerce is given to you.
Without further ado, let’s dive into it right now!
Why you should customize Checkout fields in WooCommerce
As mentioned before, if you have your own eCommerce business, checkout plays a crucial role in holding the customers back to the very last purchase process. It will decide whether customers ordered their products successfully or not. As a result, with the competition among more and more online websites, the purchase experience is prioritized when designing a website page.
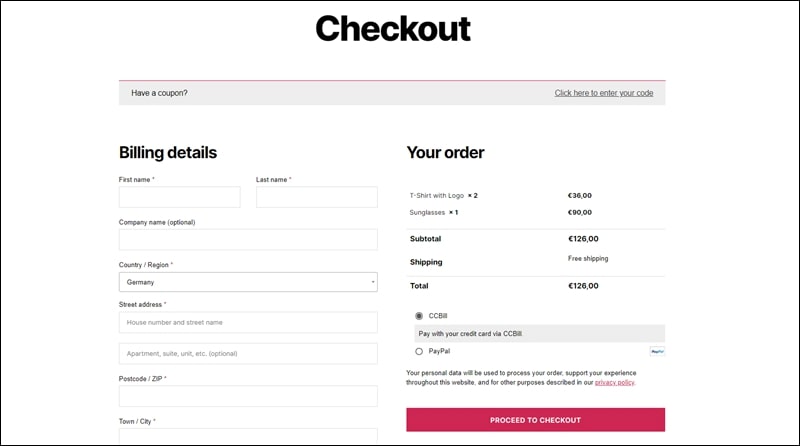
Therefore, although WooCommerce provides a good default checkout theme for your site, you still need to edit the checkout page to accelerate sales. Moreover, when customizing the checkout page, you have to remember one thing: the longer information customers need to fill out, the higher possibility customers may leave and look for ordering a similar product on another website. There is some information you can ask them to fill out if they initially have not created their own account:
-
Billing details
-
First name
-
Last name
-
Company name
-
Country
-
Address
-
Town/City
-
District
-
Postcode/ZIP
-
Phone
-
Email address
-
Order notes
You are knowledgeable about the checkout page as well as provided which factors you should customize that page. Then, we will go to the next part - a guide on designing checkout fields in your WooCommerce store. Of course, we will edit the checkout page configuring the plugin we want to connect.
How to customize checkout fields in WooCommerce
Step 1: Install a plugin
Heading to Plugins > Add New, and search for the plugin you want to install.
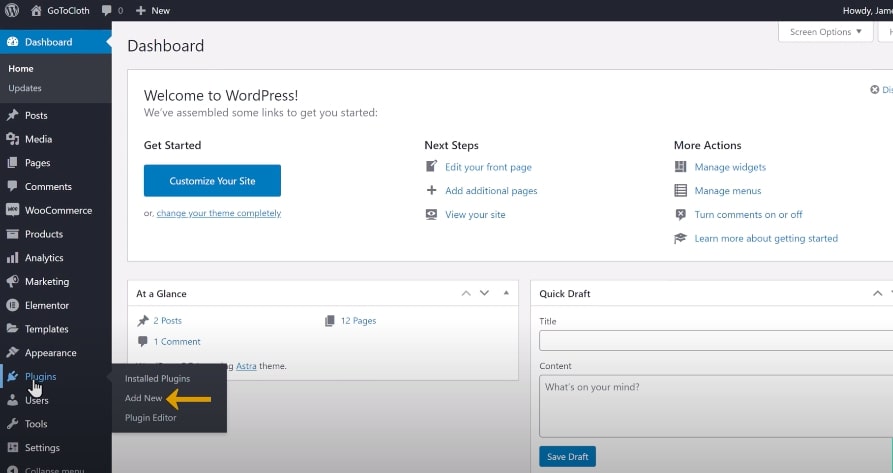
Click on Install now and activate the plugin.
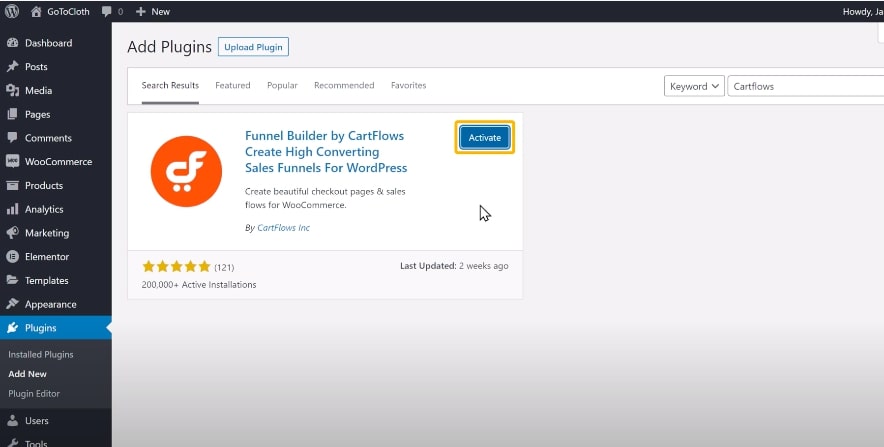
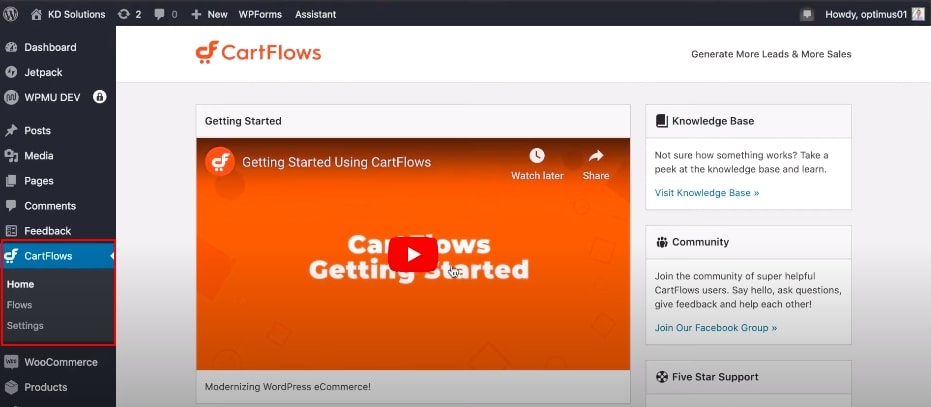
Once completing the configuration, the plugin will be added to your WooCommerce dashboard tab on the left side of the screen.
Since most of the retailers just know how to customize their website in WooCommerce settings, that’s the reason why we recommend you install a plugin for the design checkout page. There are some other methods to design the page; however, it requires you to have a basic knowledge about programming or CSS design in order to implement the code.
We will guide you in an easier way; all you just have to do is connect the plugin and follow our tutorial. Keep in mind that this plugin we are going to give you is an example to apply to your practice only.
Step 2: Display checkout field
After installing the plugin that you want to integrate, now let’s move on to the next part, which is to import the design of the checkout page and edit it.
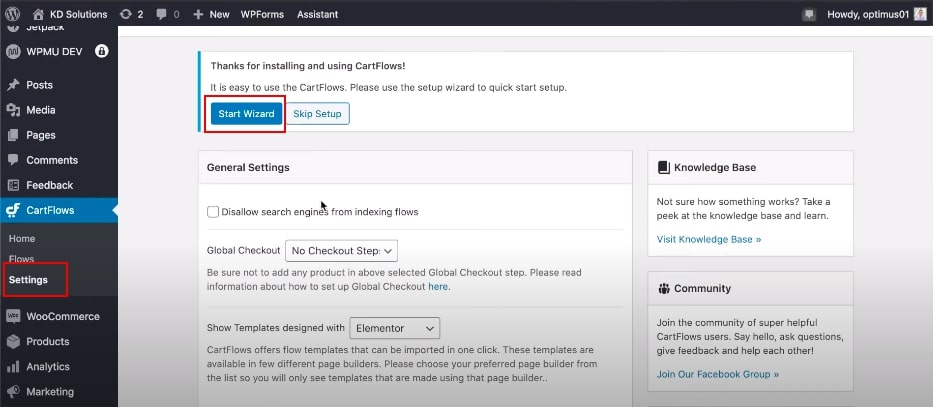
In order to do that, firstly, go to the plugin which is CartFlow in our example, choose the Settings section to activate its functionality.
Click on Start Wizard to create your account in that plugin platform if you have not had it yet.
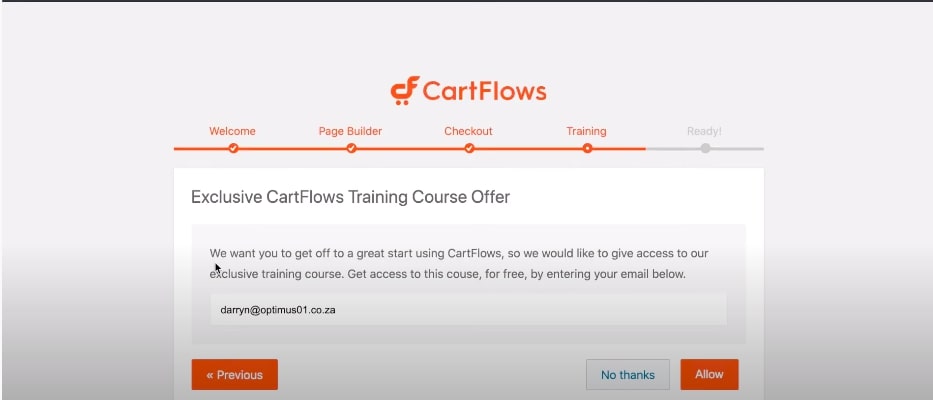
There are some stages in the process you need to implement, namely Page Builder, Checkout, Training, and Ready. When you finish, then you are able to begin your design for the checkout page.
Next, go back to your WooCommerce dashboard; in the plugin settings section, please scroll down and fill out the information relating to displaying the checkout page on your website.
Remember to save your changes after typing.
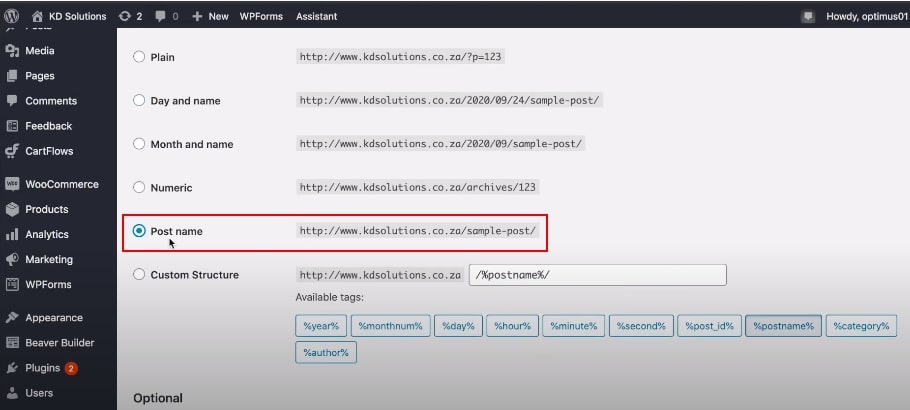
Now, you only have one more step to customize the checkout page. Heading to Settings and select Permalinks.
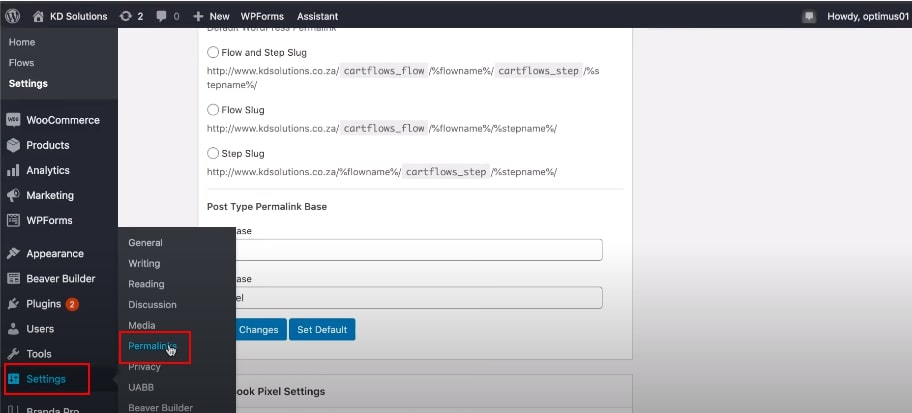
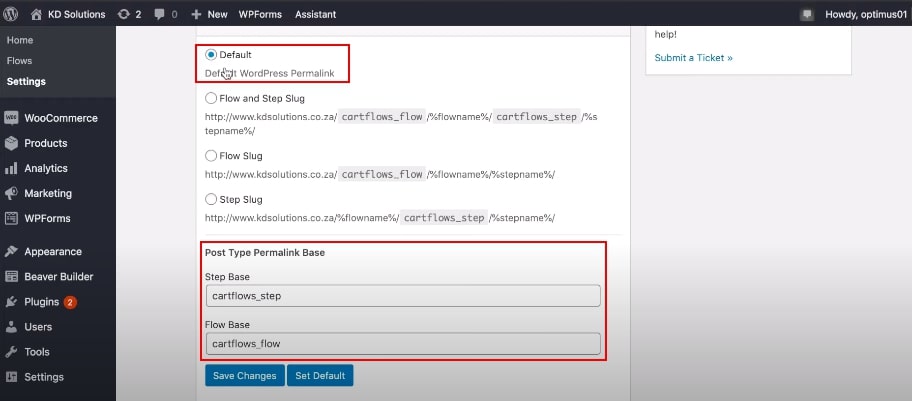
The purpose of doing that step is to double-check, making sure the plugin URL set in your WooCommerce settings works correctly. In that section, you need to enable Post name.
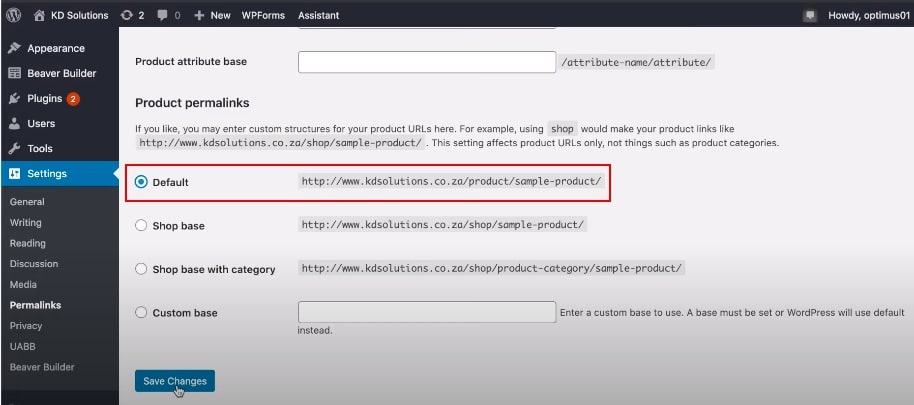
Next, tick the Default option in the Product permalinks and save your change at the end.
Step 3: Customize checkout field
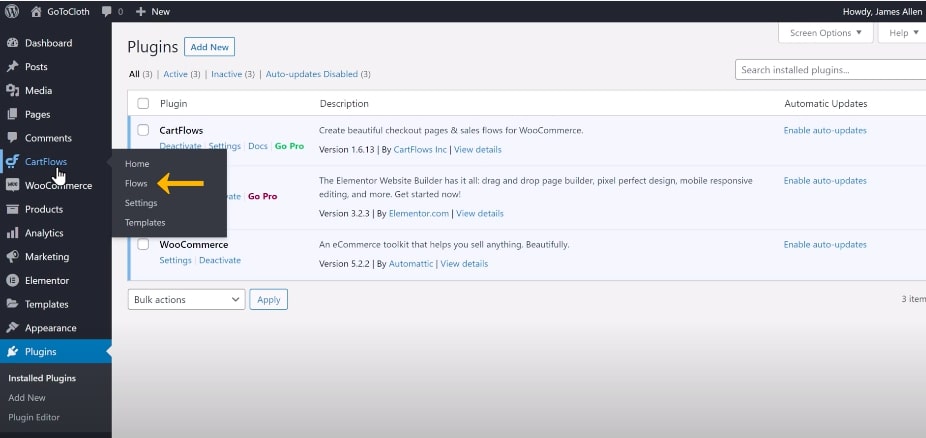
Moving on, the most important part is customizing the checkout field. You need to go back to the plugin - CartFlow, click on Flow to start customizing.
After doing that, choose Add new to select a template from a theme library. Each template has its preview for you to review and use as a try.
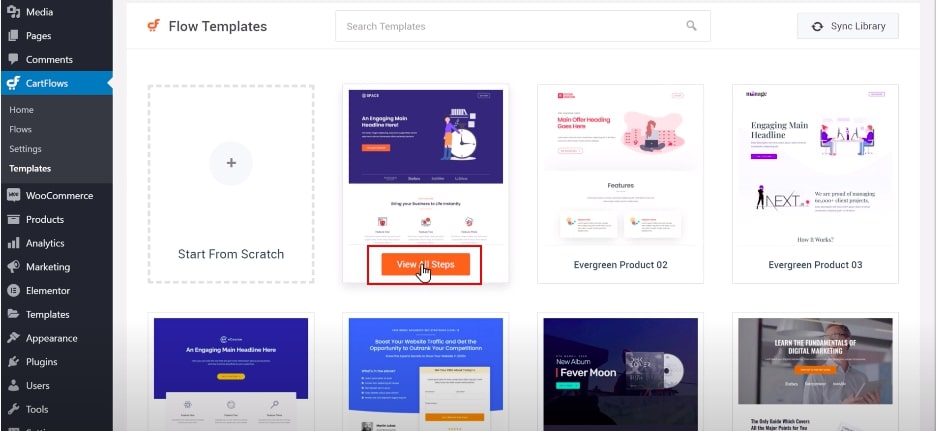
Now, choose the template you fancy and select the Checkout page to view how it looks on your site. You can import the design by choosing Import Flow and enter the title for the design.
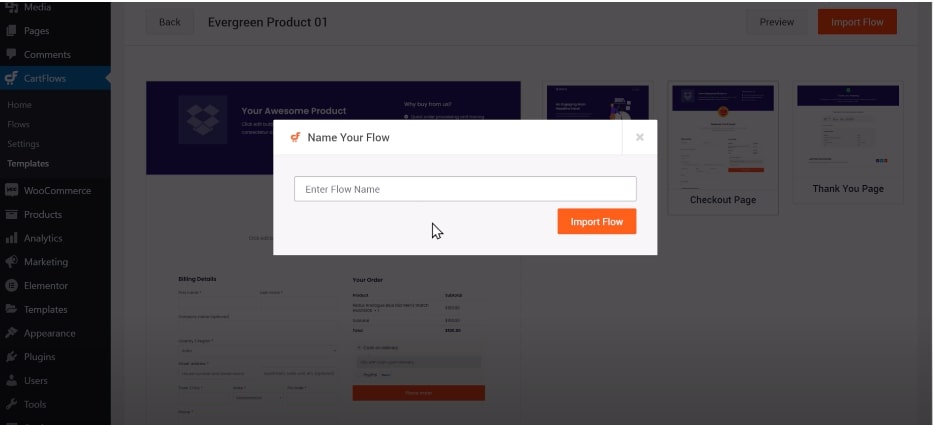
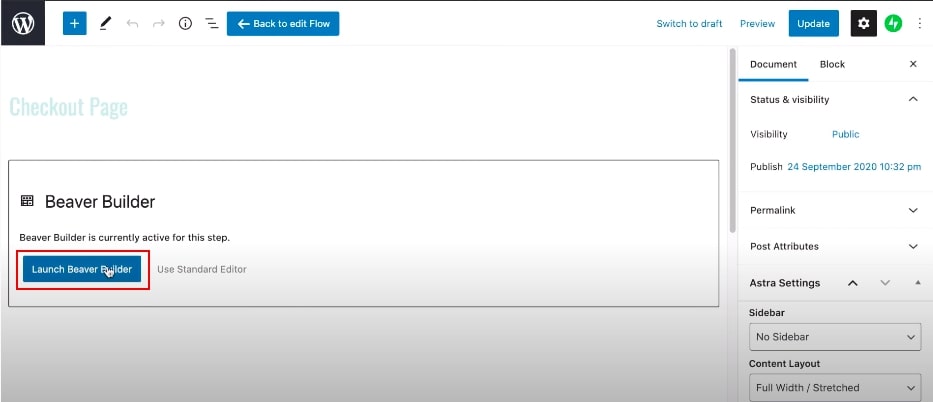
Then after naming the title of the checkout page, let’s edit the checkout page following our next steps below. Navigate to the Edit option to customize the page.
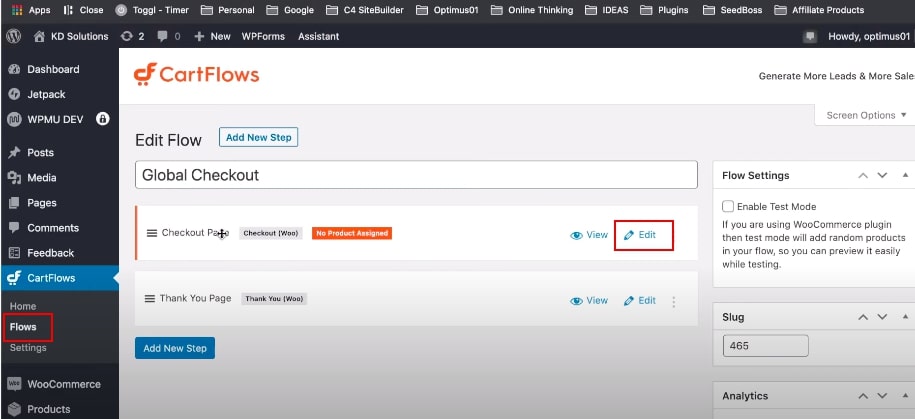
On the screen, you can see the Checkout Layout with a bunch of options to edit and other features set around the corners of the screen. Don’t worry because we will guide you step-by-step in designing your own checkout page.
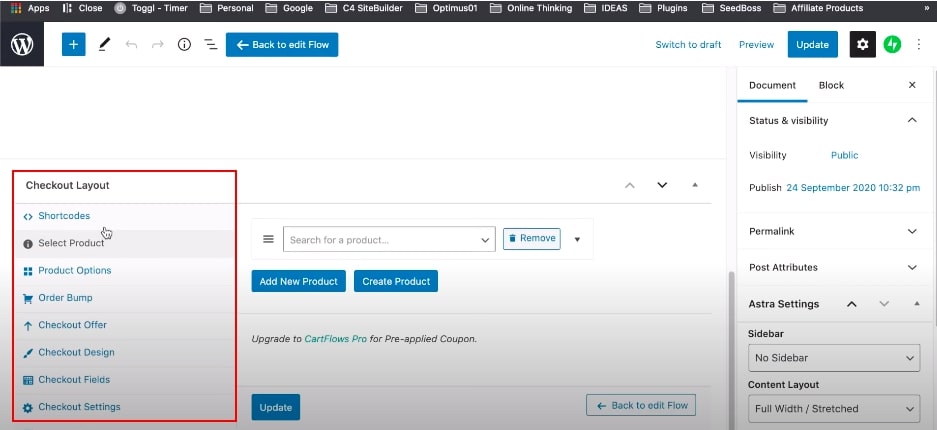
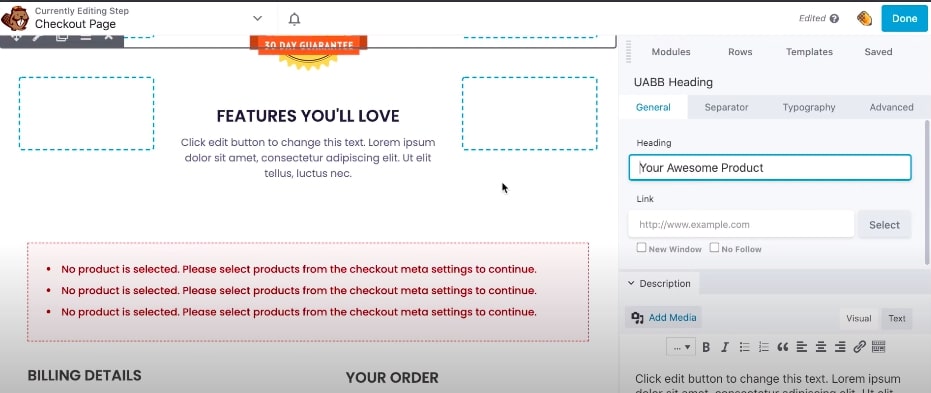
Some options need you to fill out. First, you have to add products, and of course, you can remove them if you want to later.
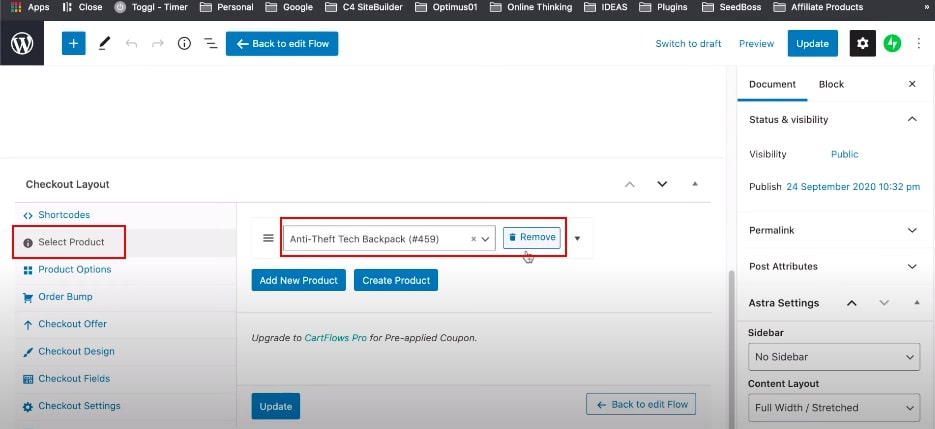
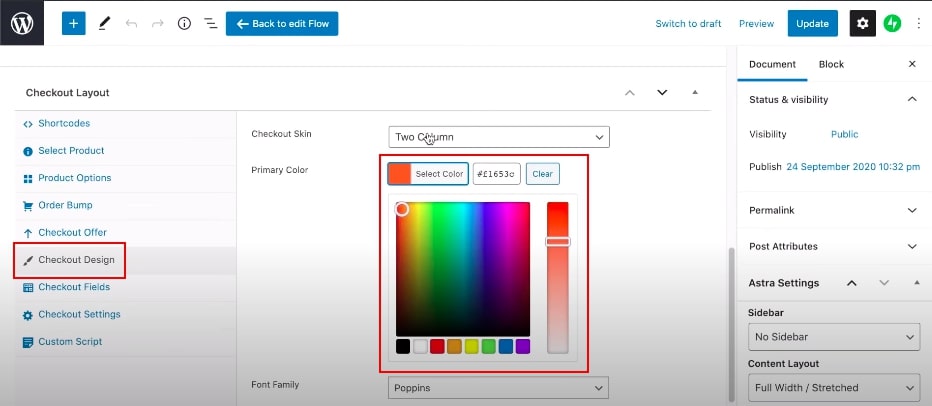
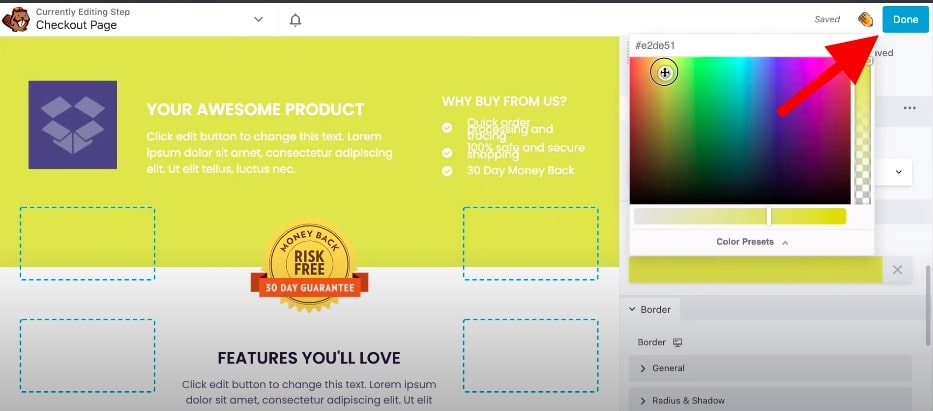
Then, apply checkout background color by selecting Primary Color in the Checkout Design term. It’s time to implement your checkout page with much more visual features that you may edit and see the changes at once, such as added images or color background, etc.
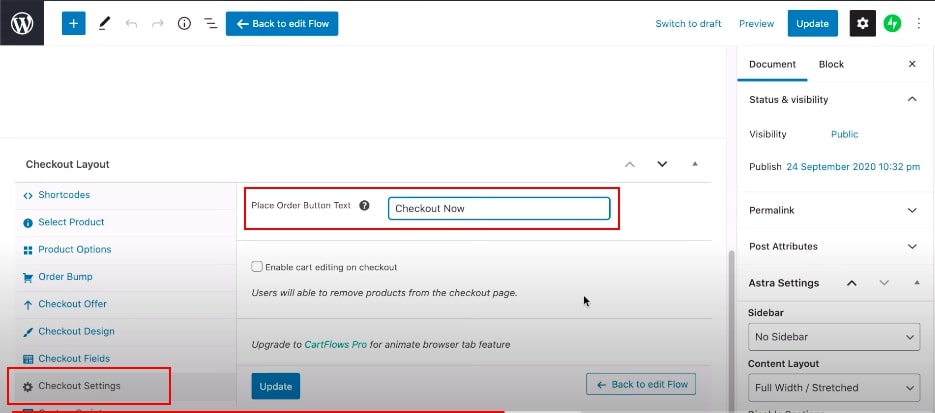
If you have enough budget and have a need to design a much more fascinating page, you can purchase - it’s up to you! Coming to Checkout Settings, just text the name of the order button as you desire. As for the rest of the options, the plugin requires you to upgrade to the Pro version if you want to utilize them.
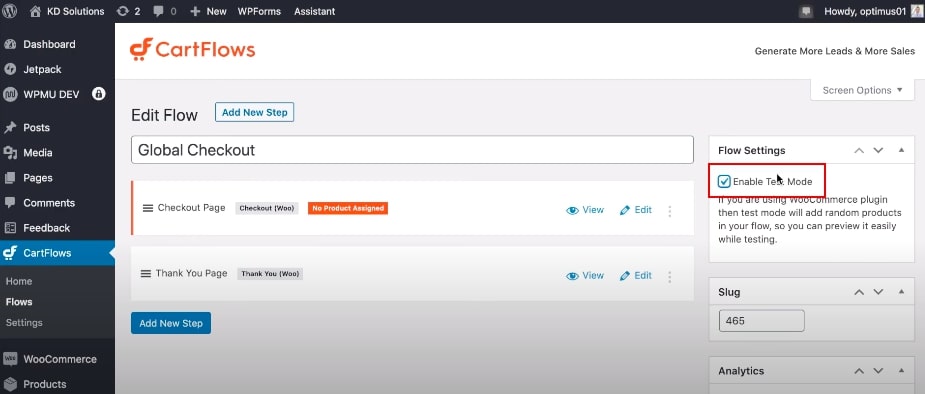
You can now launch your checkout page when you end up editing the page. It will be updated on your website afterward.
Don’t forget to enable the testing check so as to view the page easily.
Once you finish, choose Done and click on Edit steps > Back to edit to return the plugin settings. That’s the last stage of customizing the checkout page.
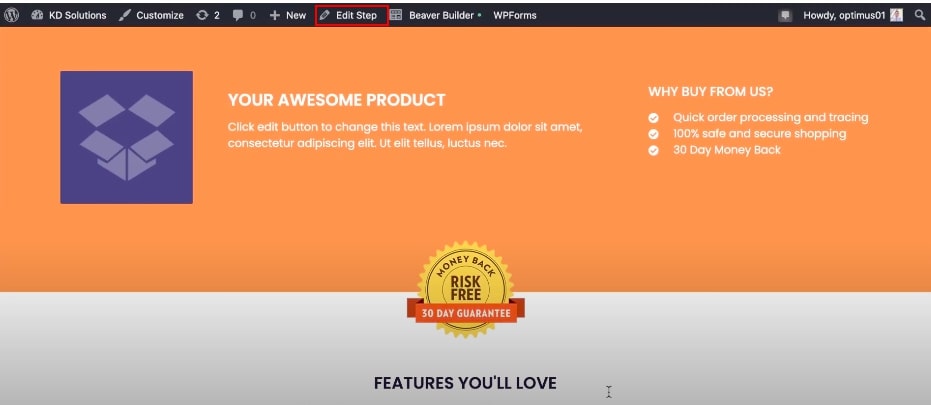
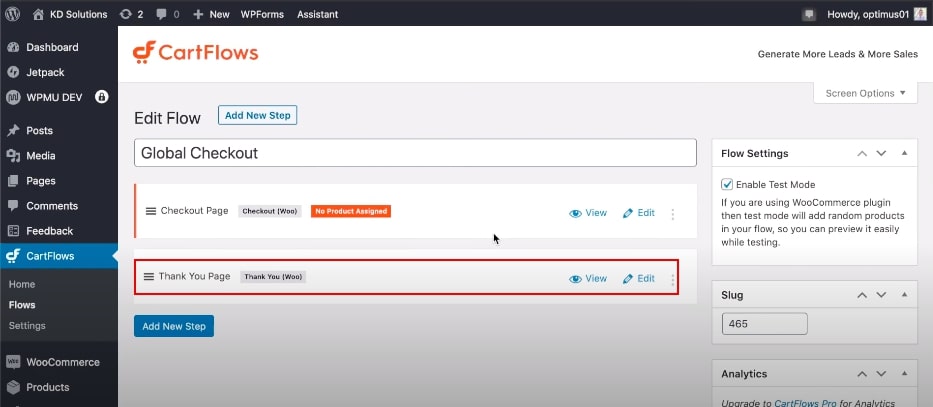
In addition, if you want to edit a “Thank you” page after a customer successfully purchased an order. Just click on the Edit section and start customizing your needs, which is similar to what you did with the Checkout page.
Common problems
WooCommerce checkout is not working
Literally, the most common issue leading to a nonworking checkout process is from a theme or plugins conflict. Maybe another possible reason comes from the endless loading. Don’t panic, we will show you some easy solutions that you can check for yourself.
As for theme conflict, you need to deactivate plugins and themes by right-clicking on the screen and select Inspect > Console. If you see any errors in the Javascript codes, you may conclude that a problem lies in either plugins or themes. After figuring out the error, you can stop activating all plugins except WooCommerce. At the same time, enable a default theme, then activate a bulk of plugins one by one and check which one is the culprit.

About the endless loading reason, in most cases, AJAX makes this problem happen. Since the review order page processes the payment methods and total price through AJAX, if the page fails to load, it causes significant damage to your sale. A customer may not have a visit to your website again due to a bad user experience. In order to tackle this issue, it is better to need help from WooCommerce developers or have a look at WooCommerce’s troubleshooting guide.
Review order section is stuck
Indeed, facing issues relating to the checkout page is a nightmare for any online retailer. However, even if you’re dealing with problems with your checkout process, don’t worry too much.
A stuck order may often happen when coming to this issue session, which is not good news WooCommerce experts. This can be triggered by a plugin or theme plugin again. So, to fix this, you should check compatibility with all connected plugins as well as update your old WooCommerce version of the templates.
Redirection to empty cart
Last but not least, many customers come to a situation that the checkout page turned out to be empty without any products that they added to their cart before. It is likely unavailable that the checkout page isn’t working probably or your hosting plugin is not compatible with WooCommerce.
The first step to do right after finding out the problem is checking all WooCommerce statuses. See whether any of them have not been ticked. Moreover, as mentioned in the earlier part, you should upgrade an outdated theme if you have not done it yet. In all, please have a whole check, including the product settings such as plugins, extensions, inventory control. It makes sure that everything works as it usually does.
In case you cannot fix it after reviewing, the last effective solution obviously is from the support of the WooCommerce help center. You will discuss with them to get a step-by-step guide to solving your current problem.
Final words
We are really appreciative if you find out to share interesting and helpful for your question about How to customize checkout page in WooCommerce. In this article, you have read the reason for editing the checkout page, the detailed tutorial of how to do it, common issues you may face, and the solutions you may settle on your own.
If you have any further questions about this topic or other problems, please let us know to be your partner helping you out as much as possible.


