How to Customize a My Account Page in WooCommerce
Customize a My Account page on your website if you’re using WooCommerce to manage your WooCommerce store . This allows consumers to keep and exchange information, account details, and billing addresses with you, making the shopping experience more comfortable for them. Most store owners miss this page, yet it can help you stand out from the competition and create a better customer experience for your customers.
There are numerous methods to modify the My Account page, which can be perplexing. Our post will help you solve your problem by detailing several methods and their functions. To take your store to the next level, learn How to customize the WooCommerce My Account page both programmatically and using plugins in this article.
Why you should customize a My Account page in WooCommerce?
The My Account page of an eCommerce website is critical to the proper operation of its activities, and it should be carefully designed to allow users to make full use of account management. Customizing this page, which is created for your registered users, can help you improve their experience on your site. Apart from providing information about their orders, you can also create and show coupons and discount codes, as well as send them unique alerts, discount offers, and sales alerts.
On their My Account page, you may offer consumers a list of downloads and virtual products they’ve purchased, as well as allow them to file premium support tickets and contact them directly from there. These initiatives will give your customers the impression that your store is concerned about them. Therefore, they’d prefer to make another purchase on your website, resulting in increased sales.
If you have a WooCommerce page and want to make it as user-friendly as possible for your visitors, you should absolutely edit the WooCommerce My Account page.
How to customize a My Account page in WooCommerce?
To alter the style, feel, layout, content, and design of WooCommerce’s My Account page (and all its subpages, of course, such as the “Address” page), you have various ways, but not all of them are simple to use or adaptable to your needs. As a solution, we’ve tried to investigate and come up with the 2 Best methods to customize a My Account page in WooCommerce to satisfy visitors.
For the first, if you’re comfortable with PHP customisation, you can accomplish practically anything with simple snippets - or, to put it another way, utilizing WooCommerce hooks.
Another easy option is to utilize a plugin. This can sometimes be a quick and error-free technique to do what you need without having to code.
So, let’s have a look at both of these helpful methods below.
Method 1: Customizing My Account page in WooCommerce using WooCommerce hooks
The first way to programmatically edit the My Account page is to use WooCommerce hooks. You’ll need a basic understanding of how WooCommerce hooks work for this. We recommend that you read this guide if you’re not familiar with hooks.
Step 1: Open your theme editor
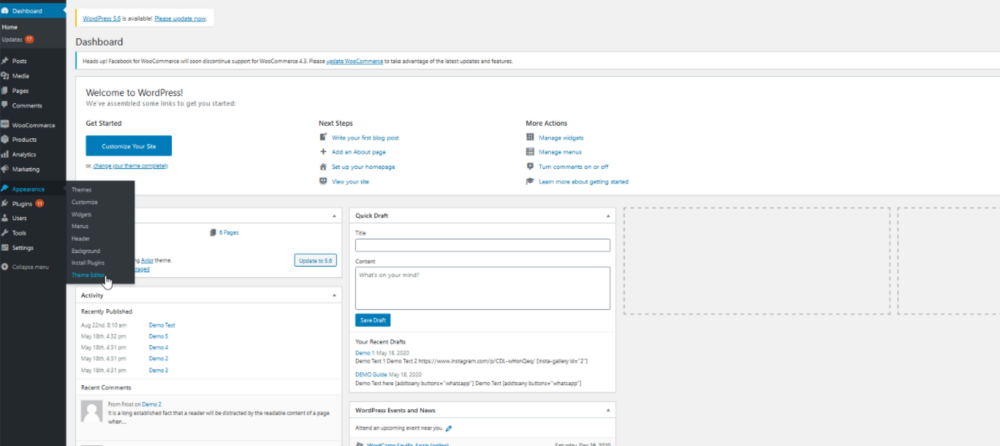
To access your theme editor, go to Appearance > Theme Editor in your WordPress Admin Dashboard.
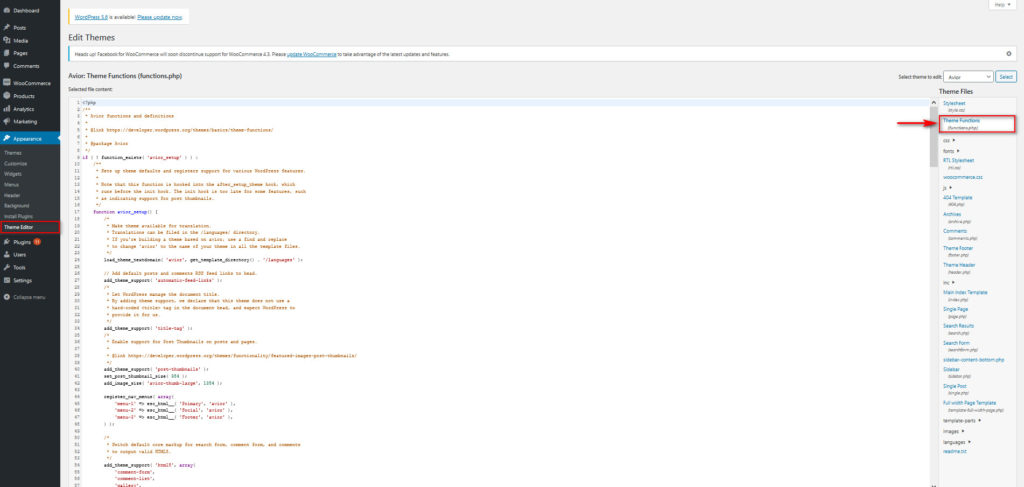
Then, on the right sidebar, browse to the functions.php file in the Theme Files list.
Step 2: Customize My Account page
You may now add your custom functions to your child theme’s functions file using the editor.
We’ll provide several script for you to add to your functions.php to personalize My Account page. The following are four often used hooks for customizing a My Account Page.
- Rename Tabs
You should use this code to rename the Address tab to Your Address
add_filter( 'woocommerce_account_menu_items', 'QuadLayers_rename_acc_adress_tab', 9999 );

function QuadLayers_rename_acc_adress_tab( $items ) {

$items['edit-address'] = 'Your addresses';

return $items;

}
You can also modify the names of your tabs by editing this script. Simply alter the name of the $items array to do this. The full list of acceptable slugs for the $items array may be found here.
$items = array(

'dashboard' => __( 'Dashboard', 'woocommerce' ),

'orders' => __( 'Orders', 'woocommerce' ),

'downloads' => __( 'Downloads', 'woocommerce' ),

'edit-address' => _n( 'Addresses', 'Address', (int) wc_shipping_enabled(), 'woocommerce' ),

'payment-methods' => __( 'Payment methods', 'woocommerce' ),

'edit-account' => __( 'Account details', 'woocommerce' ),

'customer-logout' => __( 'Logout', 'woocommerce' ),

);
You can change the functions.php file and rename all of your tabs this way. Once you’re satisfied with the changes, click Update File to complete the process.
- Remove Tabs
To completely remove any tab, you should use the unset() function like this:
add_filter( 'woocommerce_account_menu_items', 'QuadLayers_remove_acc_address’, 9999 );

function QuadLayers_remove_acc_address( $items ) {

unset( $items['downloads'] );

return $items;

}
The Downloads tab has been removed from the script above. The whole list of tabs slugs can be found in the $items array, so you may pick the one you want.
$items = array(

'dashboard'       => __( 'Dashboard', 'woocommerce' ),

'orders'          => __( 'Orders', 'woocommerce' ),

'downloads'       => __( 'Downloads', 'woocommerce' ),

'edit-address'    => _n( 'Addresses', 'Address', (int) wc_shipping_enabled(), 'woocommerce' ),

'payment-methods' => __( 'Payment methods', 'woocommerce' ),

'edit-account'    => __( 'Account details', 'woocommerce' ),

'customer-logout' => __( 'Logout', 'woocommerce' ),

);
- Merge Tabs and Content
Merging tabs is another way to customize the My Account page. Let’s look at how to get rid of the Addresses tab and relocate the content to the Account tab.
// -----------------------------

//  1. Remove the Addresses tab

add_filter( 'woocommerce_account_menu_items', 'QuadLayers_remove_acc_tab', 999 );

function QuadLayers_remove_acc_tab( $items ) {

unset($items['edit-address']);

return $items;

}

// -------------------------------

// 2. Insert the content of the Addresses tab into an existing tab (edit-account in this case)

add_action( 'woocommerce_account_edit-account_endpoint', 'woocommerce_account_edit_address' );
- Add a new tab with custom content
Paste the following code into your child theme’s functions.php file to add a Support tab with custom content to the WooCommerce My Account page.
// 1. Create a new endpoint.

// Note: Resave Permalinks or it will give 404 error

function QuadLayers_add_support_endpoint() {

add_rewrite_endpoint( 'support', EP_ROOT | EP_PAGES );

}

add_action( 'init', 'QuadLayers_add_support_endpoint' );

// ------------------

// 2. Add new query

function QuadLayers_support_query_vars( $vars ) {

  $vars[] = 'support';

  return $vars;

}

add_filter( 'query_vars', 'QuadLayers_support_query_vars', 0 );

// ------------------

// 3. Insert the new endpoint

function QuadLayers_add_support_link_my_account( $items ) {

    $items['support'] = 'Support ™';

    return $items;

}

add_filter( 'woocommerce_account_menu_items', 'QuadLayers_add_support_link_my_account' );

// ------------------

// 4. Add content to the new endpoint

function QuadLayers_support_content() {

echo '<h3>Support</h3><p>Welcome to the support area. As a premium customer, manage your support tickets from here, you
can submit a ticket if you have any issues with your website. We\'ll put our best to provide you with a fast and efficient solution</p>';

echo do_shortcode( '[tickets-shortcode]' );

echo do_shortcode( '[wpforms id="1082"]' );

}

add_action( 'woocommerce_account_support_endpoint', 'QuadLayers_support_content' );
It’s worth noting that the script is separated into four parts. You use the parts that you wish to add to your store since each of them accomplishes a particular goal. Remember that you can replace the shortcode in the do shortcode() method in the last section of the script (4).
Step 3: Save changes
Check the frontend after saving the changes. Once you’re satisfied with the changes, click Update File to complete the process.
Method 2: Customizing My Account Page in WooCommerce using plugin
Changing the WooCommerce settings The My Account page is normally only accessible to PHP-savvy developers and designers. If you’re a store owner seeking for a straightforward account customization solution, this isn’t ideal. The good news is that with the help of a handy plugin, you may make a variety of changes to your account pages without having to know any coding.
To edit the My Account page in WooCommerce, you’ll need to do 2 compulsory following:
Step 1: Install the plugin
-
Click to download link of the plugin which you want to apply to customize your My Account Page in WooCommerce
-
After download successfully, then follow these step:
-
Go to Plugins > Add New > Upload Plugin.
-
Choose the zip file you downloaded, upload, and then click Activate.
-
Once activated, you’ll need to enter your license key.
-
Step 2: Customize your account pages
There are several methods to customize your My Account Page depending on the plugin. We’ll show you the top three plugins for personalizing your WooCommerce My Account Page. Let’s have a look at the details below.
3 best plugins to customize your My Account page in WooCommerce
1. StoreCustomizer
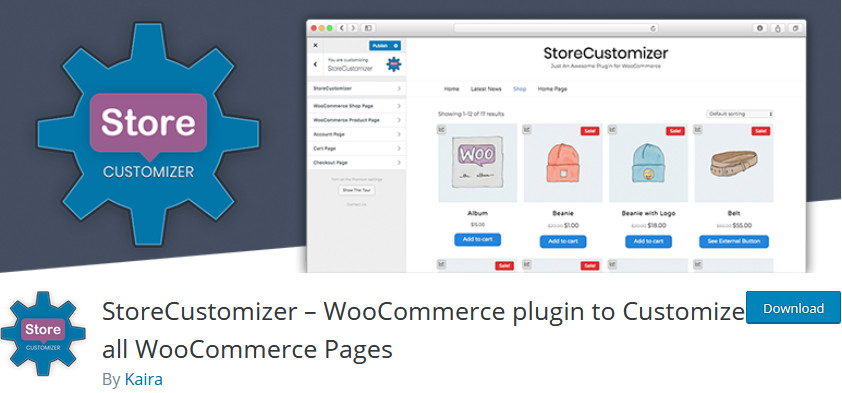
StoreCustomizer is a fantastic freemium plugin that allows you to modify every WooCommerce page. Everything from menus to the shop page, checkout, and My Account page may be edited with this tool. You can rename, delete, and add tabs, as well as change the appearance of your My Account page.
You can rename and remove tabs in the free version of StoreCustomizer, but you can also create tabs and modify the style and feel of your My Account page in the premium edition.
Key features:
-
Allow you to rename, remove, and add tabs on the My Account page.
-
Customize The appearance and feel of My Account’s page
-
Do not change WooCommerce templates.
-
Include both free and paid versions.
Price: 29 USD/year (For premium version)
2. Customize My Account for WooCommerce
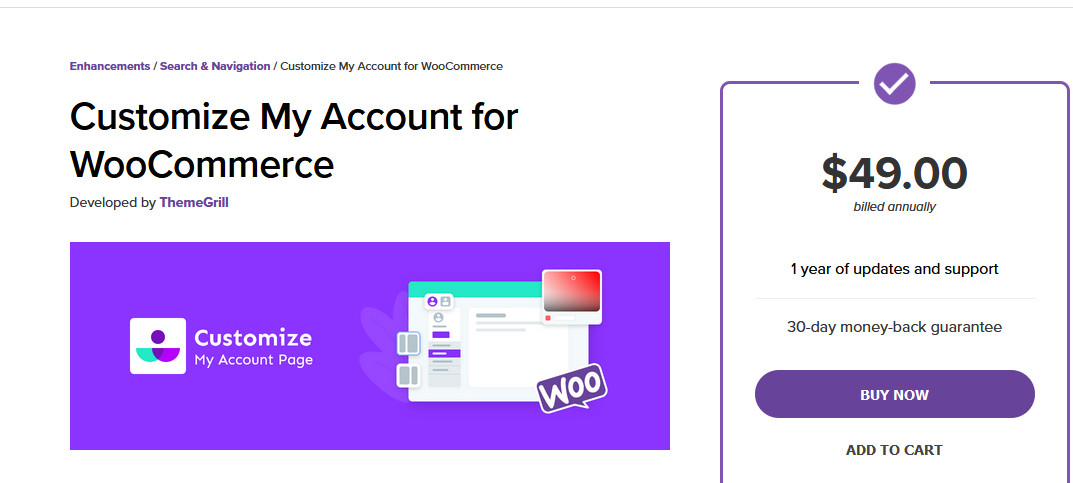
When it comes to My Account customization plugins, ThemeGrill’s Customize My Account for WooCommerce is one of the best. This WooCommerce-curated tool allows you to create as many custom endpoints and tabs as you like, and it offers a ton of endpoint customization possibilities. Furthermore, this plugin allows you to further simplify the endpoints. Multiple tabs can be grouped together, and tab content, icons, and labels can all be customized.
This application also comes with a built-in editor to let you design your My Account page. You may change color schemes, background colors, fonts, photos, borders, and much more with a single click.
Key features:
-
Provide a limitless number of endpoints/tabs with extensive customization possibilities
-
Supply endpoint customization tool with many choices in real-time
-
Support for custom CSS
-
Enable user-specific ‘endpoint’ rules for accounts with certain duties
-
Provide a powerful customization panel with a live editing preview.
Price: 49 USD/year
3. WooCommerce Custom My Account Pages
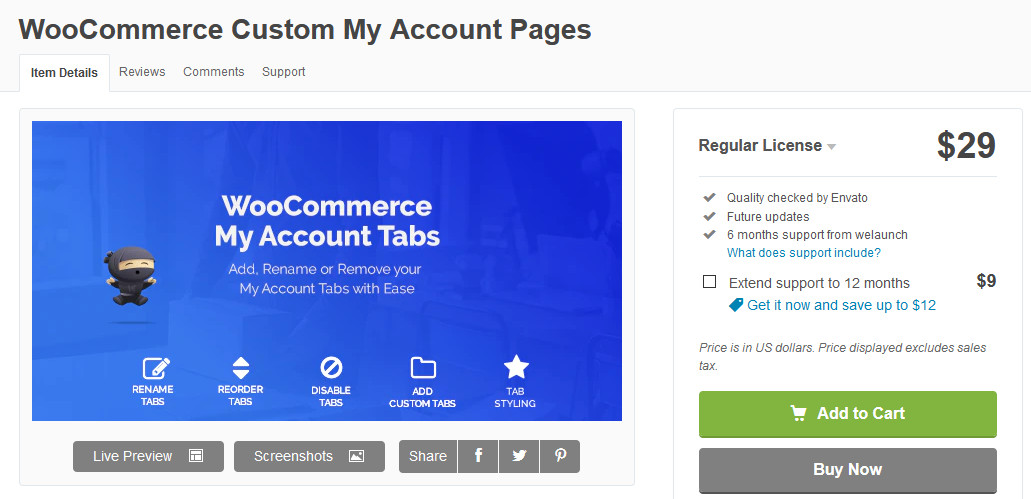
WooCommerce Custom My Account pages give you the ability to create simple, user-friendly My Account pages that can accommodate a wide range of materials. You can create tabs with 11 different content categories, such as carts, orders, recent products, featured products, and more. Tabs can also contain custom user metadata and shortcodes, as well as be restricted based on user roles.
This tool also provides a tab structure for your My Account pages, as well as various stylistic options. You can also rename, reorder, and even disable My Account tabs on the fly to quickly change your pages.
Key features:
-
Provide a simple and user-friendly design, especially when it comes to tab management.
-
Support more than 11 different content kinds.
-
Provide three different layouts with full tab styling choices
-
Support shortcodes and even custom user metadata
Price: 29 USD/6 months
Conclusion
Our two methods for customizing the My Account page are now complete. The WooCommerce default page is rather minimal, despite the fact that it contains vital information about your users. As a result, you can get a leg up on your competitors and make the most of the situation by editing it.
If you want to learn more about WooCommerce, you can discover more valuable articles on AVADA.


