
How to Customize WooCommerce Product Page with Divi Builder
By Sam Nguyen

Are you operating a WooCommerce store and wanting to boost your conversion rates through your product page? Divi is a wonderful method to visually customize WooCommerce websites without coding, trusted by over 600,000 clients worldwide.
In today’s article, we’ll show you how to customize the WooCommerce product page with Divi Builder.
Let’s get started!
Divi Builder overview
As you know, Divi is a WordPress theme; however, it is also a full design framework that lets you modify every component of your website from the ground up.
The Divi Builder is available in two forms: Back-end Builder and Visual Builder for the front-end. Both interfaces enable you to create the same sorts of websites, complete with the same content components and design options. The user interface is the only variation. The Back-end Builder is accessible through the WordPress Dashboard, with all of the other standard WordPress settings.
In contrast, the all-new Visual Builder allows you to create pages directly on your website’s front end. It creates such a fantastic experience that enables for much more rapid design. Changes you make in the visual builder, such as adding content or adjusting design settings, are immediately visible. You can just click on the page and begin typing. You can change the font and style of text by highlighting it. You can also upload new content, build your website, and see it all unfold in real time.
Why Should You Customize WooCommerce Product Page Using Divi Builder?
First of all, the product page is where you show off the products that you sell in your shop. It can have a big impact on your online business success, so you really need to take the time to tweak it to improve conversion rates.
Secondly, the WooCommerce plugin has a custom product page template by default. The components and style of the product page will be the same whether you’re using a simple theme like GeneratePress or a sophisticated one like Avada. As a result, you need to modify the default WooCommerce product page if you want to create an impression on your customers.
Thirdly, changing the product page’s colors and elements is a pretty good start, however, there’s a lot more you can do. You can fully rebuild your product page with a little PHP, HTML, and CSS. There is, however, a far better alternative if you use Divi to customize the WooCommerce product page.
Divi Builder is a custom page builder included in the Divi theme. Without any first-hand coding experience required, you can quickly personalize the WooCommerce product page and any other parts of your site, thanks to Divi Builder.
And now let’s look at how to do that in more detail.
How to Customize WooCommerce Product Page with Divi Builder?
Step 1: Install Divi with Divi Builder
First and foremost, you need to have WooCommerce, Divi with the Divi Builder installed on your WooCommerce site.
Step 2: Enable Visual Builder
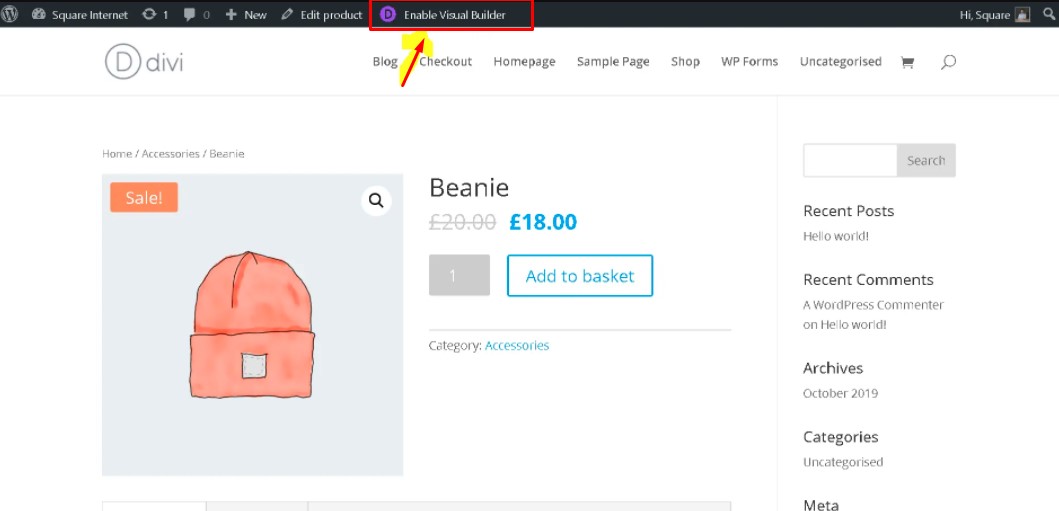
Now, to begin customizing your WooCommerce product page, you need to open the product page that you want to edit in Divi Builder. On the admin bar, you’ll notice a button called Enable Visual Builder after the website has loaded.
Activate the Divi Builder by simply clicking on Enable Visual Builder.
After that, you can start using the Divi Visual Builder to edit the WooCommerce single product template.
Step 3: Start customizing WooCommerce Product Page
After you’ve activated Divi’s visual builder, you will be free to choose and change any module on that page. You can easily change or add additional modules to your current template to make it your own.
In the modules section, there are many different WooCommerce-based modules that you can edit, such as Add to cart, Additional info, Breadcrumb, Cart notice, Description, Gallery, Images, Meta, Price, Rating, Related Product, Reviews, Stock, Tabs, Title, Upsell.
Now it’s time to customize your WooCommerce product page.
1. Background color, text color, font size, font family
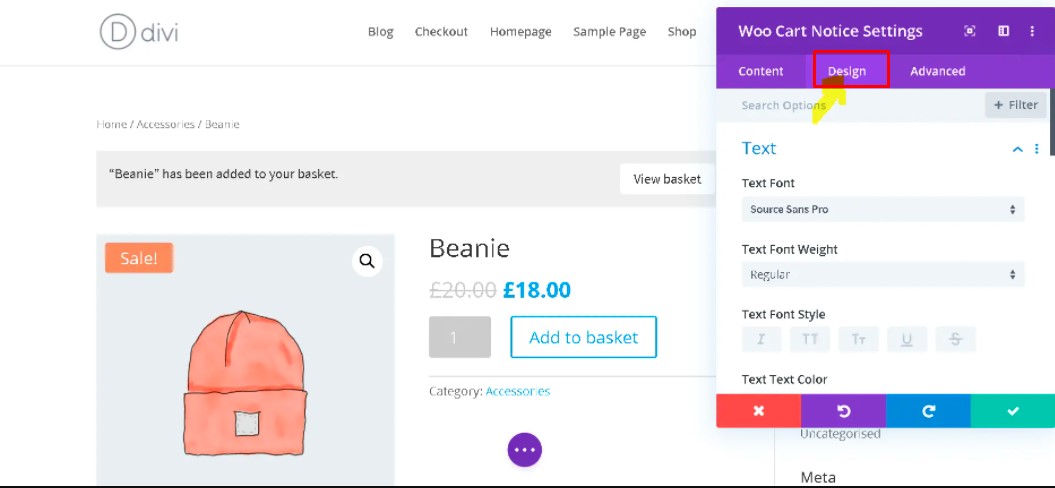
Let’s start with the Add to Basket Notice. Divi involves a variety of elements of the WooCommerce product template as modules, therefore, to modify a specific section of the page, you need to hover over it until you see the Module Settings button, which will then direct you to a screen similar to the below image.

You have complete freedom to edit the module settings box after it has been opened. To match the rest of the starter theme we’re using, we’d like the background color to be grey. To do so, go to the Content tab and then to the background tab, where we can change the background color.
Next, we’ll need to adjust the text color, font size, and font family on a grey background by heading to the Design tab and changing the color of the text. The button design styles can be changed by scrolling down to the button section of the Design tab.
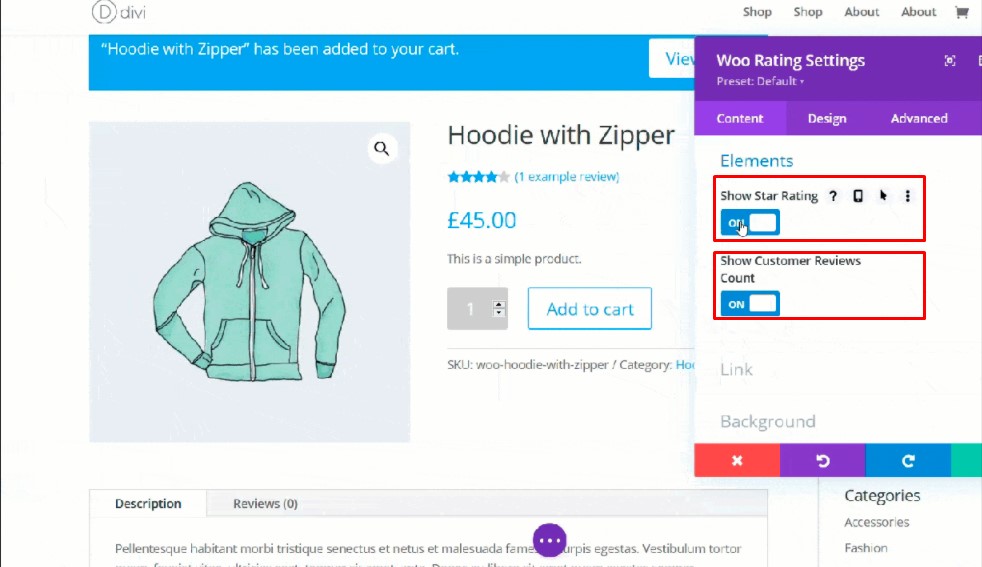
2. Display or hide reviews
With Divi Builder, you can quickly switch off the customer review count and display or hide the star rating functionality. Simply click the Settings icon after clicking the review element. Then go to the Elements section and choose whether to show or hide the star rating and the number of customer reviews.
For us, we suggest that you display both the star rating and the reviews on the product page to build trust with your online consumers.
3. Gallery modification
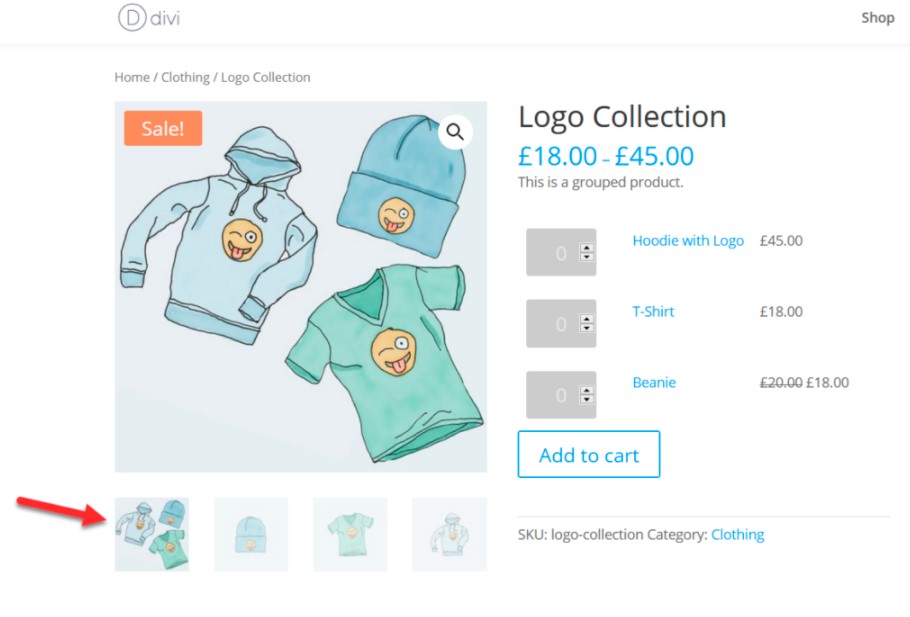
Adding a product gallery to your product pages can help you increase conversion rates. This functionality is included by default in WooCommerce, so all you have to do is add the photos to the product page or select them from the media page.
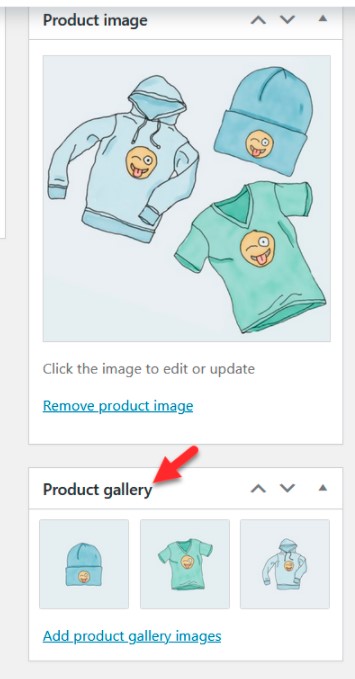
After you’ve added your photos to the product page, it should look like this:
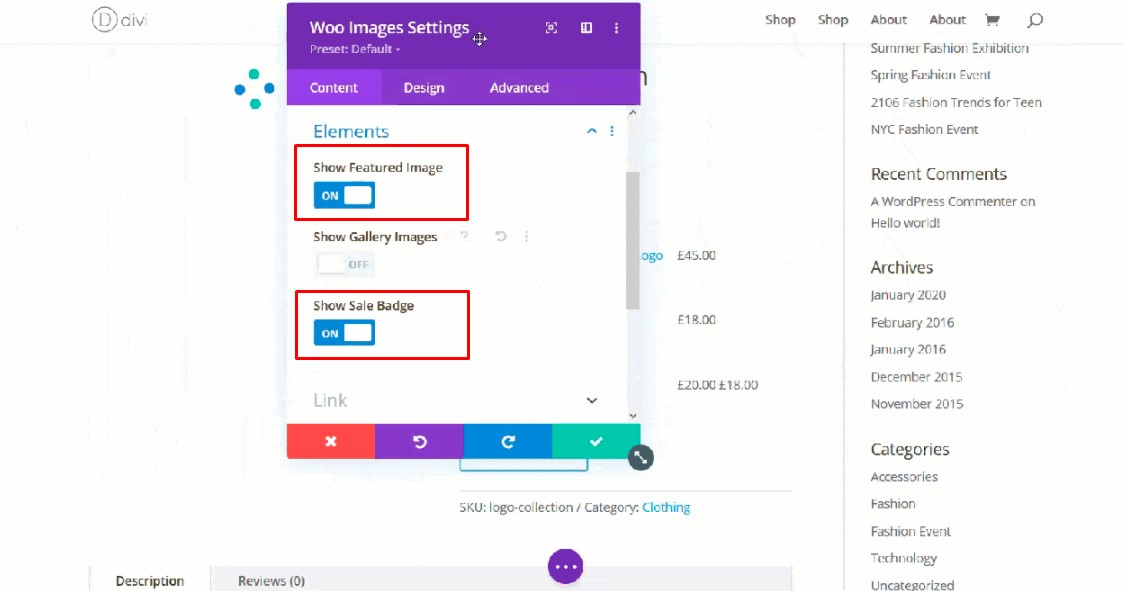
If you just want to show one image of each product, you could hide the gallery of any product using the Divi Builder. Simply choose the gallery, click the Settings icon, select Elements, and the gallery will be disabled.
You can also hide the featured picture as well as the sales badge. We recommend that you include at least 3-4 photographs of each of your items, given how essential images are when selling.
4. Featured image modification
Editing the featured picture on the WooCommerce product page in Divi is another intriguing method to personalize it. Because first impressions are important, you should select an appealing feature image for your product. This photograph will also appear on the archive page of the shop.
You can modify the featured picture and the sale badge when you use the Divi builder to view the featured image choices.
5. Add to cart button modification
As you know, shoppers need to click on the button Add to cart so as to add products to their shopping cart. With Divi Builder, you don’t have to create an Add to Cart button in a manual way because WooCommerce includes a quantity field with the Add to cart button by default. Now we will show you how to use the Divi builder to change the Add to Cart button quickly and conveniently.
There are two major options under the Elements section.
- Stock field
- Stock field
Just leave the quantity box blank if you wish to provide the user the option of selecting the product quantity. However, if you’re selling online courses, you might want to turn off the quantity option to reduce clutter on the product page.
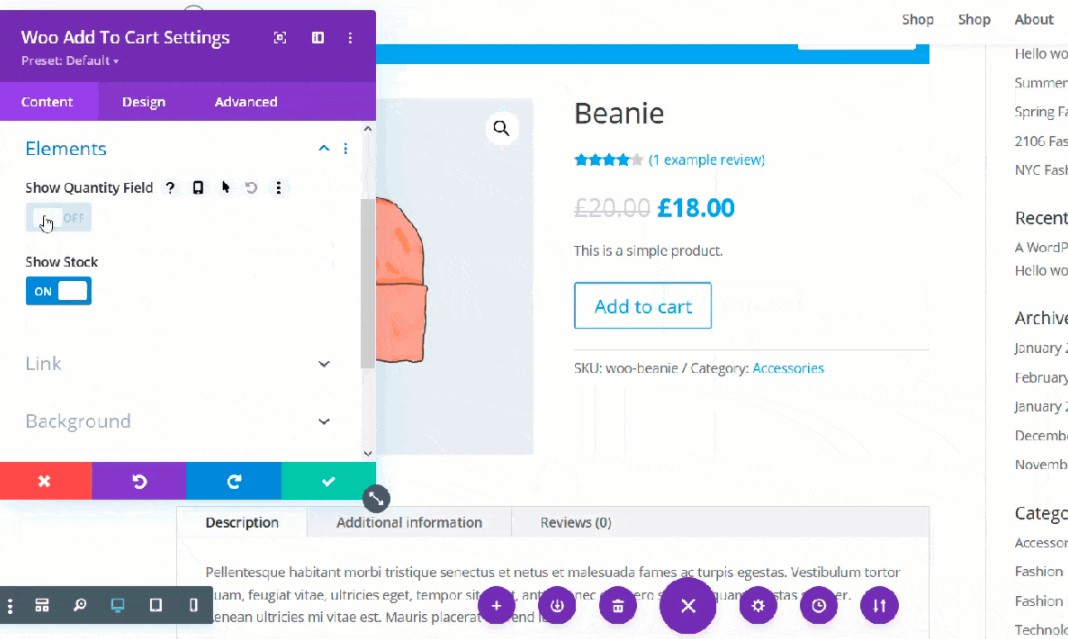
As you can see, once we switch off the quantity field, the field disappears. We don’t have a stock option on this product page, but if you display stock on your site, you can activate or disable it in the same way.
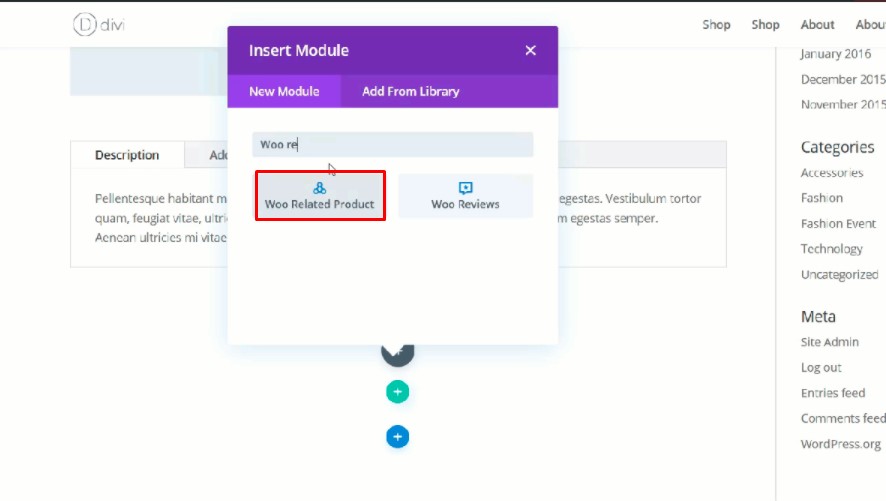
6. Apply changes to related products
Increasing sales by displaying related products to customers is a fantastic method. By default, WooCommerce shows similar items depending on the principal category of the item. If your theme or template, on the other hand, does not show similar items, we have a solution for you. Let’s look at how Divi can be used to customize the product page and add a new row with related elements.
To begin, create a new row on the page. We’ll add a single row for this guide, but you can select the style that best matches your shop.
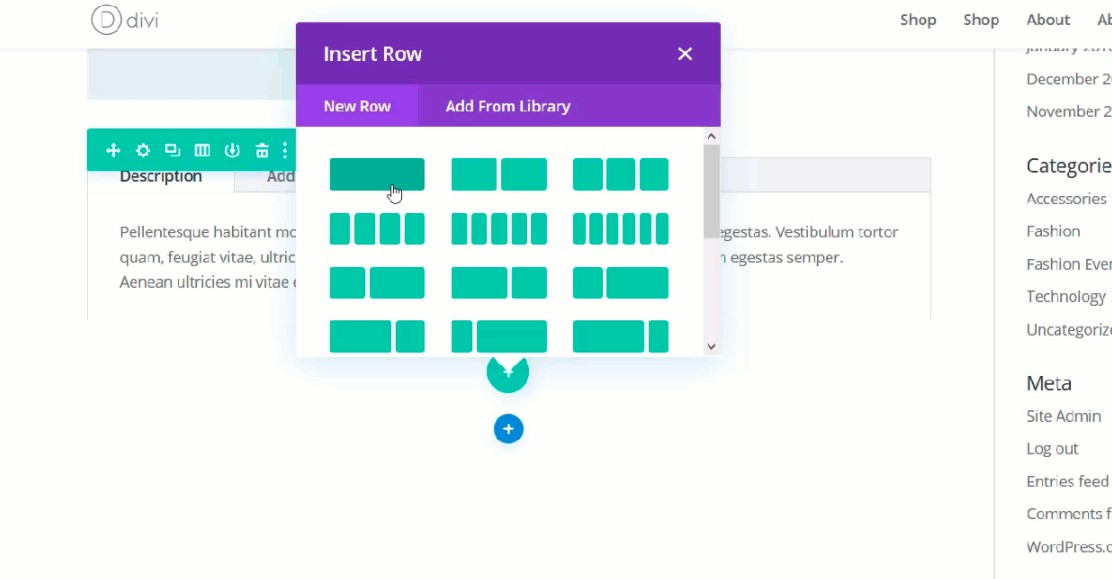
Then, you have to add the WooCommerce related product module to the row.
After that, a related product section will be added to the page. The layout and color can also be customized.
We recommend that you test it out if you aren’t currently showing related products. They’re simple to set up and can help you increase your revenue.
7. Add a toggle
Toggles are a great method to keep your product page clean while displaying information. The Toggle module in Divi can be used to create a toggle. We’ll show you how to install a toggle module underneath the product description in this section.
To begin, click the + button while hovering over the product description. Then, in the search field, type Toggle to open the toggle module.
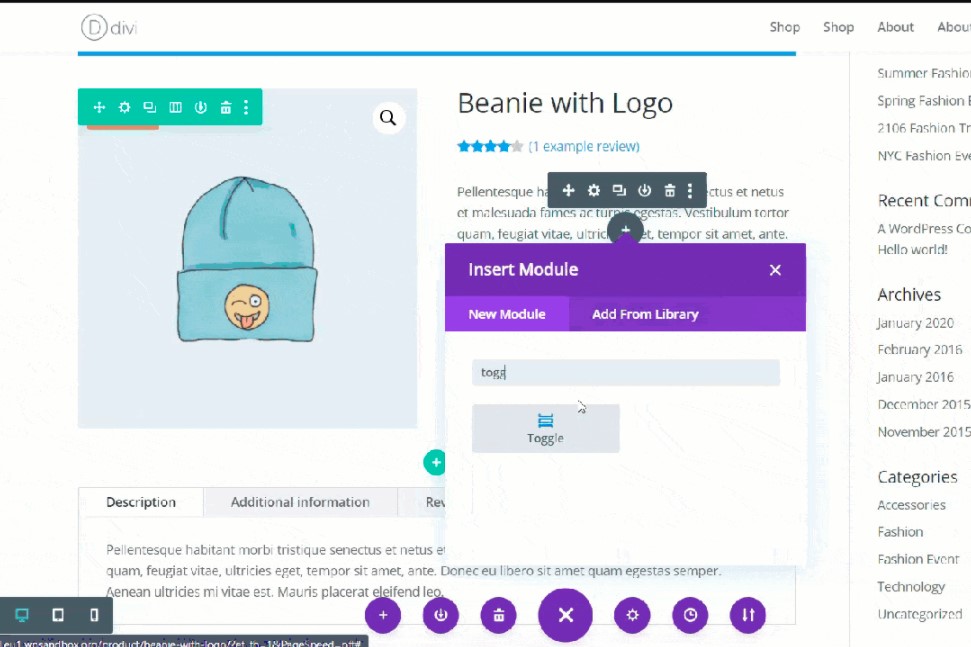
You’ll need two items to add the toggle.
- Title
- Body
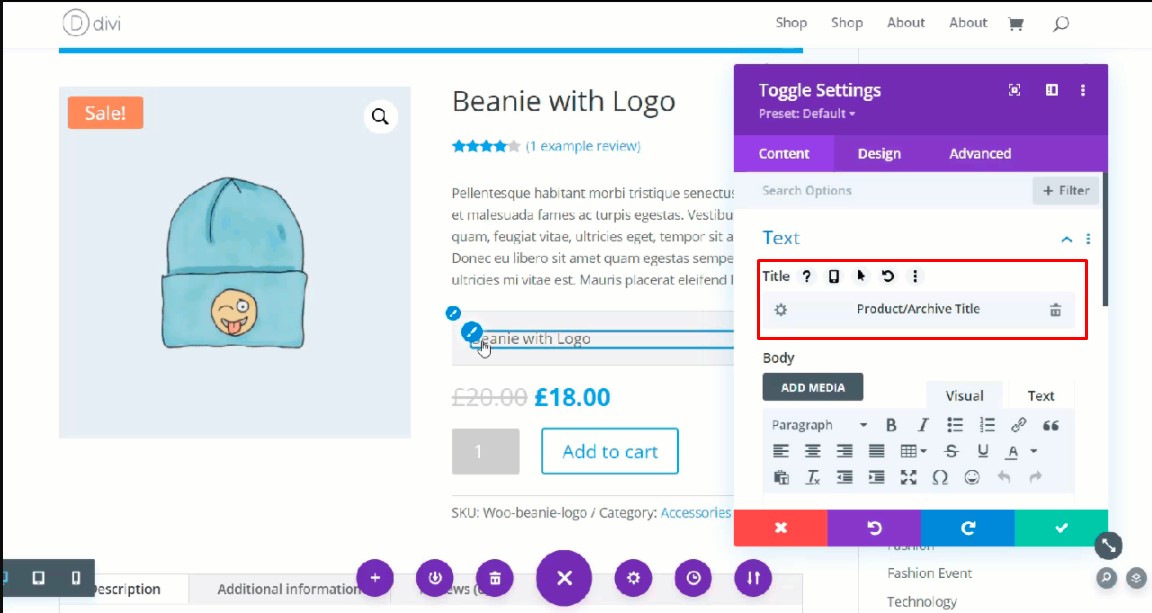
We’ll use the product name as the toggle title and the product description as the toggle content in this example. Here you just have to click on the database icon, which is on the right, to see the various sorts of information available in the database. We’ll use the Product/Archive title as the heading for the title, but you can choose the sort of material that most suits your needs.
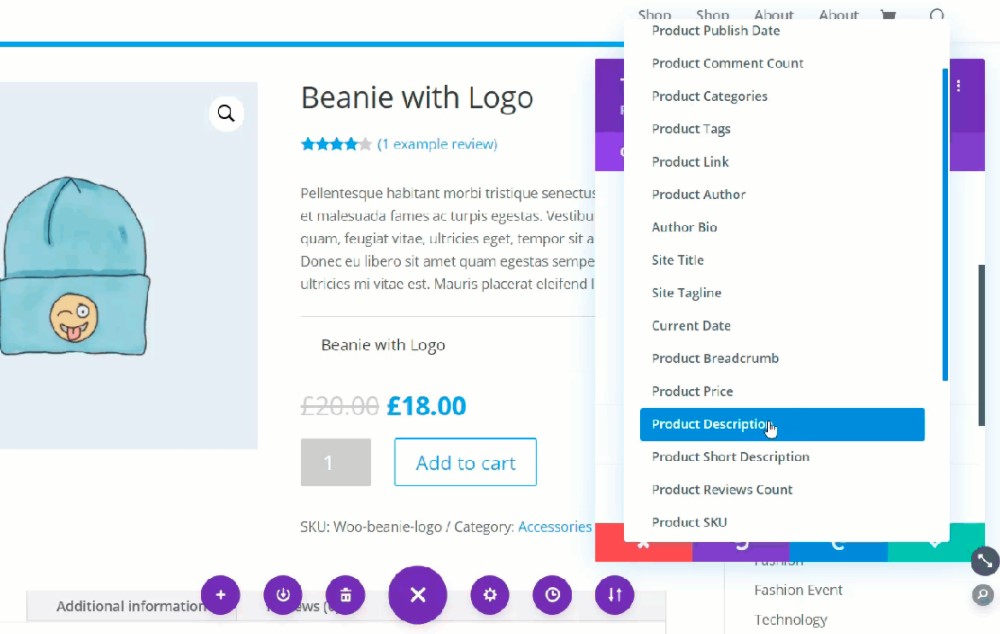
Let’s do the same thing with the body. Select Product Description from the menu by pressing the database icon.
After you save this, your product page will include a simple toggle module that people can click on to access more information about the product.
Apart from that, Divi also allows you to add other elements such as headings, descriptions, fonts, colors, etc. We recommend you test them all out to make the best out of the toggle functionality in the product page.
Tips to Better Customize WooCommerce Product Page with Divi Builder
Update the theme and plugin regularly
We strongly advise you to keep your Divi theme, Divi builder plugin, and WordPress core updated to the most recent stable version available to ensure you always have access to the most up-to-date features Divi has to offer.
Turning on automatic updates from the Divi theme menu is the most convenient method to do it.
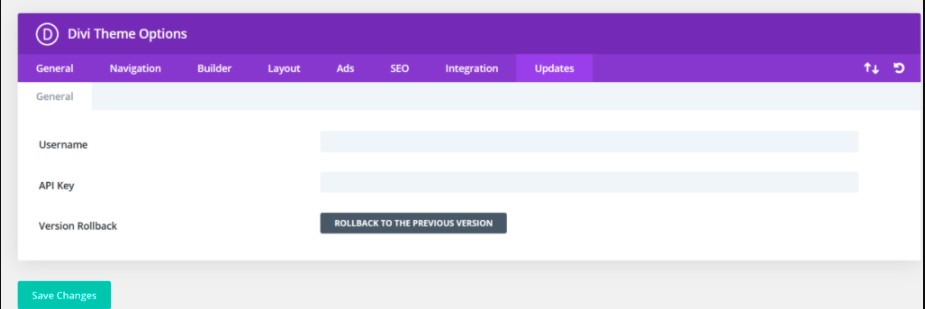
You only need to enter your Elegant Themes Username and the API key from your Elegant Themes account dashboard. Save your changes once you’ve completed them, and you’ll get automatic updates.
Site-wide usage
You’ll be able to build sections and personalize any of your pages or posts using the new Divi Builder modules. To utilize the visual editor, just activate it, add the items you want, and pick the modules you wish to use. For example, you can consider adding an Add to cart button to the review post if you’re creating a bespoke evaluation of your product. By doing this, your customers can access it right away.
Final words
Using Divi to customize the WooCommerce product page can help you increase sales and conversion rates. The good news is that Divi Builder allows you to accomplish so without having any coding experience.
Hopefully, our tutorial on how to customize WooCommerce product page with Divi Builder brings you helpful knowledge. If you have any questions about customizing the WooCommerce product page using Divi Builder, please reach out to us by leaving your comment below.
Thank you for reading this post, and we will be back with more helpful information next time.


