
The Complete WooCommerce Elementor Tutorial
By Sam Nguyen

If you operate a WooCommerce store and are searching for a page builder to effortlessly create good-looking web pages, you’ve come to the right place. Because in today’s article, we’ll show you all you need to know about Elementor, one of the finest page builders available.
Without further ado, let’s get started with the complete WooCommerce Elementor tutorial.
Why Should You Use Elementor for Your WooCommerce Store?
WooCommerce allows you to set up the complete store with a few clicks, and its sophisticated setup wizard eliminates the need for technical knowledge. However, if you want to make design modifications, there isn’t much you can do with WooCommerce. You can make some basic changes to your store parts, such as color or typeface, but you will need professional assistance if you want to completely redesign your store’s look.
That’s where the Elementor Page Builder comes in. Elementor is the best and free WordPress drag and drop editor that allows you to create stunning WordPress websites most quickly and easily possible.
With Elementor, you have a multitude of options for simply customizing and changing the appearance of your WordPress website. It provides a multitude of helpful widgets, a wonderfully designed template library, a one-of-a-kind mobile editing toolset, and a visible revision history feature.
What’s more is that you can use Elementor to create a completely operational WooCommerce website with all of the necessary pages such as Cart Pages, Checkout Pages, and many more.
How to Install and Set Up the Elementor Plugin?
To use the WooCommerce Elementor plugin, you need to first install and activate the plugin. Therefore, we’ll show you how to install and set up the WooCommerce Elementor plugin in this part. Just follow the below steps.
Step 1: Go to the WordPress admin dashboard.
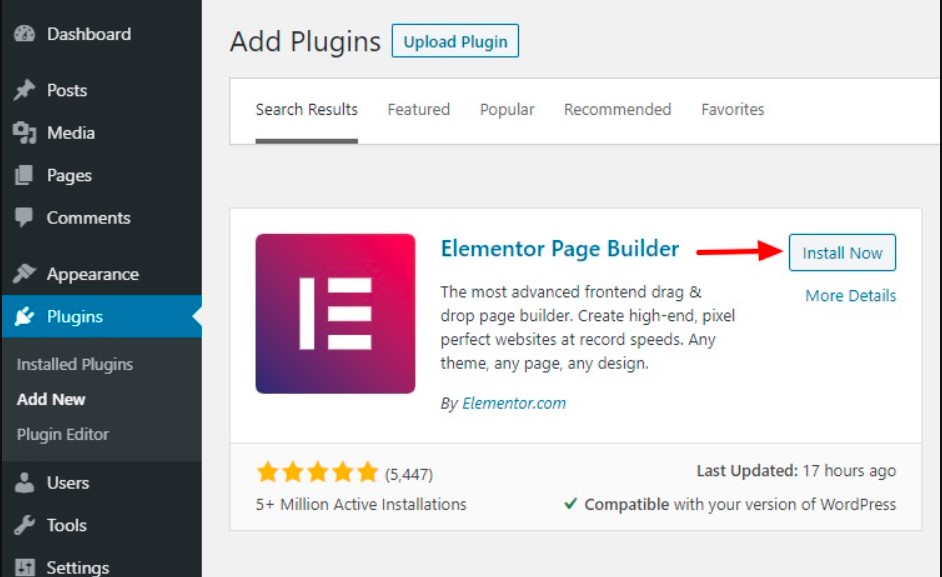
Step 2: Go to “Plugins” and then “Add New”. Search for “Elementor”.
Step 3: Click on “Install Now”.
Step 4: Install and activate the plugin.
Step 5: Configure the plugin.
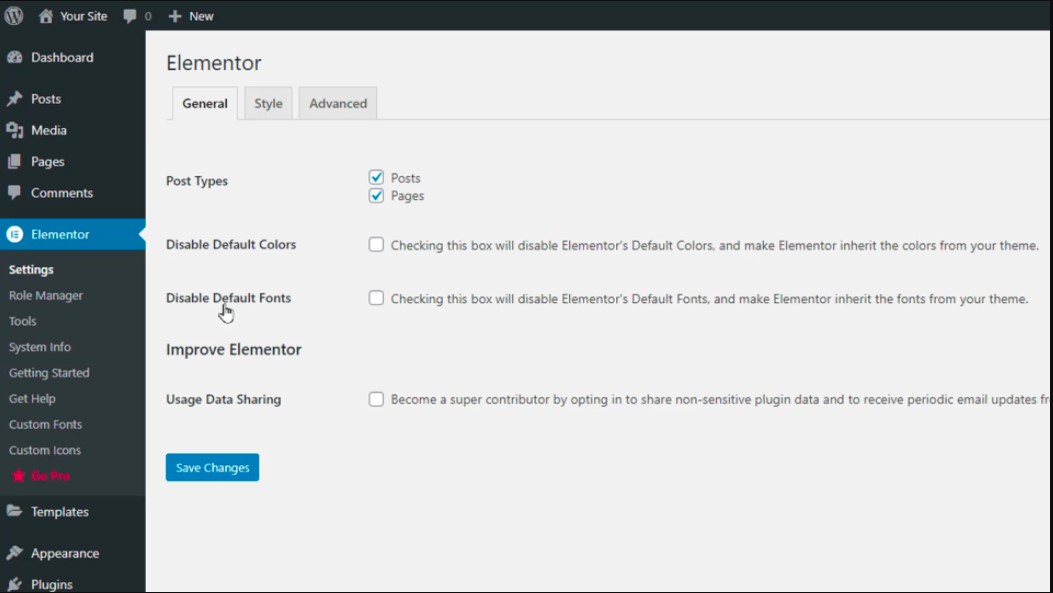
After activating it, you need to go to “Settings” to set it up. Under the General tab, you can choose which post types may be modified with Elementor. You can also disable Elementor’s default colors and fonts, making it use the colors from your current theme.
You can allow data exchange with Elementor as well. You could adjust CSS Print Method, Switch Editor Loader Method, and other Developer-specific settings in the Advanced area.
You can select which roles on your websites can modify using Elementor in the Role Manager section. If you choose the No access to editor option for the Contributor role, for example, no one who contributes to your website will be able to utilize the Elementor editor. In addition, Library Syncing, Safe Mode, Update Site Address, Rollback version, Website Beta Testing, and Maintenance Mode are all available in the Tools area.
The System Info section shows the information on the system and WordPress environments of your website. The Getting Started and Get Help sections can provide you with instructions and help.
How to Get Started with the Elementor Page Builder Layout?
In this part, we will give you an overall look at the Elementor Page Builder Layout.
To begin, in the WordPress admin area, choose the Pages section and click Add New. Give the page a title and then click the top-right Edit with Elementor button.
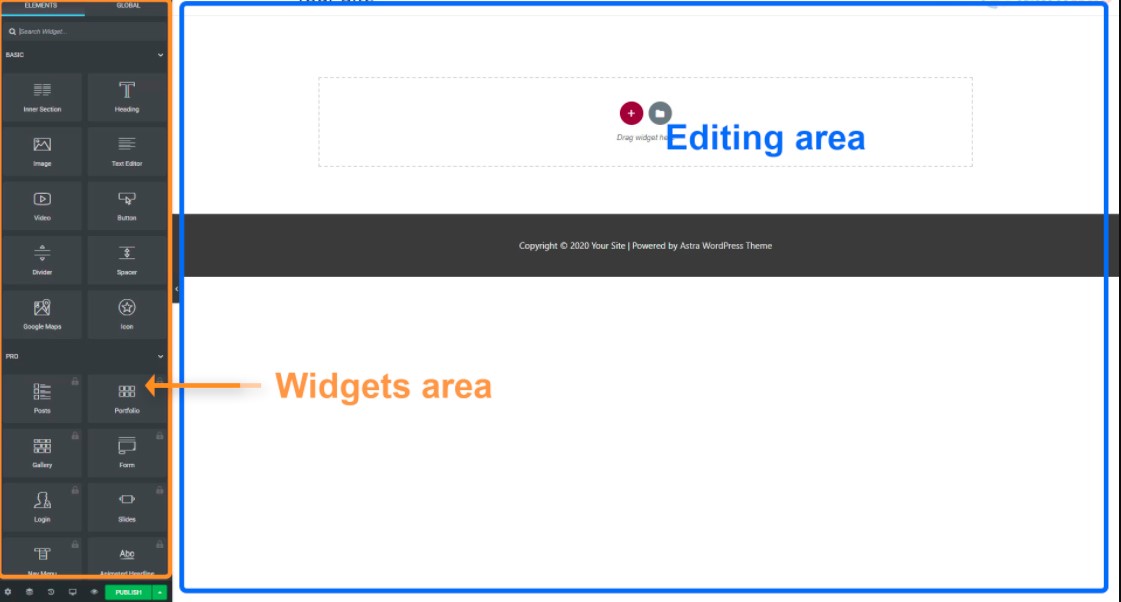
The Elementor Page Builder screen will appear, along with the editing and widgets areas. You can add and edit widgets graphically in the editing section. The Widgets section is where you can drag and drop various widgets such as text sections, headings, images, videos, and buttons. There are four choices below the widgets area.
The first option is to use the Settings button to view the page’s general settings.
In the Page settings, we can modify the page’s title and status, add a featured picture, hide the title, and choose a page layout. You could change the background of your entire page under the Style tab. You have four options here: A single-color backdrop, a static picture background, or a gradient background. The Custom CSS option in the Advanced section allows you to apply CSS code to any widget.
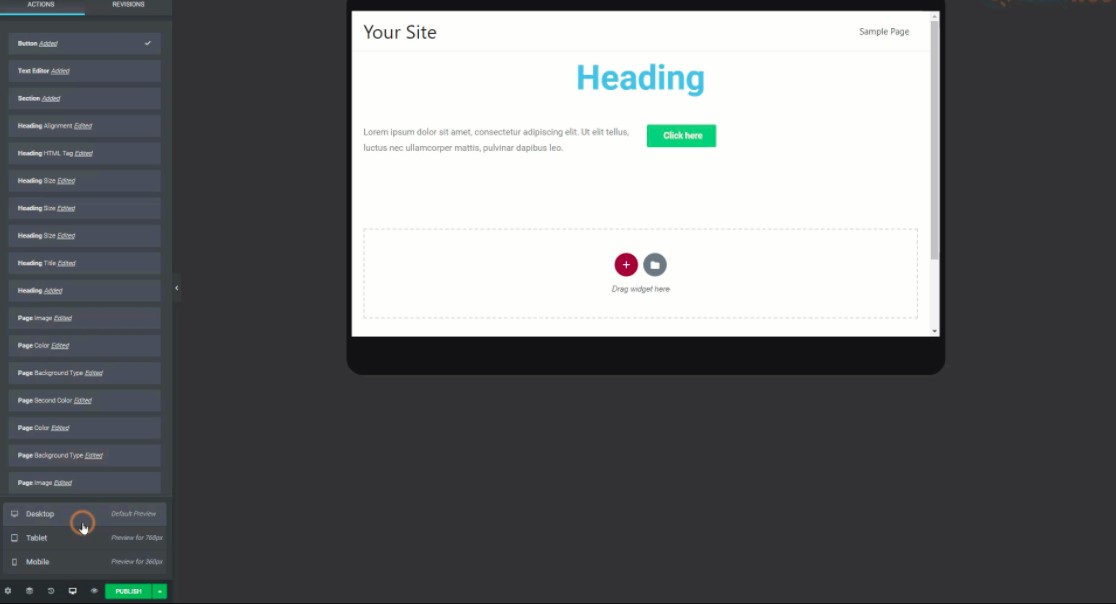
The Navigator is the option at the bottom left, adjacent to page settings. It displays the many sorts of components we’ve used on the page and makes it simple to discover and change them. Apart from that, the History option displays us the previous actions and modifications performed on this page, allowing us to easily correct our mistakes.
The Responsive mode option provides us with three options. Desktop, tablet, and mobile devices are all supported. You can use them to ensure that your website appears and functions properly on all devices. The Preview option allows you to see how the live page will look before publishing it.
Two buttons are located above the Widgets section. The Hamburger menu provides access to additional settings and navigation choices. Click the Site Settings button. You can specify global colors and fonts for all new items in the first two settings. Set the colors and fonts for your brand here so that they are easy to utilize.
Under the Theme style section, you can change the default settings for headings, buttons, images, and form fields.
How to Design Your WooCommerce Shop Page Using Elementor?
Now that we’ve completed the fundamental setup for your eCommerce business, let’s move on to the next section of creating your WooCommerce shop page.
Step 1: Download and install both Elementor and Elementor Pro.
First of all, you need to install both Elementor and Elementor Pro since the widgets included with Elementor WooCommerce Builder are premium widgets.
Step 2: Go to Pages and choose Add new.
To create a new page for your WooCommerce site, click to Pages => Add new in your WordPress Dashboard.
Step 3: Select Edit with Elementor.
To launch the Elementor Editor, click on the blue button “Edit With Elementor”.
Step 4: Start building your homepage.
After the Elementor Editor has loaded, you can begin creating your store’s home page from scratch by dragging and dropping WooCommerce elements.
Then, spend some time exploring different features to create a decent look for your WooCommerce website’s home page.
How to Showcase Your WooCommerce Product Collections Beautifully Using Elementor?
While you can certainly utilize the elements included in the Elementor WooCommerce builder to build pages for your online store, you can take it to the next level with Essential Addons for Elementor to truly engage your shoppers.
Using the Elementor Woo Product Collections element, you can show your WooCommerce Product Collections in an attractive layout with hover animation. This useful feature allows you to present your product collections in a visually appealing manner based on categories, characteristics, and tags.
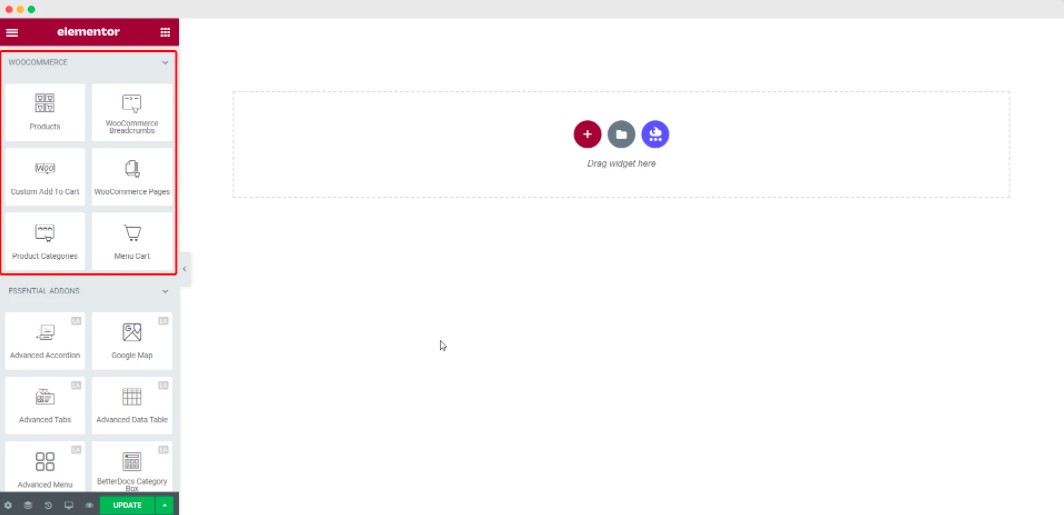
Step 1: Enable the Woo Product Collections Element in EA Woo.
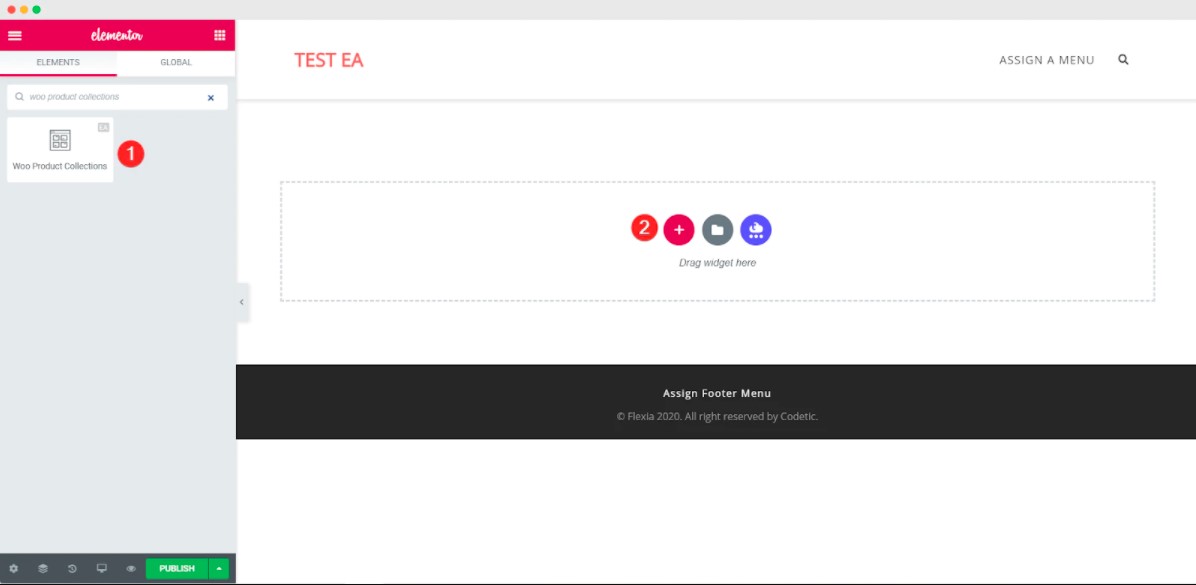
Search for the EA Woo Product Collections Element in the ELEMENTS tab of your Elementor editor to activate it. After that, simply drag and drop the elements wherever on your website after you’ve found them.
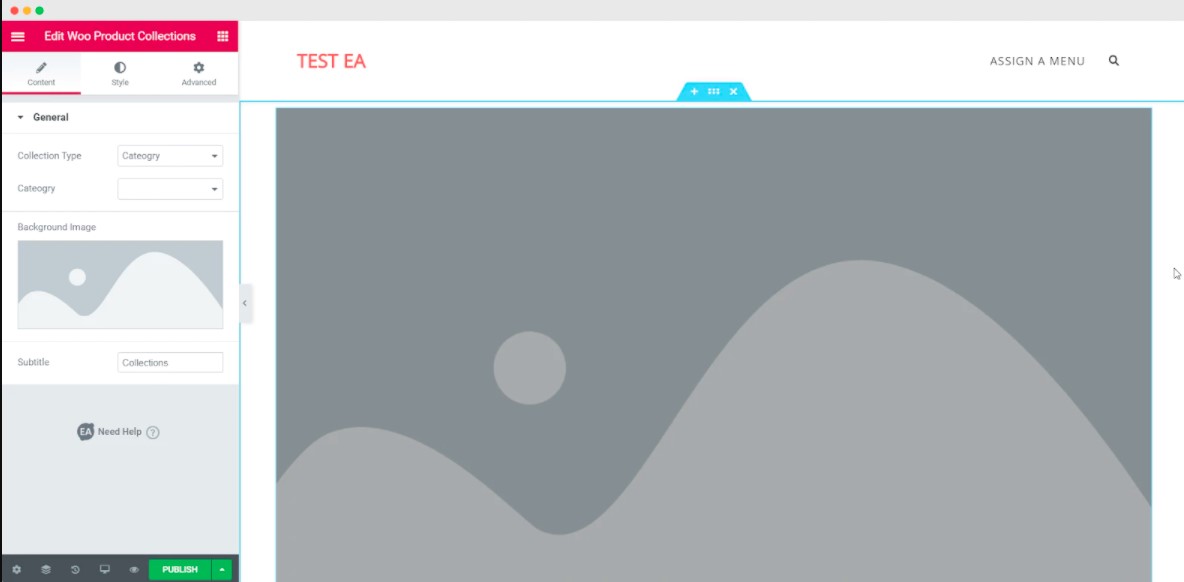
This is the default layout you’ll see when you drag and drop the element into any area of your website.
Step 2: Make changes to the content settings
After the EA Woo Product Collections element has been properly activated, you can begin modifying the content to add your product collections based on tags, categories, or product characteristics.
The General Settings option is found under the Content tab. You could select the Collection Type and Category from this menu. You can also edit the WooCommerce Product Collections’ Subtitle.

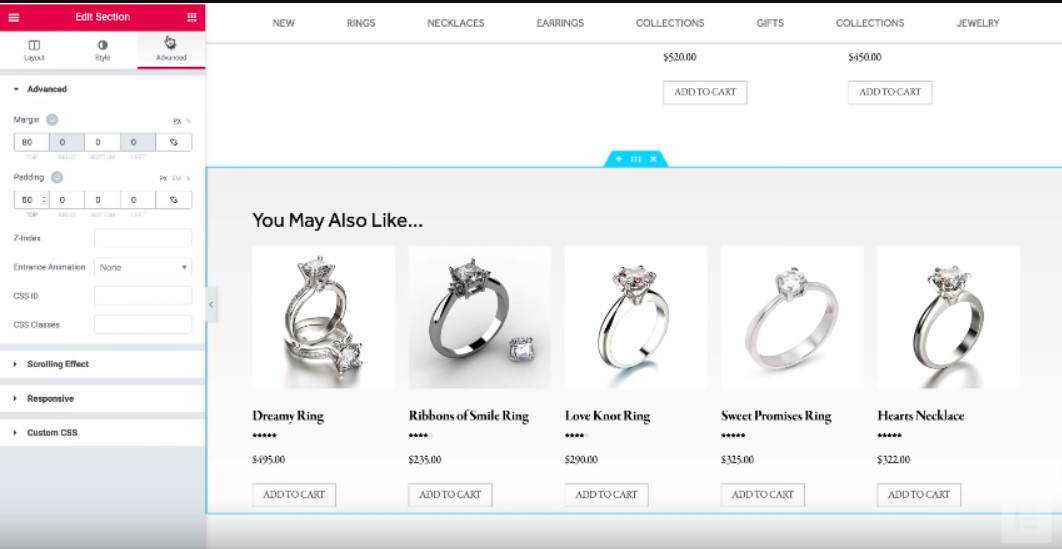
Step 3: Put Your Woo Product Collection Into Style
By going to the Customize tab, you can style your WooCommerce Product Collection. There are settings such as General, Thumbnail Style, and Typography there. You may change the overlay color, hover animation, alignment, and more under the General options. You also have the option to alter the font color and size from the Typography options.

The result after finishing customizing the EA Woo Product Collection should look like this.

How to Showcase Your WooCommerce Products in Grid Layout Using Elementor?
By following the easy instructions below, you can showcase your product in a stunning grid layout with the EA Woo Product Grid element.
Step 1: Turn on the EA Woo Product Grid Element.
To begin, locate the EA Woo Product Grid Element in your Elementor editor’s ELEMENTS tab and activate it. Once you’ve located it, just drag and drop it anywhere on your website.
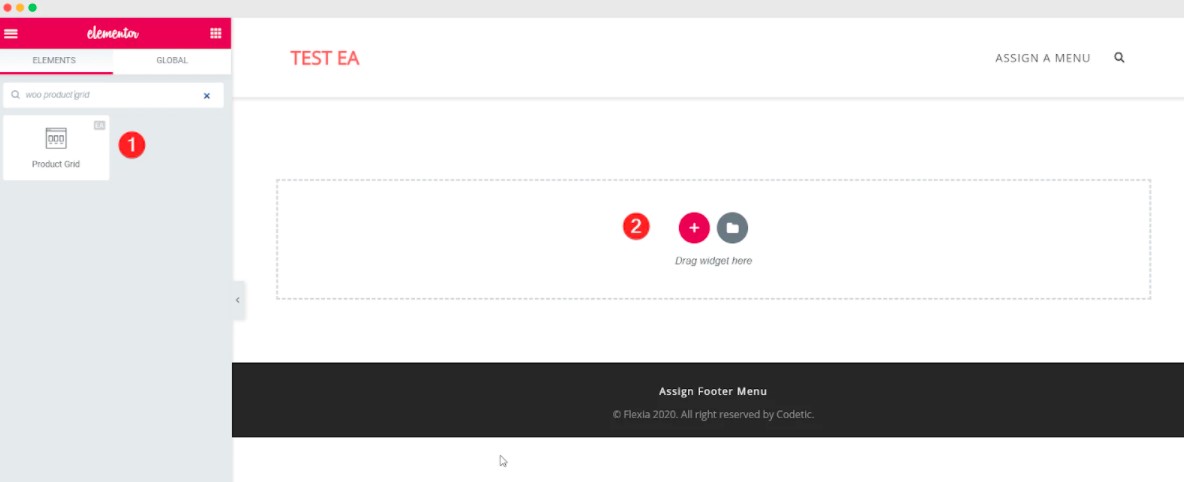
This is the default layout you will see if you drag and drop the element into any part of your website.
Step 2: Modify the Woo Product Grid’s Content Settings
You need to change the content settings after activating the EA Woo Product Grid element in order for your WooCommerce products to be shown properly in the grid layout.
Many options, such as Product Settings and Load More are available under the Content tab. You can filter your items by recent products, highlighted products, and more using the Product Settings option. You could also customize the number of columns displayed, the Product Count, and many other aspects.
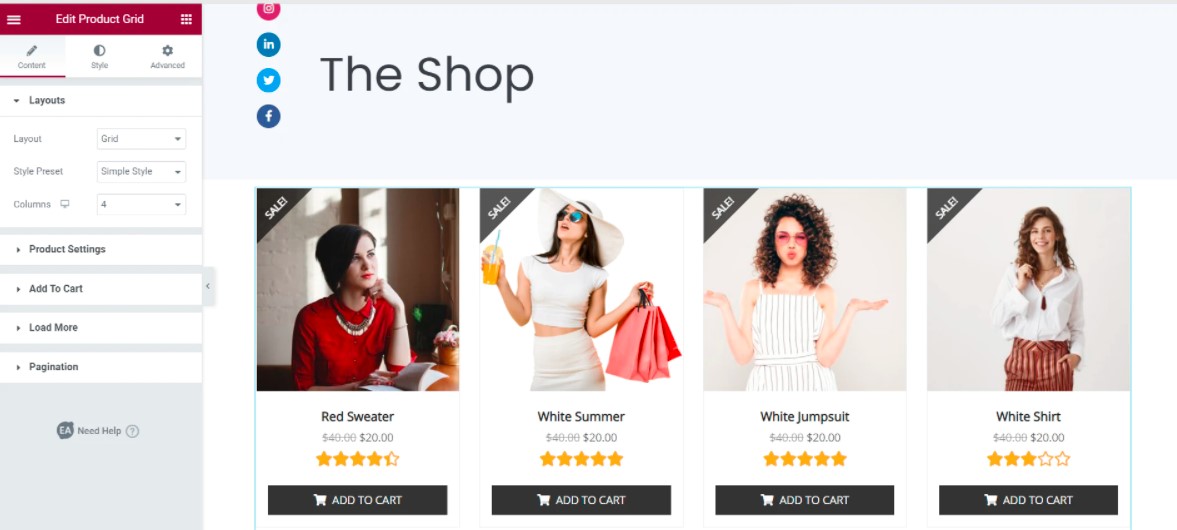
Apart from that, you can customize the Style Presets. You could select from the following styles: Default, Simple Style, Reveal Style, and Overlay Style. Furthermore, you have the option to display product ratings if you want.
Step 3: Design Your Woo Product Grid
The next step is to customize your WooCommerce Product Grid by going to the Style tab. There are numerous choices available. You can alter the background color of the content, the border type, the Color & Typography, and even the styles of your Add To Cart buttons from each of these options.
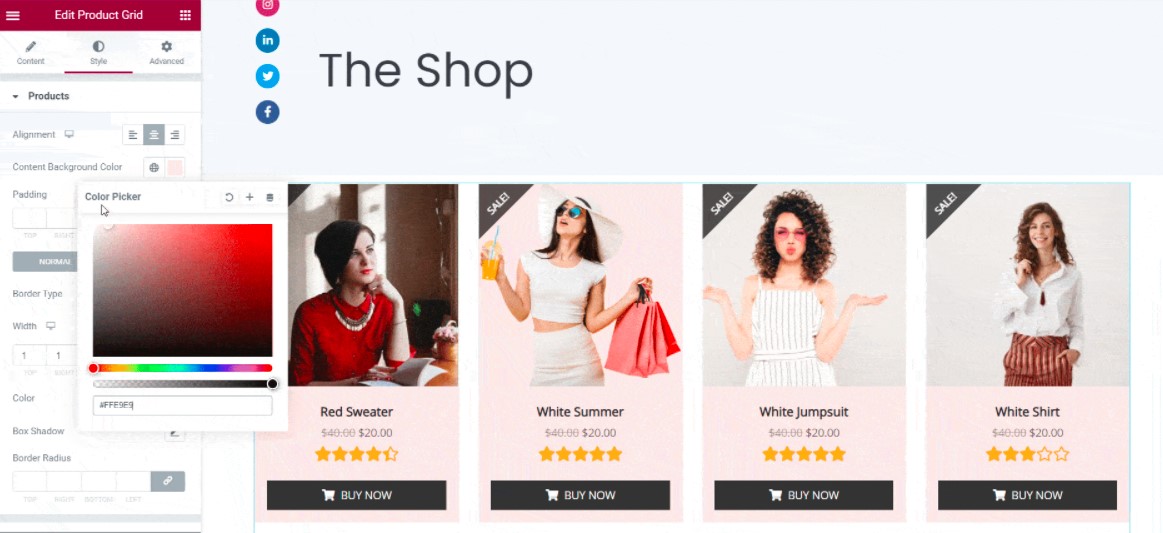
Play around with these options until you’re satisfied with the look of your EA Woo Product Grid.
Above are all steps you need to take in order for your items to be displayed in an appealing grid layout on your Elementor WooCommerce site.
How to Edit Product Page in Elementor?
Elementor just introduced WooCommerce Builder, a fantastic solution for building WordPress stores with Elementor. In this part, we will show you how to edit the product page with Elementor.
Step 1: Navigate to the Elementor section of your WooCommerce dashboard.
Step 2: Navigate to My Templates and select the “Add New” option. Choose Single Product in the popup box and give your template a name. To create a template, click the green button.
To create a template, click the green button.
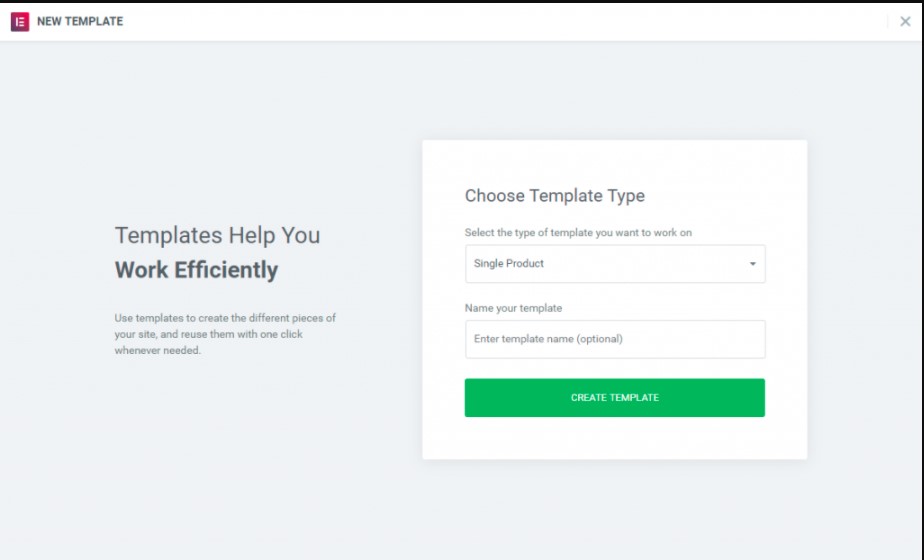
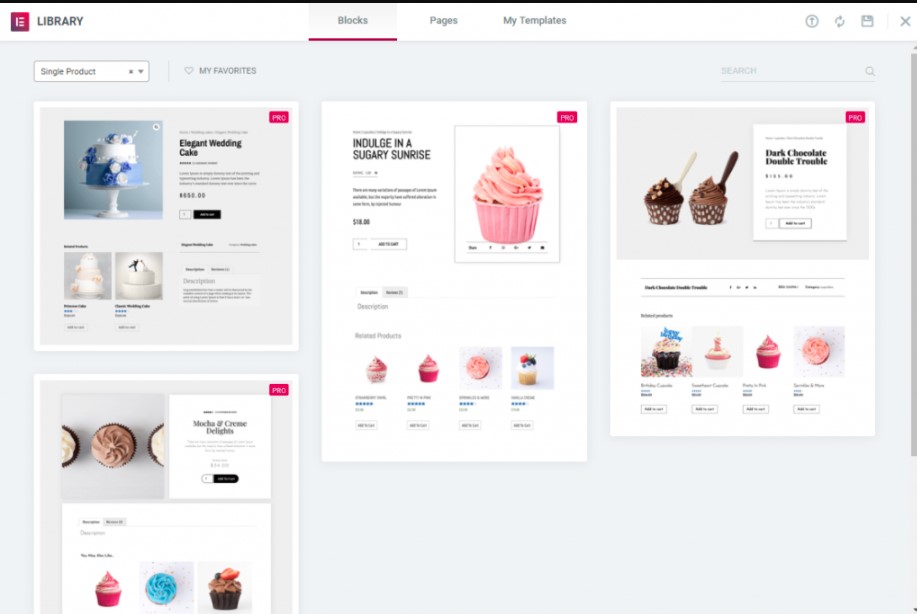
Step 3: You’ll be sent to the template library, where you can choose from a variety of styles for a single product page. This is where you can change the pre-designed template to match the general theme of your shop or start creating a product page from scratch.
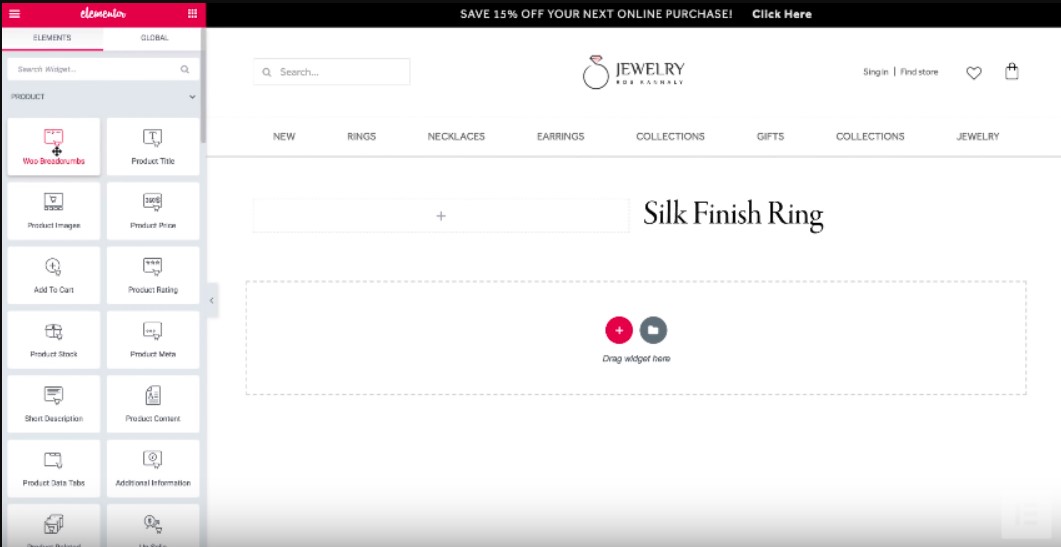
Step 4: In the Elementor editor, add a new section with two columns.
Step 5: Navigate to the Elements menu, locate the Product Title widget, and drag it to the right column. Then, place the Woo Breadcrumbs widget above this particular product.
Step 6: Locate and drag the Product Image widget to the left column. Play with the padding to keep the image and product title separate.

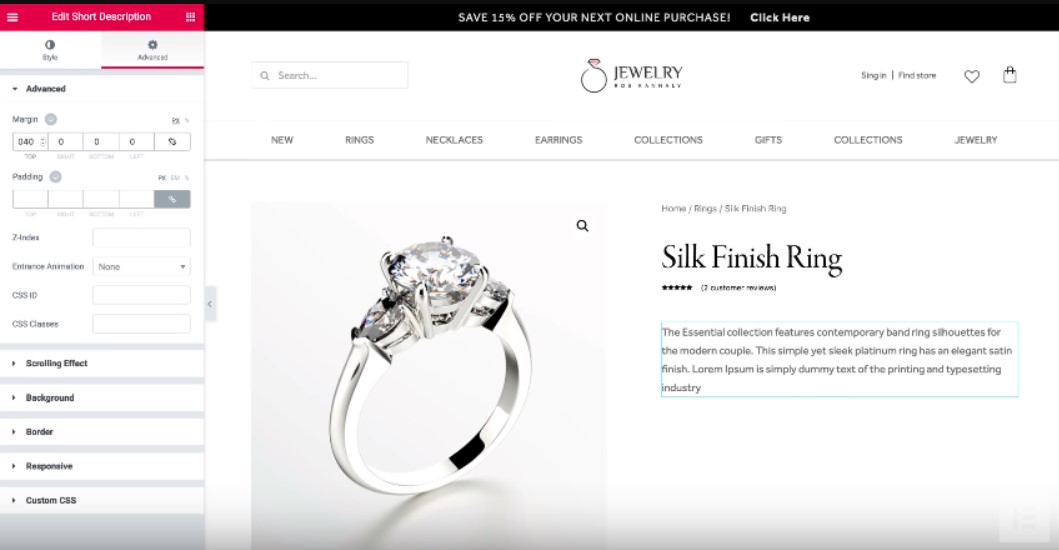
Step 7: Drag the Product Rating widget below the title, experiment with the margin, add a Short Description widget, and give it some space on top through margin settings.
Step 8: Locate the Product Price widget and drag it to the appropriate section beneath the description. Go to the Typography settings and change the default font. Change the size, weight, and color to your preference.
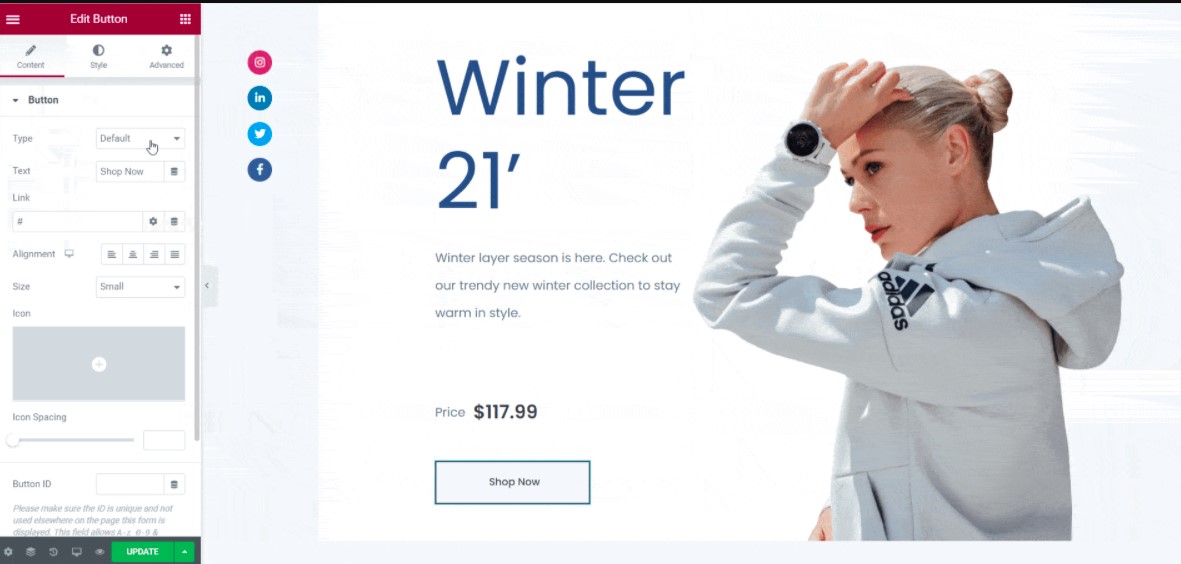
Step 9: Try adding the Add to Cart widget next. Experiment with the typography, such as font, size, and color. Add the Product Meta widget below the Add to Cart button.
Step 10: Return to the picture editing process. You can change the border radius and distance between the main image and the product photo gallery here.
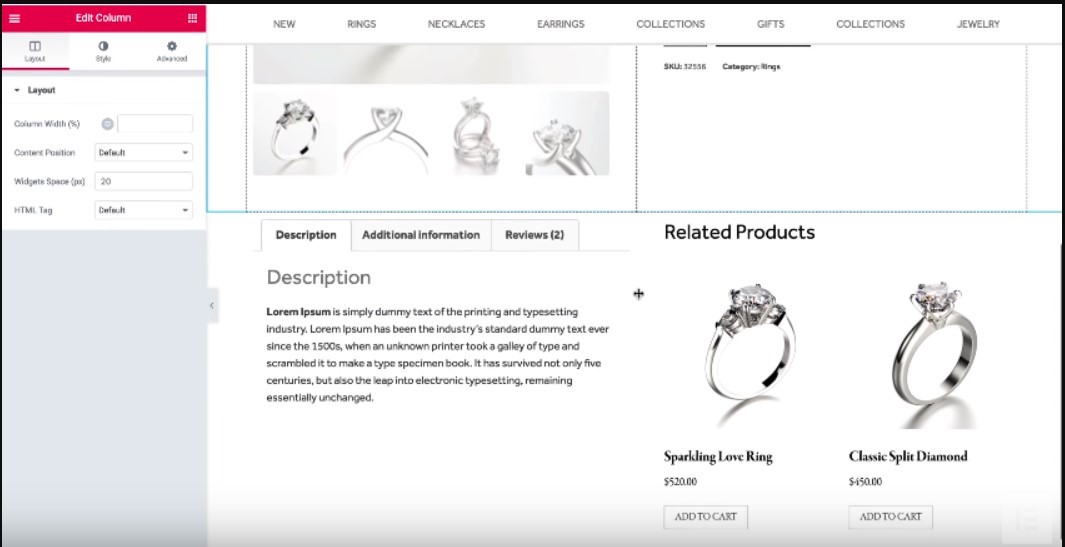
Step 11: Create a new section with two columns. Drag the Product Data Tabs widget into the left column. In the meantime, place the Product Related widget in the right column. Copy the format values from previously modified columns and paste them into newly generated ones to maintain the columns properly spaced.
Step 12: Create a new section and apply the gradient color to it. Insert an Up-Sell widget into the area and put padding around it. You are currently creating a single product page.
To modify the display of a single product, click the eye icon below and select Settings. Choose another page containing this example under Preview Settings, then click to apply and review. Set the Display Conditions by clicking Publish. When you click Publish, your single product will become live.
How to Instantly Create A WooCommerce Site With Ready Elementor Templates?
If you want to build your WooCommerce website even faster, you could utilize ready-made Elementor WooCommerce templates with only a few clicks. The EleShoply template pack from Templately is one of the greatest Elementor WooCommerce templates for this.
At over 1000 ready Elementor templates, Templately provides a large selection of some of the finest Elementor WooCommerce templates. As a result, you don’t have to worry about designing your page layout and can quickly create any type of e-commerce website.
EleShoply is a wonderful template package created by Elementor that includes a multitude of attractive ready-to-use pages including the Homepage, Product Collection Page, Single Product Page, Shopping Cart Page, Account Page, Checkout Page, About Us Page, and Contact Us Page. In two simple steps, you can construct a beautiful WooCommerce website with this ready Elementor template.
Step 1: Insert the Templately EleShoply Template Pack.
First, create an account with Templately and install the Templately WordPress plugin. Then, click on the blue Templately button, and insert any of the preset EleShoply page templates onto your website.

Step 2: Tailor the Pages to Your Specific Needs
You can now personalize your pages with your own design. Change the colors, fonts, and typography, as well as add your own content, to the existing template.
When you’re finished, just save your edits and publish them for everyone to see.
That’s all it takes to create your own e-commerce website using ready-made Elementor WooCommerce templates from Templately.
How to Customize WooCommerce Cart Page Using Elementor?
You don’t need to utilize an Elementor Page template to customize a WooCommerce cart page; instead, you can edit the WooCommerce cart page directly.
However, in this part, we’ll show you how to customize the WooCommerce Cart Page with the PowerPack addon’s Cart Page Styler .
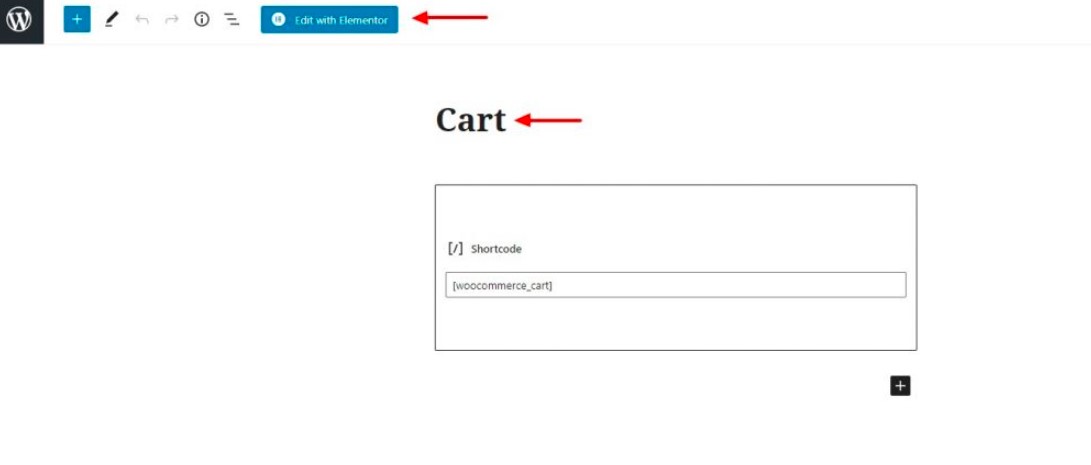
Step 1: Navigate to Pages in the WP Admin Dashboard. Now locate the Cart Page and select the edit option. By clicking the Edit with Elementor button, you can open the page in the Elementor editor.
Step 2: In the editor, set the layout to full width and, if you want, you can also disable the page title.
Step 3: Delete the page’s existing WooCommerce cart. Simply delete that whole section.
Step 4: Now we’ll add the PowerPack’s Cart widget to the page. Locate the Woo – Cart widget and drag it to the desired location on the website.
Return to your shop page and add a few products to your cart if you get a message like this on the screen.
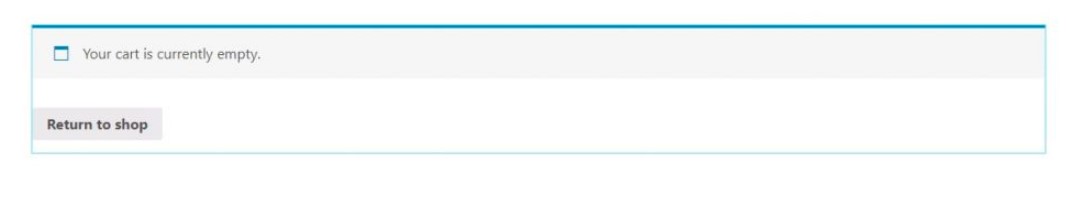
You’ll be able to see your cart and its contents once you’ve added a few items. If you still don’t see the cart in the editor, simply reload the page.
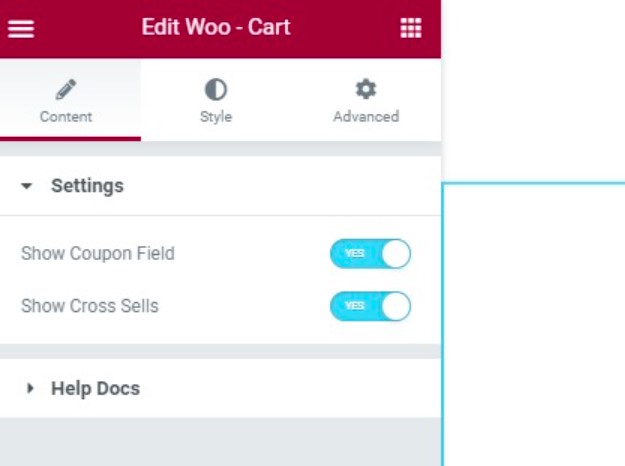
Step 5: You can enable or disable the coupon field and cross-sells from the Content tab. If you don’t want it, use the toggle buttons to turn it off.
Step 6: When you go to the Style tab, you can modify the look and design of each area and product independently.

Let yourself experiment with the settings and set them to the values that you prefer to design your cart page to your preferences.
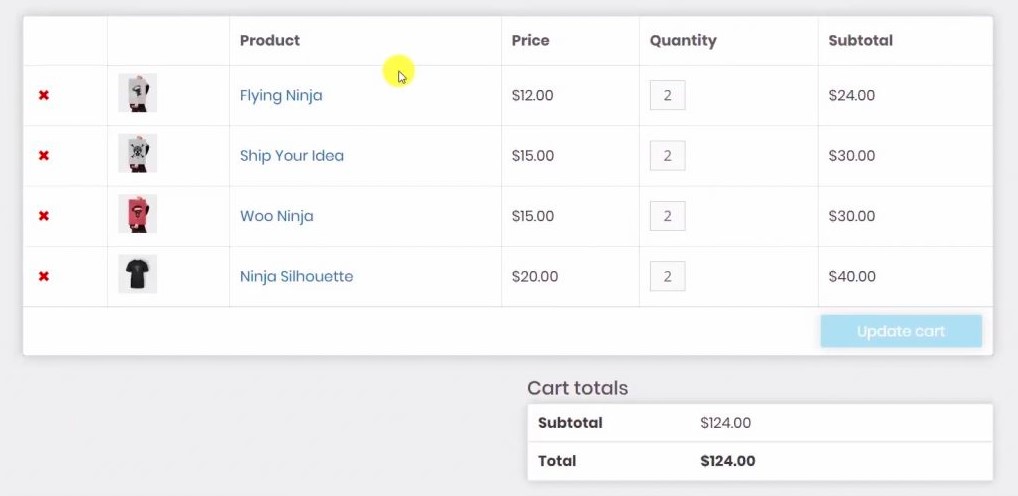
Here’s what your cart page should look like now that you’ve made all of those changes:
Step 7: Now that you’ve finished editing, you can publish the page.
How to Create a WooCommerce Checkout Page with Elementor?
In this part, we’ll show you how to create a WooCommerce Checkout Page with Elementor.
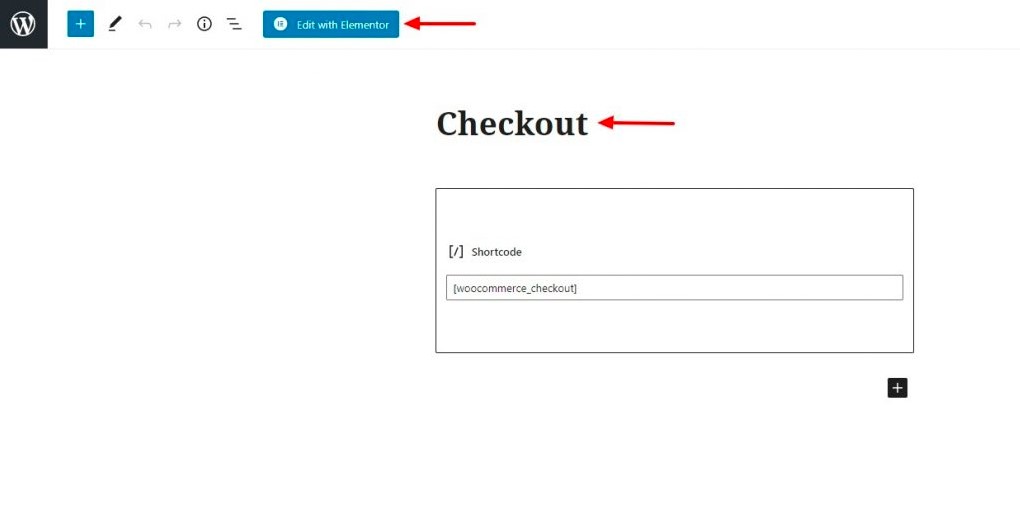
Step 1: Open the page and select Edit with Elementor.
Step 2: Change the page’s layout to full width and, if desired, delete the title. Remove the checkout part from the page as well.
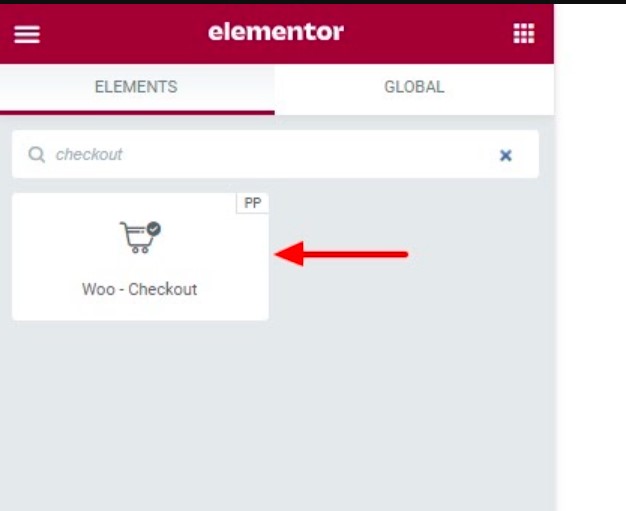
Add the Checkout widget from the PowerPack to the page now. It’s as simple as dragging and dropping it onto the page.
You can start customizing your checkout page after you’ve installed the widget.
Step 3: For the content, you have the option of using a one-column or two-column layout. The extra information box can also be enabled or disabled.
Step 4: You can modify and change nearly every aspect of the checkout page’s design.
Go ahead and make the adjustments you wish, then publish when you’re finished.
How to Customize the WooCommerce My Account Page with Elementor?
In this part, we’ll be using the PowerPack Elementor addon to customize the WooCommerce My Account Page with Elementor as well.
PowerPack features the powerful My Account widget, which allows you to modify the look of the user’s Account section.
Step 1: Use the Elementor editor, open the page and load it. Give it an appropriate name, alter the layout to full width or canvas, and remove the current My Account section, as we did before.
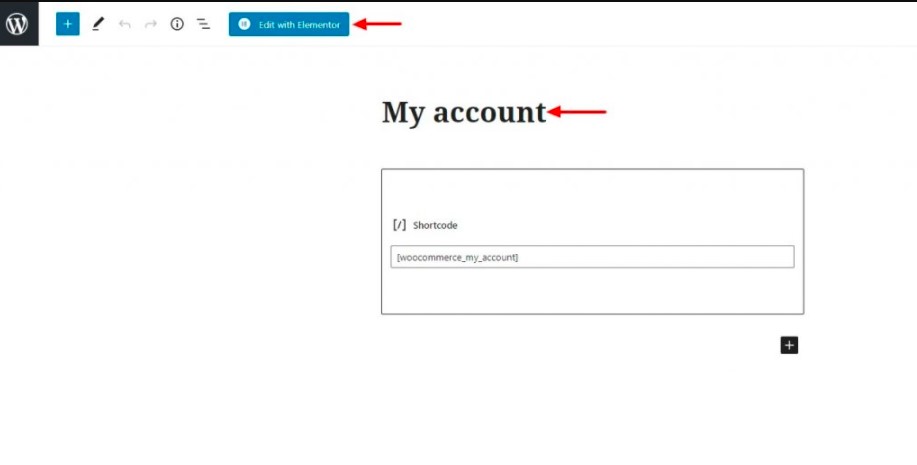
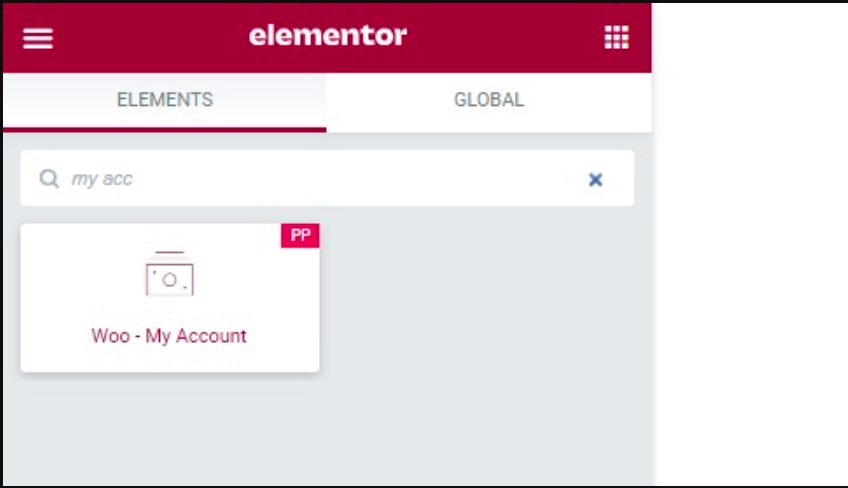
Step 2: Once you’re in the editor, drag the My Account widget into place. Simply drag and drop the widget to the desired location on the page.
Step 3: Select the endpoint you wish to edit from the Content tab. You can specify the endpoint for the Downloads tab if you’re customizing it, and you’ll see the changes you make there.
Step 4: Next, you have the option of enabling or disabling the tabs. For example, if you don’t want the logout link tab to appear, you can use the toggle button to hide it.
Step 5: When it comes to styling, you can customize each tab separately. The style choices can be used to alter the tabs, tables, buttons, forms, and even notifications. Make the modifications you want in this section.
Step 6: Once you’ve finished editing the page, you can publish it.
Final words
As you can see, creating your Elementor WooCommerce website can get easier and faster than you think, thanks to the WooCommerce Elementor plugin.
We hope that this complete WooCommerce Elementor tutorial is useful to you. Do reach out to us if you have any questions. We would love to hear from you.
Thank you for reading and we’ll see you in the next post.


