How to Integrate my WooCommerce store with Printify?
With the development of eCommerce, print on demand or POD nowadays has become a fertile ground for any eCommerce store owners. This leads to the launch of multiple platforms which enable people to create and publish POD products with ease.
One of the most popular platforms that many people prefer is Printify. With it, users are able to create custom designs on multiple products like T-shirts, hoodies, cups, etc.
So, why is printify favored in the world, and how to integrate it with a WooCommerce store?
All will be solved in this post!
Why should people choose Printify?
There are a variety of reasons for electing Printify, but in this section, we only introduce to your some highlighted roots of it:
- Printify possesses various features and functions that support you in simplifying your fulfillment. Hence, with its help, store owners can spend more time developing their business. What they have to do is just to create items, publish them, and when there is a new order, Printify will be responsible for the rest.
- There is a network of providers in Printify that allows people to select the partner they want to collaborate with. Analyzing your demands and capabilities first, you can choose a suitable provider based on their price, product offering, location, and more. A provider near your customers will help you save a lot of money and time for delivery.
- Besides WooCommerce, Printify also integrates with numerous platforms such as Shopify, Etsy, eBay, BigCommerce, and WIX. Consequently, merchants can freely sell their products on multiple platforms to increase their sales more efficiently.
How to integrate WooCommerce with Printify?
Step 1: Install & Activate Printify
Log in to your WooCommerce account and go to the admin panel. There, open *Plugins.
In Plugins, click on Add new.
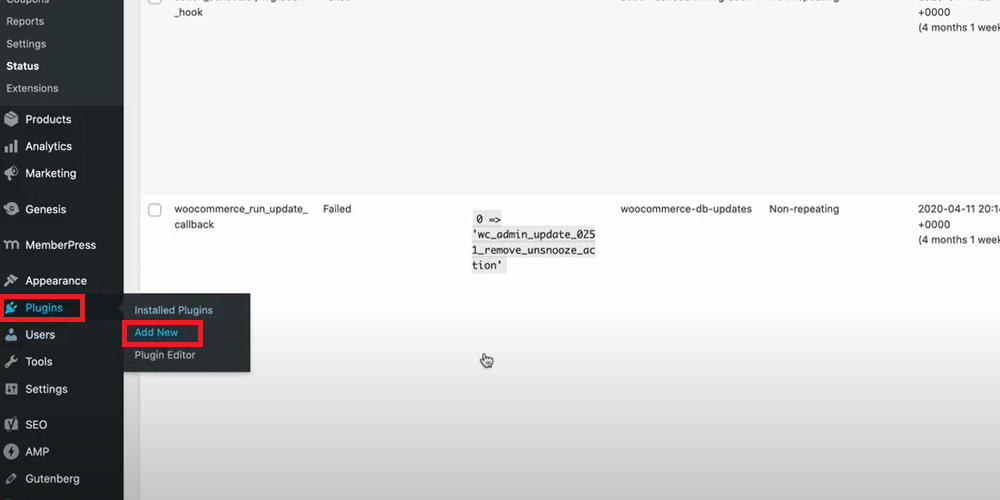
In the search box, search for Printify for WooCommerce. Choose Install to install this plugin, and when the installation is complete, the Install button will turn into Activate, click on it.
Step 2: Enable the legacy REST API
Come back to WordPress dashboard and open WooCommerce then select Settings. After that, you need to open Advanced on the top bar of the screen.
Go to Legacy API and tick on the box to enable the legacy REST API for your WooCommerce store.
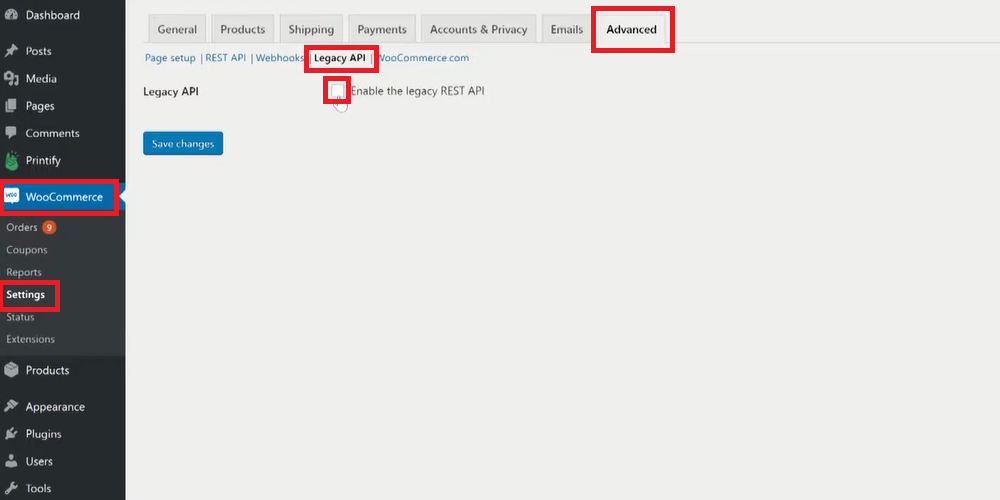
Then, click on Save changes to update.
Step 3: Change the common settings of permalinks
Come back to WordPress again and select Settings.
Open Permalinks to change the common settings. In default, the common setting in permalink is plain, you can select any setting in this list (day and name, month and name, numeric, post name, custom structure) except for plain.
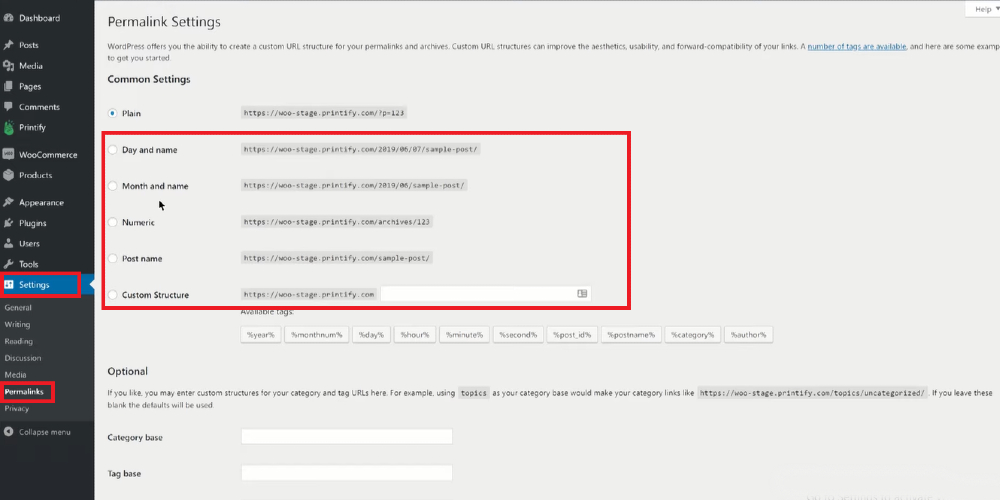
Don’t forget to Save changes.
Step 4: Log in to your Printify account
After activating, Printify will be shown as a section in your WordPress dashboard, open it a.nd click on Log in (if you have not created a Printify account yet, choose Sign up)
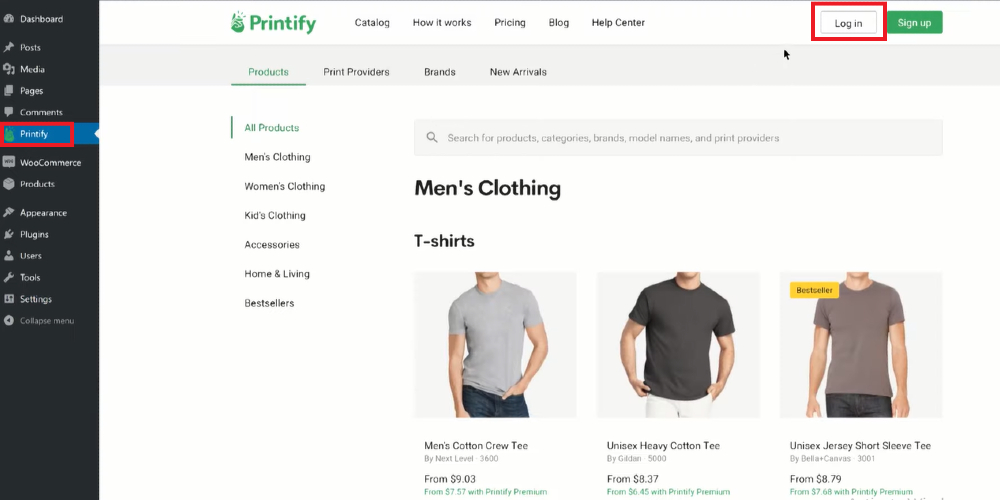
Step 5: Connect your WooCommerce store with Printify
After logging in, a window asking you to connect with an eCommerce sales channel will appear; click on Connect in the block of WooCommerce to integrate your WooCommerce store with Printify.
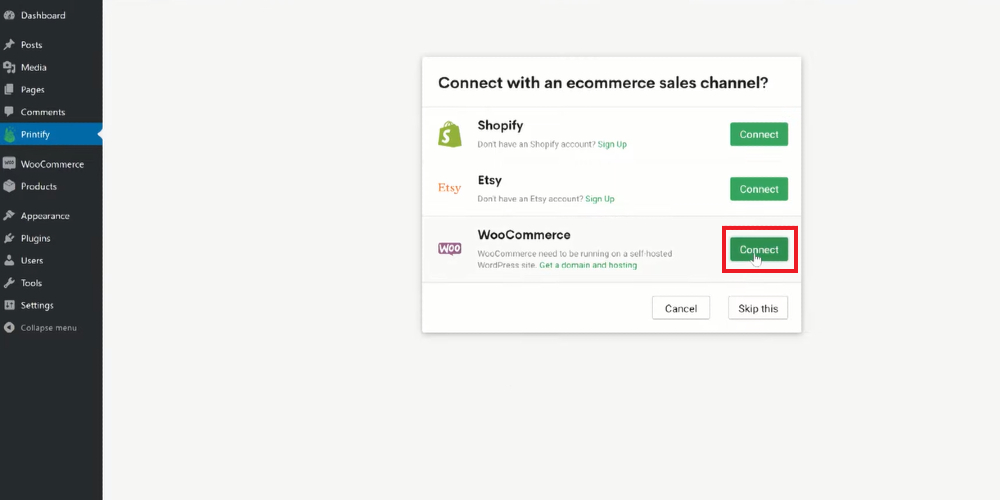
Afterward, you will be required to enter your WooCommerce store link and approve the right of Printify in your store. When it is done, you can start publishing your products from Printify to WooCommerce.
Final thoughts
In conclusion, eCommerce is the world’s future, so selling print-on-demand products is an intelligent option that many entrepreneurs choose in recent years. More than that, it is not difficult to integrate it with such platforms as WooCommerce. Via only 5 steps, WooCommerce store owners can start publishing their products from Printify and selling them to their customers. Hope that all of you will be successful.


