
How To Remove The Checkout Fields in WooCommerce
By Sam Nguyen

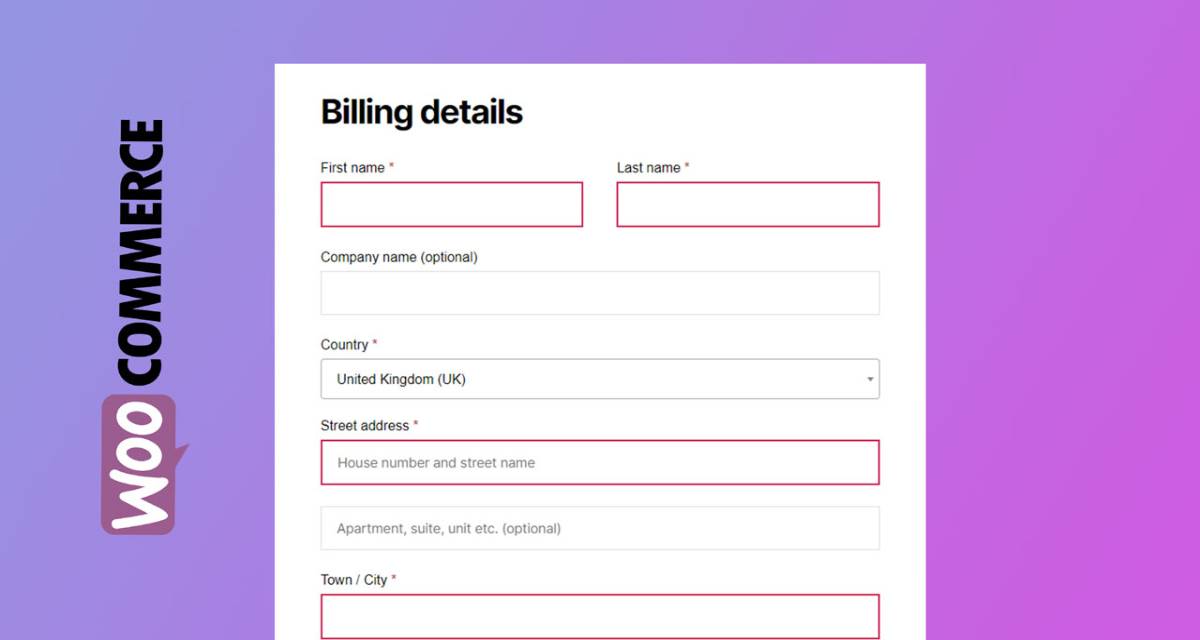
The checkout page of an eCommerce shop is critical to the consumer experience. Customers will notice several forms to fill out before completing a purchase when they arrive at the checkout page. By default, WooCommerce shows a set of fields on the checkout page. You can conceal some of these fields using different methods depending on the nature of your business.
Today’s tutorial will show you how to remove the checkout fields in WooCommerce. There will be a short and lean guide for each method we provide. If you can handle all these aspects of the checkout process, it would be a peak of your sales and conversion. So, let’s dive in!
Why do we need to disable Checkout Fields in WooCommerce?
Did you know that more than 75% of customers add a product to their shopping cart but then left the website without purchasing anything? One of the most common causes for shopping cart abandonment is that the checkout process is excessively long or complex. To avoid this, the checkout page should be straightforward and contain only the essential data. This is especially crucial if you offer digital or virtual items such as software, music, ebooks, and so on. Because this sort of goods does not need to be delivered, they should have a private checkout page where you do not have to provide information like your address or postal code.
Check out this post to learn more about how to optimize the checkout process for digital items. As a result, to increase conversions, you should hide fields that add distractions and friction to the checkout page. Let’s take a look at how to remove WooCommerce checkout fields to speed up the checkout process.
How to remove the Checkout Fields in WooCommerce
Because it is not feasible to disable WooCommerce default checkout fields from the WordPress dashboard, we will demonstrate to you how to conceal and remove checkout fields in two methods in this tutorial:
- Using a third-party plugin
- Using a PHP script
If you are not a developer, the simplest method is to use a plugin. On the other hand, the PHP script lets you remove any existing checkout data and modify your WooCommerce store with little coding. There is no superior or inferior approach. You’ll receive the same outcome with either of them, so select the one that best matches your capabilities.
Method 1: Coding
We advised that you design a child theme before we begin. Instead of changing the parent theme’s files, you’ll edit the child theme so that your adjustments aren’t deleted when the parent theme is upgraded. If you do not intend to create a child theme, you can completely back up your site if something goes wrong. This part will explain how to remove checkout fields from the WooCommerce Checkout by implementing your code. In this example, we’ll utilize the woocommerce_checkout_fields hook, which we’ll name avada_remove_checkout_fields:
add_filter( ‘woocommerce_checkout_fields’ , ‘avada_remove_checkout_fields’ );
This is a filter hook, which implies that when you execute it, it must return something. And how will it be reinserted? The data contains the fields you intend to delete.
Hide the billing last name
For example, if you decide to remove the last name field, use the following formula:
unset($fields['billing']['billing_last_name']);

Then, place it into a function with the same name as the filter hook in the first step (avada_remove_checkout_fields):

function quadlayers_remove_checkout_fields( $fields ) {

unset($fields['billing']['billing_last_name']);

return $fields;

}
Finally, as shown below, insert the complete script to delete the WooCommerce field last name in the functions.php file of a child theme:
add_filter( 'woocommerce_checkout_fields' , 'avada_remove_checkout_fields' );

function quadlayers_remove_checkout_fields( $fields ) {

unset($fields['billing']['billing_last_name']);

return $fields;

}
Hide other fields
As a consequence, if you intend to remove another field, you must add a similar line. The names of the fields that can be drawn are listed below:
unset($fields['billing']['billing_first_name']);
unset($fields['billing']['billing_last_name']);
unset($fields['billing']['billing_company']);
unset($fields['billing']['billing_address_1']);
unset($fields['billing']['billing_address_2']);
unset($fields['billing']['billing_city']);
unset($fields['billing']['billing_postcode']);
unset($fields['billing']['billing_country']);
unset($fields['billing']['billing_state']);
unset($fields['billing']['billing_phone']);
unset($fields['order']['order_comments']);
unset($fields['billing']['billing_email']);
unset($fields['account']['account_username']);
unset($fields['account']['account_password']);
unset($fields['account']['account_password-2']);
Undo the removed fields
What can you do if you accidentally remove specific checkout fields that you need to re-display? Simply delete the line of code that conceals the field you intend to reveal. For example, if you removed the postcode field in the billing section and now need to re-enable it, delete the following line from your child theme’s functions.php file:
unset($fields['billing']['billing_postcode']);
Similarly, if you prefer to reveal many fields at once, you may remove multiple lines.
Method 2: Using third-party plugins
There are several methods available to deactivate and conceal fields on the checkout page. We’ll illustrate to you how to achieve that using four different plugins:
- WooCommerce Direct Checkout
- Checkout Field Editor Plugin
- WooCommerce Customizer
- WooCommerce Checkout Manager
These tools function similarly, although there are some distinctions. The primary disadvantage of this technique is that you are altering your website’s code when you install a plugin. This raises its complexity and the probability of something breaking. Consequently, if you’re comfortable creating a few lines of code, a customized script may be a suitable option. Let’s take a deeper look at how these plugins can assist you in removing some checkout fields.
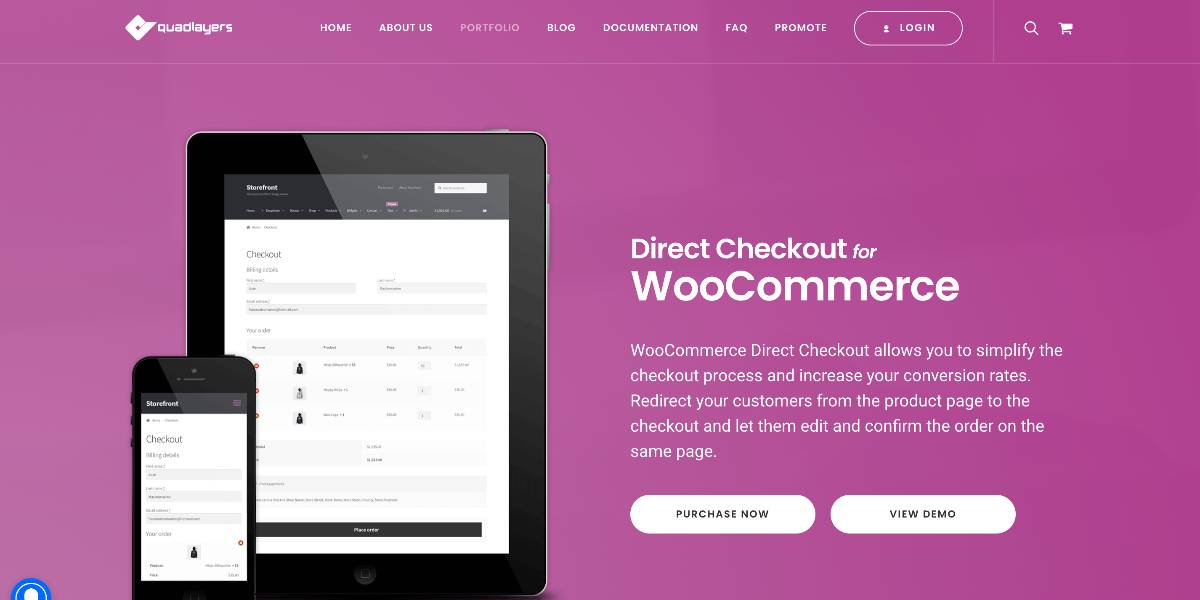
WooCommerce Direct Checkout
WooCommerce Direct Checkout is an excellent plugin that optimizes both the checkout process and the checkout page. This tool attempts to speed up the checkout process to offer consumers a better purchasing experience. Direct Checkout assists you in removing redundant data and increasing conversion rates. This is a freemium application. It provides a free version with basic functionality and three premium subscriptions starting at $19 (one-time payment).
To remove fields from the WooCommerce checkout page using Direct Checkout, follow these steps below:
- Step 1: First, WooCommerce Direct Checkout must be installed and activated. Go to Plugins > Add New in your WordPress dashboard and search for “WooCommerce Direct Checkout,” or download it for free from the homepage of the plugin.
- Step 2: Navigate to the WooCommerce section of your WordPress dashboard.
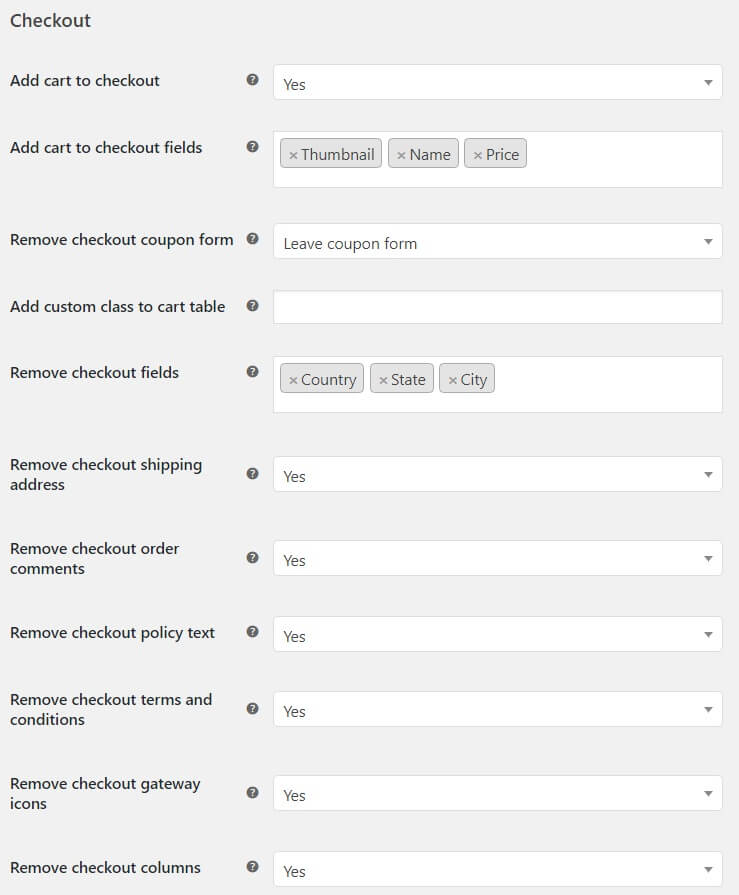
- Step 3: Go to the Checkout tab after pressing Direct Checkout.
- Step 4: You’ll find a list of all the fields you may delete here, including nation, state, order comments, policy text, columns, and others. You can also use the Added to cart redirect to option on the General tab to route customers from the product page directly to the Checkout.
- Step 5: Simply save the modifications after you’ve deleted the fields you don’t want to show the checkout page.
Checkout Field Editor Plugin
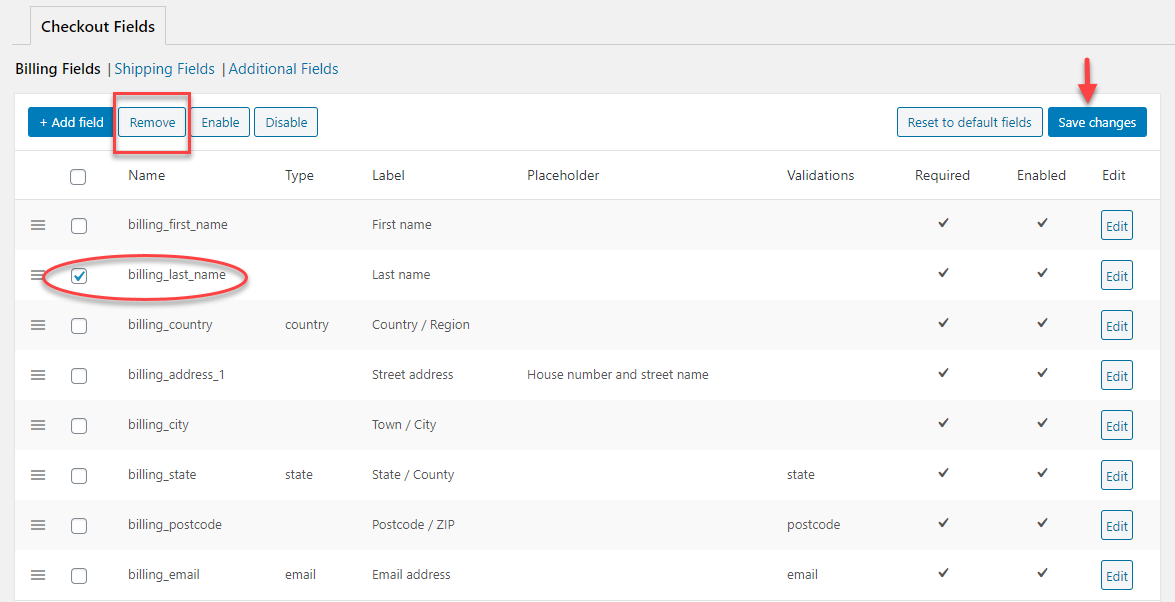
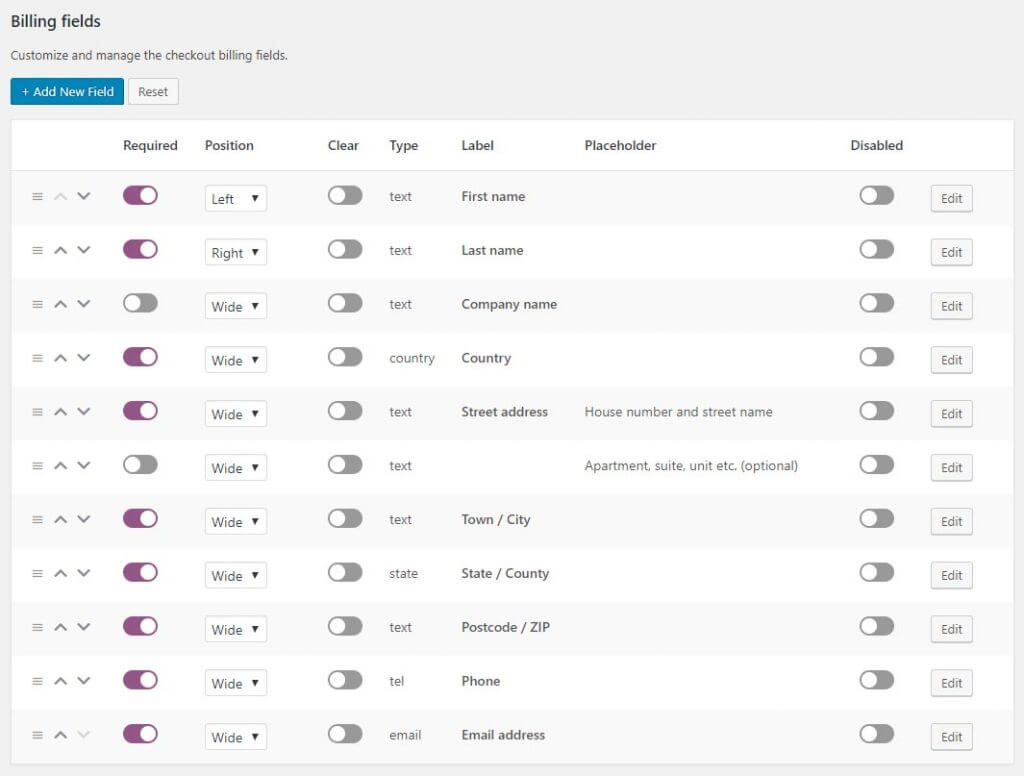
If changing the theme functions file is too difficult for you, you may use the Checkout Field Editor Plugin instead. The WooCommerce Checkout Field Editor (Checkout Manager) Plugin allows you to add seven different types of custom checkout fields to your Checkout page, all while maintaining a simple and user-friendly interface. It will enable you to alter your WooCommerce platform’s default checkout fields, create new custom fields in the three parts (Billing, Shipping, and Additional), update, hide, or remove the default fields, change labels, rearrange checkout fields, verify checkout fields, add custom CSS classes, and so on.

You must first install and activate the plugin. The fields to be deleted can be specified on the plugin settings menu. We shall delete the ‘last name’ field in this case. Click the Remove button after checking the box next to the billing last name field. Then, press the Save changes button. And from now on, your customers will no longer see the last name field on the checkout page. In this manner, you may delete any field from the checkout page that you want. The plugin also allows you to add additional fields and rearrange the order of display.
WooCommerce Customizer
If the prospect of changing the appearance and feel of your site makes you uncomfortable, this plugin is for you. Using the plugin’s options page, you may change some of your site’s front-end features without writing any code. You also don’t need to change any templates to do this. This plugin is handy for rapid change testing. You may alter the text of the “Add to Cart” button for different product kinds with the WooCommerce Customizer plugin. Depending on the situation, this might be done on the specific product page or the main shop page. You can also adjust the number of goods displayed on the store page and the content of the sales badge. You may also change the header wording for the “product information” and “additional information” tabs. Additionally, you may make changes to the checkout page. You can change the coupon or login text, the default wording for the “create account” button, or the text for the “submit order” button.

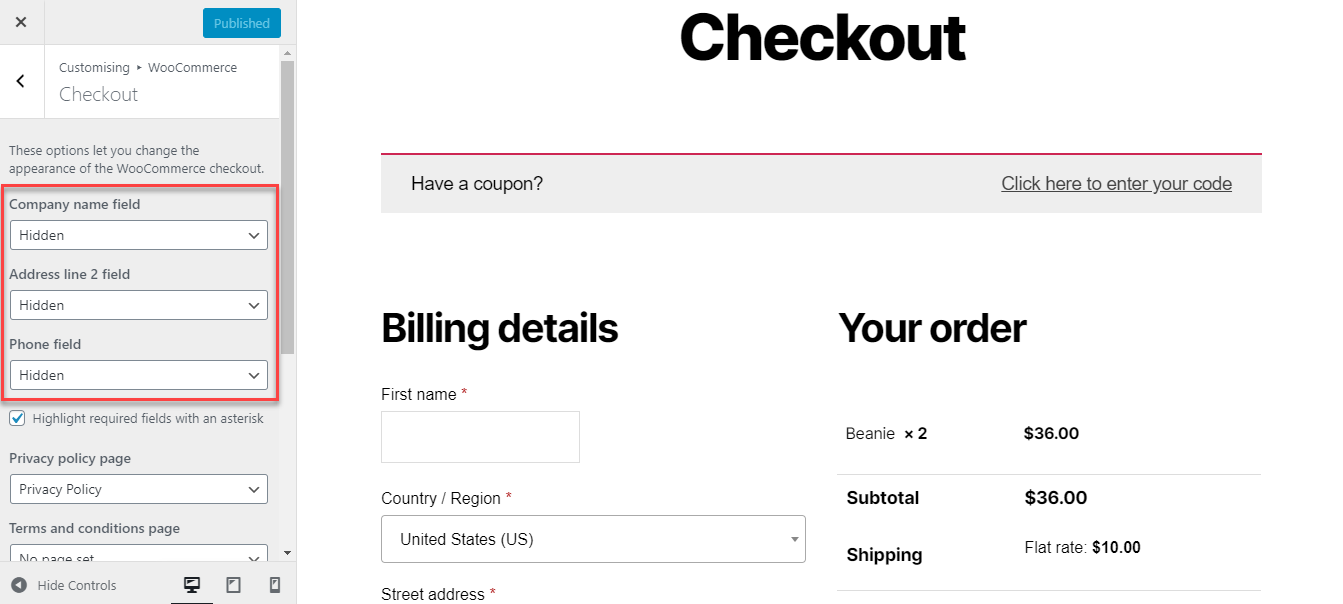
To remove the checkout fields in WooCommerce, from the WordPress admin panel, go to Appearance > Customize > WooCommerce > Checkout to access the WooCommerce Customizer. The three fields on the checkout page can be removed here. These are the Company name field, the Address line 2 field, and the Phone field. For all three fields, select the ‘Hidden’ option from the drop-down menu. Finally, press the Publish button. These three fields have now been deleted from the checkout page.
WooCommerce Checkout Manager
One of the finest tools for removing checkout fields is WooCommerce Checkout Manager. WooCommerce Checkout Manager lets you modify the checkout process by adding or removing order data. The plugin may evaluate your billing data inside the checkout page and retrieve any data necessary by your business process. In addition to deleting fields, this plugin allows you to add new fields, make fields optional or mandatory, modify the order in which the fields are shown, apply conditional logic, and much more. This freemium plugin offers a free version as well as three subscription plans starting at $19 (one-time payment).
Simply follow these instructions to deactivate any of the WooCommerce checkout fields:
- Step 1: First, the WooCommerce Checkout Manager must be installed and activated. You may either go to Plugins > Add New and search for “WooCommerce Checkout Manager” or get it free from the homepage of the plugin. The extension includes a pro edition with more complex capabilities, but the free version is refined for our purpose.
- Step 2: Navigate to the WooCommerce section of your WordPress dashboard.
- Step 3: Click on the Checkout section, then the Billing tab.
- Step 4: You’ll get a list of all the fields you may conceal, so simply deactivate the field you wish to delete.
- Step 5: After that, go to the Shipping and Additional tabs and uncheck the boxes next to the fields you wish to remove.
- Step 6: After you’ve hidden all of the fields you don’t want to see on the WooCommerce checkout page, remember to save your modifications, and you’re done! In addition to deleting fields, this plugin allows you to add new fields, make fields optional or mandatory, modify the order in which the fields are shown, apply conditional logic, and much more.
Conclusion
In short, your checkout page may have a significant influence on your business and provide you with a competitive advantage. As a result, it is critical to optimize and enhance it as much as possible. WooCommerce Checkout Manager and Direct Checkout are excellent plugins for quickly and easily disabling fields. They may, however, complicate the store’s coding. On the other hand, the PHP function necessitates some code but is cleaner and uses no resources. Aside from eliminating checkout fields, you can also optimize your site’s purchasing experience by building sales funnels.
We hope this post will help you understand how to remove the checkout fields in WooCommerce. We’ve seen two methods for removing and disabling WooCommerce checkout fields. Each has advantages and disadvantages, so you should select the one that best matches your talents and needs. Let’s take more profound research to find out the appropriate method and peak your sales!


