
How to Set up USPS Shipping Labels in WooCommerce
By Sam Nguyen

Have you ever noticed the little sticker-like piece of paper on the packages every time you shop online? Have you ever wondered what it is, and why it always appears on each of your packages? That’s exactly what’s called a shipping label that includes all of the information needed by a carrier like USPS to deliver a product to its final destination, such as names, addresses, and tracking codes. Maybe you do not notice, or you do notice but do not pay attention too much to it because what you care about is the product inside the package, right? However, as an eCommerce seller, you must always be aware of the importance of shipping labels. Because shipping labels are such an indispensable part of your supply chain, or even shipping can make or break your business, knowing how much they are worth is key.
In this article, we will show you How to set up USPS shipping labels in WooCommerce with the hope that you can create yourself a shipping label to make your online business smoother. Let’s dive in!
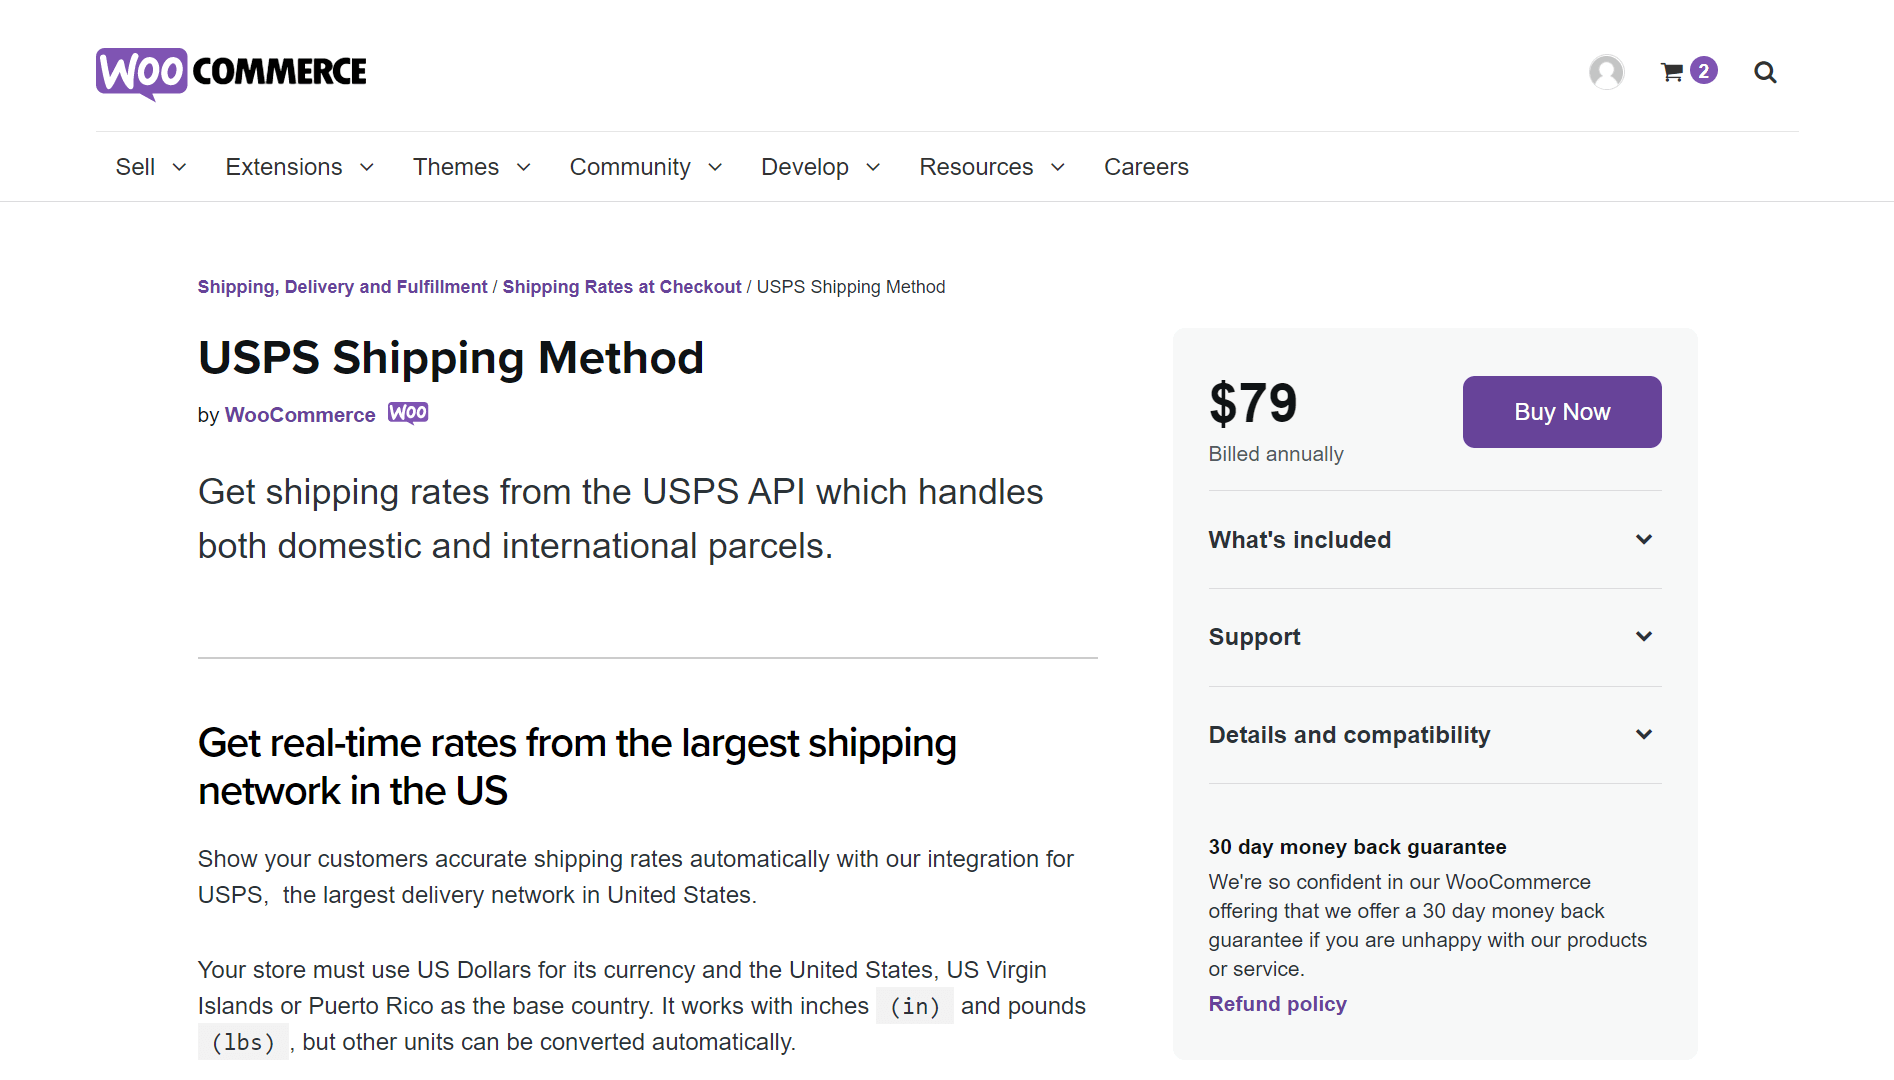
An overview of USPS Shipping Method
The first decision you must make is which shipping carrier you will utilize to transport your goods. The major three are usually compared: USPS, FedEx, and UPS. Each service has its own set of advantages and disadvantages, but USPS (The United States Postal Service) is the most cost-effective alternative.
USPS Shipping is a premium solution that uses the USPS API to obtain shipping costs and integrates with free WooCommerce Shipping service, which generates reduced shipping labels directly from your WooCommerce dashboard. USPS can calculate both domestic and international parcel rates.
Your store’s currency must be US Dollars, and the base nation must be the United States, US Virgin Islands, or Puerto Rico. It works with inches (in) and pounds (lbs), but it can also convert between other units. SimpleXML must be installed on the server. In case you are unsure, contact your hosting company.
USPS calculates quotes worldwide
| DOMESTIC | INTERNATIONAL |
|---|---|
| - First class | - First Class Mail® International Letters and Envelopes |
| - Flate rate | - Global Express Guaranteed (GXG) |
| - Priority Mail | - Priority Mail International |
| - Priority Mail Express | - Priority Mail International Flat Rate |
| - Standard Post | - International Postcards |
| - Media Mail | |
| - Library Mail |
Here is a concise description of each element of a USPS Shipping label
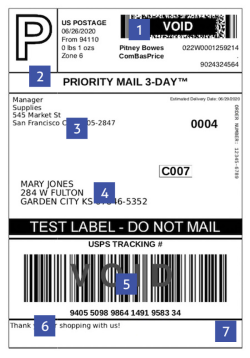
- OneCode: Contains all of the information required for delivery, and a scanner can read it from any angle
- Level of Service: Displays method of delivery purchased from the carrier (Priority Mail in this example)
- Name and address of sender
- Name and address of recipient
- Machine-readable Tracking Number: Allows carrier to track package
- Human-readable Tracking Number: Allows customer to track package
- Custom Area: Allows for brief custom messages
How to set up USPS shipping labels in WooCommerce
You now have an overall understanding of USPS shipping labels and their significance in eCommerce. It’s time to delve into setting up a USPS shipping label in the WooCommerce store.
Here are steps to create a USPS shipping label that can not only help your online business become better but also improve the customer’s purchasing experience. Let’s get started!
Step 1: Installation
-
Download the extension from your WooCommerce Dashboard
-
Then, go to the Plugins > Add New > Upload; select the ZIP file you just downloaded
-
Install Now, and Activate to complete this step
Step 2: API and Debug
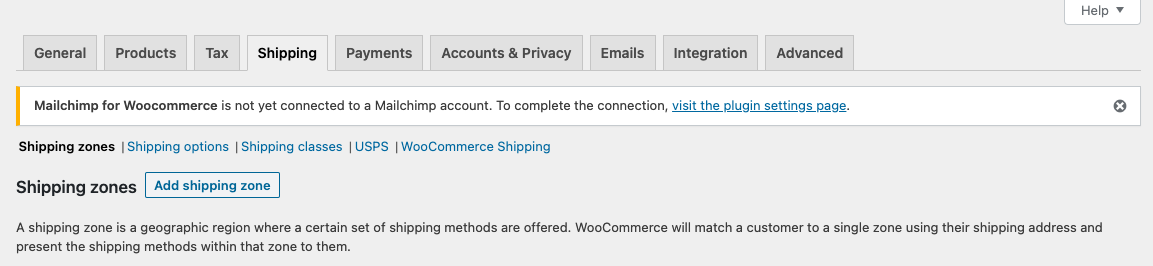
Go to: WooCommerce > Settings > Shipping > USPS. Now you have to notice two things:
-
USPS User ID: obtain a user ID by registering for a Webtools account on USPS.com
-
Debug Mode: reveal debugging details in your shopping basket. Only logged-in administrators have access to this data.
Step 3: Setting up shipping zones
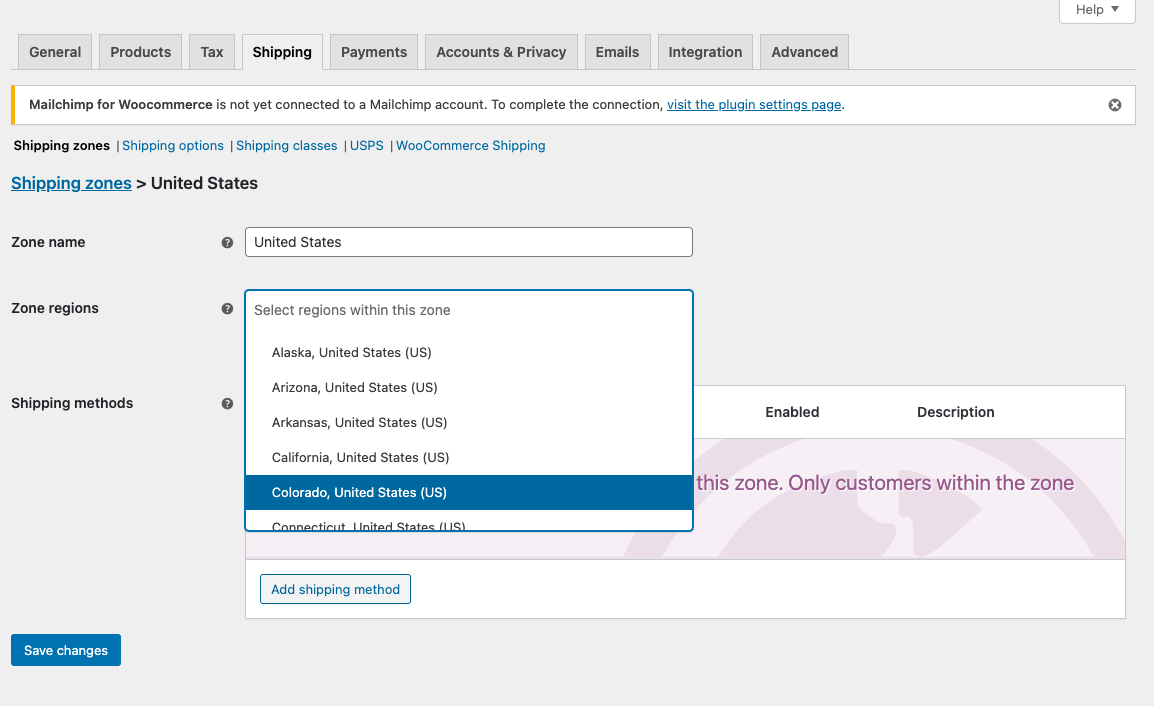
Go into WooCommerce > Settings display your Dashboard, then tap on Add Shipping Zone in the Shipping tab.
The first place to start customizing your shipping options via WooCommerce shipping zones is here. You can construct as many zones as you like, and each zone can be as large or small geographically according to your demand. You can, for instance, create a shipping zone for the entire United States, a zone for one or more states, or even a single zip code.
Step 4: Adding shipping method and shipping options
To add the shipping method, either establish a new Shipping Zone or modify the existing one.
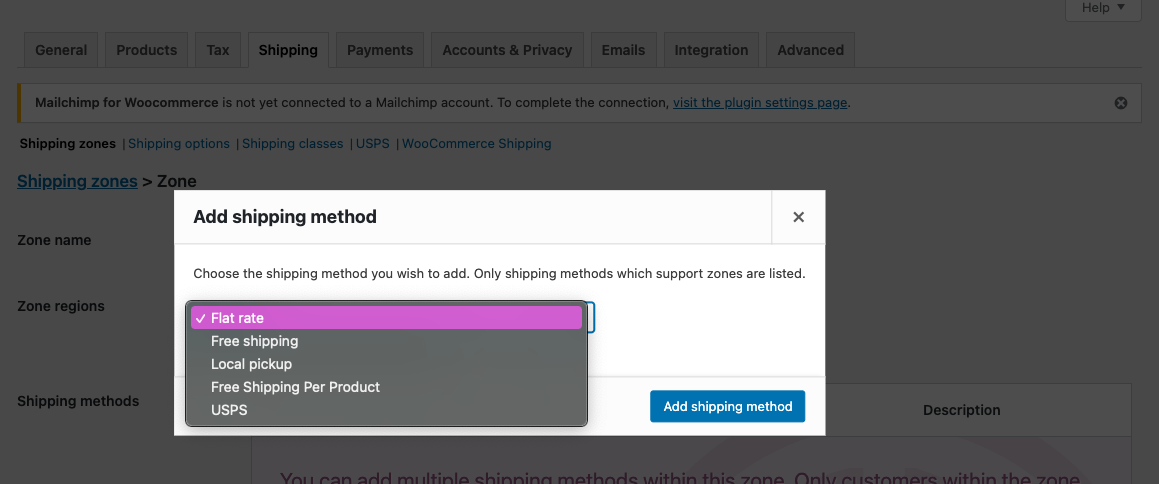
Note: In a single shipping zone, you can designate numerous shipping methods. You must specify USPS as one of the zone’s shipping methods if you plan to offer USPS shipping.
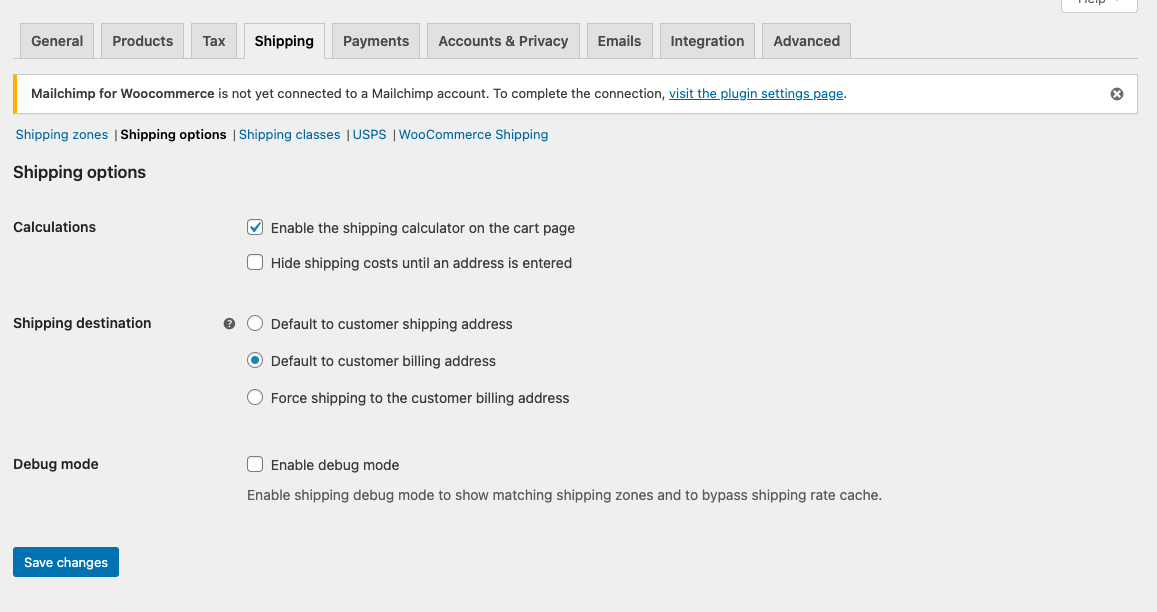
In terms of Shipping options, this section refers to specific settings as below:
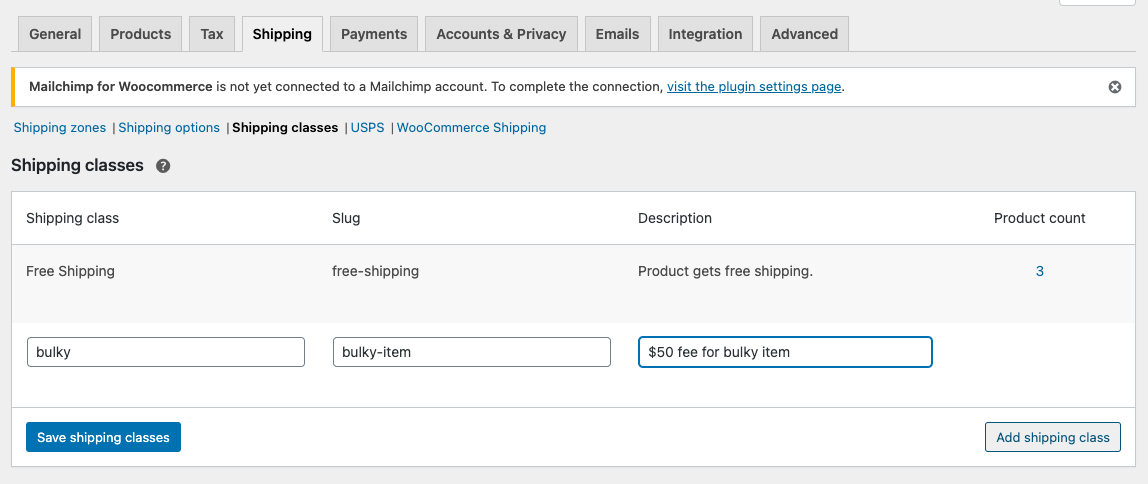
Step 5: Setting up the shipping classes
If your products differ substantially in weight, size, or packaging, creating WooCommerce shipping classes can be quite handy.
For example, suppose you have flat rate delivery arranged for all of your products but one or two that are significantly bigger and will charge you more to deliver. In that case, you may establish and apply a “bulky” shipping class to those products and command a higher flat-rate.
Step 6: Configure USPS settings
Setting Up WooCommerce USPS Shipping Rates
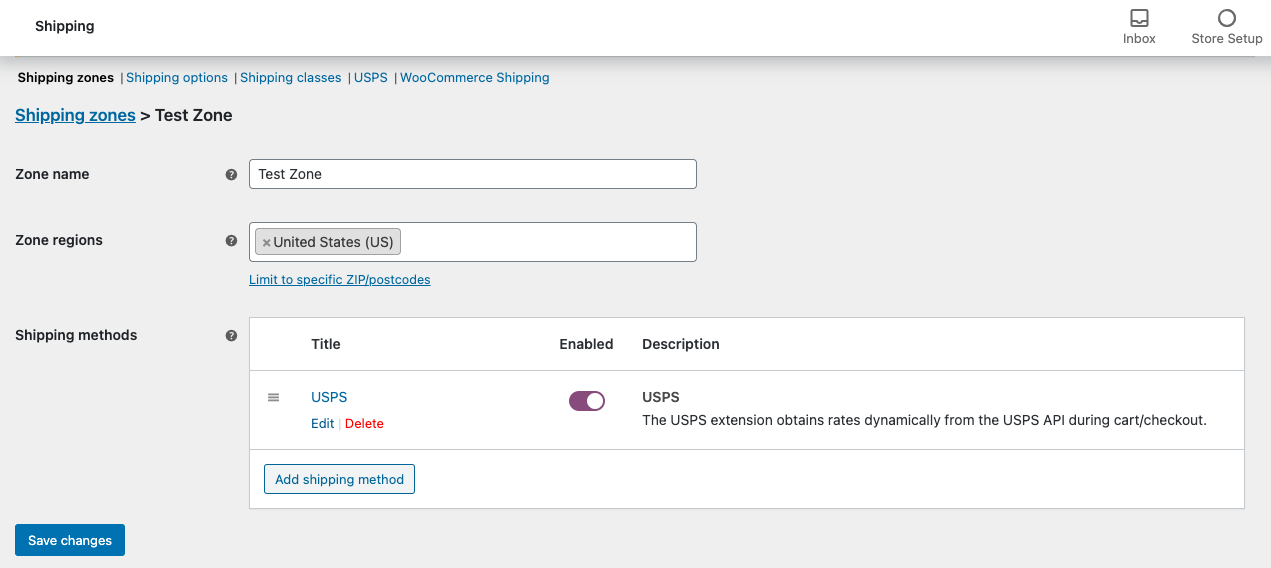
When the USPS shipping method to a shipping zone is added, configuring the USPS settings is what you need to do. Pick out the shipping zone you want to edit > click Edit under USPS in the Shipping Method section.
Next, you will see Method Title, Origin Postcode, Tax Status, Offer Rates, and Fallback
-
Method Title - the name of the shipping method that is visible to customers at checkout
-
Origin Postcode - the postcode from which the items will be shipped and it is a required field
-
Tax Status - you should check with federal and state regulations if you think your items are non-taxable
-
Offer Rates – choose whether to offer the customer only the cheapest rate or all returned rate options
-
Fallback – if no rates are received from the API, submit a fallback shipping cost (optional). If USPS somehow does not respond matching pricing, the purchaser might check out. Do not use a dollar sign when utilizing this selection; merely enter the amount.
Now you must choose between using only USPS Flat Rate Boxes and Envelopes, USPS API rates, or both. If you enable Flat Rates, the four alternatives listed below will appear.
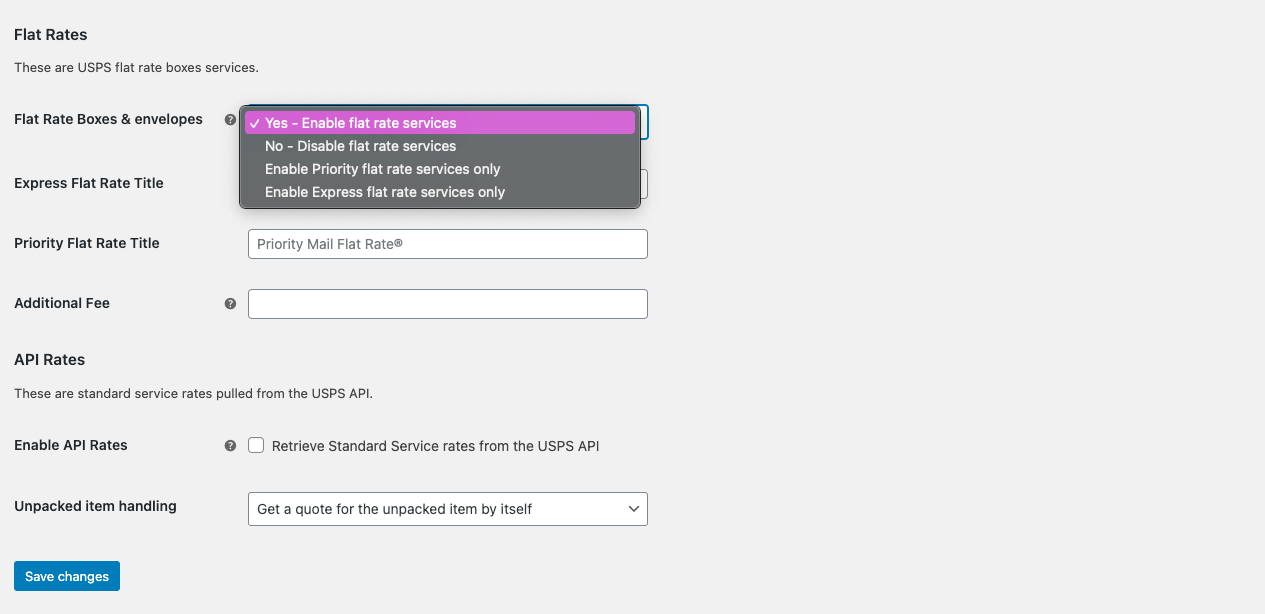
In particular:
-
Flat Rate Boxes and Envelopes — Select this option to use USPS Flat Rate services for shipment. The consumer is given a single rate after the items are packaged into the boxes/envelopes
-
Express Flat Rate Title — Give the flat express rate a custom name
-
Priority Flat Rate Title — Give the priority flat rate a custom name
-
Additional Fee – Enter a figure or a percentage for an additional fee per box, excluding tax. Alternatively, you may leave the field blank to deactivate it.
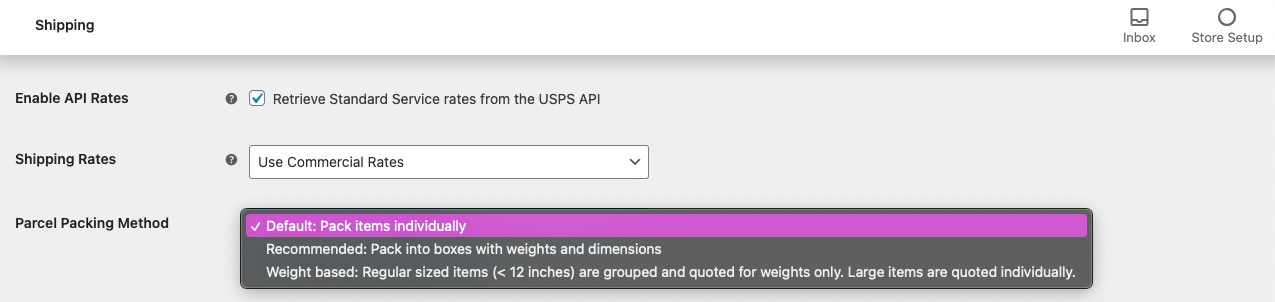
Setting Up WooCommerce USPS API Rates
If you choose to use USPS API rates, the WooCommerce Shipping Method plugin will automatically apply standard USPS service rates.
Select Enable API Rates by choosing the box. Your screen will appear like this once you have clicked the button.

API Rates — Use the USPS API to enable non-flat rates. By default, all services are available; alternatively, you can pick and choose from the different shipping services listed below. You can make the following changes:
Enable API Rates - Allow non-flat rate services
Original Postcode - Postcode from where you ship. It’s forwarded to the USPS API
Shipping rates - Retail rates are the usual costs, while commercial rates are reduced. Set it to “Commercial rates” if you want those rates to match the ones you obtain when printing labels with WooCommerce Shipping. When you print using WooCommerce Shipping, you are automatically eligible for Commercial rates.
Packing Method for Parcels
Upon choosing a Parcel Packing Method, you have three alternatives: pack items individually (default), **pack into boxes with weight and dimensions (suggested), or **weight-based.
4 best WooCommerce USPS Plugins
1. Marketplace USPS Shipping for WooCommerce
You can use Marketplace USPS Shipping for WooCommerce to display USPS shipping prices if you’re utilizing the WordPress WooCommerce Multi-Vendor Marketplace plugin. On the Checkout page, you’ll be able to enable or disable the USPS delivery option based on your needs. Additionally, it provides real-time freight calculation via API.
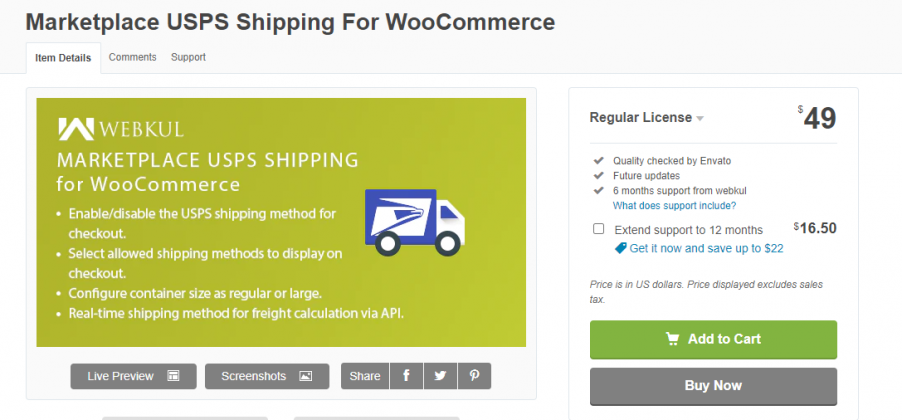
Outstanding features:
- Enable or disable the USPS shipping method for checkout
- The real-time shipping method for freight calculation via API
- Enable or disable USPS services according to store needs
- Provide USPS shipping services on your multi-vendor marketplace
Price: $49 including 6 months support
2. ELEX WooCommerce USPS Shipping Plugin Free Version
One of the most popular free WooCommerce USPS shipping plugins on the market is this one. ELEX WooCommerce USPS Shipping Plugin Free Version allows you to display USPS local and international services, as well as their current rates, on your shopping and checkout pages. Based on the weight and dimensions of the products, as well as the delivery destination, the plugin calculates the shipping charges for an order. It will provide a list of all available shipping providers from which your consumers may select the most appropriate.
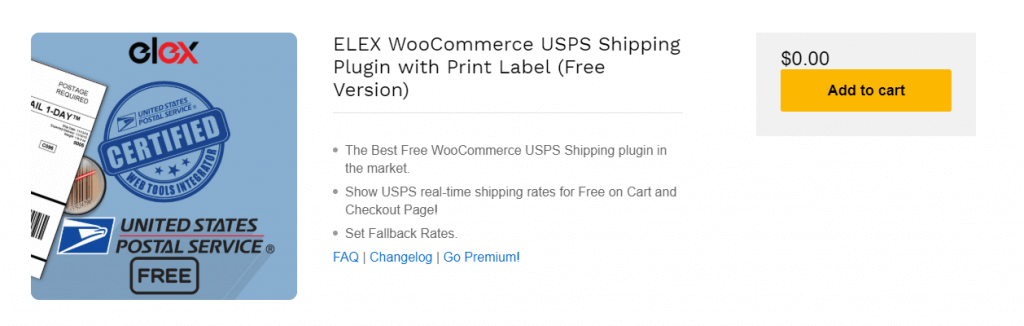
Outstanding features:
- Access USPS live rates
- Restrict Media Mail
- Set FallBack Rate
- USPS Services for Real-time rates
Price: As we mentioned above, this plugin is a free version
3. US Postal Service USPS WooCommerce Shipping Plugin for Rates and Tracking
This US Postal Service USPS WooCommerce Shipping Plugin for Rates and Tracking for WooCommerce connects your WooCommerce store to the USPS Web Tools. It may show your customers real-time shipping rates in their shopping basket as well as at checkout. It also gives you the most up-to-date package tracking information from the USPS. It can be used to ship both within the United States and internationally.
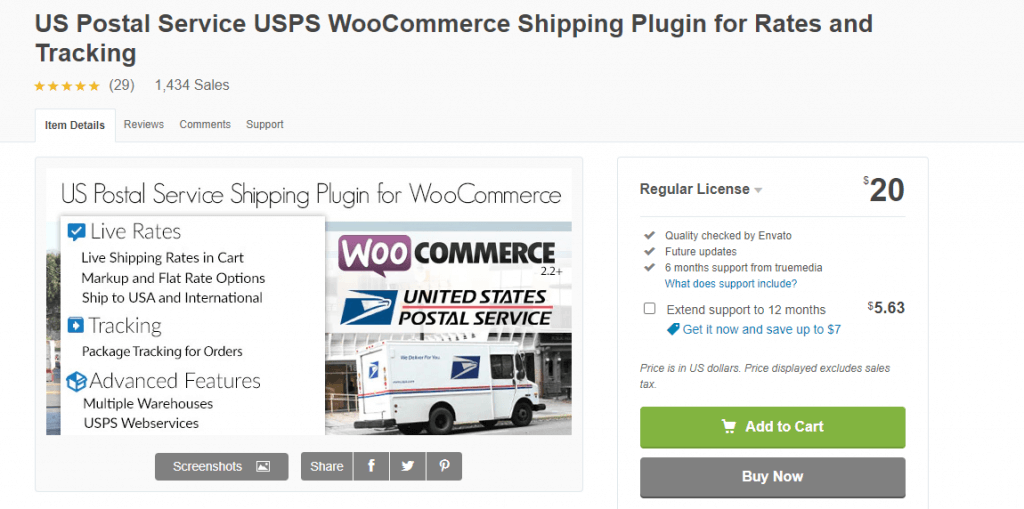
Outstanding features:
- Show real-time shipping rates of USPS services
- Access to USPS web service
- Advanced 3D Box Packing
- Ship from multiple warehouses
- Ship to USA and Worldwide
Price: The Regular License of the plugin costs $20
4. ELEX WooCommerce USPS Shipping Plugin with Shipment Tracking and Print Label
ELEX WooCommerce USPS Shipping Plugin with Shipment Tracking and Print Label assists you in The ELEX WooCommerce USPS Shipping Plugin can assist you in automating USPS shipping by displaying shipping prices on the Cart and Checkout pages. Display complete USPS Shipment Tracking information on the Order Page. From the WooCommerce Order Admin Page, print USPS eVS Shipment Labels.
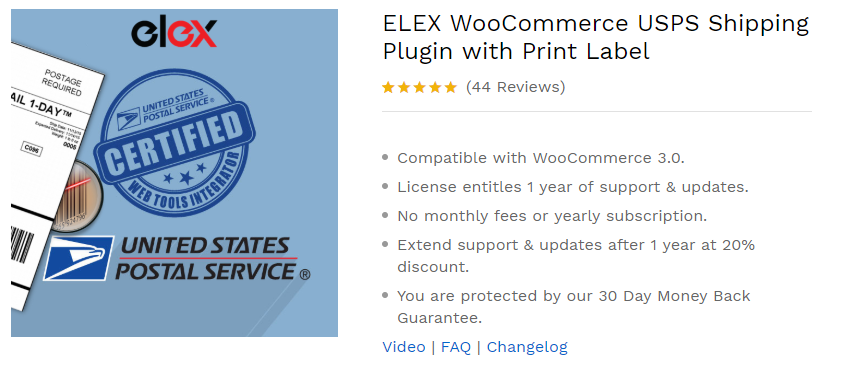
Outstanding features:
- Real-time shipping rates and estimated delivery date
- USPS Shipment Tracking for customers and store admins
- Enable USPS Flat Rate Shipping
- Parcel Packaging Options
- Adjust Shipping Prices
Price: $69 for a single-site license, and 5-site and 25-site licenses are available at $99 and $199, respectively.
Final words
We hope to help you have a more comprehensive view of the importance of shipping labels in the e-commerce business through this article. Besides, we also offer ways to set up your own shipping labels, and provide an in-depth understanding that a shipping label’s main function is to ensure that your shipment arrives at its destination as quickly and efficiently as feasible.
We hope to play a part in making your business easier, even more, prosperous Moreover, your experience in using the extensions is extremely valuable to us, so don’t hesitate and share it with us.


