WooCommerce Webhooks Guide: Everything you need to know
Webhooks are event notifications sent to a URL of your choice. You can configure webhooks to trigger events on one site to invoke behavior on another.
In this article, we will give you a comprehensive WooCommerce Webhooks guide.
Let’s dive right in!
What is WooCommerce Webhooks?
Webhooks is one means for apps to send automatic messages or instructions to other apps. It provides a straightforward approach for your online accounts to connect with one another and get updates.
Webhooks were added in July 2014, in WooCommerce 2.2, and they can cause events to be triggered whenever you add, update, or remove orders, products, coupons, or customers.
Webhooks can also be used in conjunction with WooCommerce actions.
Benefits of Using Webhooks in WooCommerce
-
Webhooks can compel the WooCommerce built-in plugin to operate how the developer desires.
-
Webhooks allow you to collect data from customers, monitor their activity, and take action quickly using custom codes.
-
WooCommerce can store and show information on the screens (website owner and client) based on the developer’s preferences.
-
Webhooks can be used to integrate with third-party services and other external APIs that support them.
How to Create Webhooks in WooCommerce?
Step 1: Go to Webhooks from the WP admin dashboard
First of all, you need to log in to your WooCommerce store as an administrator. Then go to WooCommerce > Settings, and click on the tab Advanced. Then, click on the Webhooks link in the sub-menu.
It’s worth noting that Webhooks could be found under WooCommerce > Settings > API in the versions prior to WooCommerce 3.4.
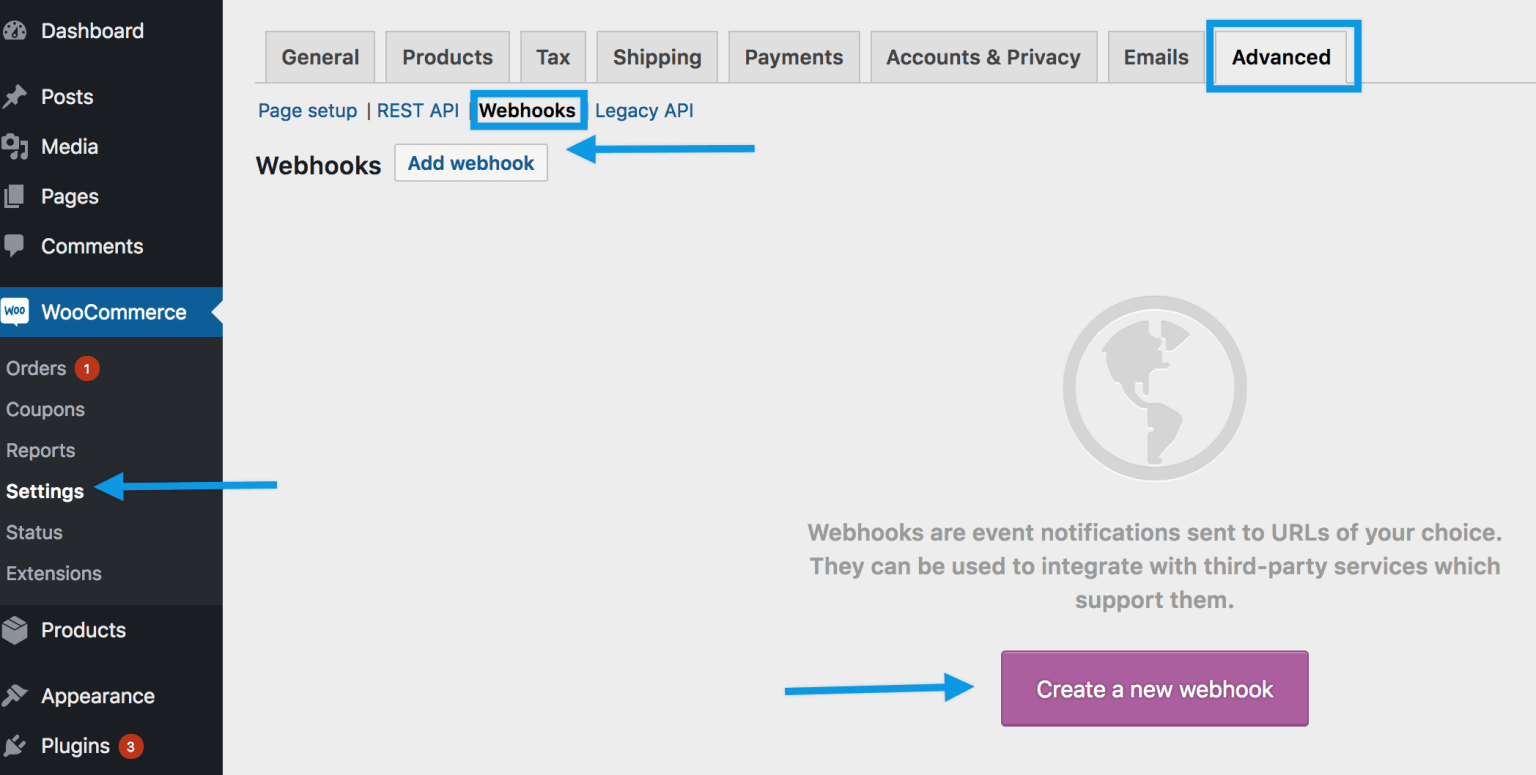
Step 2: Click on Create a new webhook or Add webhook
There are currently no webhooks in your WooCommerce store.
To begin, you just need to click on the button Create a new webhook or Add webhook.
After that, the Webhook Data box will show up with numerous settings fields displayed, which we’ll go over in the next step.
Step 3: Enter details
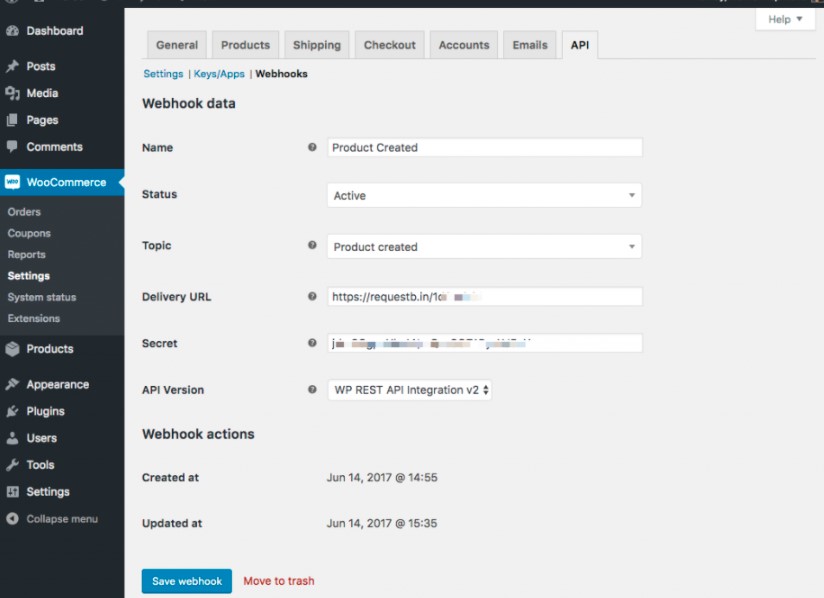
You will need to enter/ fill in details for each settings field.
-
Name: As a standard, the name is automatically given as “Webhook created on [date and time of creation]”. You should change the name to whatever you feel like, but it should help you remember what the webhook is for.
-
Status: Three kinds of status are available: Active (delivered), Paused (not delivered), and Disabled (delivery failure).
-
Topic: This is when the webhook should be activated. You can choose from 15 available actions and two custom actions. The pre-defined actions are: Coupon created, Coupon updated, Coupon deleted, Coupon restored, Customer created, Customer updated, Customer deleted, Order Created, Order Updated, Order deleted, Order restored, Product created, Product updated, Product Deleted, Product restored. The two more custom options are Action and Custom.
Action event option is available when the topic is a WooCommerce action, such as woocommerce_add_to_cart.
Custom Topic is only for advanced users, adding new and customizable topics thanks to the filter woocommerce_webhook_topic_hooks.
-
Delivery URL: This is the URL to which the Webhook payload will be sent.
-
Secret: The Secret Key is included in the request headers and creates a hash of the sent webhook. If nothing is entered here, the consumer secret of the current API user will be used. Secret can be used to verify the webhook on the receiving end.
-
API Version: Choose one out of three API versions. Unless you have unique circumstances, you can keep this as “WP REST API Integration v3.”
Step 4: Save Webhook
Finally, you need to save the webhook you’ve just created. Because this is the first time you’ve saved your webhook with the Activated status, a ping is sent to the Delivery URL.
How to Edit and Delete WooCommerce Webhooks?
It’s pretty easy to edit/ delete webhooks since they are listed just like posts or products.
Step 1: Look for the webhook
First of all, you need to navigate to the webhook that you want to edit or delete.
Step 2: Click on Edit or Delete permanently

You need to hover over the name of the webhook, then two options will be displayed, namely, Edit and Delete permanently.
You just need to click on either of the two options.
Step 3: Delete, Edit, and Save changes
If you want to delete the webhook, you’re done after clicking on the Delete permanently. But if you want to edit the webhook, you need to edit it now.
After that, save the changes you’ve just made.
In addition, you can also delete in bulk via the function Bulk Actions with the dropdown list.
How to Test WooCommerce Webhooks?
In this part, we’ll test WooCommerce webhooks by using RequestBin and the webhook will use the topic Order Updated.
Step 1: Create a new bin for testing in RequestBin
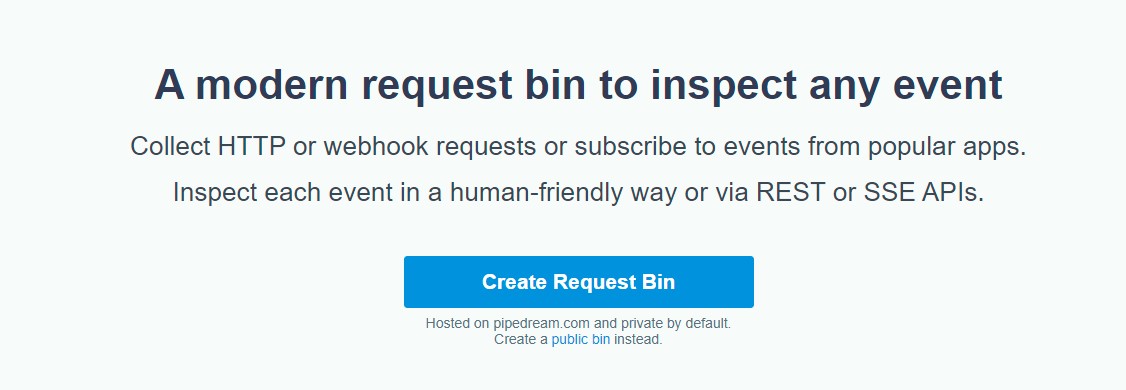
First of all, you need to go to RequestBin and create a new request bin for testing. Remember to keep this browser tab open since we will need this bin URL in the next step.
Step 2: Paste the bin URL in the Delivery URL field
Now you need to get back to the WooCommerce dashboard. In case you have not created a webhook, you need to do it right now.
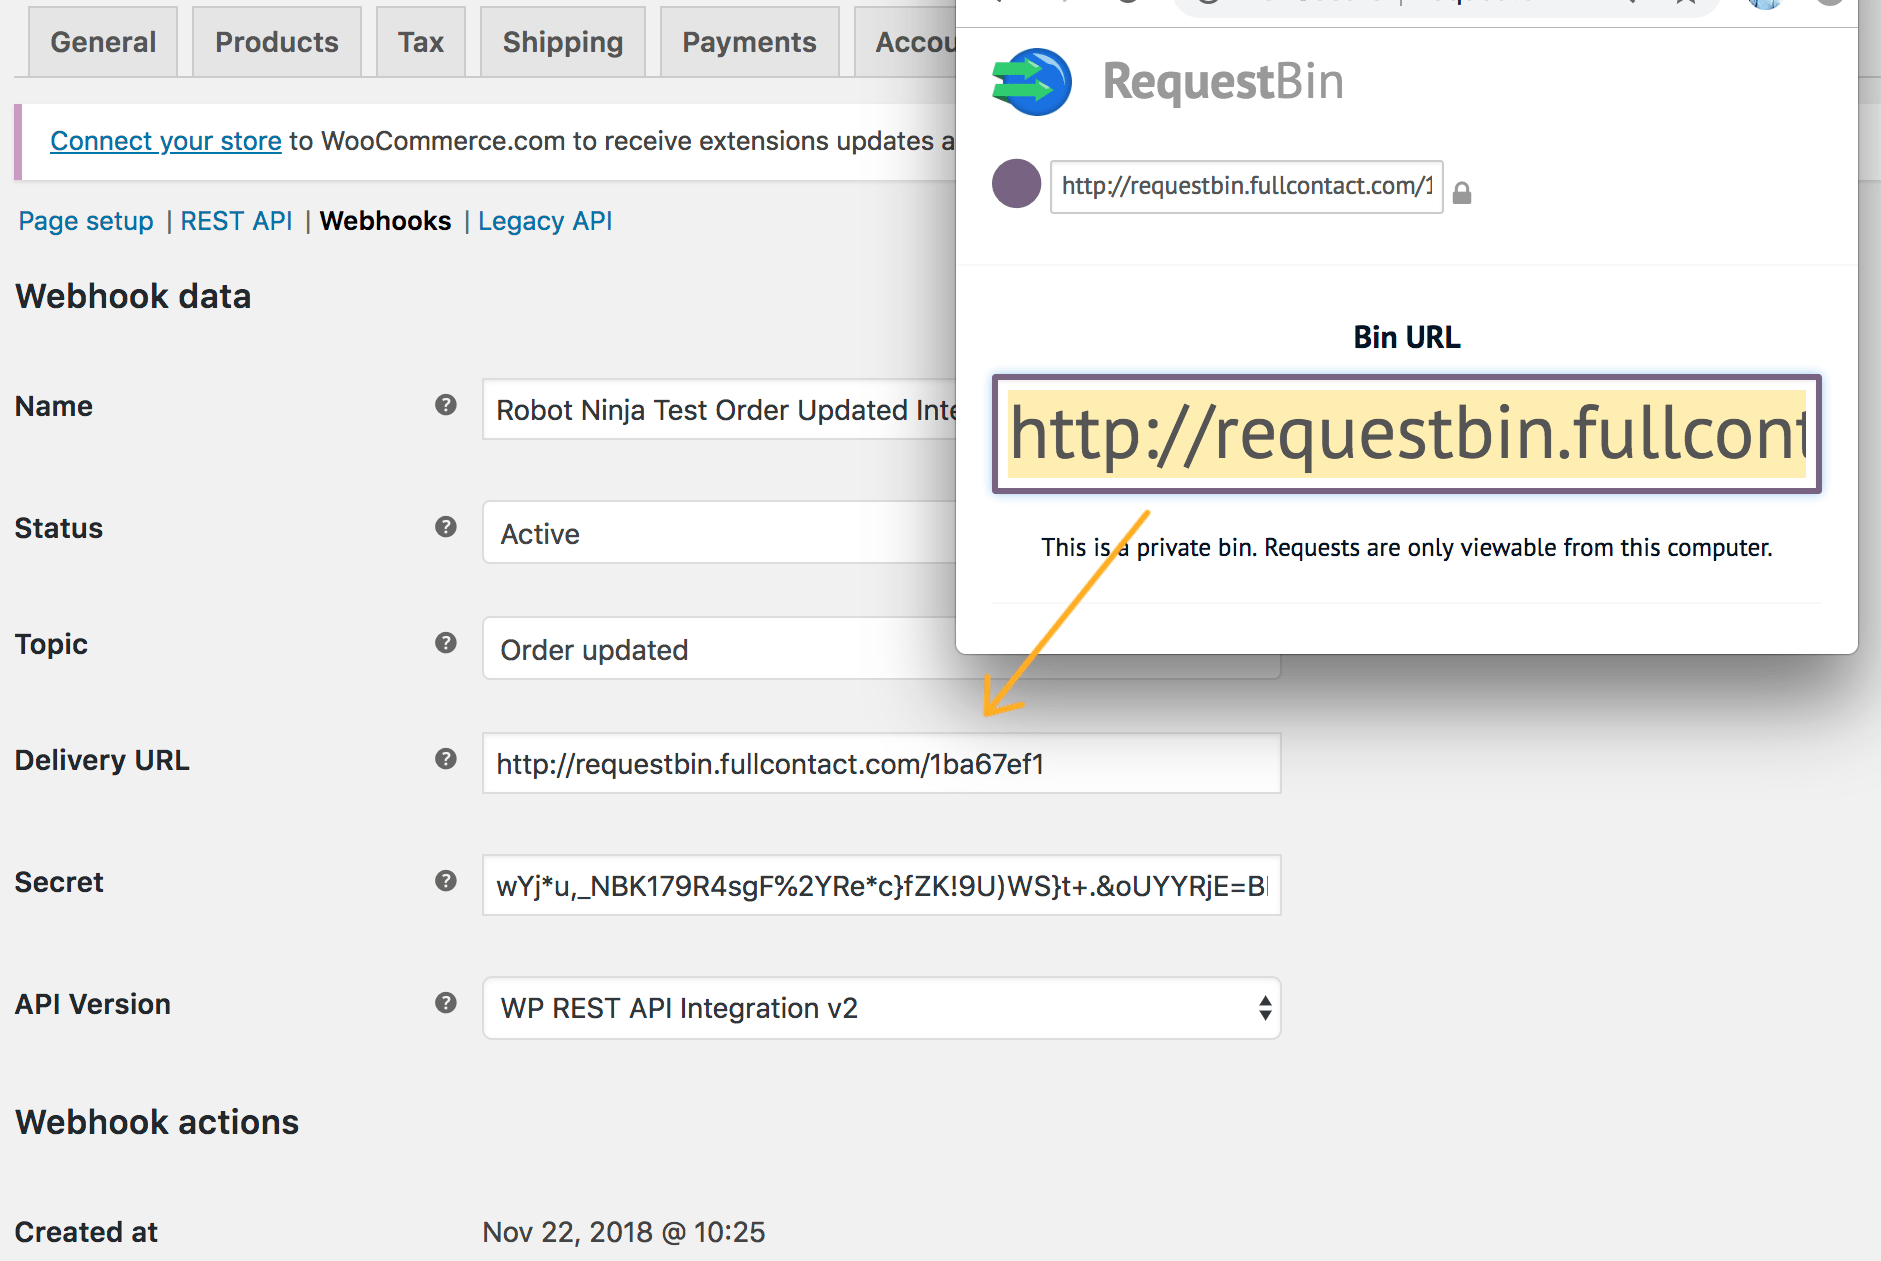
After that, go back to RequestBin and copy the bin URL that we mentioned earlier. Then paste that link in the Delivery URL field.
Step 3: Enter details for other fields
You also need to fill in the remaining webhook fields. Remember to choose a topic Order updated and set your webhook to Active before saving.
Step 4: Trigger your webhook
Because we’re testing Order Updated, we need to conduct the below steps to get your webhook triggered.
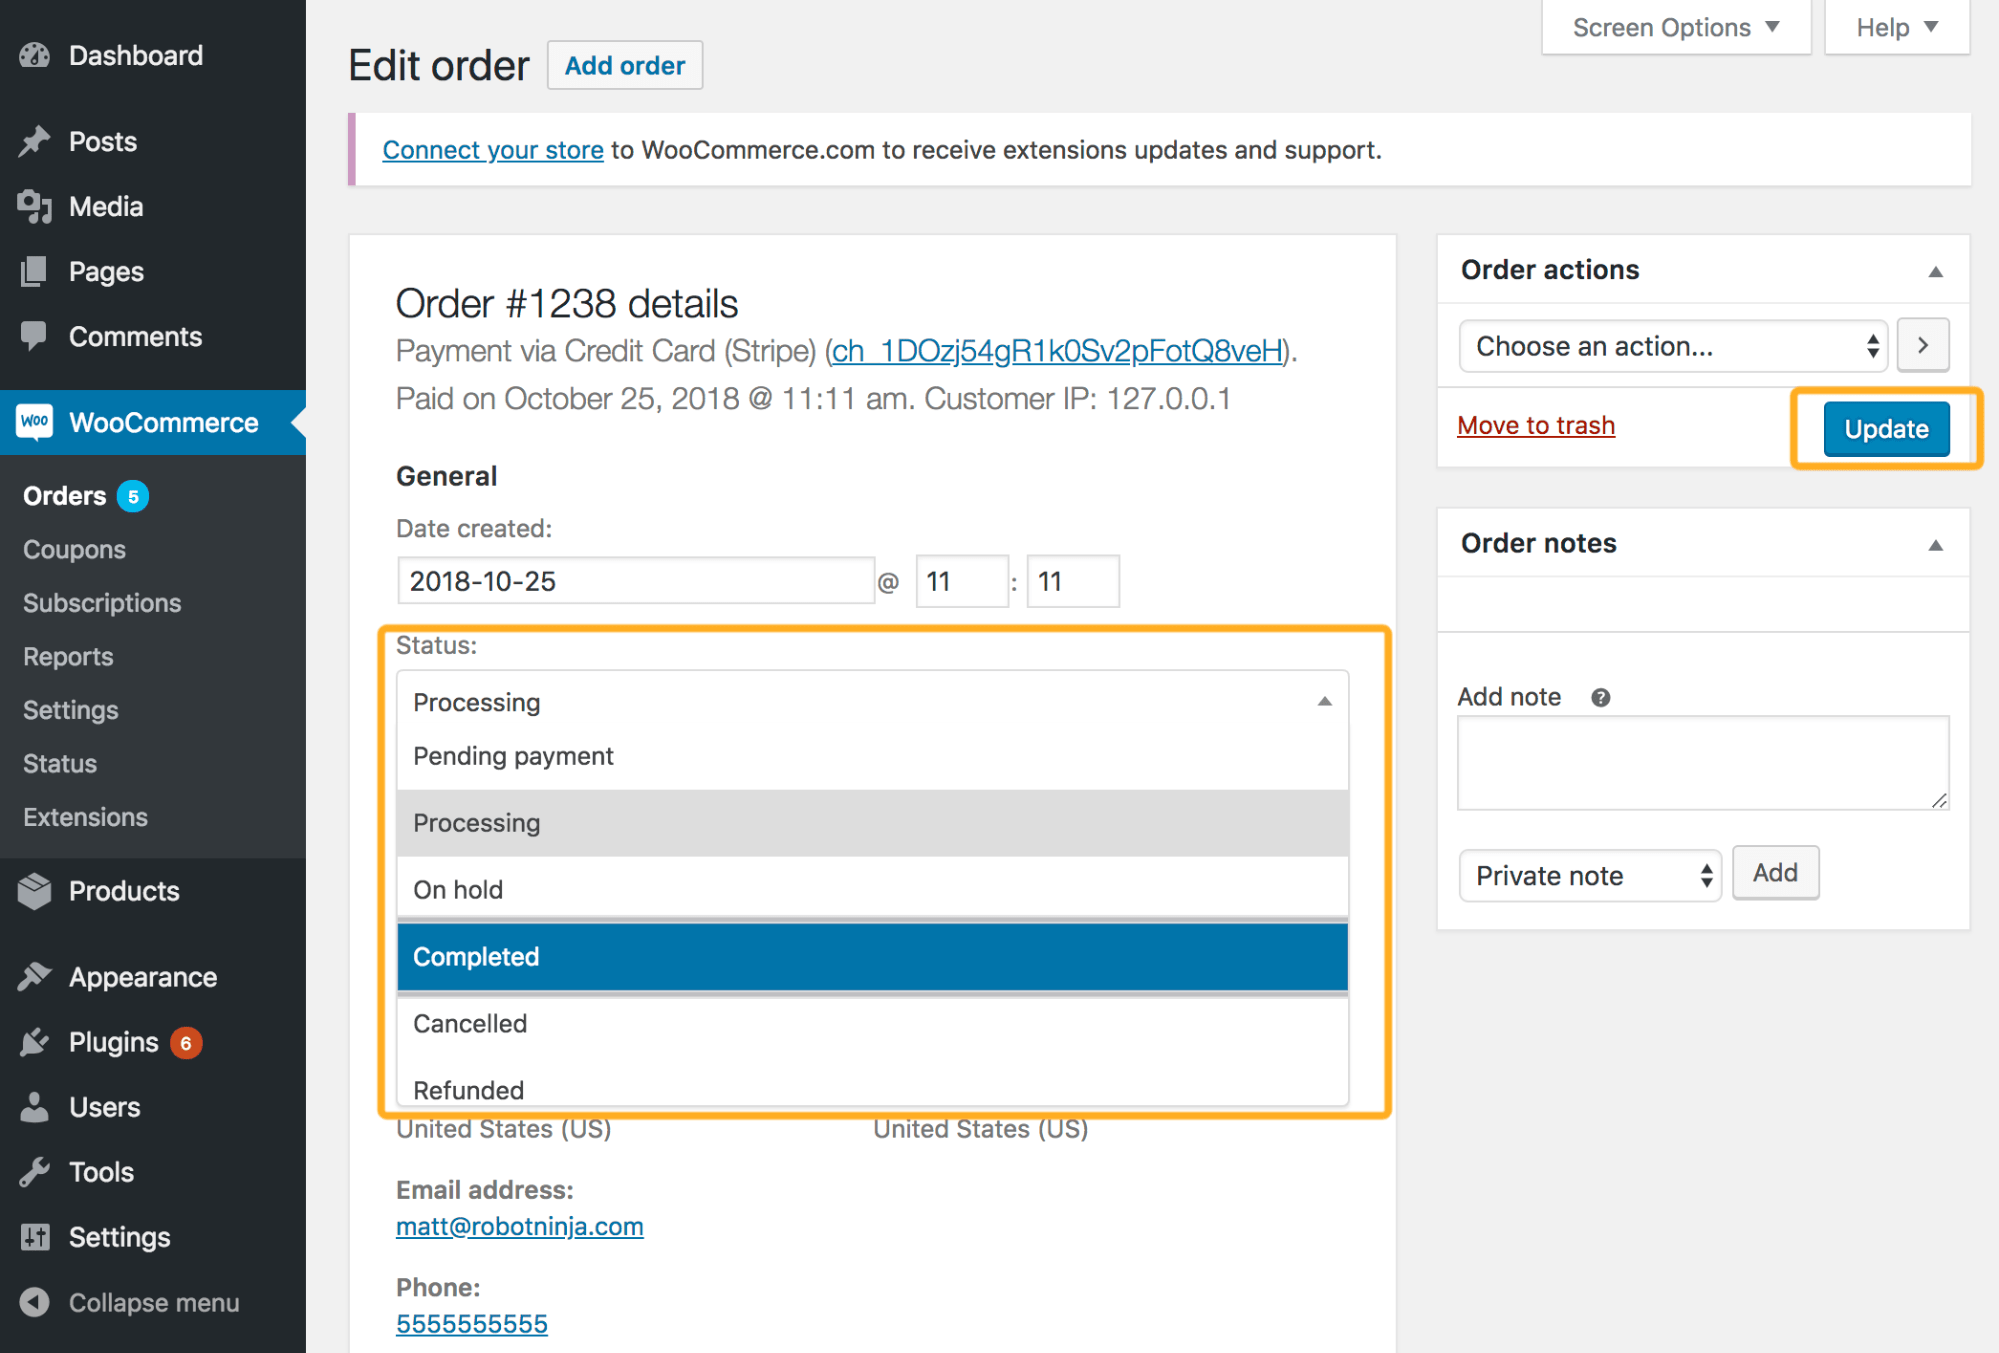
You go to the orders table from the WordPress admin dashboard and then update the order status from “Processing” to “Completed”. After that, click on Update.
Step 5: Refresh the Edit Order page
Because webhooks are being delivered in the background, you should wait for a little while and then reload your Edit Order page to trigger the queued event.
Step 6: Refresh the RequestBin page
Now go back to the RequestBin URL and refresh the RequestBin page.
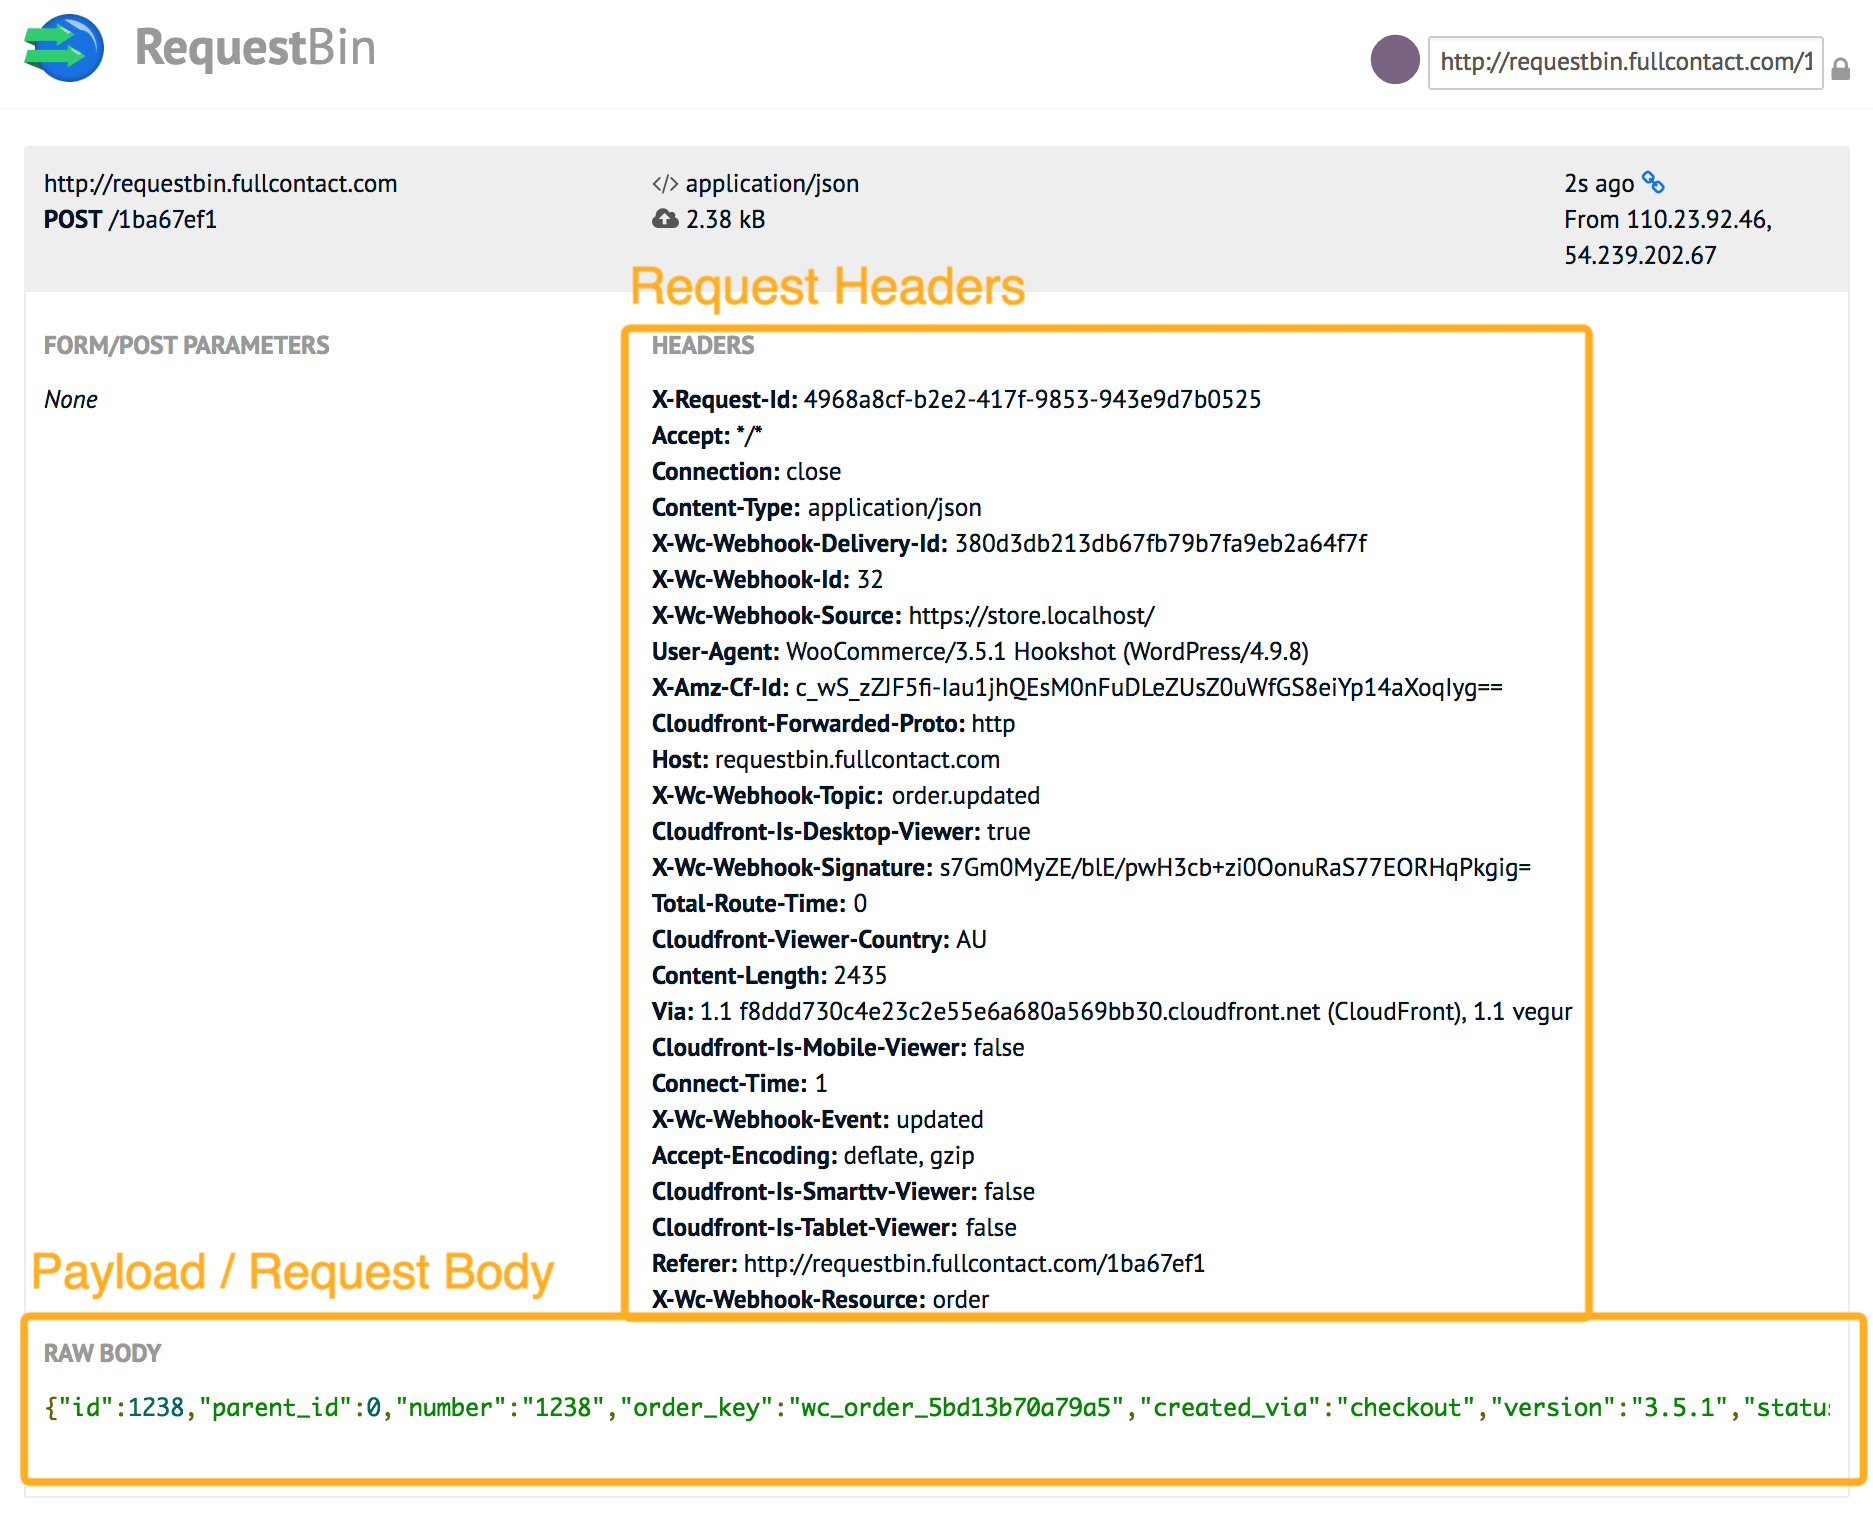
After that, you should see the detailed information of the request that was delivered with the payload data.
Tools for Testing WooCommerce Webhooks
In this part, we’ll introduce to you some prominent request collectors and testing tools.
1. RequestBin
RequestBin is a tool for gathering, analyzing, and debugging HTTP and webhook requests.
RequestBin is excellent at ensuring that webhook delivery is functioning and that the payload data is accurate.
RequestBin allows you to establish a private bin for up to 20 requests that will be held for up to 48 hours. Your requests will no longer be available after that period, which is ideal for testing webhook delivery when you only need a fast or temporary solution.
When a webhook is sent to a request collector URL, you can examine the request headers and body.
Apart from Request Bin, you could also take this free useful request collector into consideration, called Webhook.site .
2. WooCommerce Logs
WooCommerce logs show you how a webhook request appears regarding headers and data delivered, as well as what was returned in the response. It’s a good idea to check here if you’re testing a webhook with an actual delivery URL to make sure it’s working.
Webhook logs can be found under WooCommerce > Status > Logs and you just need to choose the webhook log you want to see from the dropdown.
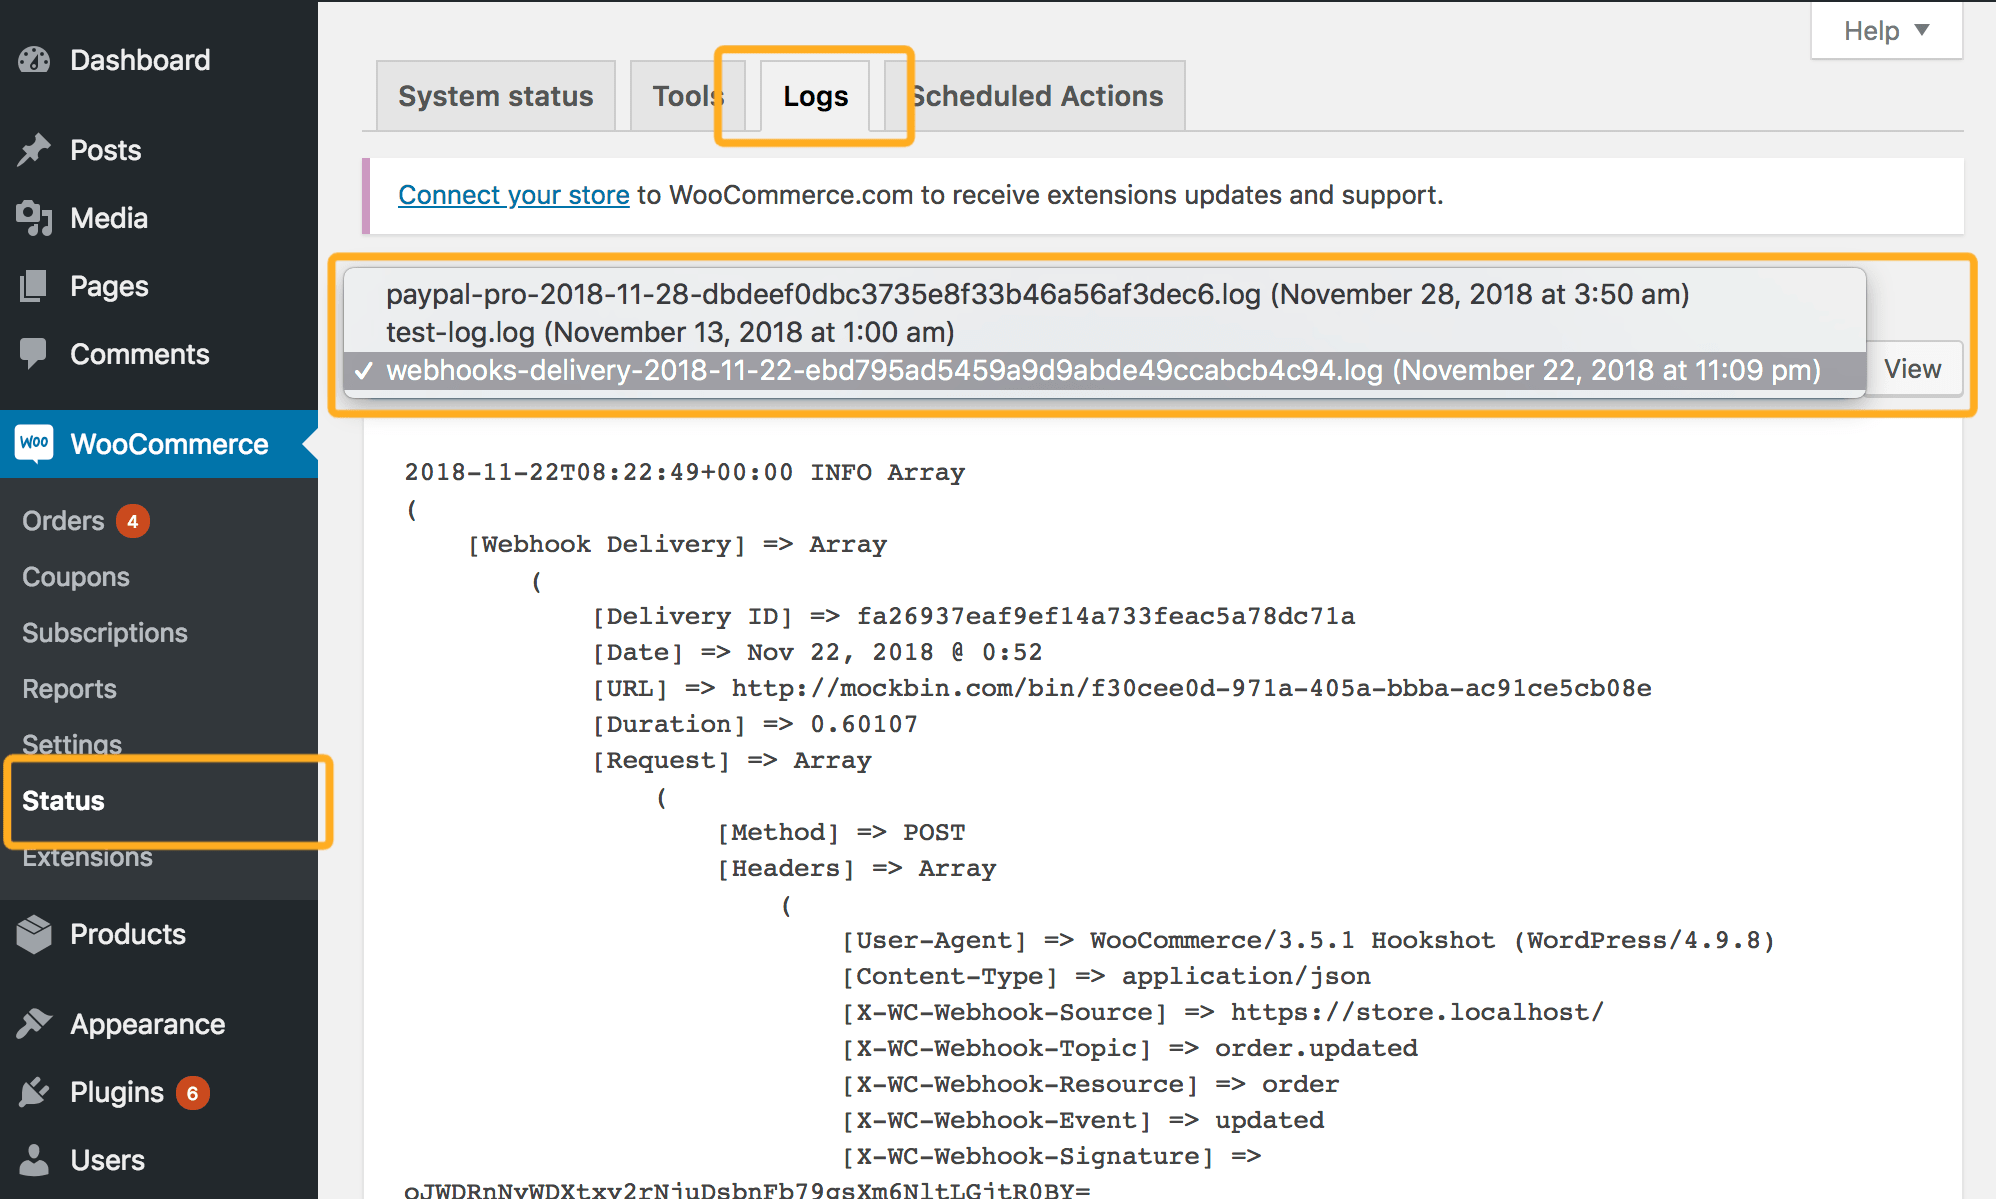
WooCommerce logs will not display the webhook payload data if WP Debug is not set to true in your wp-config.php file, to prevent sensitive logging order, customer, and other post data.
3. Action Scheduler
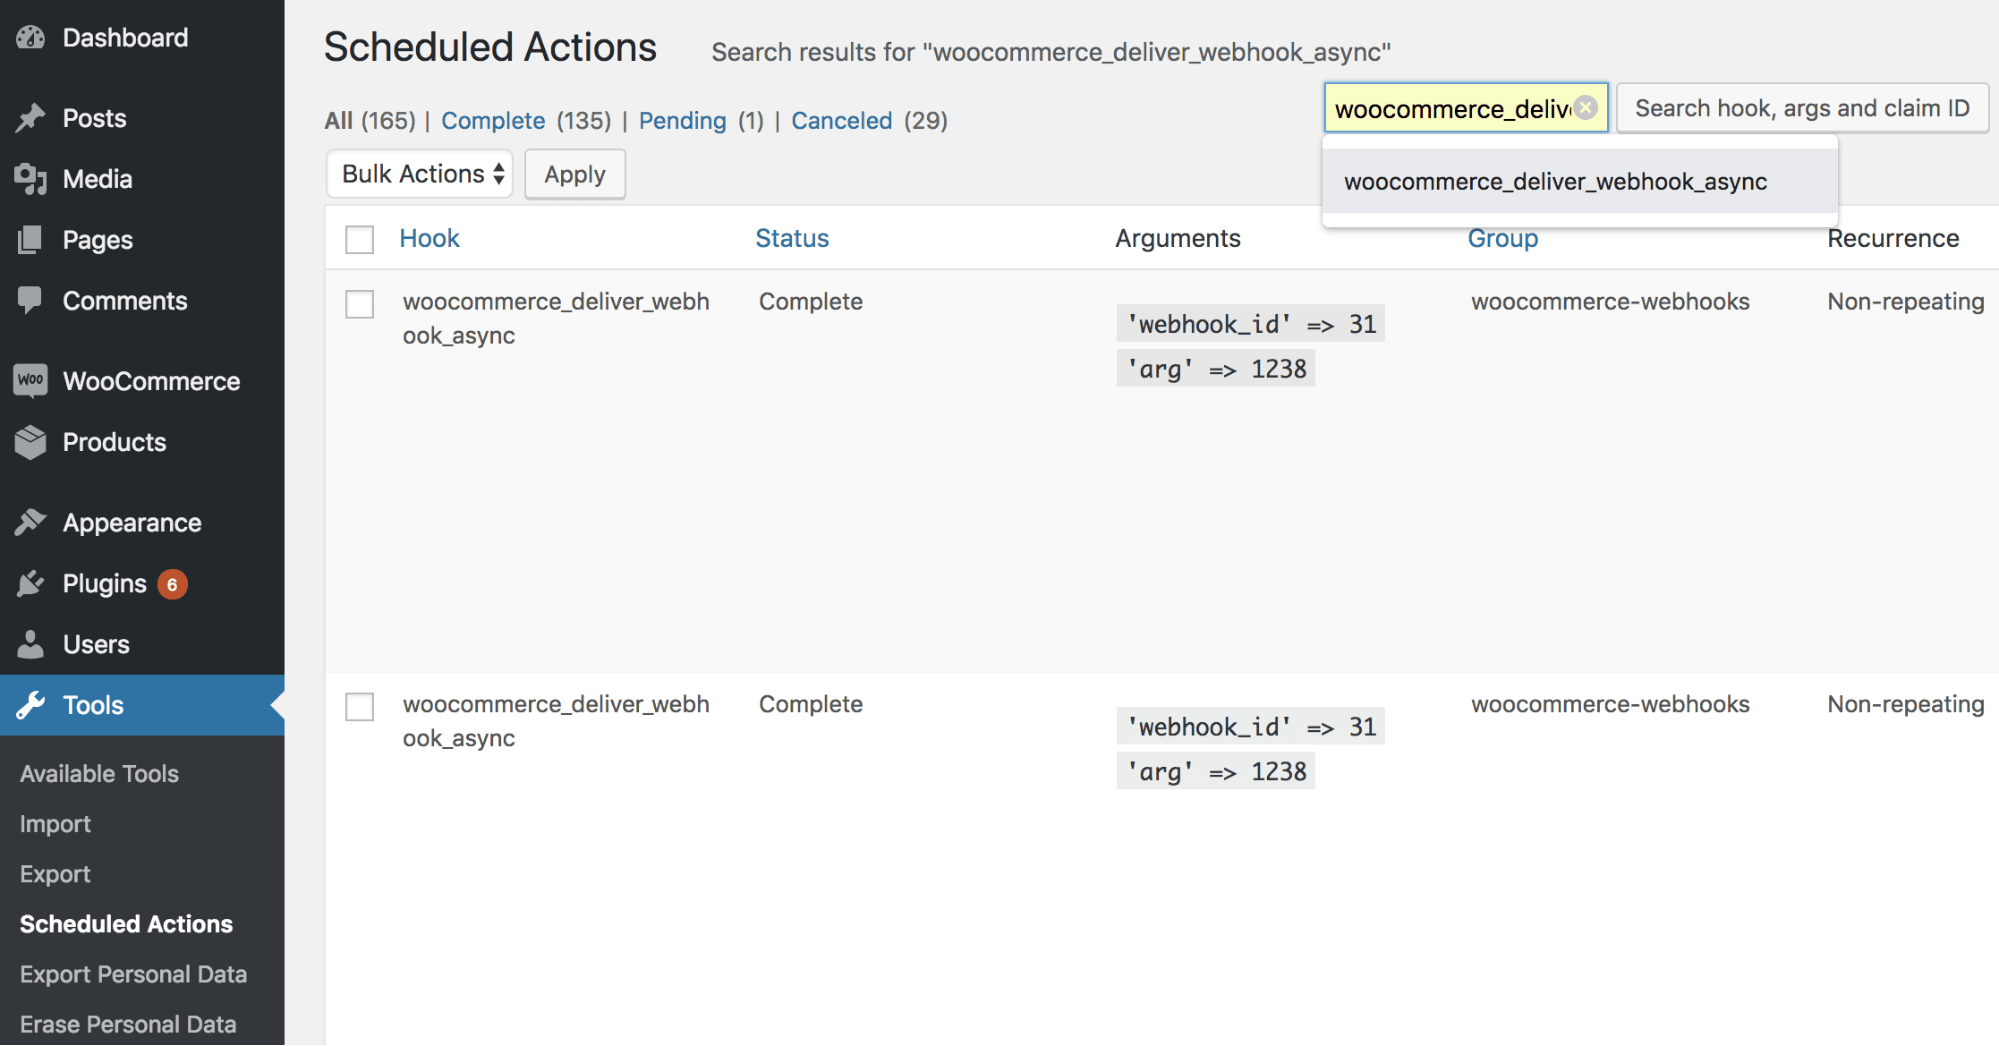
The Action Scheduler has been used to trigger and send webhooks asynchronously (in the background) since WooCommerce 3.5.0.
You can learn all you need to know about the queueing and dispatching of your webhook events using the Action Scheduler, which is now included in WooCommerce. To access your data, navigate to Tools > Scheduled Actions.
Common WooCommerce Webhooks Issues
You could run into problems with your webhook after it’s up and running. There are a variety of reasons for webhooks problems, but here are a few of the most prevalent ones, along with solutions.
Issue 1: Can’t Activate a Webhook
Before enabling the webhook to be activated, WooCommerce will rapidly test the delivery of a newly constructed webhook.
WooCommerce will try to send some data to the delivery URL to verify the connection, and if the request does not return a 200 OK response code, the webhook will be marked as “Disabled.”
WooCommerce will provide a notice with the cause for the error to assist you in troubleshooting:
- Delivery URL cannot be reached: (reason)
- Delivery URL returned response code: (code)
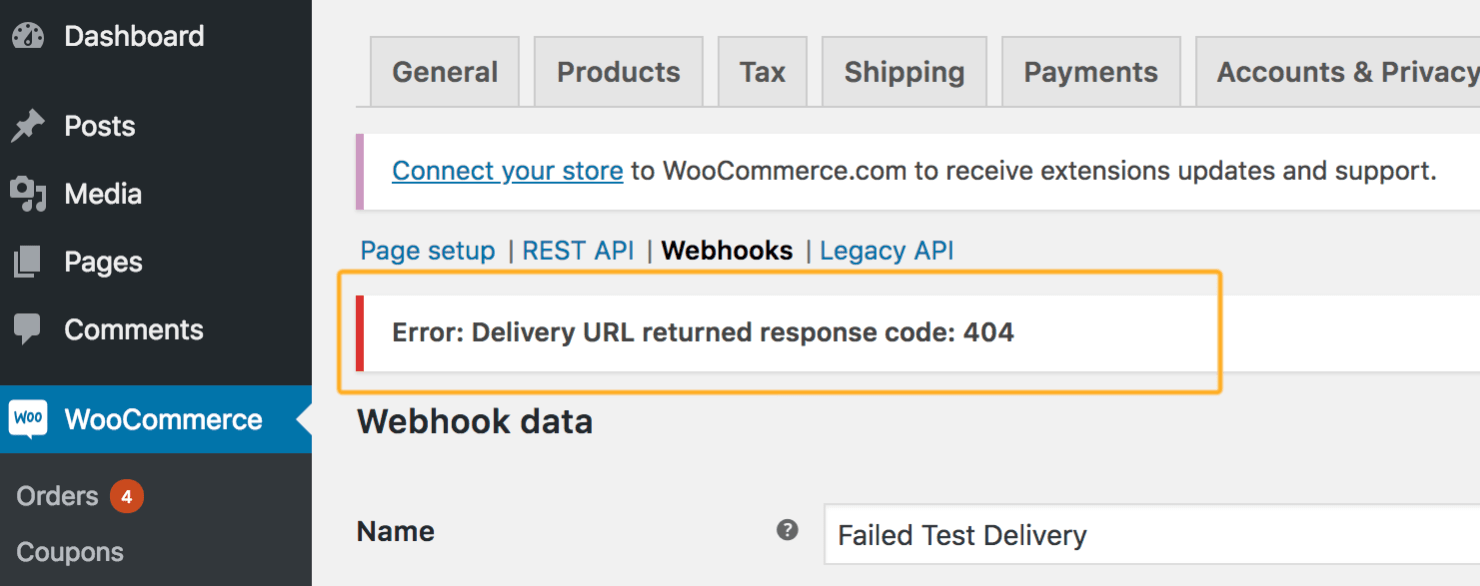
Here are some typical error codes and their explanations if the problem is related to response codes:
- 401 – Bad Request: The reason for this varies depending on the delivery URL, however, if the webhook is referring to a third-party URL, a 401 usually implies the request contains invalid data.
- 403 – Forbidden Access: This indicates that the request to access the given URL was made without authorization. (Firewalls and security plugins are occasionally to blame.)
- 404 - Not Found: The requested URL does not exist.
Issue 2: Webhook Switches to Disabled After Each Test
Any webhooks that report an error will be automatically disabled by WooCommerce. The best method to figure out exactly what the problem was and why it was disabled is to check through your WooCommerce logs.
Every WooCommerce webhook delivery (even successful webhooks) is logged, together with the request and response data, so you should have enough information to figure out what went wrong and why.
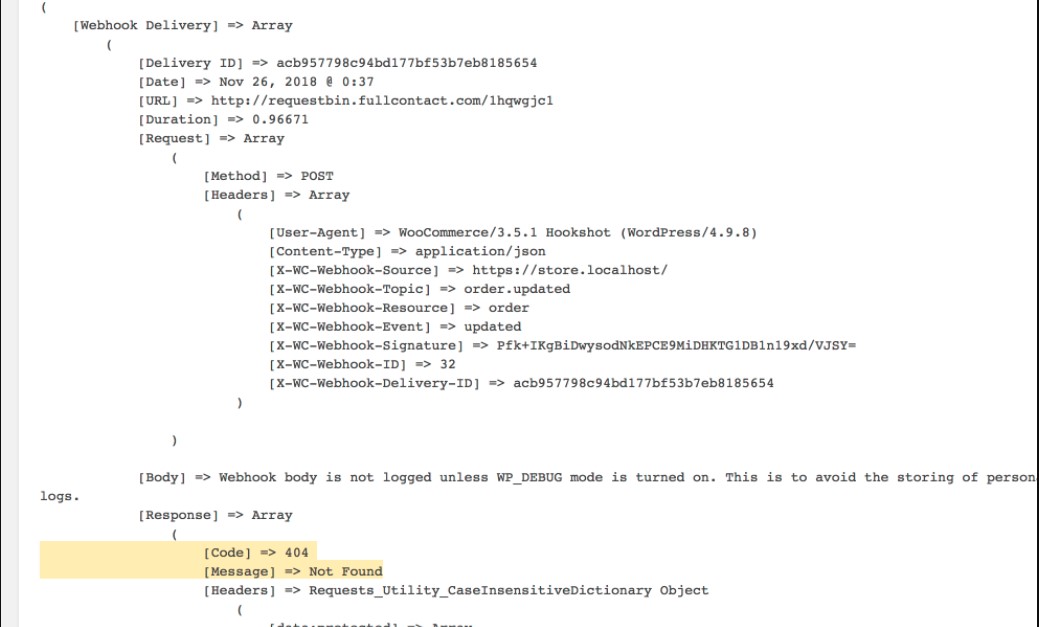
If you’re using a lot of webhooks, the log files may grow fairly big, so searching for webhook IDs or delivery URLs will help you locate the logs you’re looking for faster.
Final Words
Webhooks is a great method to connect your WooCommerce store to other apps. Therefore, it’s of critical importance that you have a knack for utilizing Webhooks.
We hope that you find our detailed WooCommerce Webhooks guide to be useful. If you have any questions, please leave them in the comments section below.
Thank you for reading, and we’ll see you in the next article.


