Add your Google Maps API Key to your Theme on Shopify
In the themes provided by Shopify, there are a lot of them have a map section. Adding a map section to your homepage enables you to show the location of your business. However, in order to add a Google map API to the themes on Shopify, you have to register it first. This is the writing on how to add your Google Maps API key to your theme on Shopify. Please read carefully and follow my instruction step by step.
Related Posts:
- How to register a google maps API key
- How to Use map in Shopify
- How to embed a Google Map on the Jekyll site in Shopify
- Shopify Geo Location Apps
- Add a Google Translate Widget to your Online Store on Shopify
- How to Connect Google Analytics to Shopify
How to add your Google Maps API key to your theme
Step 1: Go to the Online Store.
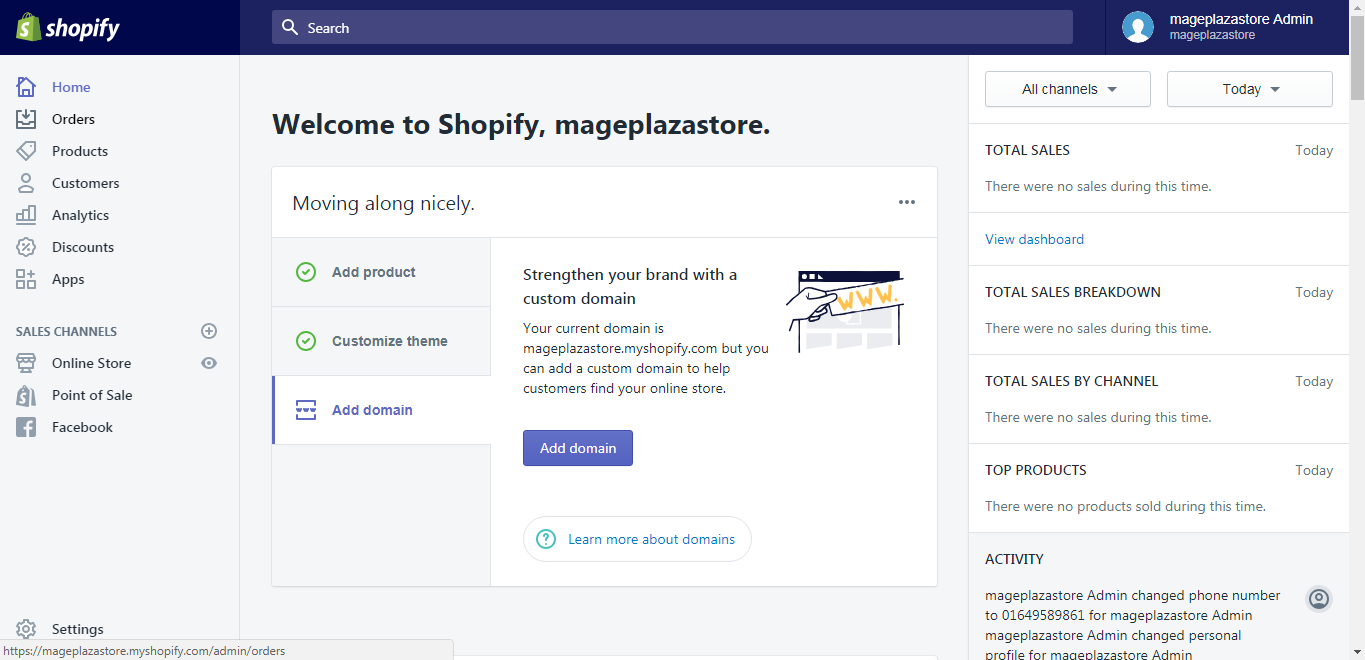
After logging in your Shopify account, from the homepage page, take a look at the left side of the screen, you can see a section called Online Store in the Sales Channels category. Click on Online Store.
Step 2: Choose a theme to customize.
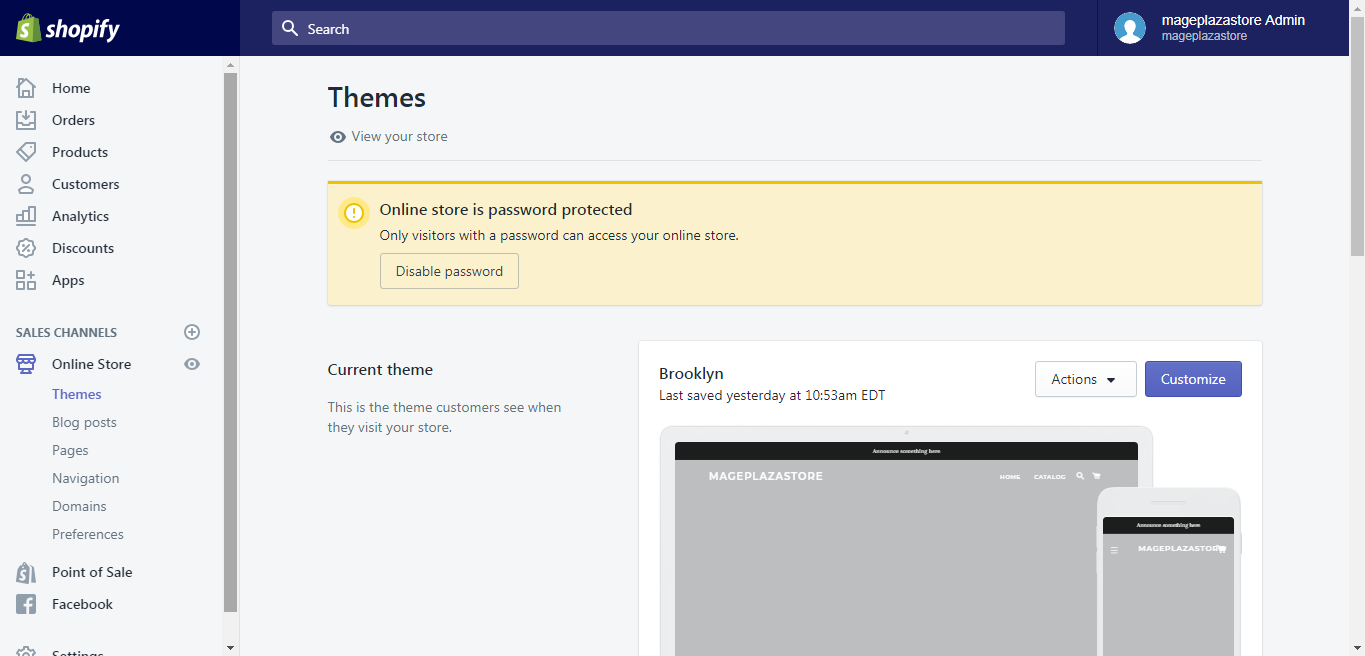
The Shopify system will automatically take you to the Themes page. From the Themes screen, scroll down to see more themes, decide which one would you like and hit Customize.
Step 3: Go to the Sections tab.
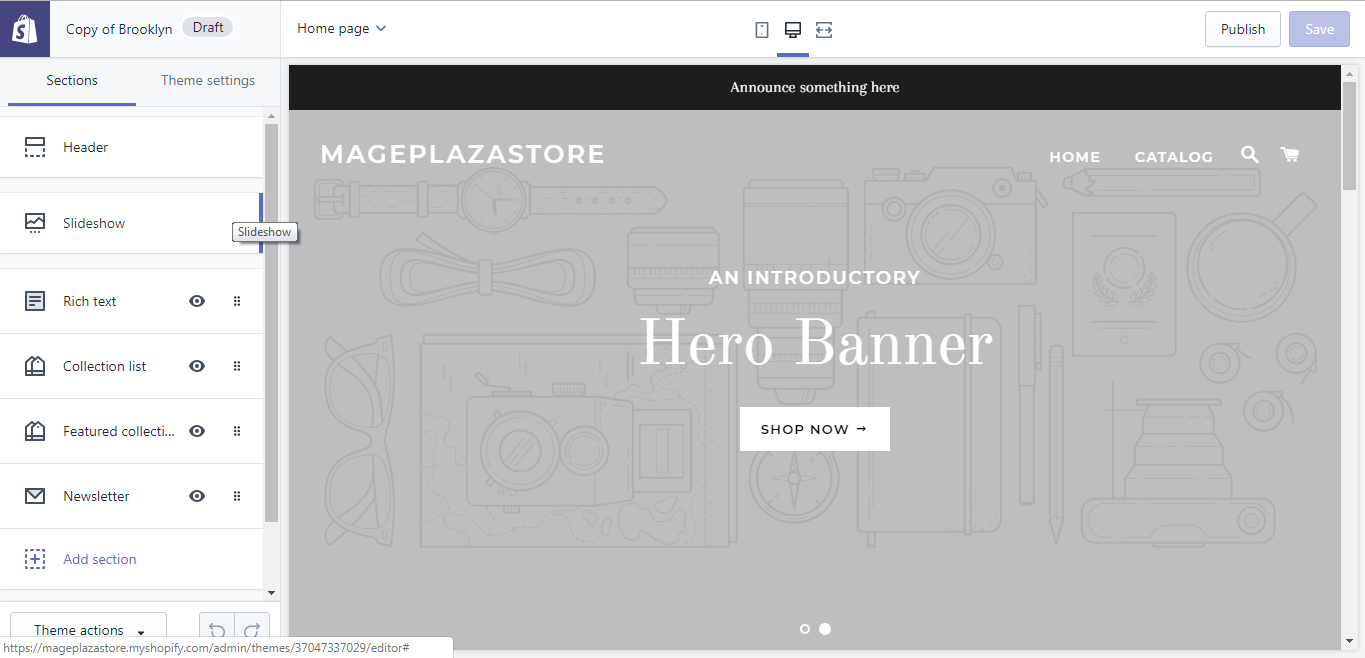
The themes editor toolbar is divided into two tabs, which are Sections and Themes setting. As for our purpose, go to the Sections tab.
Step 4: Add Section.
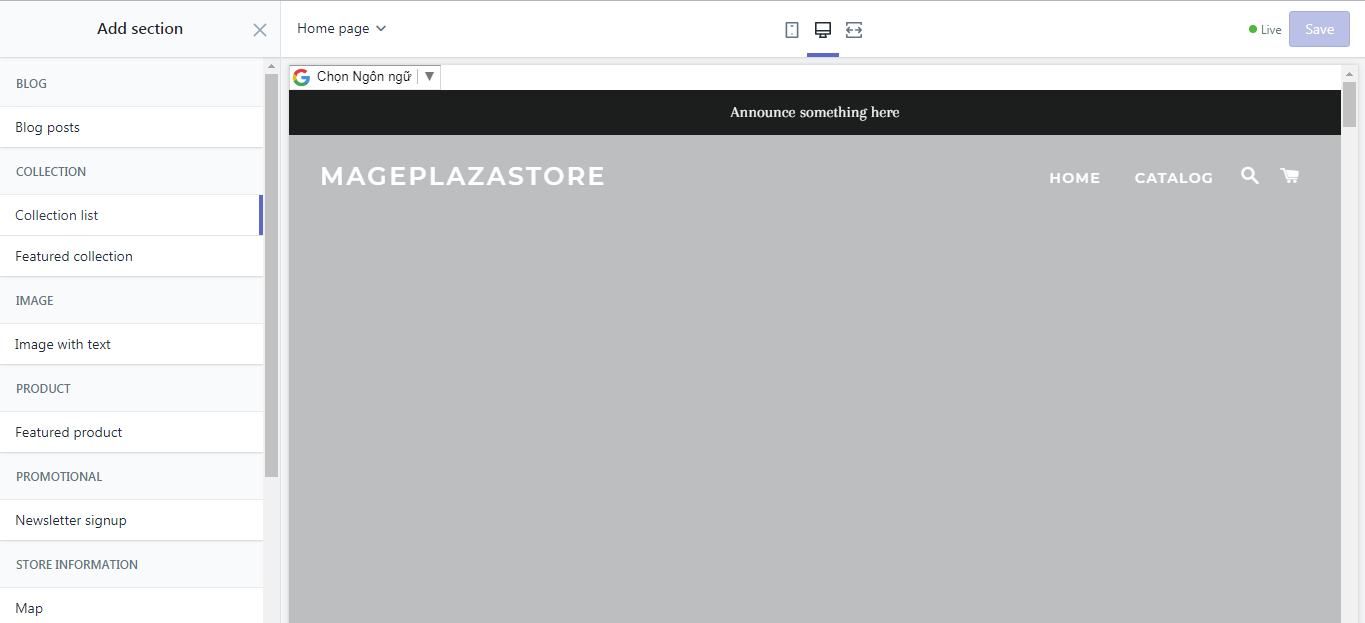
From the Sections tab, scroll down until you see the Add Section button, click on it.

Step 5: Add the Map section.
In the Add Section dialog, you can see the Map section in the Store information area. Click on the Map button to add it.
Step 6: Paste the API link.
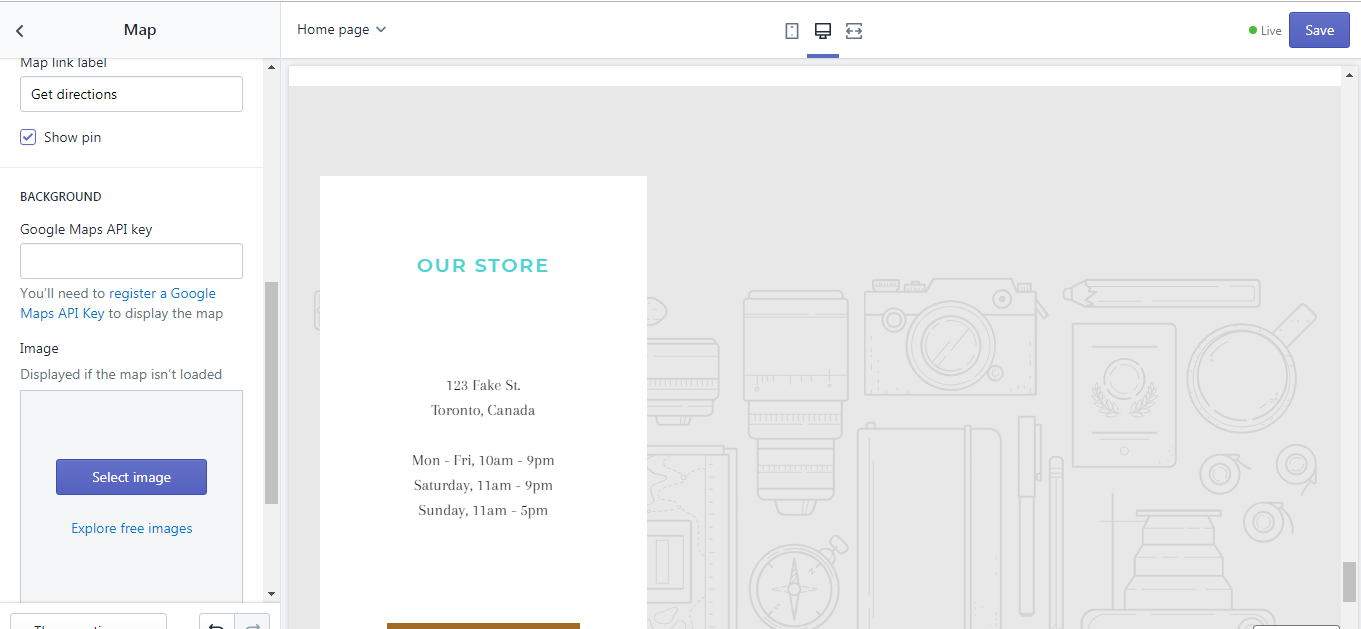
After clicking on the button, you can see the map dialog, scroll down to the Background area, you can see a box called Google Map API key, move your cursor in the box and paste the Google Map API you registered before in it.
Step 7: Save theme.
The final step is quite simple, all you have to do is hit Save.
To add your Google Maps API key to your theme on iPhone (Click here)
-
Step 1: Go to Store. After getting into your Shopify app, at the bottom of your phone screen, there is a
Storebutton, tap on it.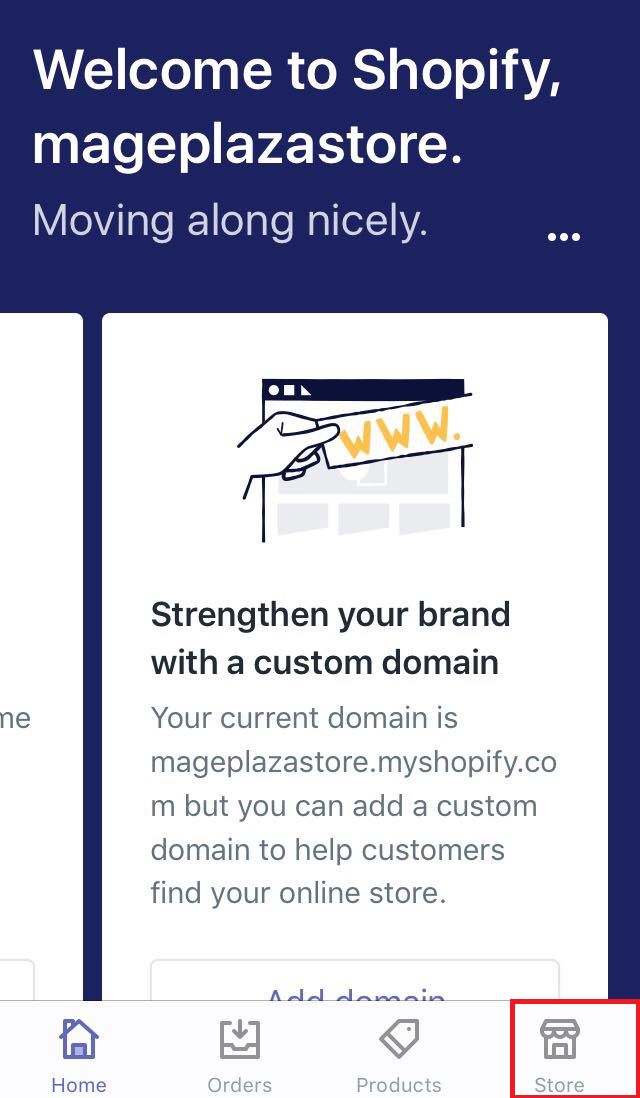
-
Step 2: Go to the Online Store. In the middle of the screen, you can see the Sales channels category, under it is the
Online Storesection, hit that button to continue.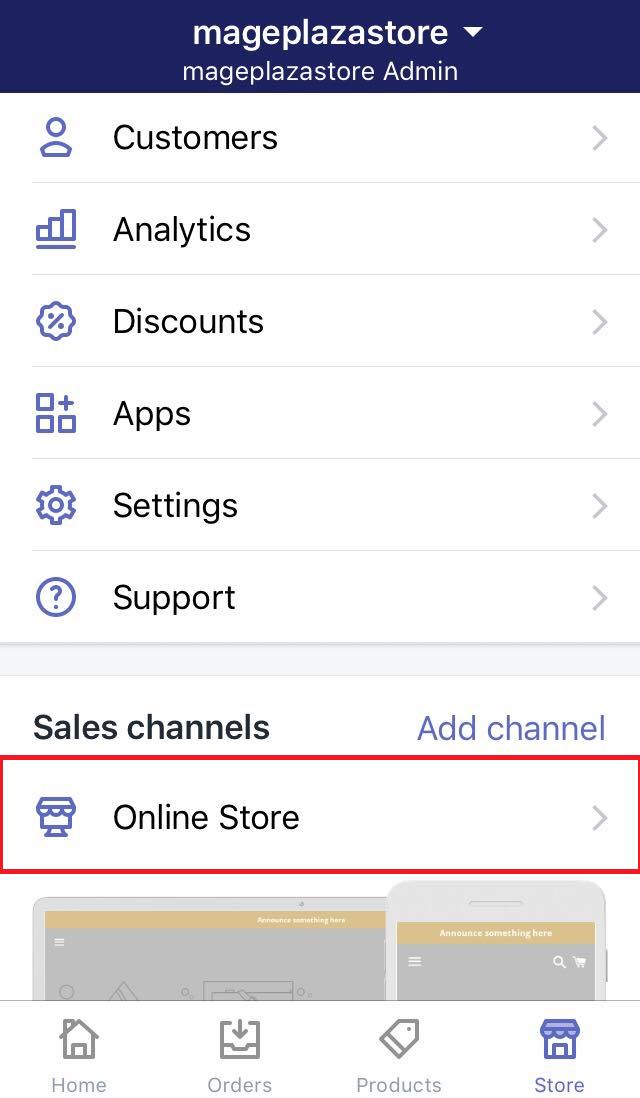
-
Step 3: Tap Manage Themes. After finishing the above step, continue by tapping the
Manage Themesbutton.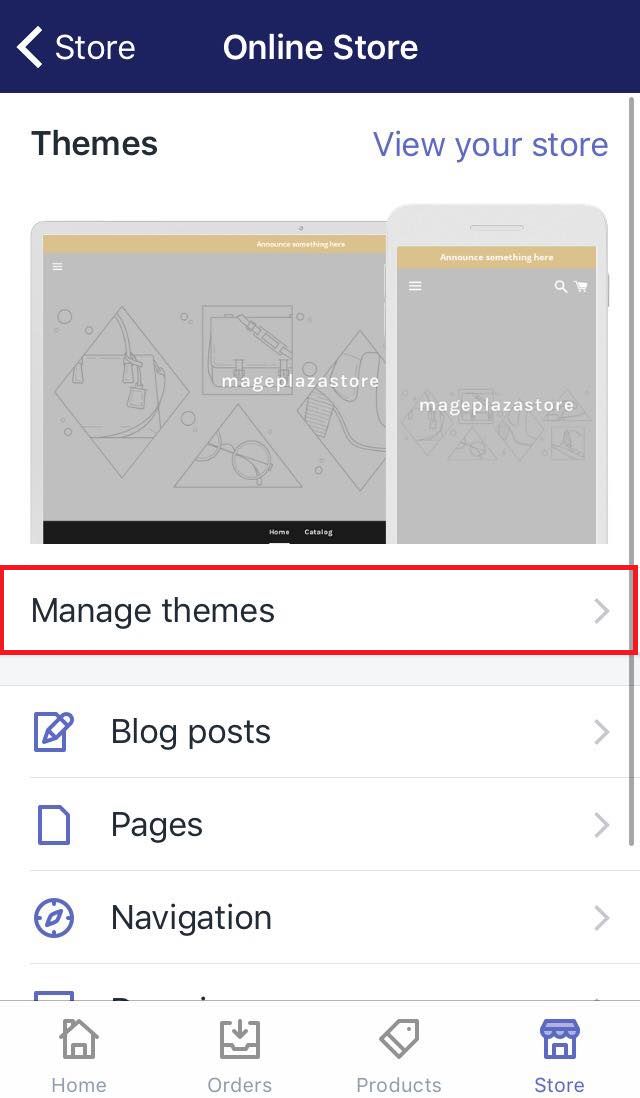
-
Step 4: Choose a theme to customize. From the Themes screen, scroll down to see more themes, decide the themes you want to make changes to and click
Customize.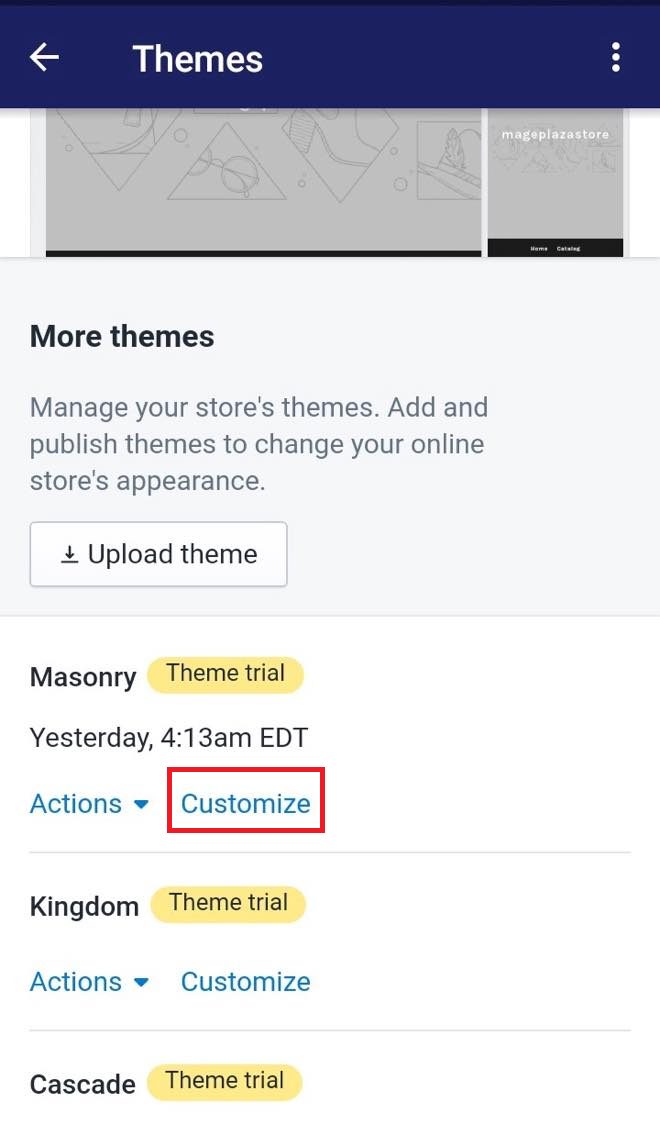
-
Step 5: Go to the Sections tab. The themes editor toolbar is divided into two different tabs, however, for our purpose, go to the
Sectionstab.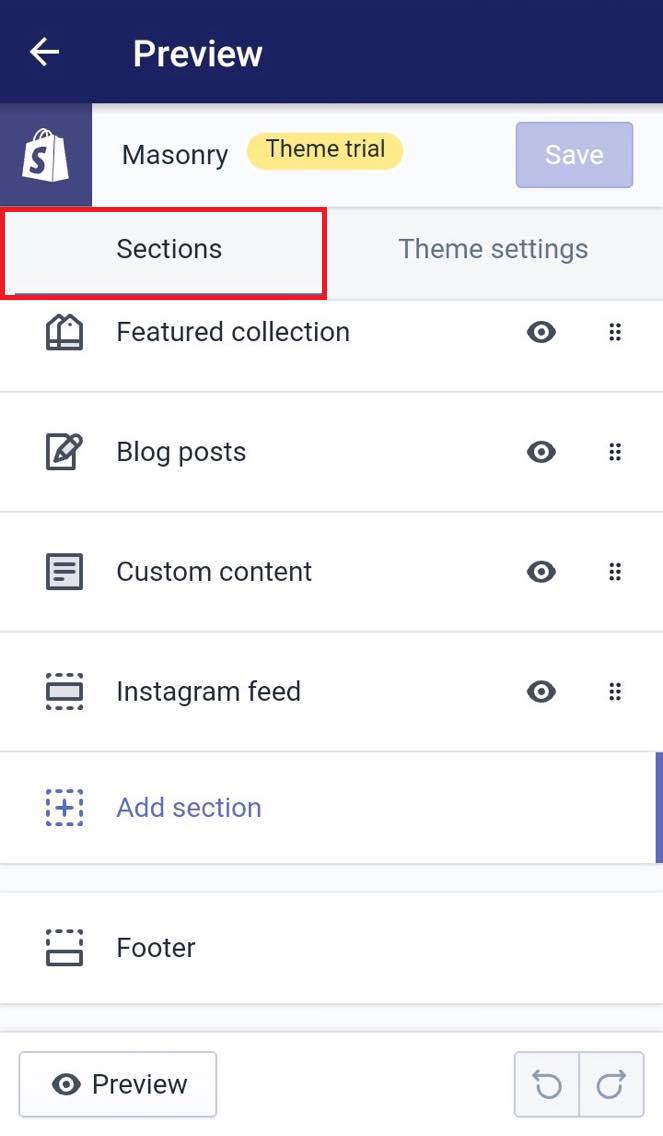
-
Step 6: Add section. From the Sections tab, scroll down until you see the
Add Sectionbutton, click on it.
-
Step 7: Add the Map section. In the Add Section dialog, you can see the Map section in the Store information area. Click on the
Mapbutton to add it.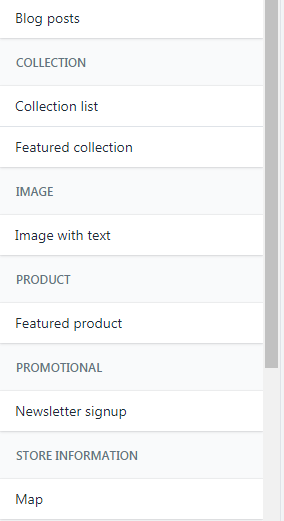
-
Step 8: Paste the API link. After clicking on the button, you can see the map dialog, scroll down to the Background area, you can see a box called
Google Map API key, move your cursor in the box and paste the Google Map API you registered before in it.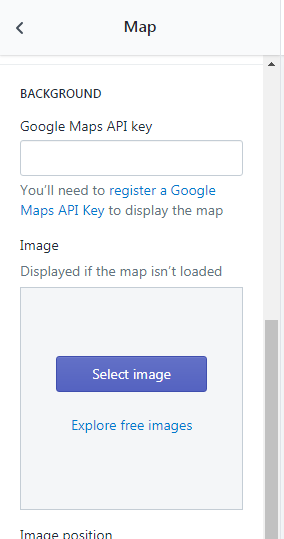
-
Step 9: Saving. The final step is quite simple, all you have to do is tap the
Savebutton.
To add your Google Maps API key to your theme on Android (Click here)
-
Step 1: Go to Store. After getting into your Shopify app, at the bottom of your phone screen, there is a
Storebutton, tap on it. -
Step 2: Go to the Online Store. In the middle of the screen, you can see the Sales channels category, under it is the
Online Storesection, hit that button to continue. -
Step 3: Tap Manage Themes. After finishing the above step, continue by tapping the
Manage Themesbutton. -
Step 4: Choose a theme to customize. From the Themes screen, scroll down to see more themes, decide the themes you want to make changes to and click
Customize. -
Step 5: Go to the Sections tab. The themes editor toolbar is divided into two different tabs, however, for our purpose, go to the
Sectionstab. -
Step 6: Add section. From the Sections tab, scroll down until you see the
Add Sectionbutton, click on it. -
Step 7: Add the Map section. In the Add Section dialog, you can see the Map section in the Store information area. Click on the
Mapbutton to add it. -
Step 8: Paste the API link. After clicking on the button, you can see the map dialog, scroll down to the Background area, you can see a box called
Google Map API key, move your cursor in the box and paste the Google Map API you registered before in it. -
Step 9: Saving. The final step is quite simple, all you have to do is tap the
Savebutton.
Conclusion
Above is my writing on how to add your Google Maps API key to your theme on Shopify. I hope you have a great time reading and applying it while running your store.


