3 Steps to Add a Logo to your Email Templates on Shopify
Logo plays an unquestionable significant role in brand recognition. Logos are signs that give the audience a brief concise statement about a brand, such as a field it’s working on. By adding a logo to your email templates, customers can identify your store in an instance and get your points in a glance without having to read the whole message.
Related Posts:
- Add a Logo to the Checkout Page on Shopify
- Add a Logo to my Shopify Store on All Pages
- Add a Logo to Shopify email
Step 1: Go to Notifications
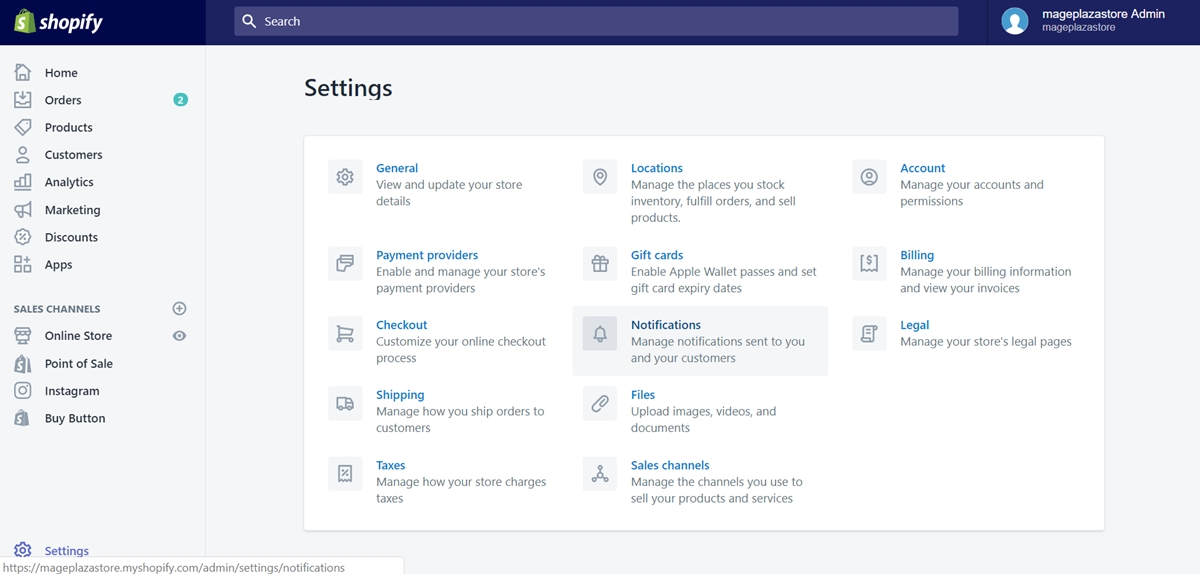
From the Shopify admin interface, which you may get accustomed, you can see the Settings option at the bottom left corner. Let’s click on it!
You will be directed to Settings section, with a lot of aspects that you can configure to improve your store. In here, you need to find and select the Notifications setting. It’s visualized with a bell icon.

Step 2: Click Customize
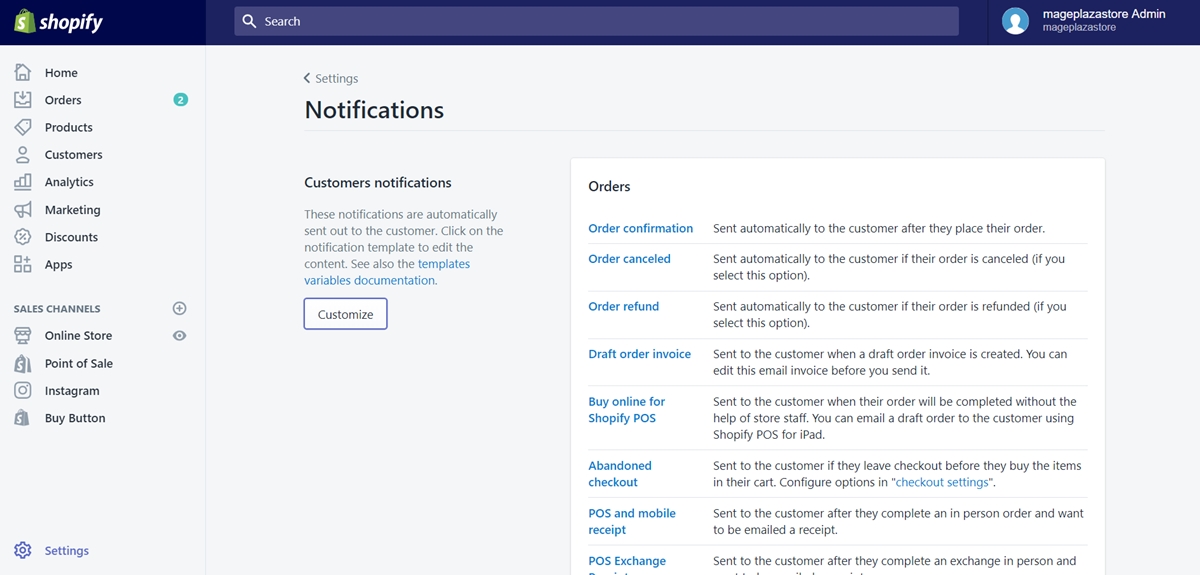
In the Customers notifications area located right on top in Notifications section, you can see the Customize button to click on.

Step 3: Upload your logo
After that, the system will bring you into the Customize email templates section.
In the middle of the screen, there are some examples of the notification templates that Shopify will send to your customers via email. You can switch between templates by clicking on the arrow button on the top right corner of the template.
On the right side of the screen, it’s the Logo area. You can adjust the size of your logo by putting your desired size (in pixel) in the blank field. In order to add your logo, click on Choose file. A new window will appear to help you select your logo file from your desktop’s storage.
Done!
To add a logo to your email templates on iPhone (Click here)
- Step 1: Go to Store, tap Settings
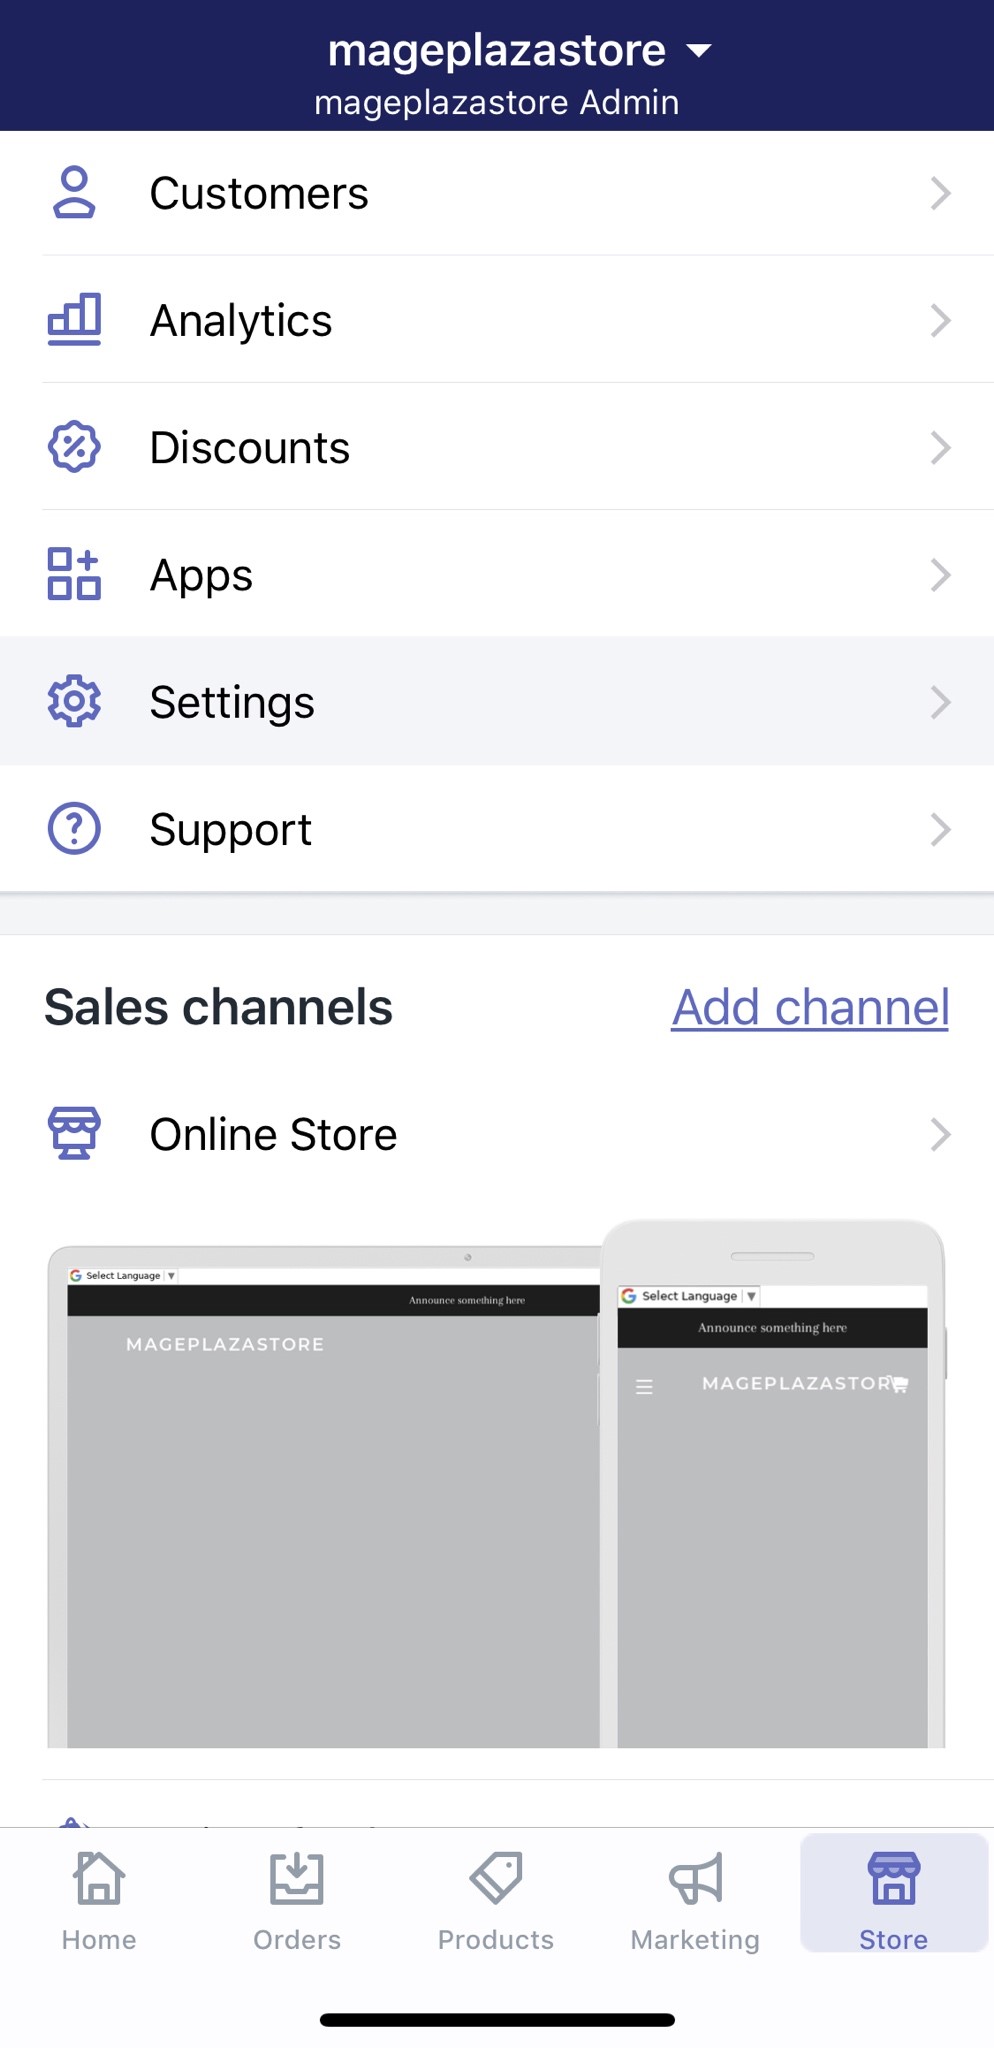
After opening the Shopify app on your iPhone, look at the bottom bar on your screen and tap on Store.

- Step 2: Tap Notification under Store settings
Under the list with several Store settings regarding store management, tap on Notification.
- Step 3: Tap Customize
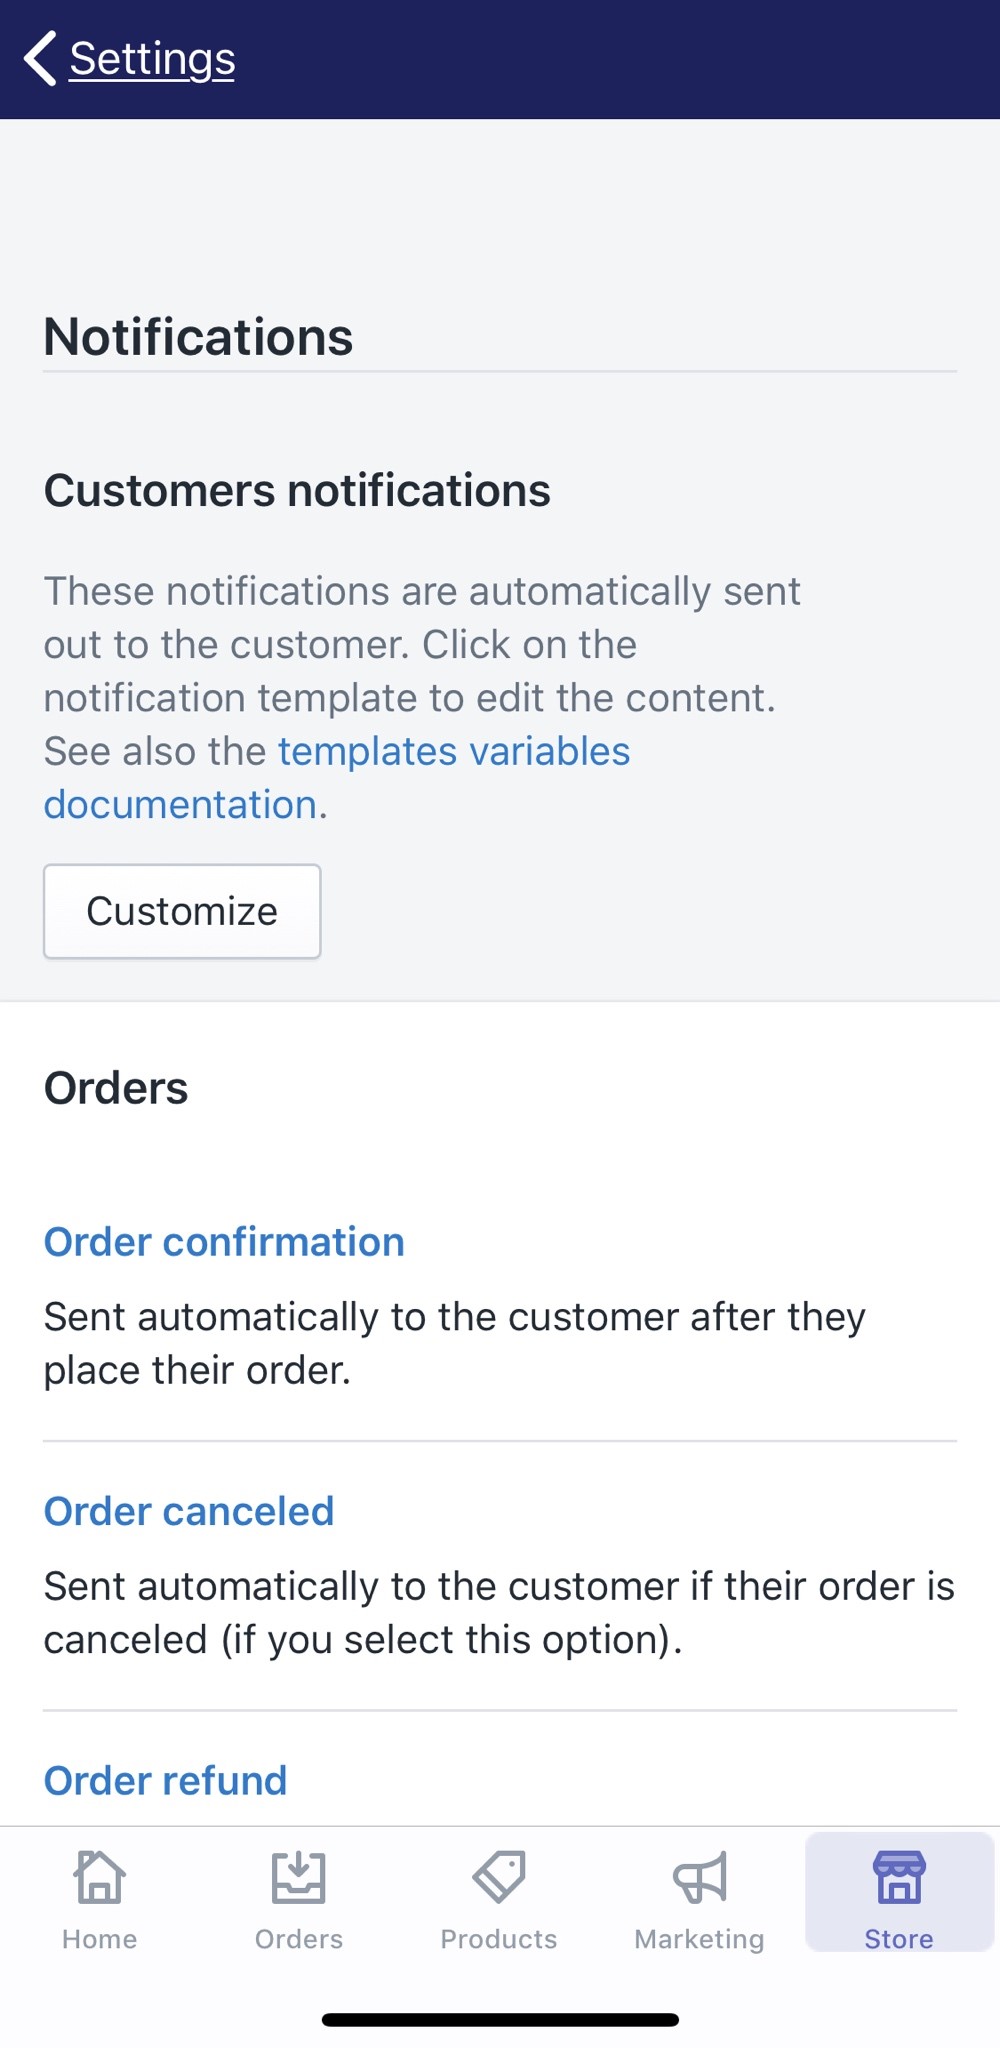
After access the Notification section, you will see the Customers notifications area on top of the list.
Tap on the Customize button.

- Step 4: Upload your logo
Once you do, the screen will show you the customer notification forms that Shopify sends to your customers.
You need to swipe down to the bottom of the page to continue our task. When you reach the bottom, you will meet the Logo area.
Tap Choose file button and select your logo file in your device to upload.
Done!
To add a logo to your email templates on Android (Click here)
- Step 1: Go to Store, tap Settings
After opening the Shopify app on your Android device, look at the bottom bar on your screen and tap on Store.
- Step 2: Tap Notification under Store settings
Under the list with several Store settings regarding store management, tap on Notification.
- Step 3: Tap Customize
After access the Notification section, you will see the Customers notifications area on top of the list.
Tap on the Customize button.
- Step 4: Upload your logo
Once you do, the screen will show you the customer notification forms that Shopify sends to your customers.
You need to swipe down to the bottom of the page to continue our task. When you reach the bottom, you will meet the Logo area.
Tap Choose file button and select your logo file in your device to upload.
Done!
Summary
Since a long time ago, tribes and nations have been using their symbols and flags to give others a statement of authority. Today, cooperations from big to small use logos to mark their identical businesses.
Therefore, let’s add a logo to your email templates and tell customers what your business truly is!


