Choose your Label Printer on Shopify
Choosing the label printer is an important stage because without it you cannot buy shipping labels for your store. You can use various devices such as desktop, iPhone, or Android to select the label printer that you want to use. But to achieve the highest efficiency, Shopify advise you to use Shopify supported hardware when printing your shipping labels.
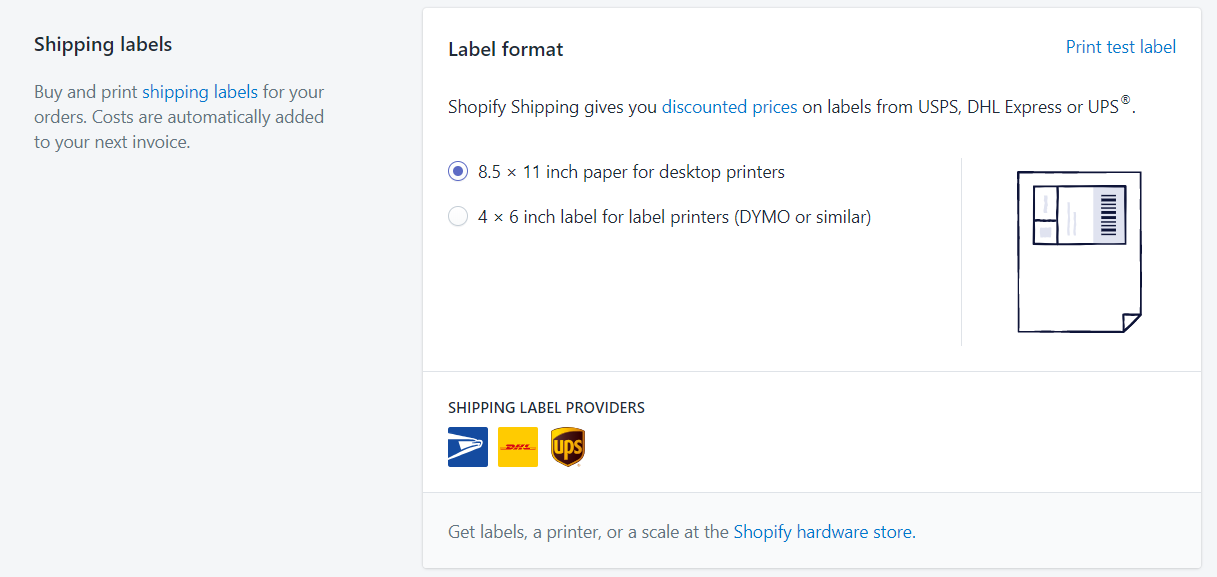
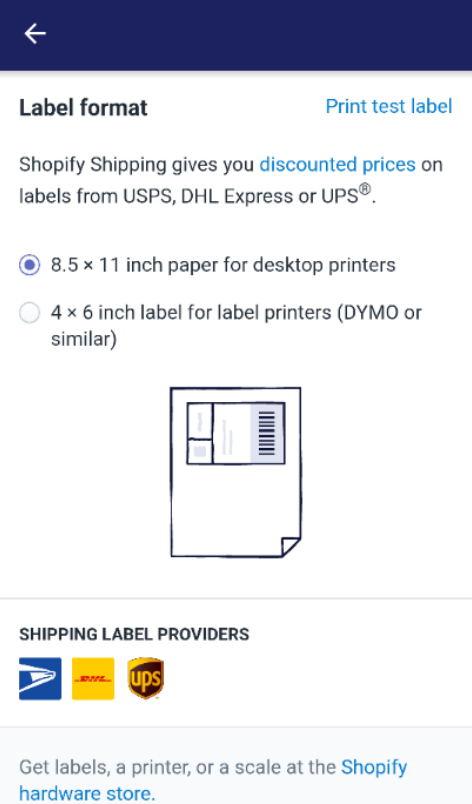
Some labels can only be printed by a specific type of printer, because of this reason, before printing a label, you need to make sure that the model of printer that you choose matches the one that you have. On Shopify there are two Label formats for you to choose from:
- 8.5 × 11 inch paper for desktop printers: You can select this section if you want to print your labels using a desktop printer, you can also choose this to print two labels per page by using multiple shipping labels.
- 4 × 6 inch label for label printers: You can select this section if you want to use a label printer such as Dymo, Rollo, or other to print your labels.
I help you understand more about the chosen label printer process; I have prepared some steps on how to choose your label printer on Desktop, iPhone, and Android.
To choose your label printer on shopify
Step 1: Choose Shipping
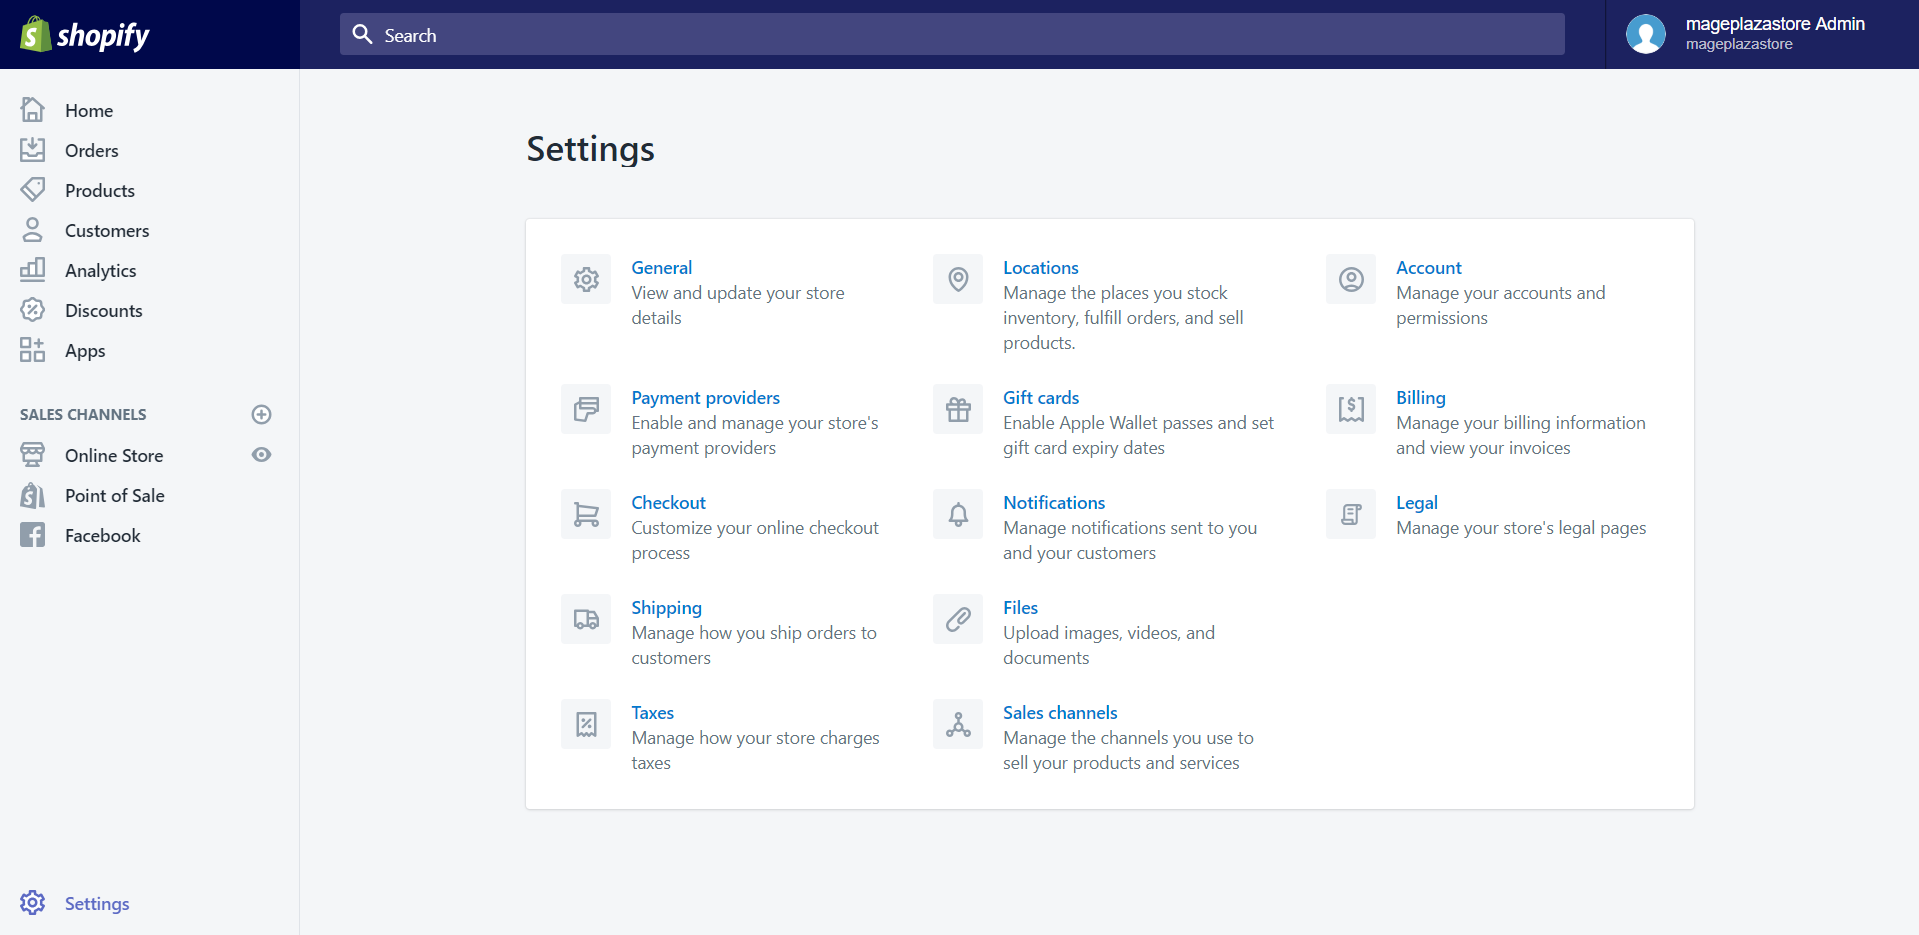
The first thing you will have to do is going to this link and logging into your Shopify account. You will see the Setting section in the bottom left corner of the screen. In this section, choose Shipping which is between the Checkout and Taxes section.

Step 2: Select Label format
In the Shipping detail screen, scroll down to find the Shipping labels section. In here you can choose the Label format which suitable with the printer you will use.

To choose label printer on iPhone (Click here)
-
Step 1: Choose Setting The first thing you will have to do is opening the
Shopify appon your phone. Afterward, you tapStore. In the store section, tap on theSettingbutton. -
Step 2: Tap Shipping In the second step, scroll down to the
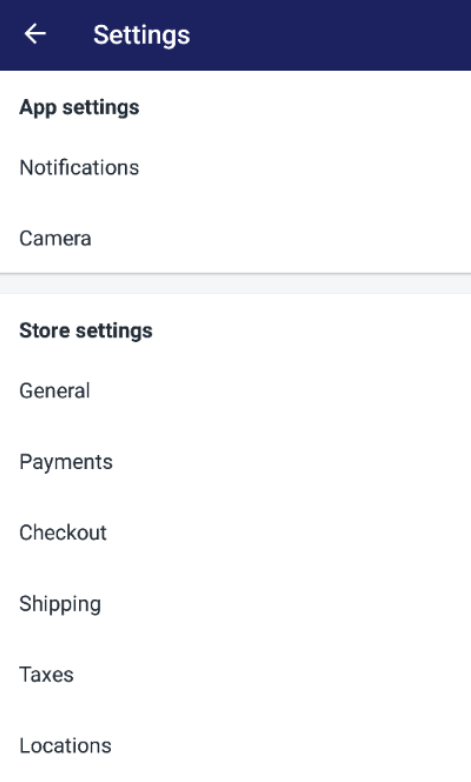
Store settingssection. Under that section, tapShippingwhich is between theCheckoutandTaxesoption. -
Step 3: Select Label format In the
Shipping detailscreen, scroll down to find theShipping labelssection. In here you can choose theLabel formatwhich suitable with the printer you will use.
To choose label printer on Android (Click here)
-
Step 1: Choose Setting The first thing you will have to do is opening the
Shopify appon your phone. Afterward, you tapStore. In the store section, tap on theSettingbutton.
-
Step 2: Tap Shipping In the second step, scroll down to the
Store settingssection. Under that section, tapShippingwhich is between theCheckoutandTaxesoption.
-
Step 3: Select Label format In the
Shipping detailscreen, scroll down to find theShipping labelssection. In here you can choose theLabel formatwhich suitable with the printer you will use.
Conclusion
Above is the brief instruction which I have prepared for you on how to choose your label printer on Shopify. I hope that this tutorial will become helpful you and your crew. To read more posts about adding and managing domains you can go to our website.
Related Posts:


