How to Configure Your Default Package Dimensions on Shopify
Nowadays, many delivery companies use the shipping rates based on the dimensional or volumetric weight of your shipments. It is calculated with a formula using your default shipment dimensions. If your store uses only one box size to ship the orders, your default shipment dimensions would give you the accurate shipping rates. Otherwise, you should get another app to do the job for you for more accuracy.
This is the writing that gives you the basic guideline on how to configure your default package dimensions on Shopify. Please spend some time reading and following my instruction carefully.
Related Posts:
- How to Add a Package Type on Shopify
- How to Edit or Delete a Package Type on Shopify
- How to Create a New Shipping Zone on Shopify
- How to Add Price-Based Manual Rates
How to configure your default package dimensions
Step 1: Go to Settings > Shipping
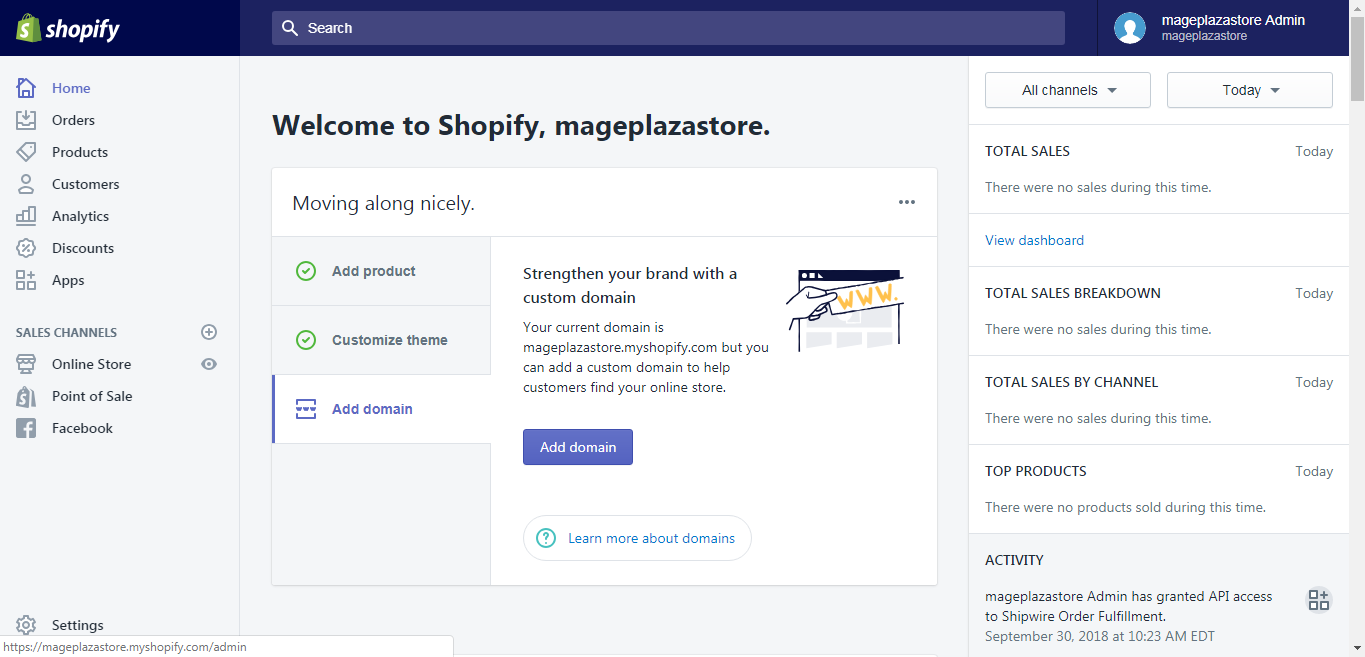
After you logged into your Shopify account, take a look at the bottom of the admin screen, you can see there is a button called Settings with the gear sign next to it. Click on Settings.
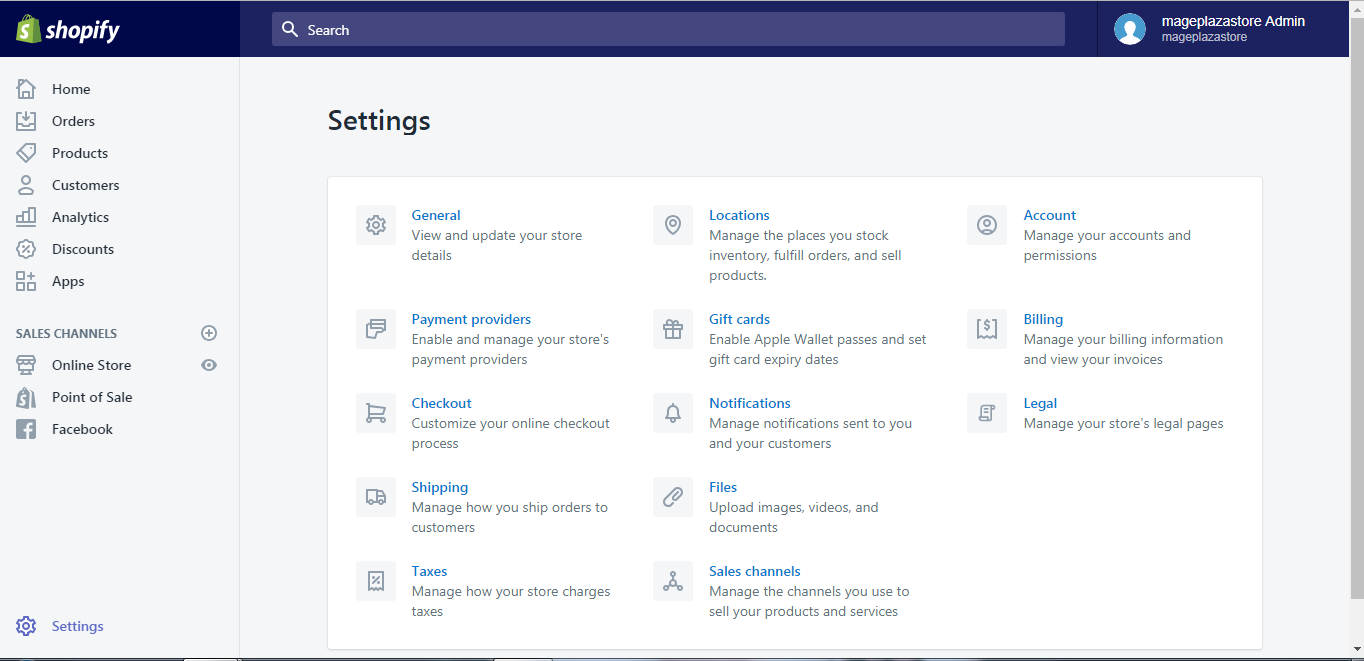
After that, you will be taken to the Settings pages. There are a lot of choices on the page, however, for our purpose, please hit Shipping.
Step 2: Edit the package
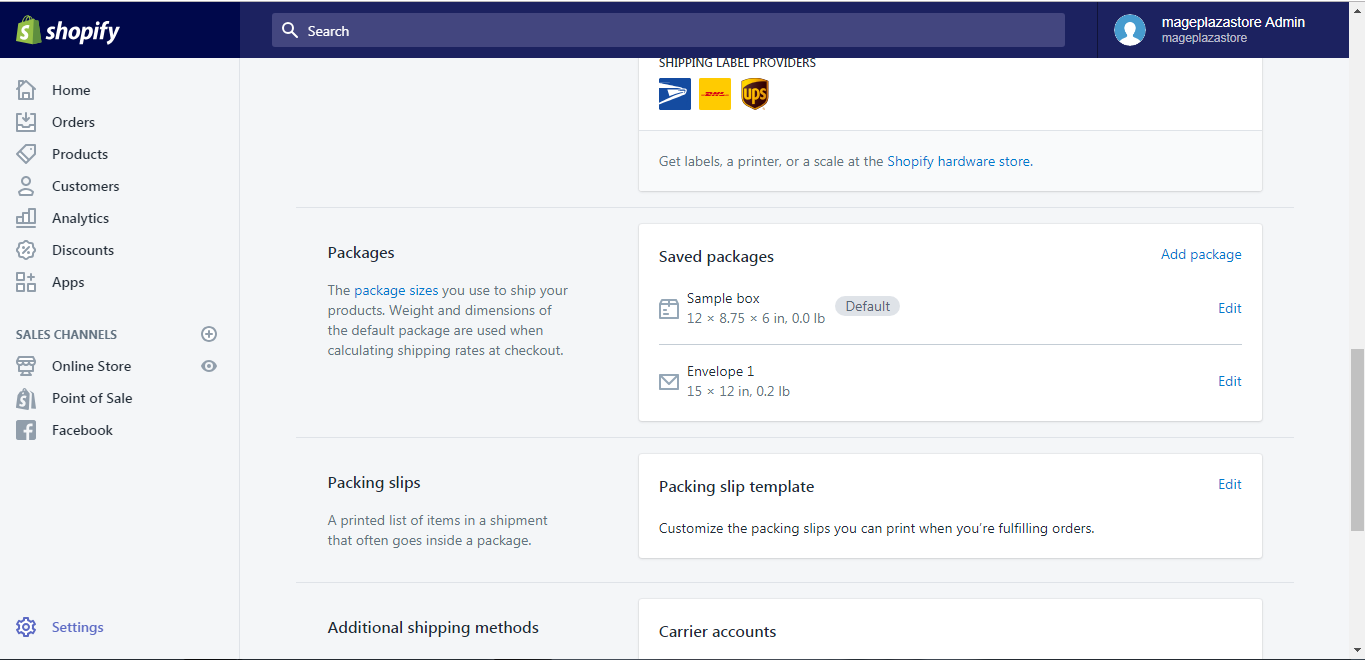
After you get to the shipping page, scroll down to find the Packages area. Form this area you can see the Saved packages section, click the Edit button next to the default label.
Step 3: Enter the information
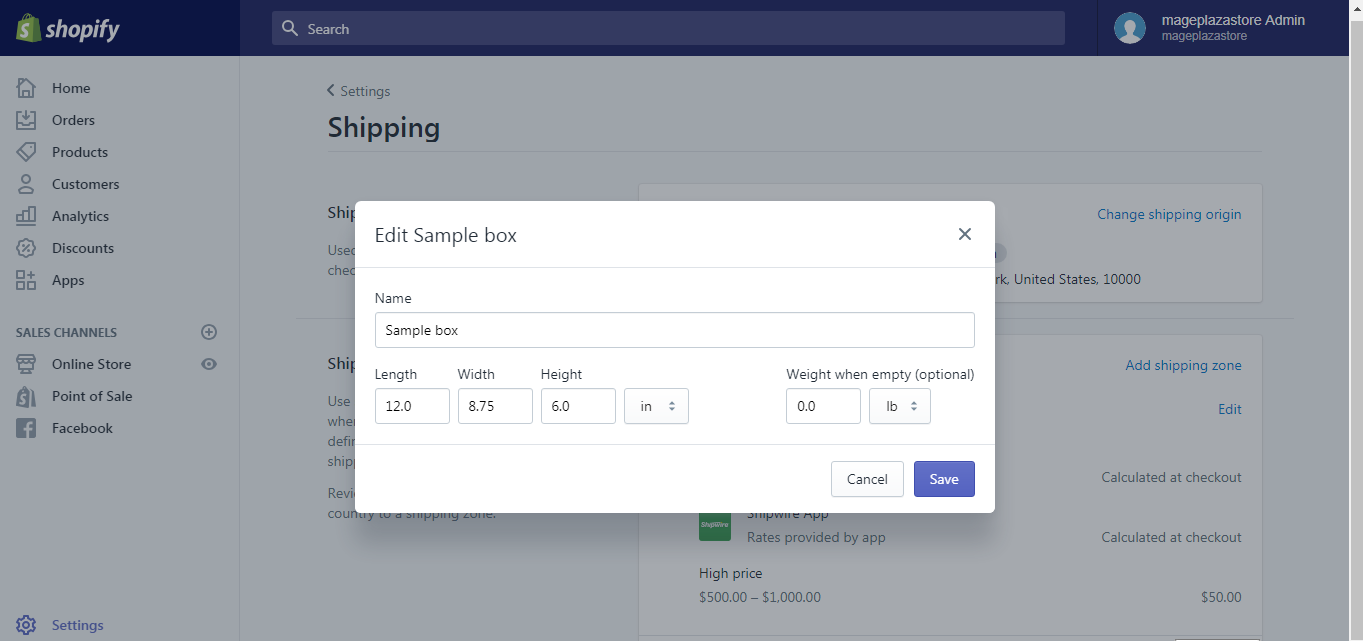
A new dialog will appear on your screen, enter a name, the dimensions, and weight of your default shipment package.
Step 4: Saving
The final step is easy for you, all you have to do is hit Save.
To configure your default package dimensions on iPhone (Click here)
-
Step 1: Go to Store > Settings After you logged in your Shopify account in the app, notice there is a
Storebutton, go to it.
In the Store screen, there is a button called
Settings, tap on it.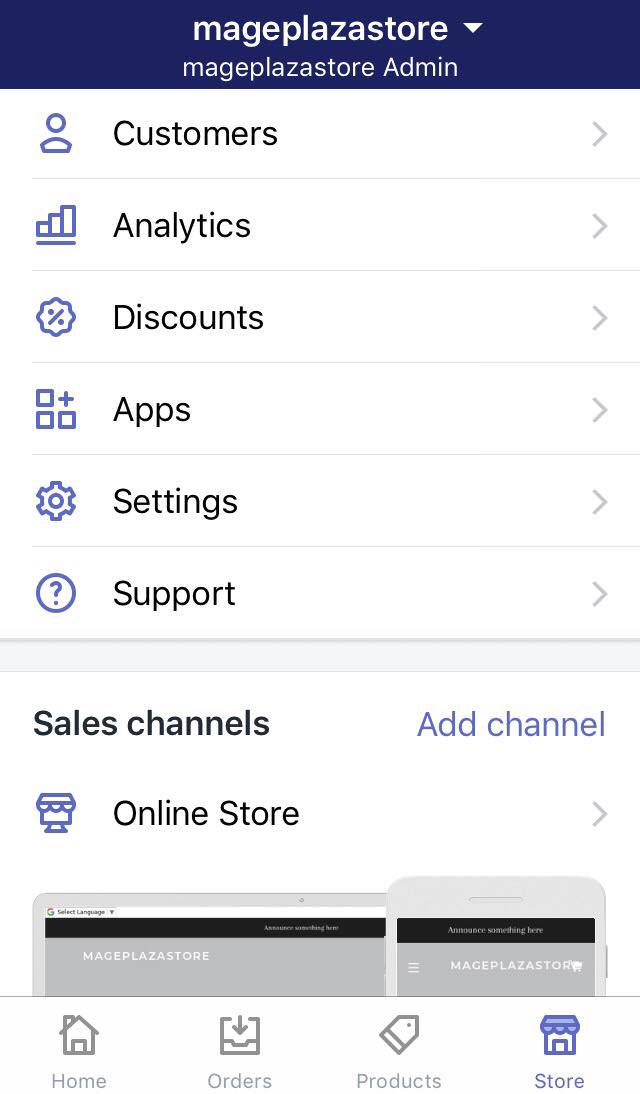
-
Step 2: Go to Shipping After the previous step, you should find and tap the
Shippingbutton in the Store setting area.
-
Step 3: Edit the package After you get to the shipping page, scroll down to find the
Packagesarea. Form this area you can see theSaved packagessection, click theEditbutton next to the default label.
-
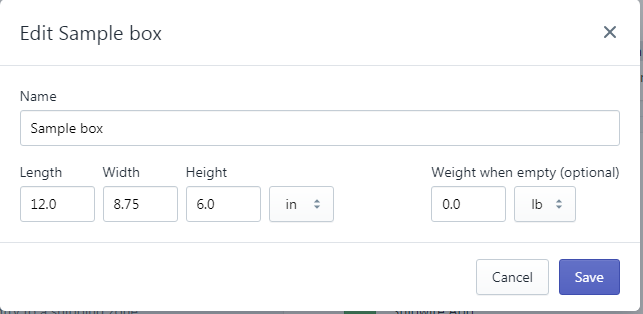
Step 4: Enter the information From the edit dialog, enter a name, the dimensions, and weight of your default shipment package.
-
Step 5: Saving The final step is easy for you, all you have to do is hit
Save.
To configure your default package dimensions on Android (Click here)
-
Step 1: Go to Store > Settings After you logged in your Shopify account in the app, notice there is a
Storebutton, go to it. In the Store screen, there is a button calledSettings, tap on it. -
Step 2: Go to Shipping After the previous step, you should find and tap the
Shippingbutton in the Store setting area. -
Step 3: Edit the package After you get to the shipping page, scroll down to find the
Packagesarea. Form this area you can see theSaved packagessection, click theEditbutton next to the default label. -
Step 4: Enter the information From the edit dialog, enter a name, the dimensions, and weight of your default shipment package.
-
Step 5: Saving The final step is easy for you, all you have to do is hit
Save.
Conclusion
Above is a brief instruction on how to configure your default package dimensions on Shopify. I hope this short tutorial will provide you with a basic background on managing the shipping services.


