How to generate a new Liquid snippet called swatch.liquid in Shopify
In the Shopify theme editor, when Swatches are chosen as the item variant style there could be so many options for adjusting and modifying the color of the swatch. There is a fact that you are completely able to set up custom colors in a manual way.
However, please keep reading our instructional writing on How to generate a new Liquid snippet called swatch.liquid to know more deeply about the solution to create a new swatch.liquid Liquid snippet.
Under most circumstances, the theme will switch the names of the color variant into CSS colors that will work in a completely automatic way. All the names will be associated automatically with one of up to 140 color names, which all modern browsers do support.
To go more into details, it is possible to add-in custom names of the color or even overwrite the color HEX values of an existing CSS color by changing the swatch-color.liquid or snippets file. It is possible for you to employ these examples written below as a detailed instructional writing to succeed in getting colors generated:
- Inserting an existing name of CSS to the end of
swatch_color_overwrites the CSS color, which is set by default. - Insert the product variant color’s name without spaces and all must be in lowercase.
- All custom names of colors must start with
swatch_color_.
Here are we giving you several instances for the colors listed below:
-
Pink - {%- assign swatch_color_pink = ‘#cf3393’-%}
-
Dark red - {%- assign swatch_color_darkred = ‘#a70d11’-%}
-
Navy (overwriting the default #000000 CSS color valur for ‘navy’) - {%- assign swatch_color_navy = ‘#1f3ba5’-%}
Now let’s move to the Show swatch images. By getting this setting enabled, you are able to get your own custom images uploaded. To receive the best results as possible, we would like to suggest you to use the image with the type of file is .png and in the size form of 100 x 100px. The file name of the image will need to follow the handle, hyphenated format of the color option that you are using for the variant. For instance, Dark Green might require a file name called dark-green.png to be shown. The name of the file has to match all the available variant color options in he similar format in order to be displayed. Next, please follow these steps listed below to get your image files uploaded:
Step 1:
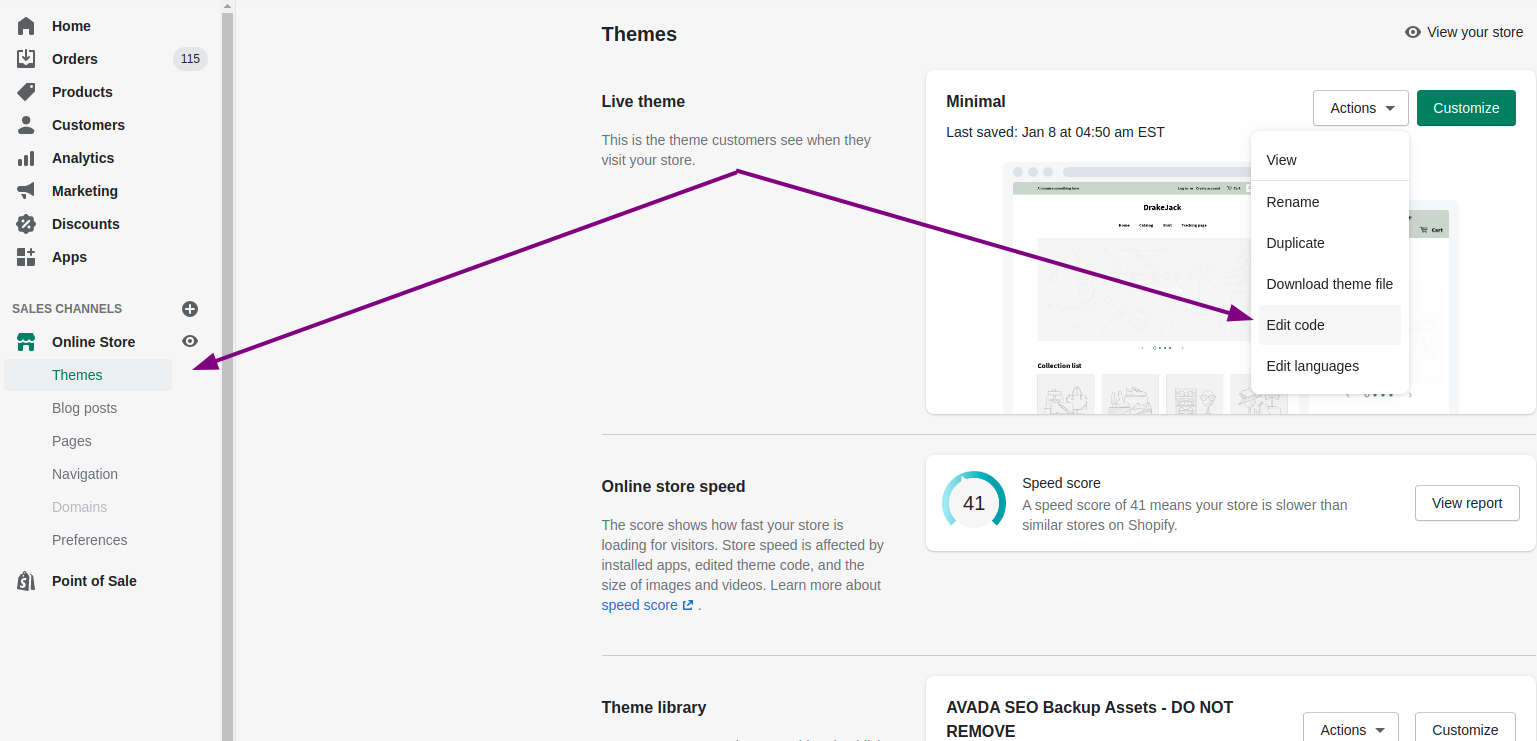
In the Shopify Admin panel, please open the Themes page.
Step 2:
Tap Edit code which is listed right in the drop-down menu called Actions.

Step 3:
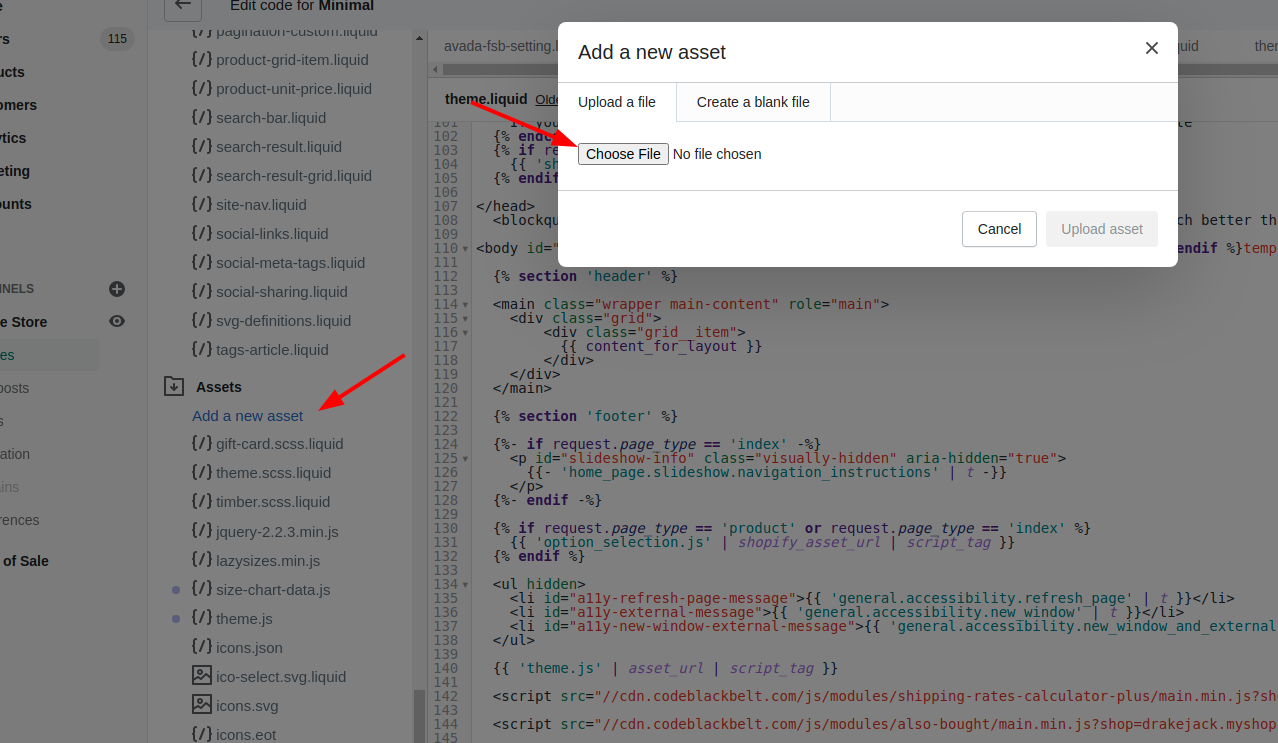
Please choose Add a new asset after getting the Assets folder opened.
Step 4:
Choose Upload asset.

Step 5:
Do this process again to every swatch image that you want to use.
To generate a new Liquid snippet called swatch.liquid
- Step 1: Open Themes section
- Step 2: Choose Edit code
- Step 3: Tap Snippets
- Step 4: Choose Add a new snippet
- Step 5: Tap Create snippet
- Step 6: Insert content into new swatch.liquid snippet
- Step 7: Save
Step 1: Open Themes section
Go to Online Store > Themes from your Shopify Admin panel.
Step 2: Choose Edit code
Look for the theme you want to edit and click Actions > Edit code.

Step 3: Tap Snippets
On the left side, please tap the Snippets heading to get your Shopify content shown.
Step 4: Choose Add a new snippet
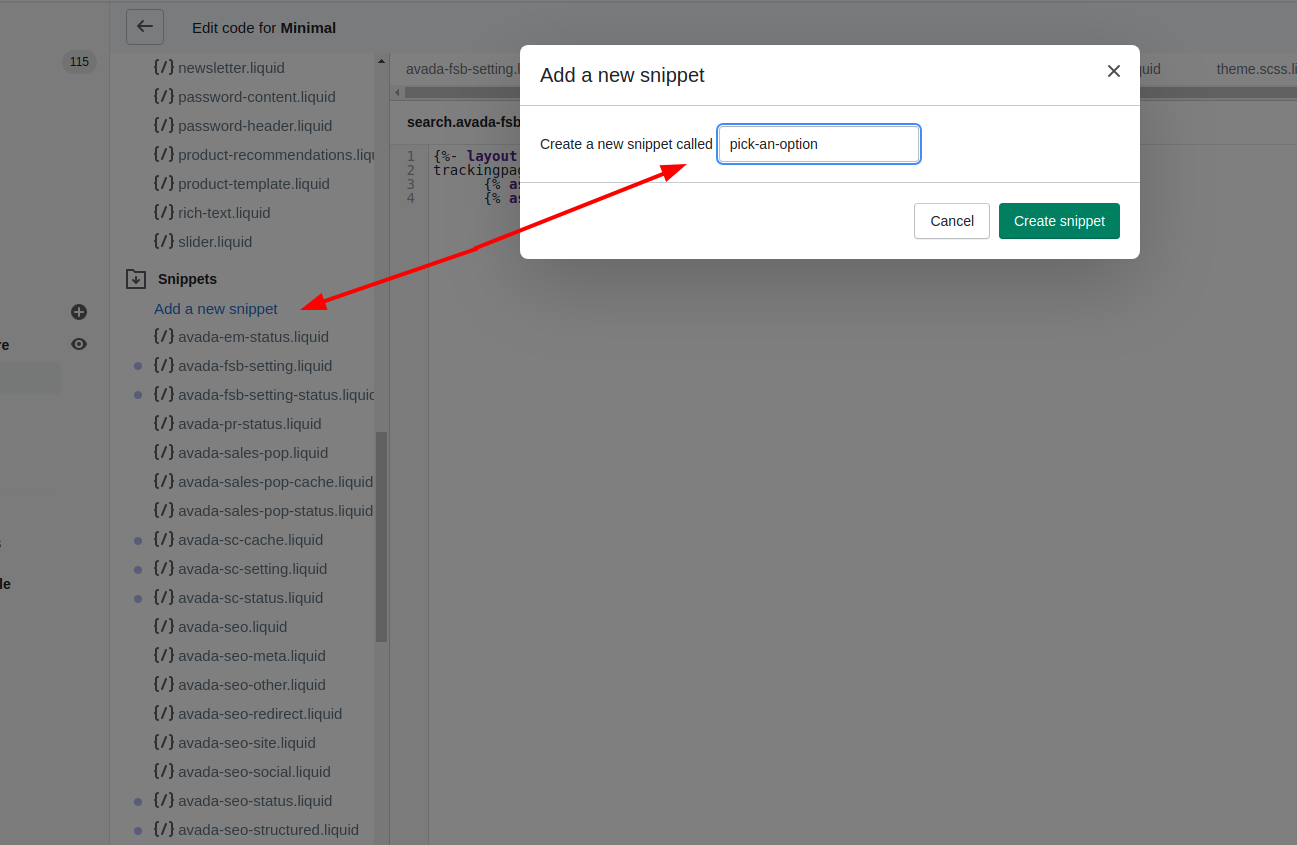
Tap the Add a new snippet link which is displayed right under the heading of Snippets.
Step 5: Tap Create snippet
Name your new snippet Swatch and tap the Create snippet button to get it generated.

Step 6: Insert content into new swatch.liquid snippet
Copy the content of this file and insert it into your new swatch.liquid snippet.
Step 7: Save
Tap Save to save all changes.
Conclusion
Thank you for finishing reading our step-by-step instruction. Please note that once you have finished all the steps mentioned in this tutorial, your products’ color options will absolutely be displayed as clickable swatches on the product pages, which must be very eye-catching!


