How to track inventory levels in Shopify
Managing inventory can be challenging if you don’t know how to track inventory levels in Shopify. This guide will show you a simple way to monitor your stock and avoid running out of products. Keep your store running smoothly by staying on top of your inventory with these easy steps.
How to track inventory levels
- How to set up inventory tracking
- View your product inventory
- How to adjust inventory levels
- View a product’s inventory history
How to set up inventory tracking
Step 1:
From your Shopify Admin panel, please go to Products.

Step 2:
Select the name of the product that you need to track.

Step 3:
If that products has variants, then choose the variant that you want to track.
Step 4:
Choose Shopify tracks this product’s quantity from the Inventory policy list in the Inventory section.
Step 5:
Set the quantity.
Step 6:
Tap Save.
View your product inventory
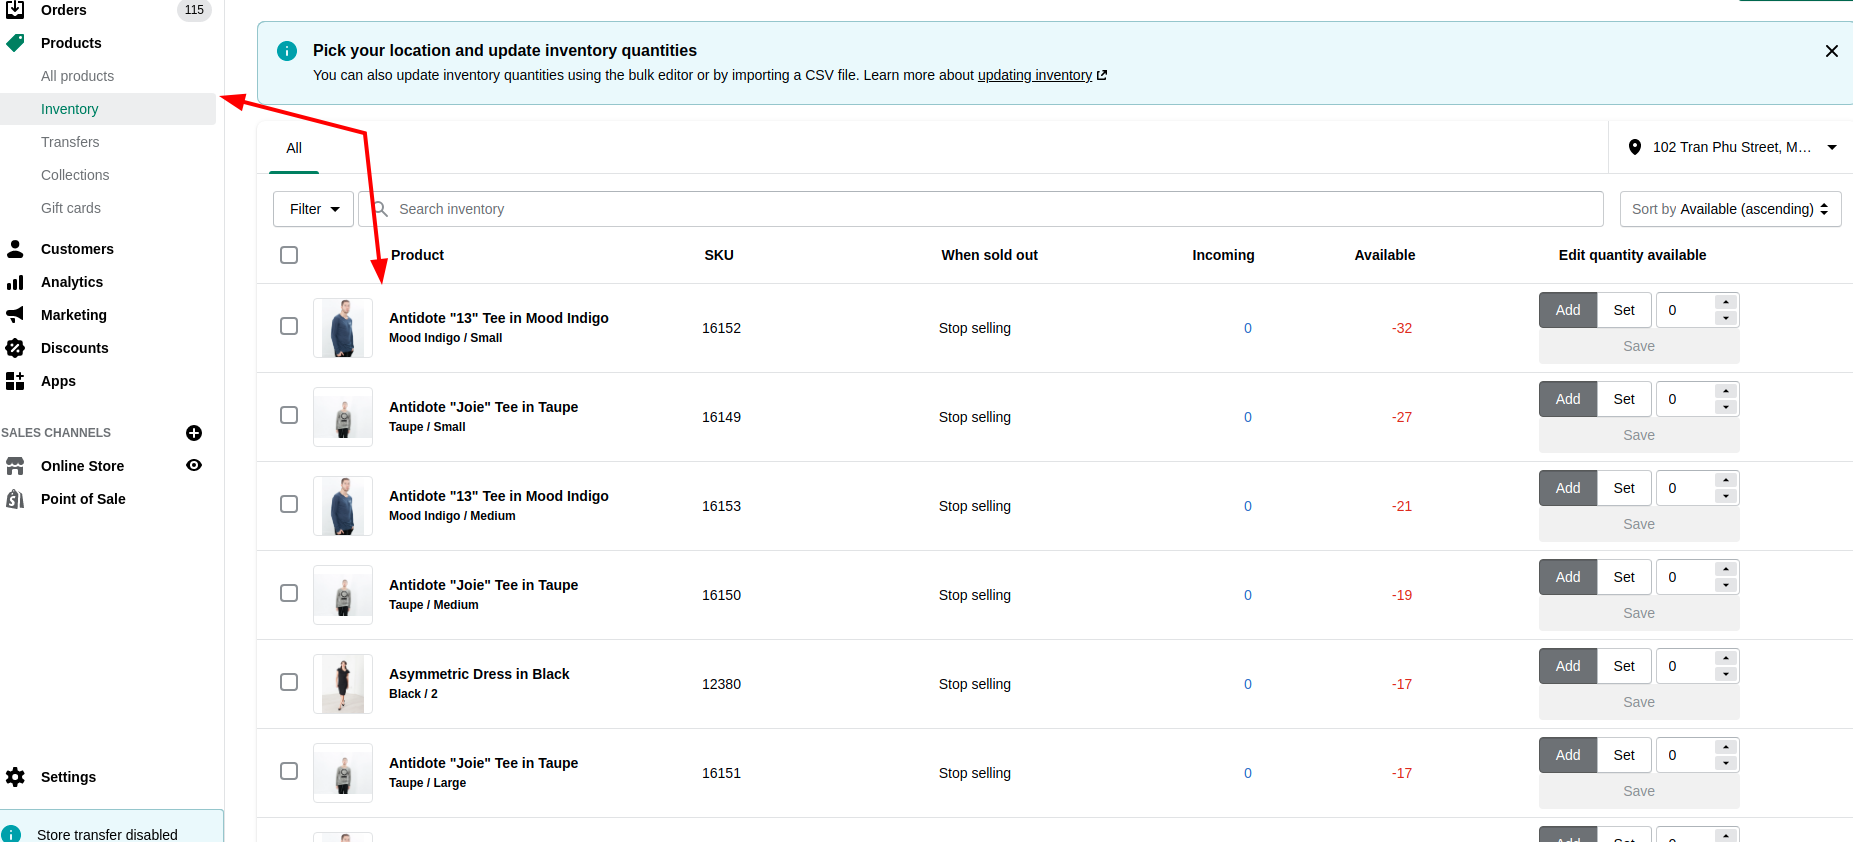
Feel free to view the inventory counts for your product variants on the Inventory page.
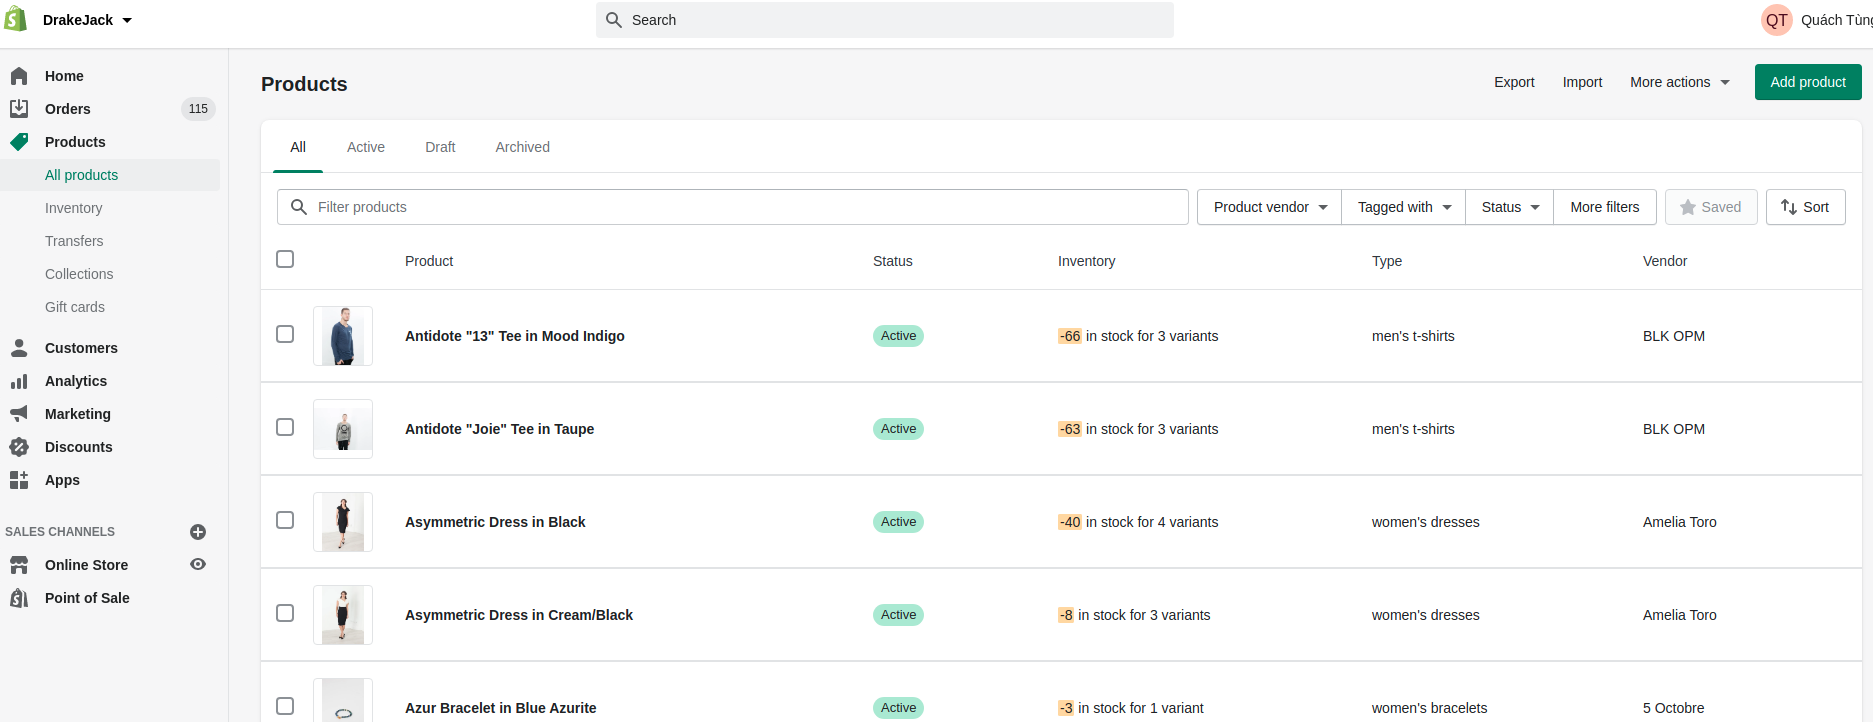
Also, you are allowed to view product inventory on the Products page, which should show a combined inventory count for all the available variants of every product.
How to adjust inventory levels
You are enabled to adjust the inventory count for product variants right on the Inventory page.
Please follow these steps below:
Step 1: From your Shopify Admin panel, go to Products > Inventory.
Step 2: Under Update quantity, change the inventory count:
- To set a new total inventory count, choose Set and enter a number.
- To edit the count, click Add and enter a number. You are able to use a negative number to subtract from the inventory.

Note that the new total is displayed under Quantity.
Step 3: Click Save.
View a product’s inventory history
In case you are using Shopify to track the inventory of a product, then you are capable of viewing the history of its inventory adjustments. If that product has variants, you can view the inventory history of every variant that is being monitored. But pleas note that you are not allowed to view the inventory history of all the available variants at the same time.
Additionally, you can view only the last 90 days of inventory distory for a variant or a product.
When viewing the inventory for a product or a variant, you will see some information about inventory adjustments:

- Date - the date of evey adjustment
- Event - the event that caused the adjustment like a transfer or an order
- Adjusted by - the staff member who made the adjustment
- Adjustment - the quantity of the adjustment change, positive or negative
- Quantity - the quantity of the inventory after the adjustment
Steps to view a product’s inventory history:
- Step 1: From your Shopify Admin panel, please go to Products.

-
Step 2: Choose the name of that product.
-
Step 3: If that product has variants, click Edit beside a variant.
-
Step 4: Tap View inventory history in the Inventory section.
Conclusion
This instructor may help you partly get through some necessary information about How to track inventory levels in Shopify that you need, please look at some more of our available posts to see many related topics.


